
.svg?format=pjpg&auto=webp)
.svg?format=pjpg&auto=webp)
.png?format=pjpg&auto=webp)


.png?format=pjpg&auto=webp)
Create a Segmented Experience
In Contentstack Personalize, Segmented Experiences empower you to create highly targeted, individualized content experiences for distinct audience segments. By dynamically displaying personalized content variations based on demographics, referral sources, behaviors, and other critical attributes, you can:
- Maximize Engagement
- Boost Conversions
- Enhance Customer Satisfaction
When to use Segmented experiences in Contentstack Personalize?
- Diverse Audience with Varied Needs
- High Level of Content Customization
- Focus on Engagement and Conversion Metrics
- Technical Expertise and Resources
- Contentstack's Segmentation and Analytics Capabilities
By carefully considering these factors, you can determine whether segmented experiences are the right fit for your personalization strategy and leverage them to maximize the impact of your campaigns.
Prerequisites
- Contentstack account
- Access to the Contentstack Organization that has Personalize enabled
- Access to a project in Personalize
- Audience created in your Personalize project
Note: Users with Owner and Member access to a Personalize project can create Segmented experiences.
Steps for Execution
Note: For this guide, we have assumed that you have already created a Personalize project. If not, please follow this guide and create a project in Personalize.
To create a Segmented Experience, log in to your Contentstack account and perform the following steps:
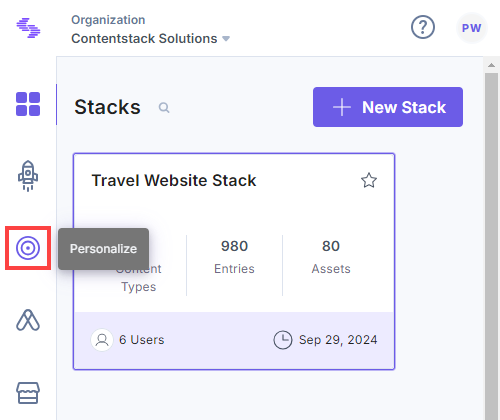
- In the left navigation panel, click the Personalize icon.
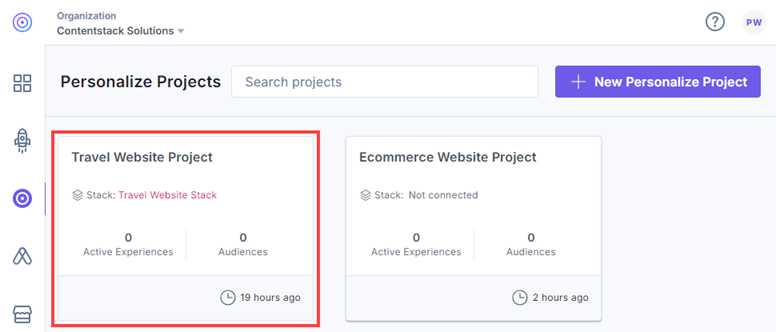
- You will be redirected to the Personalize Projects landing page. Click the project for which you want to create a Segmented Experience.
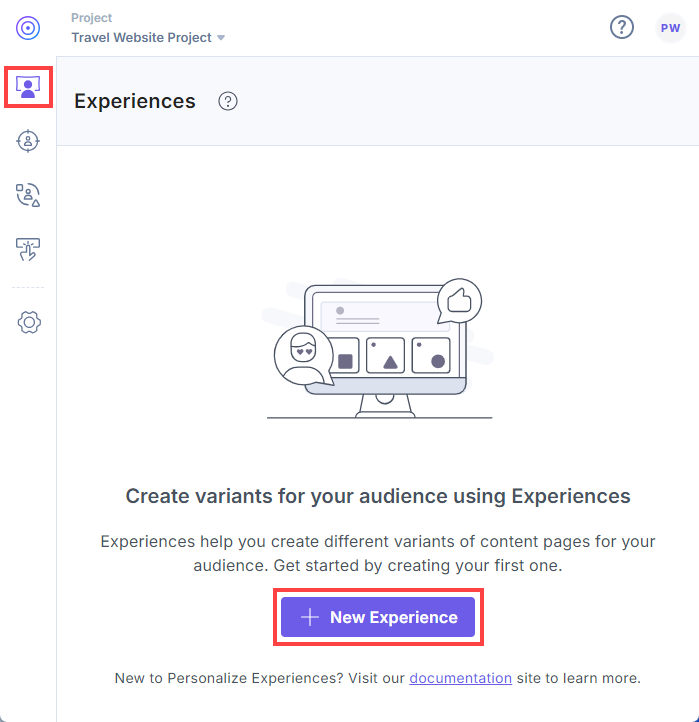
- On the Experiences page, click the + New Experience button.
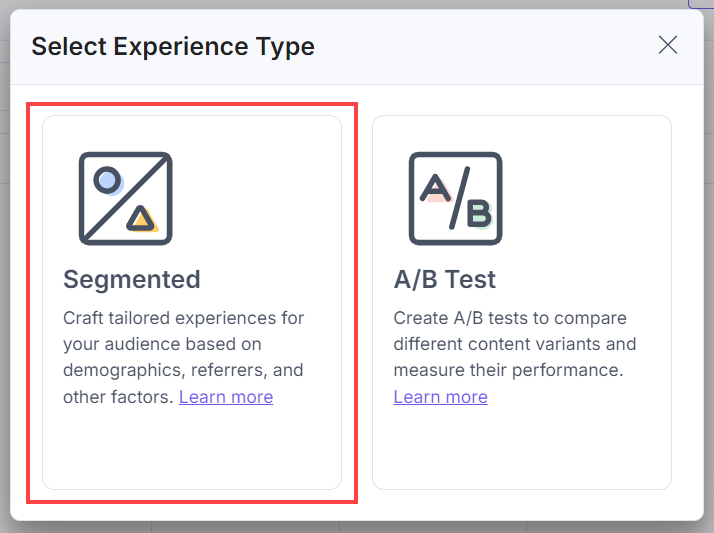
- In the Select Experience Type modal, click the Segmented experience type.
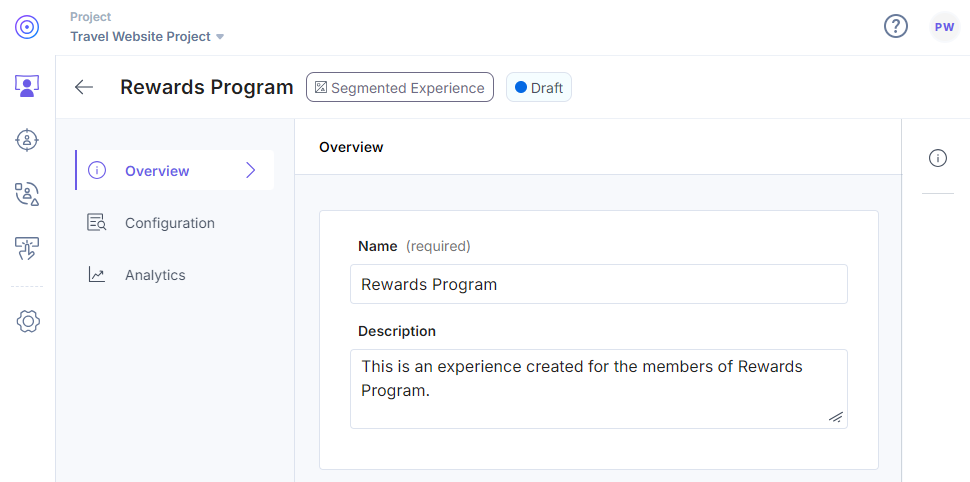
- On the experience draft page, in the Overview tab, provide a suitable Name and an optional Description for the experience and then click the Save General Details button.
- Click the Configuration tab.
- To create variants for your experience, click the + Add Variant button. Variants are alternative versions (CMS Entry Variants) of content or experiences designed to cater to specific audiences. You need to provide a combination of conditions and audiences as follows:
- Short UID: This unique ID is automatically assigned to each variant and used in Personalize Edge SDK and Personalize API requests.
- Variant Name: Provide a meaningful name for the variant. This name will be reflected in the Entry Editor for the Entry Variants in the CMS.
Note: Each segmented experience must contain at least 1 variant. Each experience is reflected in the CMS as the Variant Group with the same experience name and you can create Entry Variants for each of these variants via the Entry Editor.
- Condition: You can set the rule to satisfy either all audiences (Match All) or at least one of them (Match Any) by selecting from the dropdown.
- Audiences: Click inside the Audiences field to open the Select Audience(s) modal and select one or more (if available) audiences, and click the Apply Selected Audiences button to set the audience criteria for the experience.
Similarly, you can add multiple variants by clicking the + Add Variant button.
Note: If your audience condition matches multiple variants and you wish to prioritize a specific variant, simply drag and drop the variants to reorder them. The variant at the top of the list will take priority for personalization when the experience is activated.
- Save Draft: Once you have defined your variant, click the Save Draft button.
Note: Personalize adds metadata to the Variant Group, including the Personalize project UID, experience UID, and experience short UID.
- If you want to activate the draft now, click the Activate Draft button. This will activate the experience on your site for your visitors.
Note: Ensure you create Entry Variants in the CMS before activating an experience for a seamless personalized campaign for your visitors.
This creates a new Segmented Experience in your Personalize project. For managing experience versions (activated/draft/paused), please refer to this guide.
Additional Information: To achieve optimal personalization for your users, prioritize experiences and variants independently. Use experience priority when multiple experiences customize the same element on a digital property, and apply variant priority when audience conditions match multiple variants. For more details, please refer to this guide.
After activating your segmented experience, the Analytics are updated within a few minutes when your visitors start accessing and interacting with your content.
Note:
- Users with Owner and Member access to a Personalize project can create new experiences, and edit/delete existing experiences.
- The default number of Experiences allowed per project is 100. To increase this limit, please contact our support team. By Contentstack permissions, they can be extended till 1000 per project.
- The default number of Variants allowed per experience is 20. To increase this limit, please contact our support team. And each variant can be mapped to a maximum of 50 audiences.
Additional Resource: You can use the Personalize Management API to create, edit, delete, and retrieve all existing experiences.
More articles in "Working with Experiences"
