
.svg?format=pjpg&auto=webp)
.svg?format=pjpg&auto=webp)
.png?format=pjpg&auto=webp)


.png?format=pjpg&auto=webp)
AI Assistant with Brand Kit
The AI Assistant is a powerful natural language processing app that efficiently processes, transforms, and generates content with human-like accuracy.
Its flexible architecture seamlessly integrates with Brand Kit, enabling content creation from the Knowledge Vault or LLM, ensuring consistency across digital touchpoints.
By setting up Brand Kit, the AI Assistant applies your brand's guidelines, styles, and preferences, ensuring all generated content aligns perfectly with your brand identity for a cohesive audience experience.
You can install the AI Assistant app directly from our Marketplace and use it within your entries to generate brand-specific content.
Additional Resource: For more details, refer to the Brand Kit documentation.
Prerequisites
- Contentstack account
- Brand Kit enabled for your Contentstack Organization
- Access to the Contentstack Organization/Stack as the Owner/Admin
Note: If Brand Kit is not enabled for your Organization, the AI Assistant app operates as usual. Please follow the AI Assistant App Installation Guide to see how it works in this scenario.
Follow this step-by-step guide to install the AI Assistant app within your stack.
Steps for Execution
-
Install the AI Assistant App in Marketplace
To install the AI Assistant app, log in to your Contentstack account and follow the steps below:
- From the left-hand side primary navigation, click the Marketplace icon.
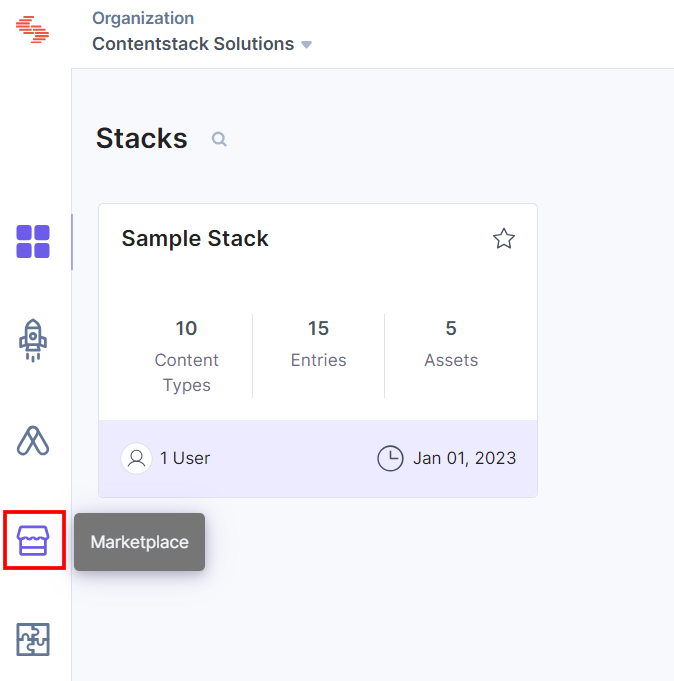
- Click Apps from the left panel.
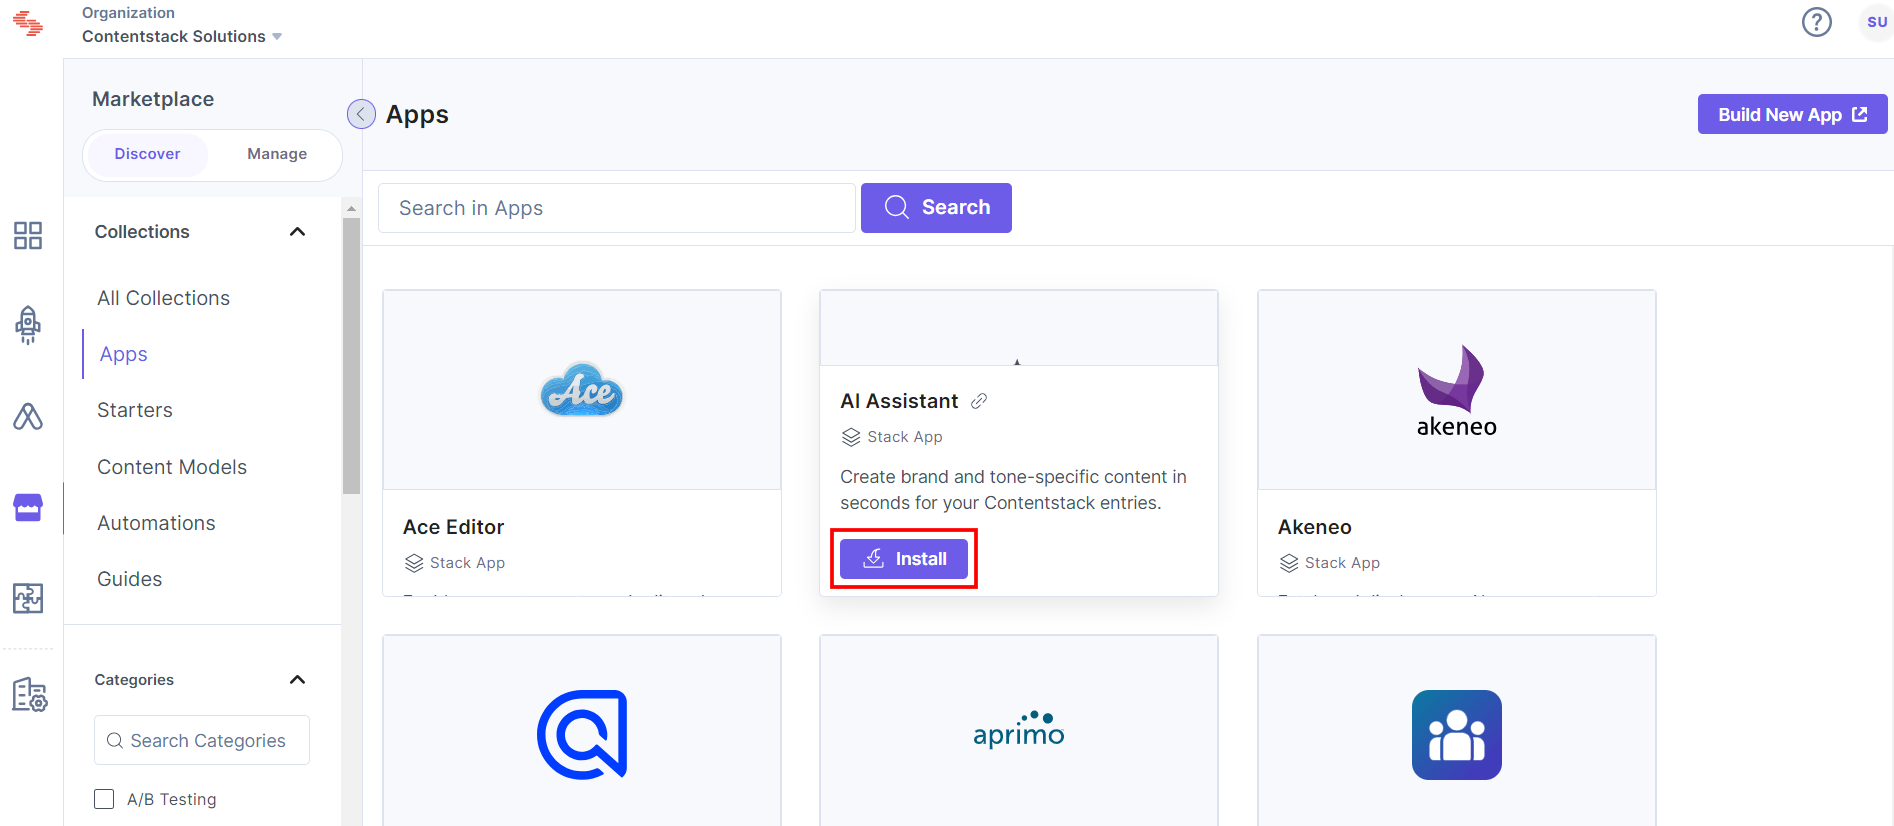
- Within the Marketplace, you can see all the available apps. Hover over the AI Assistant app and click Install.
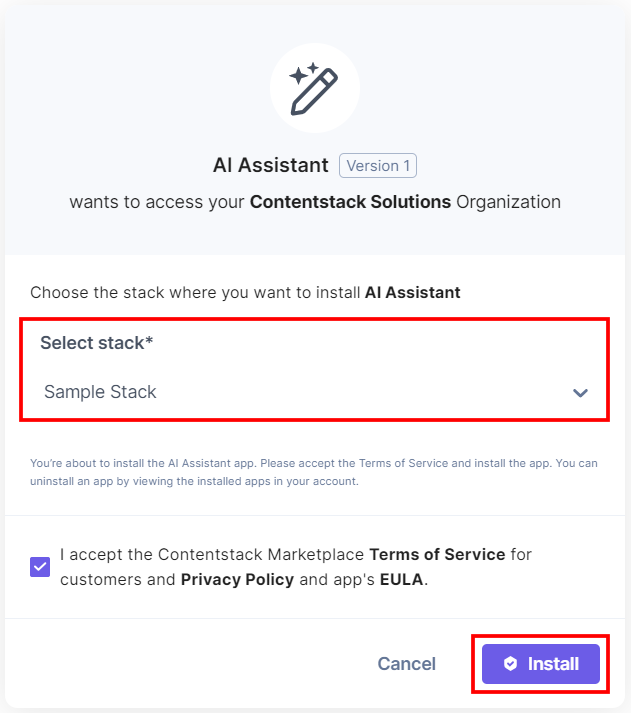
- In the pop-up window, select the stack where you want to install the AI Assistant app, accept the Terms of Service, and click the Install button.
- On the Configuration page, enter the following details:
- Platform Configuration: You can manage the API Keys by enabling Brand Kit, or configure the app using a Contentstack-managed API Key or custom credentials:
Brand Kit Configuration (Overrides API Credentials): You can use Brand Kit’s API Key Credentials in the AI Assistant app.
- Brand Kit Disabled: By default, Brand Kit is disabled in the app. This means that, initially, you must manually configure the API credentials directly within the app.
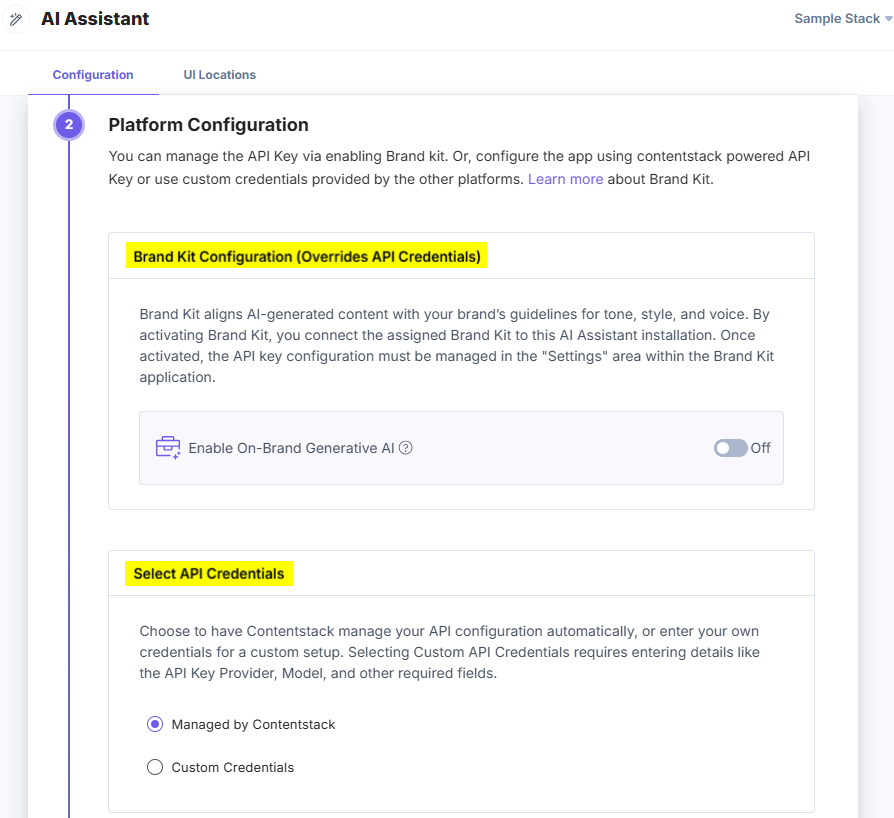
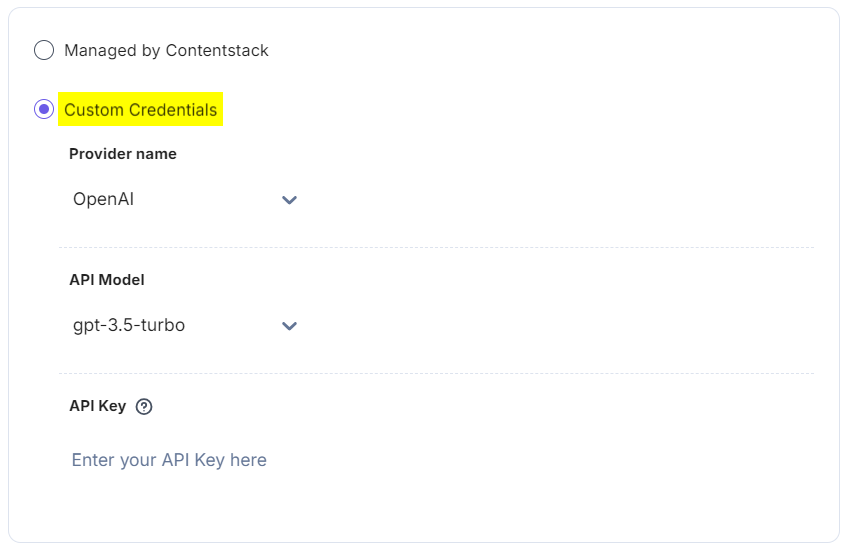
Select API Credentials: You can select a way to configure the AI Assistant app:
- Managed by Contentstack: Select the Managed by Contentstack option to configure the app using Contentstack-powered API keys.

- Custom Credentials: You can configure the app using third-party API credentials, such as OpenAI, Azure OpenAI Service, AWS Bedrock, and Google Vertex AI. Select the Provider Name and enter the required credentials to configure the app.
- Managed by Contentstack: Select the Managed by Contentstack option to configure the app using Contentstack-powered API keys.
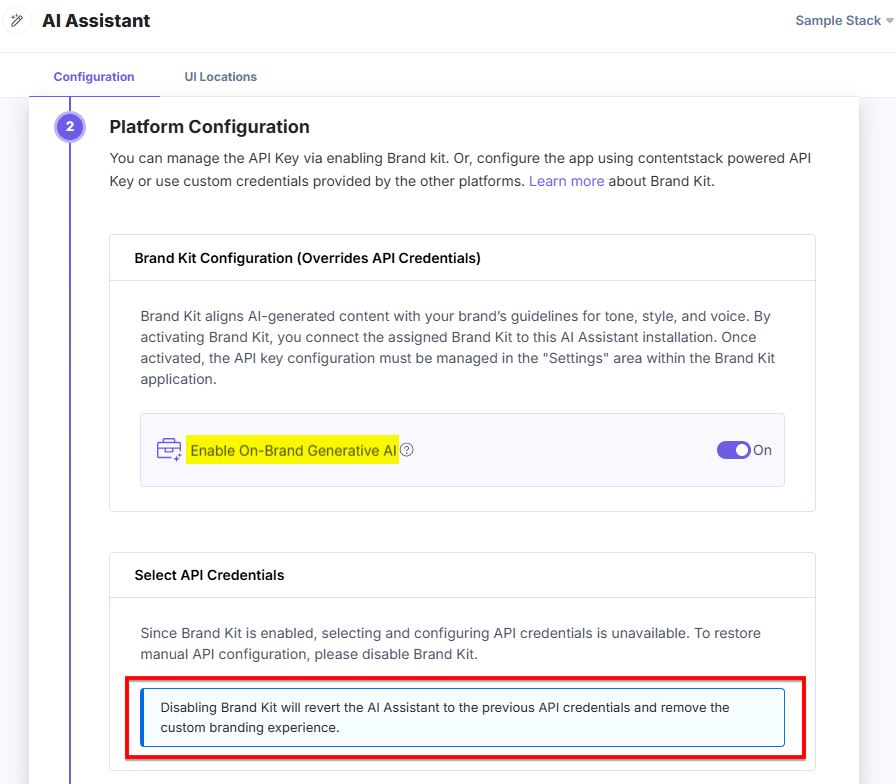
- Brand Kit Enabled: When enabling Brand Kit, the app will use Brand Kit’s API settings to manage the API credentials. This override aligns the AI Assistant’s output with your brand’s guidelines for tone, style, and voice, ensuring a consistent branded experience.
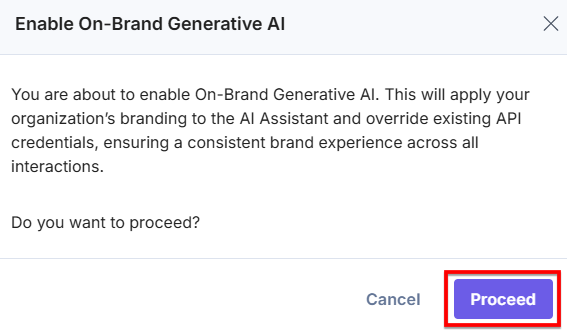
Click the Enable On-Brand Generative AI toggle button, a pop-up appears. Then click Proceed to override the existing API Keys.
Enabling Brand Kit will automatically manage the AI Assistant app API settings, overriding any manual configurations. You can see a note in the Select API Credentials section.
Additional Resource: To view the Brand Kit API Key configurations, refer to the Edit a Brand Kit document.
- After adding the details, click Save and Proceed.
- Brand Kit Disabled: By default, Brand Kit is disabled in the app. This means that, initially, you must manually configure the API credentials directly within the app.
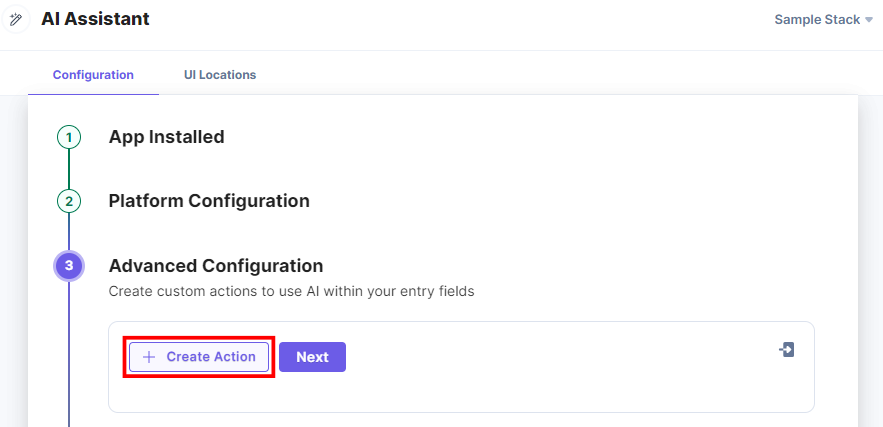
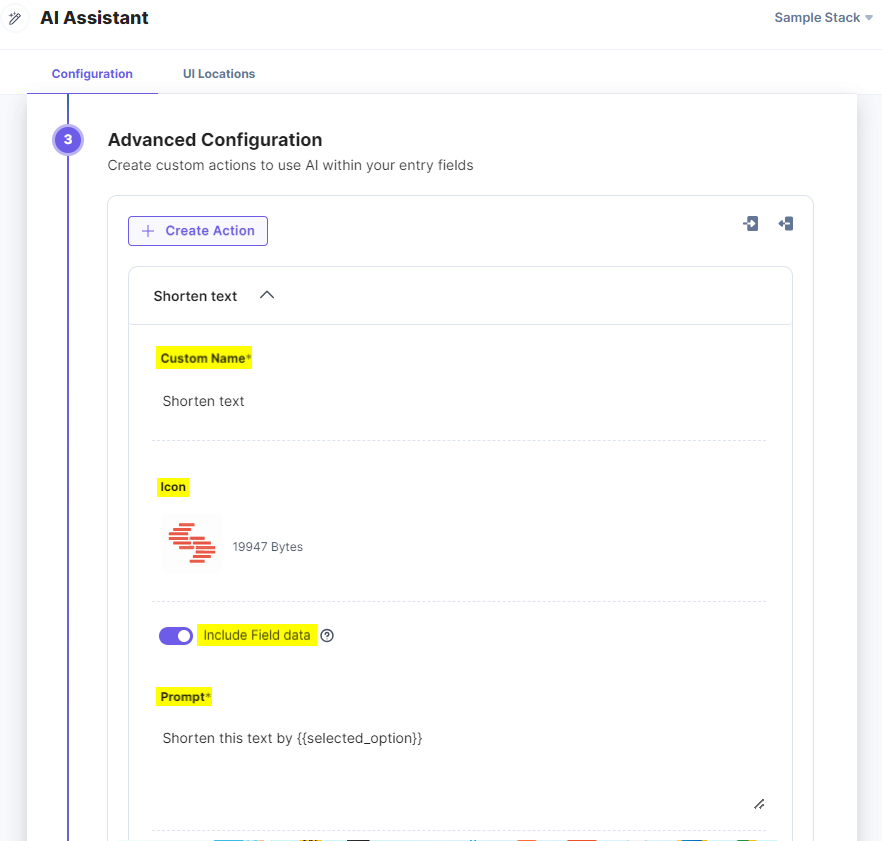
- Advanced Configuration: You can create custom actions to use AI within your entry fields.
Perform the following steps to create a Custom Action:
- Click the + Create Action button.
- In the Add your custom prompt section, enter the Custom Name, upload the Icon (in SVG format), enable or disable Include Field data option, and provide the required Prompt.
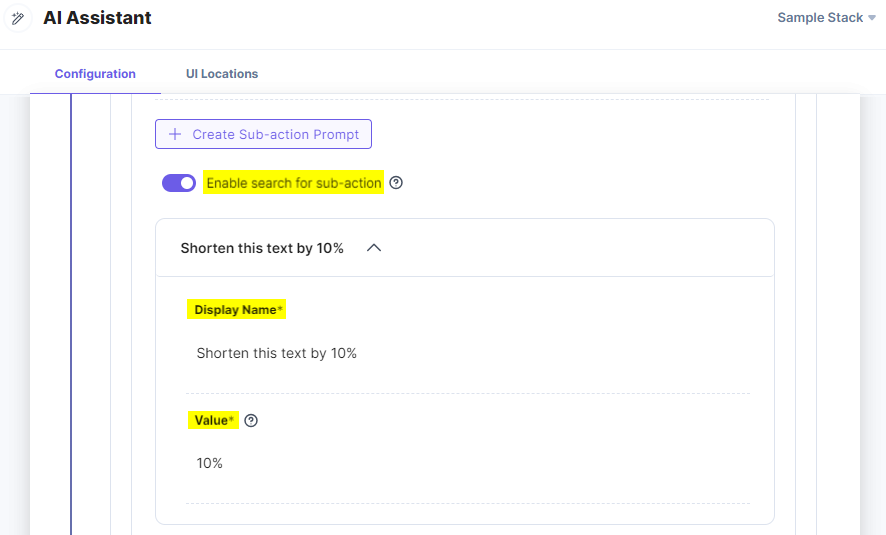
You can group similar prompts together by adding sub-actions for the main prompt.
- To add a sub-action, click + Create Sub-action Prompt and follow the steps given below:
- You can also toggle Enable search for sub-action to have a search bar filter for your sub-actions.
- In the Add the custom option section, enter a Display Name and Value for your sub-action.
- You can add, delete, or reorder the sub-actions.
For example, your prompt is "Shorten this text by {{selected_option}}". In the sub-action prompt, you can provide a value that will customize your prompt further. Suppose, you enter 10% in the Value field, then, the final prompt will be "Shorten this text by 10%".
Note: "{{selected_option}}" must be included in the prompt if you want to add sub actions.
- Choose the option to Perform action on. You can select whether to apply the action on the Current Field or Other Field.
- To View Custom Action on, select the Entry Field checkbox(s) to view the app in the entry field. If you select the When JSON RTE field content is selected checkbox, you will be able to perform actions only on the selected content in the JSON Rich Text Editor field.
- Then, click Save or Save and Proceed to save the advanced configuration settings.

You have successfully configured the AI Assistant app with Brand Kit.

- Click the + Create Action button.
- Platform Configuration: You can manage the API Keys by enabling Brand Kit, or configure the app using a Contentstack-managed API Key or custom credentials:
- Click Save to save the app configurations.
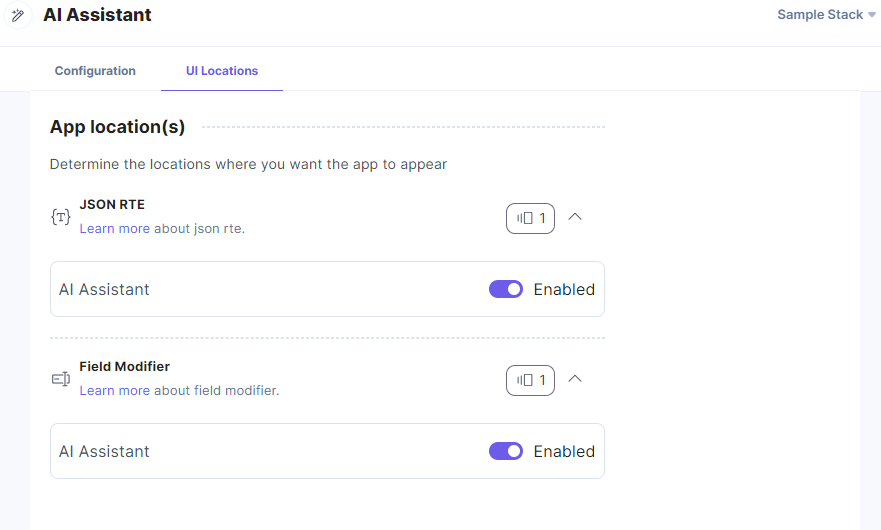
- On the UI Locations tab, you can see the predefined app locations. You can use the toggle button corresponding to each UI location to enable or disable it based on your requirements.
Additional Resource:
- To use the AI Assistant app in your stack, configure the field type(s) for the Field Modifier UI Location. Refer to the Field Modifier UI Location documentation for details.
- For more information on UI locations, please refer to the Installed Apps guide.
- You must update the AI Assistant app manually, if available, to install the latest release enhancements.
- If there is any updated version available for installation, you will see a red dot on the stack name.
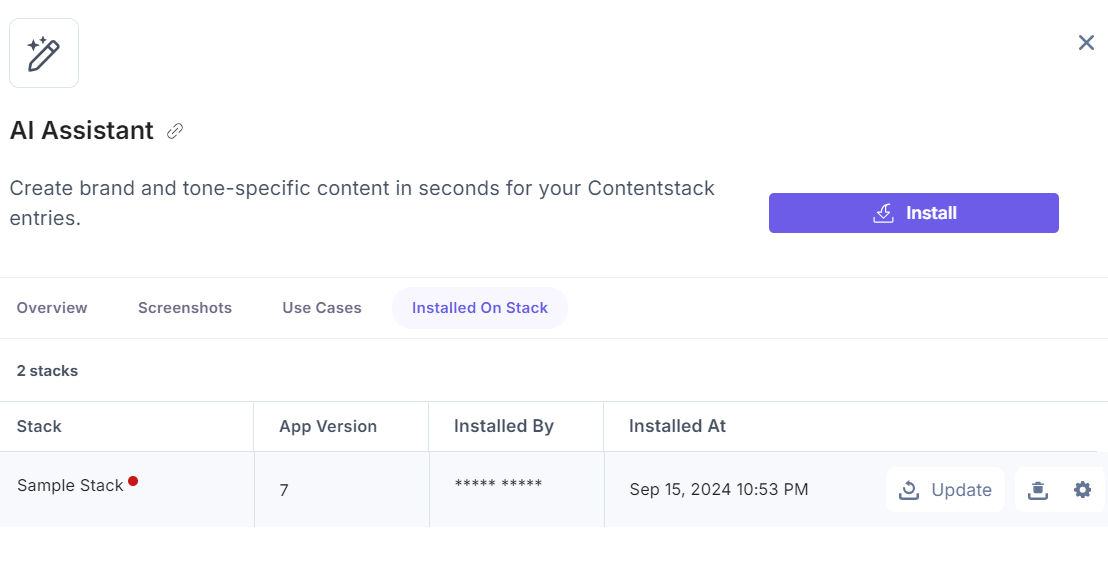
- If you ignore the update requirement and directly go to the app configuration by clicking the gear icon, you will get instructions to update the app first.

- In this case, you have to go back to the Installation tab and click the Update button to install the updates.
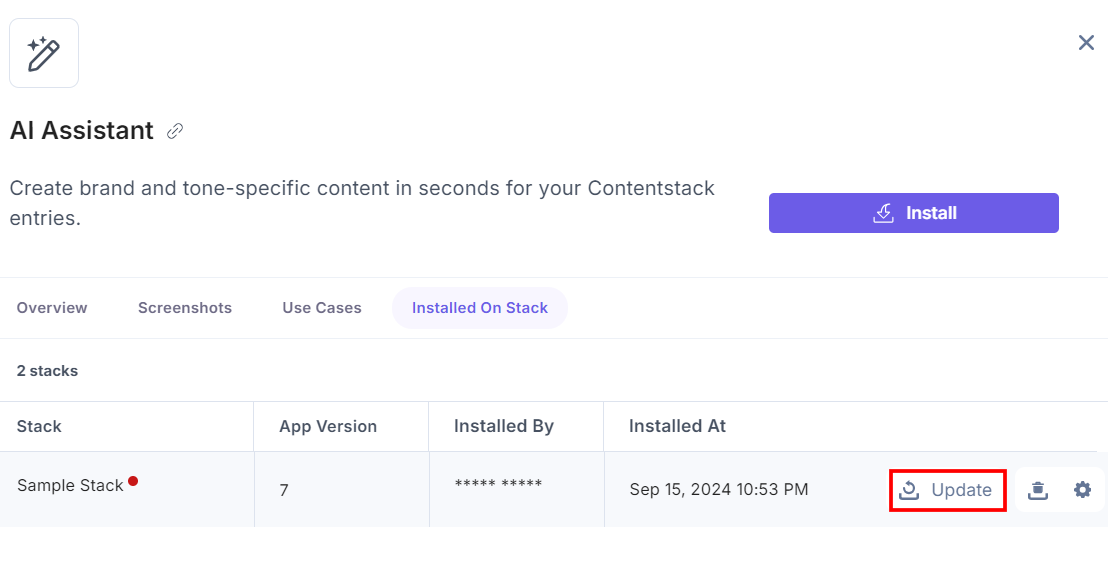
- After installing the updates, click Save to save the updated app configurations.
- If there is any updated version available for installation, you will see a red dot on the stack name.
- Once done, click Open Stack to start using the AI Assistant app.
- From the left-hand side primary navigation, click the Marketplace icon.
-
Use the AI Assistant App within your Entry
To use the AI Assistant app within the entry of a stack, follow the steps given below:
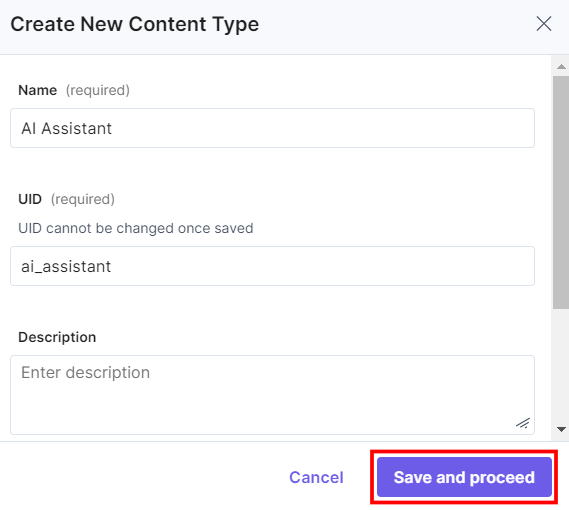
- Go to the stack where you have installed the AI Assistant app, click the Content Models icon from the left navigation panel, and click the + New Content Type button.
- Create a content type by adding relevant details as displayed below:
- To use the AI Assistant app, let's create an entry in the newly created content type. In the left navigation panel, navigate to the Entries page, click + New Entry to create a new entry for the above content type, and then click Proceed.
- You can see the AI Assistant app in the Field Modifier location.
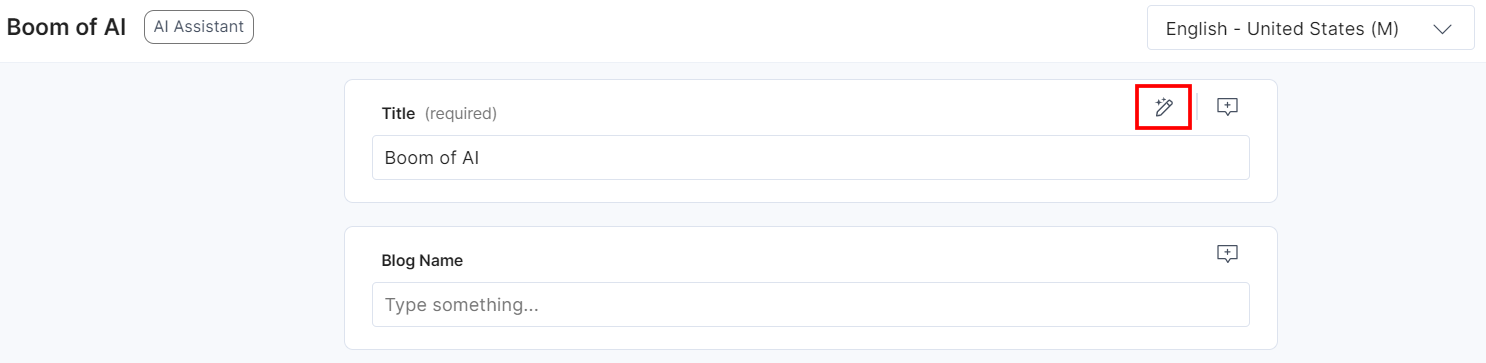
- Click the AI Assistant app icon, a pop-up appears.
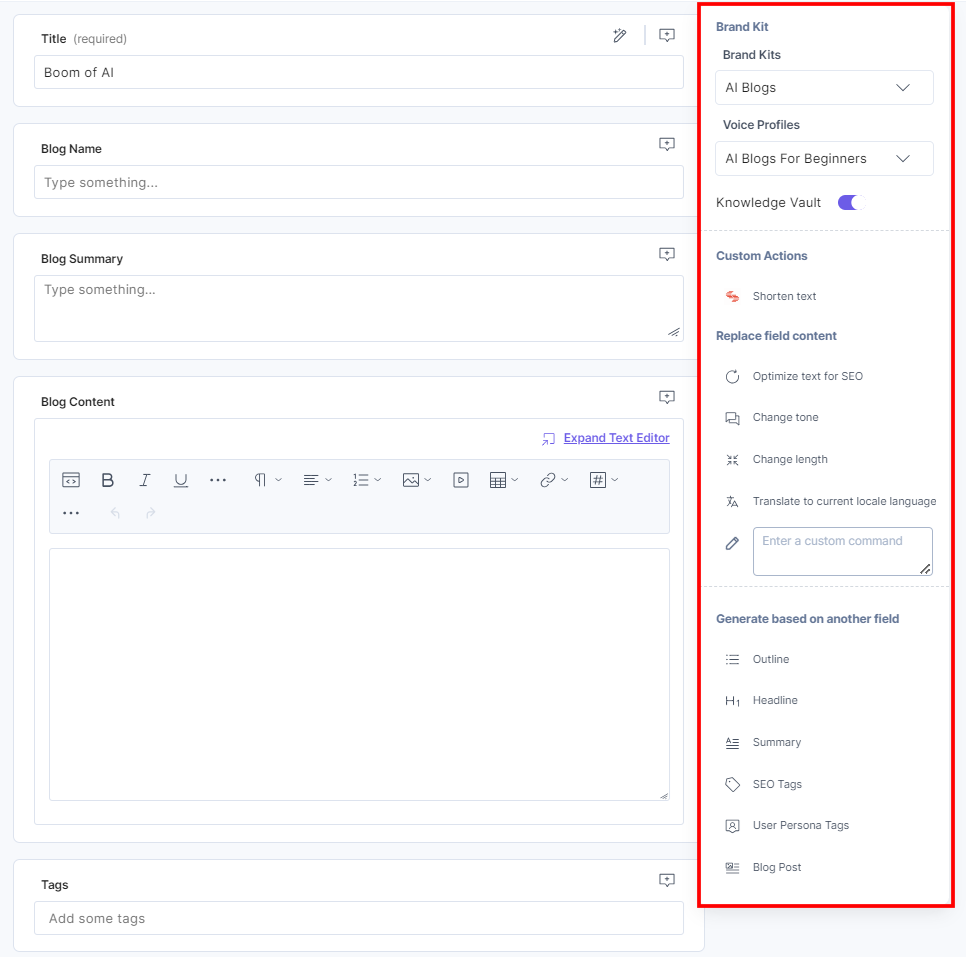
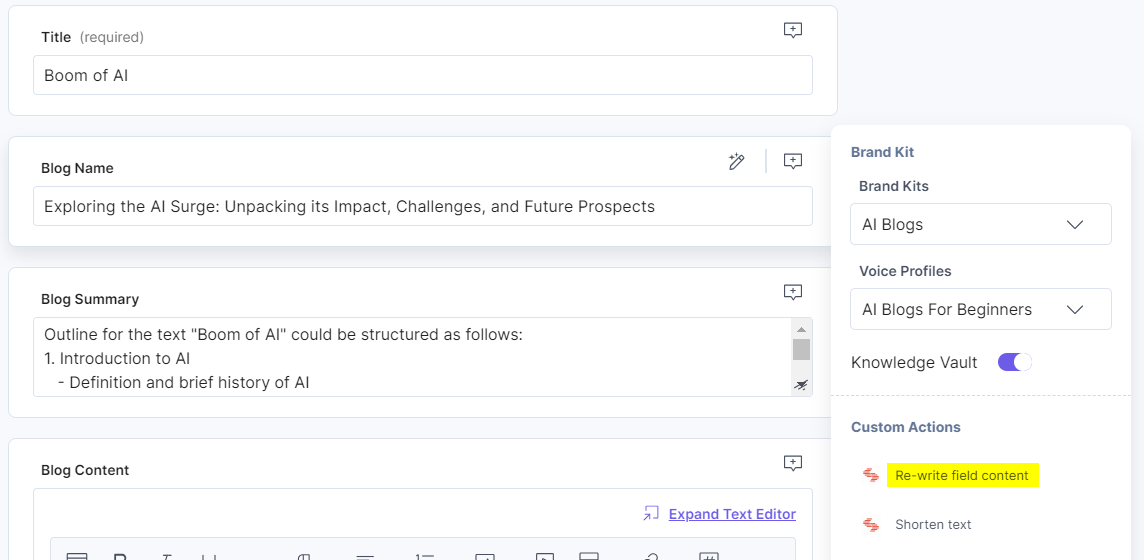
- A panel opens up. Click the Brand Kits drop-down and select the required Brand Kit. Then, from the Voice Profiles drop-down, select the applicable Voice Profile. If you want to generate content from the Knowledge Vault, enable it. If you disable it, the AI Assistant app will generate content directly from the LLM (Large Language Models).
Additional Resource:
- To know more about Brand Kit, Voice Profile, and Knowledge Vault, refer to the Brand Kit, Voice Profile, and Knowledge Vault documentation.
- To start using the Brand Kit with the AI Assistant app, refer to the Get Started with Brand Kit documentation.
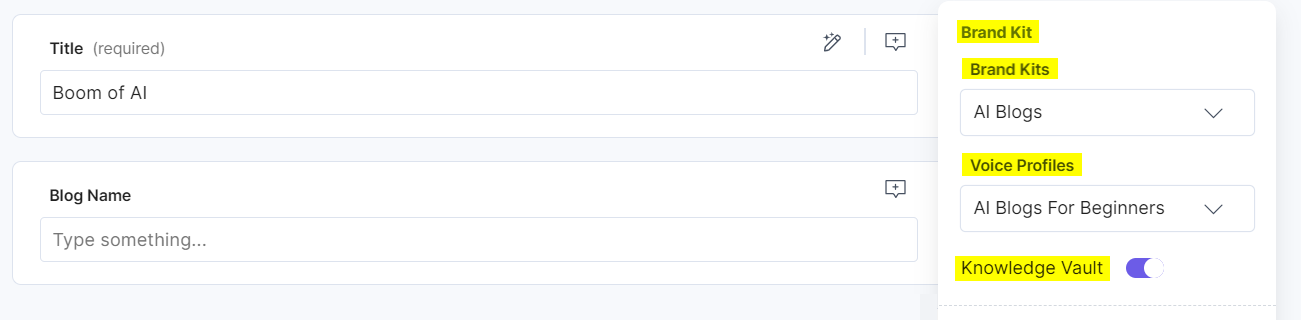
Note: If you don't want to use Brand Kit or if it is disabled for you, you can still use all the AI Assistant options for creating generic or non-brand specific content.
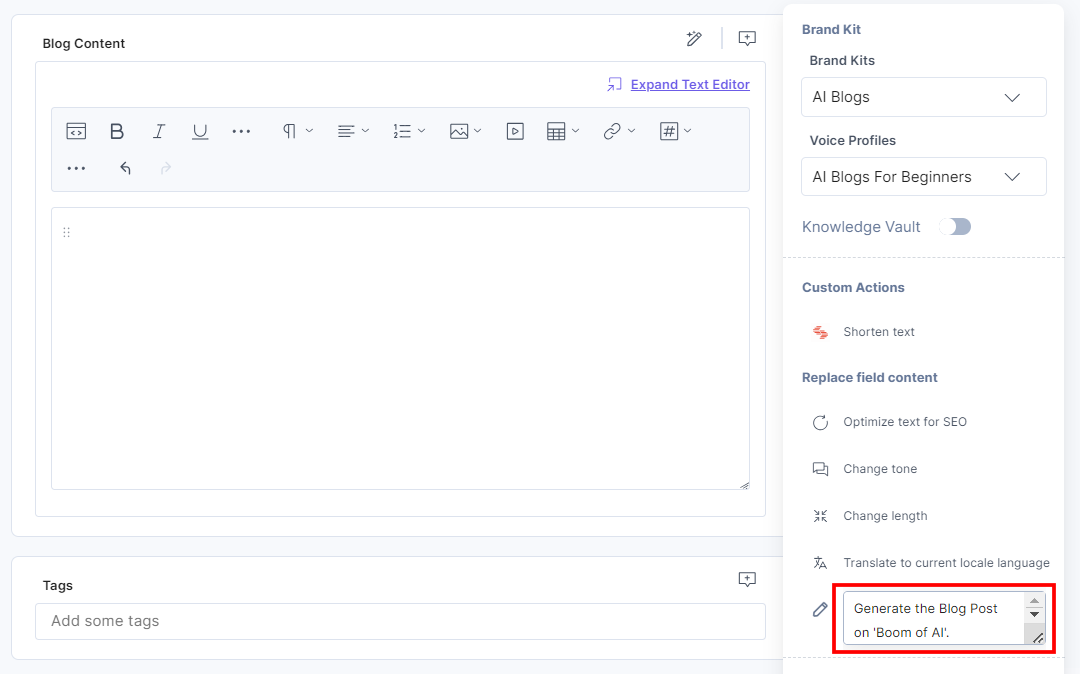
You are now ready to use the AI Assistant app. Enter the prompt to start generating the content.
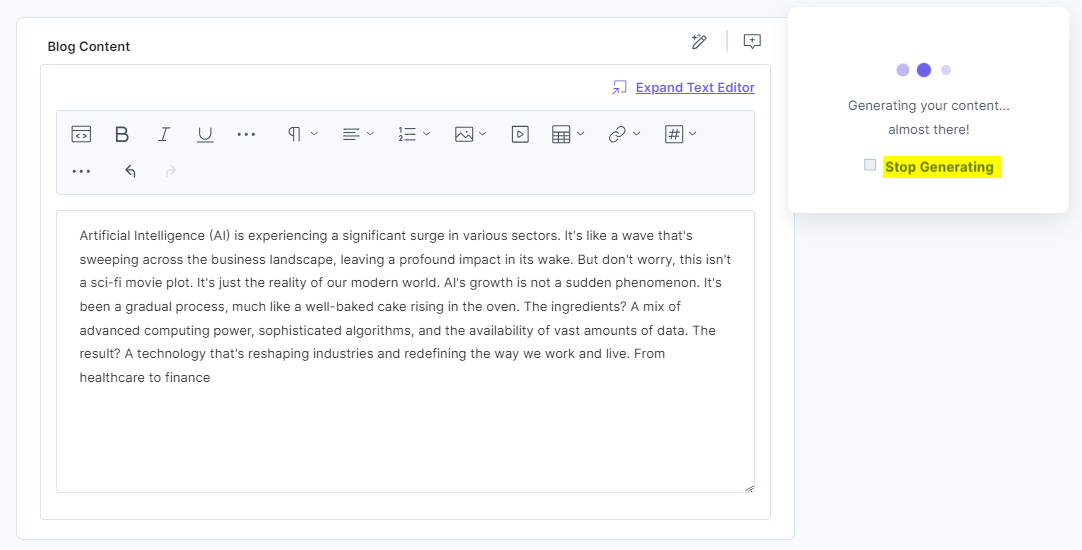
When you press enter, the AI Assistant app generates text based on the communication style settings that you used while configuring the voice profile.
To stop the app from generating the content, click Stop Generating.
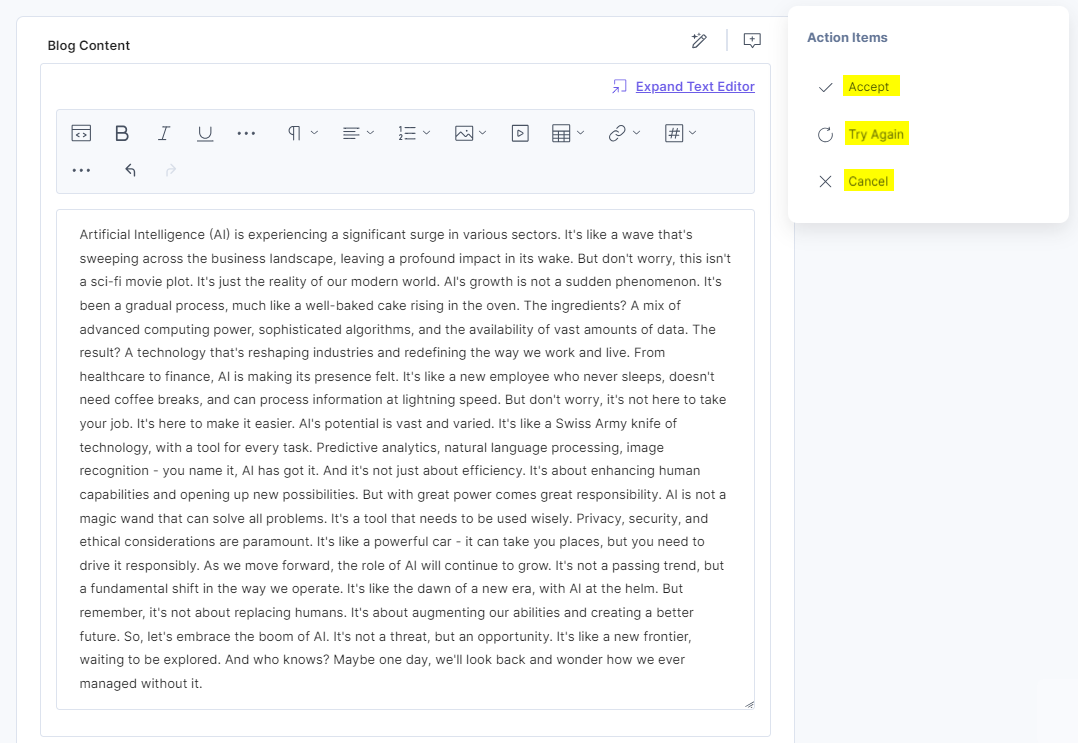
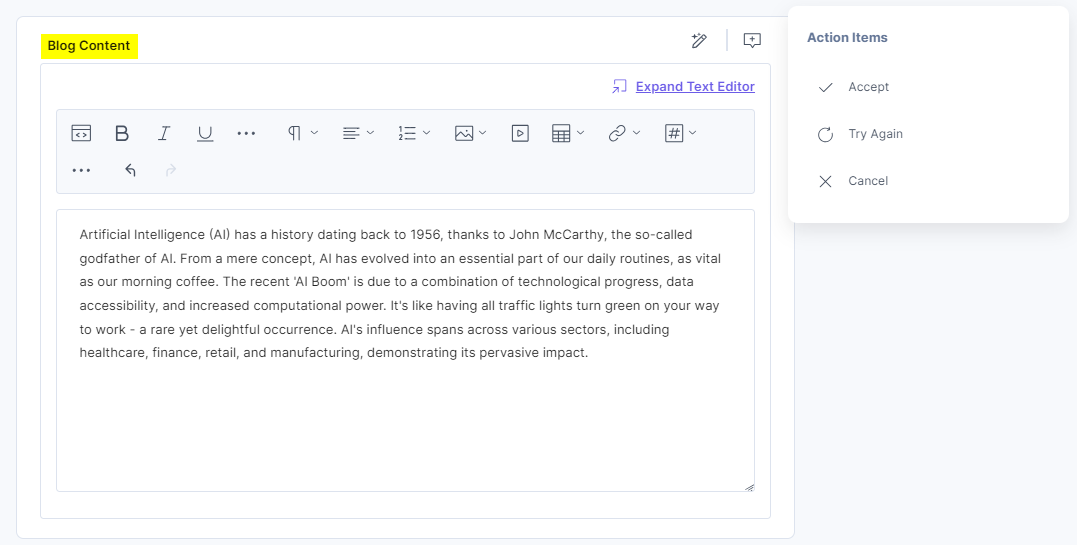
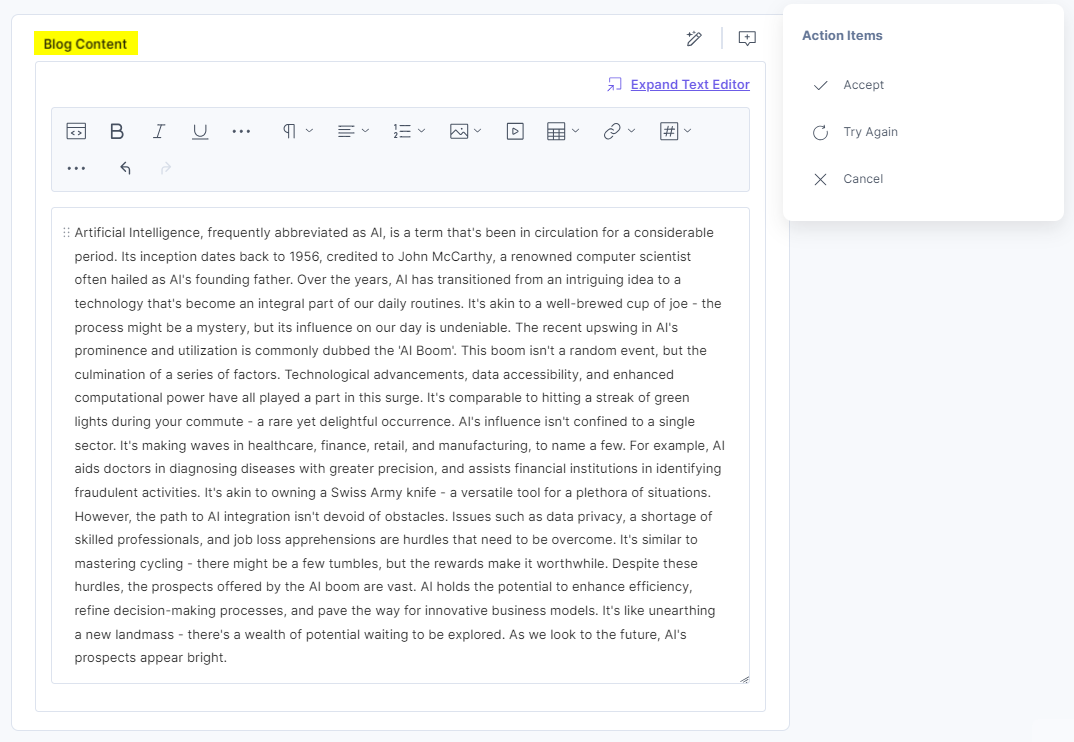
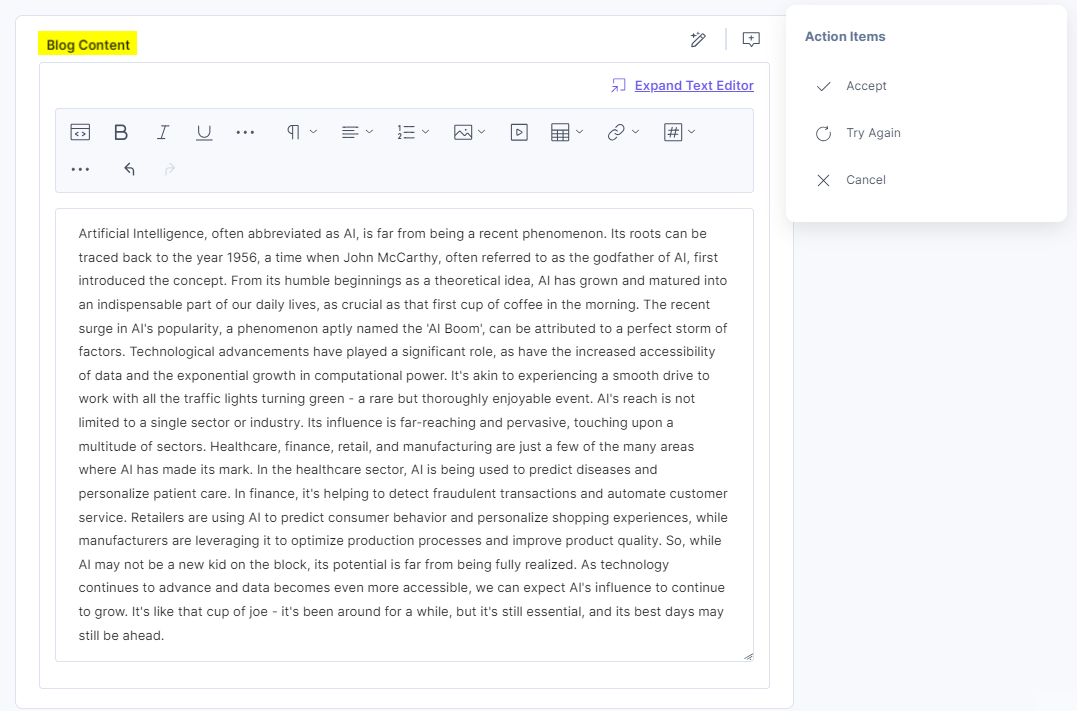
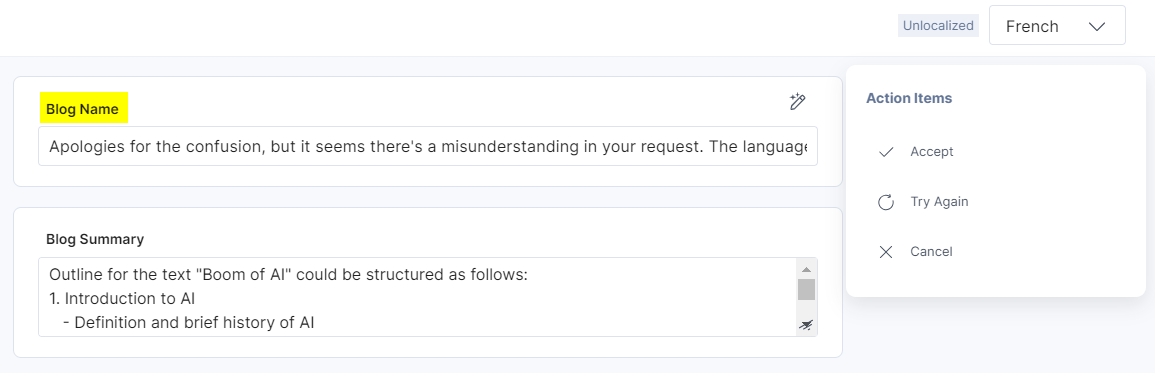
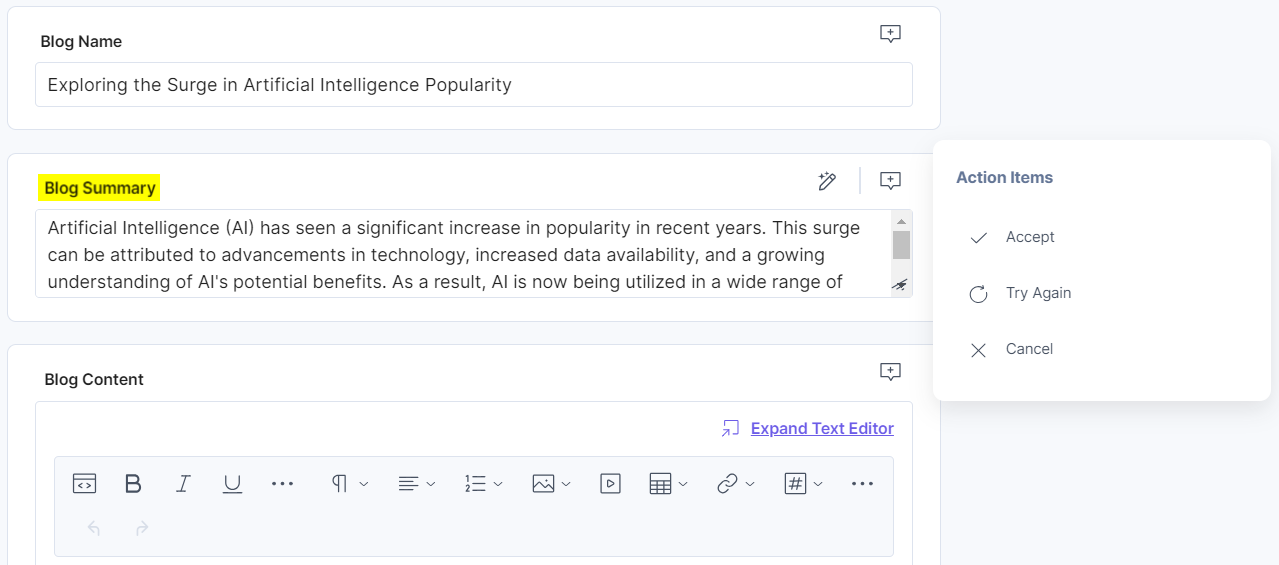
After the app generates the content, it offers three options: Accept, Try Again, and Cancel, as shown in the screenshot below.
Click Accept to accept the current content changes or to overwrite the existing content with the newly generated content. To rephrase the content, click Try Again and to discard the generated content , click Cancel.
The AI Assistant app categorize the content generation in three categories:
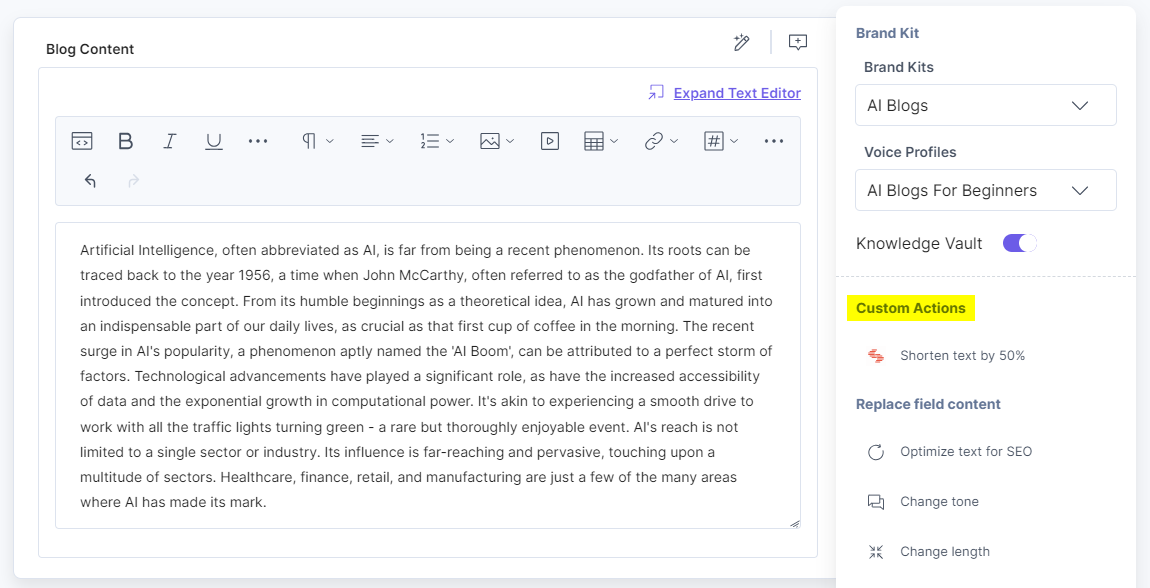
Custom Actions
You can see the Custom Actions that you configured in the advanced configuration settings in step 1.
Note: The AI Assistant options in the UI can be changed or edited by the Contentstack authorized team member or an Organization Owner/Admin.
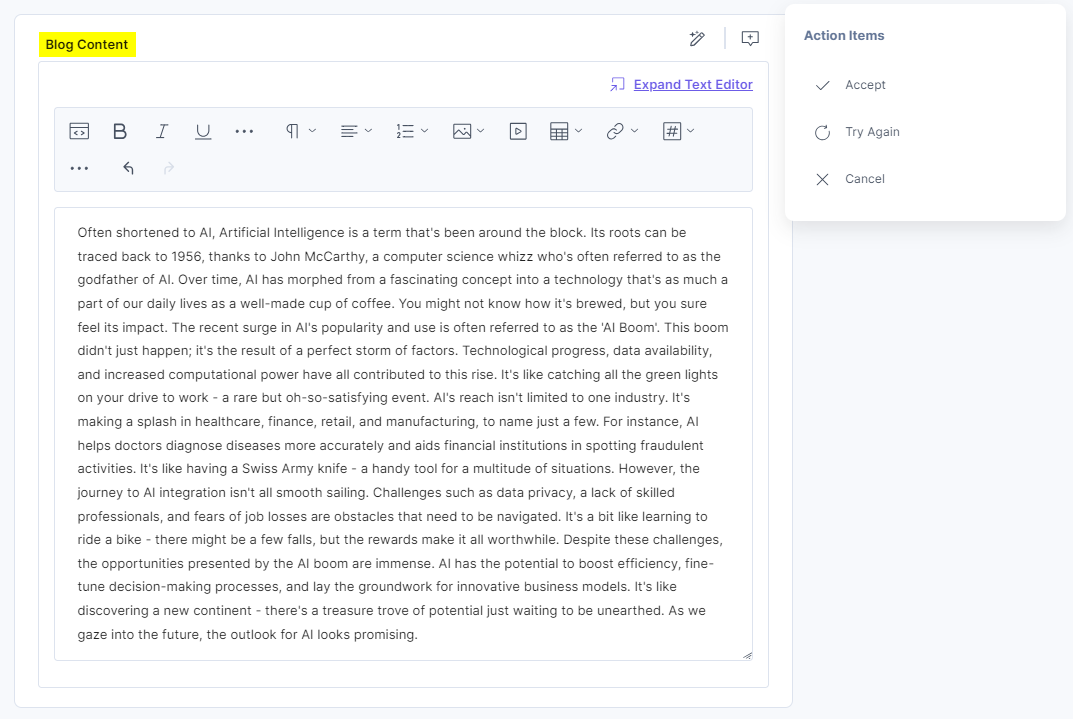
You can use the Custom Actions defined in the configuration and transform your content.
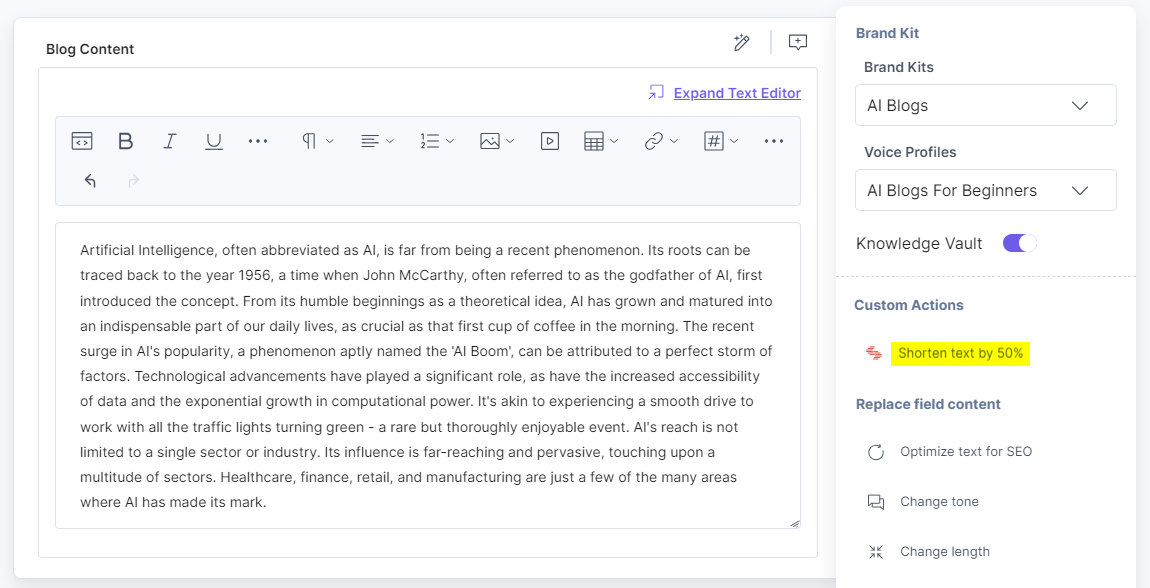
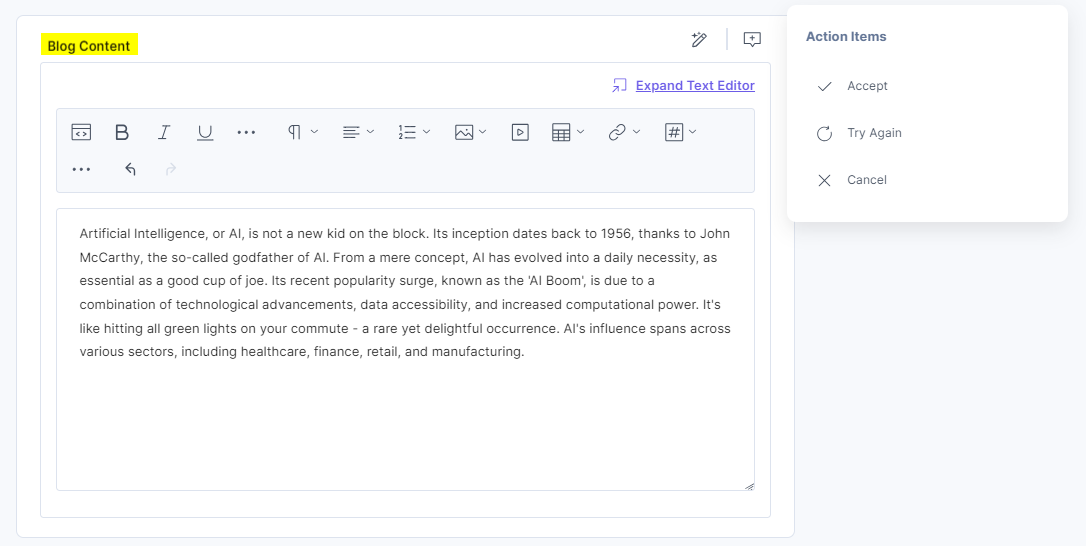
In the above example, there is a custom action to “Shorten text by 50%”. You can see the output as per the custom action:
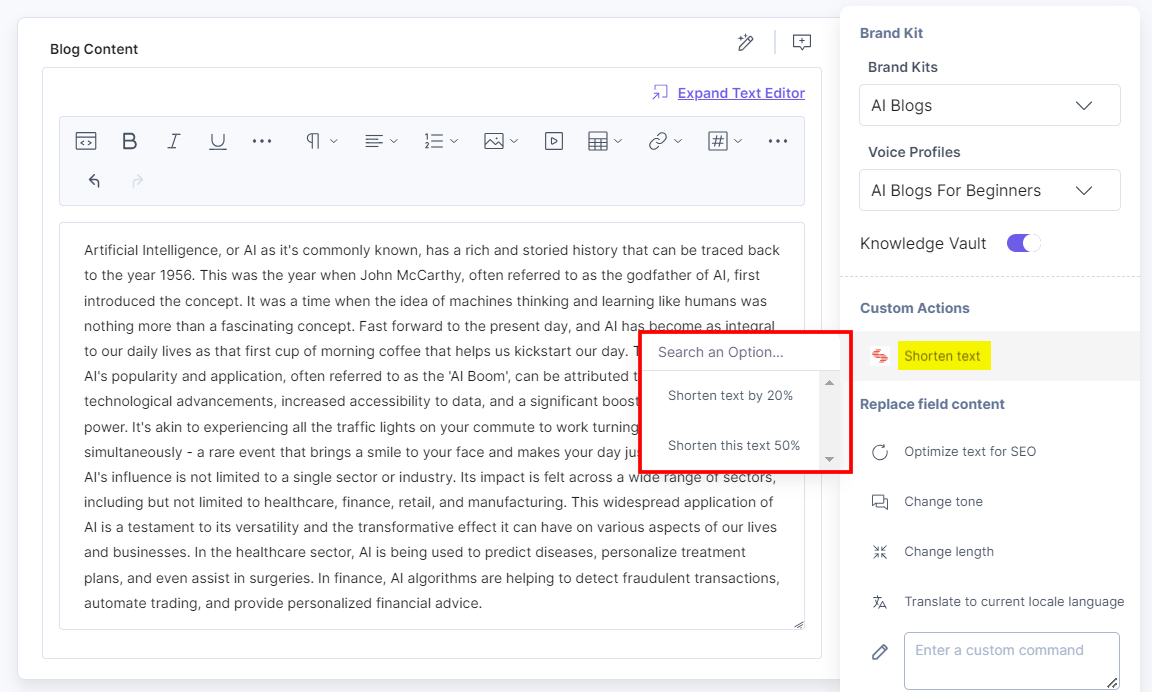
If the Custom Action has any sub-action(s), then the sub-action(s) can be displayed in the form of a dropdown when you hover over the custom action.
You get options to transform the content, such as:
- Rewrite the field content
- Shorten this text
- You can also provide custom commands for a field
Let’s see one of them with an example.
Navigate to the Title field. Click the AI Assistant app icon and then click Rewrite the field content option.
This re-phrases the existing content for better understanding.
Replace field content
You can replace or modify the content using the following predefined actions.

Let’s see each one of them with an example:
-
Optimize text for SEO
The AI Assistant Optimize text for SEO predefined action empowers you to create highly search-optimized content, driving more organic traffic and improving your website's overall search rankings. This action will Identify keywords and key phrases, and simply generate the SEO optimized text.
-
Change tone
The AI Assistant Change tone predefined action allows you to change the tone and style of the existing content using four options: Persuasive, Straightforward, Friendly, and Professional.
-
Change length
The AI Assistant Change length predefined action helps increase or reduce the length of the existing content.
You can use Longer to add more content.
You can useShorter to shorten up the content.
-
Translate to current locale language
You can also enter custom commands to generate content based on the command for the entry field. You can add and use the following variables in the custom command as placeholders for dynamic content.
-
Field Data
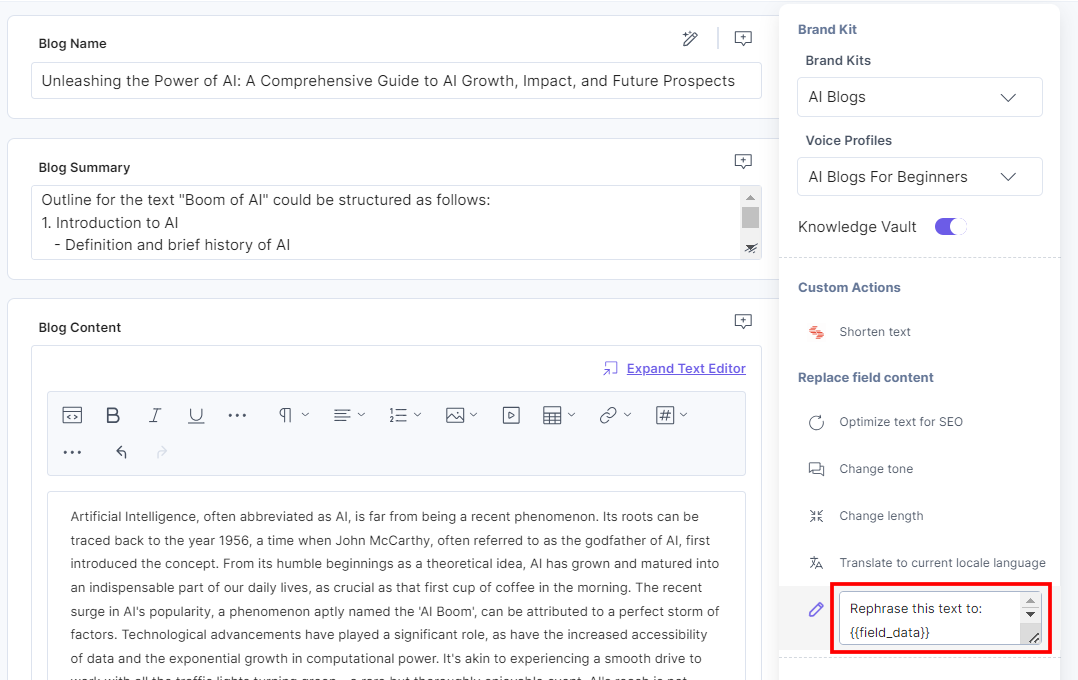
{{field_data}}: Use this variable to store the current field content in the custom command box for manipulation. The field_data placeholder can hold the value of the current field’s content.
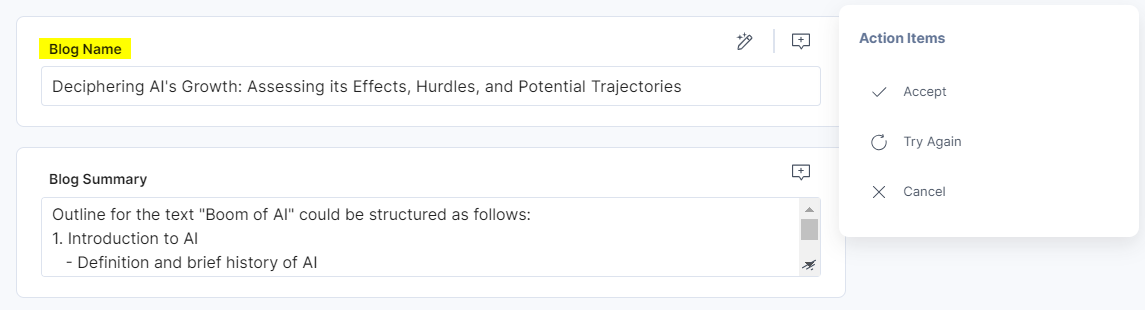
Suppose you want to rephrase the content in the Blog Name field then you can provide the following command in the custom box and click enter:
Rephrase this text to: {{field_data}} OR Summarize this text: {{field_data}}
In our example, it can generate new content for the Blog Name field as shown below:
Note: If you do not add the {{field_data}} variable in the custom command, the field content is automatically added at the end of the custom command.
-
Current Locale
{{current_locale}}: Use this variable to translate the field content in different locales. The {{current_locale}} placeholder can hold the value for the current locale in which you want to translate the field content.
Suppose you want to rephrase the content in the Blog Name field then you can provide the following command in the custom box.
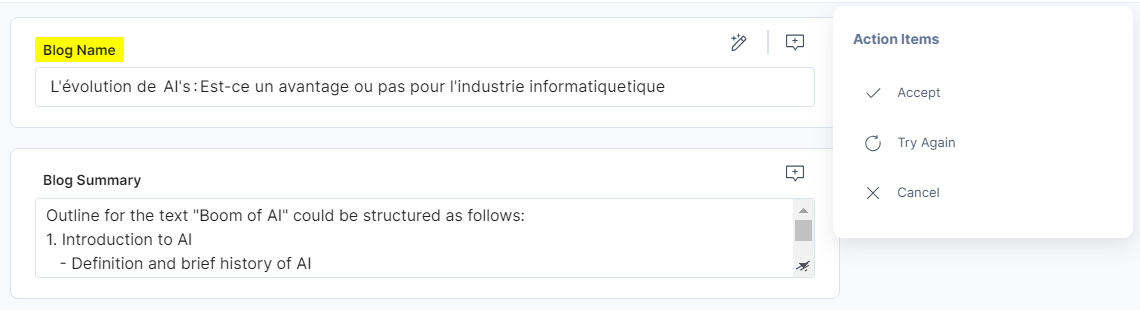
Translate this text to {{current_locale}}:{{field_data}}
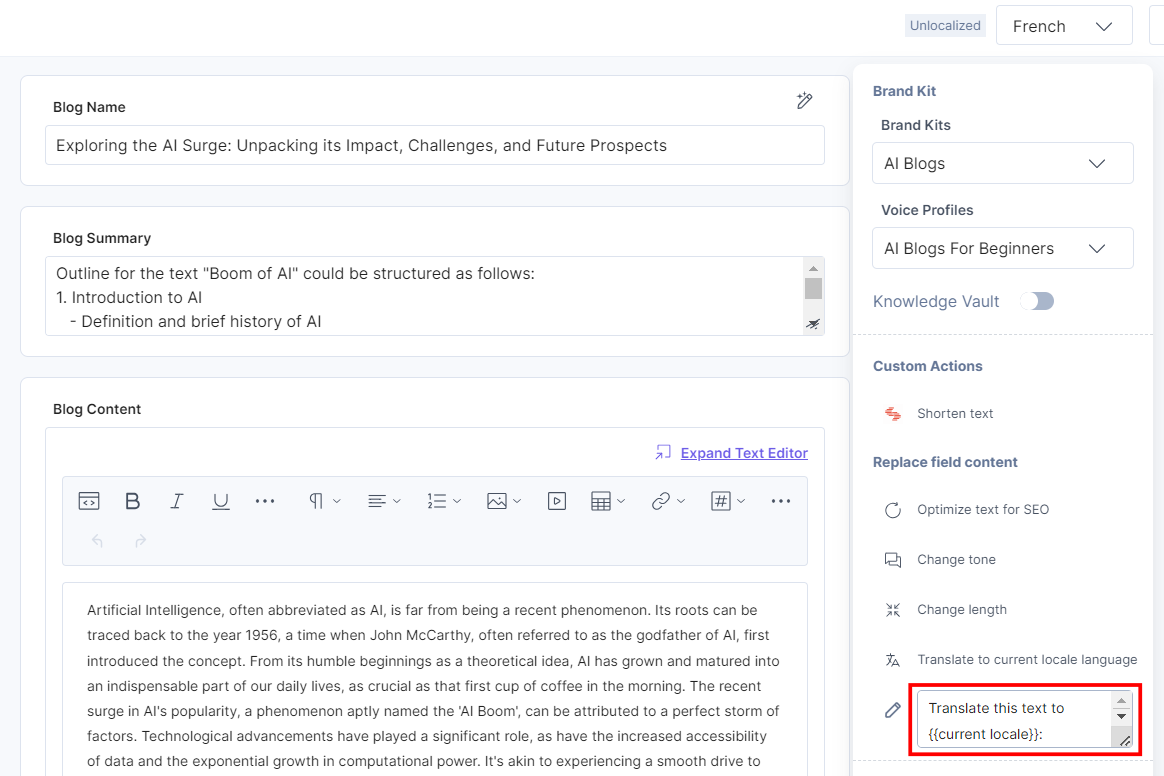
In our example, our locale is English and we are translating it to French locale. This can generate the content in the specified locale for the Blog Name field as shown below:
-
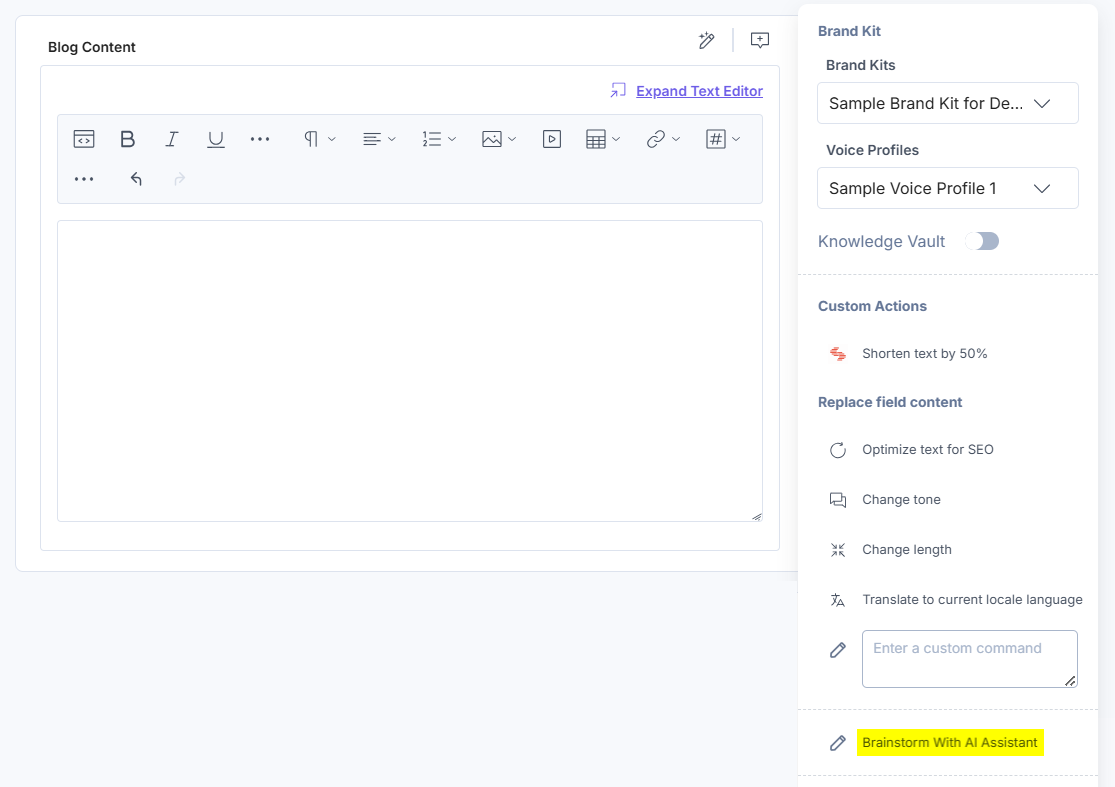
Brainstorm With AI Assistant
Brainstorm With AI Assistant is a chat-based feature in the AI Assistant app, designed to support your creative process. It enables users to engage in dynamic, conversational brainstorming sessions with AI, helping generate ideas, outline concepts, and shape content effortlessly.
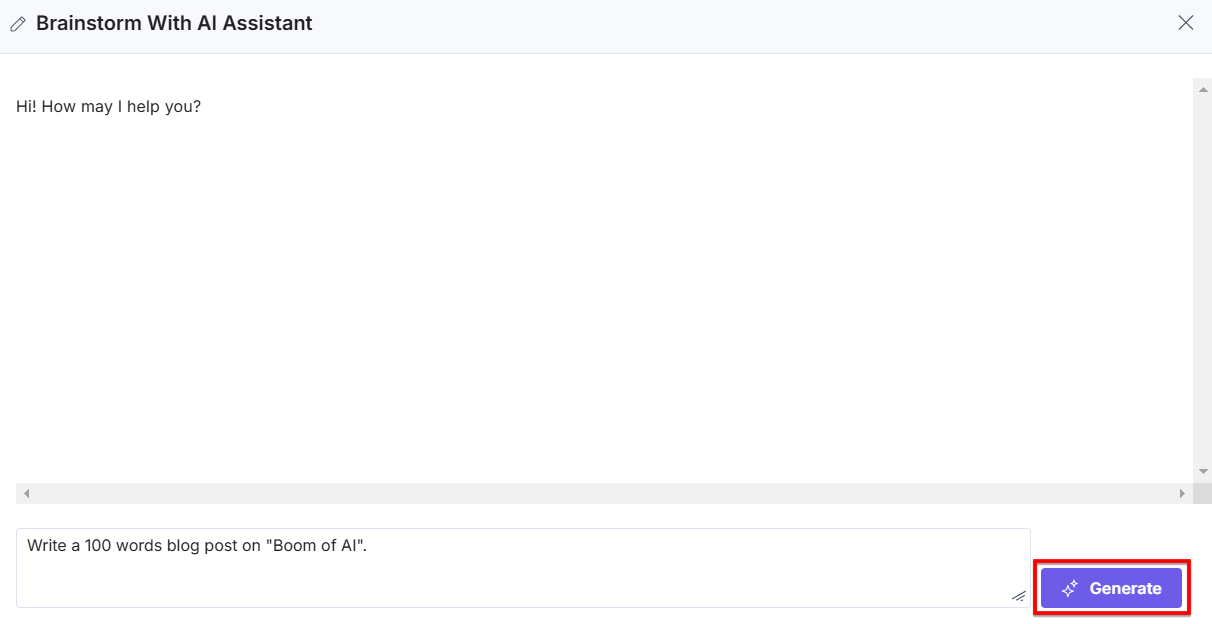
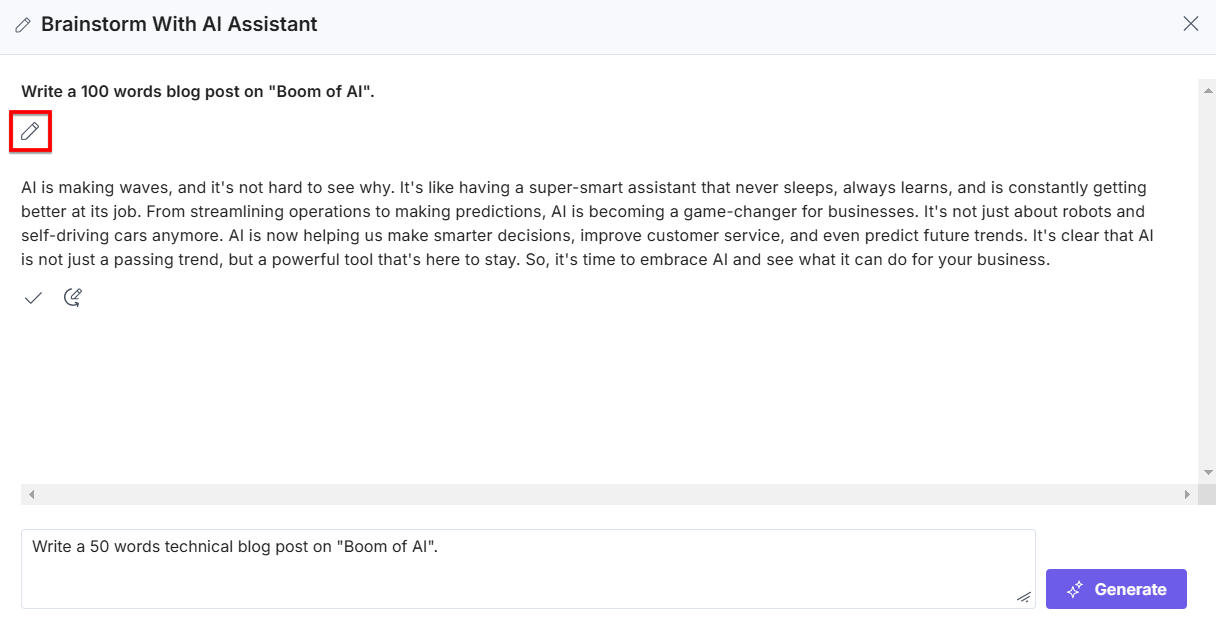
To use this feature, click the Brainstorm With AI Assistant option, a pop-up appears.
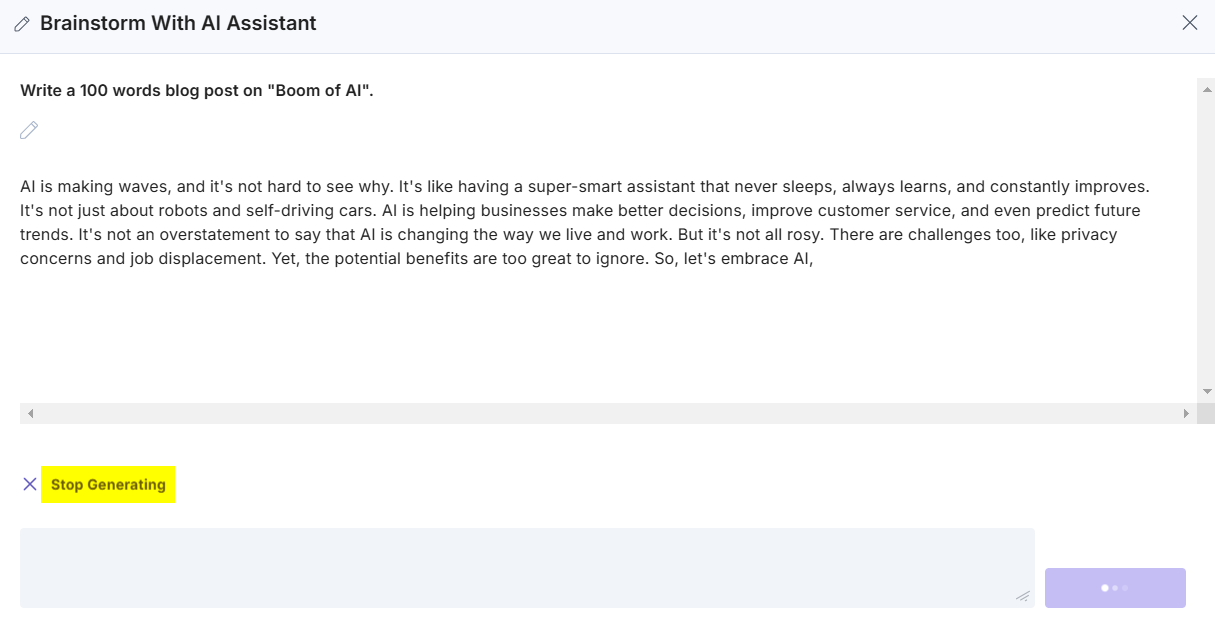
Enter any prompt of your preference, to initiate the conversation with AI and then click the Generate button to generate a response for your prompt.
To stop the app from generating the content, click Stop Generating.
This generates the content based on your provided prompt.
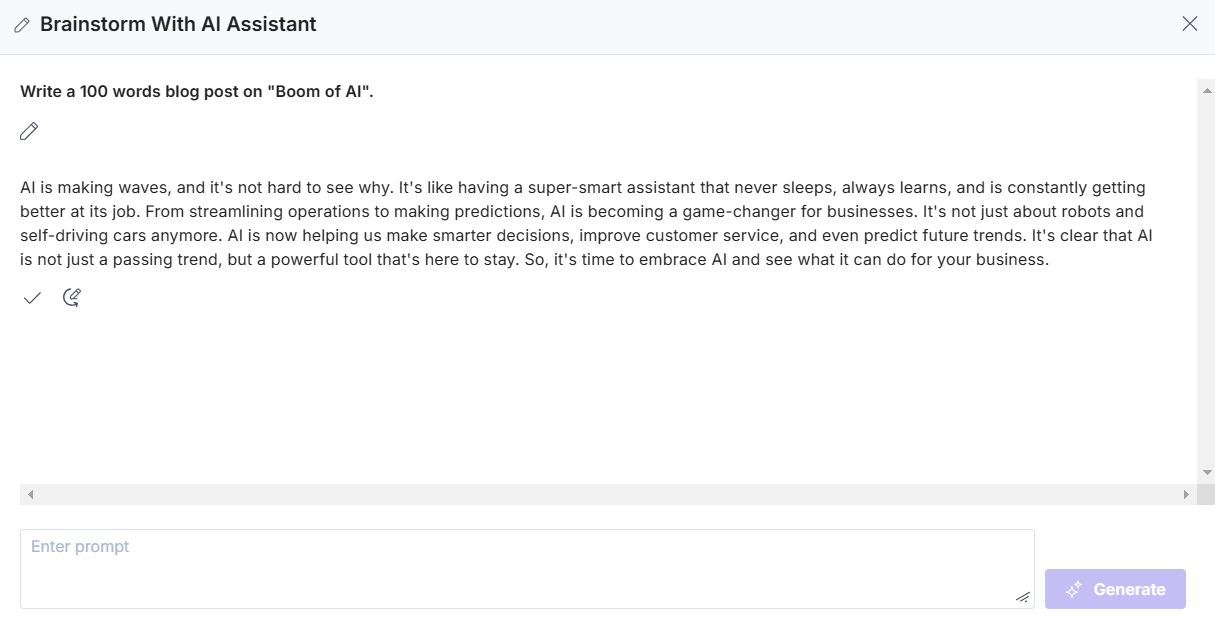
After the app generates the content, it offers these options: Accept, Regenerate, and Edit, as discussed below:
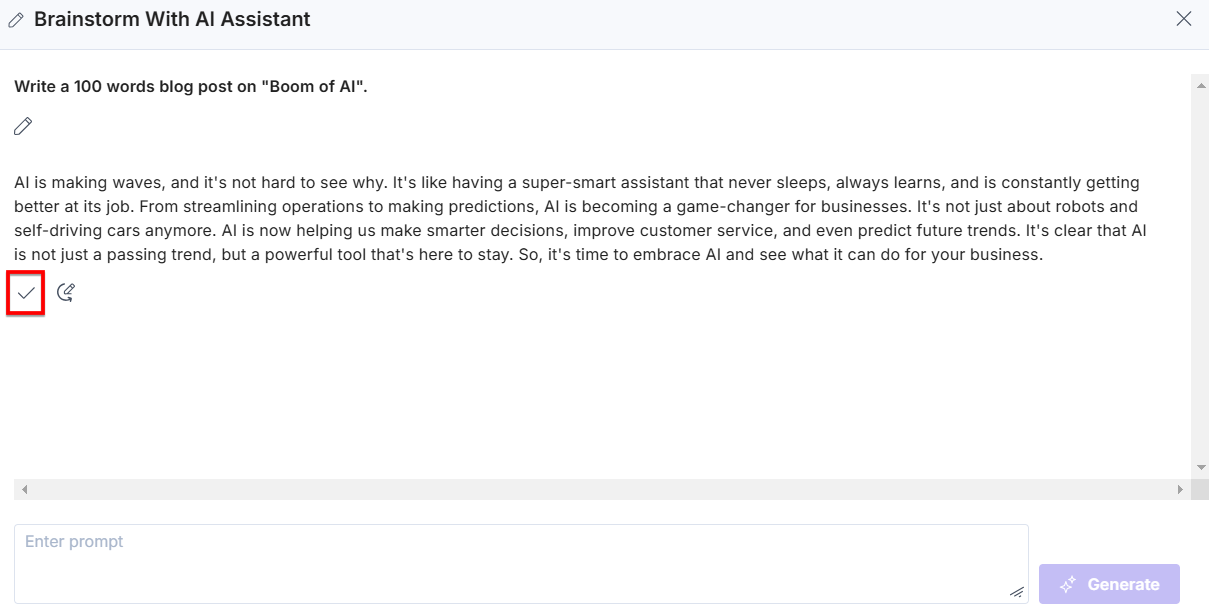
- Click the Accept icon to accept the newly generated content and add it in the field.
- To rephrase the content, click the Regenerate icon.
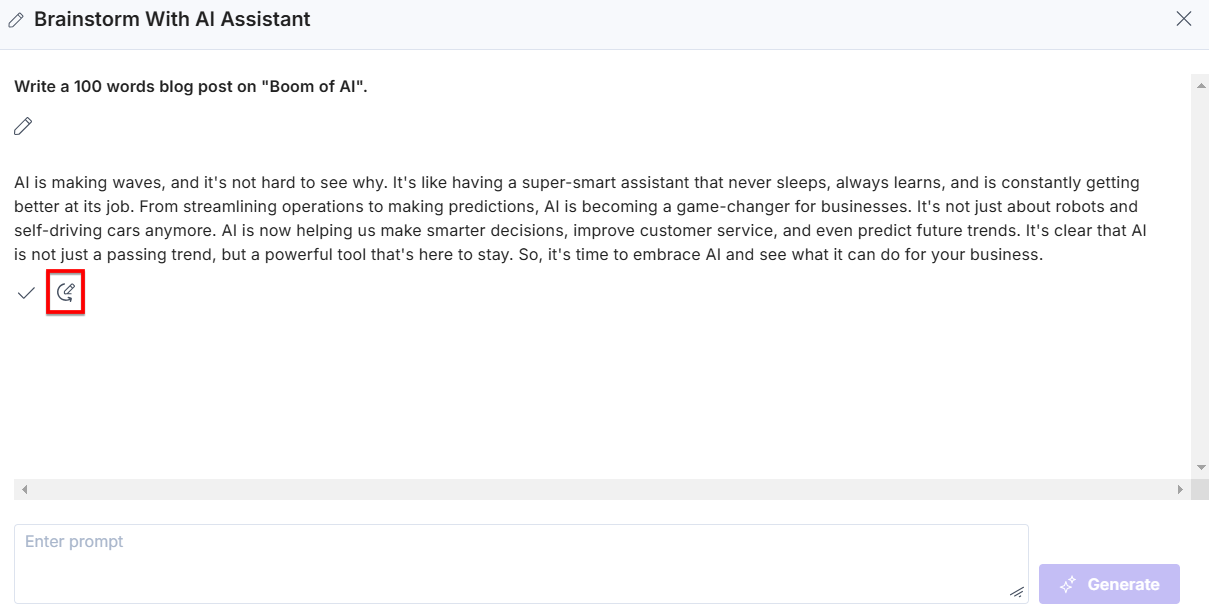
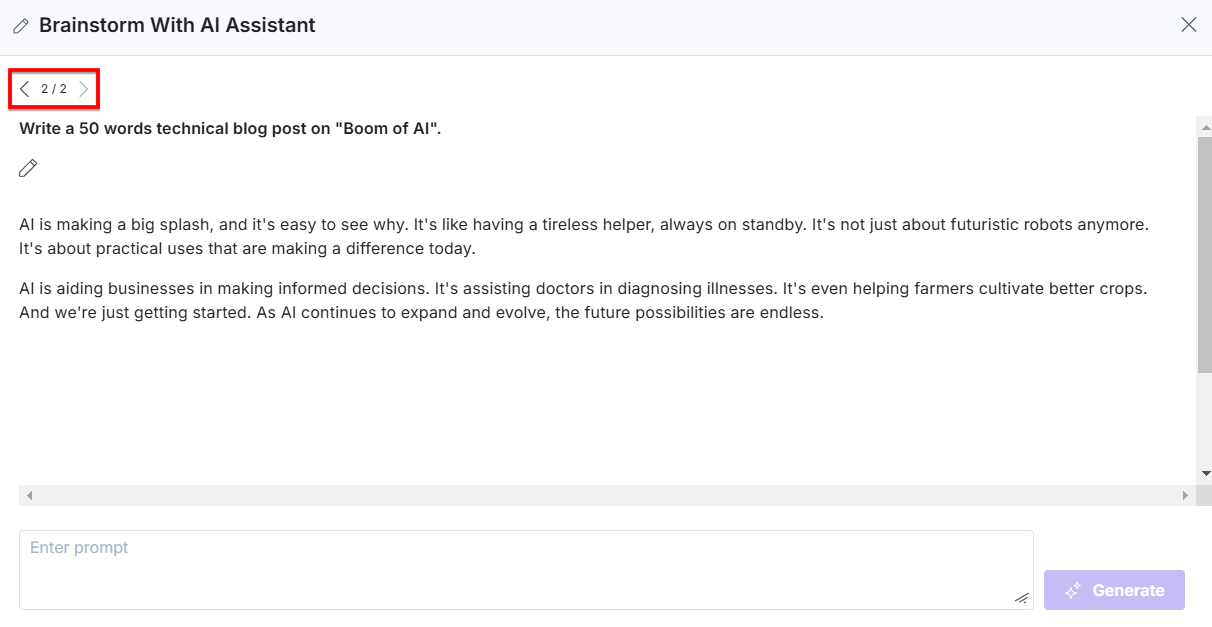
- Click the Edit icon, to update the prompt, then click the Generate button to get a new response for the updated prompt.
You can use pagination to view all your responses.
Warning: Once you close the Brainstorm With AI Assistant pop-up, all the conversation will be lost.
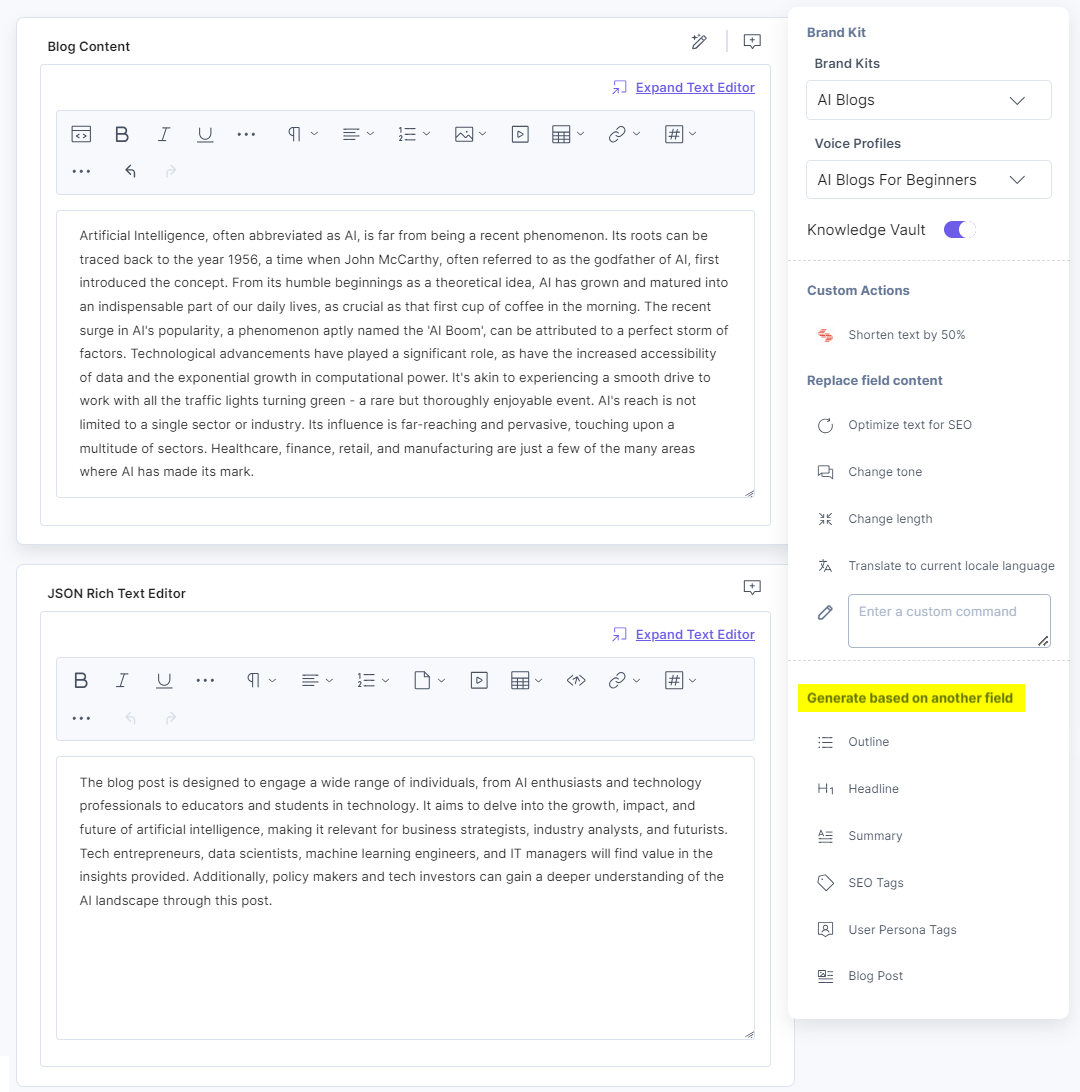
Generate based on another field
You can also generate content for one field based on the content of another field.
The AI Assistant app lets you generate the following content based on another entry field.
Let’s see each of them with some examples as shown below:
-
Outline
To generate an outline for the Blog Summary field based on the Title of the entry, navigate to the Blog Summary field, click Outline, and then click the Title field.

-
Summary
Now, to generate a Summary for the Blog Summary field based on the Blog Name, navigate to the Blog Summary field, click Summary, and then click Blog Name.
-
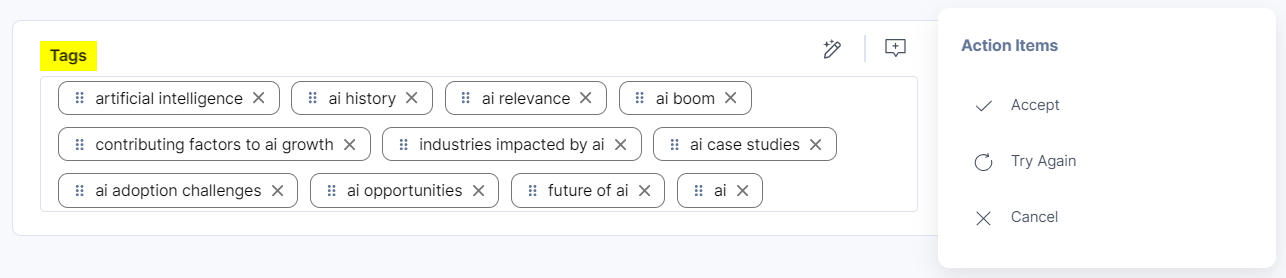
SEO Tags
To generate SEO Tags for the Tags field based on the Blog Name, navigate to the Tags field, click SEO Tags, and then click Blog Name.
-
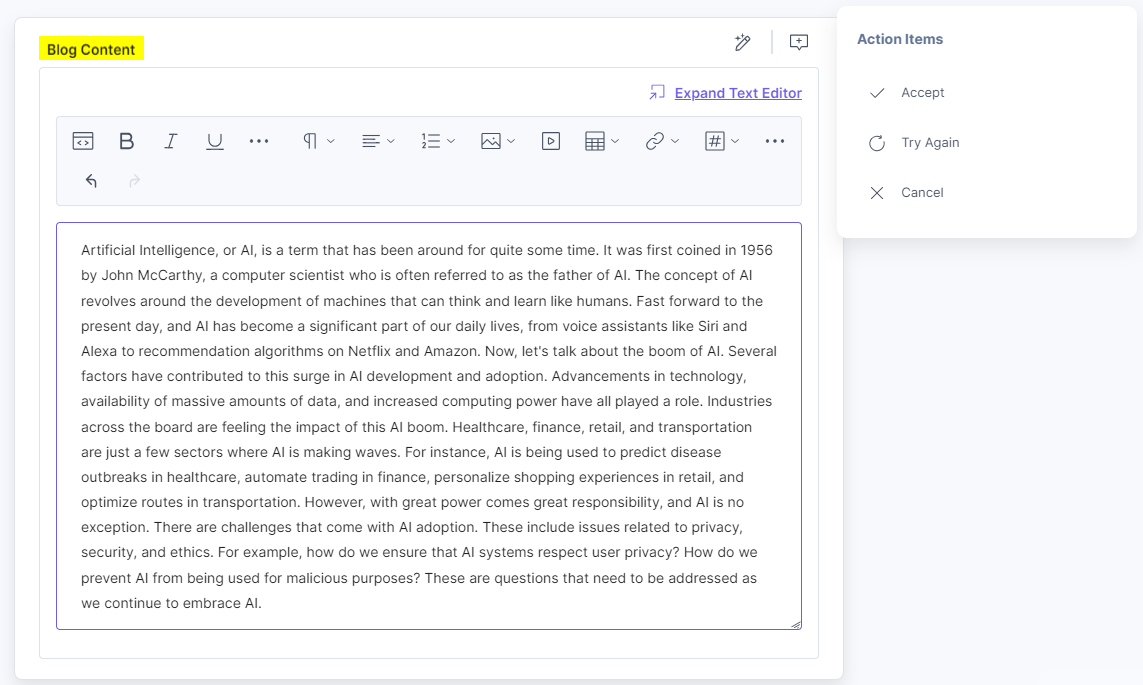
Blog Posts
Now, to generate a Blog Post for the Blog Content field based on the Blog Summary field, navigate to the Blog Content field, click Blog Posts, and then click Blog Summary.
-
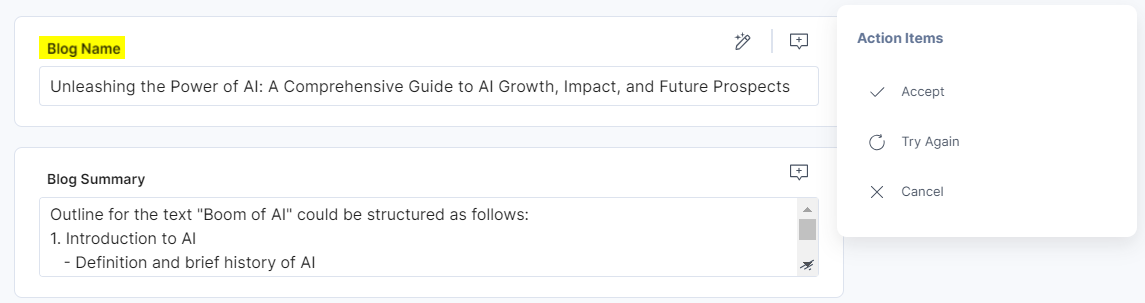
Headline
To generate a headline for the Blog Name field based on the Blog Summary of the entry, navigate to the Blog Name field, click Headline, and then click the Blog Summary field.
-
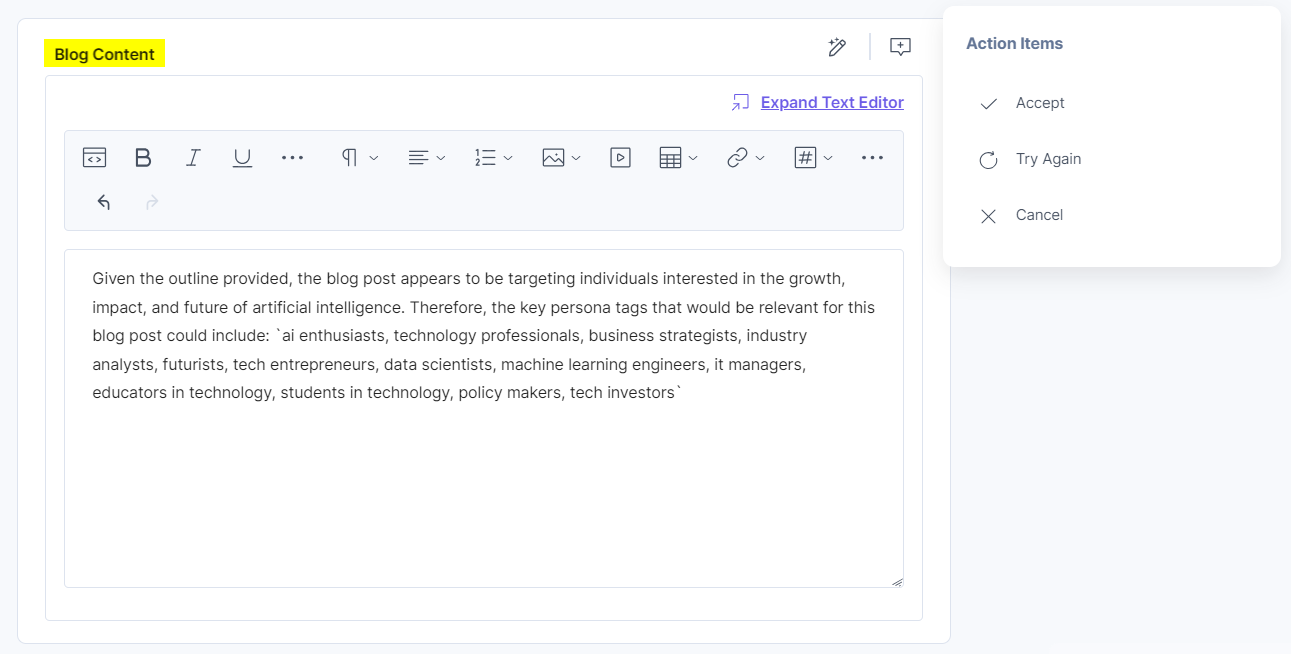
User Persona Tags
To generate a user persona tag for the Blog Content field based on the Blog Summary of the entry, navigate to the Blog Content field, click User Persona Tags, and then click the Blog Summary field.
More articles in "Artificial Intelligence"
