
.svg?format=pjpg&auto=webp)
.svg?format=pjpg&auto=webp)
.png?format=pjpg&auto=webp)


.png?format=pjpg&auto=webp)
Get Started with Brand Kit
This step-by-step guide explains how to create a Brand Kit and Voice Profile in Contentstack, and how to utilize them within the AI Assistant app. You will learn the following:
- Create a Brand Kit: Create a centralized repository for your organization's identity.
- Define a Voice Profile: This Voice Profile can be applied to your content to ensure a consistent brand voice across your digital experiences.
- Integrate the Brand Kit and Voice Profile into the AI Assistant app: The AI-powered natural language processing platform can transform your content with accuracy and efficiency.
By the end of this guide, you will have the knowledge and skills to leverage Contentstack's powerful branding tool to elevate your digital presence and deliver a cohesive, on-brand experience to your audience.
Prerequisites
- Contentstack account with access to Brand Kit
- Access to the Contentstack Organization/Stack as the Owner/Admin
Steps for Execution
- Create Brand Kit
- Create Voice Profile
- Install the AI Assistant app from the Contentstack Marketplace
- Use Brand Kit in the AI Assistant app
-
Create Brand Kit
As a first step, you need to create a Brand Kit. To do so, log in to your Contentstack account and follow the steps given below:
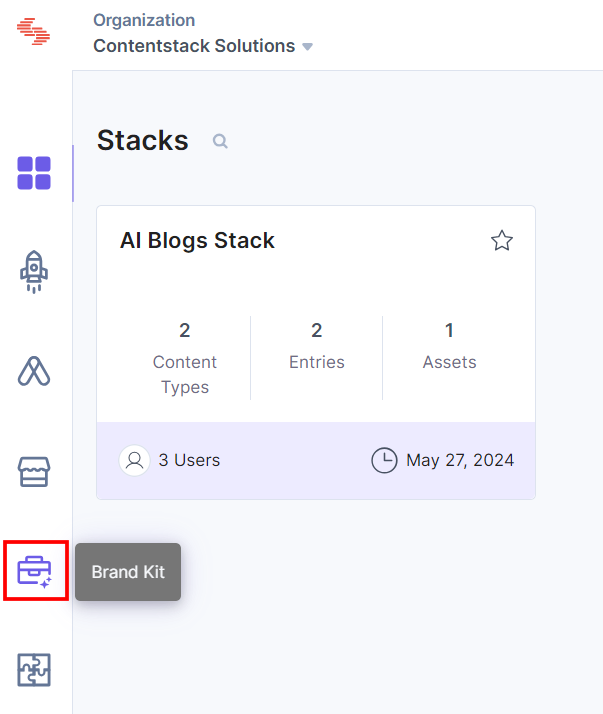
- On the left navigation panel, click the Brand Kit icon.
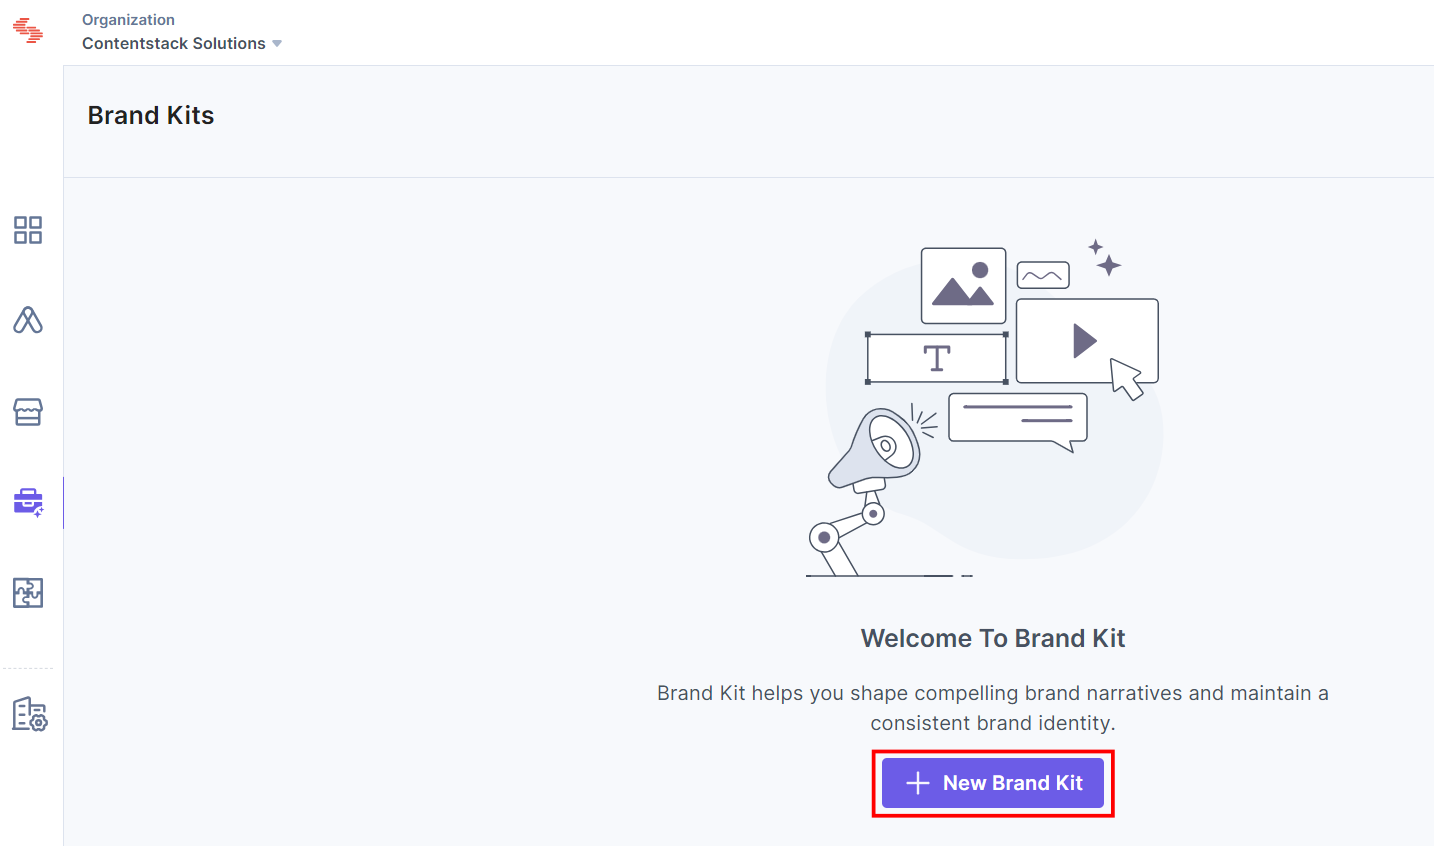
- Click the + New Brand Kit button to create a new Brand Kit.
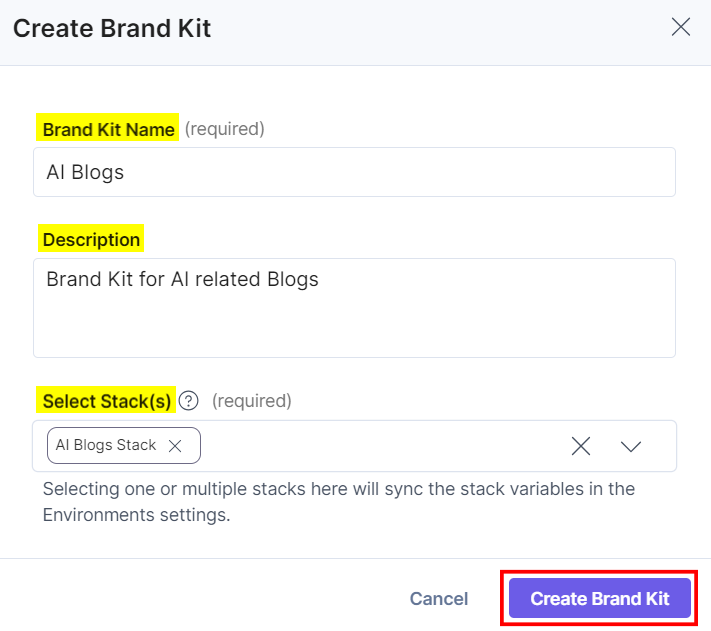
- In the Create Brand Kit modal, enter the Brand Kit Name and Description (optional). Then, Select Stack(s) from the dropdown and click Create Brand Kit.
Note: When creating a Brand Kit, selecting one or multiple stacks will synchronize the associated stack content and its environment settings.
This creates your Brand Kit.
- On the left navigation panel, click the Brand Kit icon.
-
Create Voice Profile
Let's now create a Voice Profile for this Brand Kit by following the steps given below:
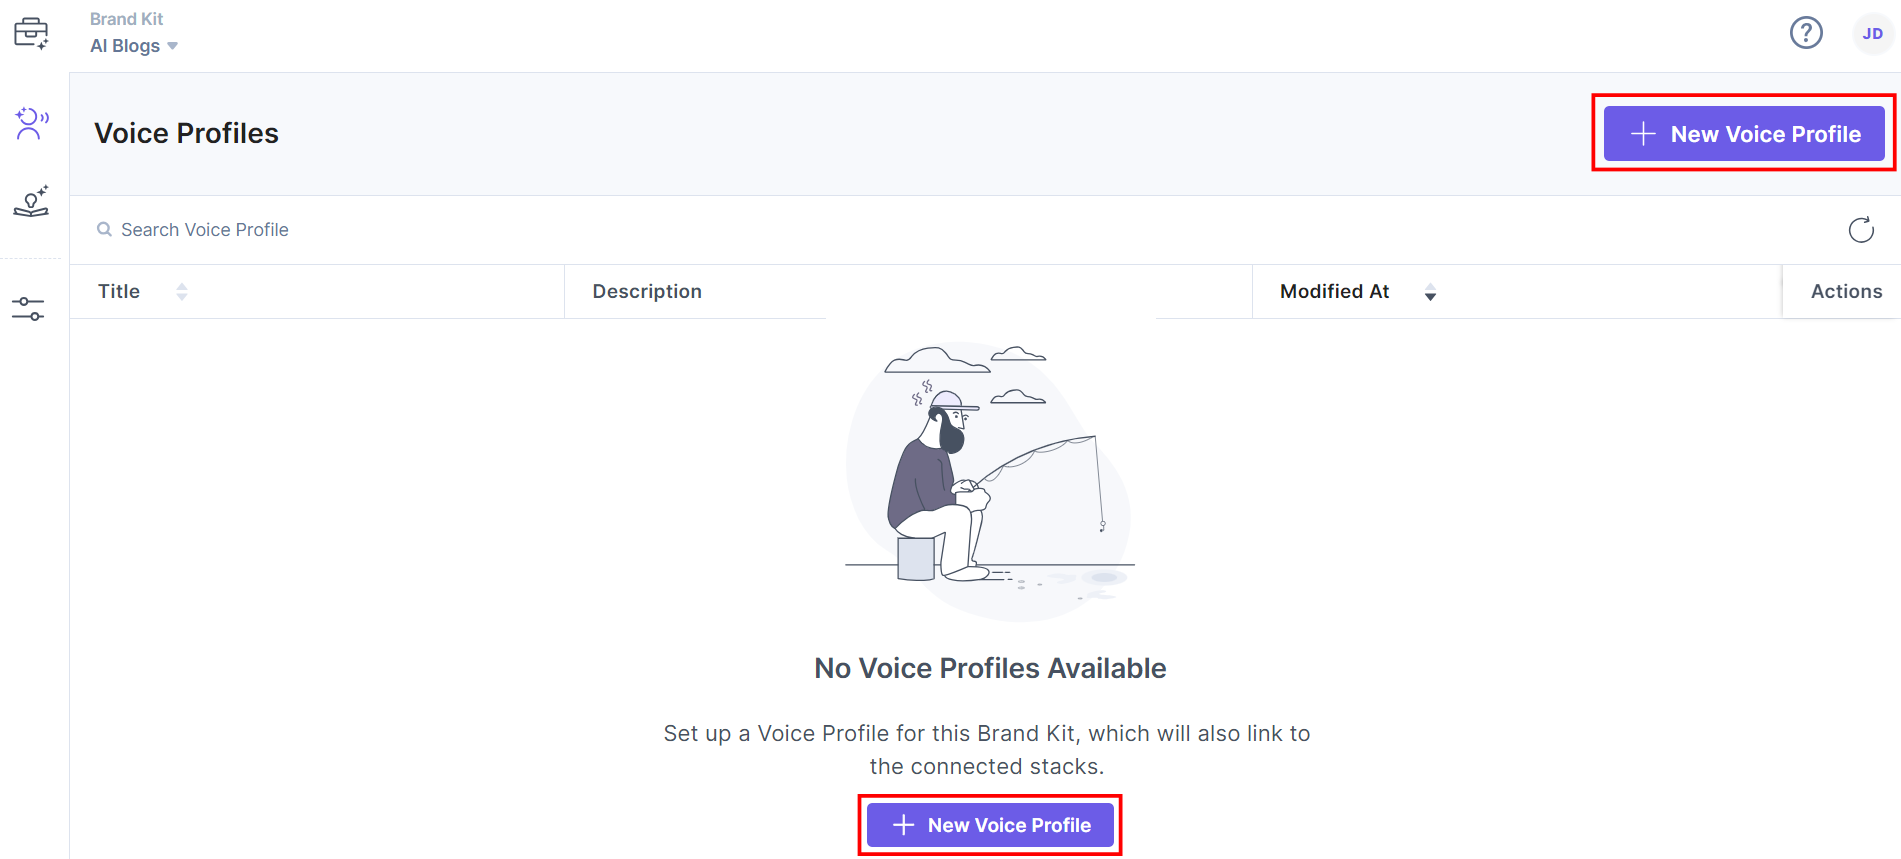
- Select the Brand Kit in which you want to create a Voice Profile.
- Click the + New Voice Profile button to create a new Voice Profile.
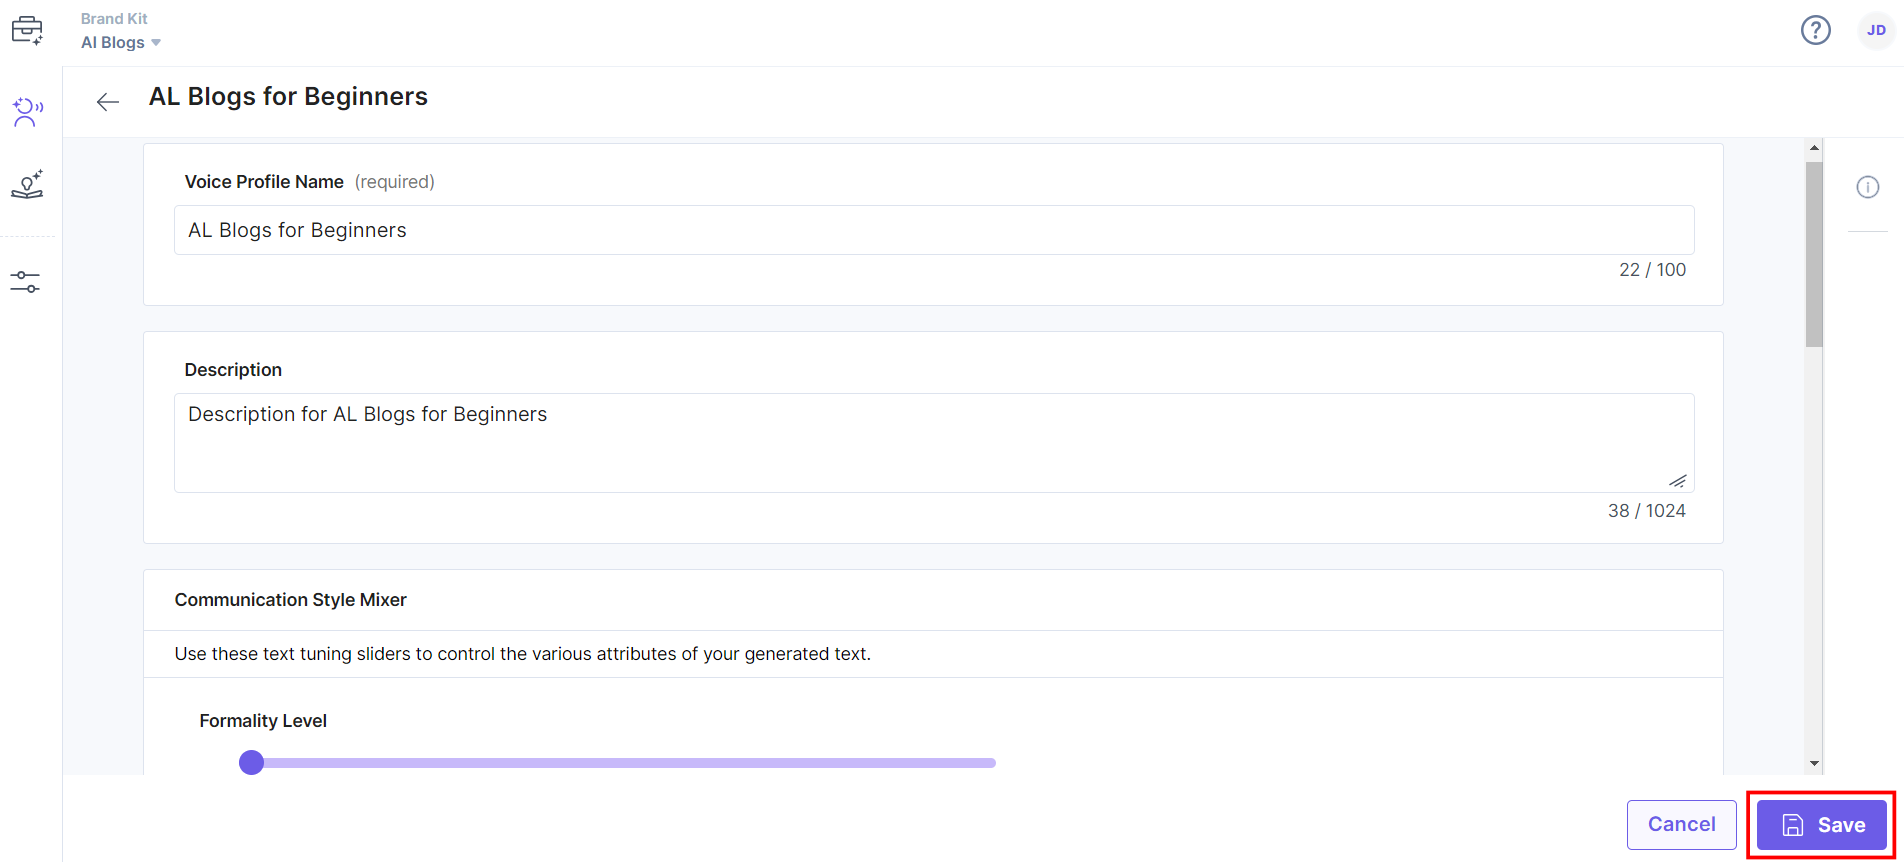
- On the Create Voice Profile page, enter the following details:
- Enter a suitable Voice Profile Name and Description.
- Set the Communication Style Mixer using the Formality Level, Tone Of Voice, Humor Level, and Language Complexity Level slider bars. It defines how your content generation will be styled.
- Inside the Custom Details section, you can provide Insights and Sample Content.
Inside the Insights section, you can provide additional information to the AI model. You can give sample content to your Voice Profile to generate similar content in action.
- Generate content in the Playground based on the Voice Profile settings. Enter the prompt in the Provide Prompt field and click the Generate Response in Playground button to view the generated response in the right-side slider. You can refine the Voice Profiles by evaluating the content specifications.
- After filling out the details, click Save to create a voice profile.
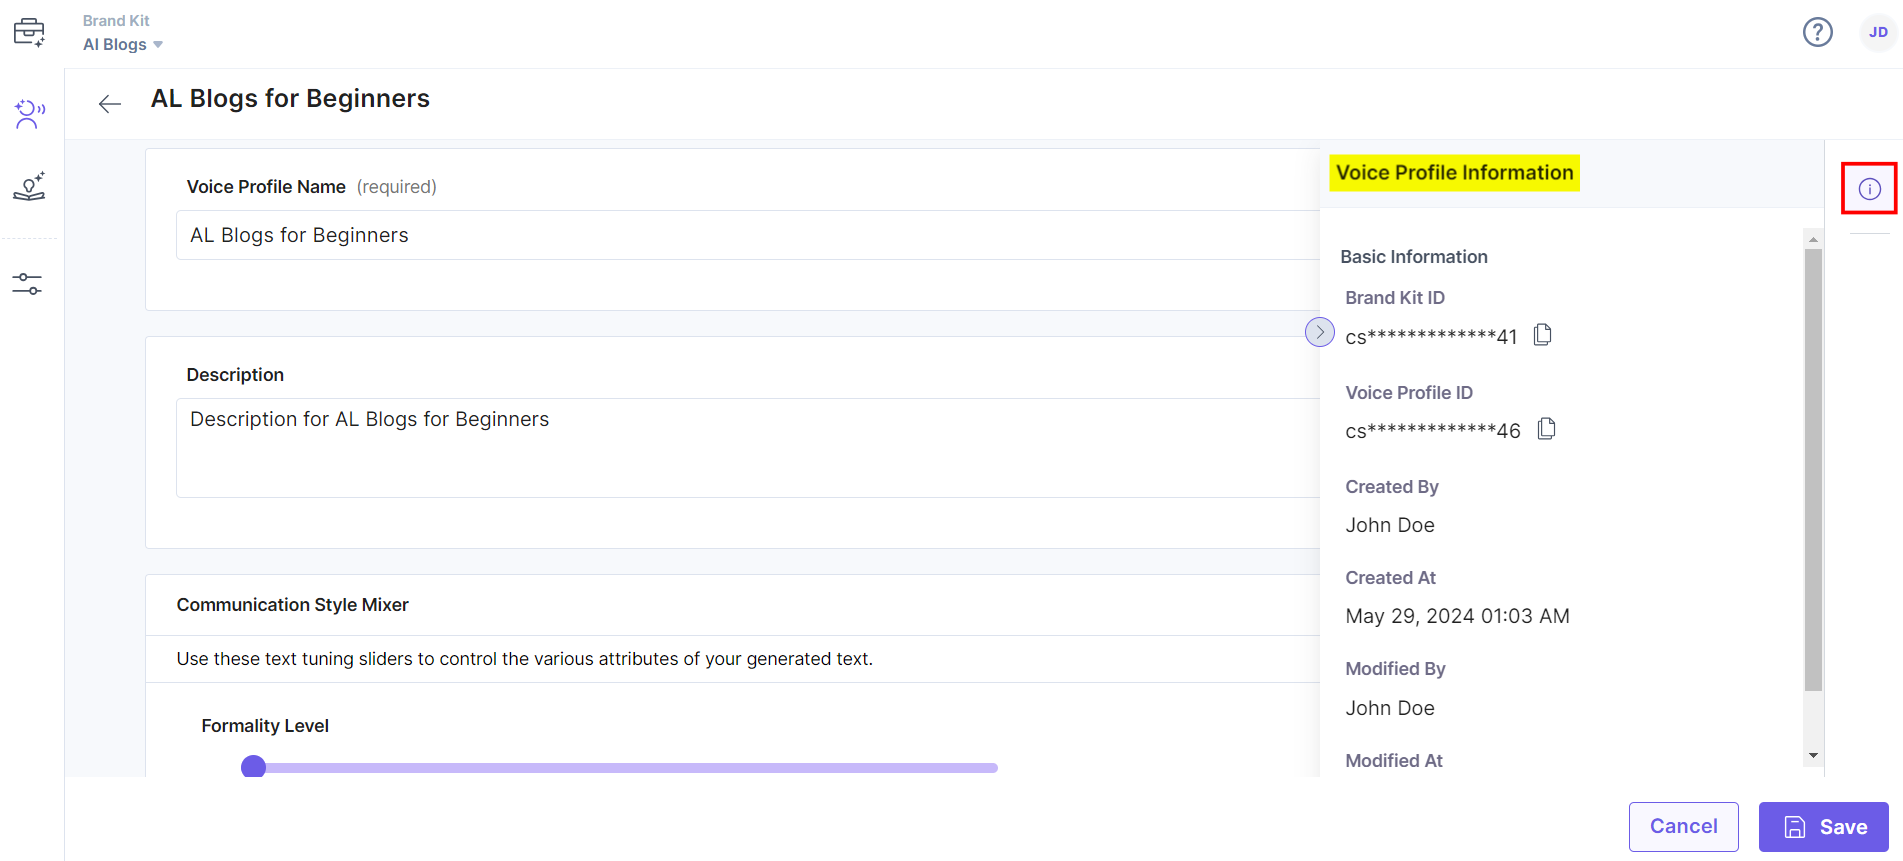
After the Voice Profile is created, you will receive a success message. You can view its details by clicking the Information icon on the right-side navigation panel.
-
Install the AI Assistant app from the Contentstack Marketplace
AI Assistant is an app available in Contentstack Marketplace. It provides AI-powered features to streamline content creation and management processes within the Contentstack platform.
It offers functionalities such as SEO metadata generation, content optimization suggestions, blog post content generation, user persona tag creation, and more.
To install and configure the AI Assistant app, follow the step-by-step process defined in the AI Assistant with Brand Kit documentation.
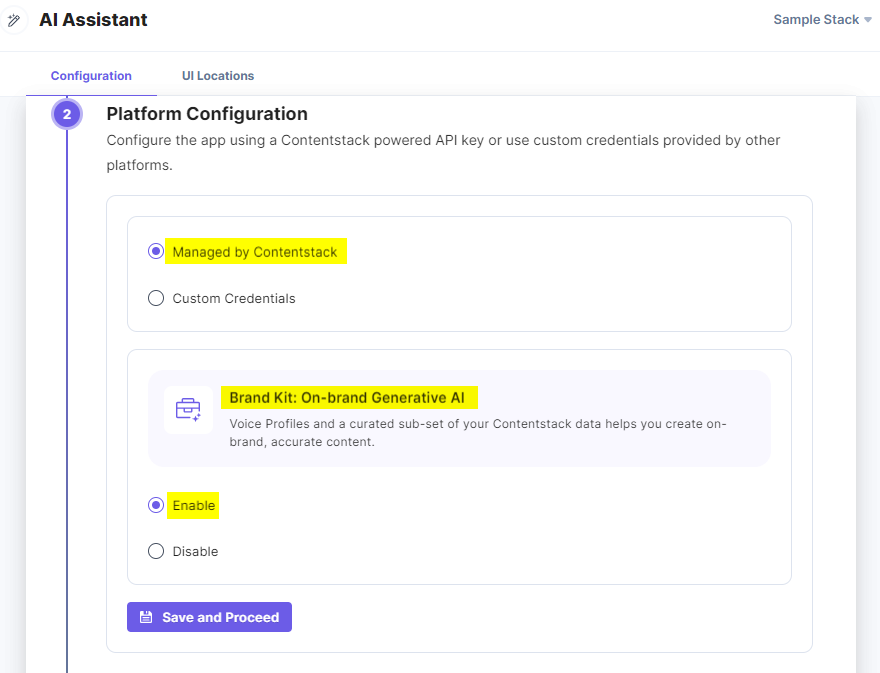
Note: To use Brand Kit efficiently, select the Managed by Contentstack option under Platform Configuration settings on the AI Assistant app Configuration page and then enable the Brand Kit: On-brand Generative AI settings.
-
Use Brand Kit in the AI Assistant app
To use Brand Kit within the AI Assistant app within an entry of your stack, follow the steps given below:
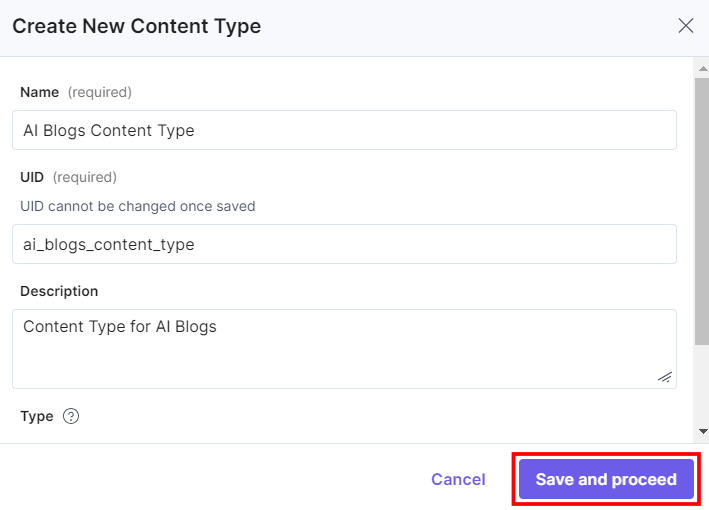
- Create a content type by adding relevant details as displayed below and click the Save and proceed button.
- To use the AI Assistant app, create an entry for the above content type. In the left navigation panel, navigate to the Entries page, click + New Entry to create a new entry for the above content type, and then click Proceed.
- You can see the AI Assistant app icon in the Field Modifier Location.

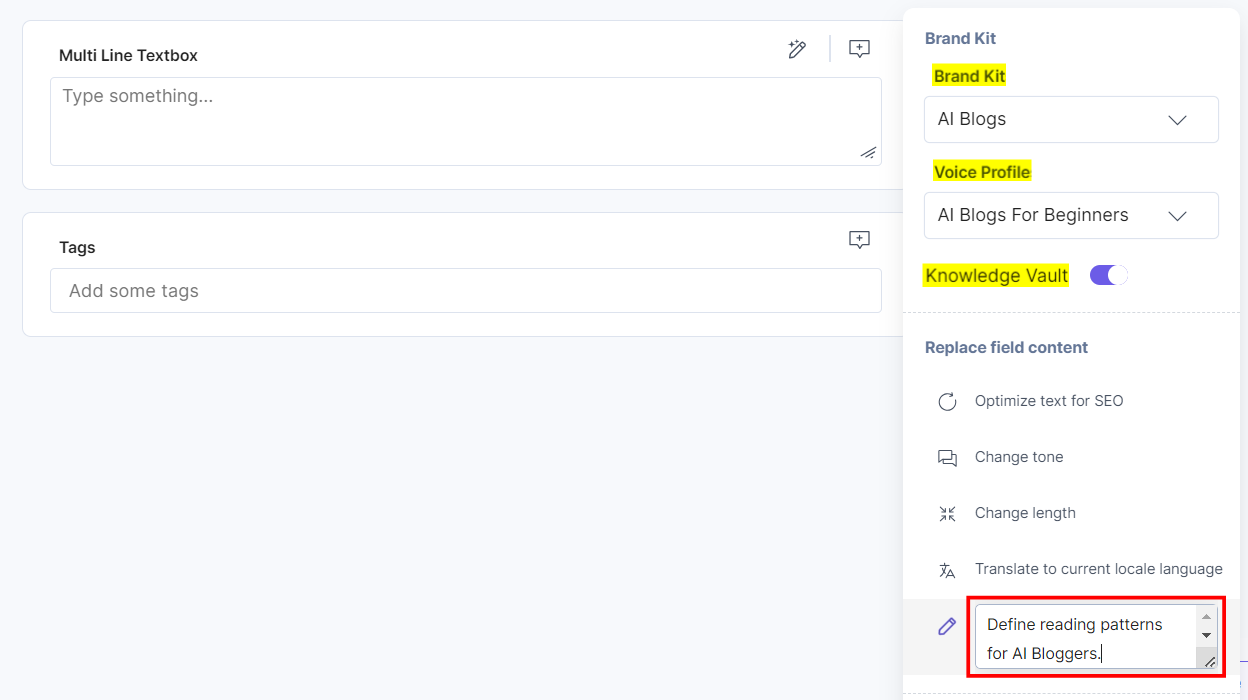
- To generate Brand Kit specific content, provide the following details:
- Select the Brand Kit from the dropdown.
- Select the relevant Voice Profile from the dropdown.
- Enable or disable the Knowledge Vault to fetch the desired data.
- Write a prompt and press enter to generate content in the respective field.
- This starts generating your content. Click Accept to accept the newly generated content. To rephrase the content, click Try Again. To remove the content, click Cancel.
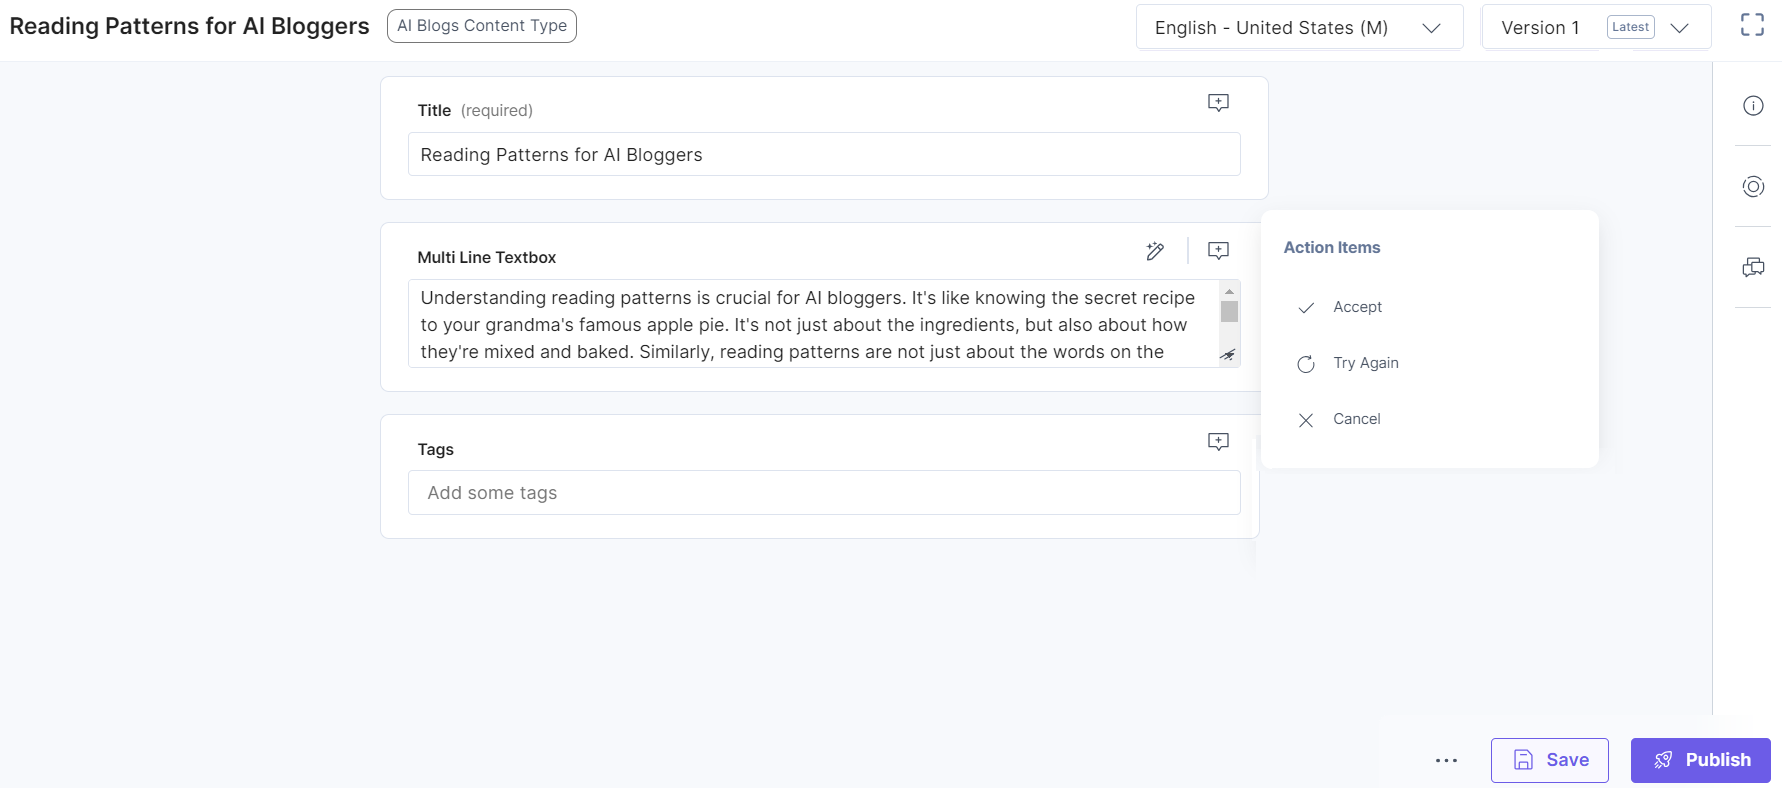
- After adding the content, Save and Publish your entry.
- Create a content type by adding relevant details as displayed below and click the Save and proceed button.
Additional Resource:
- For details on the Brand Kit, refer to the Brand Kit, Voice Profile, and Knowledge Vault documentation.
- For AI Assistant app related information, refer to the AI Assistant with Brand Kit documentation.
- For more queries, refer to the Brand Kit FAQs documentation.
More articles in "Quickstart"
