JIRA
The JIRA action connector lets you create a task, create an issue, and update an issue in JIRA.
Set up JIRA
Perform the following steps to set up JIRA action connector:
- Click Configure Action Step from the left navigation panel.
- Click Action Step to configure third-party services.
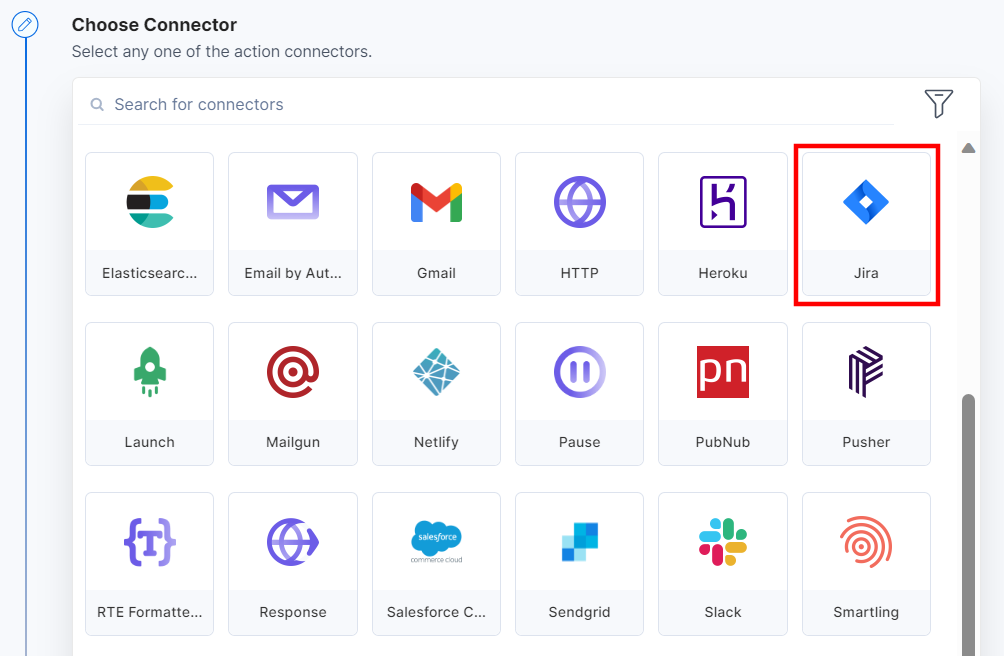
- Within the Configure Action Step, click the Jira connector.
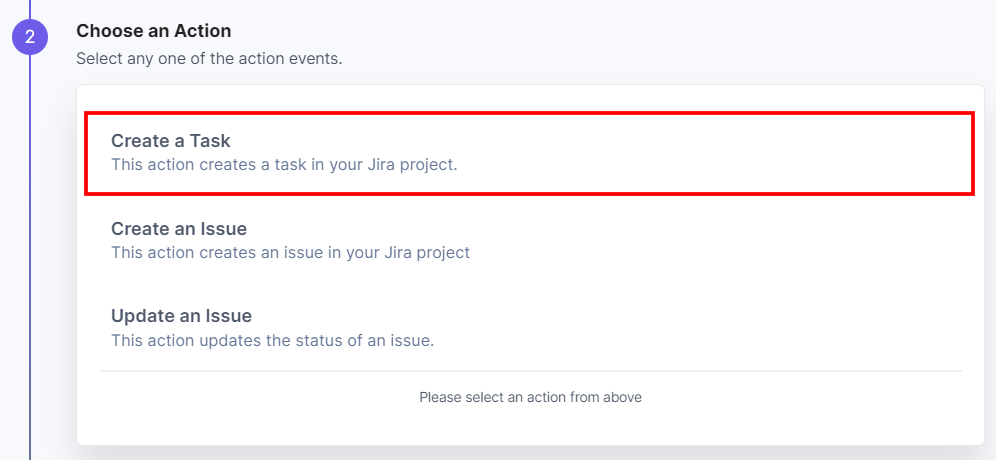
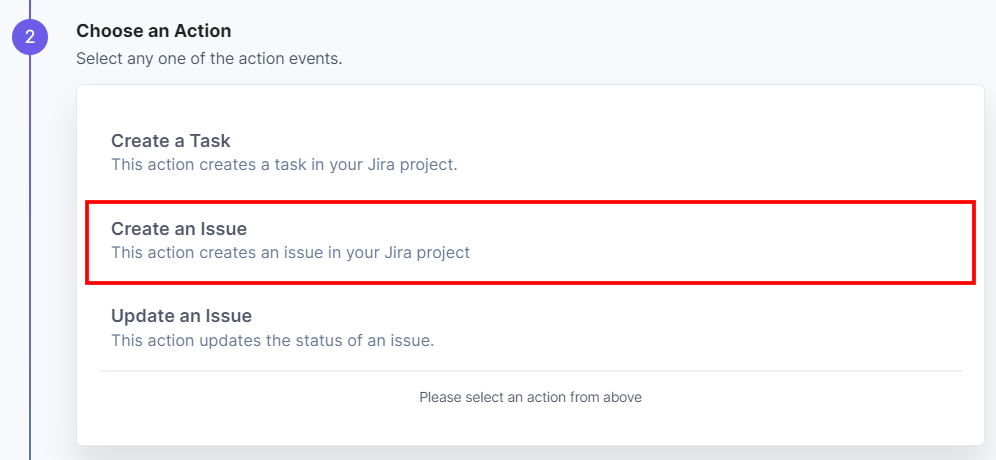
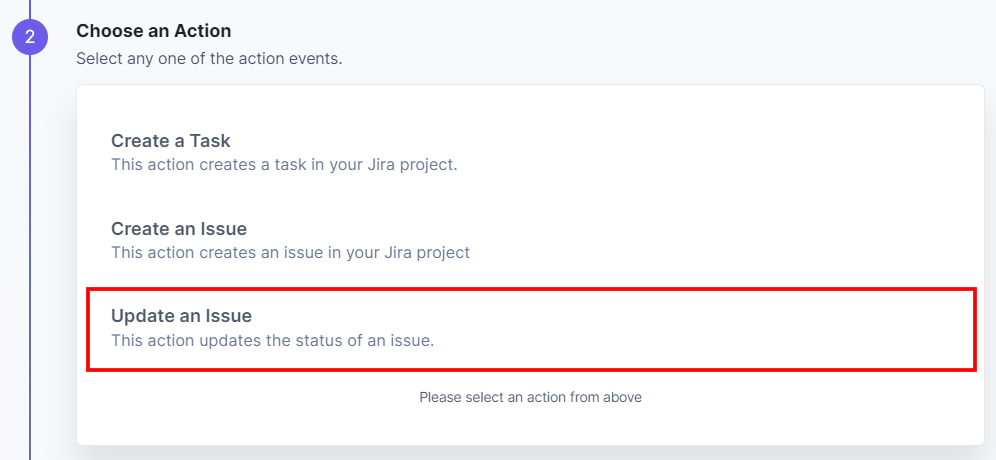
- Under Choose an Action tab, you will see three actions: Create a Task (creating a ticket in Jira), Create an Issue (creating an issue in Jira) , and Update an Issue (updating an issue in Jira).
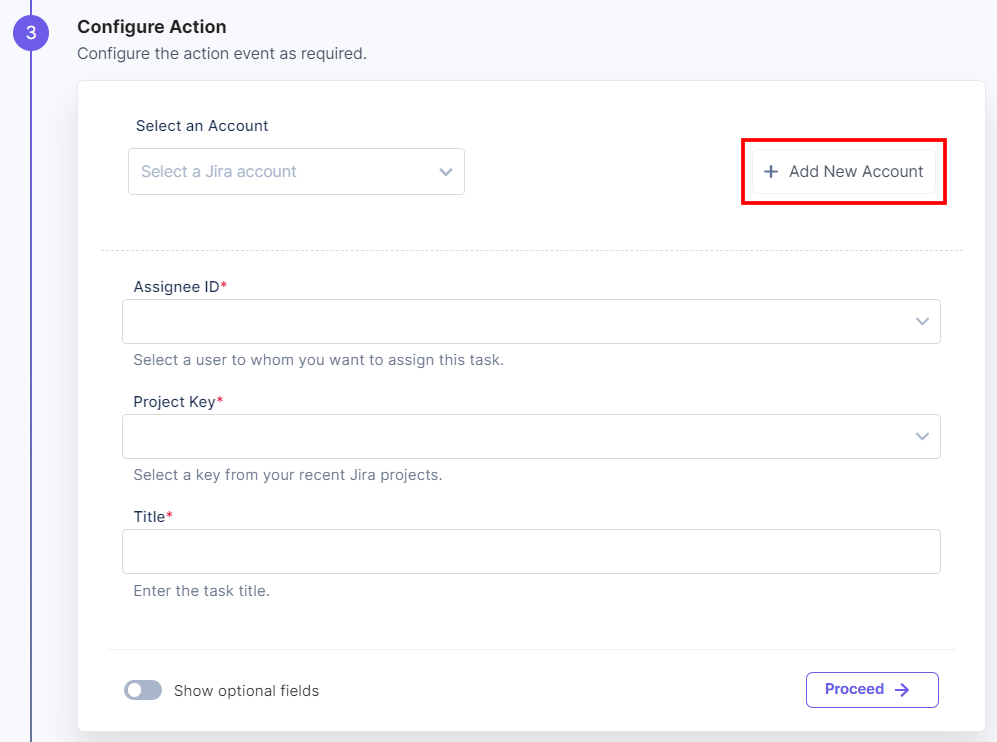
Let’s look at each of them in detail. Action 1: Select the Create a Task action: - Click the + Add New Account button to set up your Jira account (see screenshot in next step).
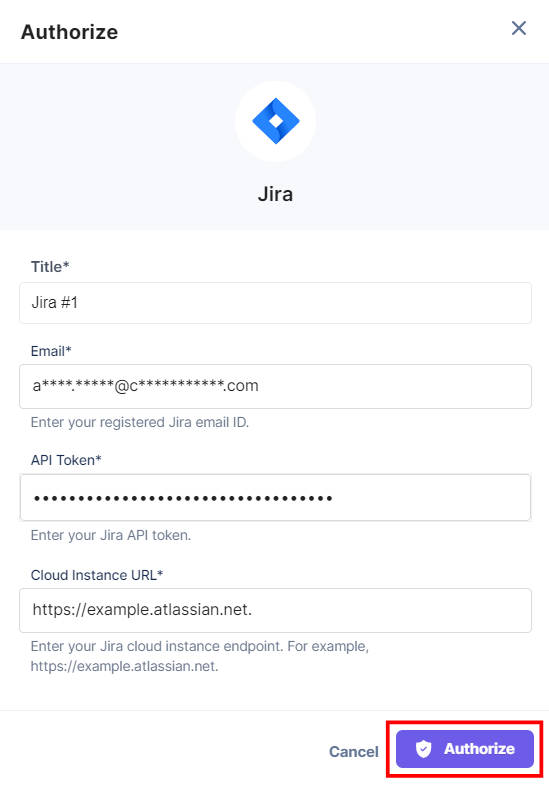
- In the Authorize modal, enter a Title, an Email, an API Token and a Cloud Instance URL, and then click Authorize.
To generate the API Token and Cloud Instance URL, log in to the JIRA dashboard and perform the following steps:- Log in to JIRA using your authorized email address and go to your Account Settings.
- In the Security section, click Create and manage API tokens.
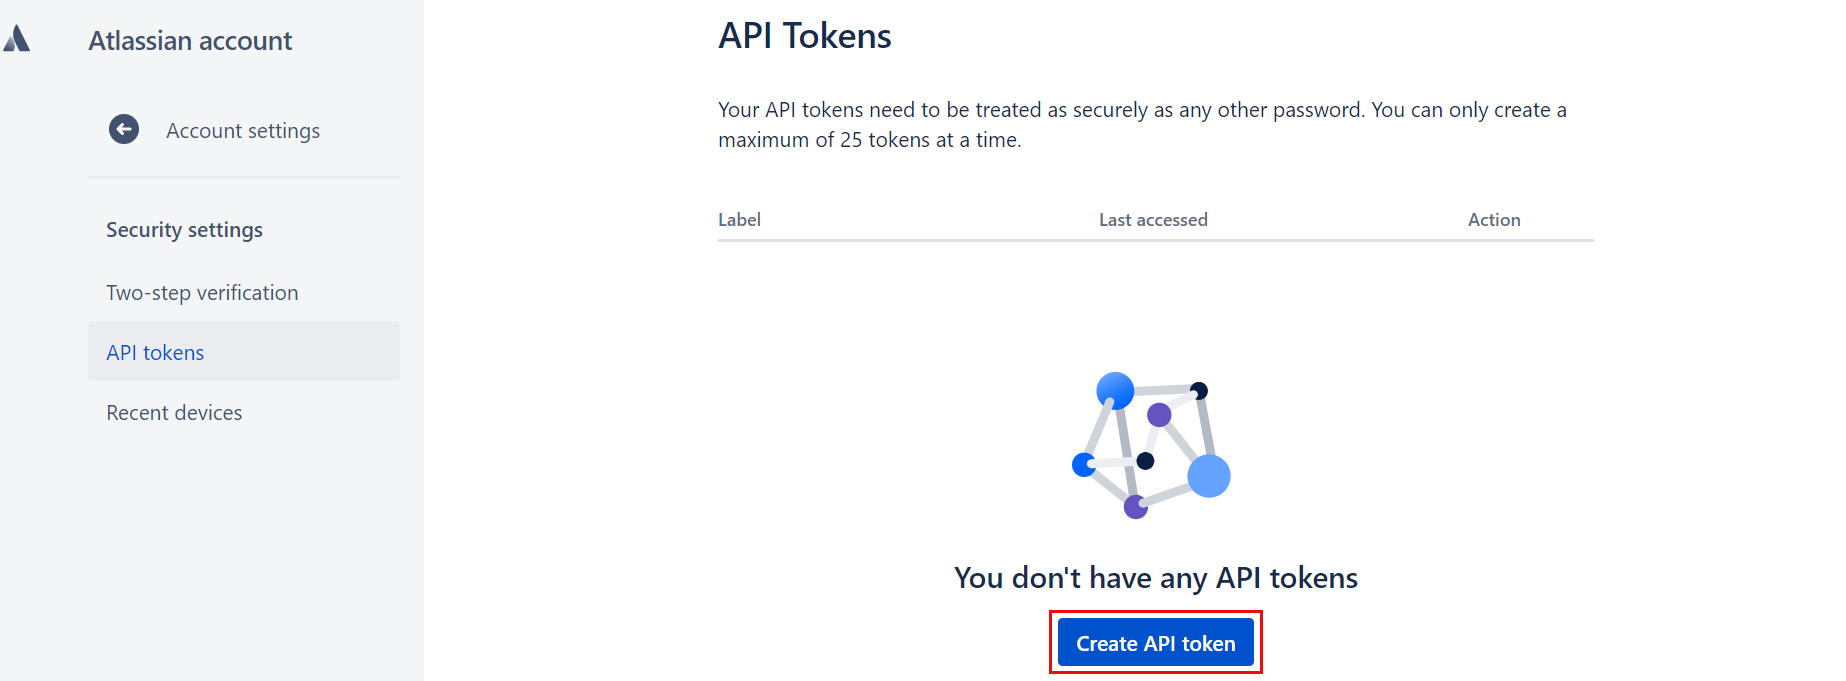
- Click Create API token.
- Provide a Label for the token and click Create.
- Copy this token and save it somewhere as you won’t be available to view it once you close the modal.
Note: For more information on API Tokens, refer to the How to create API Tokens in JIRA document.
- Your Cloud Instance URL is the custom URL that you provide while creating a project, say
https://domain_name.atlassian.net/.
Additional Resource: Read more on Create a Project | Customize your project.
- On the Create a Task Configure Action page, enter the details given below:
- Select the Assignee ID of the user to whom you want to assign the ticket from the Lookup list.
- Select Project Key of the project in which you want to create the ticket from the Lookup list.
- Provide a suitable Title for the task.
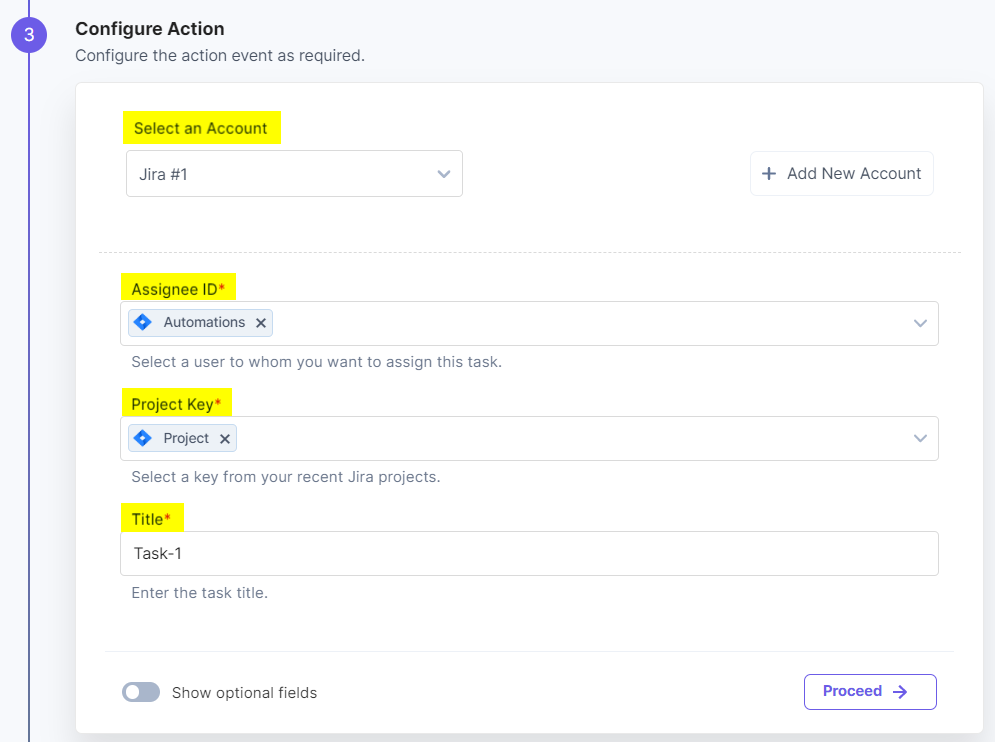
Click the Show optional fields toggle button to provide the Description and Labels.
- Click Proceed.
- You will see the input values which you have configured in the Configure Action modal.

- Check if the details are correct. If yes, click Test Action.

- Once set, click Save and Exit.
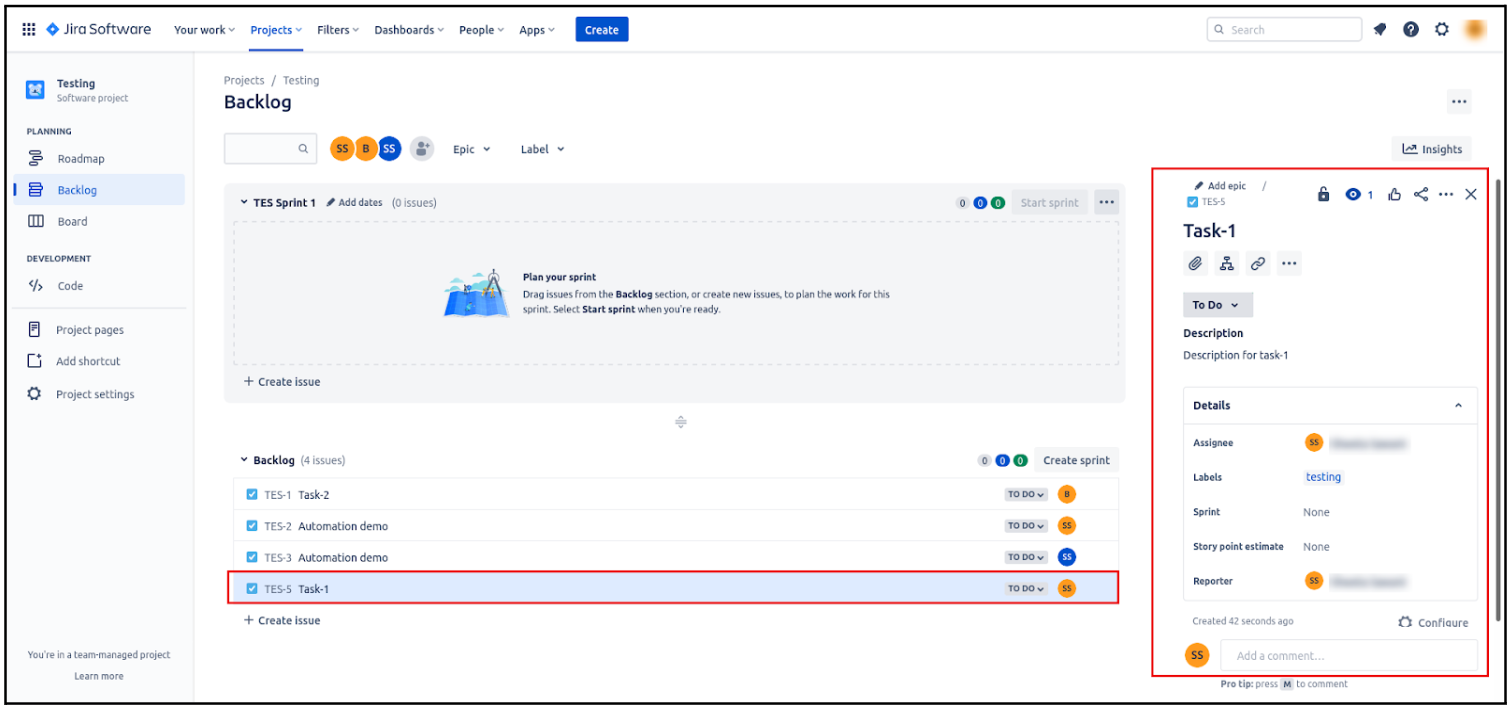
- Navigate to your JIRA Project. You should see that the ticket has been generated and is placed under Backlog.
- Action 2: Select the Create an Issue action:
- Click the + Add New Account button to set up your Jira account (see screenshot in next step).
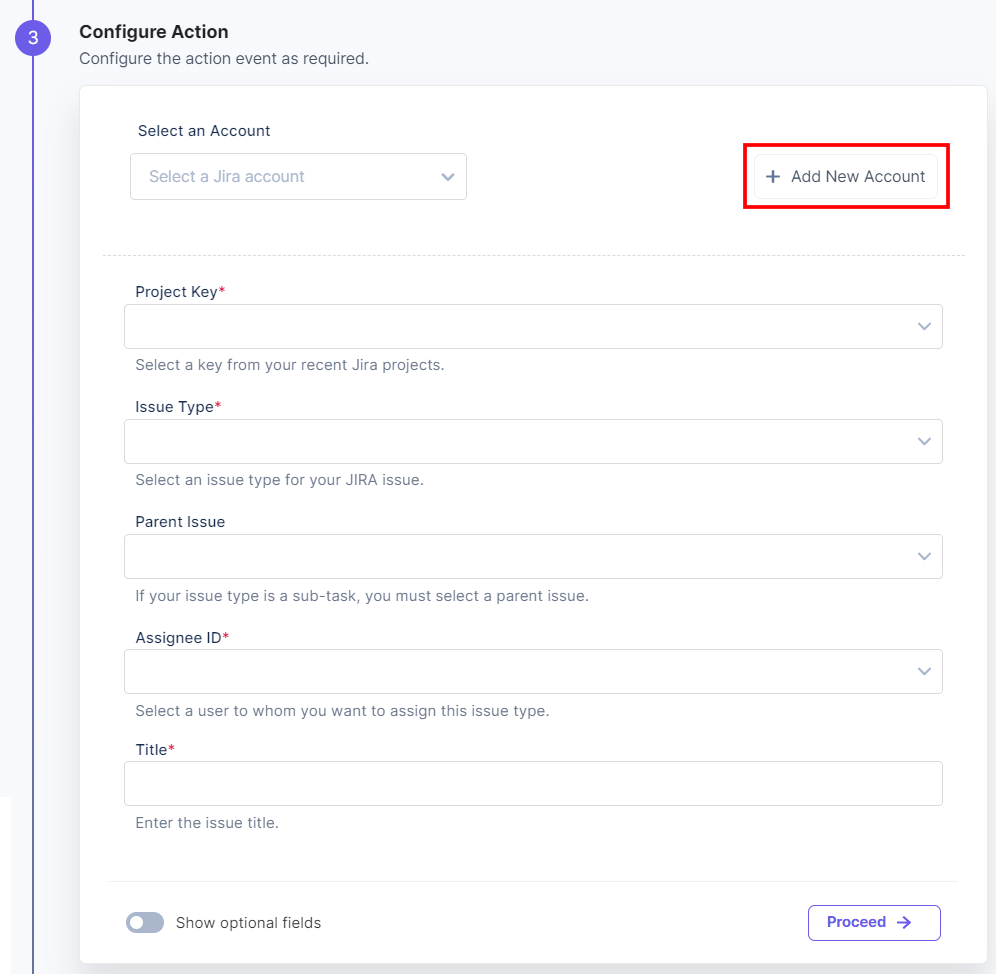
- In the Authorize modal, enter a Title, an Email, an API Token and a Cloud Instance URL, and then click Authorize.
To generate the API Token and Cloud Instance URL, log in to the JIRA dashboard and perform the following steps:- Log in to JIRA using your authorized email address and go to your Account Settings.
- In the Security section, click Create and manage API tokens.
- Click Create API token.

- Provide a Label for the token and click Create.
- Copy this token and save it somewhere as you won’t be available to view it once you close the modal.
Note: For more information on API Tokens, refer to the How to create API Tokens in JIRA document.
- Your Cloud Instance URL is the custom URL that you provide while creating a project, say
https://domain_name.atlassian.net/.
Additional Resource: Read more on Create a Project | Customize your project.

- On the Create an Issue Configure Action page, enter the details given below:
- Select a Project Key of the project in which you want to create an issue from the Lookup list.
- Select an Issue Type from the Lookup list.
Note: It is mandatory to select a Parent Issue if you choose the issue type as a sub-task.
- Select the Assignee ID from the Lookup list.
- Provide a suitable Title for the issue.
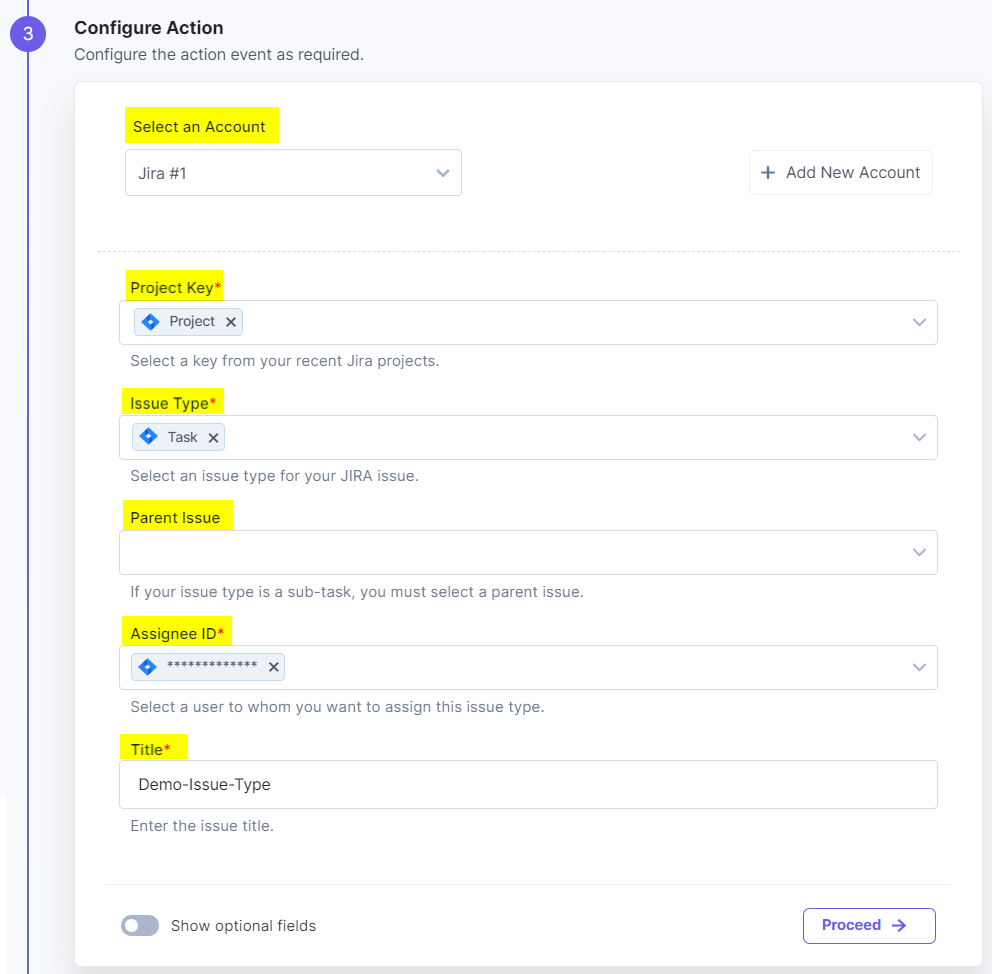
Click the Show optional fields toggle button to provide the Description and Labels.
- Select a Project Key of the project in which you want to create an issue from the Lookup list.
- Click Proceed.
- You will see the input values which you have configured in the Configure Action modal.

- Check if the details are correct. If yes, click Test Action.

- Once set, click Save and Exit.
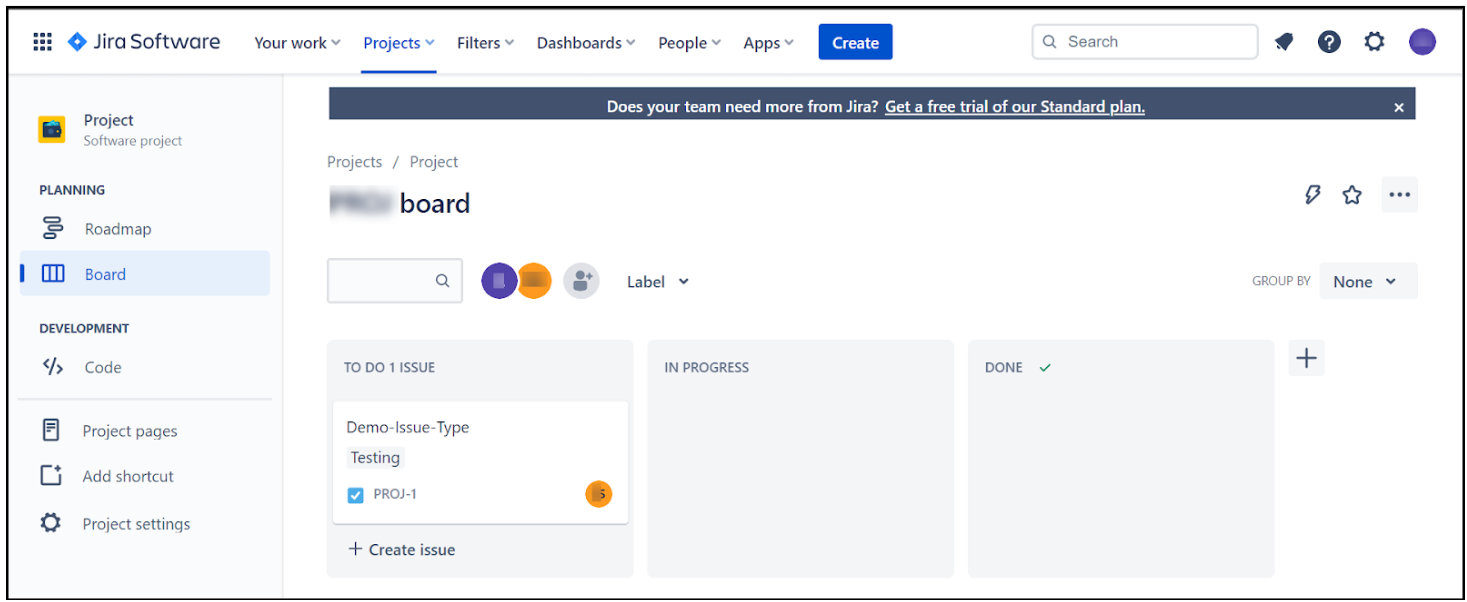
- Navigate to your JIRA Project. You should see that the ticket has been generated and is placed under Backlog.
- Action 3: Select the Update an Issue action:
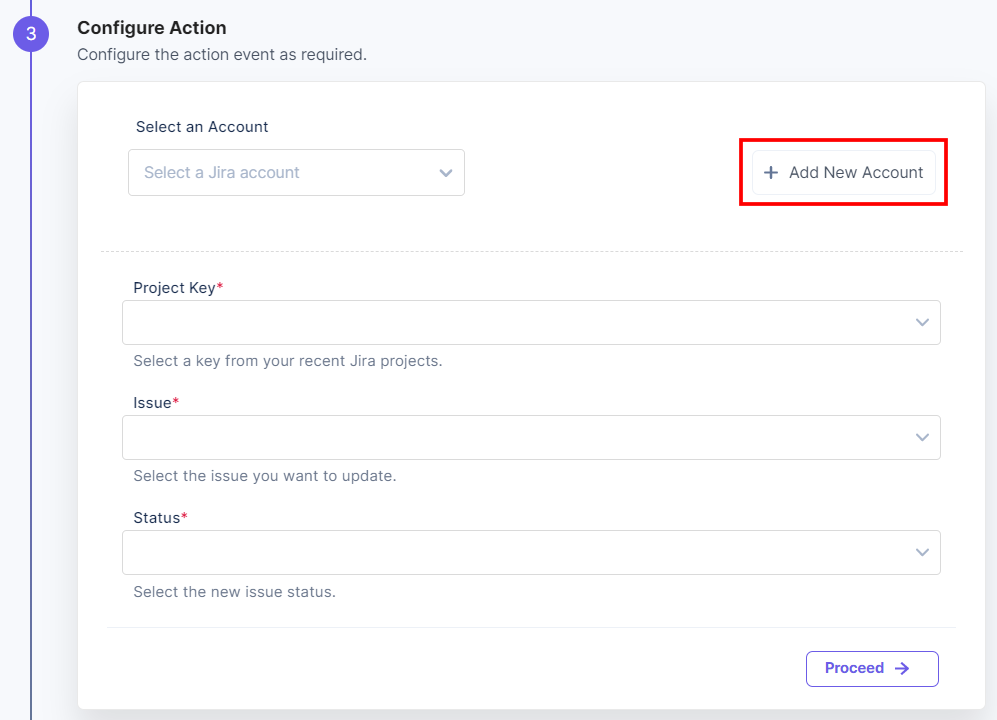
- Click the + Add New Account button to set up your Jira account (see screenshot in next step).
- In the Authorize modal, enter a Title, an Email, an API Token and a Cloud Instance URL, and then click Authorize.
To generate the API Token and Cloud Instance URL, log in to the JIRA dashboard and perform the following steps:- Log in to JIRA using your authorized email address and go to your Account Settings.
- In the Security section, click Create and manage API tokens.
- Click Create API token.

- Provide a Label for the token and click Create.
- Copy this token and save it somewhere as you won’t be available to view it once you close the modal.
Note: For more information on API Tokens, refer to the How to create API Tokens in JIRA document.
- Your Cloud Instance URL is the custom URL that you provide while creating a project, say
https://domain_name.atlassian.net/.
Additional Resource: Read more on Create a Project | Customize your project.

- On the Update an Issue Configure Action page, enter the details given below:
- Select a Project Key of the project in which you want to update an issue from the Lookup list.
- Select an Issue (of which you want to update the status) from the Lookup list.
- Select the Status from the Lookup list.
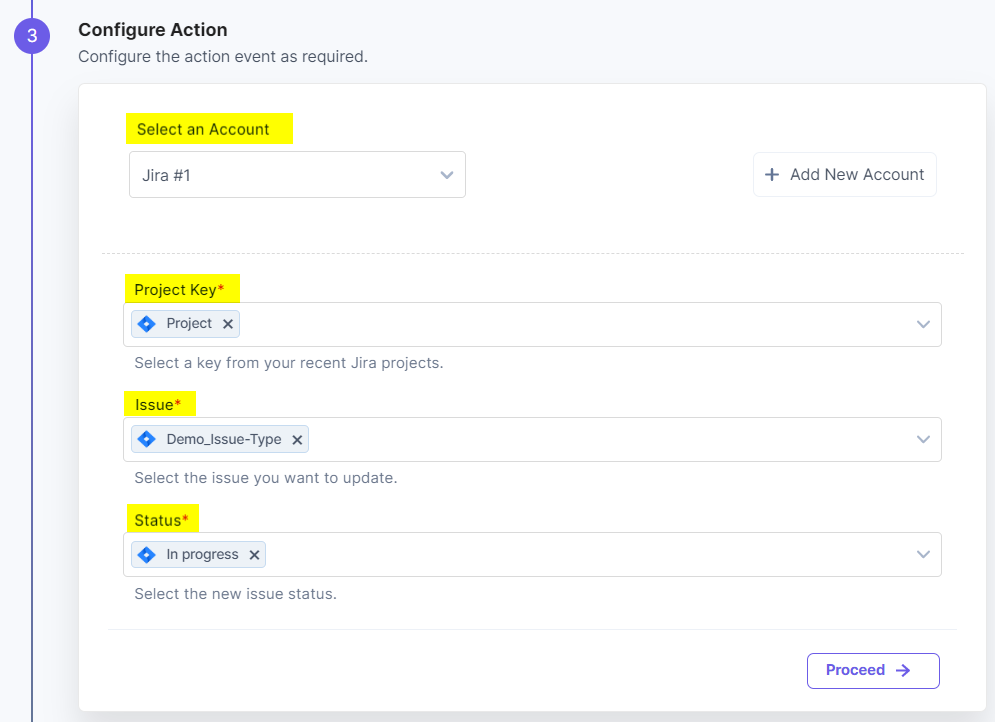
- Select a Project Key of the project in which you want to update an issue from the Lookup list.
- Click Proceed.
- You will see the input values which you have configured in the Configure Action modal.

- Check if the details are correct. If yes, click Test Action.

- Once set, click Save and Exit.
- Navigate to your JIRA Project. You should see that the ticket has been generated and is placed under Backlog.
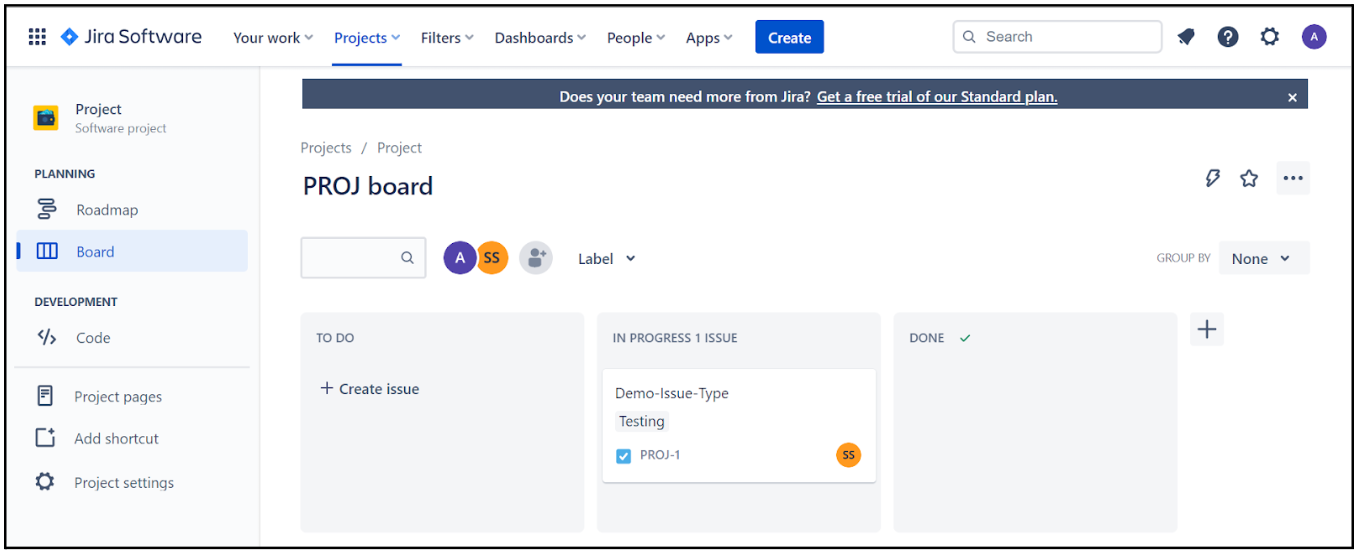
This sets your JIRA action connector.


.svg?format=pjpg&auto=webp)
.svg?format=pjpg&auto=webp)
.png?format=pjpg&auto=webp)


.png?format=pjpg&auto=webp)