Create a Voice Profile
Voice Profiles allows you to define unique AI-generated brand voices that you can apply to your content.
Note: Each organization can create a maximum of 100 Voice Profiles within each Brand Kit.
Prerequisites
- Contentstack account
- Access to Organization that has Brand Kit enabled
- Access to the Contentstack Organization/Stack as the Owner/Admin
- Access to Brand Kit as an invited Collaborator
Steps for Execution
To create a Voice Profile in Brand Kit, log in to your Contentstack account and perform the following steps:
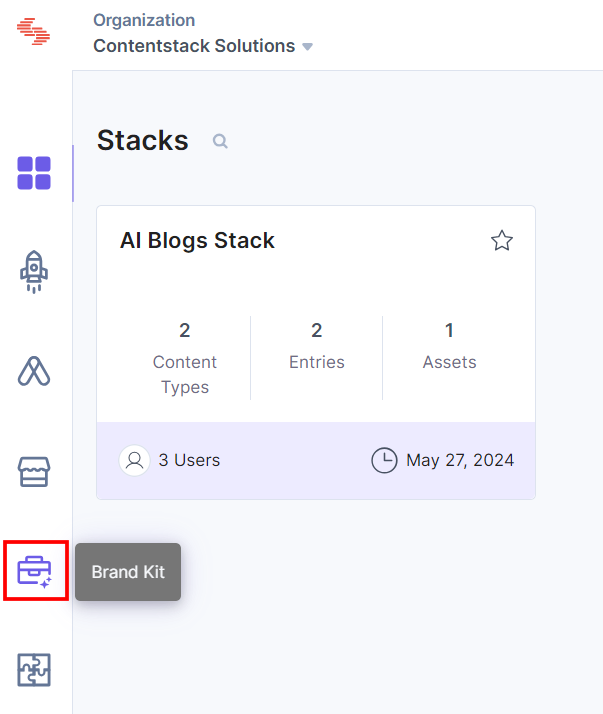
- On the left navigation panel, click the Brand Kit icon.
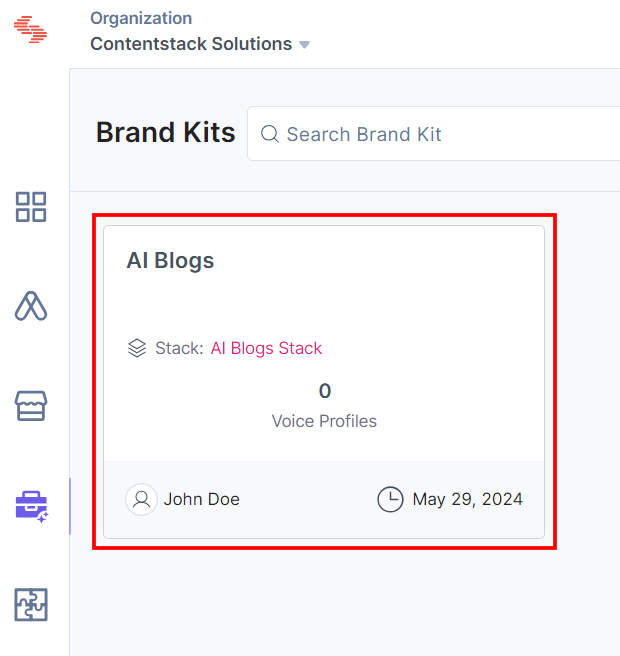
- Select the Brand Kit in which you want to create a Voice Profile.
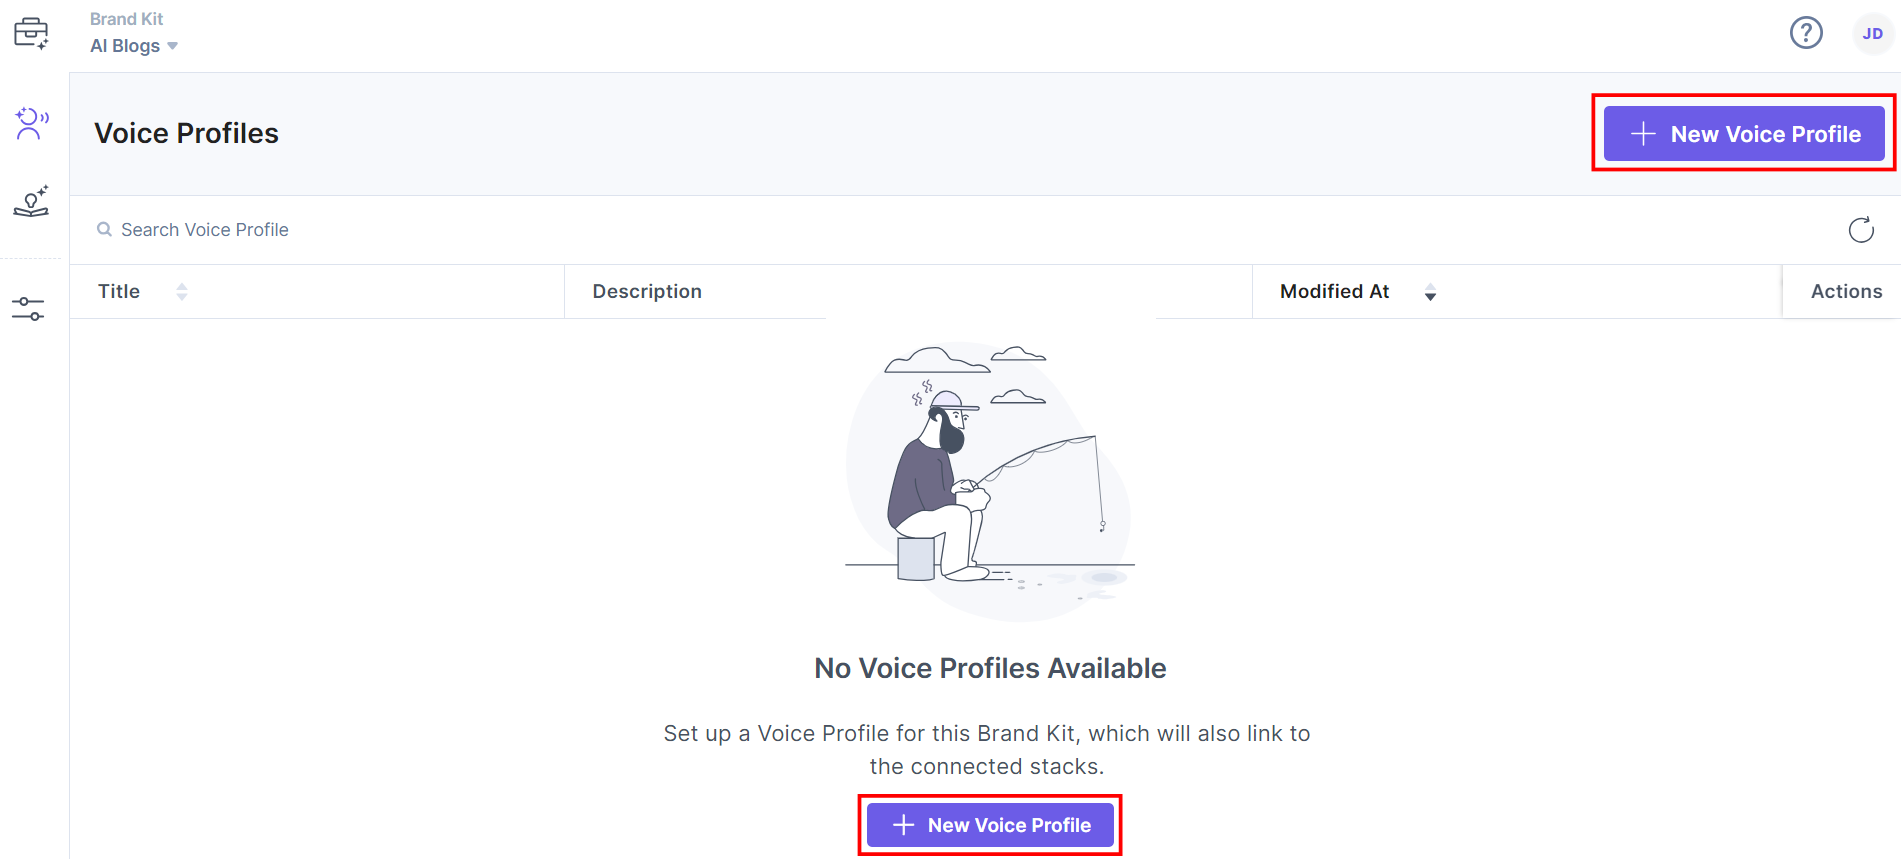
- You will be navigated to the Voice Profile landing page. If there are any Voice Profiles already created, they will appear here. To create a new one, click the + New Voice Profile button.
Create a Voice Profile
On the Create Voice Profile page, enter the following details:
- Voice Profile Name (required): Enter a suitable name for your Voice Profile.
- Description (optional): Enter an appropriate Voice Profile description.

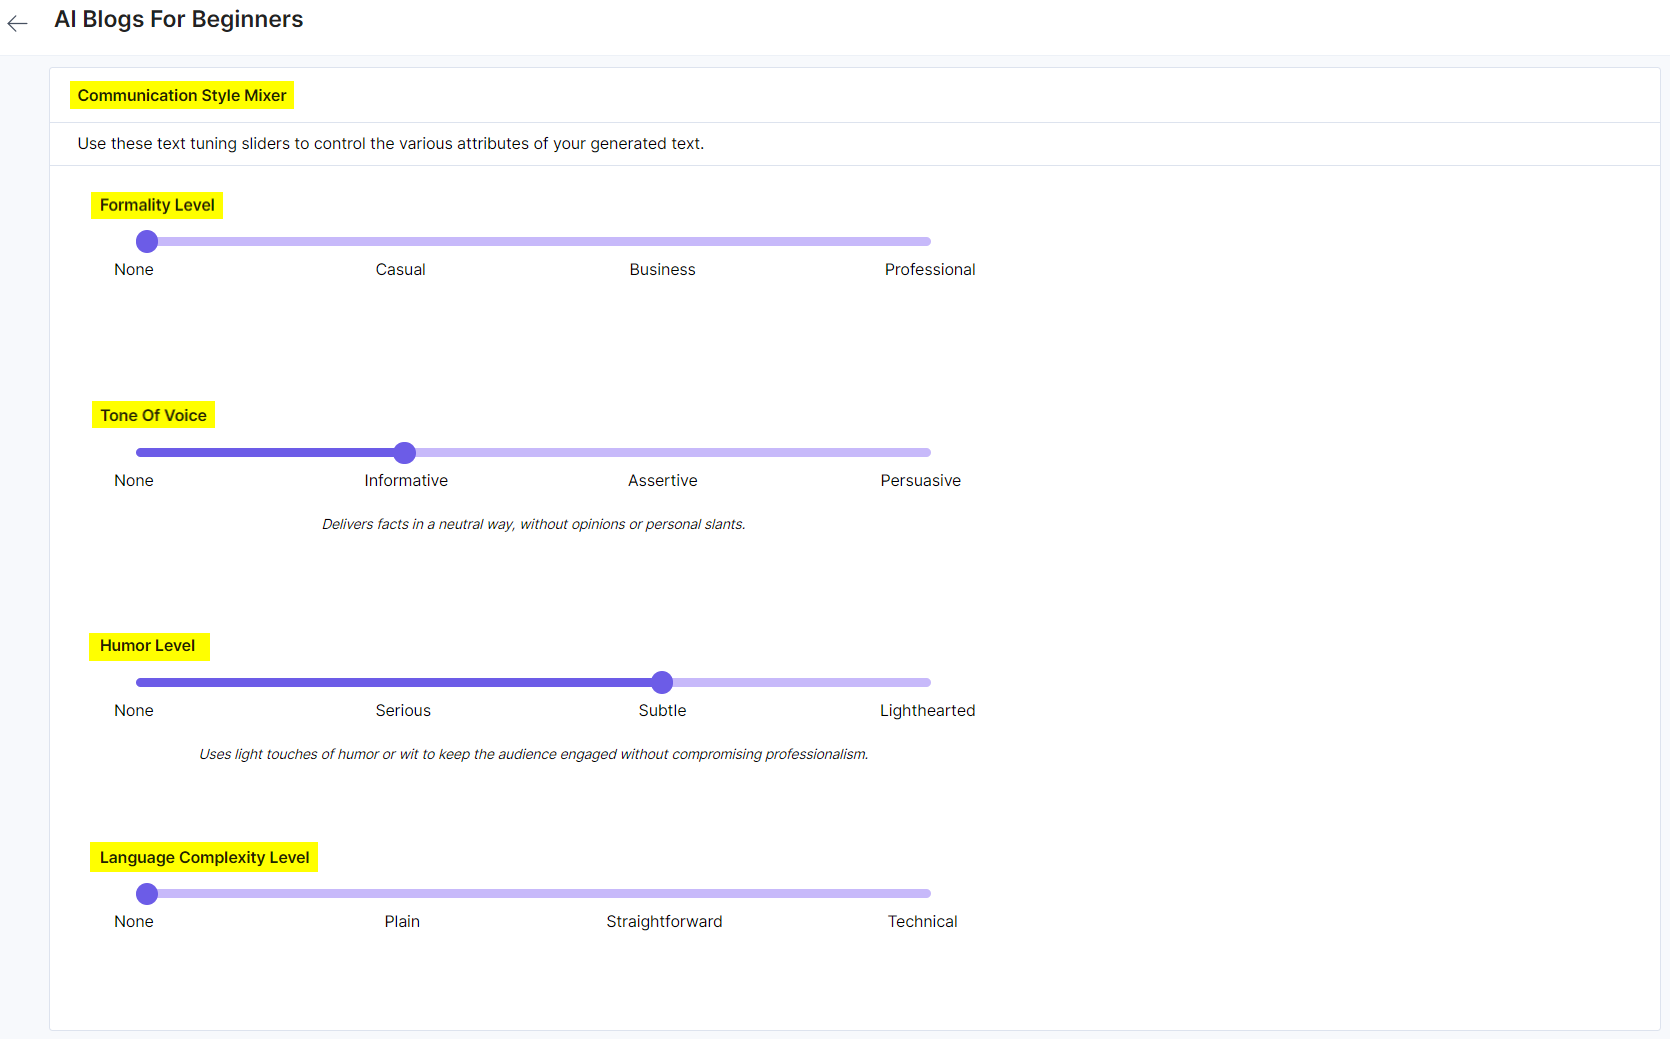
- Communication Style Mixer: The Communication Style Mixer is a critical element of your brand identity, defining how your organization interacts with customers. In this section, you can set the following parameters:
- Formality Level: You can set the formality level from None, Casual, Business, to Professional. Let’s discuss in detail:
- None: Generic content without any specifications
- Casual: Uses an informal but engaging tone that makes content more compelling.
Example: "It’s true, nobody really enjoys grocery shopping. Here's five ways to make it less painful."
- Business: Employs clear and concise language that maintains a tone suitable for business settings, you can set this parameter accordingly.
Example: "Please note that customer support is available 24/7 via our online customer portal."
- Professional: Uses polished language often found in legal documents or important announcements.
Example: "We are pleased to announce the official launch of our new product line."
- Tone Of Voice: You can set the tone of voice from None, Informative, Assertive, to Persuasive. Let’s discuss in detail:
- None: Generic content without any specifications.
- Informative: Delivers facts in a neutral way, without opinions or personal slants.
Example: "The report shows a 15% increase in sales."
- Assertive: Presents arguments and ideas with confidence, making clear recommendations.
Example: "This method is the most effective based on our research."
- Persuasive: Uses strong arguments and emotional appeals to influence action or belief.
Example: "Upgrade now and unlock exclusive features to transform your experience!"
- Humor Level: You can set the humor level from None, Serious, Subtle, to Lighthearted. Let’s discuss in detail:
- None: Generic content without any specifications.
- Serious: Maintains a strictly professional tone, avoiding humor altogether.
Example: "Lack of data security can have serious consequences."
- Subtle: Uses light touches of humor or wit to keep the audience engaged without compromising professionalism.
Example: "Here are ten tips for writing email subject lines that won’t end up in the dreaded spam folder."
- Lighthearted: Incorporates relevant humor to connect with the audience and create a more playful atmosphere.
Example: "Sometimes my biggest accomplishment of the day is simply remembering to mute myself during a virtual meeting."
- Language Complexity Level: You can set the language complexity level from None, Plain, Straightforward, to Technical. Let’s discuss in detail:
- None: Generic content without any specifications.
- Plain: Uses everyday words that are clear and understandable to a broad audience.
Example: "Turn on the device and follow the on-screen instructions."
- Straightforward: Employs clear communication, potentially including industry-specific terms relevant to the target audience.
Example: "The ROI of this investment is significant."
- Technical: Leverages advanced concepts and specialized vocabulary for audiences with prior knowledge.
Example: "The software leverages machine learning algorithms for optimization."
- Formality Level: You can set the formality level from None, Casual, Business, to Professional. Let’s discuss in detail:
- Custom Details: Custom Details includes two entities: Insights and Sample Content:
- Insights: Insights are the additional information that you can provide to the AI model.
Example: Monitor industry trends, experiment with new content formats and strategies, incorporate ethical AI practices.
- Sample Content: You can provide sample content to your Voice Profile to generate similar content in action.
Example: Navigating the AI Landscape: Essential Insights for Aspiring Bloggers. Explore the fundamentals of AI, uncover your niche, leverage AI tools, engage with the community, and address ethical considerations to succeed as an AI blogger.

- Insights: Insights are the additional information that you can provide to the AI model.
Playground in Voice Profile
Playground lets you experiment with prompts to test and refine your Voice Profiles. Inside this section, you can perform the following operations:
- Enable Knowledge Vault: Enable this button to generate content through the Knowledge Vault.
- Enter Prompt: Enter your topic or content idea into the Provide Prompt field.
- Generate Response: Click the Generate Response in Playground button to generate the content.

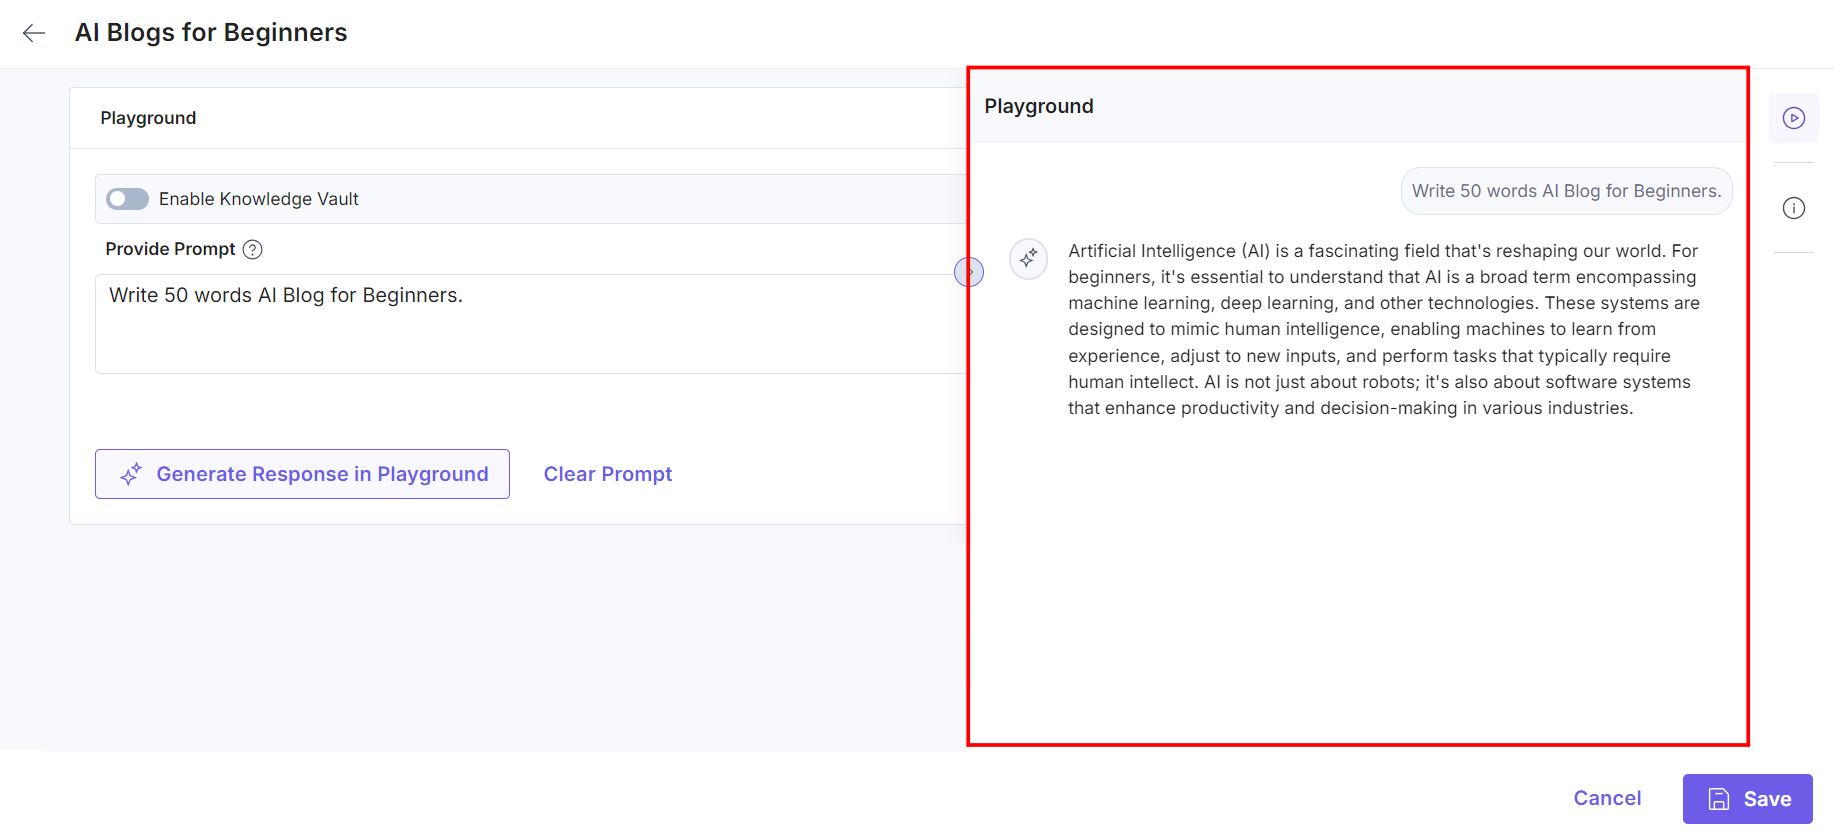
The content generation initiated in the right side Playground panel.
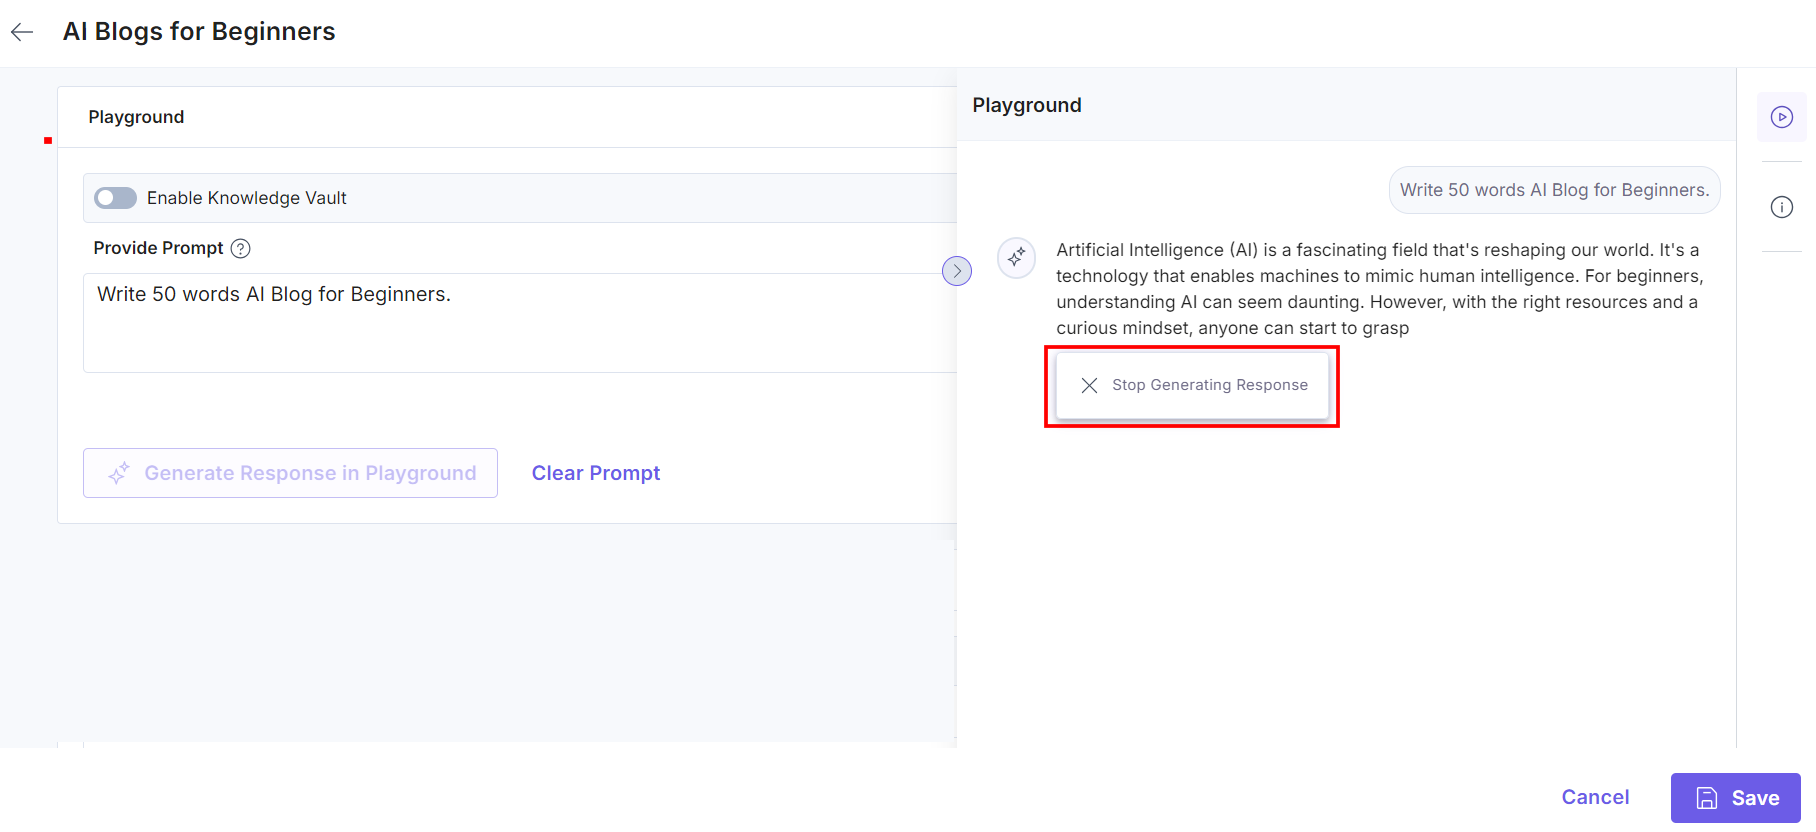
- Stop Content Generation (optional): Click Stop Generating Response option to halt the process.
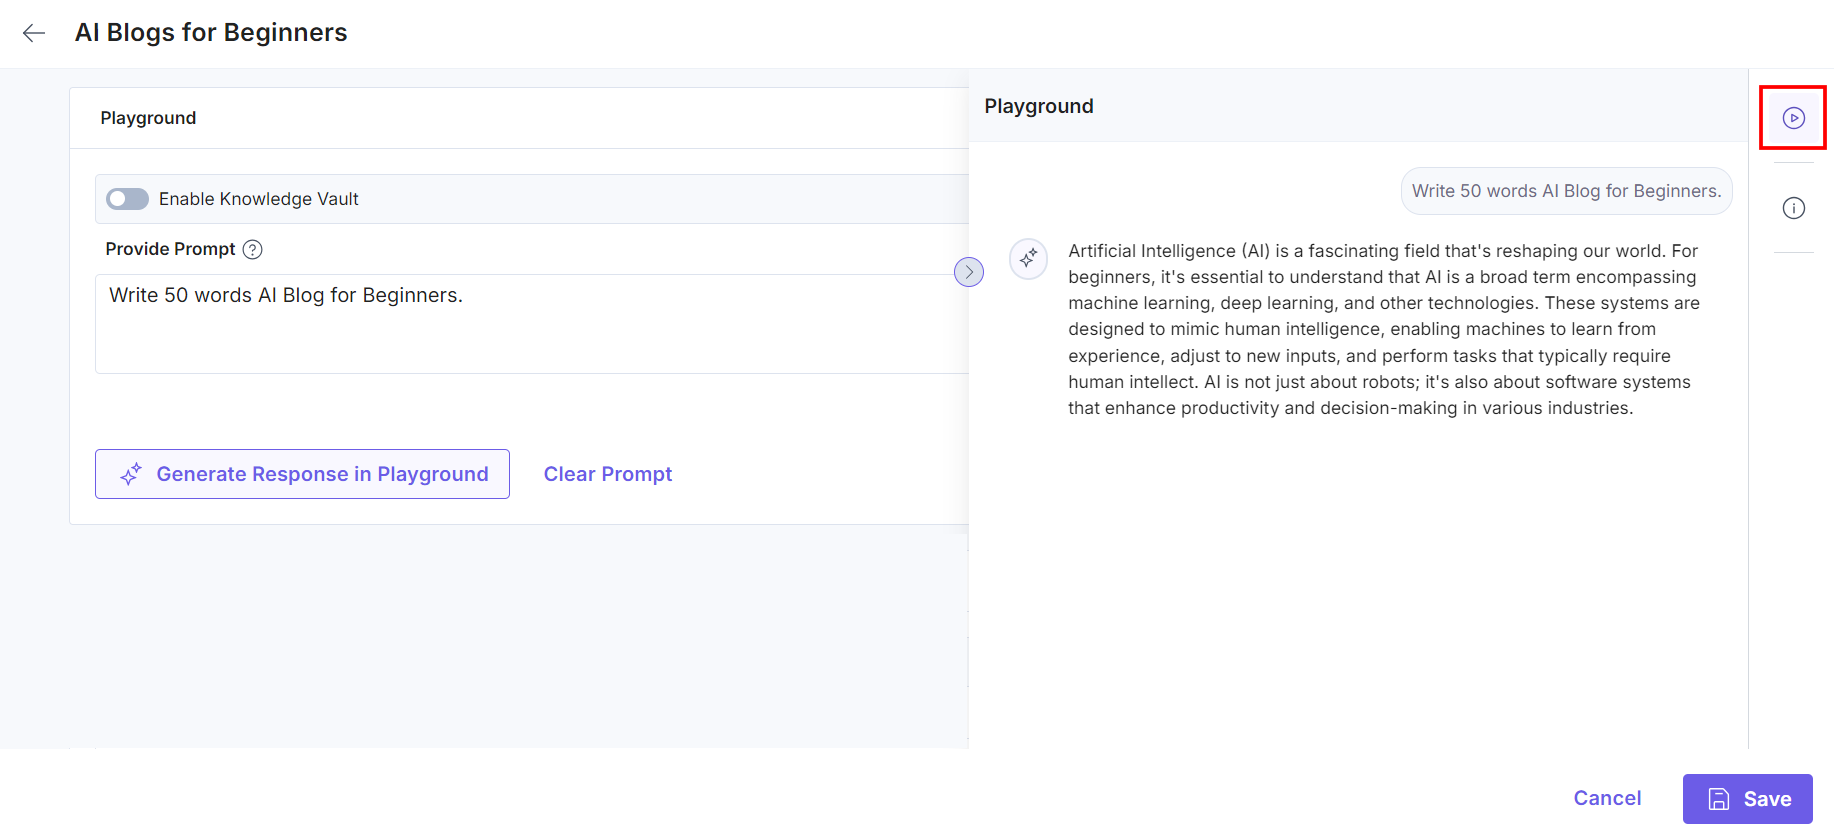
- View/Hide Response: Use the highlighted icon, to toggle the response display.
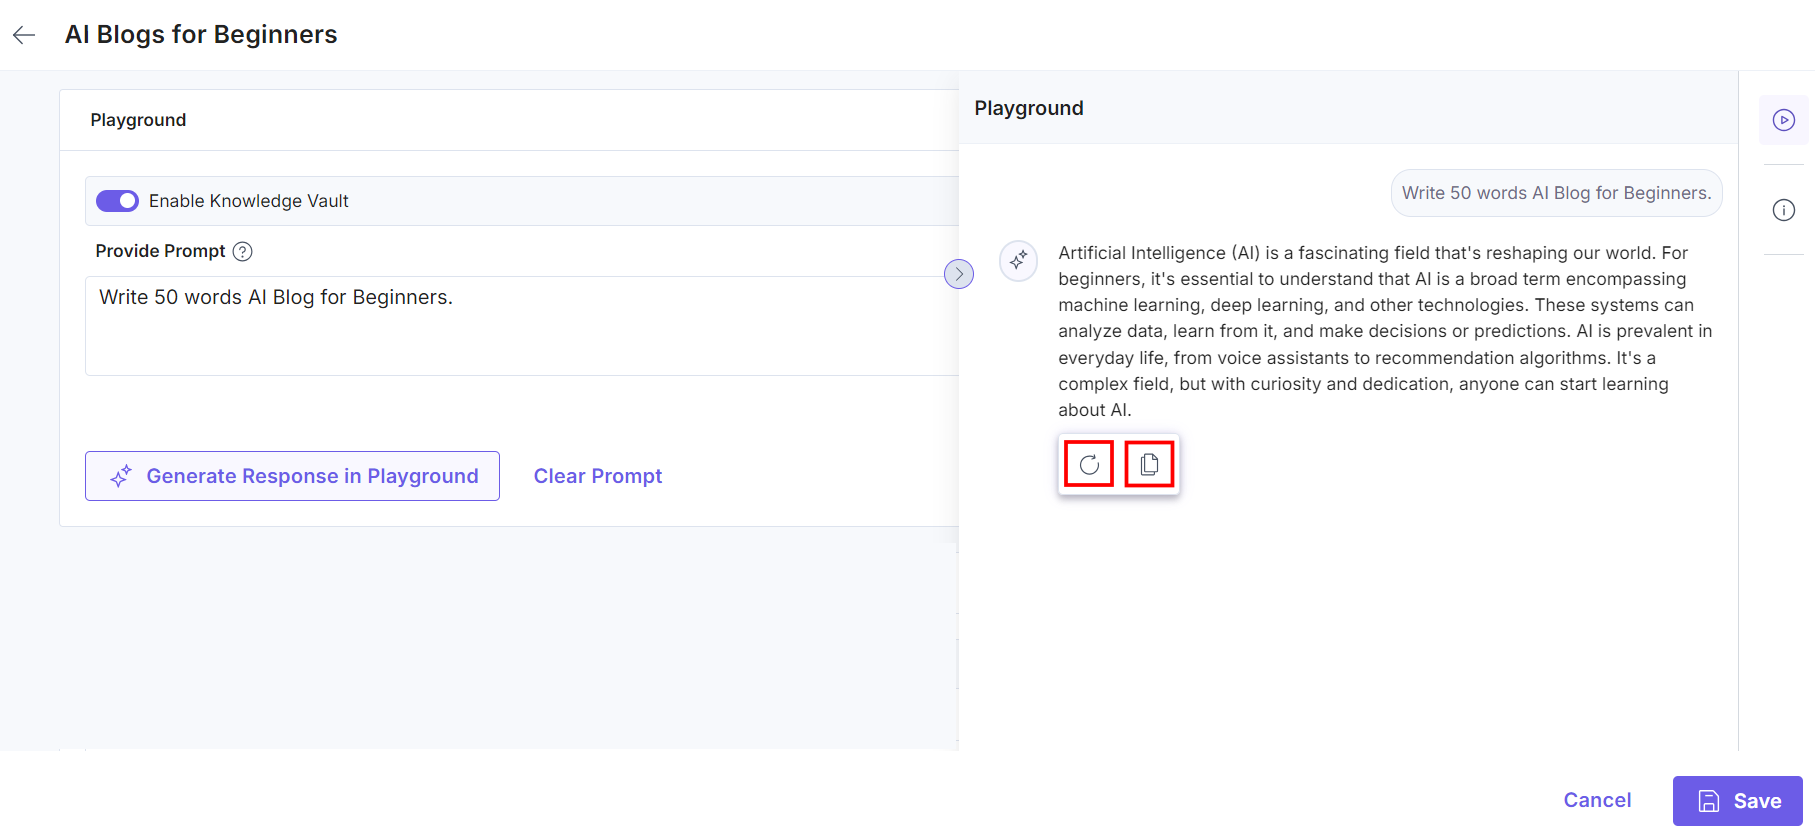
- Regenerate or Copy Generated Content: After the content is generated, you can see two options:
- Regenerate: This option allows you to regenerate the content.
- Copy: Copy the content to clipboard and use it further if required.
- Clear Response: Click Clear Response to start a new prompt.
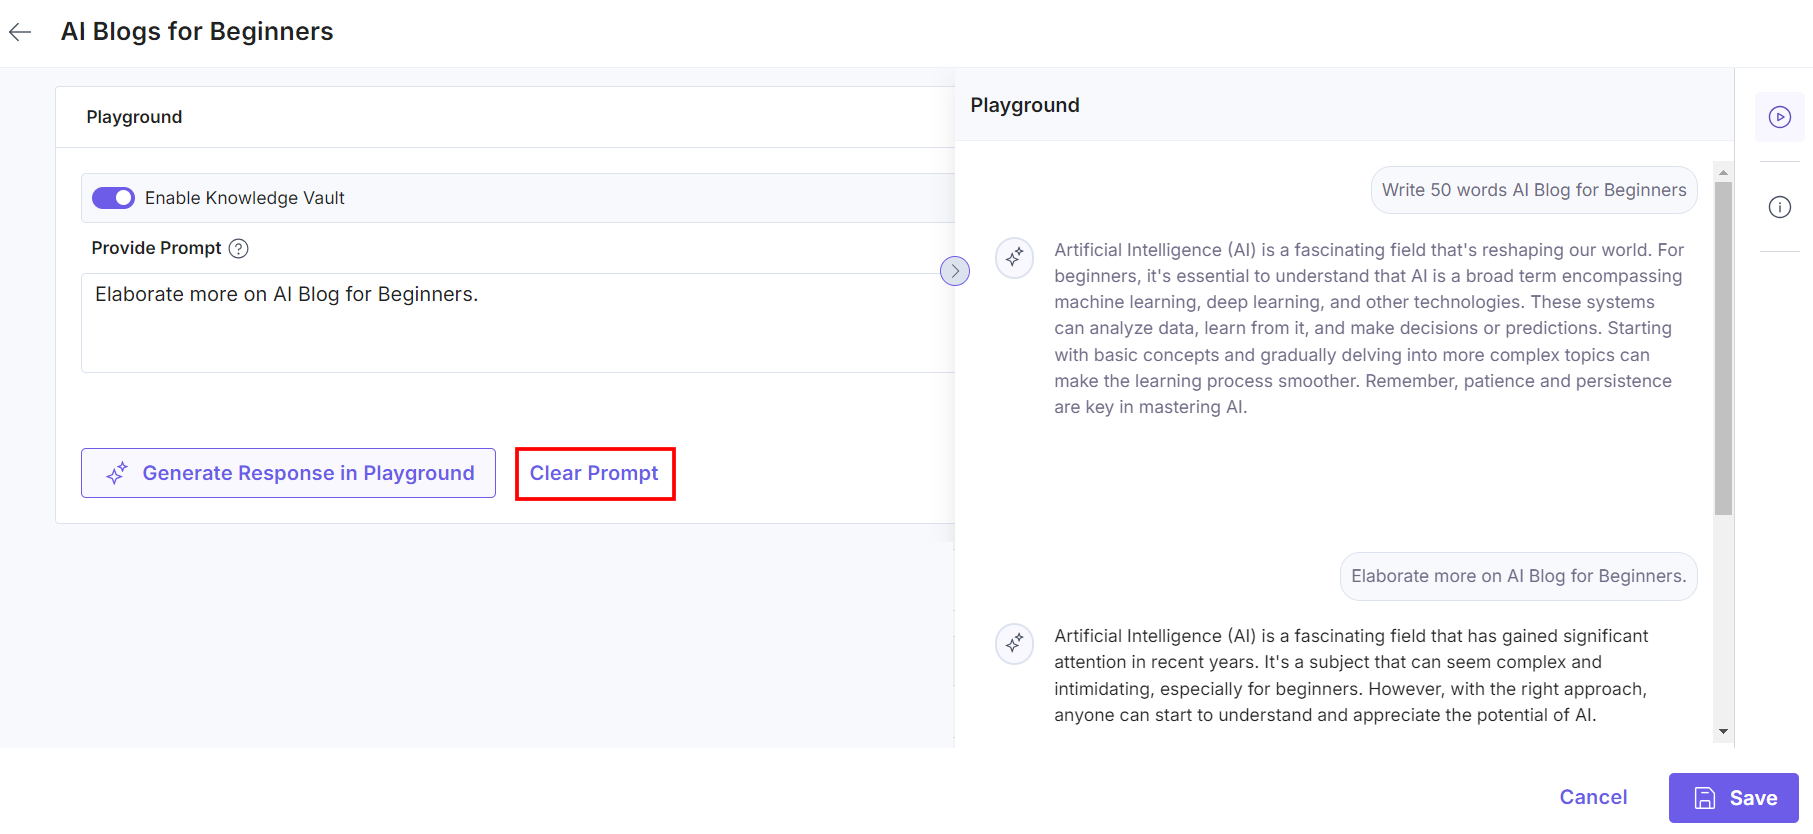
Warning: The generated content will not be saved in the history and will be cleared once you click the Save button.
- Once you have added these details to your Voice Profile, click Save.
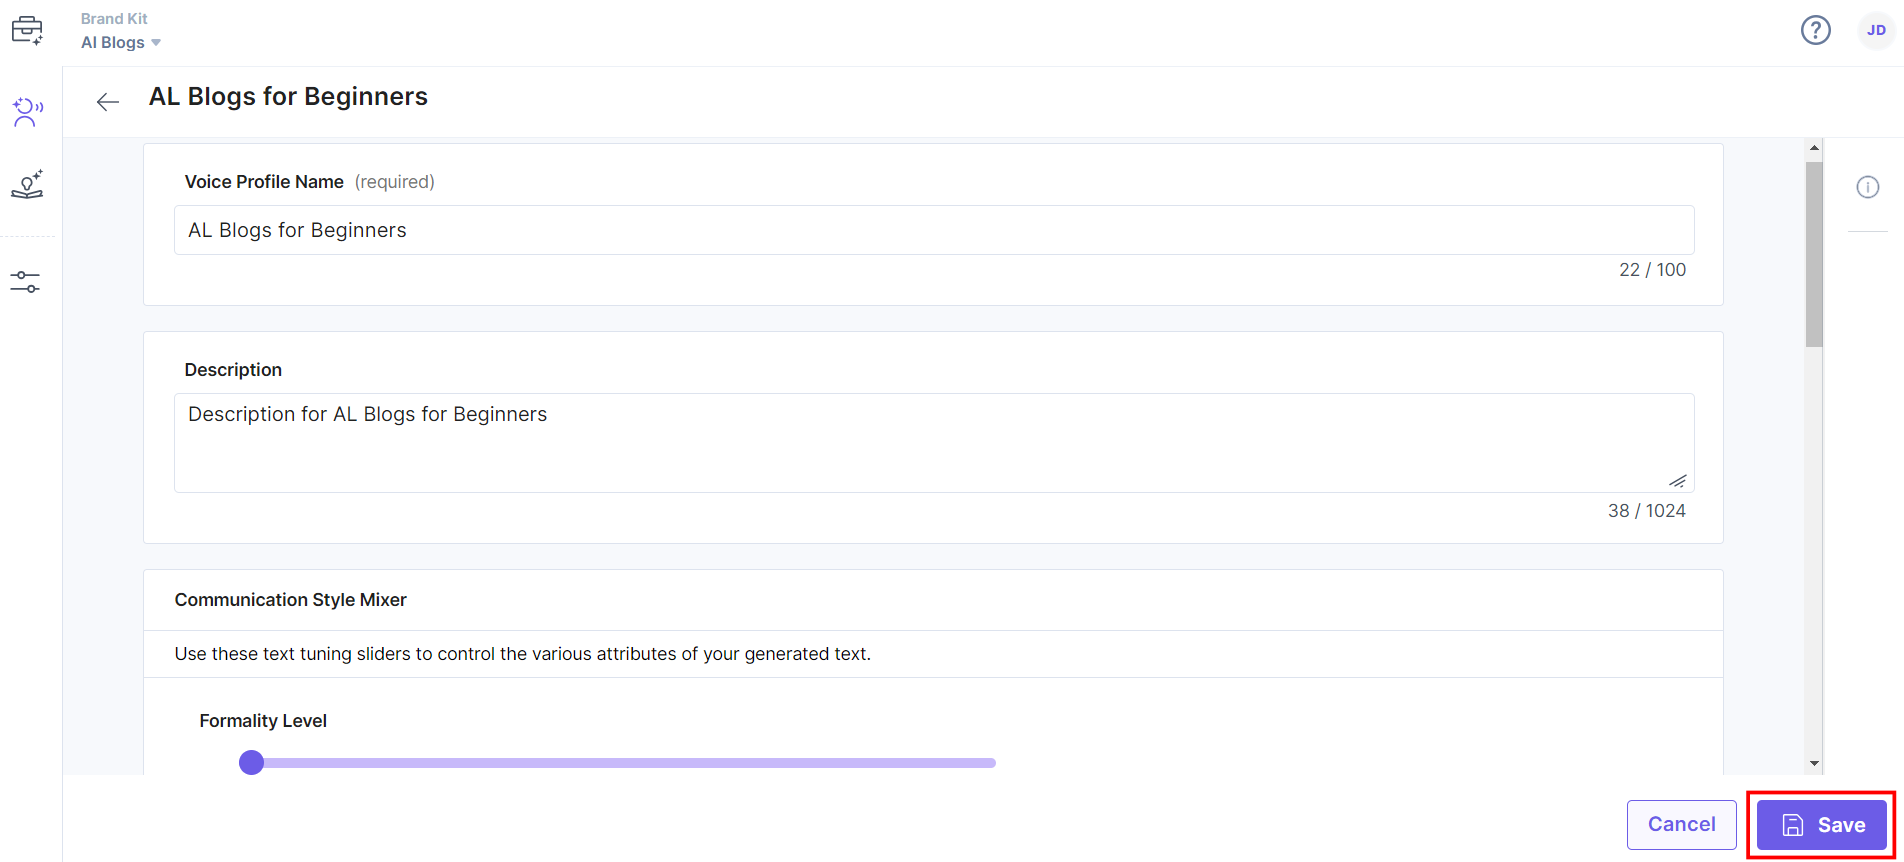
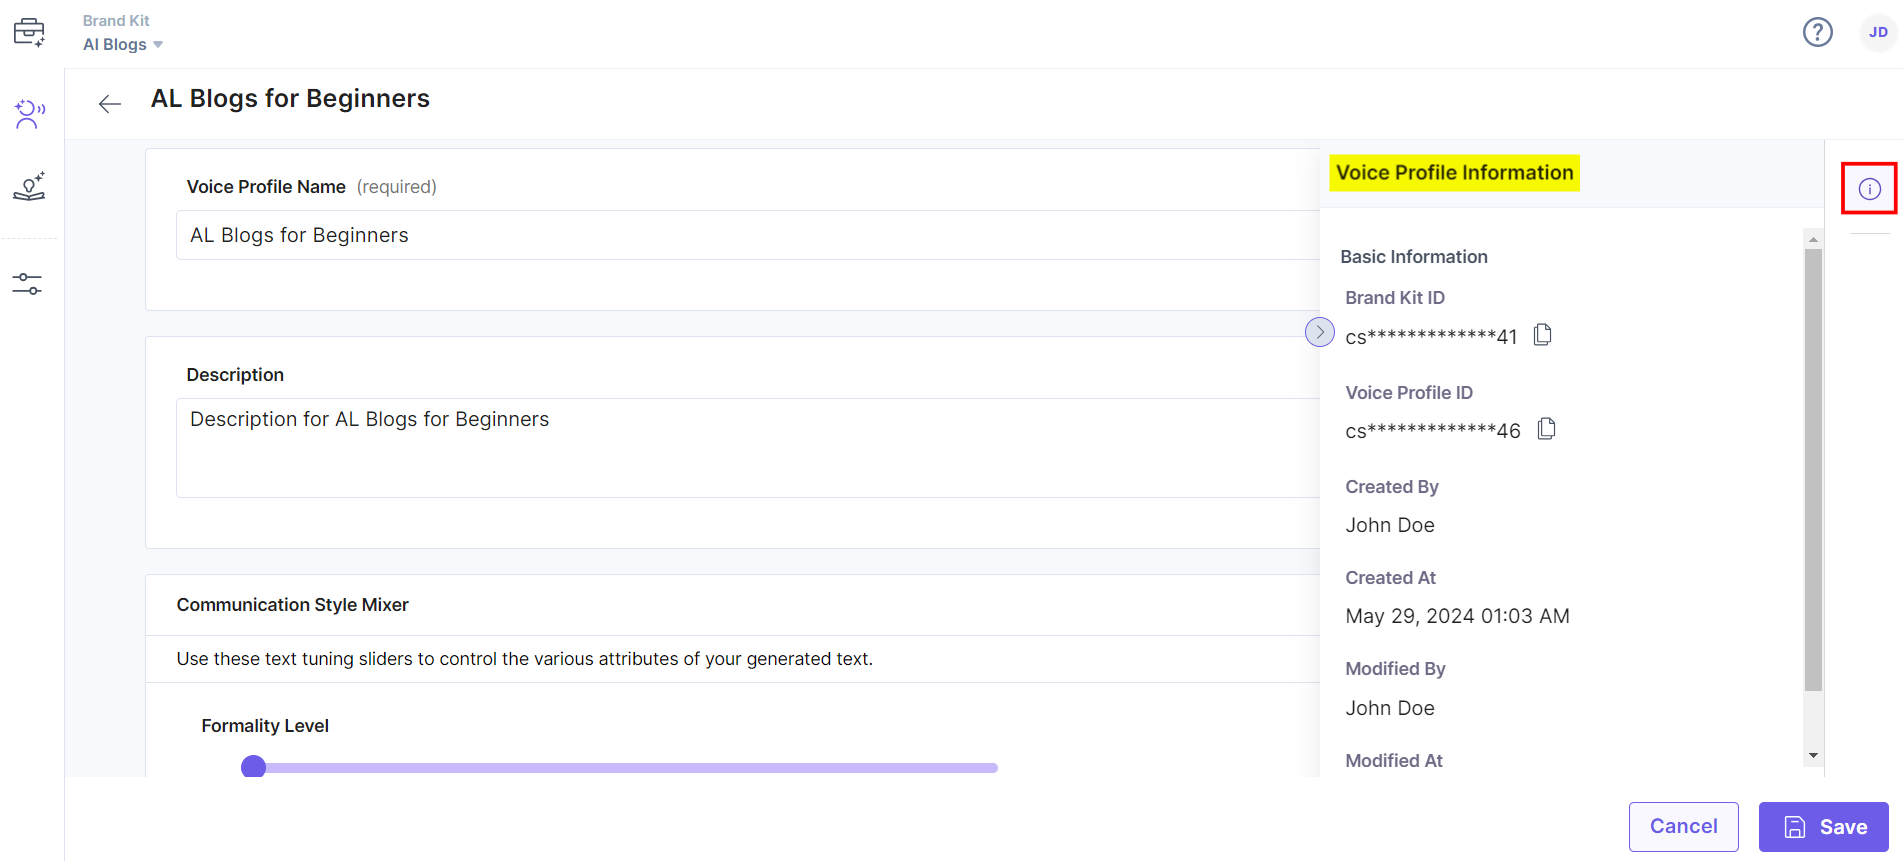
You will get a success message after the Voice Profile is created. You can view its details by clicking the Information icon on the right-side navigation panel.
Additional Resource: To generate content specifically in the entry’s fields, refer to the AI Assistant with Brand Kit documentation.


.svg?format=pjpg&auto=webp)
.svg?format=pjpg&auto=webp)
.png?format=pjpg&auto=webp)


.png?format=pjpg&auto=webp)