Using Deploy Hooks
Using Deploy Hooks
A deploy hook allows you to trigger a deployment using a unique URL.
The following are some of the example use cases for Deploy Hooks:
-
Rebuilding your site to reflect changes in a Headless CMS
-
Scheduling deployments with Cron Jobs
This document guides you through the process of creating, triggering, renaming, and deleting a deploy hook in Launch.
Prerequisites
-
Access to Launch for your organization
-
A project already deployed in Launch
Create a Deploy Hook
Follow the steps given below to create a deploy hook in your project:
-
From the Launch landing page, click the project card to open your project.
-
In the Environments screen, hover over the environment where you created the project and then click the Environment Settings icon to configure the deploy hook. For this tutorial, we will be adding a deploy hook to the Default environment.
-
In Environments under Settings, click Deploy Hooks.
-
Click the + New Deploy Hook button.
-
Enter a name for your deploy hook.
Note: The deploy hook name is for your reference. This name will display in your list of deploy hooks.
-
Click the Create Deploy Hook button.
Launch provides you with a unique URL for this deploy hook.
Trigger a Deploy Hook
Follow the steps given below to trigger a deploy hook:
-
Click the Environments icon in the left panel.
-
Hover over the Default environment and click the Environment Settings icon to go to the Settings page.
-
In Environments under Settings, click Deploy Hooks.
-
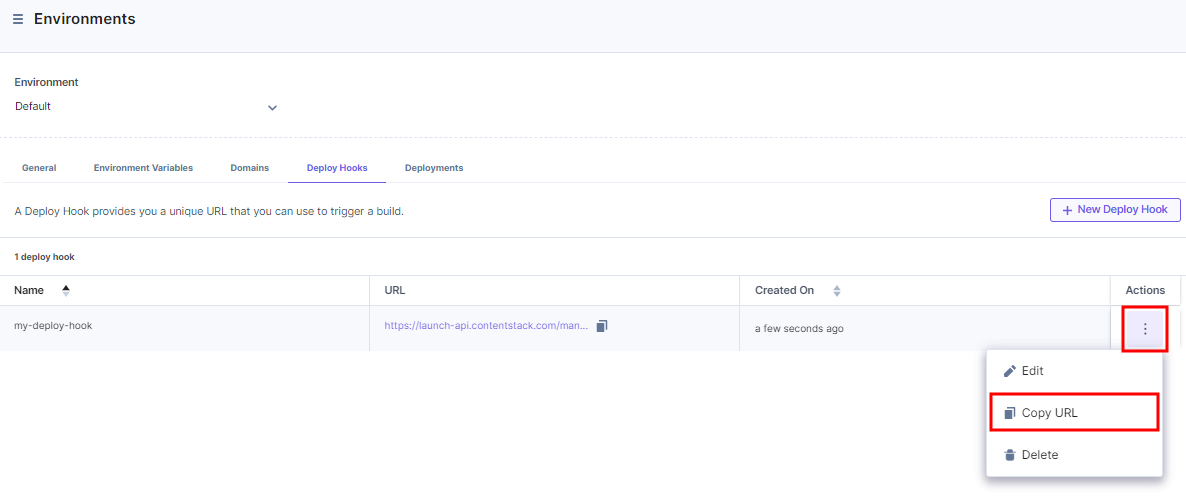
Click the ellipses under Actions and then click Copy URL to copy the deploy hook URL.
-
Send a POST request to this URL to trigger the deploy hook you created.
Example Request
curl -X POSThttps://cs-domain.com/Launch-path/manage/deploy/deploy-hook-id
Example Response
{ "message": "Deployment triggered successfully" }
-
Click the Environments icon in the left panel and then go to your environment.
You will see that it has triggered a deployment successfully.
If you used a git repository to import your project, then by default, the deploy hook uses the latest commit from the git branch for the deployment.
Parameter used in a Deploy Hook
Deploy hooks accept the following optional URL query parameter:
-
commit: Parameter that specifies which git commit to deploy on triggering the deploy hook.
Here's an example where a deploy hook URL uses the commit parameter:
curl -X POST https://cs-domain.com/Launch-path/manage/deploy/h83y7hreohuuererh7343?commit=rbg734
The commit can be the full SHA or just the first seven characters of your full SHA.
Note: When you import a project by uploading a file, you should not pass the commit parameter.
Rename a Deploy Hook
Follow the steps given below to rename a deploy hook:
-
Click the Environments icon in the left panel.
-
Hover over the Default environment and click the Environment Settings icon to go to the Settings page.
-
In Environments under Settings, click Deploy Hooks.
-
Click the ellipses under Actions and then click Edit to edit the deploy hook URL.
Delete a Deploy Hook
Follow the steps given below to delete a deploy hook:
-
Click the Environments icon in the left panel.
-
Hover over the Default environment and click the Environment Settings icon to go to the Settings page.
-
In Environments under Settings, click Deploy Hooks.
-
Click the ellipses under Actions and then click Delete to delete the deploy hook URL.
Redeploy Automatically when Content is Published on CMS
Launch allows you to set up a site to redeploy automatically when its content is modified in the CMS.
Prerequisites
-
Access to Launch for your organization
-
A site on Launch that fetches data from the CMS
Steps for execution
Follow the steps to redeploy automatically when content is published.
-
Create a deploy hook in Launch.
-
Follow the steps to add the deploy hook as a Webhook to Contentstack CMS.
-
Copy the deploy hook URL.
-
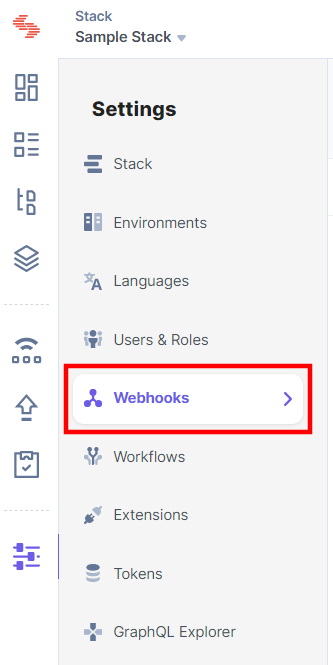
Go to your stack and then go to Settings > Webhooks.
-
Click the New Webhook button.
-
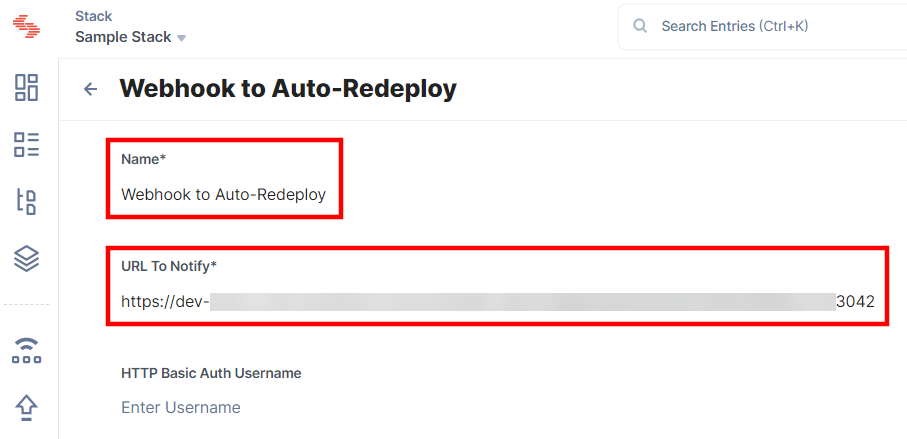
In the Name field, enter a suitable name for the Webhook.
-
In the URL To Notify field, paste the deploy hook URL.
-
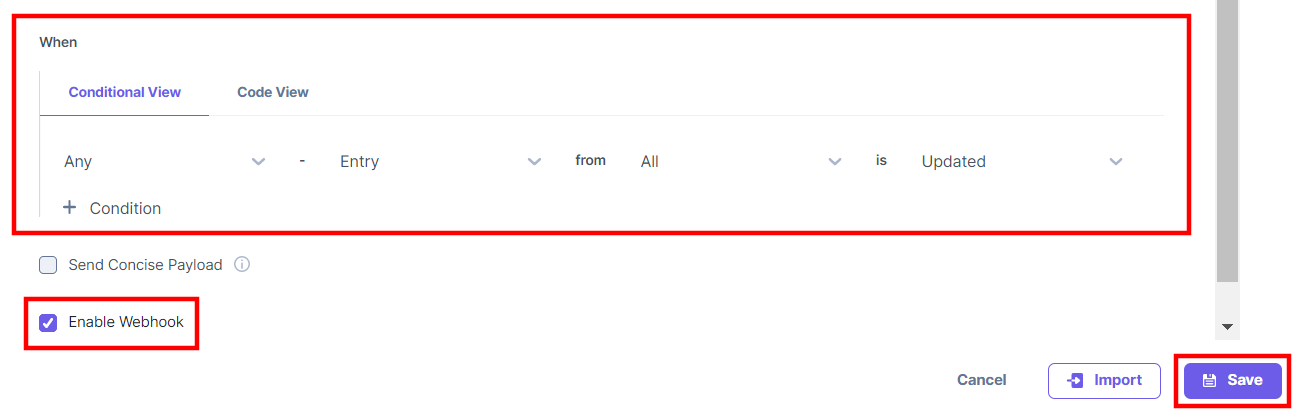
In the When field, enter the conditions for the deploy hook to trigger.
-
Mark the Enable Webhook checkbox.
-
Click the Save button.
You will see the conditions updated on the deploy hook page in Launch.
-
-
Go to the entry where you want to make the update.
-
Make the necessary updates, and click the Save button.
-
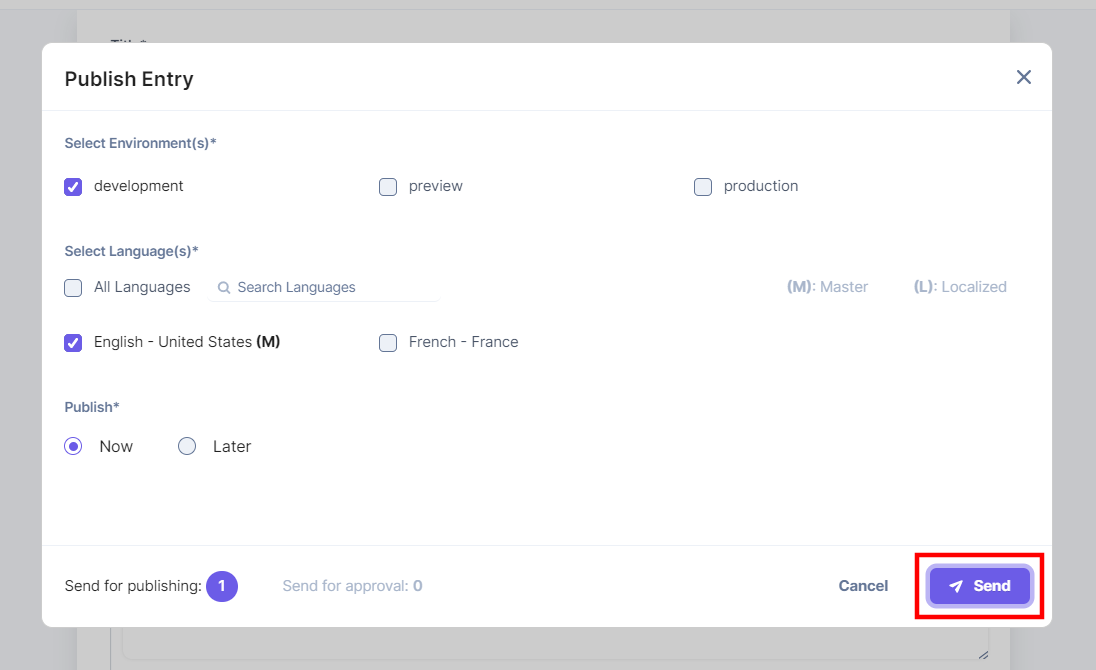
Click the Publish button, select Environment(s) and Language(s), and then click the Send button.
On clicking Publish, the Webhook gets triggered and the project gets automatically redeployed in Launch.