Set up SSO with OneLogin
This step-by-step guide explains how to set up Single Sign-On in Contentstack with OneLogin as your SAML 2.0 Identity Provider (IdP).
To do so, this integration requires following steps:
- Create SSO Name and ACS URL in Contentstack
- Configure Contentstack App in OneLogin
- Configure OneLogin details in Contentstack
- Manage users access control in OneLogin
- Create Role Mappings in Contentstack
- Test and Enable SSO
Let us see each of the processes in detail.
Create SSO Name and ACS URL in Contentstack
- Log in to your Contentstack account, go to the Organization Settings page, and click on the Single Sign-On tab.
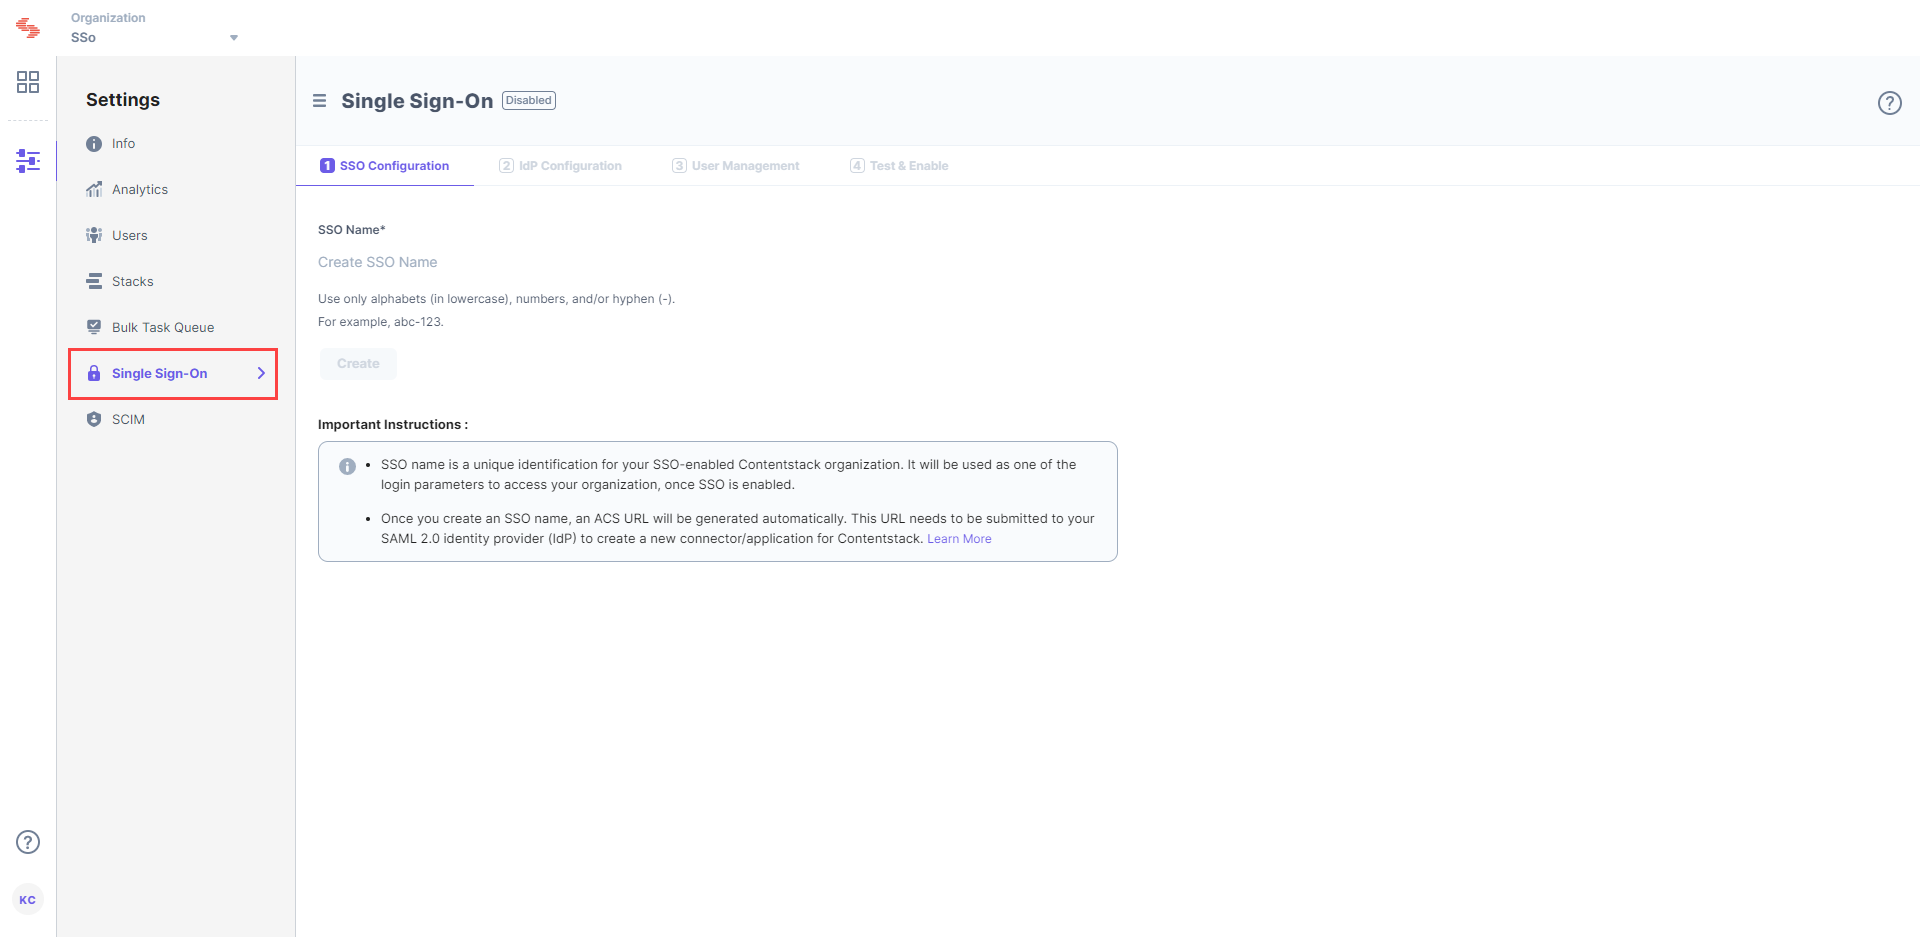
- Enter an SSO name of your choice, and click Create. For example, if your company name is “Acme, Inc.” enter “acme” here. This name will be used as one of the login credentials by the organization users while signing in.
Note: The SSO Name can contain only alphabets (in lowercase), numbers (0-9), and/or hyphens (-).
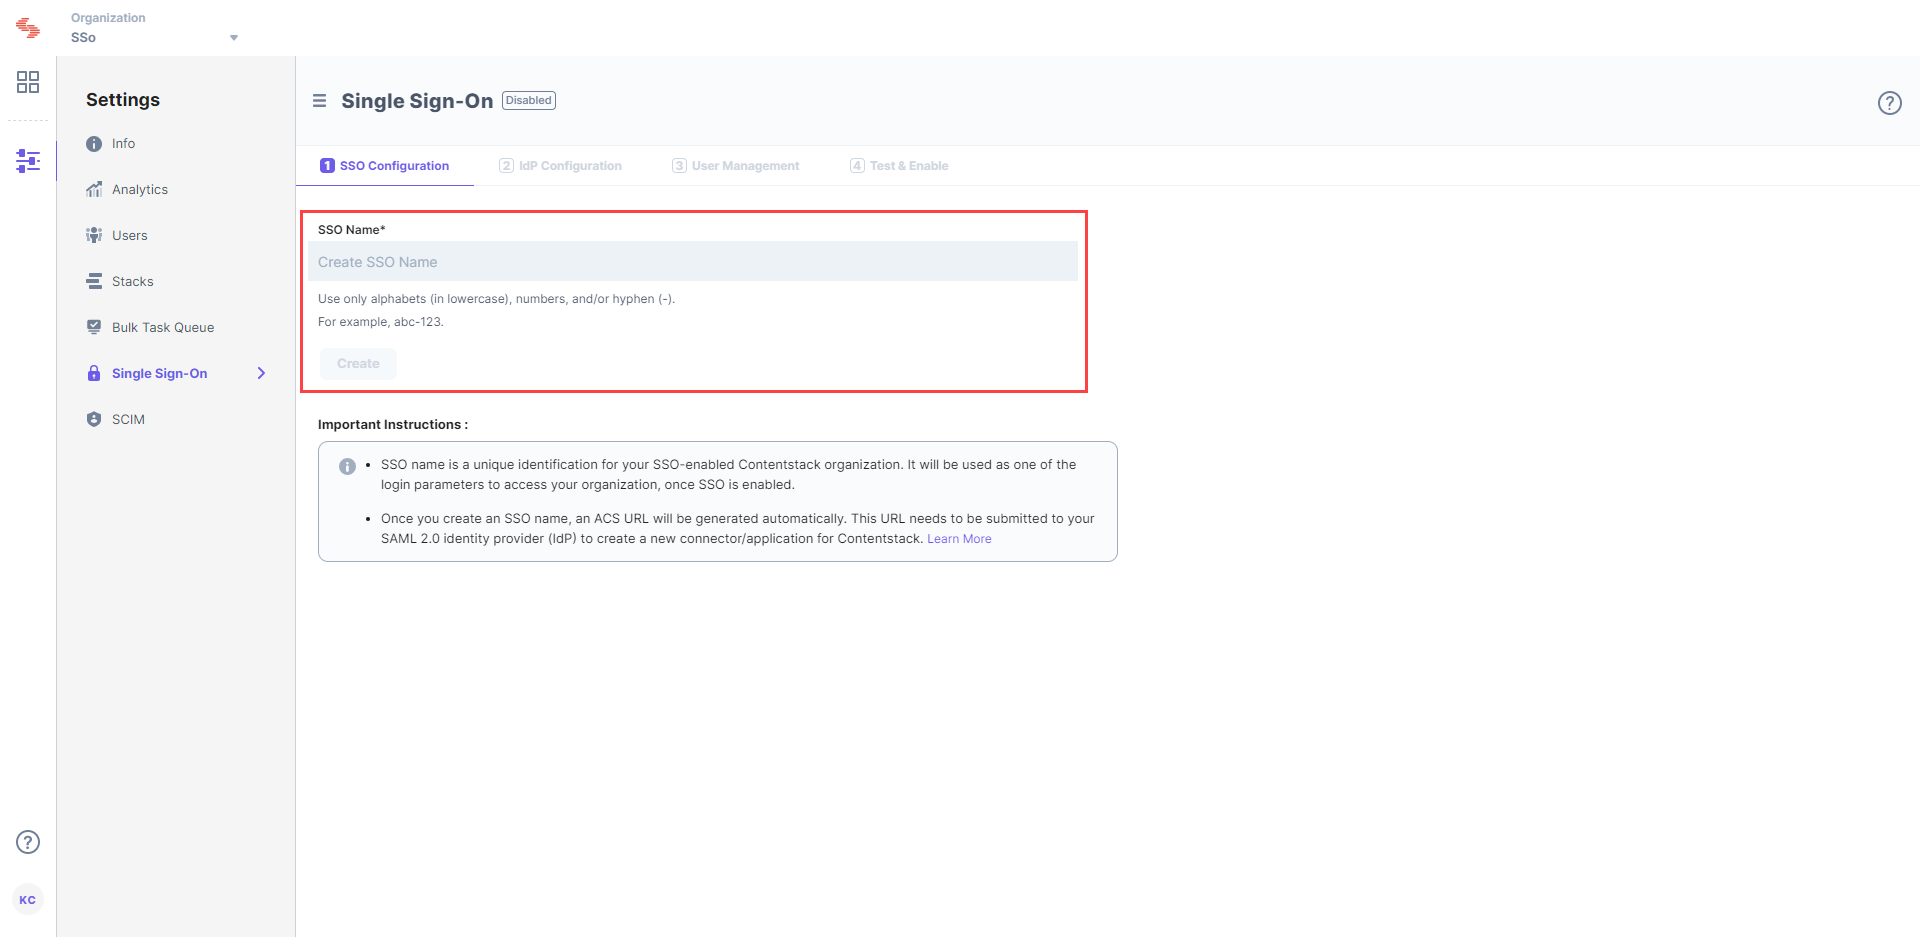 Let's use “sso-test” as the SSO Name.
 - This will generate Assertion Consumer Service (ACS) URL and other details such as Entity ID, Attributes and NameID Format. These details will be used in Step 2 for configuring the Contentstack app in OneLogin.
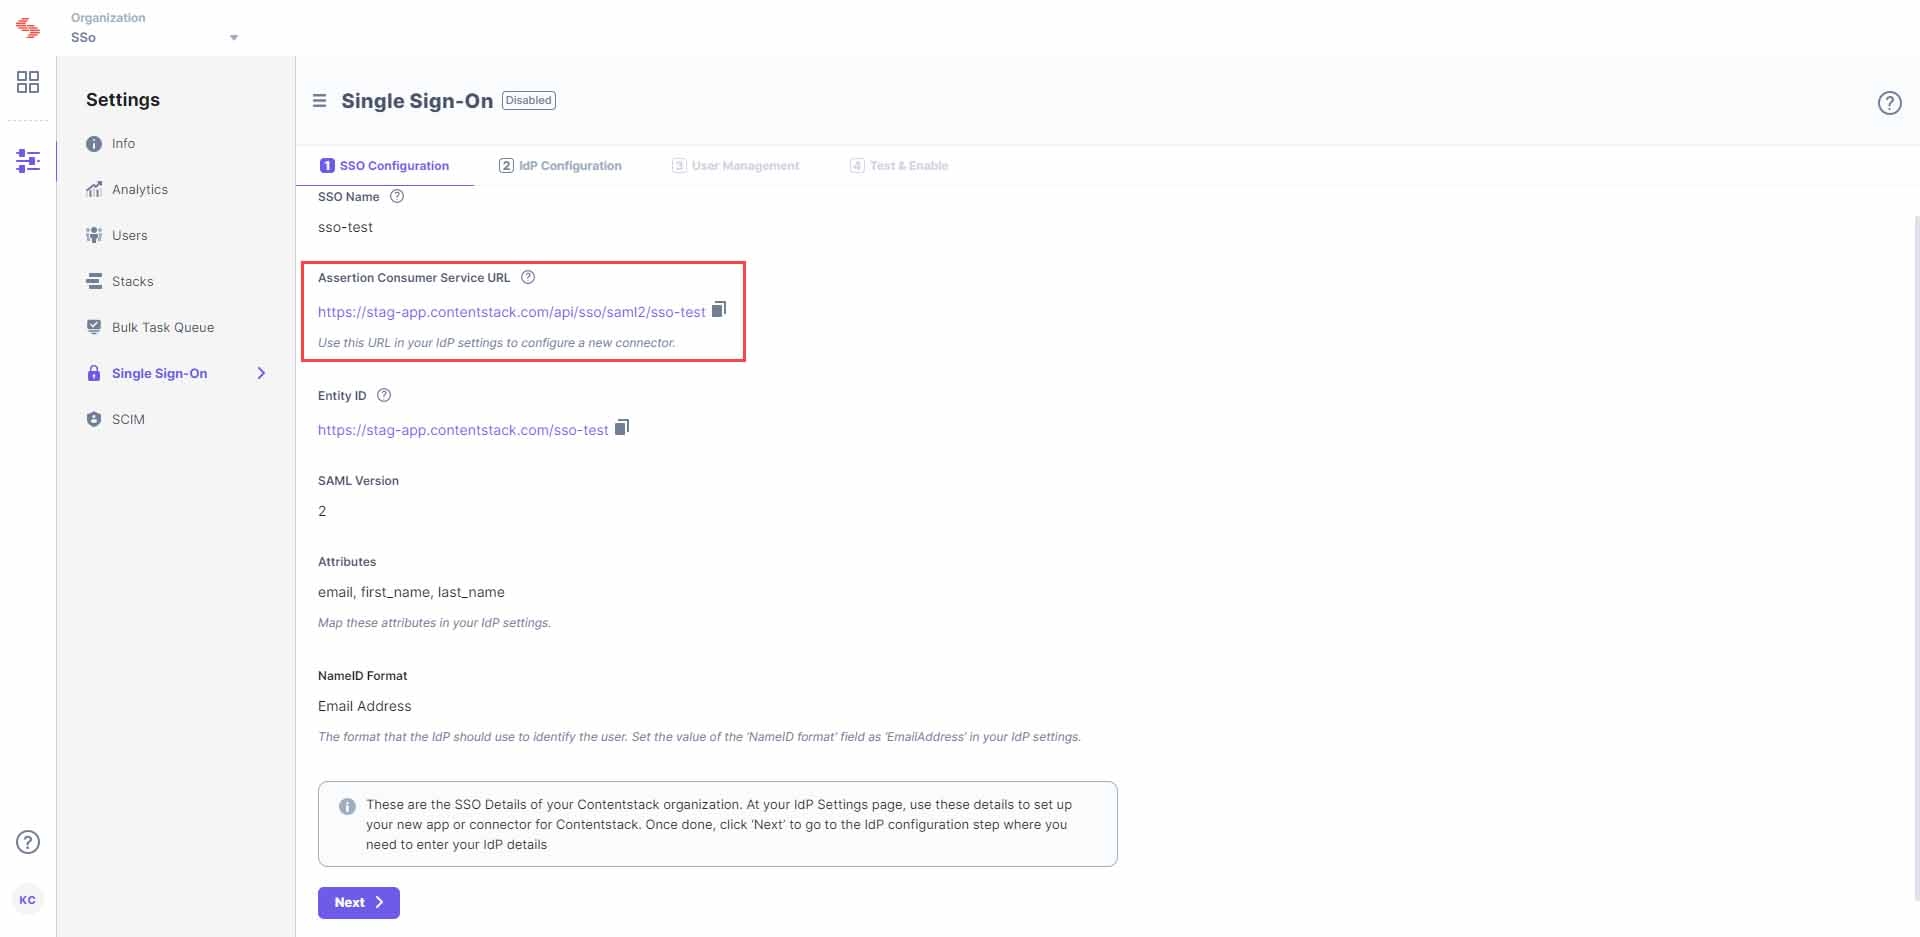
Keep this window open, as you may need these details for setting up the Contentstack app in OneLogin.
- Log in to your Contentstack account, go to the Organization Settings page, and click on the Single Sign-On tab.
Configure Contentstack App in OneLogin
Note: You will need to be a OneLogin administrator to complete the below steps.
- Log into your OneLogin Admin account, click on the APPS tab and click on the ADD APP button on the top right corner.
- From the applications displayed on the page, use the SAML Test Connector (IdP) application.
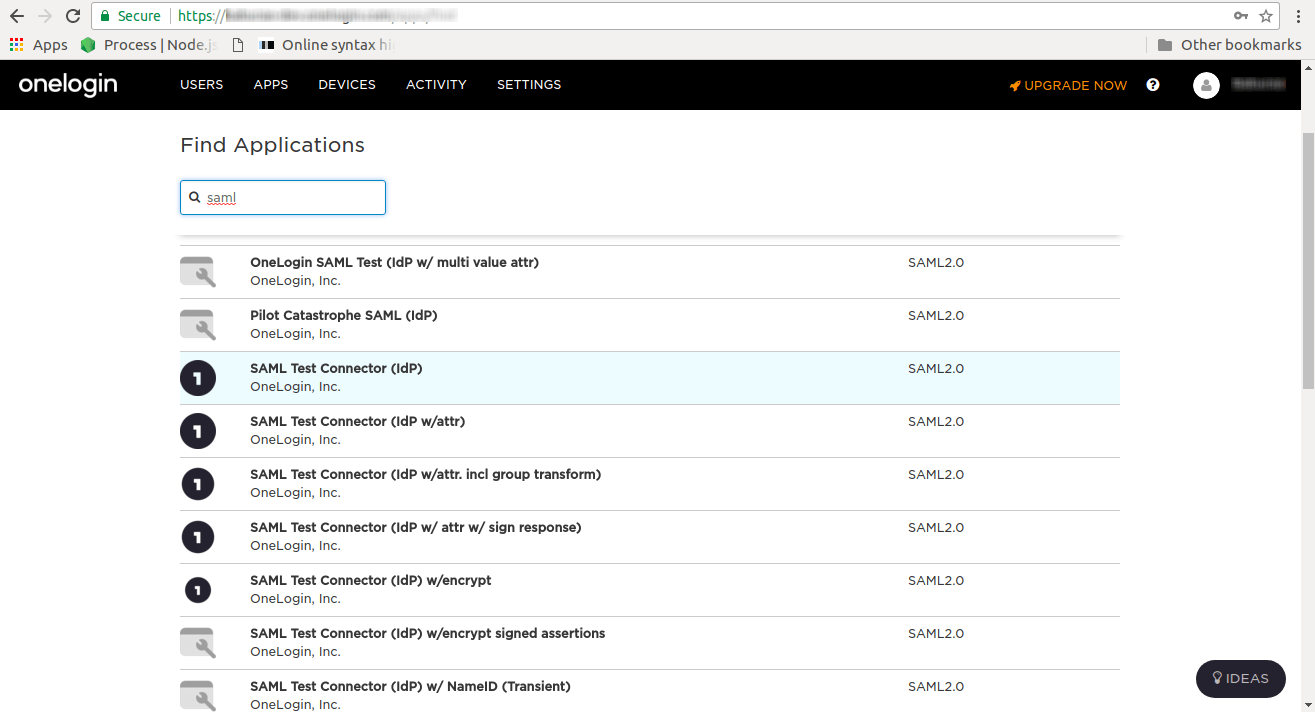
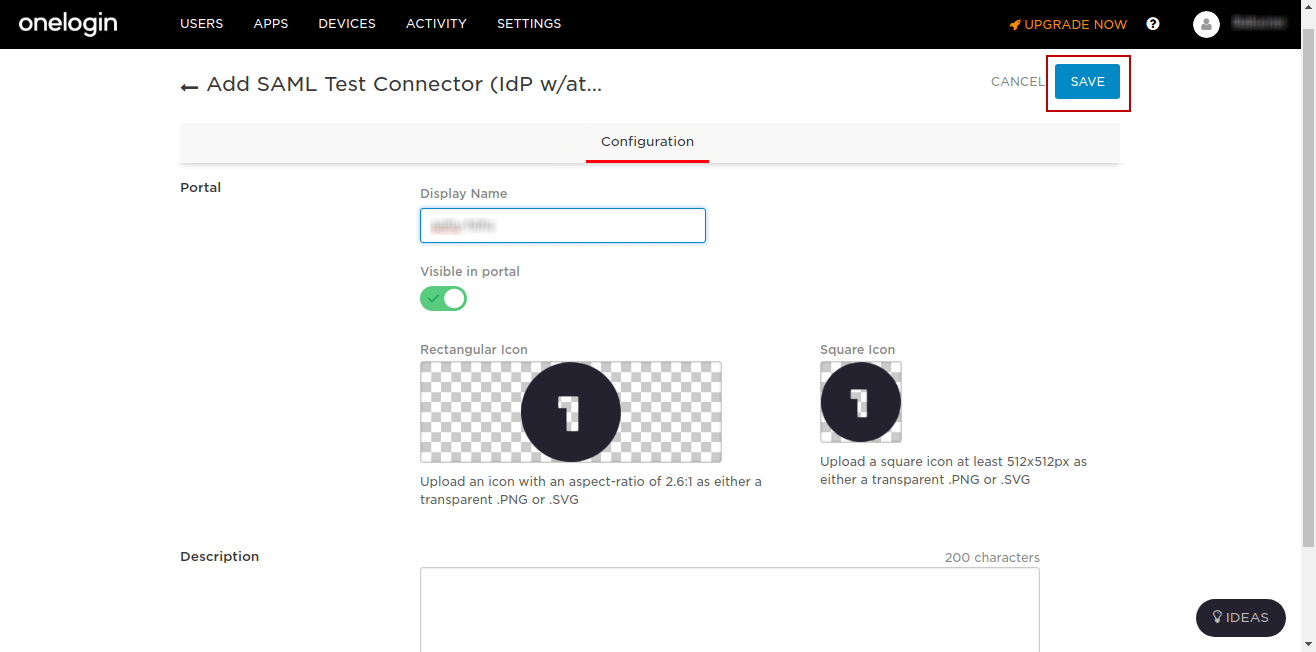
- Set the Display Name for your Contentstack application, for example “Contentstack” and click Save.
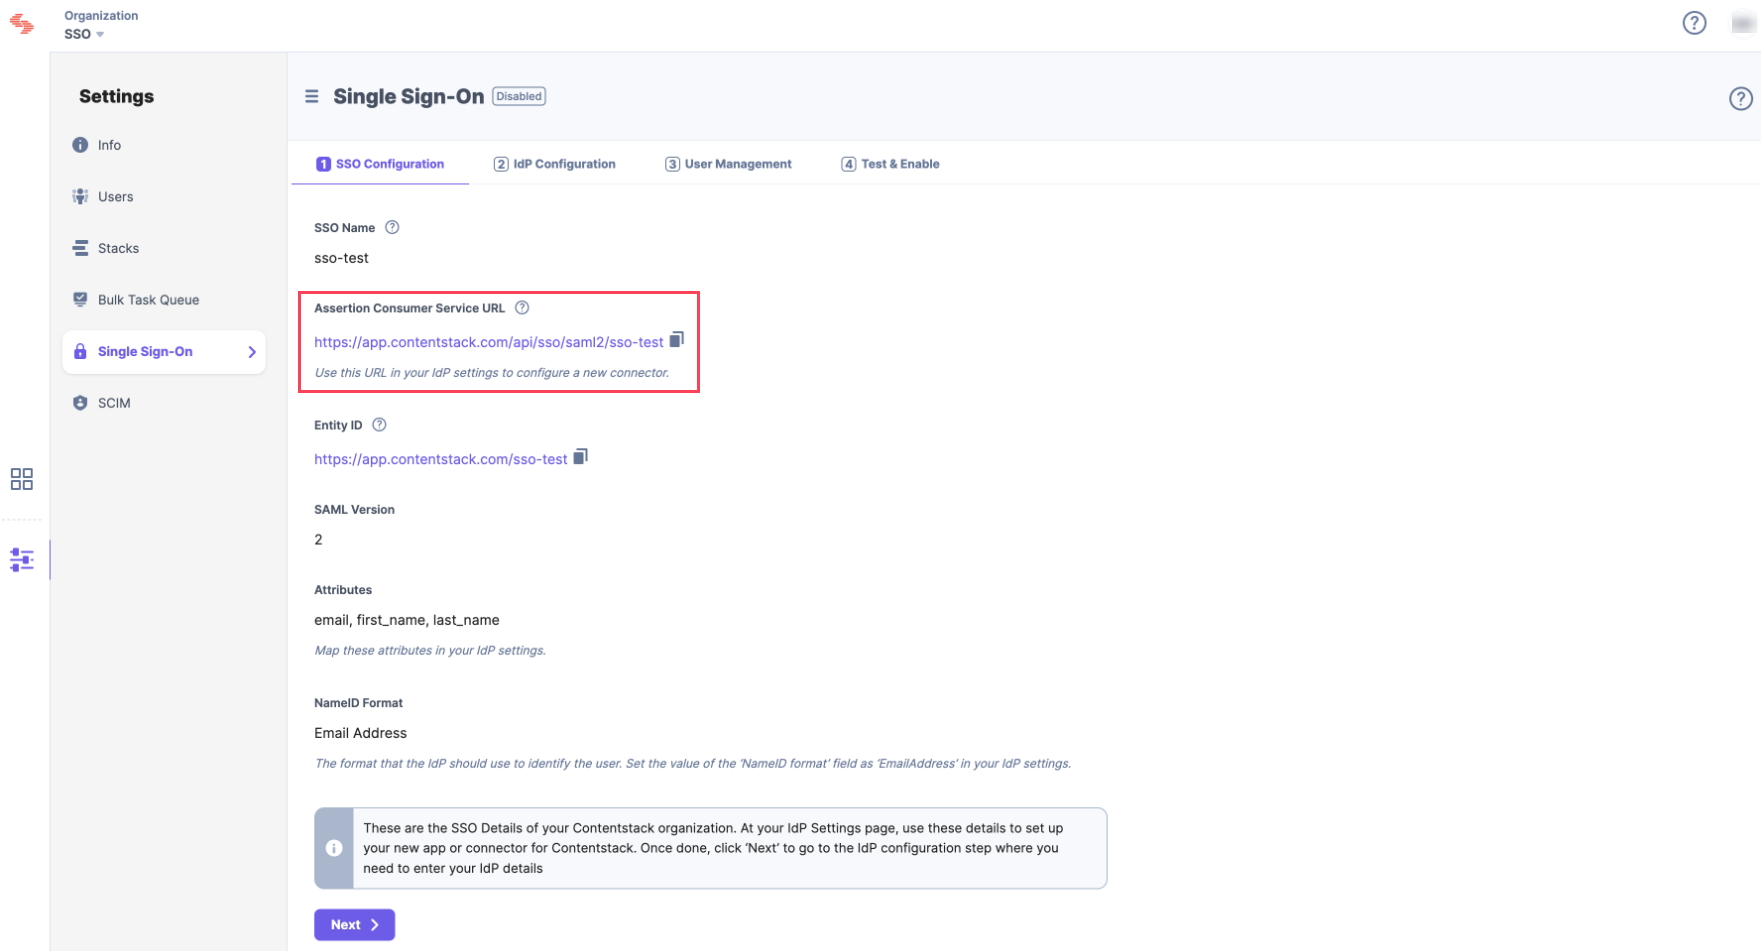
- Log into your Contentstack account as the Owner and get your “Single sign on URL” for OneLogin. In Contentstack, it’s called Assertion Consumer URL and you can find it in Organization Settings > SINGLE SIGN-ON.
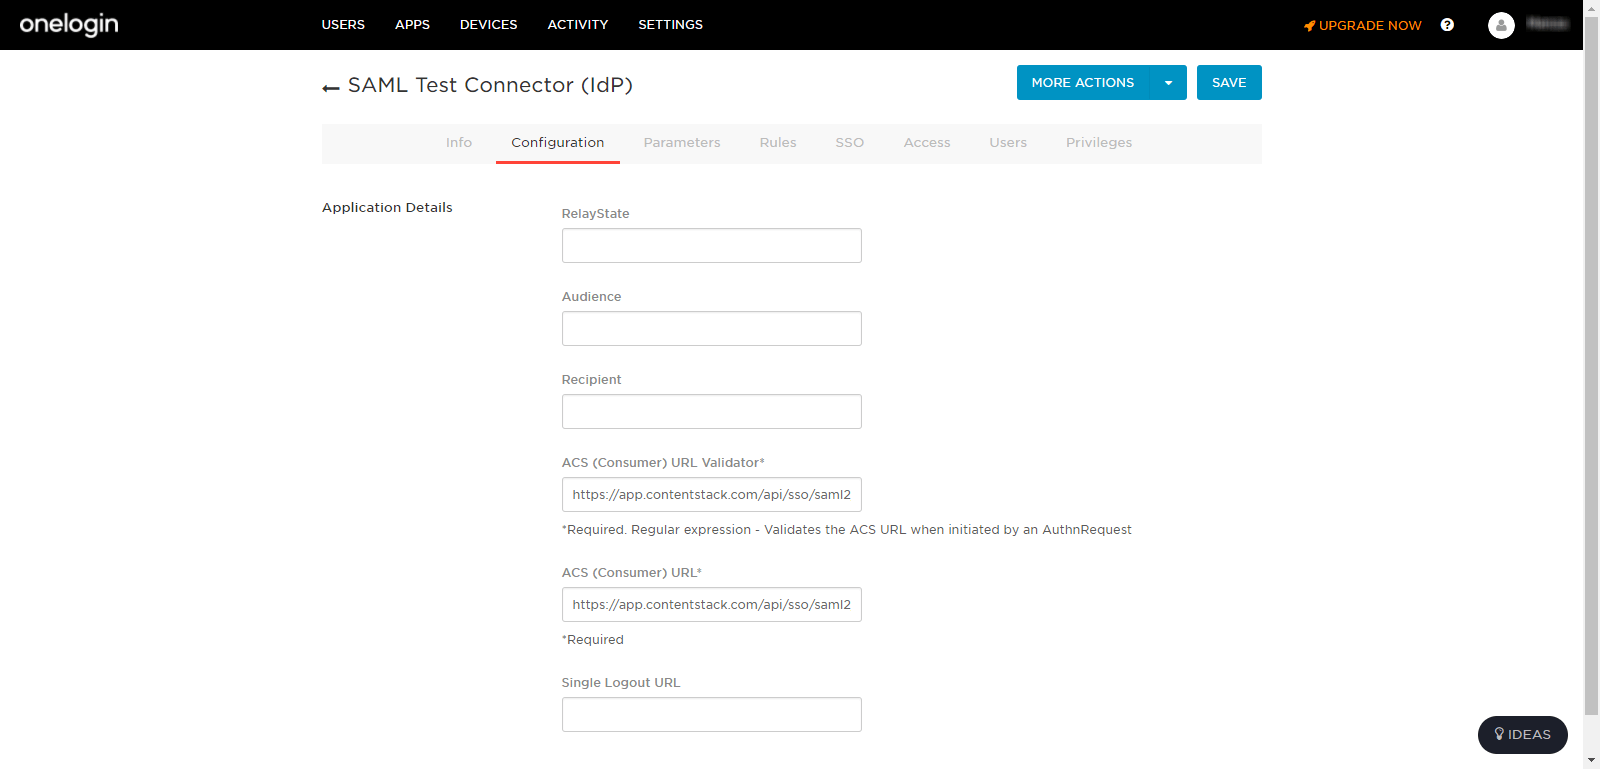
- Now, click on the Configuration tab, opy the “ACS URL” from the above step and paste it into the ACS (Consumer) URL Validator field in OneLogin. Paste the same value into the ACS (Consumer) URL field as well.
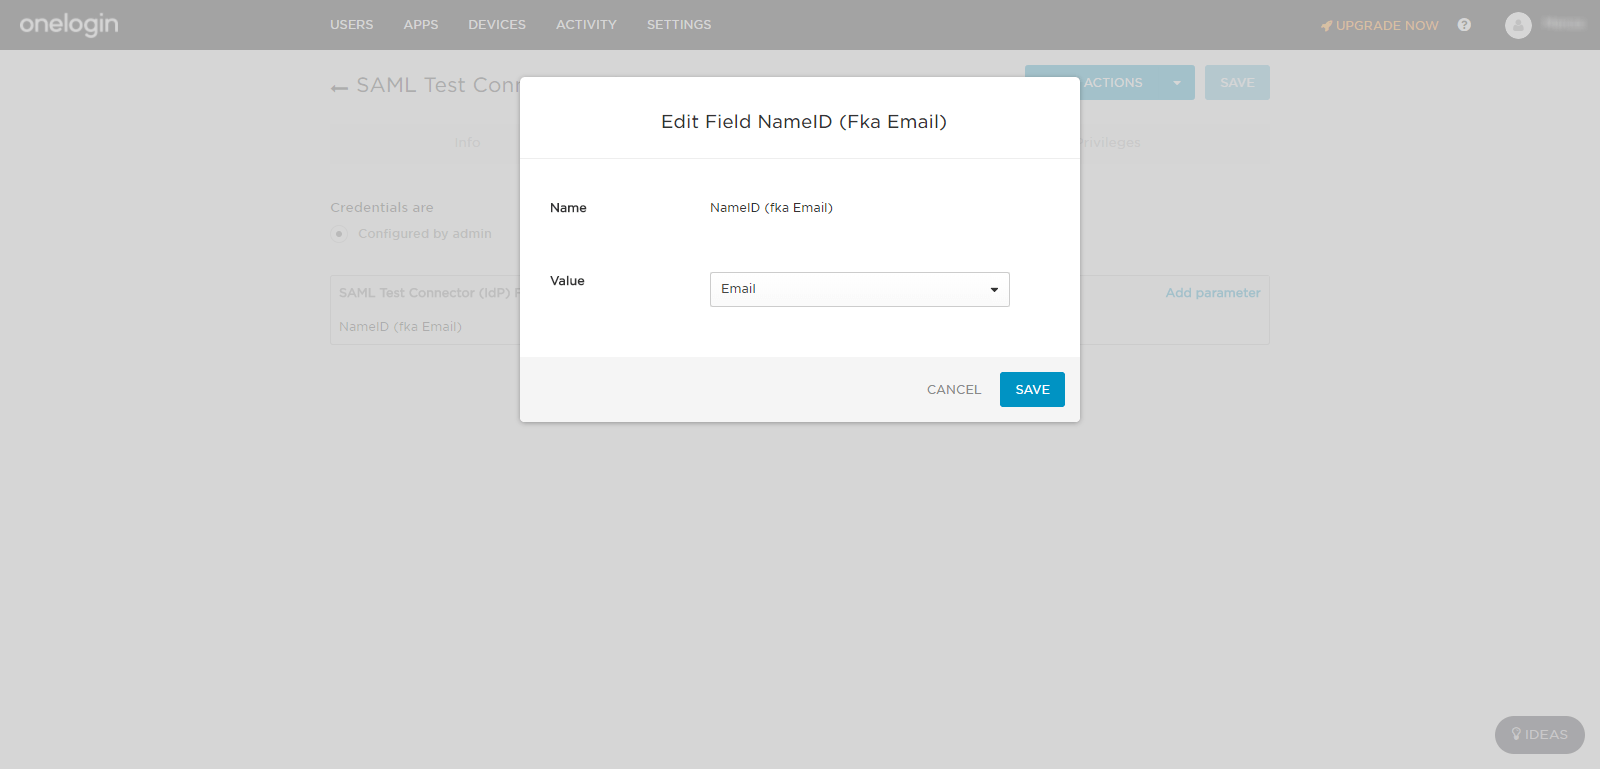
- Go to the Parameters tab and add parameters. By default, the first parameter is NameID. We will set its value to Email by clicking on the parameter and selecting it from the dropdown.
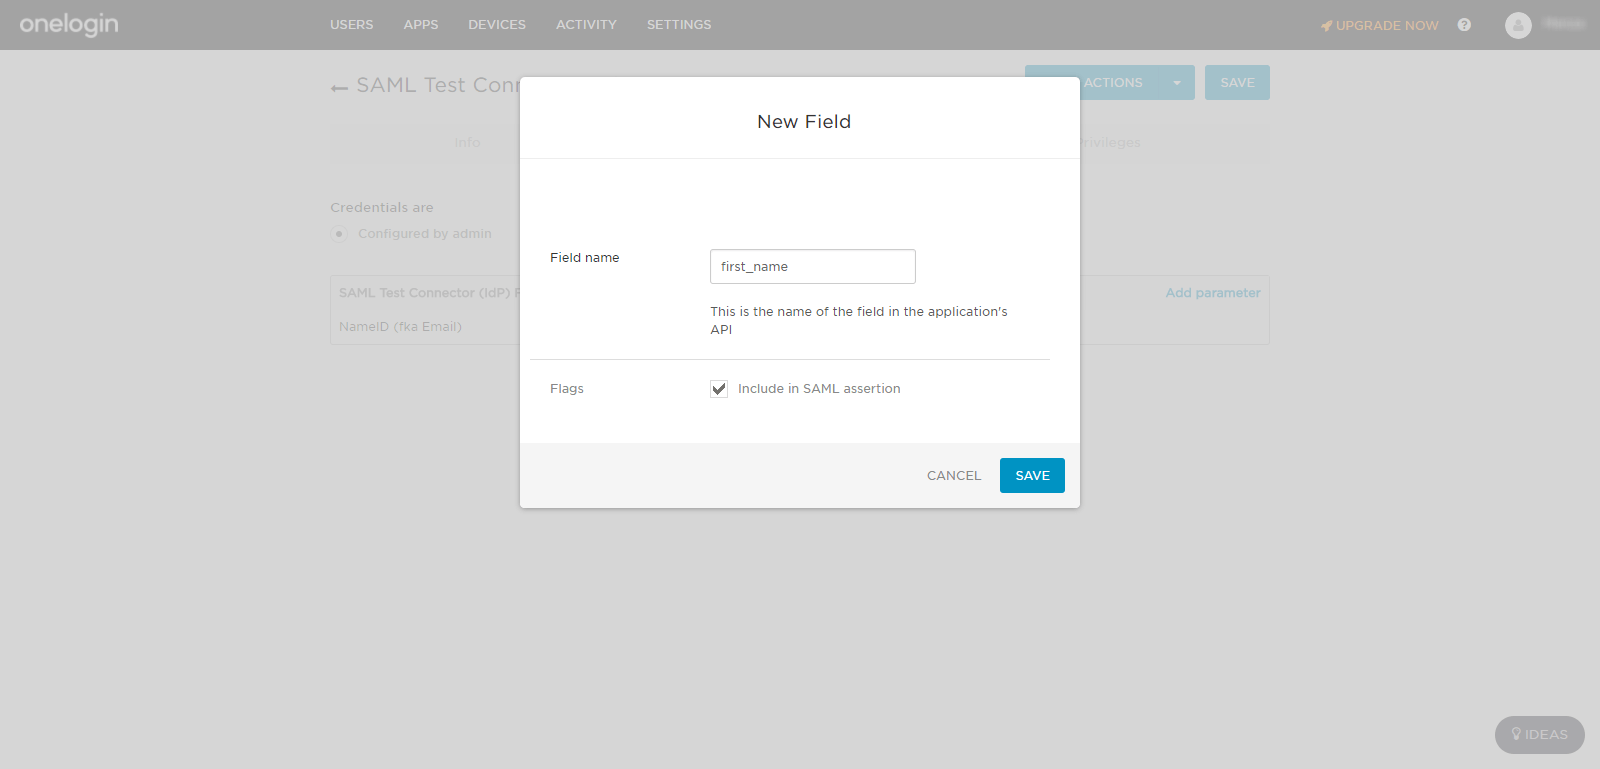
- Click on the Add parameter link, add a parameter named first_name, select the Include in SAML assertion checkbox, and click on Save.
- Next, we will assign a value for the created field. Click on the Value dropdown, select First Name, and click on Save.
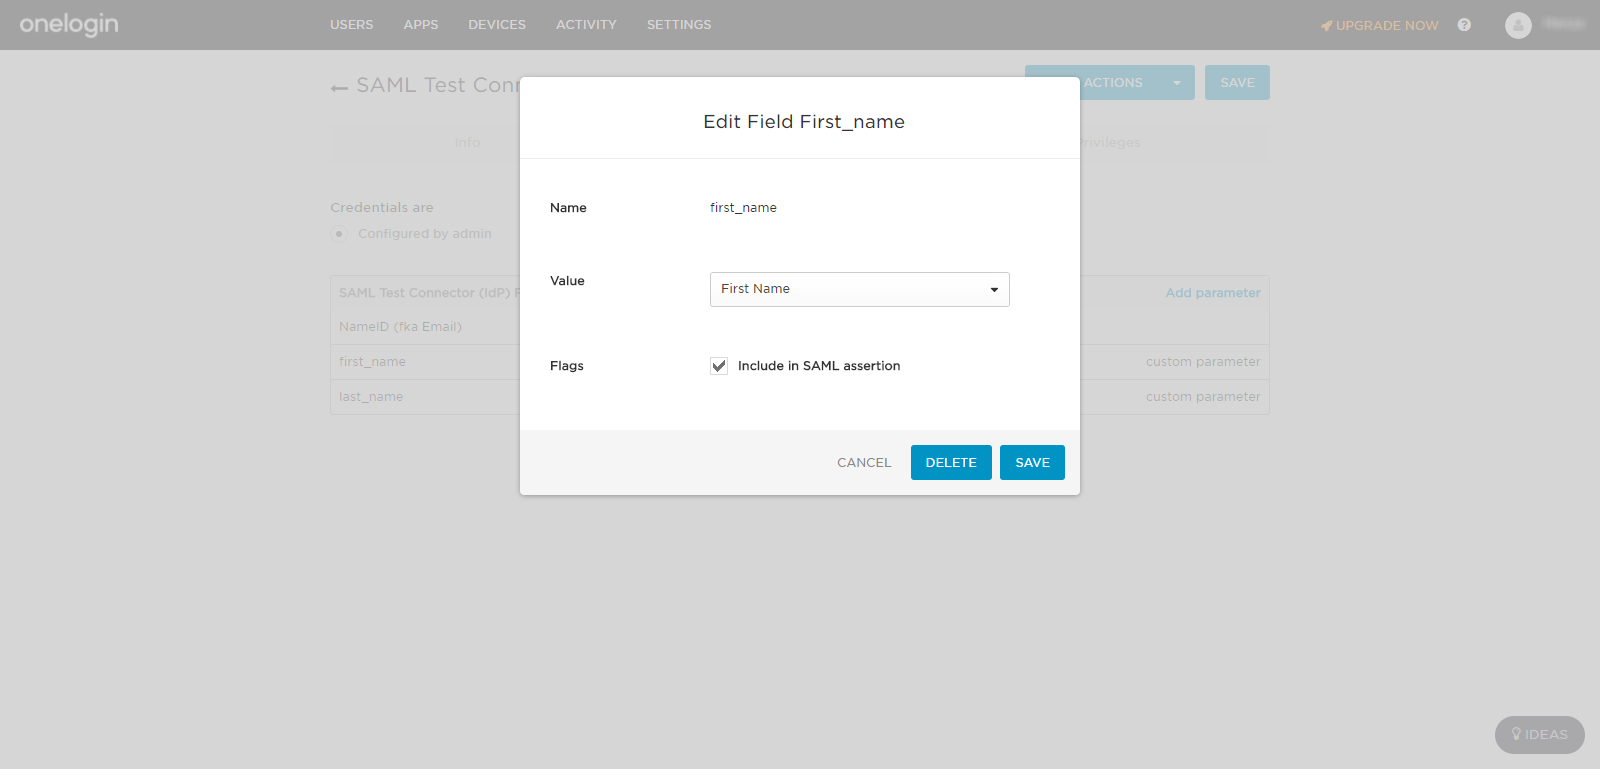
Similarly, we will add two more attributes. Add last_name and select Last Name as the value, and add email and select Email as the value. Finally, your attribute list will look as follows:
- [Optional Step] If you want to map IdP roles to Contentstack roles, you need to add a new attribute called roles. Check the Include in SAML assertion and click on Save.
- Select Users Roles as the Value and click on Save.
Note: Perform steps 8 and 9 only if IdP Role Mapping is part of your Contentstack plan.
Configure OneLogin details in Contentstack
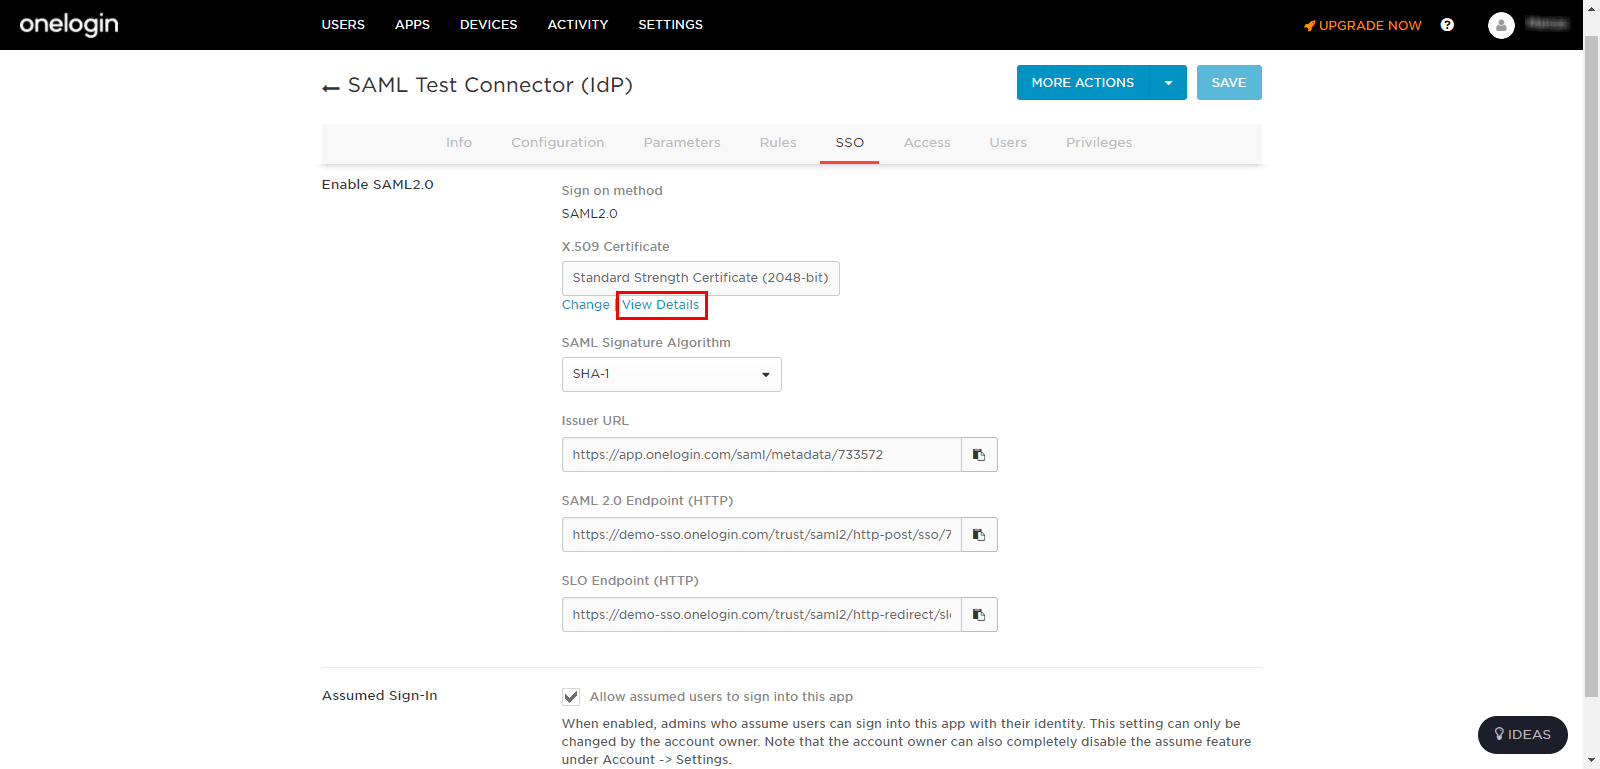
- Click on the SSO tab of your Contentstack application in OneLogin, you will see the SAML 2.0 Endpoint (HTTP) URL field.
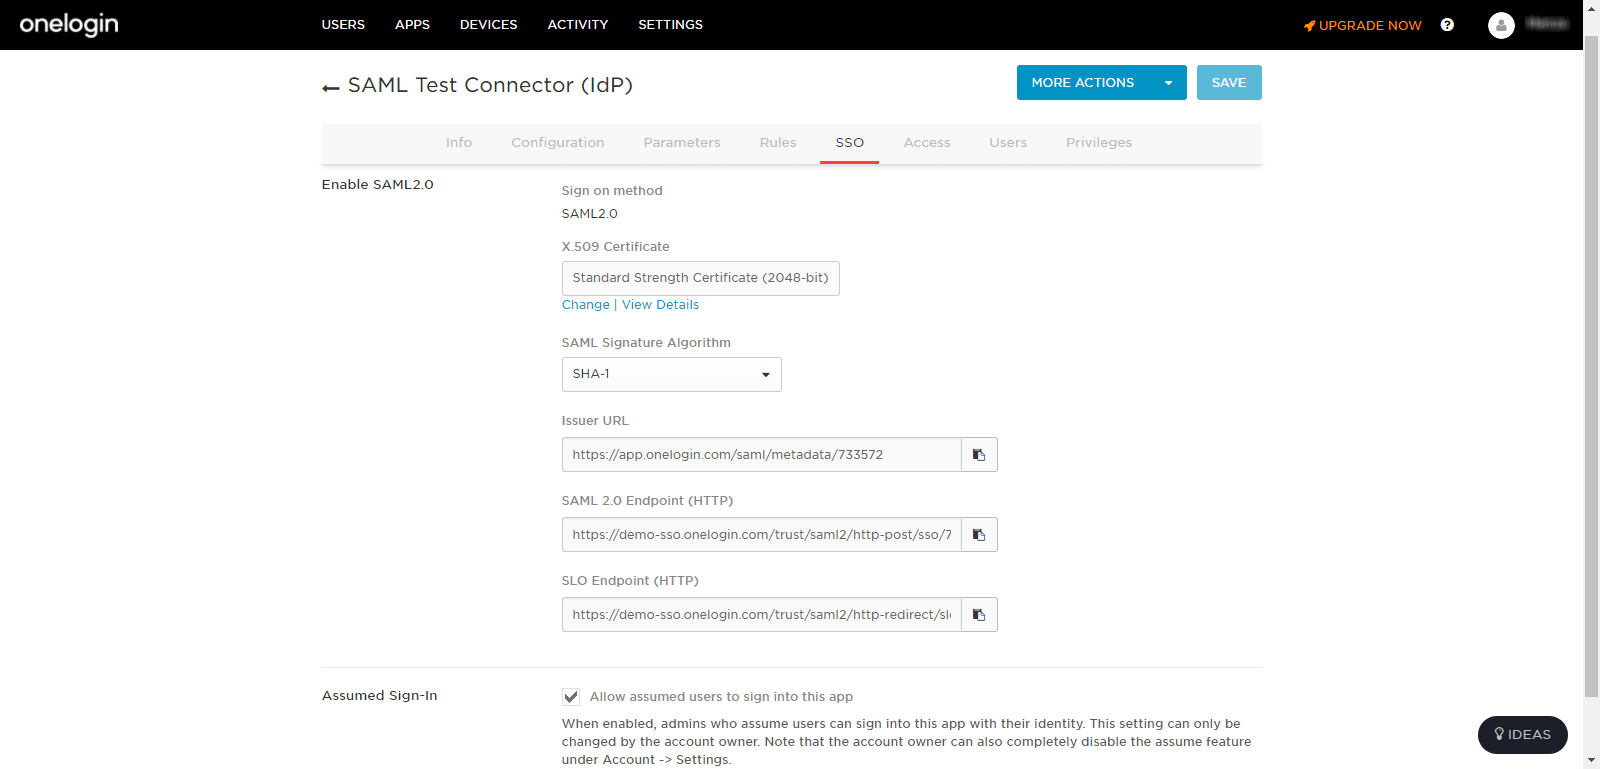
- Click on the “Copy to Clipboard” icon beside the SAML 2.0 Endpoint (HTTP) field or you can just manually copy the URL.
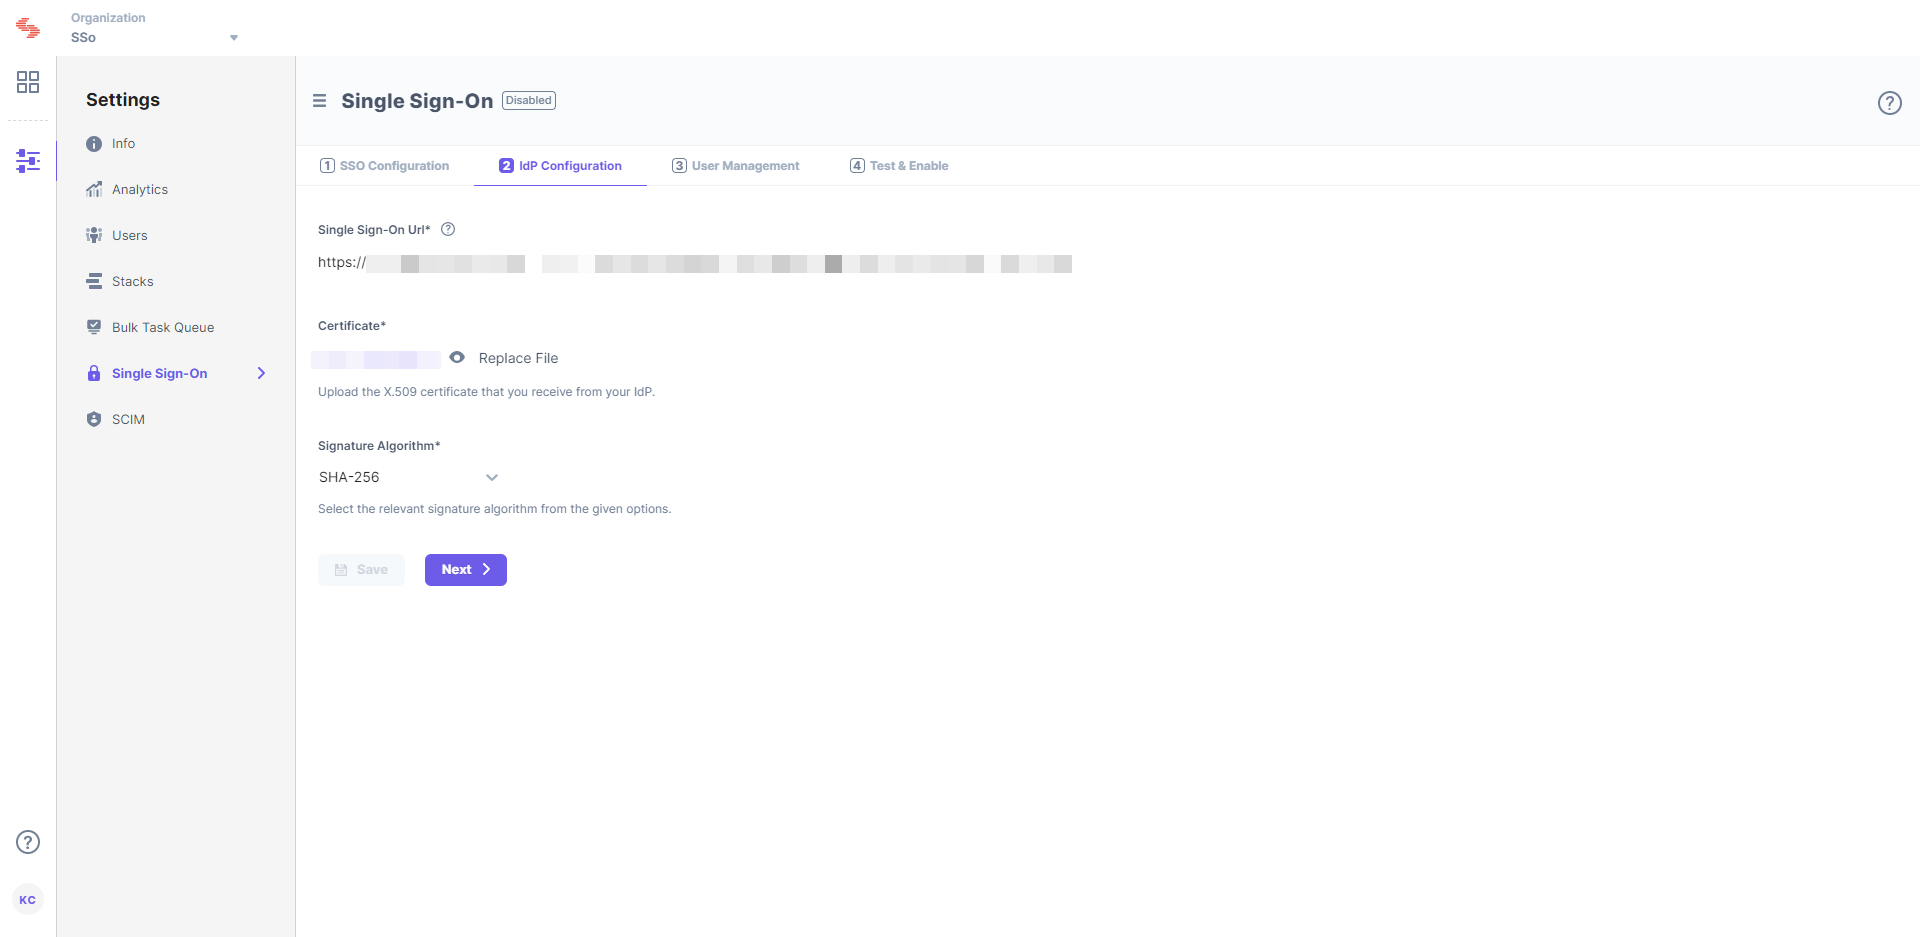
- Then, in the Contentstack Single Sign-On page, go to 2 IdP Configuration, and paste the copied URL into the Single Sign-on URL field.
- Now, in the SSO tab, click on View Details under the X.509 Certificate parameter.
- The Standard Strength Certificate (2048-bit) window displays the details of the certificate. Click on the DOWNLOAD button to download the certificate.
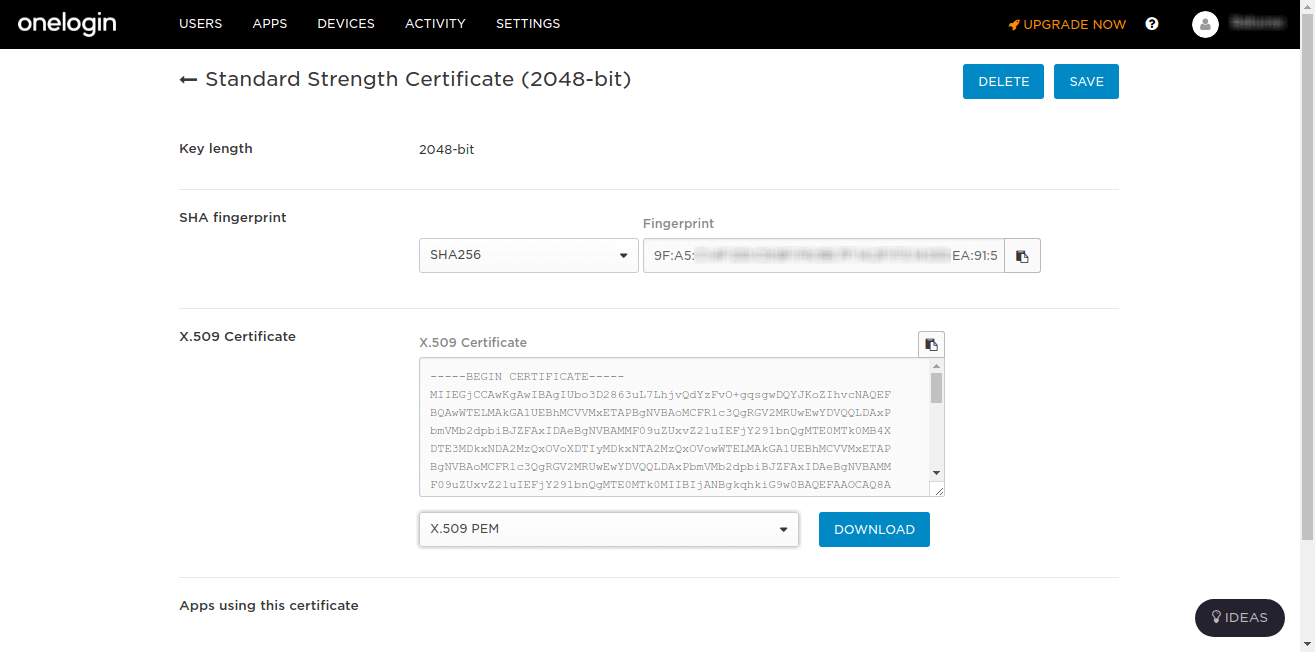
- Upload the X.509 certificate that you downloaded into the Certificate field in Contentstack.
- Click on the SSO tab of your Contentstack application in OneLogin, you will see the SAML 2.0 Endpoint (HTTP) URL field.
Manage users access control in OneLogin
After setting the necessary configurations in Contentstack, you need to now assign the newly added application to your users.
A - Add application to users
- You can assign a single user under Users > All Users. OneLogin will automatically retrieve the list of potential users that are currently logged in to OneLogin based on the user’s email address.
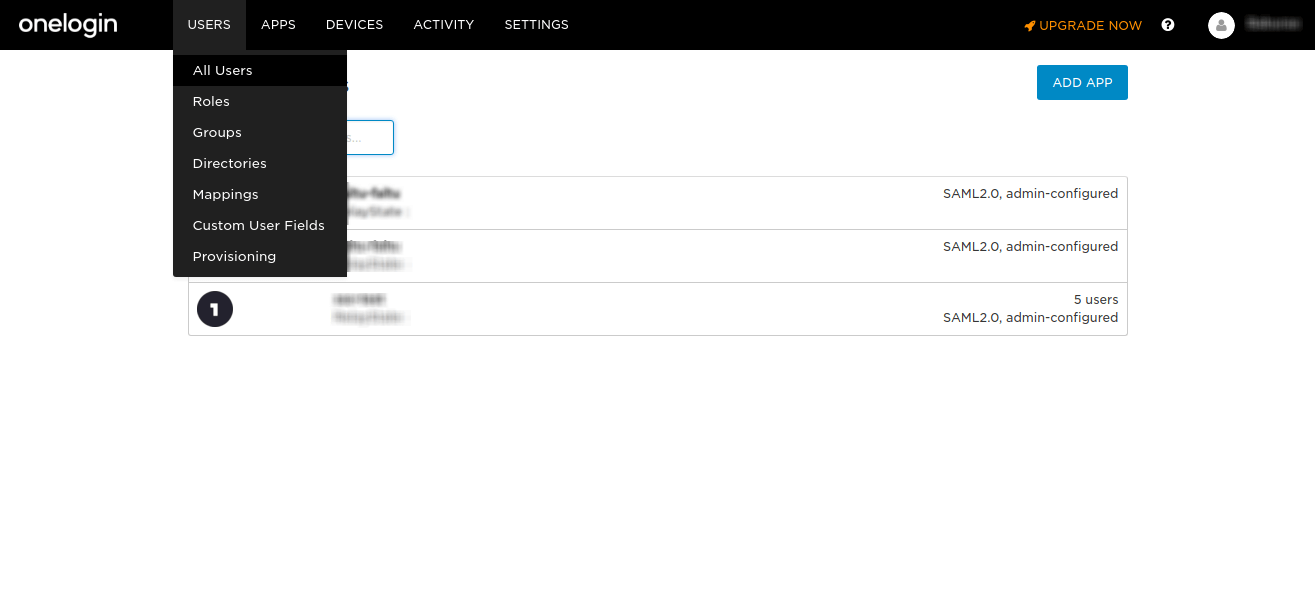
- Click on the NEW USER button at the top right corner to add new users to Contentstack. Add the user’s Email address, First Name, and Last Name.
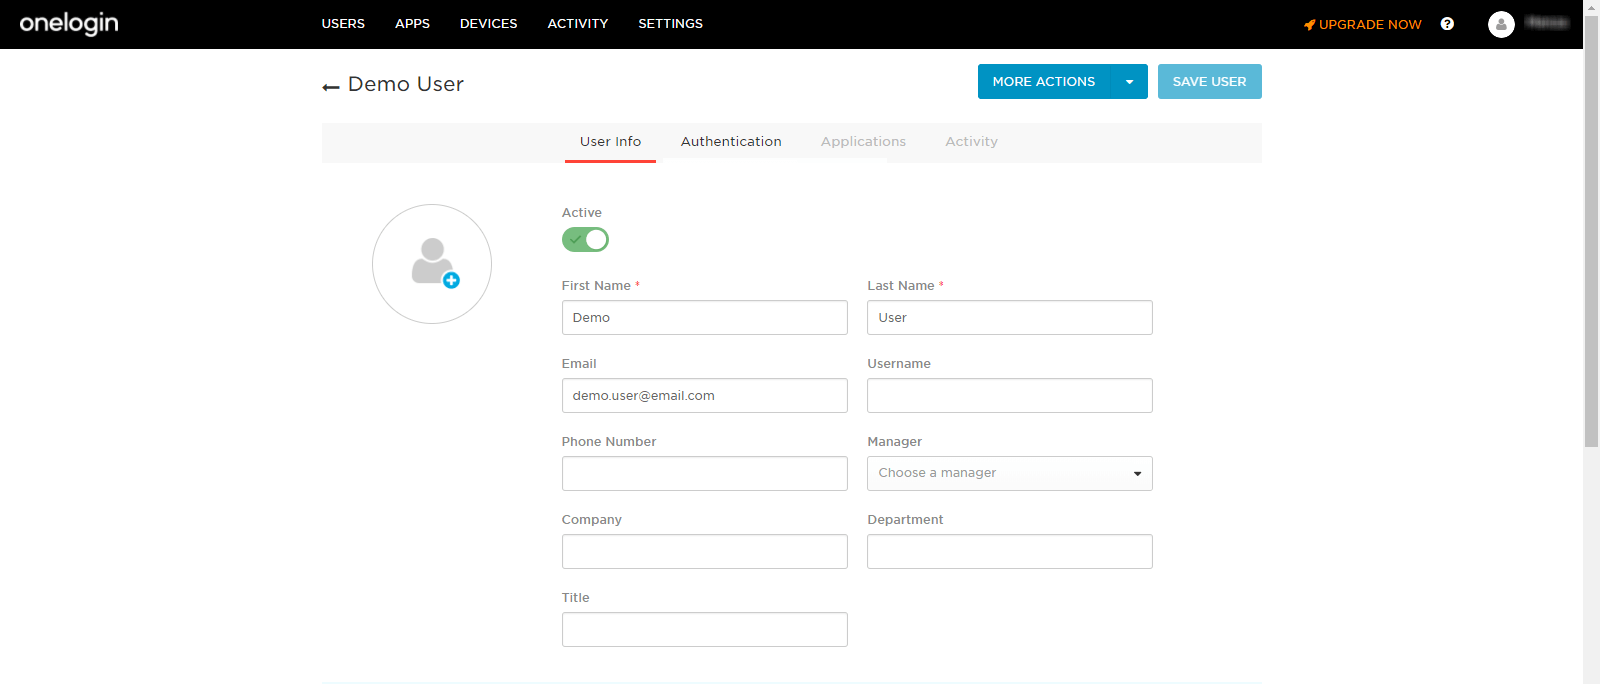
- Now, on the Applications tab, click on the + icon beside the Applications bar, and select your app in the Select Application dropdown. Then, click on CONTINUE
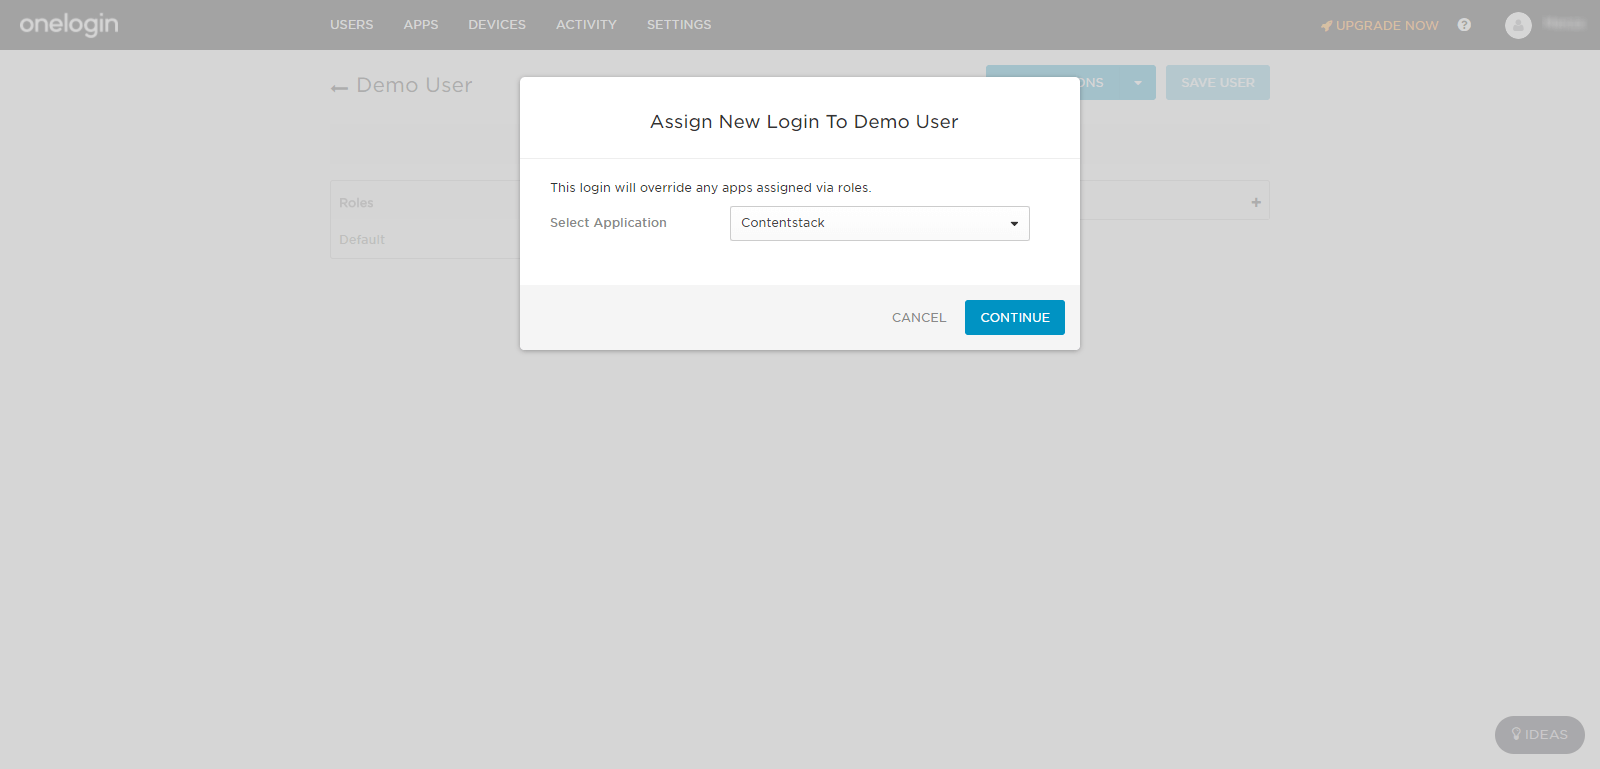 You will be led to the Edit Contentstack Login For Demo User window where you can verify the details. Click on Save.
With this, you are done with setting up the Contentstack app in OneLogin. Proceed to configuring the remaining steps in Contentstack SSO in Step 6.
But, if you want to perform IdP Role Mapping and allow user groups to directly log in to your SSO-enabled organization (without invitation) with the assigned permissions through role mapping, perform Step 4.B.
B - Add application to user groups for IdP Role Mapping
Perform this step only if IdP Role Mapping is part of your Contentstack plan.
This is an alternate way of managing users and permissions of your SSO-enabled organization. IdP Role Mapping allows you to map your IdP roles to Contentstack roles while configuring SSO for your organization.
- You can assign a role under Users > Roles. OneLogin will automatically retrieve the list of potential user roles that are currently in your OneLogin account.
- To add a new role, click on the NEW ROLE button located at the top right corner to add a new user role.

- You will be allowed to assign a role name. Provide a role name and click on the check (✓) icon.
- Select the apps that you want to assign the role under the Select Apps to Add section.
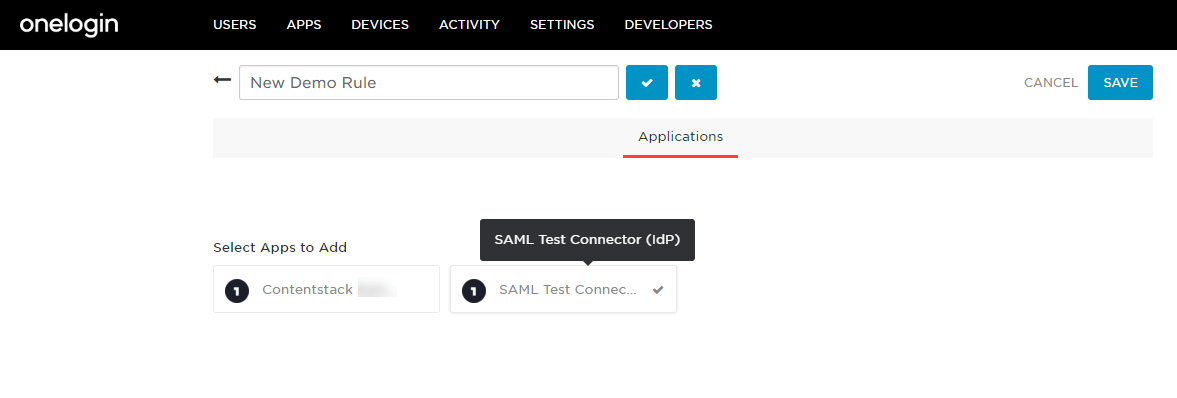
- Click on Save.
You can now proceed to create role mappings in Contentstack for the IdP roles you created. Go to the 3. User Management section of your Contentstack SSO settings and perform Step 5.
- You can assign a single user under Users > All Users. OneLogin will automatically retrieve the list of potential users that are currently logged in to OneLogin based on the user’s email address.
Create Role Mappings in Contentstack
In the User Management section, you will see the following steps:
- Strict Mode: Enable Strict Mode if you do not want any users to access the organization without SSO login.
- Session Timeout: The Session Timeout lets you define the session duration for a user signed in through SSO. While the default is set to 12 hours, you can modify it as needed.
- Advanced Settings: Click on Advanced Settings to expand the IdP Role Mapping section to map IdP roles to Contentstack.
- In the Add Role Mapping section, click on the + ADD ROLE MAPPING link to add new IdP role mapping and enter the following details:
- IdP Role Identifier: Enter the IdP group/role identifier, for example, “Contentstack Developers.”
- Organization Role: Assign either the ADMIN or MEMBER role to the mapped group/role.
- Stack Roles (optional): Assign stacks as well as the corresponding stack-level roles to this role.
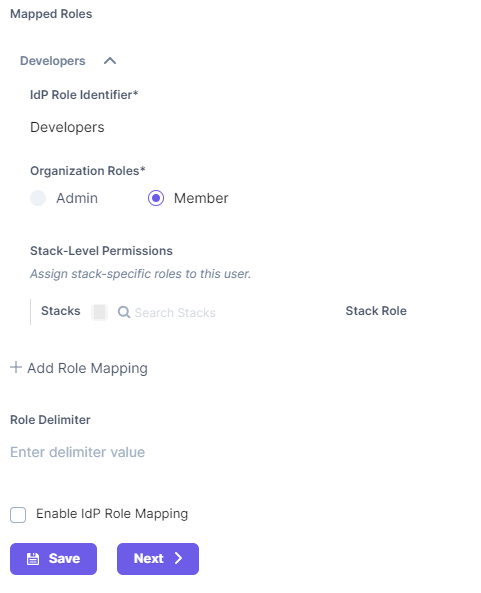
- Enter ; (semicolon) in the Role Delimiter textbox.
- Finally, check the Enable IdP Role Mapping checkbox to enable the feature.
- In the Add Role Mapping section, click on the + ADD ROLE MAPPING link to add new IdP role mapping and enter the following details:
- Click on Next to continue further.
While some details about these steps are given below, you can refer to our general SSO guide for more information.
Test and Enable SSO
Next, you can try out the “Test SSO” and “Enable SSO” steps in Contentstack.
Test SSO
Before enabling SSO, it is recommended that you test the SSO settings configured so far. To do so, perform the following steps
- Click on the Test SSO button and it will take you to Contentstack’s Login Via SSO page, where you need to specify your organization SSO name.
- Then, click on Continue to go to your IdP sign-in page.
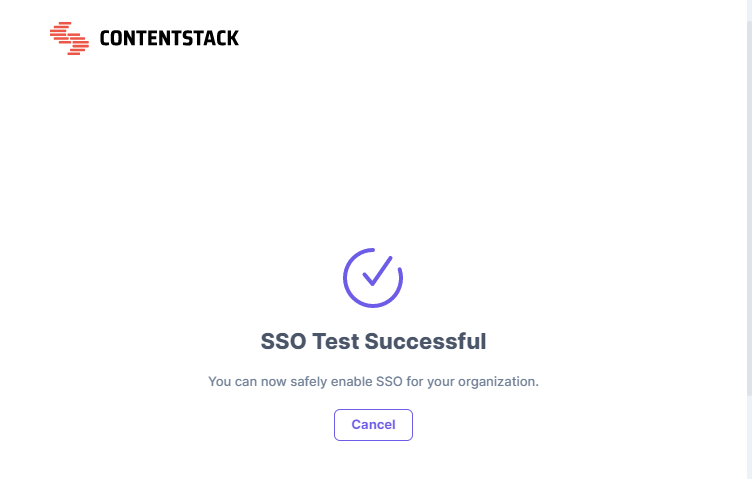
- Sign in to your account. If you are able to sign in to your IdP, your test is successful. On successful connection, you will see a success message as follows:
- If you have enabled IdP Role Mapping, you’ll find the following details in a new page:
- SSO connection established successfully - A success message is displayed.
- IdP Roles received - The list of all the roles assigned to you in your IdP.
- Contentstack-IdP role mapping details - The details of all the Contentstack Organization-specific and Stack-specific roles mapped to your IdP roles.
- Click on the Close button. Now, you can safely enable SSO for your organization.
Note: While testing SSO settings with IdP Role Mapping enabled, the test will be performed only for the IdP roles of the currently logged-in user (i.e., the Owner performing the test).
Enable SSO
Once you have tested your SSO settings, click Enable SSO to enable SSO for your Contentstack organization.
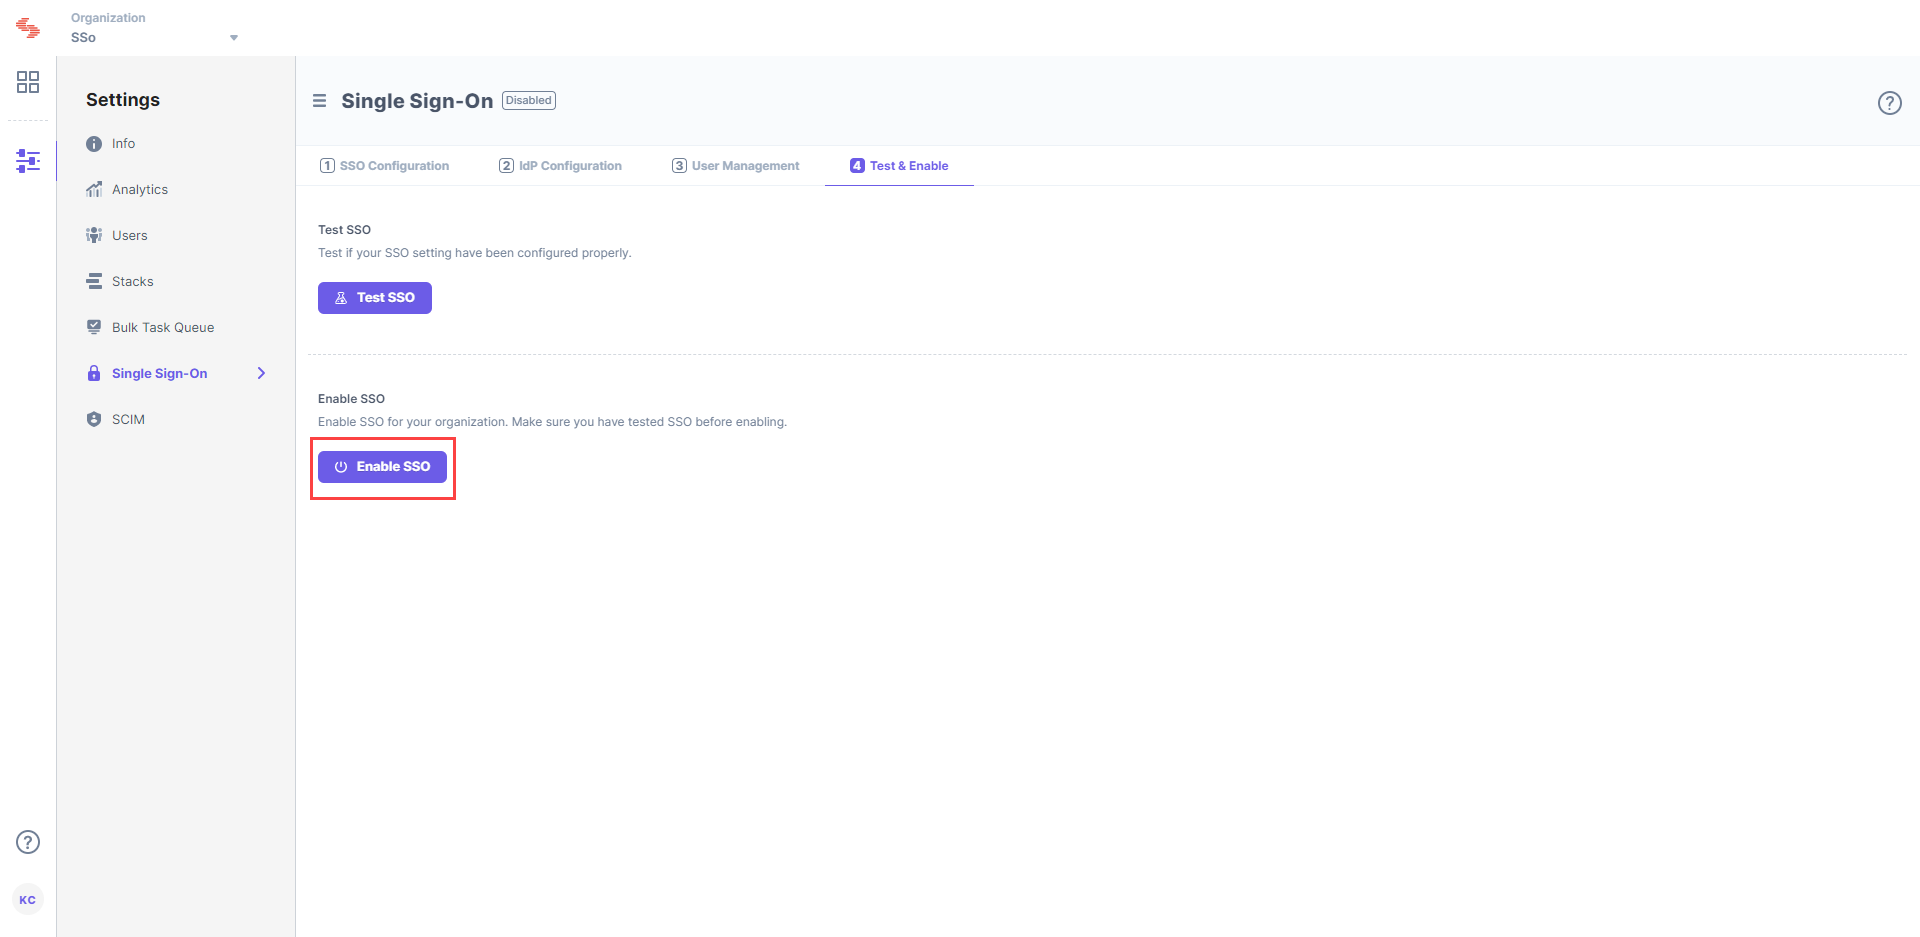
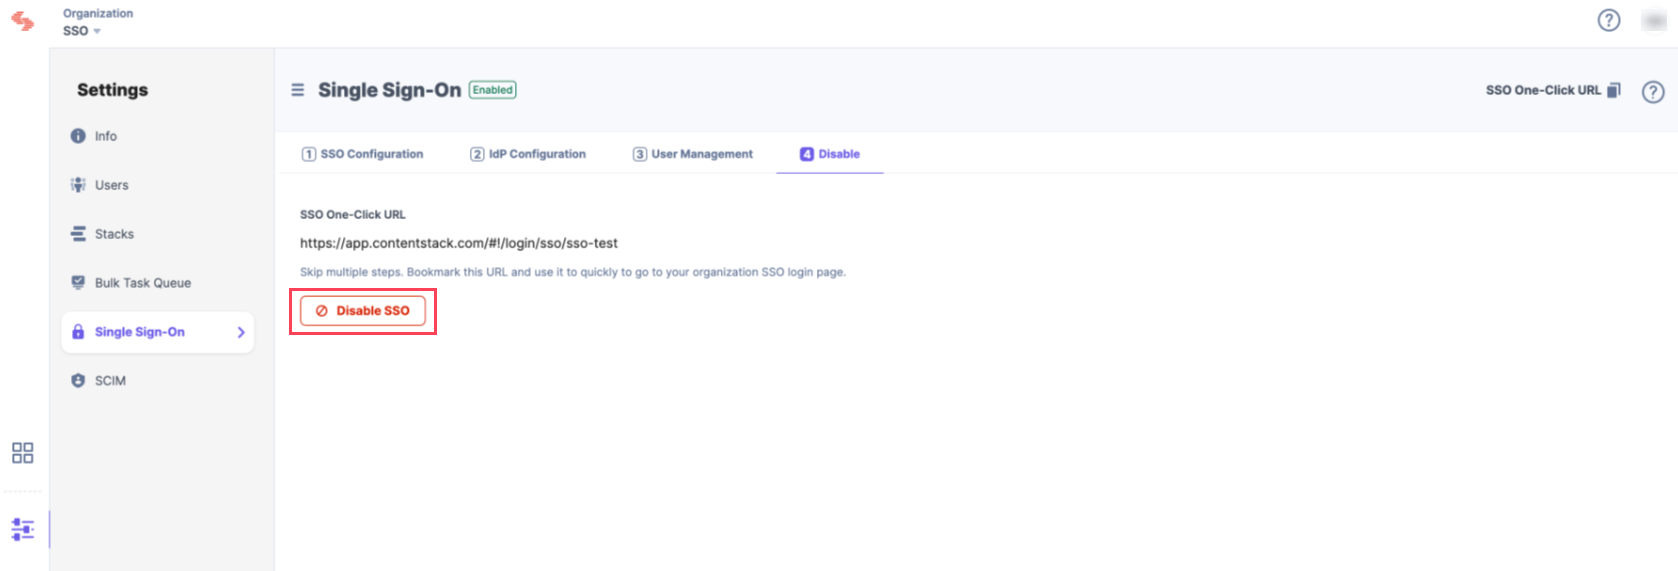
Confirm your action by clicking on Yes.Once this is enabled, users of this organization can access the organization through SSO. If needed, you can always disable SSO from this page as well.


.svg?format=pjpg&auto=webp)
.svg?format=pjpg&auto=webp)
.png?format=pjpg&auto=webp)


.png?format=pjpg&auto=webp)