Set up SSO with Active Directory Federation Services (AD FS)
This step-by-step guide explains how to set up Single Sign-On in Contentstack with AD FS as your SAML 2.0 Identity Provider (IdP):
- Create SSO Name and ACS URL in Contentstack
- Configure Windows Server
- Edit Claim Rules for your AD FS App
- Configure AD FS details in Contentstack
Note: This guide covers SAML 2.0 SSO setup using Windows Server 2012 R2 Standard (Windows Server 2008R2 is supported too, but requires additional setup), and AD FS 2.0 serves as the Identity Provider.
Let’s go into each of the processes in detail.
-
Create SSO Name and ACS URL in Contentstack
- Log in to your Contentstack account, go to the Organization Settings page and click on the SINGLE SIGN-ON tab.
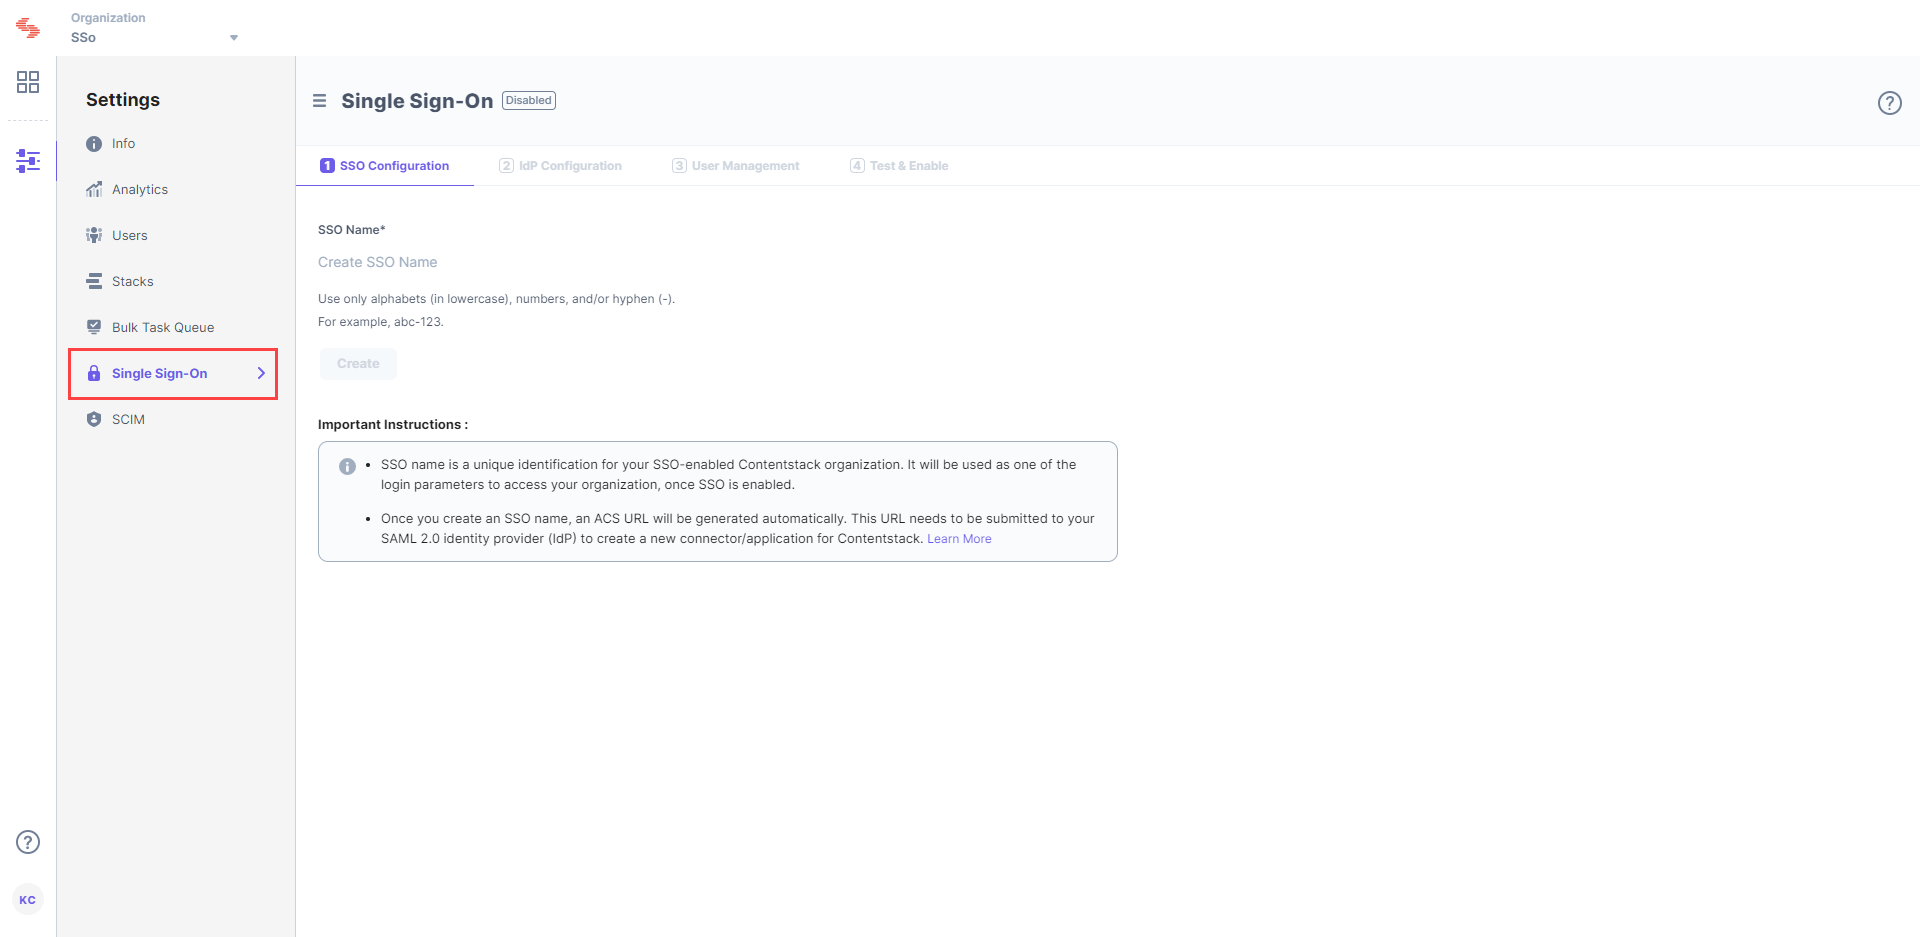
- Enter an SSO Name of your choice, and click Create. For example, if your company name is “Acme, Inc.” enter “acme” here. This name will be used as one of the login credentials by the organization users while signing in.
Note: The SSO Name can contain only alphabets (in lowercase), numbers (0-9), and/or hyphens (-).
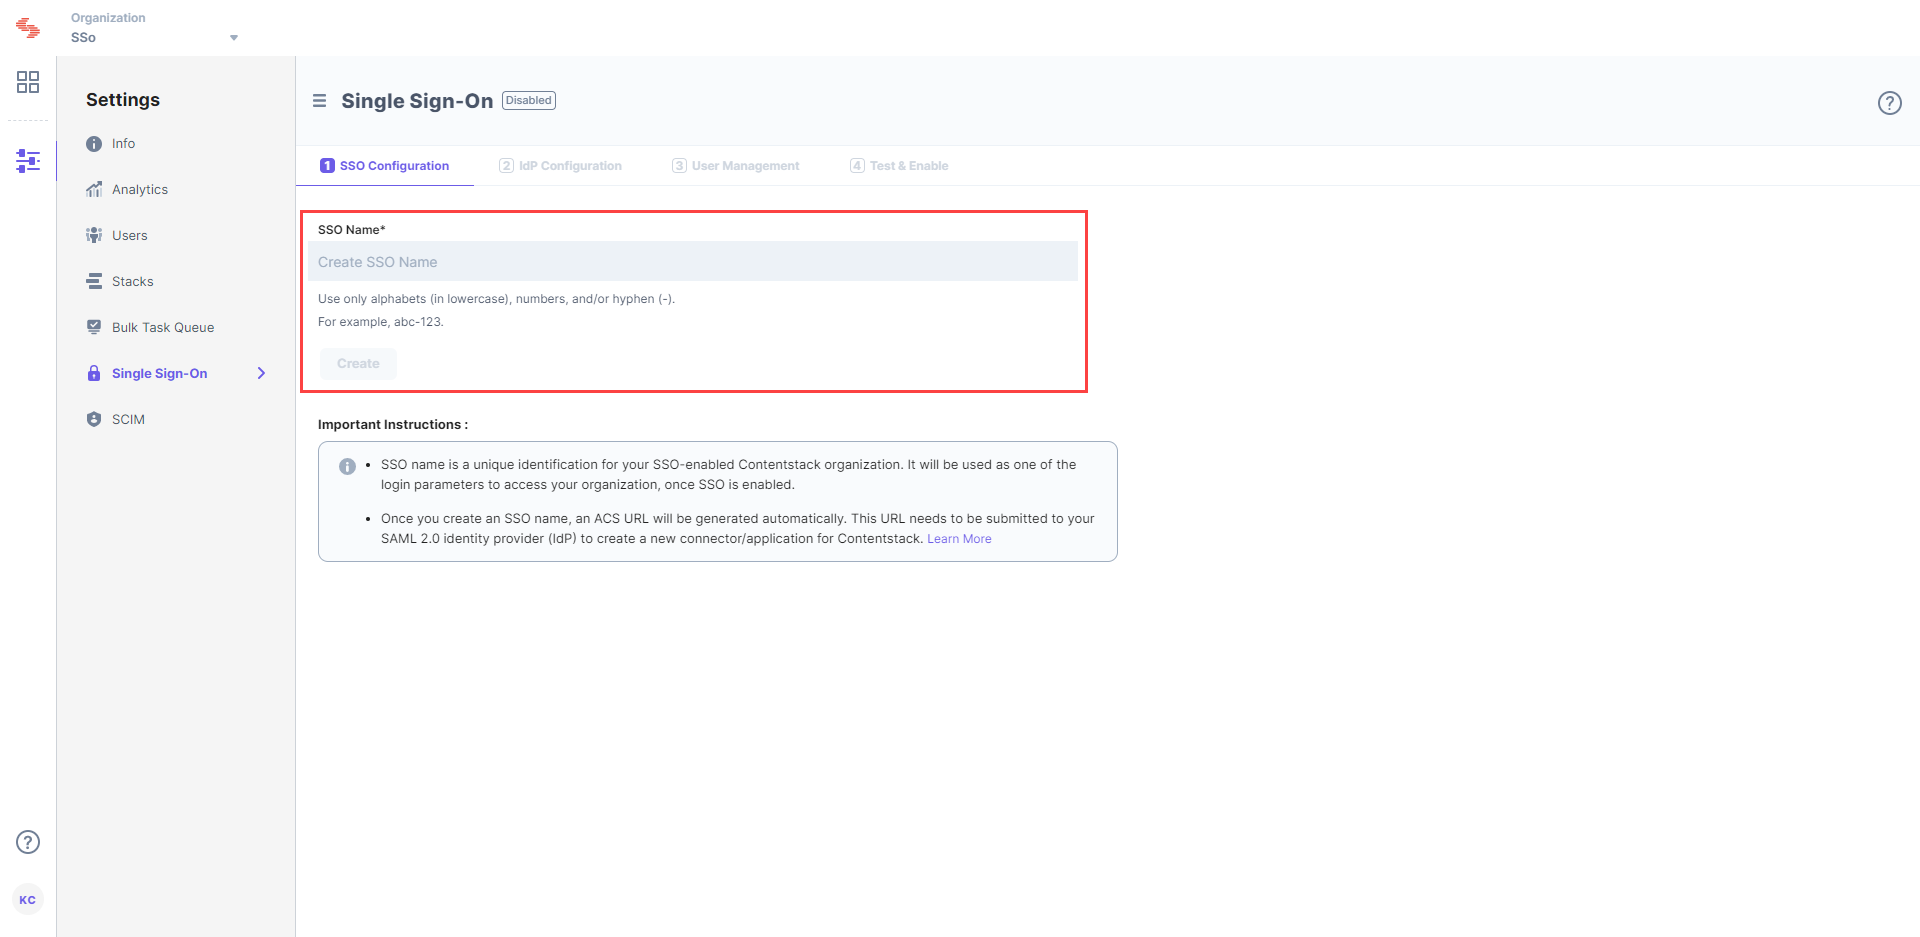
Let's use “sso-test” as the SSO Name.
- This will generate Assertion Consumer Service (ACS) URL and other details such as Entity ID, Attributes, and NameID Format. These details will be used in Step 2 for configuring Contentstack app in AD FS.
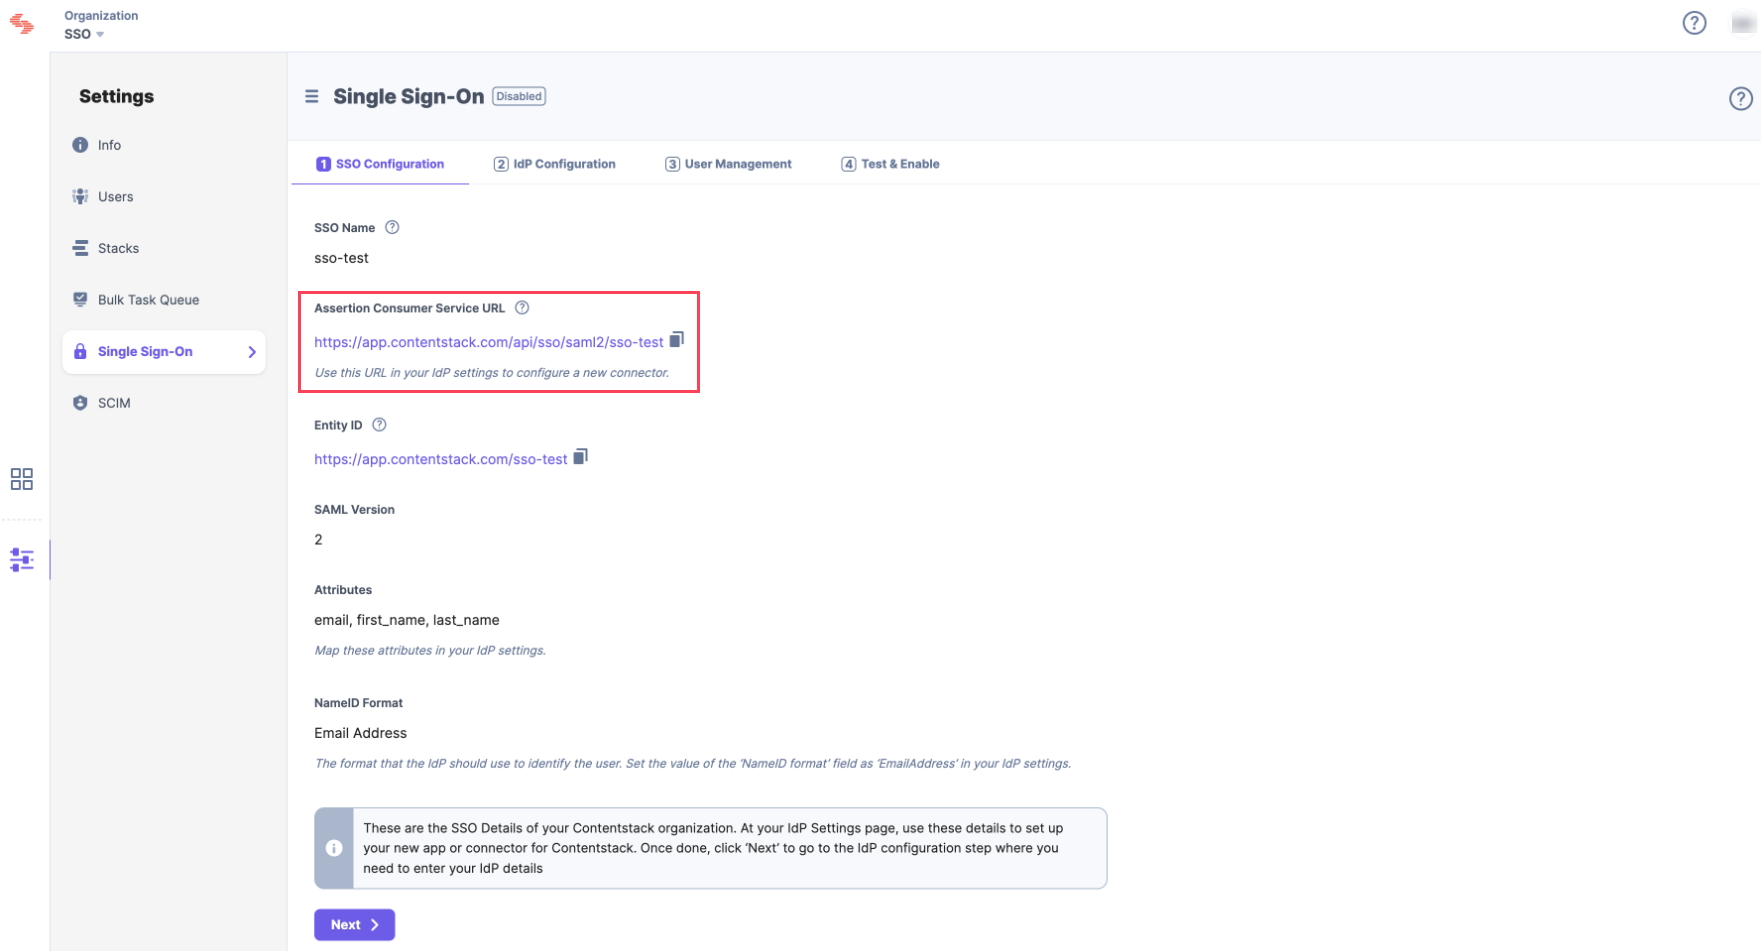
Keep this window open, as you may need these details for setting up the Contentstack app in AD FS.
- Log in to your Contentstack account, go to the Organization Settings page and click on the SINGLE SIGN-ON tab.
Configure Windows Server
- Open the AD FS Management Console, you will see the dashboard as follows:
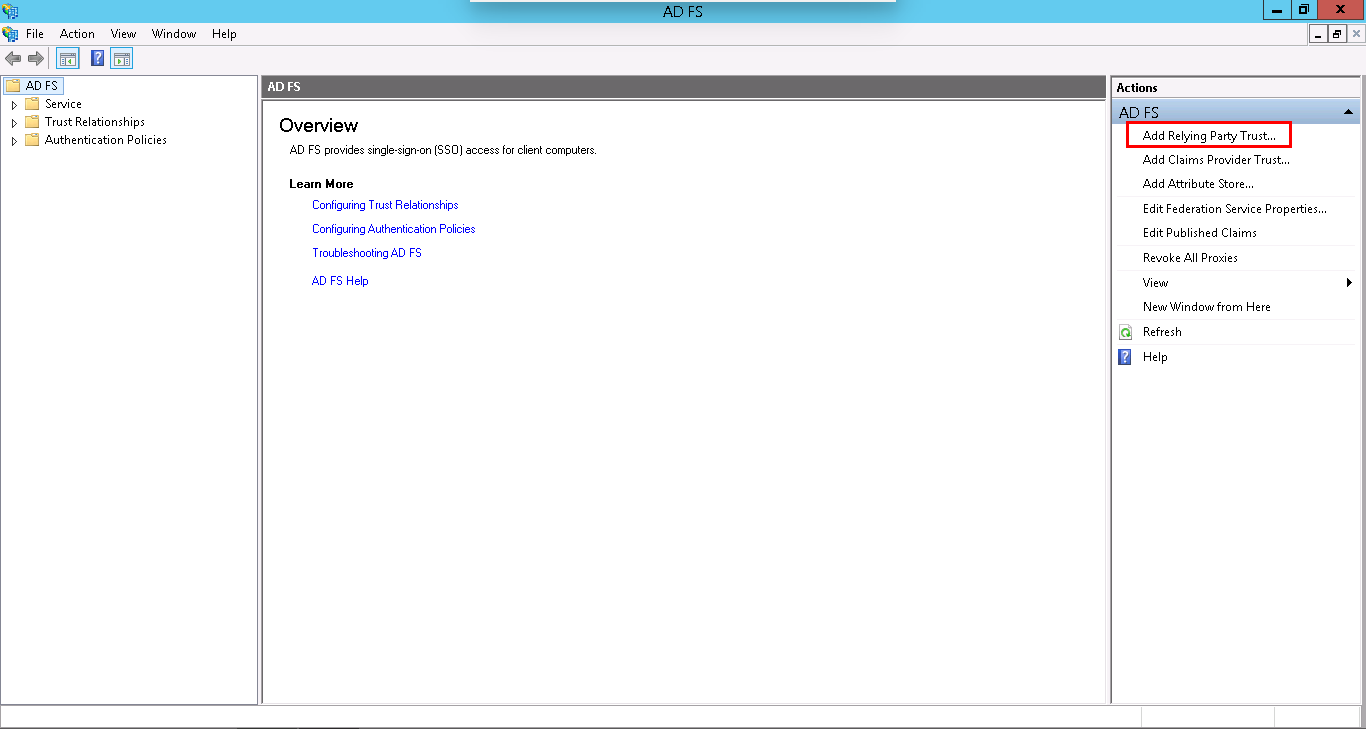
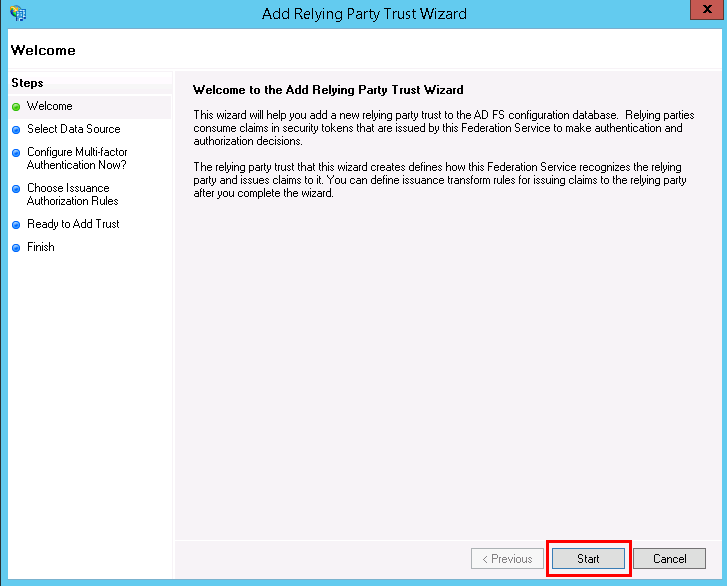
- We will define a Relying Party Trust (RPT) which will serve as a connection between AD FS and Contentstack. Click on Add Relying Party Trust from the Actions sidebar on the right as shown in the above screenshot. This will open the Add Relying Party Trust Wizard where you need to perform certain steps to create your own RPT. Click on Start:
- Select a data source for your Windows Server. Choose Enter data about the relying party manually. This option will allow you to manually enter the details of the relying party organization.
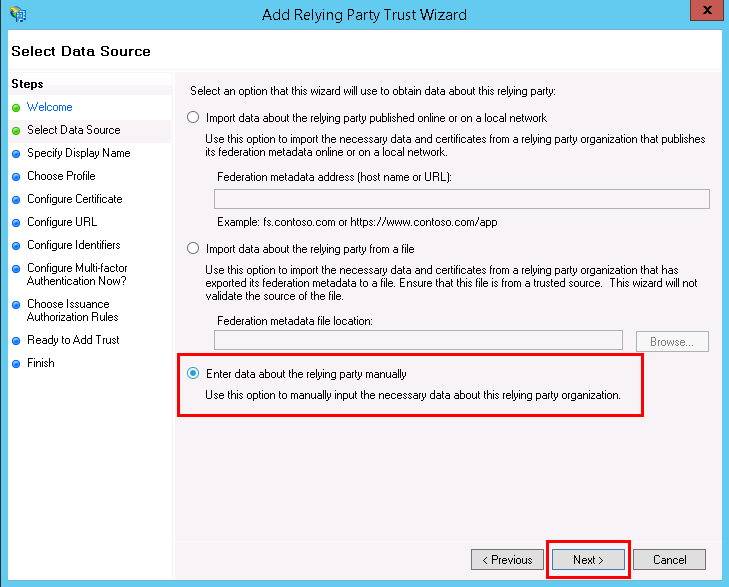 Click on Next to proceed ahead.
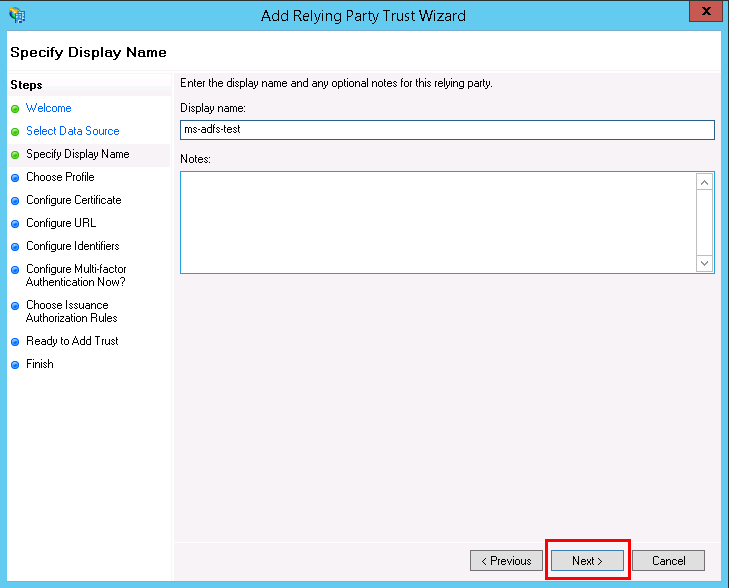
 - Enter a name for your relying party, for example, “ms-adfs-test.”
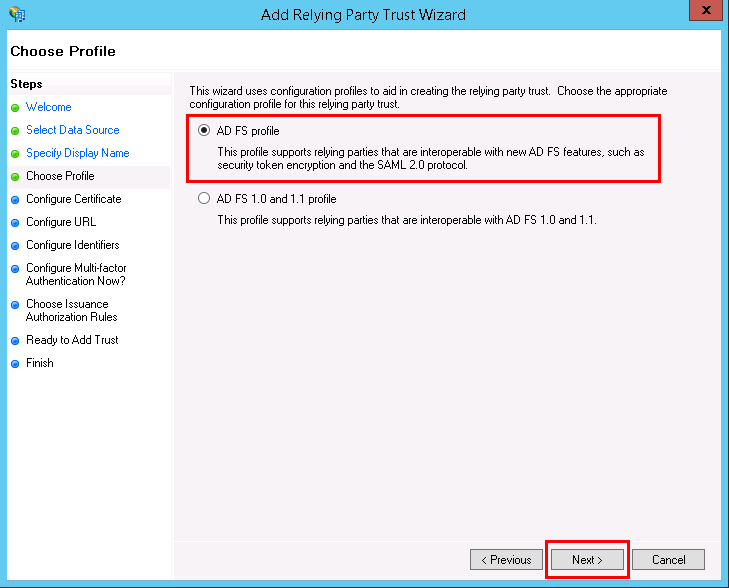
- To choose a profile, click on AD FS profile. This profile supports relying parties that are interoperable with SAML 2.0 protocol. Then, click on Next.
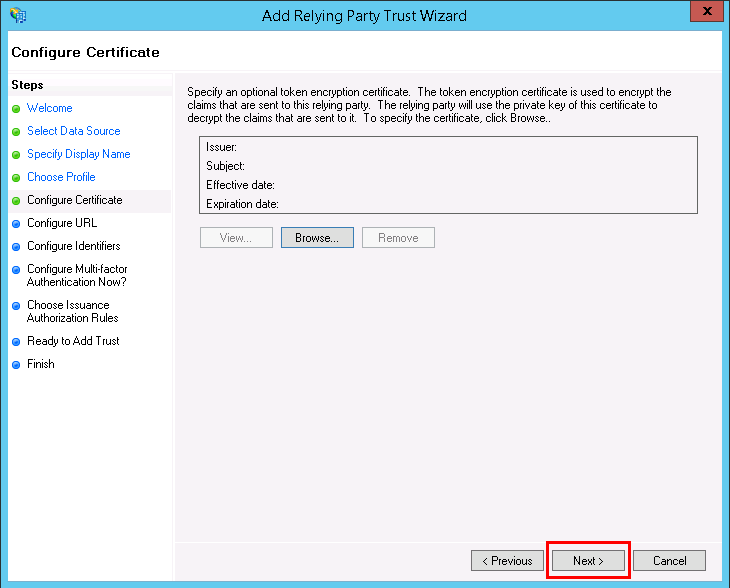
- You can skip the Configure Certificate step, as it is not required. Click on Next.
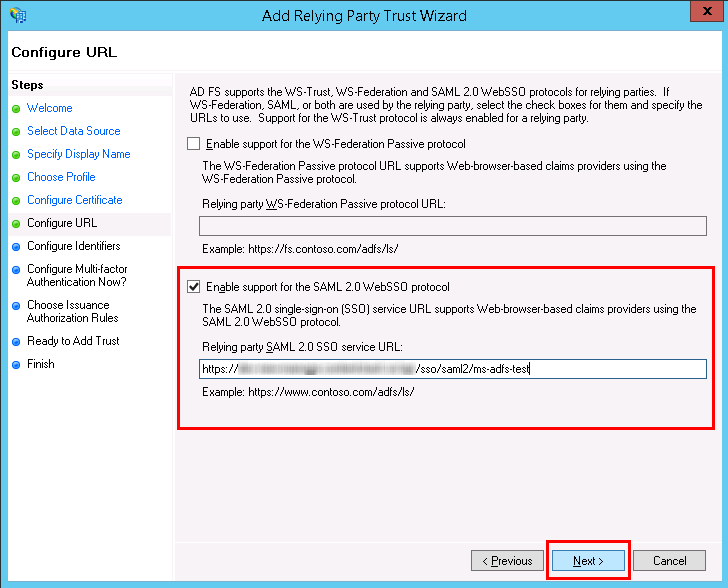
- In Configure URL, select Enable support for the SAML 2.0 WebSSO protocol, and enter the Assertion Consumer Service URL that we created in Contentstack in Step 1.c. Finally, click on Next.
Warning: Do not add a slash “/” at the end of identifier, otherwise, this integration will not work.
- In the Configure Identifiers section, enter the Entity Identifier URL (without a slash “/” at the end) that was generated in Contentstack, and click on Add.
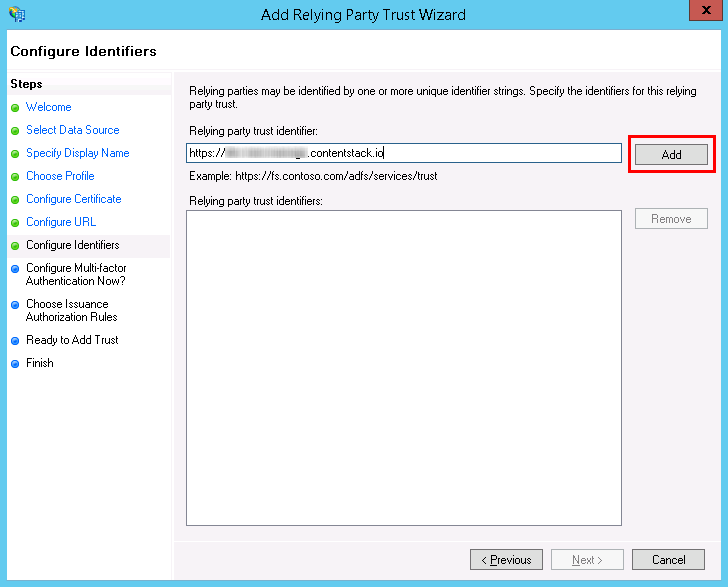
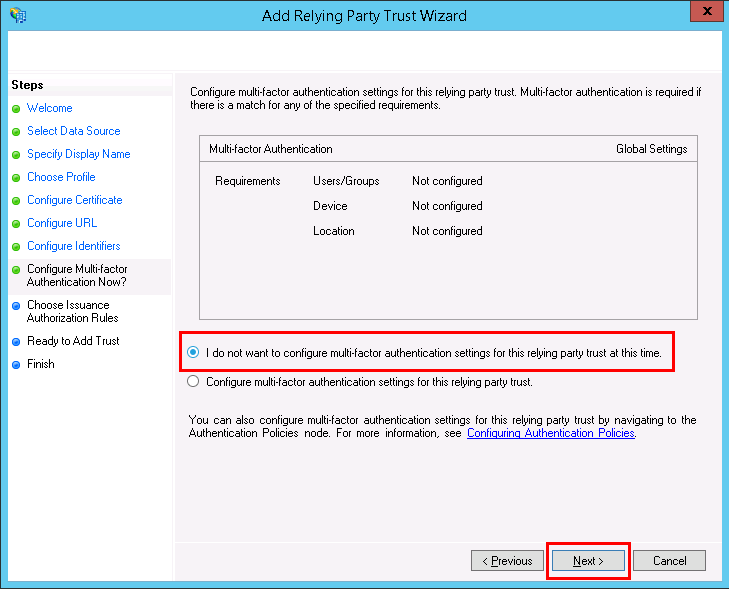
After adding the Entity Identifier URL, click on Next. - Click on the I do not want to configure multi-factor authentication settings for this relying party trust at this time radio button in the Configure Multi-factor Authentication Now? section, and click on Next.
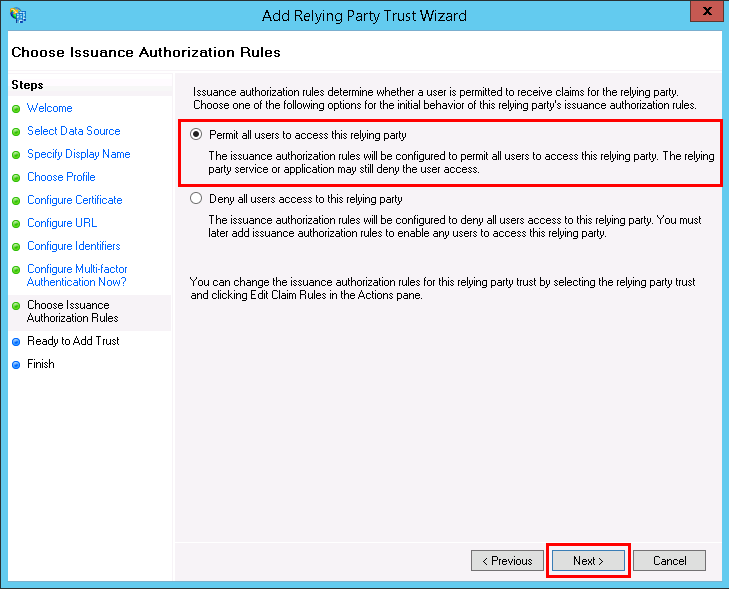
- In the Choose Issuance Authorization Rules section, select Permit all users to access this relying party to allow all Active Directory users to log into Contentstack, and click on Next.
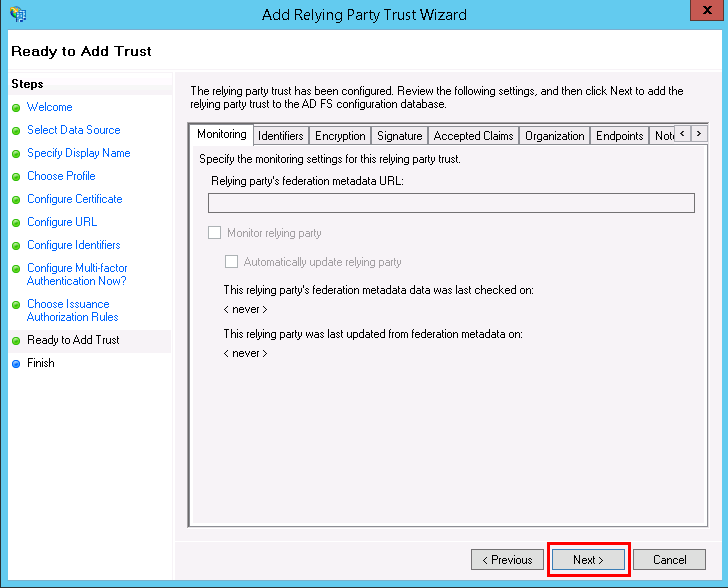
- The Ready to Add Trust section will display the configuration that you set. Don’t change any setting and click on Next.
- Finally, you have successfully configured the Relying Party Trust. Leave the Open the Edit Claim Rules dialog for this relying party trust when the wizard closes option checked to set up the Claim Rules.
- Click on Close to close the wizard.
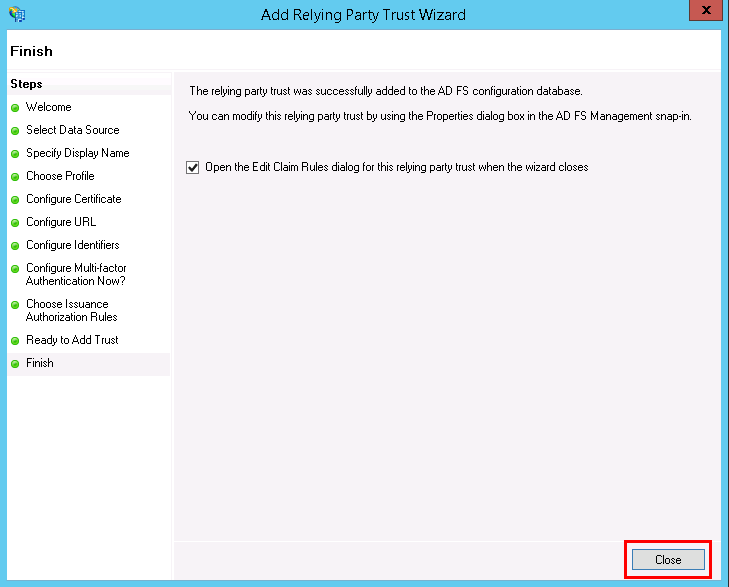
As soon as you have configured Windows Server, the Edit Claim Rules for app_name window opens up. Let us see how to set up claim rules in the next step.
- Open the AD FS Management Console, you will see the dashboard as follows:
Edit Claim Rules for your AD FS App
- In the Edit Claim Rules for ms-adfs-test window, click on the Add Rule button under the Issuance Transform Rules tab.
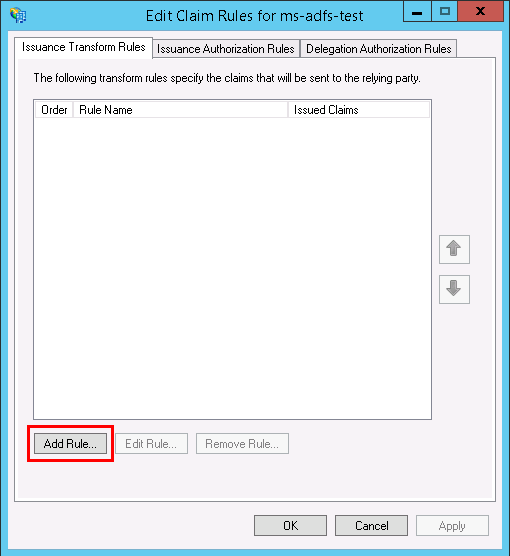
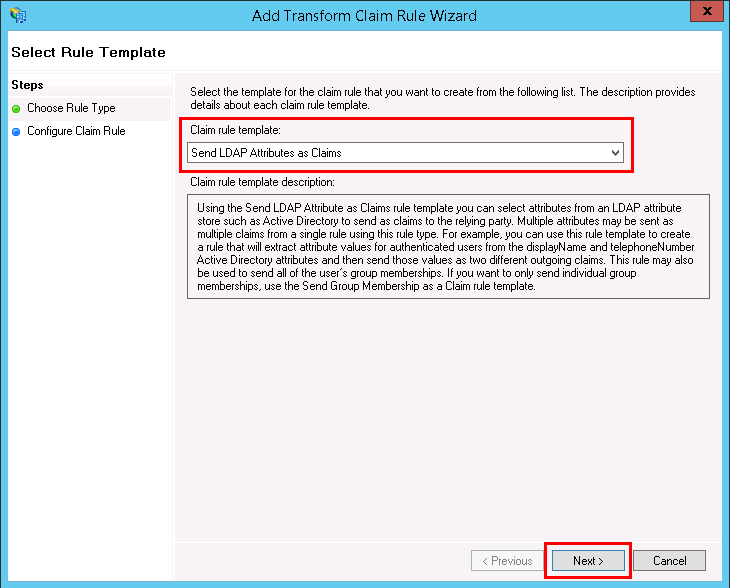
- The Add Transform Claim Rule Wizard window opens where you need to select Send LDAP Attributes as Claims as the Claim rule template, and click Next.
- Enter a name for your Claim Rule, for example, “email,” then set Attribute store to Active Directory.
- Now we need to enter LDAP attributes. We will enter the LDAP attribute E-Mail-Addresses twice and set their outgoing types to E-Mail Address and email. Similarly, we will enter the LDAP attribute Given-Name twice and set their outgoing types to Given-Name and first_name, and enter the LDAP attribute Surname twice and set their outgoing types to Surname and last_name.
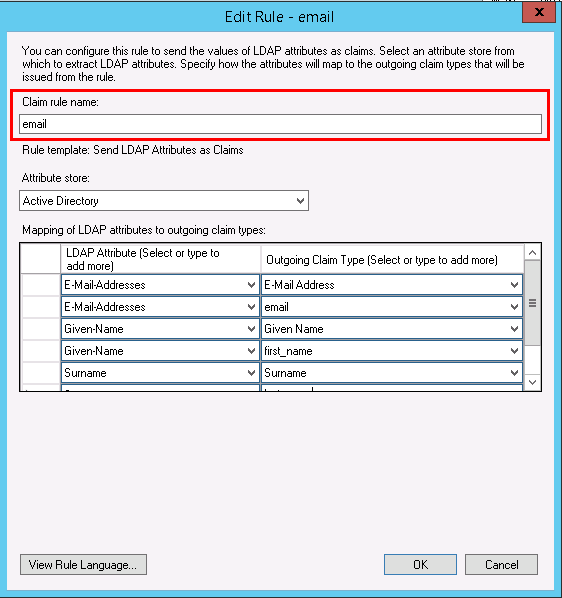
Note: Every attribute has been entered twice in order to provide a user-specific claim type (i.e., email, first_name, and last_name).
- Click OK when you are done adding the required LDAP attributes.
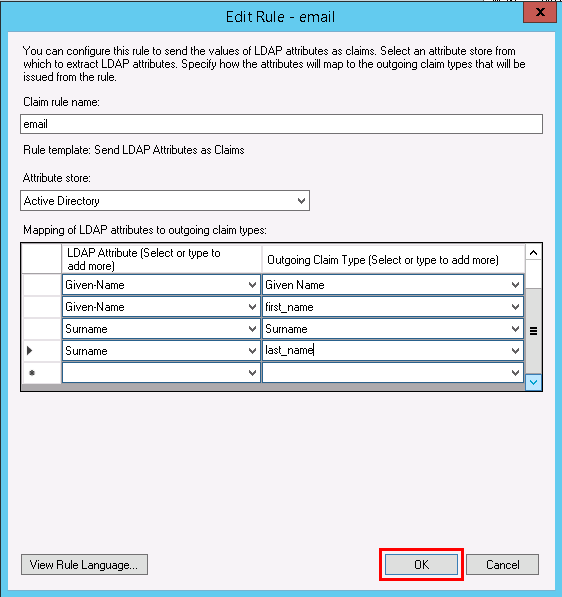
Warning: Make sure you select accurate options because the integration may not work if the variant you selected does not match.
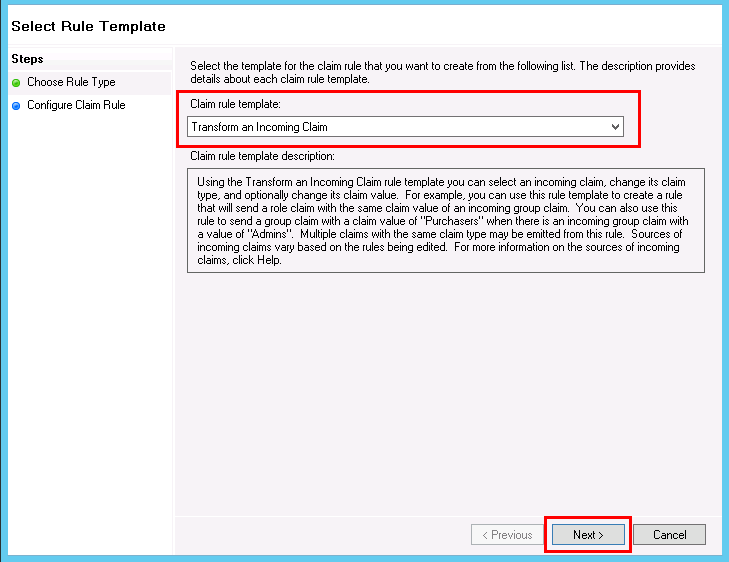
- You need to add another Claim Rule. So, click on Add Rule on the Issuance Transform Rules tab, select Transform an Incoming Claim, and click on Next.
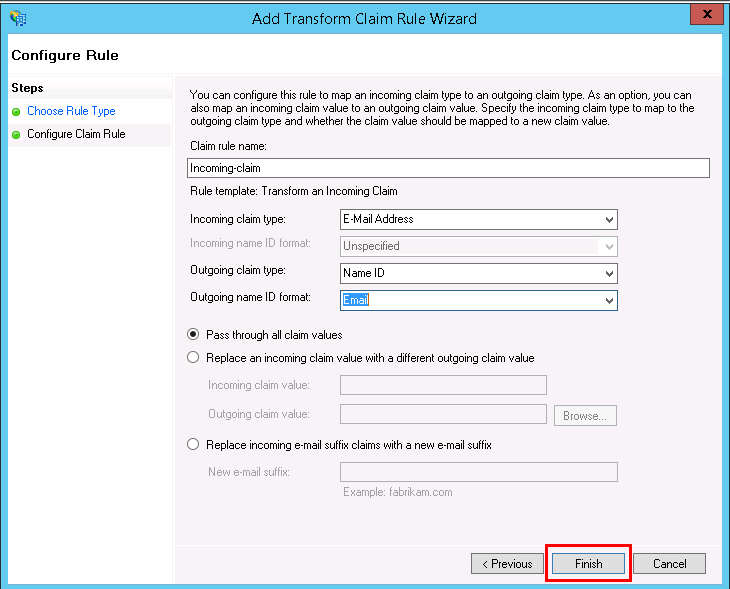
- Enter a Claim rule name, for example, Incoming-claim, set Incoming claim type to E-Mail Address, set Outgoing claim type to Name ID, and set Outgoing name ID format to Email.
- Select Pass through all claim values and click Finish.
- In the Edit Claim Rules window, click OK.
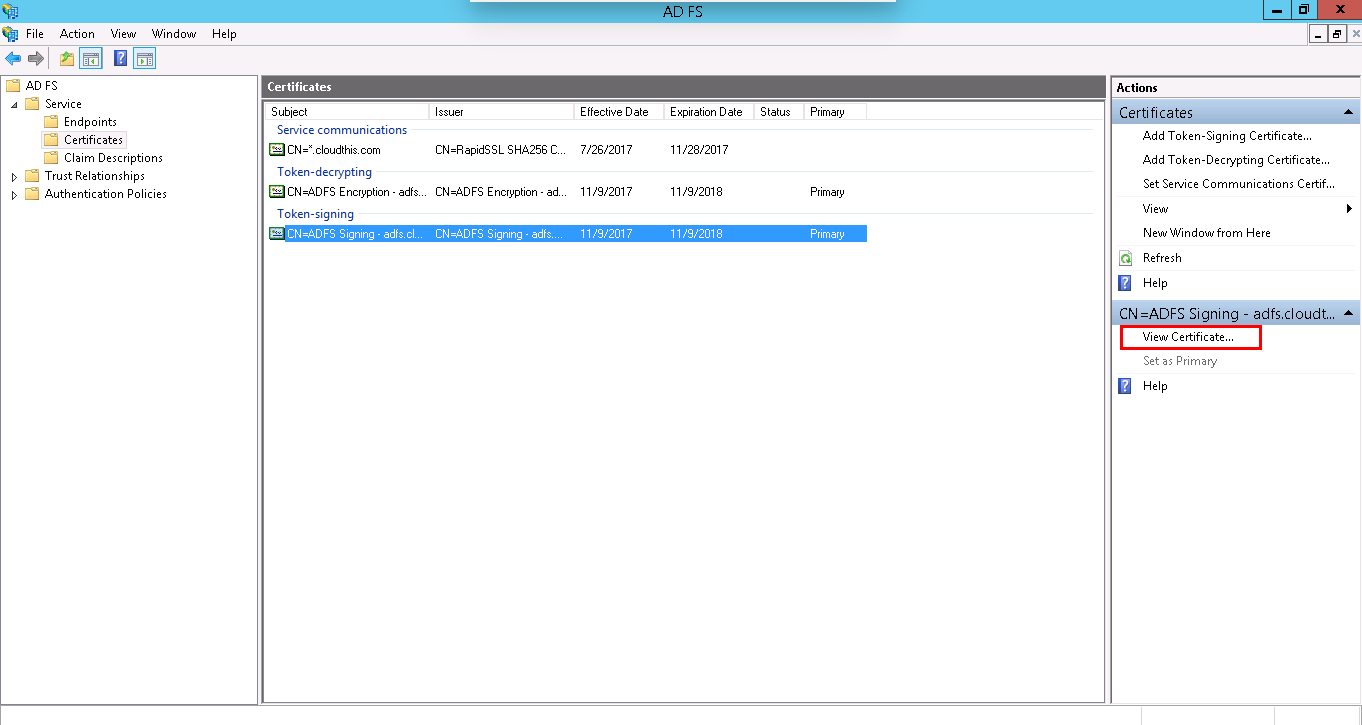
- Now, click on Service > Certificates; select your Token-signing certificate and click View Certificate… in the Actions pane.
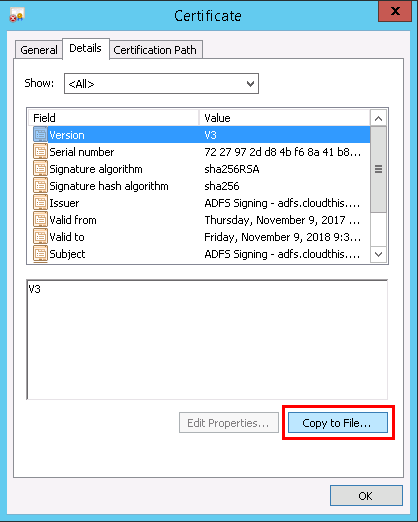
- Click the Details tab and click Copy to File… option.
This will open the Certificate Export Wizard window. Click Next.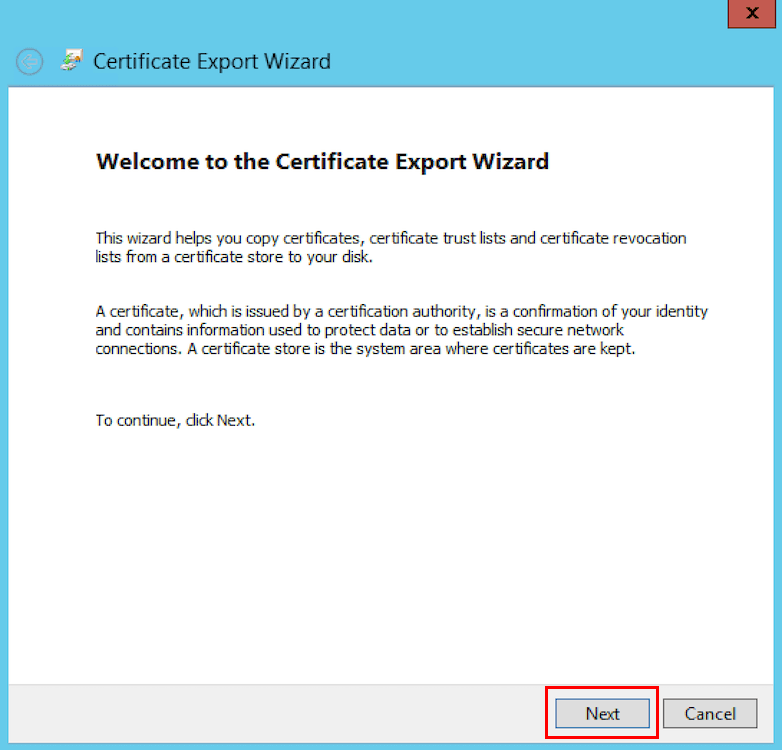
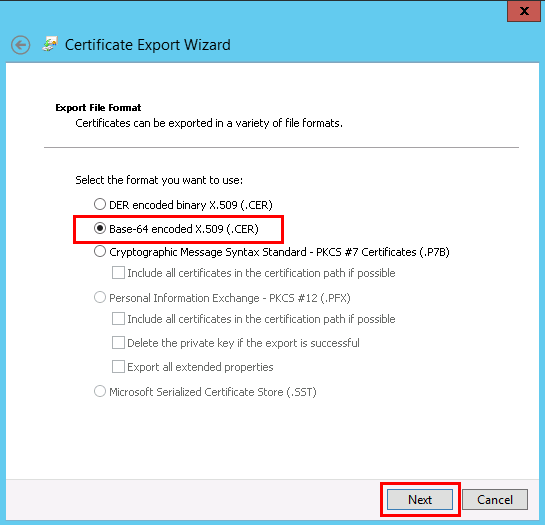
- Select Base-64 encoded X.509 (.CER) as the format of your certificate, and click Next.
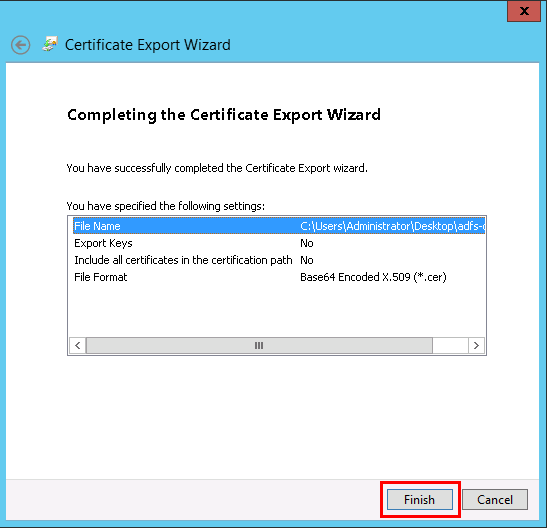
- Next, click on Browse and choose a location in your filesystem to save the certificate file. Click Next, and click Finish and OK if the certificate file was successfully exported.
- On your AD FS Server, click on Service > Endpoints, and locate the endpoint URL path for the SAML 2.0 specification.
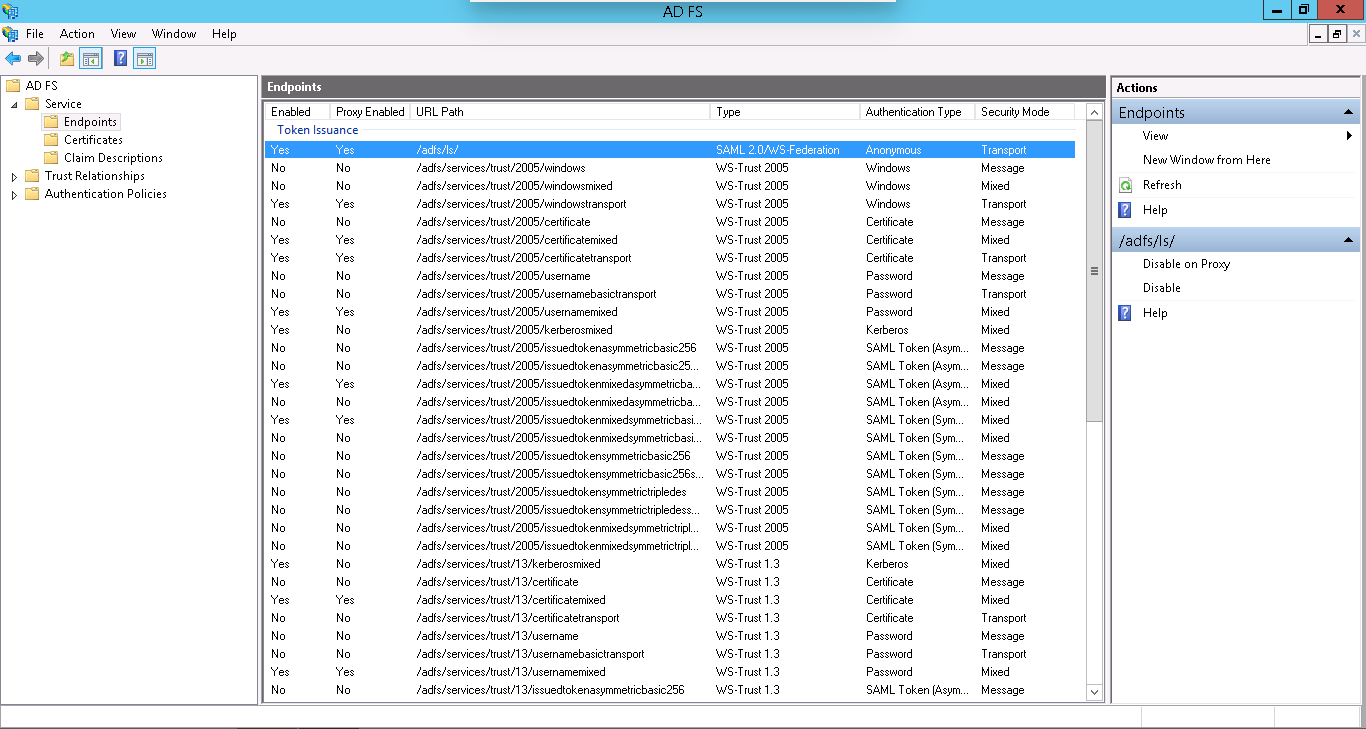
Check the URL path of SAML 2.0/WS-Federation Endpoint. We will be using this when configuring AD FS details in Contentstack.
- In the Edit Claim Rules for ms-adfs-test window, click on the Add Rule button under the Issuance Transform Rules tab.
Configure AD FS details in Contentstack
- Enter the Single Sign-On Login URL of your AD FS service into the Single Sign-on URL field in Contentstack SSO settings. This is generally the URL of your AD FS service followed by the suffix “/adfs/ls/”.
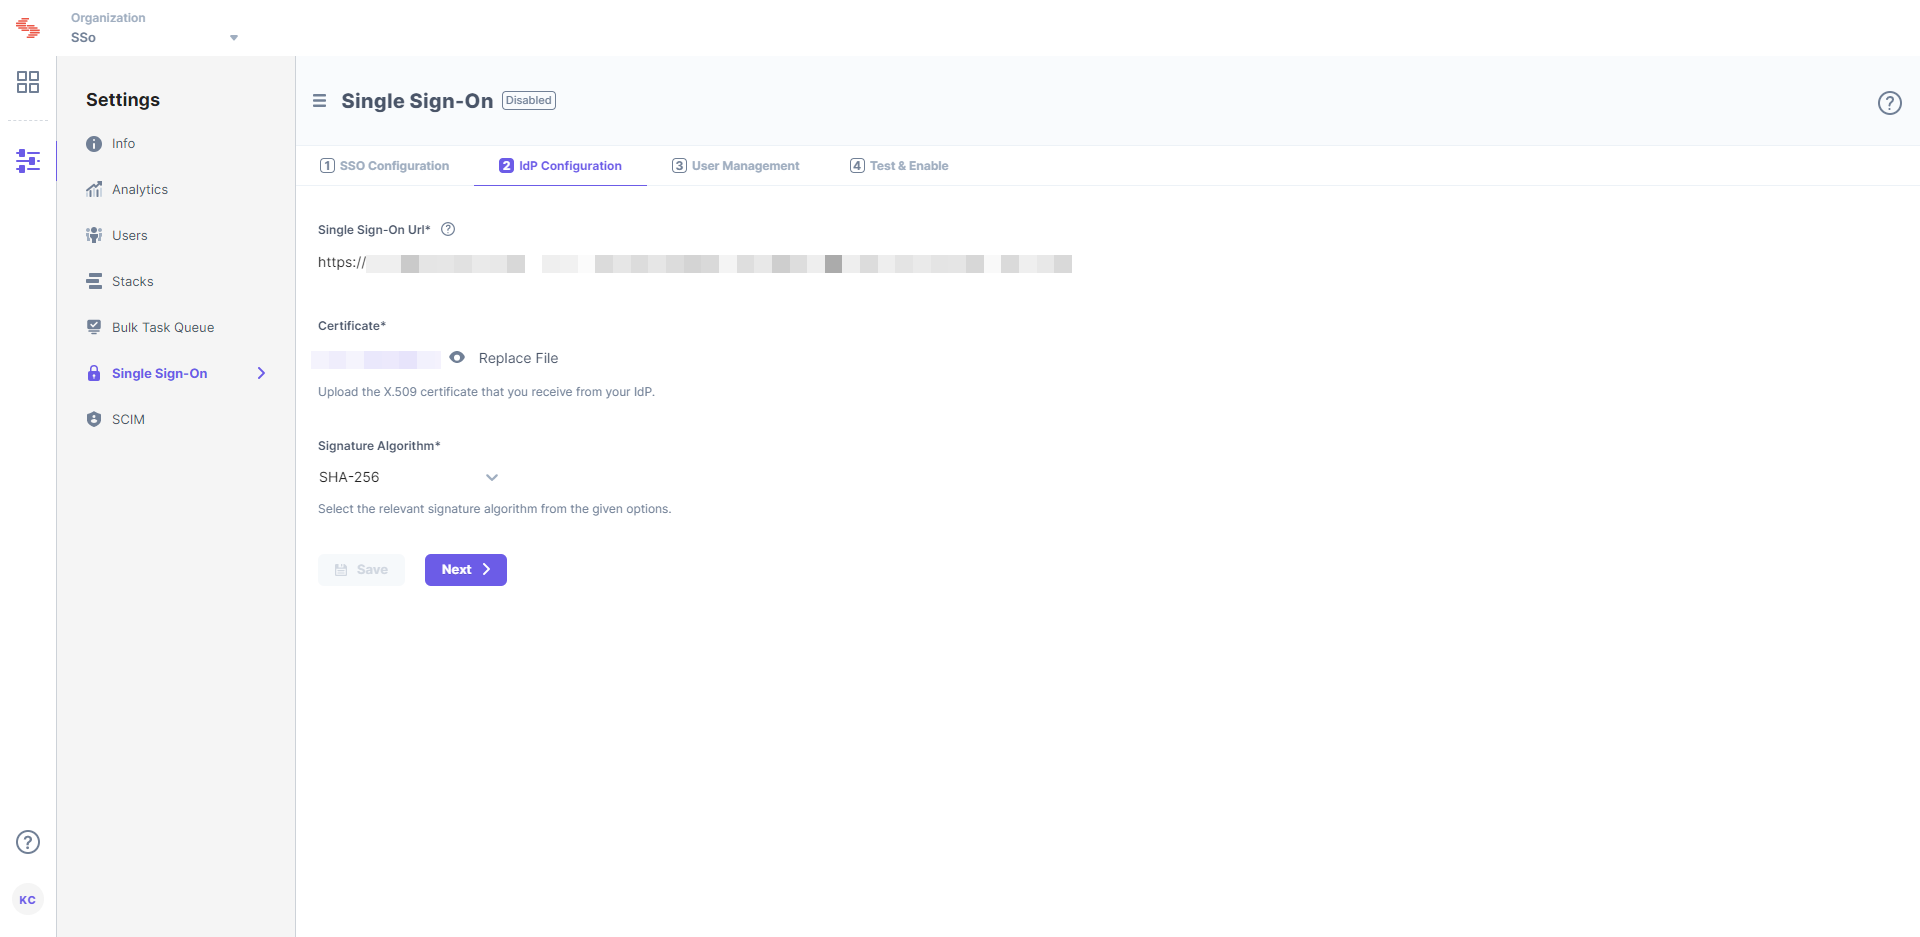
- Upload the certificate that you downloaded into the Certificate field in Contentstack.
- Enter the Single Sign-On Login URL of your AD FS service into the Single Sign-on URL field in Contentstack SSO settings. This is generally the URL of your AD FS service followed by the suffix “/adfs/ls/”.
Further Steps
User Management
In Contentstack, save your settings and go to 3. User Management.
Enable Strict Mode if you do not want any users to access the organization without SSO login.

Session Timeout lets you define the session duration for a user signed in through SSO. While the default is set to 12 hours, you can modify it as per your requirement.
Note: We are yet to introduce IdP Role Mapping for AD FS. If you want to know how it works, check out our IdP Role Mapping document.
Test & Enable
Go to 4. Test & Enable in Contentstack.Click the Test SSO button to check if your SSO settings have been configured properly. It is highly recommended that you test your settings before enabling SSO.

To enable SSO for your Contentstack organization, click on Enable SSO. Once this is enabled, users of the organization can access the organization through SSO.

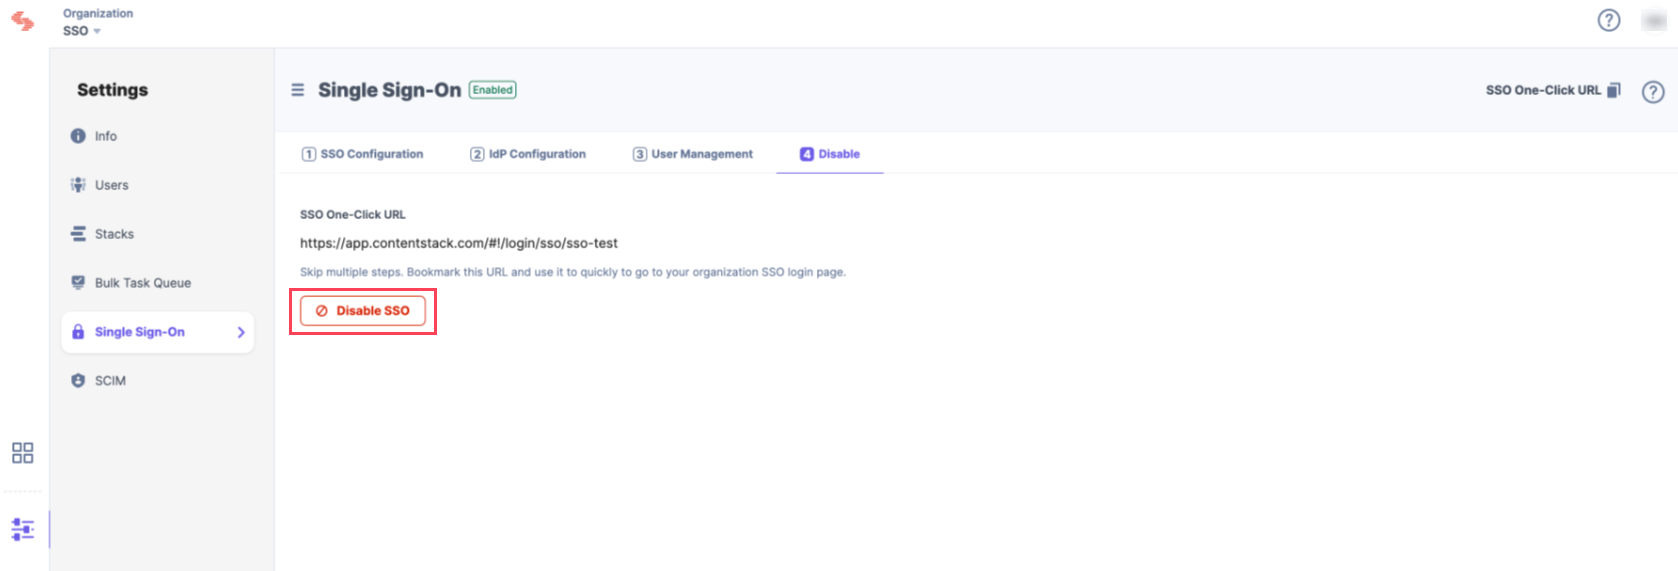
You can disable SSO anytime from the same page.


.svg?format=pjpg&auto=webp)
.svg?format=pjpg&auto=webp)
.png?format=pjpg&auto=webp)


.png?format=pjpg&auto=webp)