Form.io App Installation Guide
Form.io is a data and form management platform for advanced web-based applications. It provides a serverless application architecture through which you can easily embed forms through API within your application. It has a flexible user interface designed to ease the form creation process. You can drag and drop the elements to create your customized forms.
With the Contentstack Marketplace Form.io app you can fetch and display forms from the Form.io dashboard within your entries. You can view the form on your website once the entry gets published.
Prerequisites
- Form.io account
- Contentstack account
- Access to the Contentstack Organization/Stack as the Owner/Admin.
This step-by-step guide to install and configure Form.io within your stack.
Steps for Execution
- Fetch Credentials from Form.io
- Install and Configure Form.io in Contentstack Marketplace
- Use Form.io within your Stack Entry
-
Fetch Credentials from Form.io
You must fetch the credentials from the Form.io dashboard to configure the app. Follow the steps to do so:
- Go to Form.io and sign up to create a new account.
- Click the + Create Project button. A pop-up appears.
- Fill out the details such as Project Title, Description, and so on to create a new project. Once done, click the Create Project button.
- In the left navigation panel, click Settings.
- Under Settings, click API Settings.

- Click the + Add Another button.

-
This generates an API Key for your project.
- Below the form title, you can see the Live stage section. This serves as the base URL for the configuration page within Contentstack.

Note: In the Access section, you can change the project-level access permissions for different roles, such as Administrator, Authenticated, Anonymous, and Everyone.
-
Install and Configure Form.io in Contentstack Marketplace
To install the app, log in to your Contentstack account and follow the steps:
- In the left-hand side primary navigation, click the Marketplace icon.
- Click Apps from the left panel.
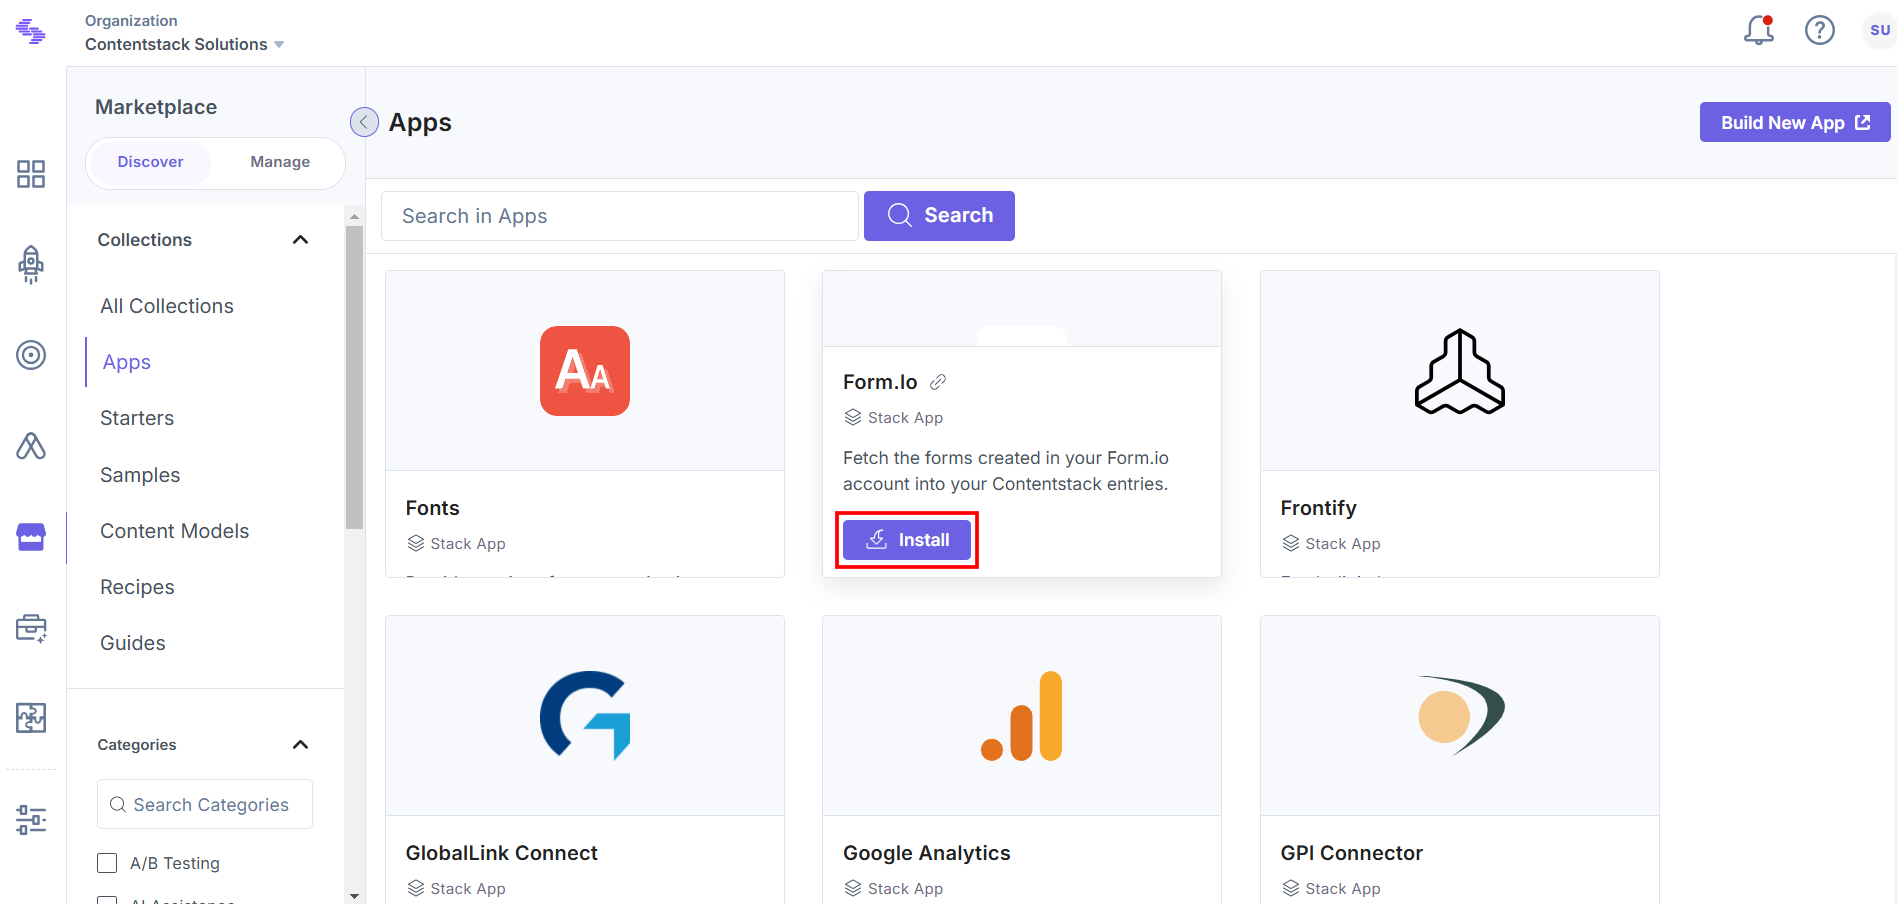
- Within the Marketplace, you can see the available apps. Hover over the Form.io app and click Install.
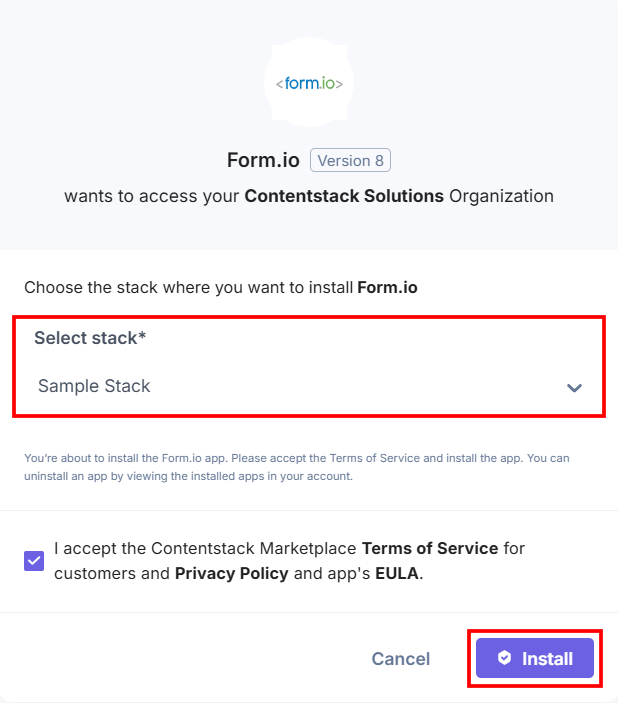
- In the popup window, select the stack where you want to install the Form.io app, accept the Terms of Service, and click the Install button.
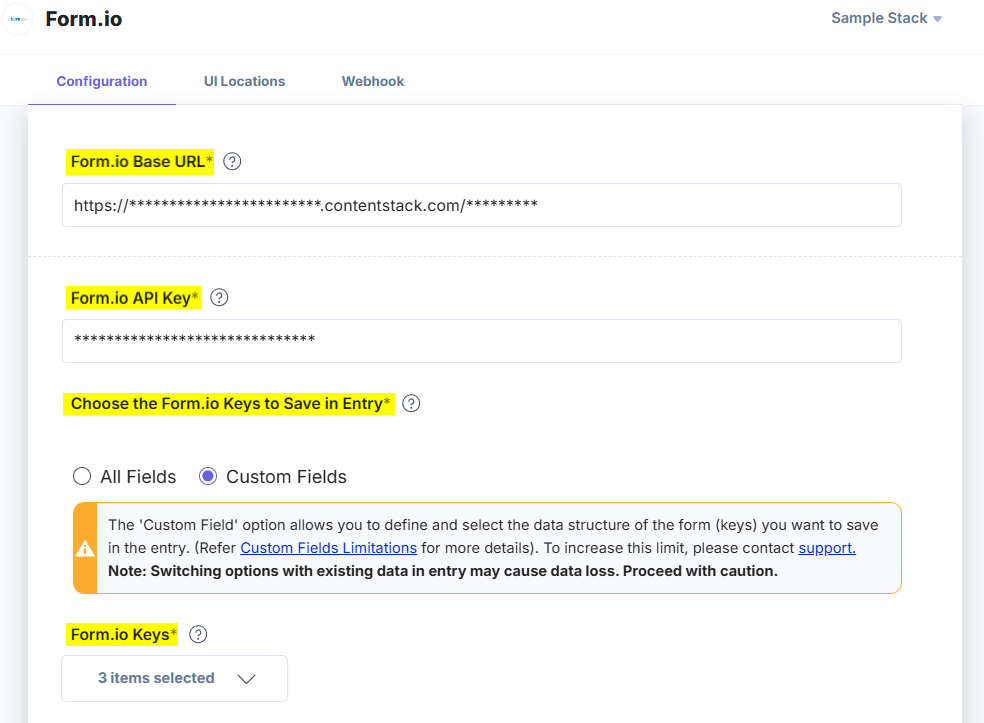
- On the Configuration page, enter the following details:
- Form.io Base URL and Form.io API Key: Enter the Form.io Base URL and Form.io API Key you retrieved from the Form.io dashboard in step 1.
- Choose the Form.io Keys to Save in Entry: Choose how to save the data fetched from the Form.io account in Contentstack entries. If you select the All Fields option, you can add all keys from the response data structure. With Custom Fields, you can define and select the data structure of the form (keys) you want to save in the entry.
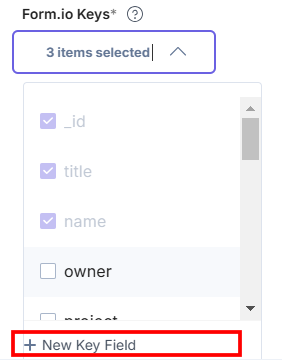
If you select Custom Fields, then the Form.io Keys drop-down appears in which _id, title, and name keys options are selected by default. If you want to create a new key, click the New Key Field option.
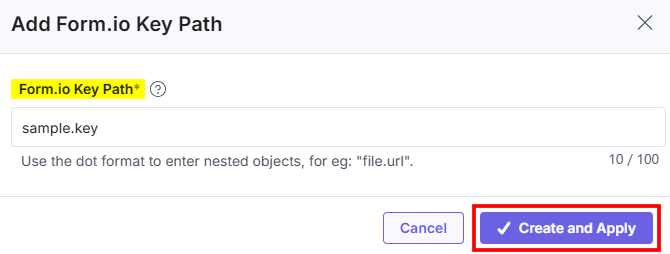
In the Add Form.io Key Path modal, enter the Form.io Key Path and click the Create and Apply button to create a new key.
- Click the Save button.
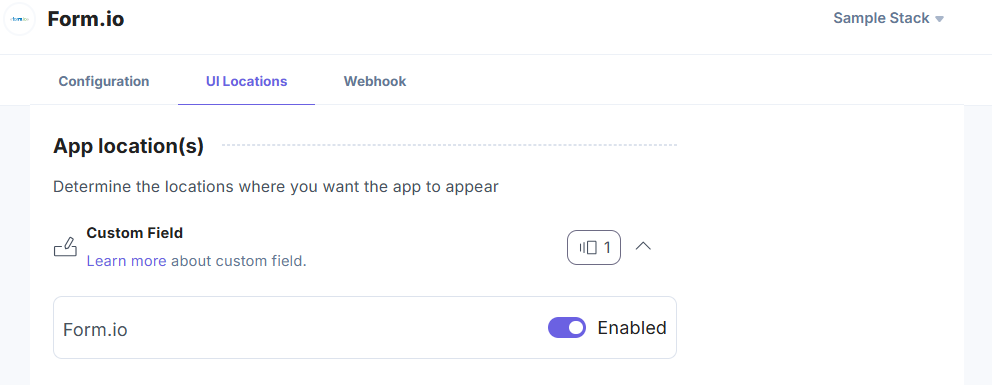
- On the UI Locations tab, you can see the predefined app locations. You can use the toggle button corresponding to each UI location to enable or disable it based on your requirements.
- If the webhook is enabled for your app, you can view the webhook logs under the Webhook tab.
Additional Resource: For more information on UI location and webhooks, please refer to the Installed Apps guide.
- Click Open Stack to start using the Form.io application.
-
Use Form.io within your Stack Entry
To use the Form.io app within an entry of your stack, follow the steps given below:
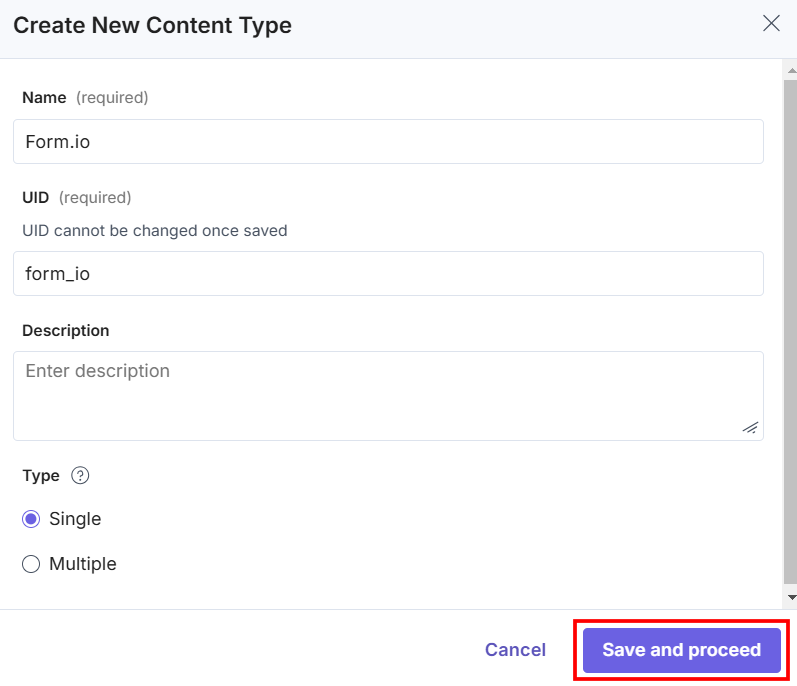
- Go to your stack, and click the Content Models icon on the left navigation panel, and click the + New Content Type button.
- Create a content type by adding relevant details as displayed below:
- In the Content Type Builder page, add a Custom field in your content type by clicking the Insert a field link represented by a + sign.
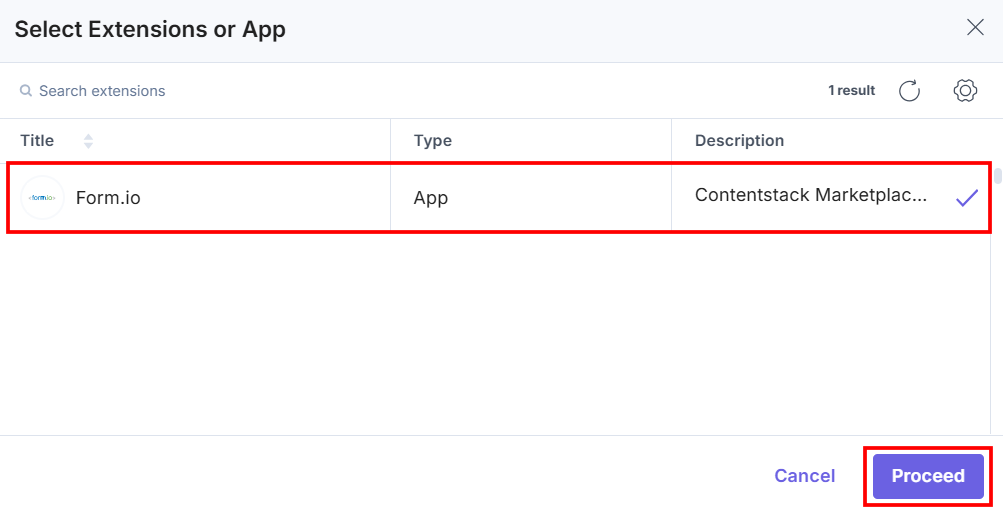
- Under Select Extension or App, select Form.io, and then click the Proceed button.
Change the Display Name of the custom field to your choice, for example, Form.io Custom Field. Optionally, you can add Help Text and Instruction Value for your custom field. This adds the Form.io app in the custom field.
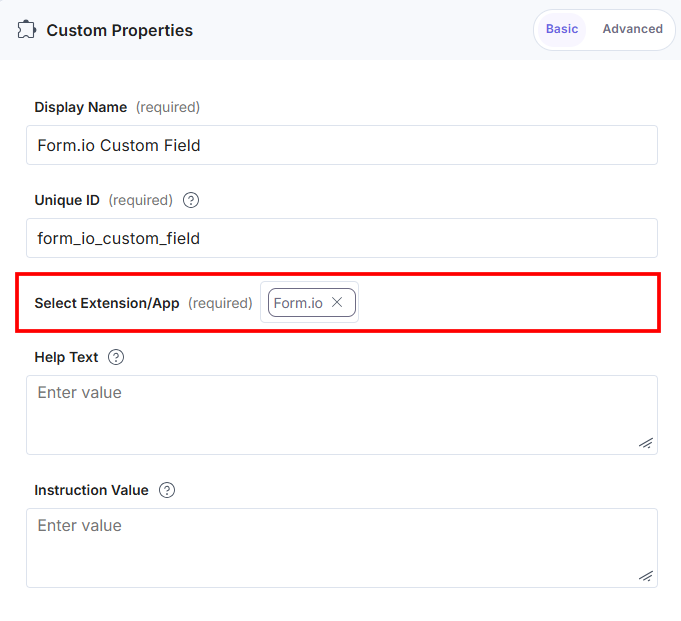
- After adding the app, click Save or Save and Close to save your changes.
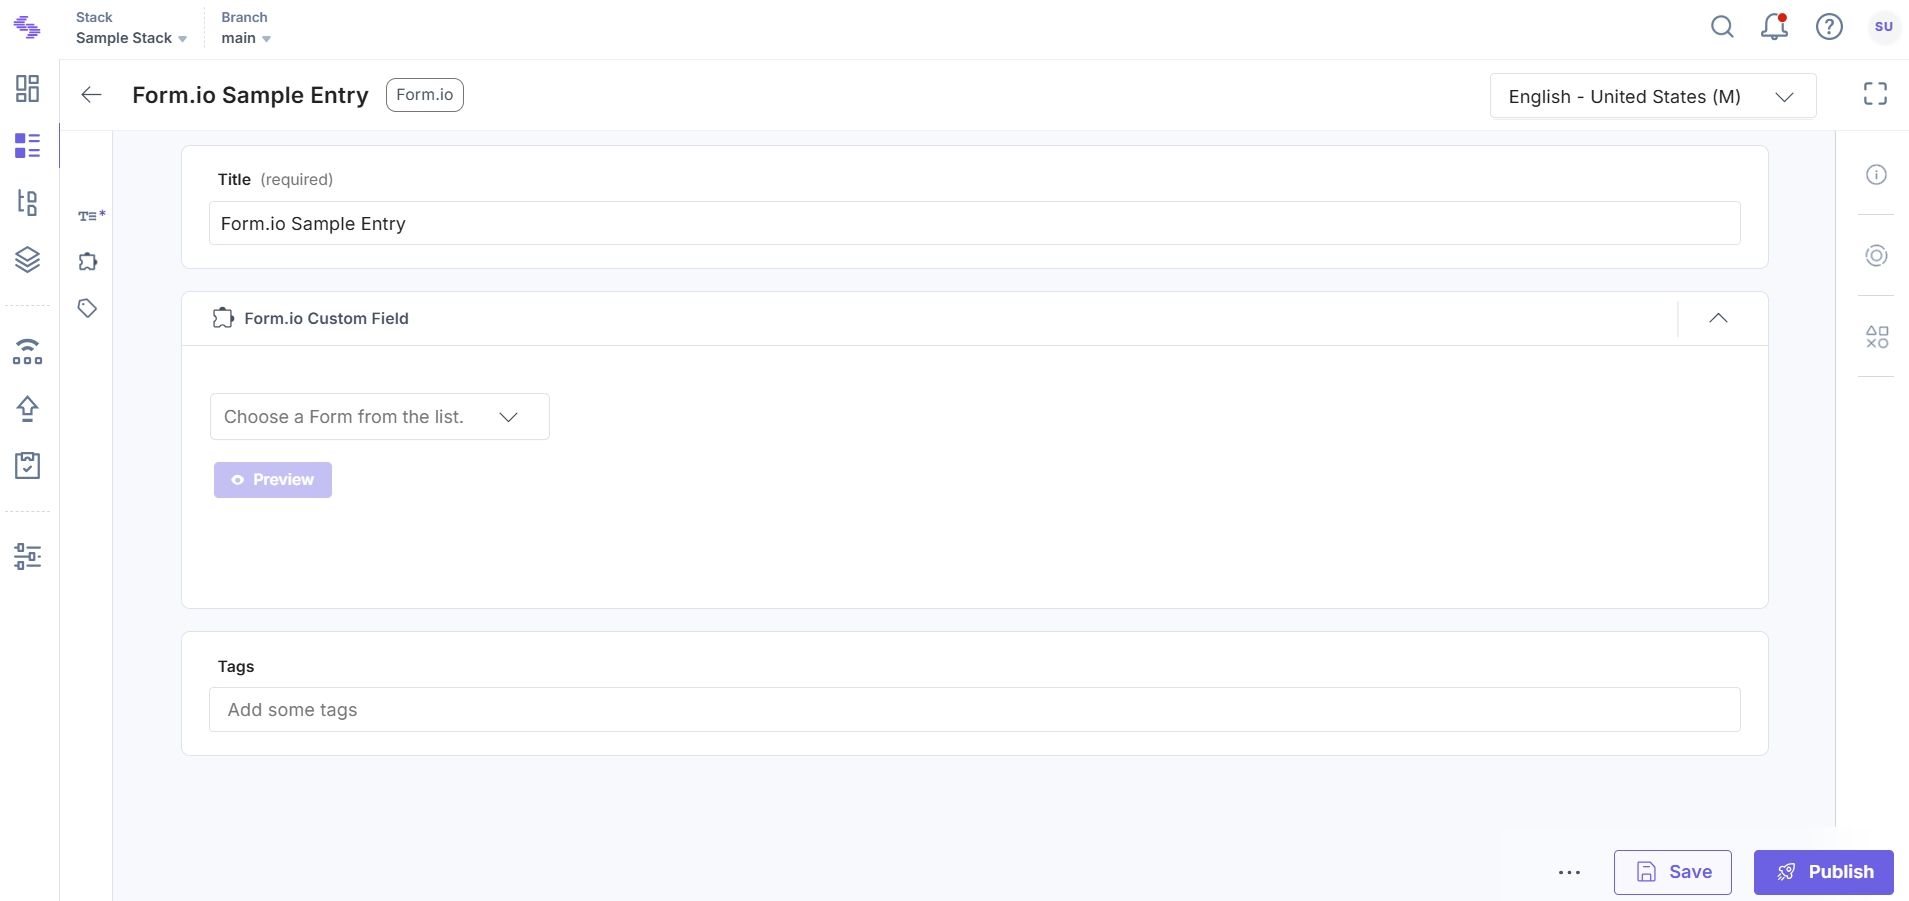
- To use the Form.io app, create an entry for this newly created content type. To do this, in the left navigation panel, navigate to the Entries page, click + New Entry to create a new entry for the above content type, and then click Proceed.
You will see the Form.io app added as a custom field in your entry page as shown below:
- In the custom field, select a form from the dropdown you want to display on your website.
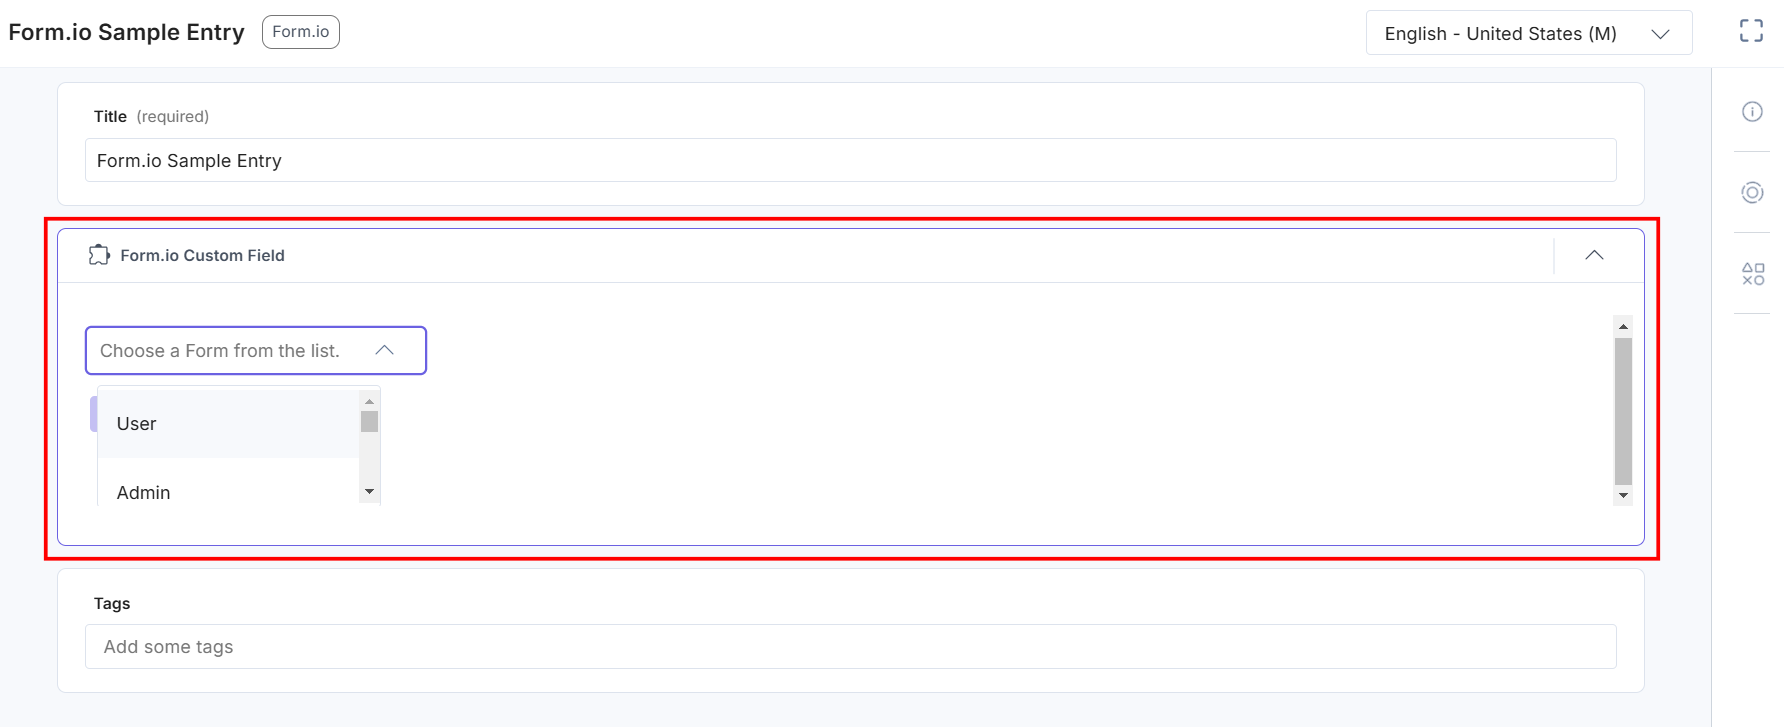
Note: You can select only a single form for each Contentstack entry.
- Click the Preview button to view the form. This redirects you to the Form.io dashboard.
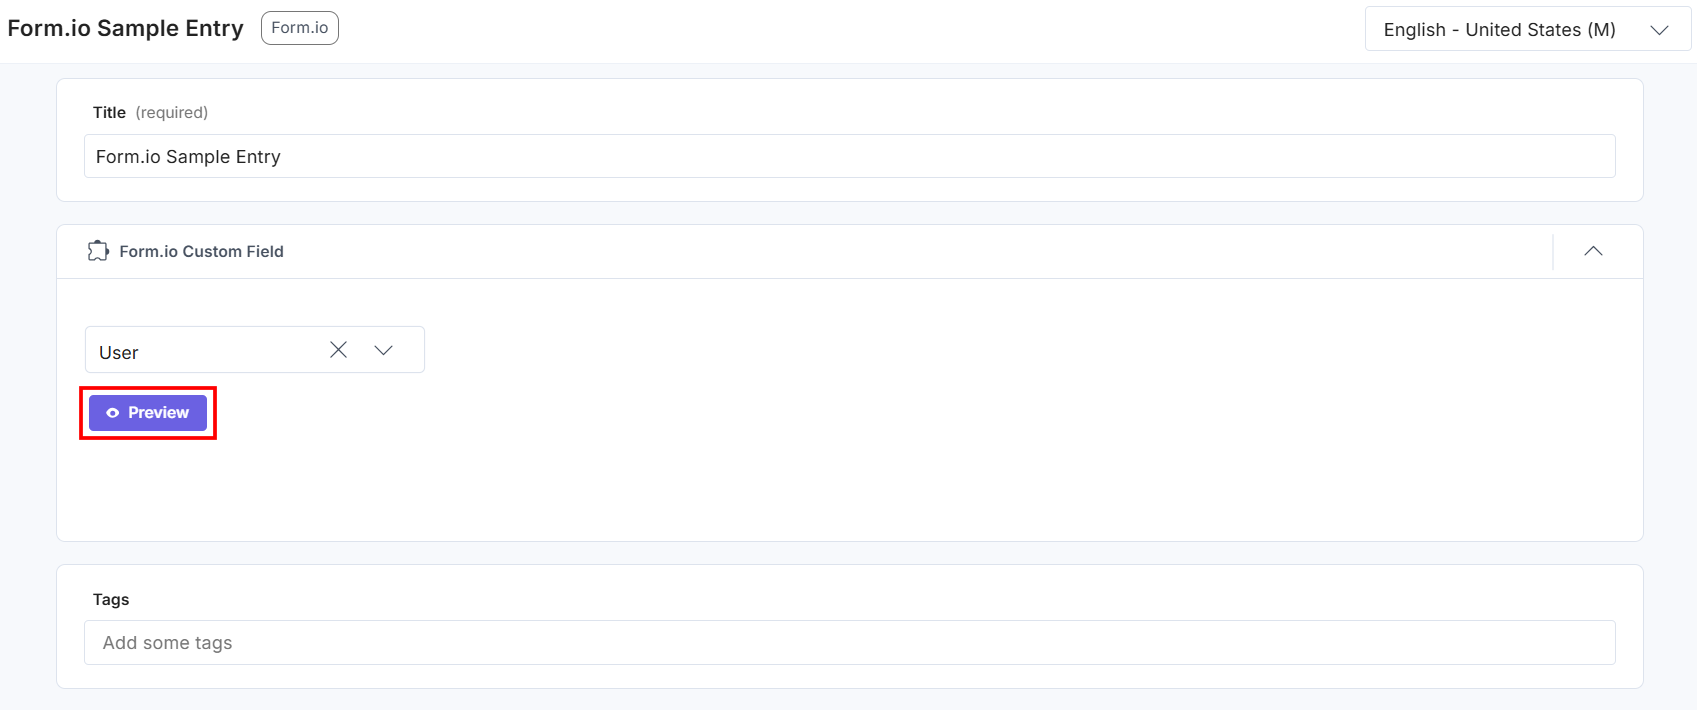
Note: Preview access is available only to users with a Form.io account.
- Click Save to save the entry.
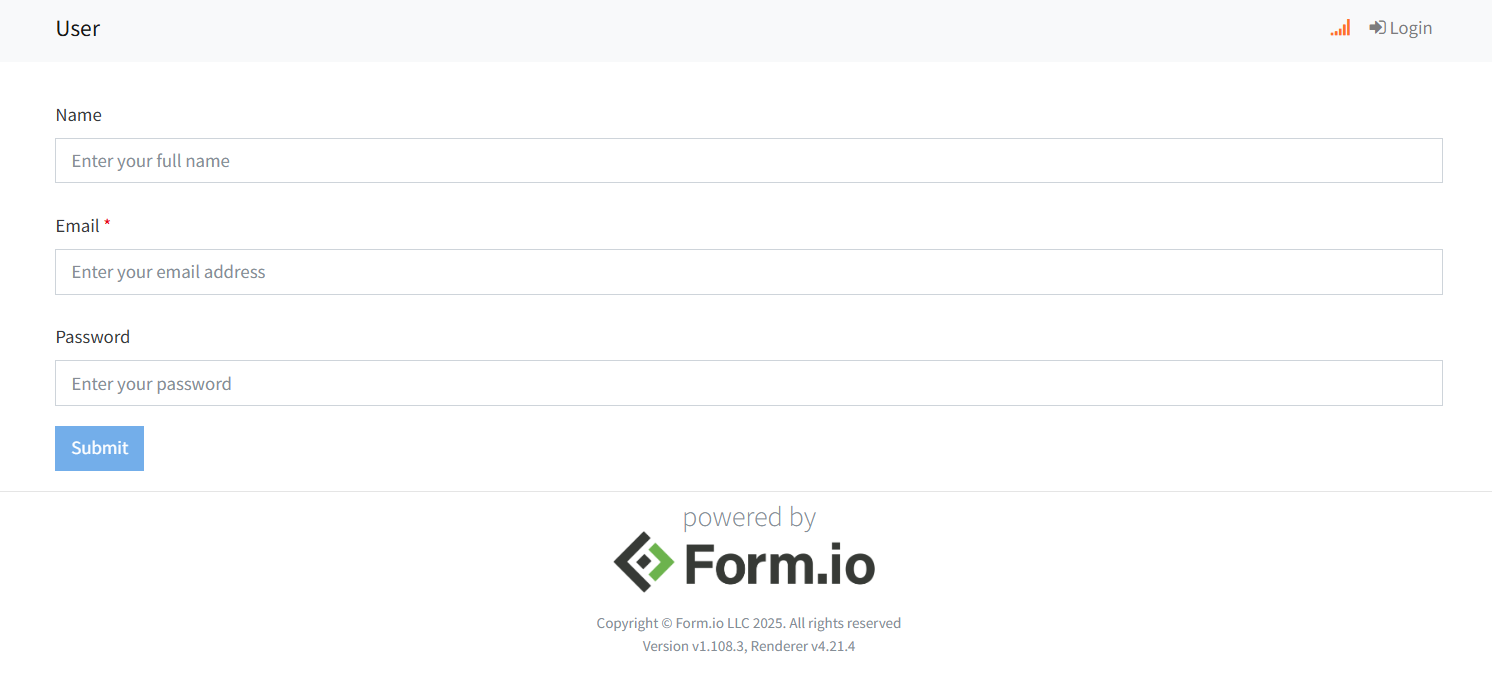
- Once you publish the entry, you can see the form on your website.


.svg?format=pjpg&auto=webp)
.svg?format=pjpg&auto=webp)
.png?format=pjpg&auto=webp)


.png?format=pjpg&auto=webp)