Deploy Contentstack Powered Website on AWS Amplify
Note: We recommend using Contentstack Launch, a front-end hosting and deployment platform designed for websites developed on the Contentstack CMS. Launch streamlines development by allowing you to start a new project and easily connect it to your GitHub repository.
AWS Amplify is an AWS service which lets users develop and deploy mobile & web apps on the AWS cloud. If you have a Contentstack-powered website and want to learn how to deploy it on AWS Amplify, then this guide is for you.
We're going to use Amplify’s website hosting and deployment services to deploy our Contentstack’s static web applications globally. There are multiple ways in which you can achieve this using AWS Amplify, and in this guide, we will discuss those in detail.
To understand the process we'll use our Contentstack’s React.js Starter App and deploy it using AWS Amplify. Check our detailed guide that will help you set up the stack and build a starter website using React.js and Contentstack.
Prerequisites
- Access to AWS environment and AWS Amplify
- Contentstack account
- AWS Amplify CLI installed and configured on your machine
- Node.js v12.x or any latest version installed on your machine
- npm v5.x or latest version installed
- Contentstack’s React.js starter website running on your machine
Deployment Methods
We'll demonstrate website deployment using the following methods of AWS Amplify:
Let's take a look at each method in detail.
Method 1: Deploy Without Git Providers
AWS Amplify allows you to deploy websites without connecting your GitHub repository. This is a manual deployment method that allows you to publish your website on AWS Amplify Console without any Git providers.
Let's follow the steps given below to begin with your deployment:
- Firstly, clone the repository or download the zip file of the Contentstack React.js Starter Website that we will be deploying.
- Now, unzip the file and open it in any code editor.
- Open command prompt, navigate to the root directory, and run the following command to install the node modules:
npm install
- Rename the .env.sample to .env and provide your the stack credentials of the stack which you used to build the starter website.

- Now go back to your command prompt, point to the project location and run the following command:
npm start
The above command will start the app on localhost:3000.
- Now, proceed to create a build of the starter app.
By running the following command, we create a project build output folder to deploy the website on AWS Amplify.npm run build
The build folder will be created in the root directory. - Now let's deploy your website to AWS. Firstly, login to your AWS Management Console. Search AWS Amplify in the search bar and open the Amplify dashboard.
- Now click on the New app drop-down and select Host web app.
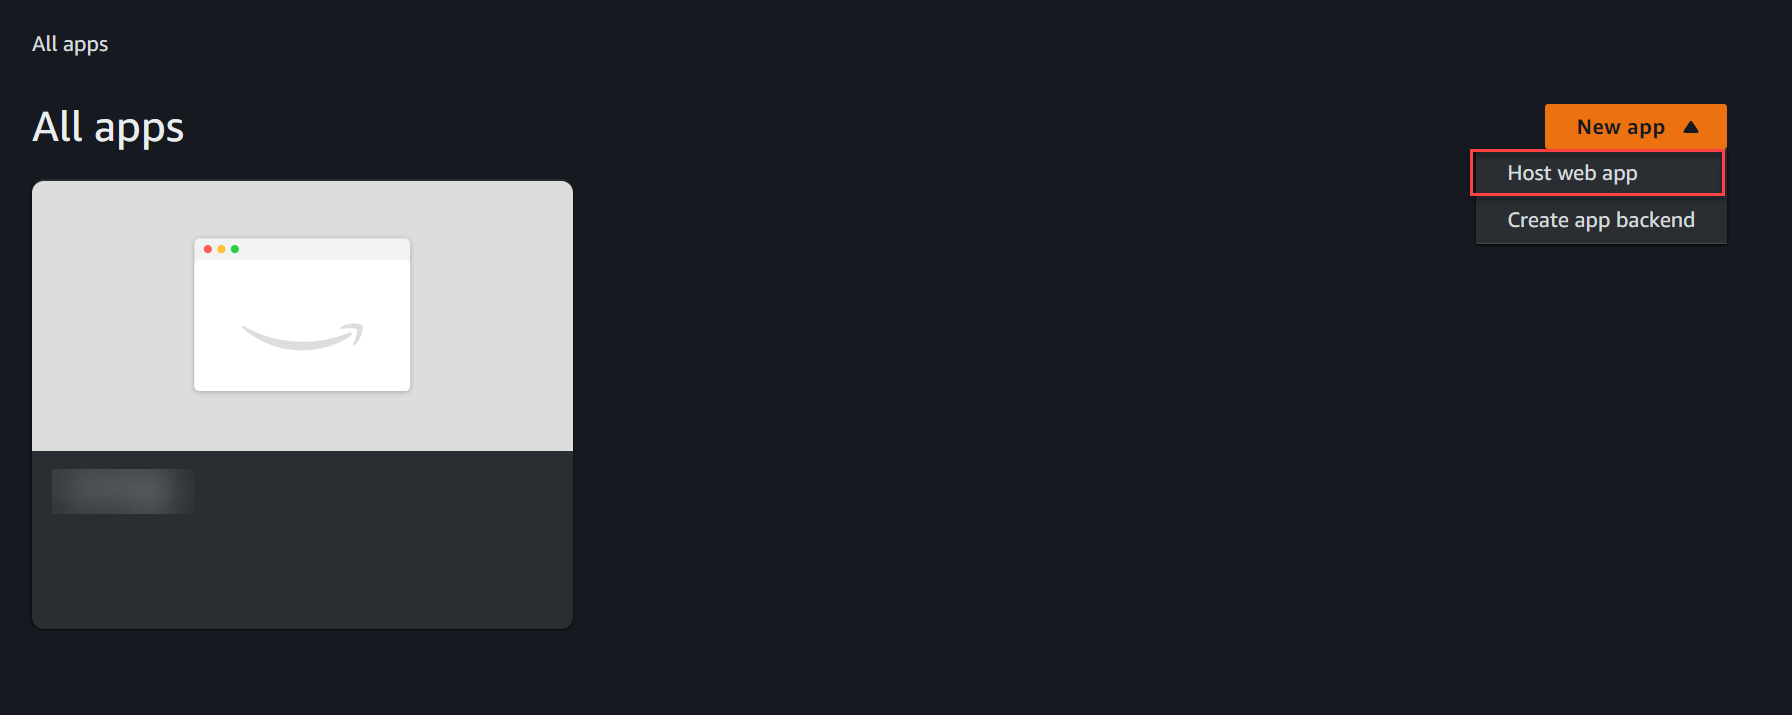
- Now on the Host your web app page, select the Deploy without Git provider option and click on Next.
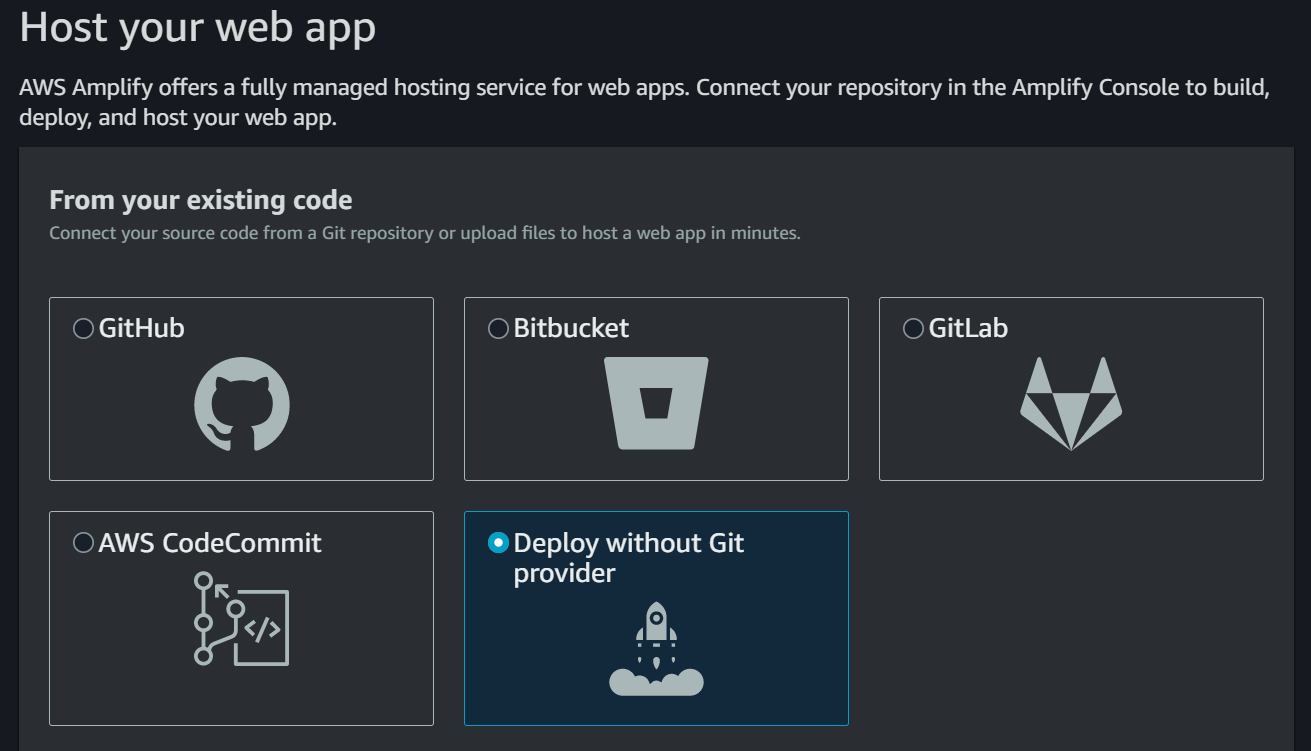
- To start deploying your app add your App name and Environment name. Finally, select the Drag and drop option.
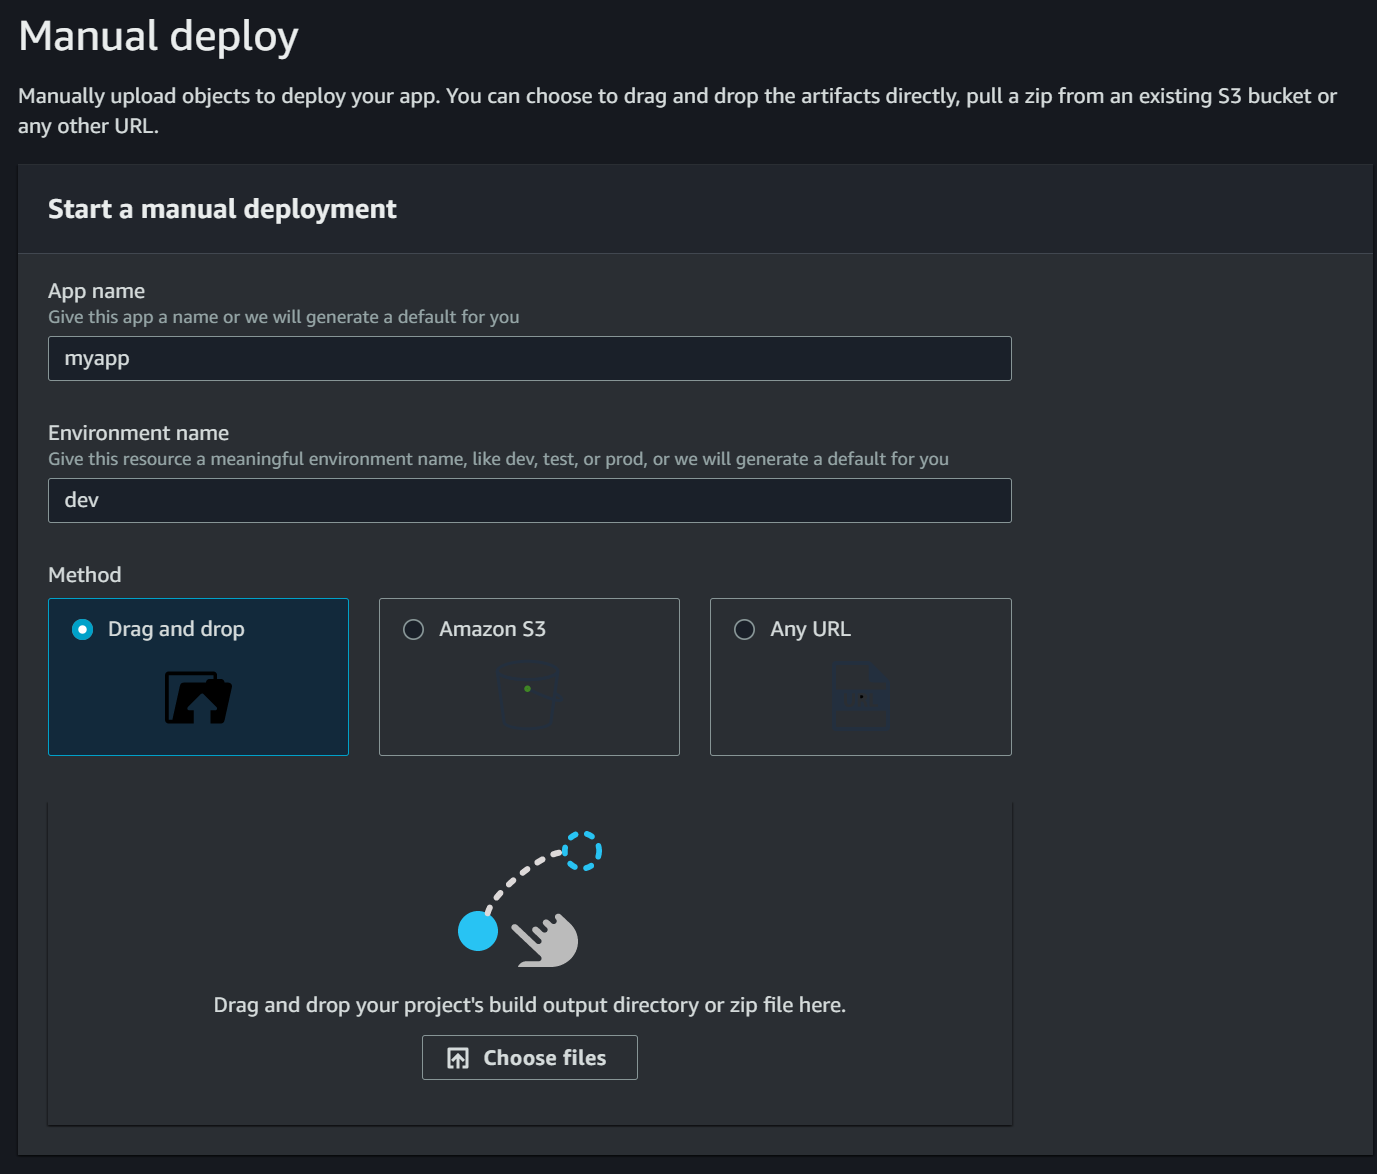
- Click on Choose files and drag the build folder that we created in section.
- This will deploy the React.js starter app on Amplify and you will get a URL to access the website online.
Method 2: Deploy Using Amplify CLI
AWS Command Line Interface (CLI) offers commands that lets you perform common tasks and manage AWS services with ease.
Using the AWS Amplify CLI you can deploy your Contenstack powered website(in our case Contentstack React starter app) to AWS cloud.
Follow the steps below to begin with your deployment using Amplify CLI.
- Similar to the previous method, clone the repo or download the zip file of the Contentstack React.js starter website that we will be deploying.
- Now, unzip the file and open it in any code editor.
- Navigate to the root directory and run the following command in your terminal:
npm install
- Rename the “.env.sample” to “.env” and provide the stack credentials of the stack which you used to build the starter website.
.png)
- Finally open your terminal, point to the project location and run the following command
npm start
This will create and run your website on port localhost:3000. - Once your app is running on the localhost, open your terminal and point to the root directory of the app.
Now perform the following steps to deploy your website on AWS cloud using the Amplify CLI:Note: Before running the following commands make sure that the Amplify CLI is configured with your AWS account. To begin with the configuration you can refer to this detailed video on Installing & Configuring the AWS Amplify CLI.
- Once the configuration completes, run the following commands:
amplify init
- After running the above command, you'll be prompted to enter a few details of your project as follows:
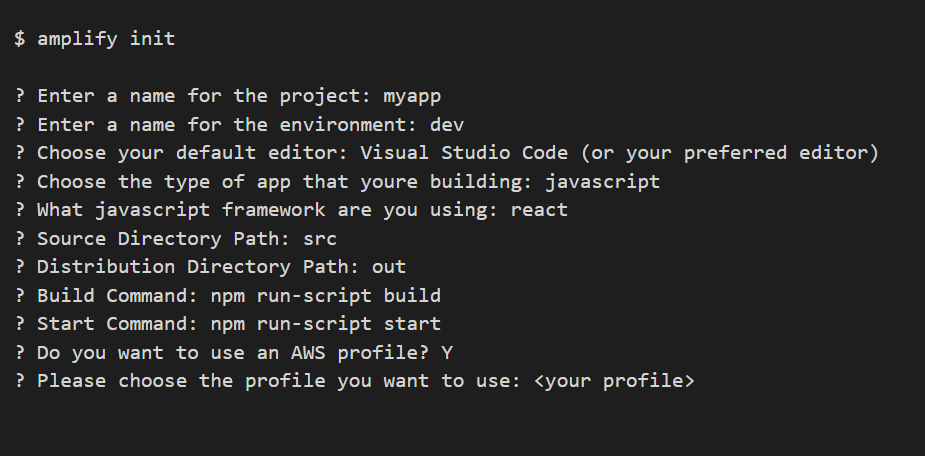 Mention the project name and environment name, your code editor, app type, javascript framework, directory path and distribution and your build command & start command.
Finally select your AWS profile and proceed to the next step. - Now add hosting using the following command:
amplify add hosting
- Select the Hosting with Amplify Console (managed hosting with custom domains, Continuous deployment) plugin mode option to execute the project and for deployment type choose the Manual deployment option.
- Now run the publish command given below:
amplify publish
The publish command will deploy the Contenstack React.js starter app on Amplify using the CLI and you will get a URL to access the website online.
Method 3: Deploy Using the GitHub Repository
AWS Amplify also allows you to easily deploy your Contentstack powered website on AWS cloud using your GItHub repository.
To do this, follow the steps given below:
- Start by adding the react.js starter app to your own or any other repository of your choice.
To do this goto the Contentstack React.js Starter App Git page and click on the Fork button in the right top corner. - Select your GitHub account to fork the starter app repository from Contenstack to your private repository.
- Now let's deploy your website to AWS. Login to your AWS Management Console. Search AWS Amplify in the search bar and open the Amplify dashboard.
- Now click on the New app drop-down and select Host web app.

- On the Host your web app page select the GitHub option and click on Next.
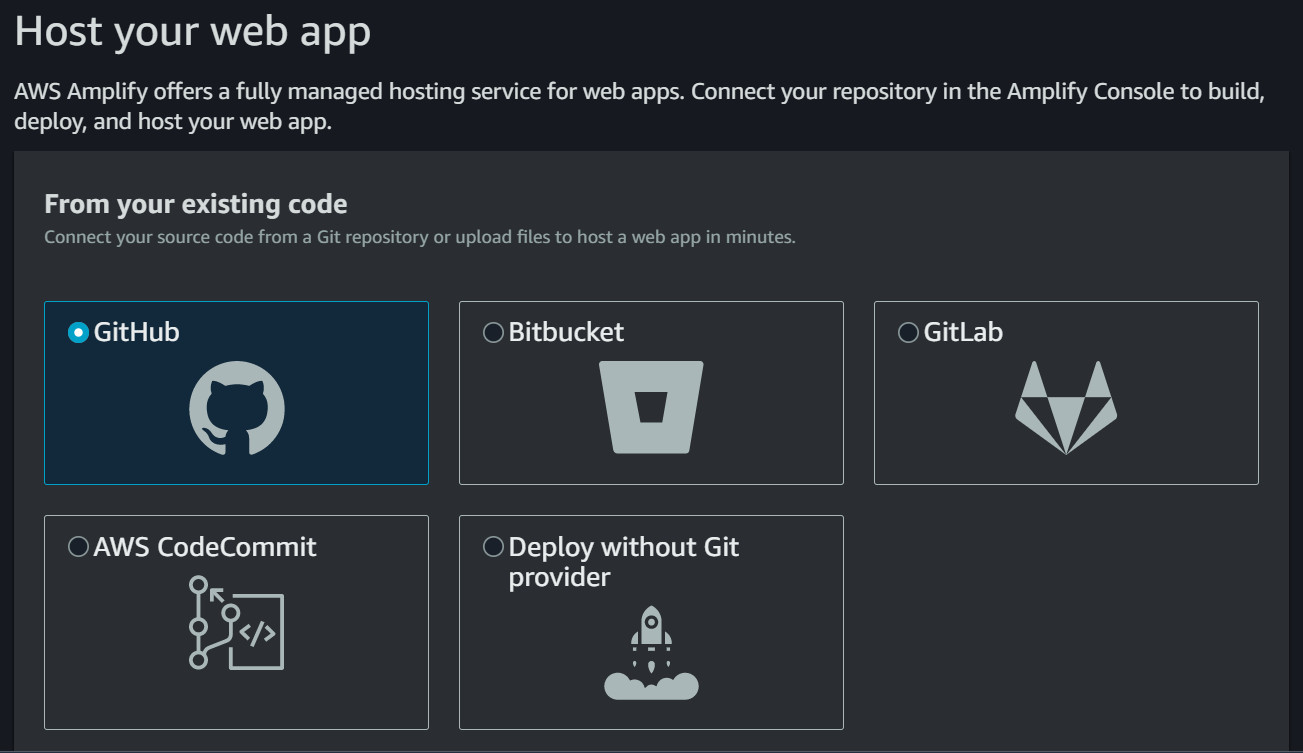
Note: Make sure to authenticate GitHub with AWS Amplify to get access to your repositories.
- Click on Continue. In the next section select the starter app repository that we previously forked from Contenstack.
Also, select the branch name i.e. master from the dropdown menu.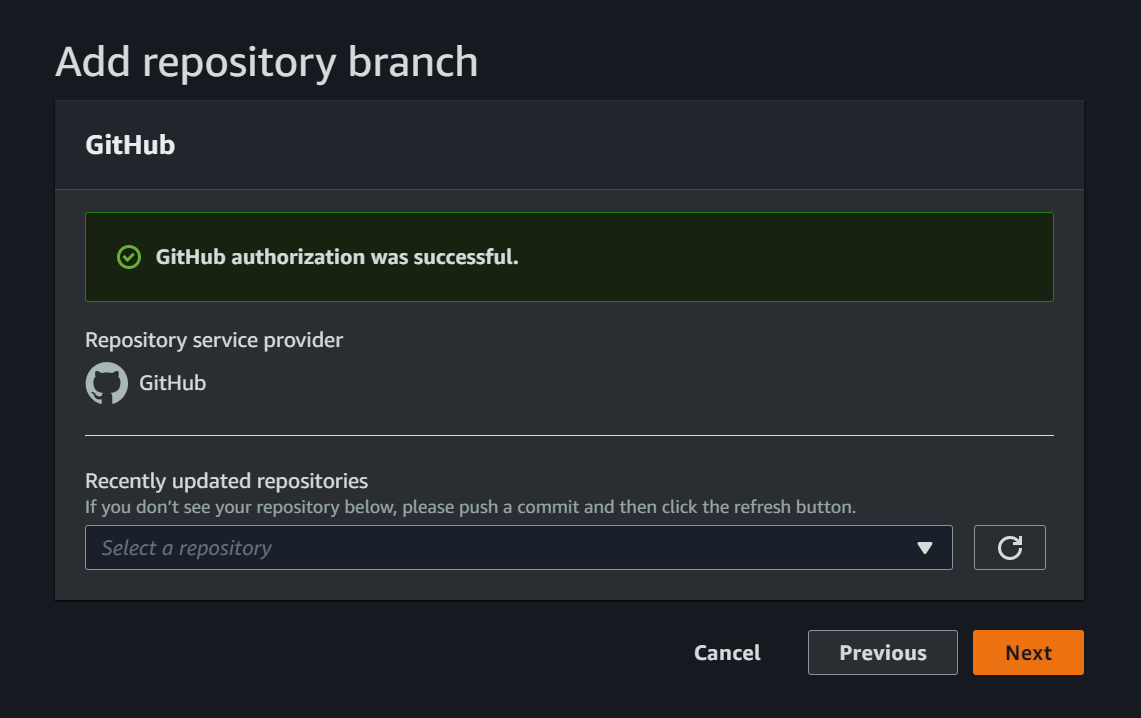
- Click on the Next button. In the next window under the Configure build setting goto the Advanced settings section and add your stack credentials as shown below:
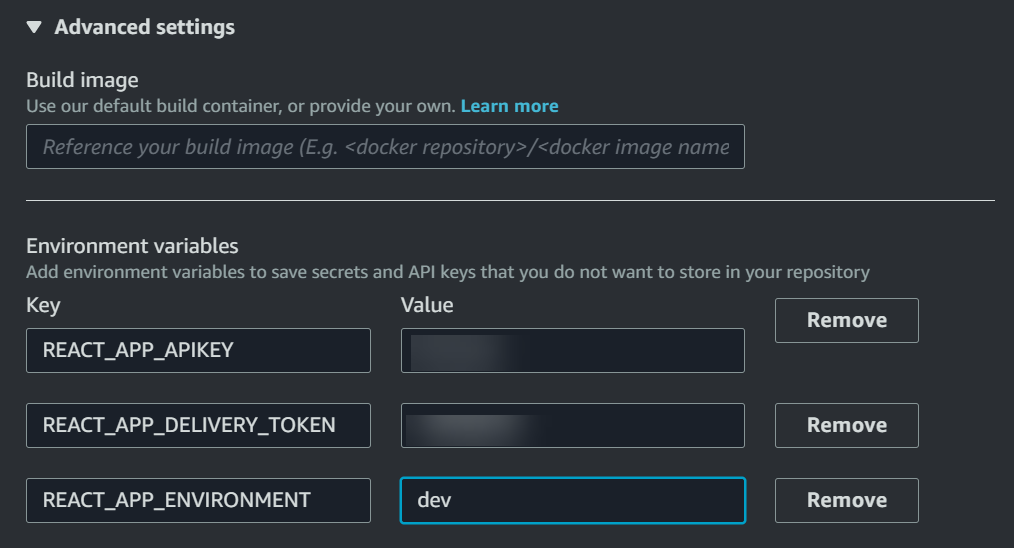
- After adding credentials click on Next. This will initiate the deployment process of the starter website and you will get a URL to access the website online.


.svg?format=pjpg&auto=webp)
.svg?format=pjpg&auto=webp)
.png?format=pjpg&auto=webp)


.png?format=pjpg&auto=webp)