Personalize Connector
Contentstack Personalize is an optimization engine designed to tailor content based on information gathered about user preferences. By using the logged observations, you can provide targeted content experiences in real time to your customers or audiences depending on their own preferences.
Personalize offers two distinct types of experiences:
- Segmented Experience: Used when you want to show a particular variation to the visitor based on demographics, referrers, and other relevant factors.
- A/B Test Experience: Used when you want to measure the performance of multiple variations.
Within experiences, you can create different Variants of content which you can use within the CMS Entries for Content Types.
Note: Variant Groups in the CMS are equivalent to Experiences created in a Personalize project. You can create variants (entries) in the CMS for these Variant Groups.
The Personalize connector lets you fetch the details of all the Audiences and Experiences created in your Personalize project.
Details of each action are covered in their respective sections.
Prerequisites
To use the Personalize connector, you must first add your account. To do so, follow the steps given below:
Connect your Personalize Account to Automate
- Click Configure Action Step from the left navigation panel.
- Click Action Step to configure third-party services.
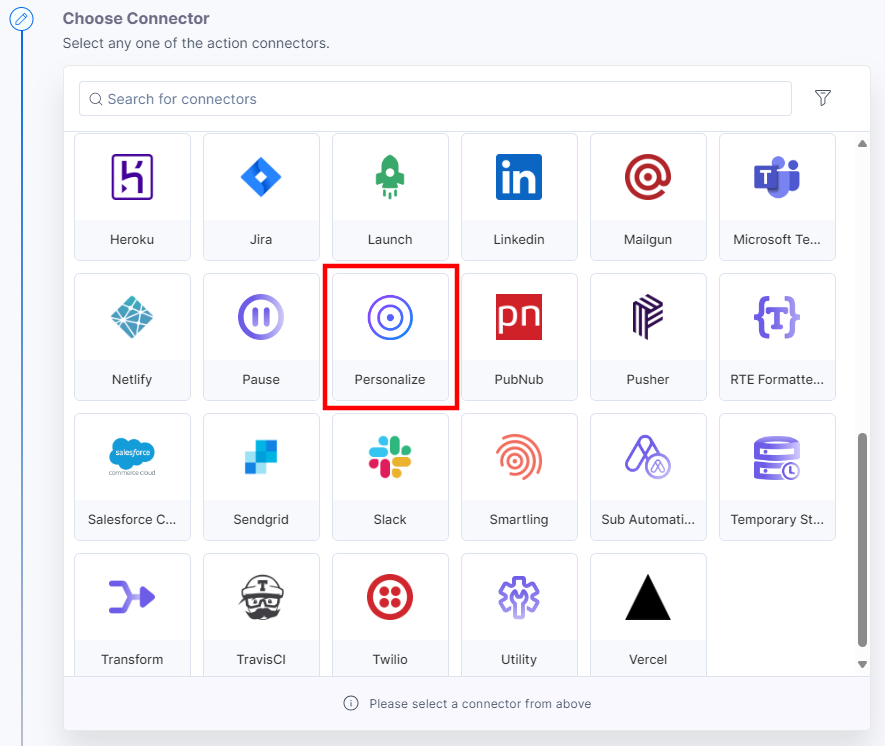
- Within the Configure Action Step, click the Personalize connector.
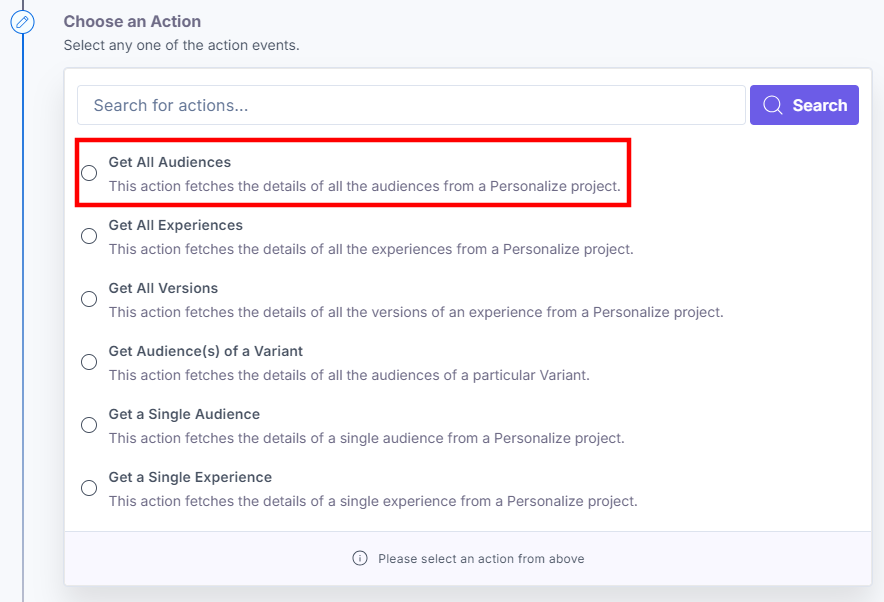
- Under Choose an Action tab, select any one action from the list. Here, we are selecting the Get All Audiences action.
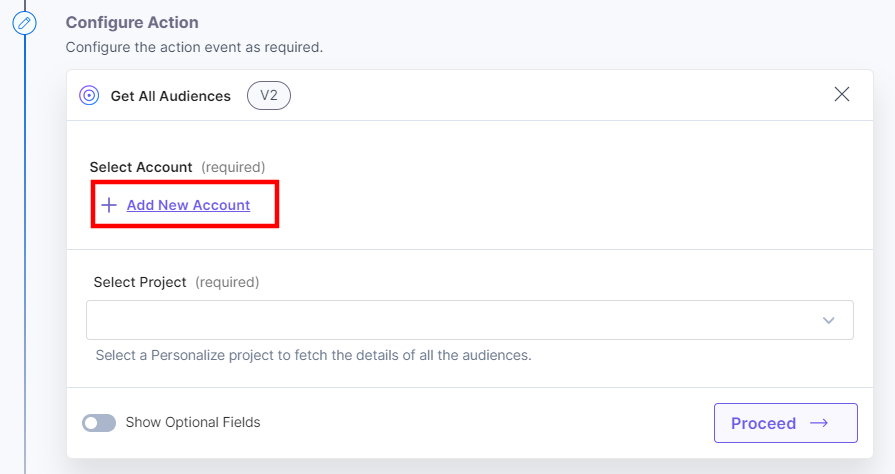
- On the Configure Action page, click the + Add New Account to add your Personalize account.
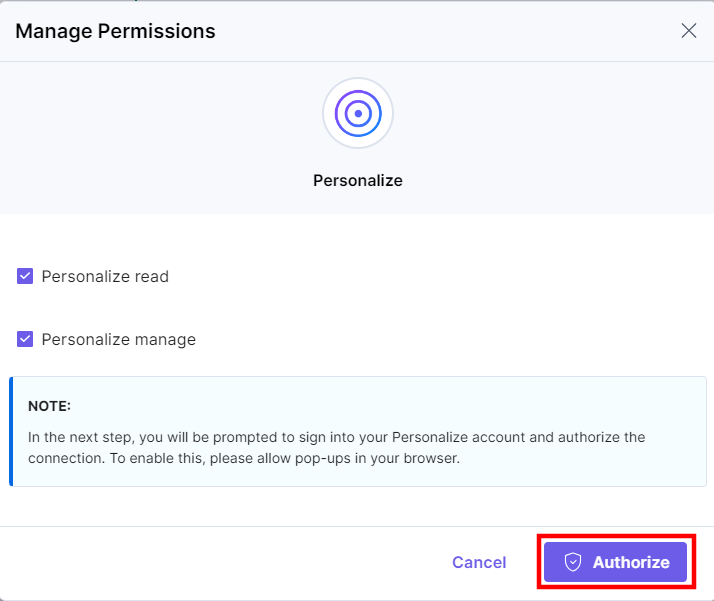
- In the pop-up window, mark the checkboxes for all the OAuth permissions and then click the Authorize button.
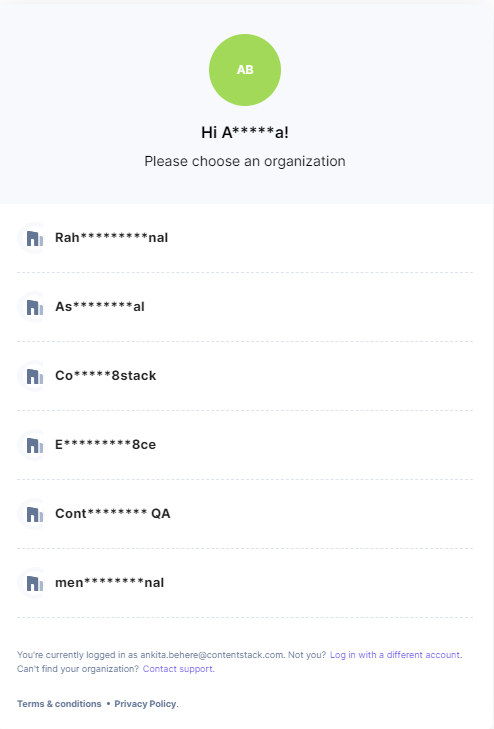
- In the pop-up, select your organization to complete the authorization.
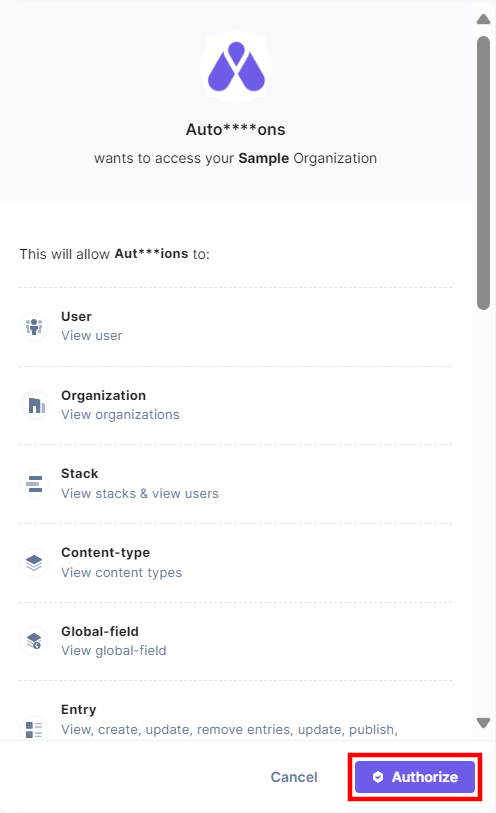
- In the pop-up that appears, view the module-specific access rights provided to the app. Click Authorize to complete authorization.
- Provide an Account Name and then click Save.

Once done, you can go ahead and set up your Personalize connector.
Set up the Personalize Connector
Perform the following steps to set up the Personalize connector:
- From the left navigation panel, click Configure Action Step.
- Then, click Action Step to configure third-party services.
- Within the Configure Action Step, click the Personalize connector.

Note: You can sort and search the connector(s) based on the filter.
- Under Choose an Action, you will see these actions: Get All Audiences, Get All Experiences, Get All Versions, Get a Single Audience, Get a Single Experience, and Get Audience(s) of a Variant.
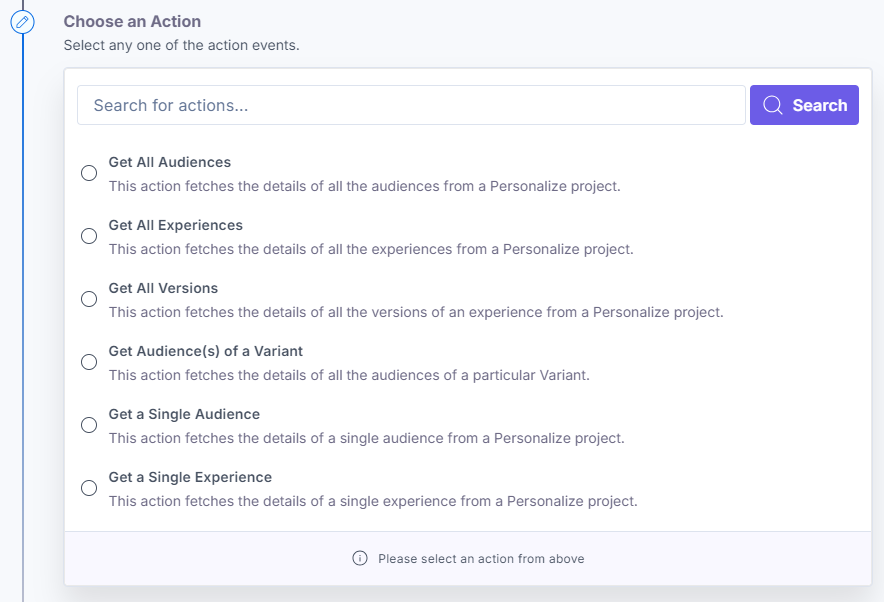
Let’s look at each of them in detail.
Get All Audiences
This action fetches the details of all the audiences from a Personalize project.
- Under Choose an Action tab, select the Get All Audiences action.
- On the Get All Audiences Configure Action page, enter the details given below:
- Click + Add New Account button to connect your Personalize account as shown in the Connect your Personalize Account to Automate step.
- Select a Project from the Lookup list.
- [Optional] Enable the Show Optional Fields toggle button to display the Select Audiences field.
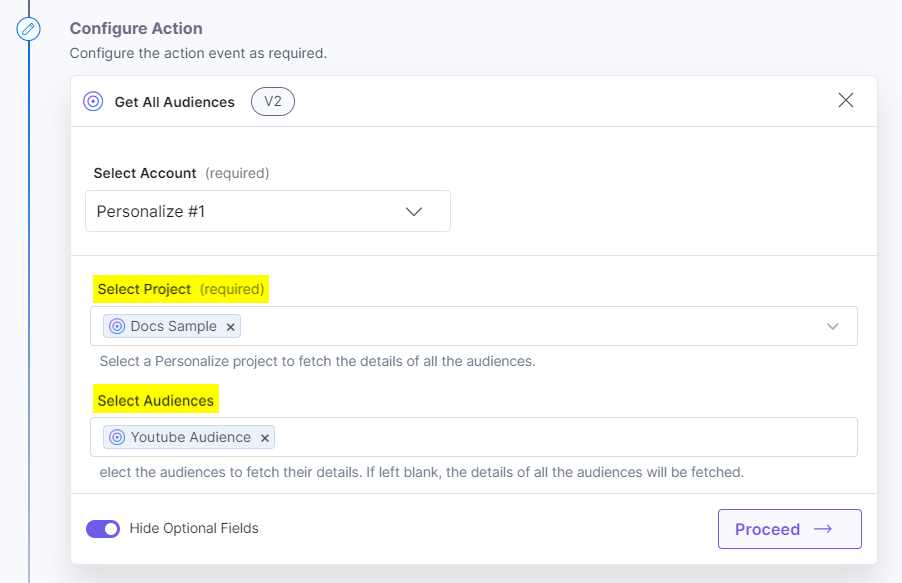
- Once done, click Proceed.
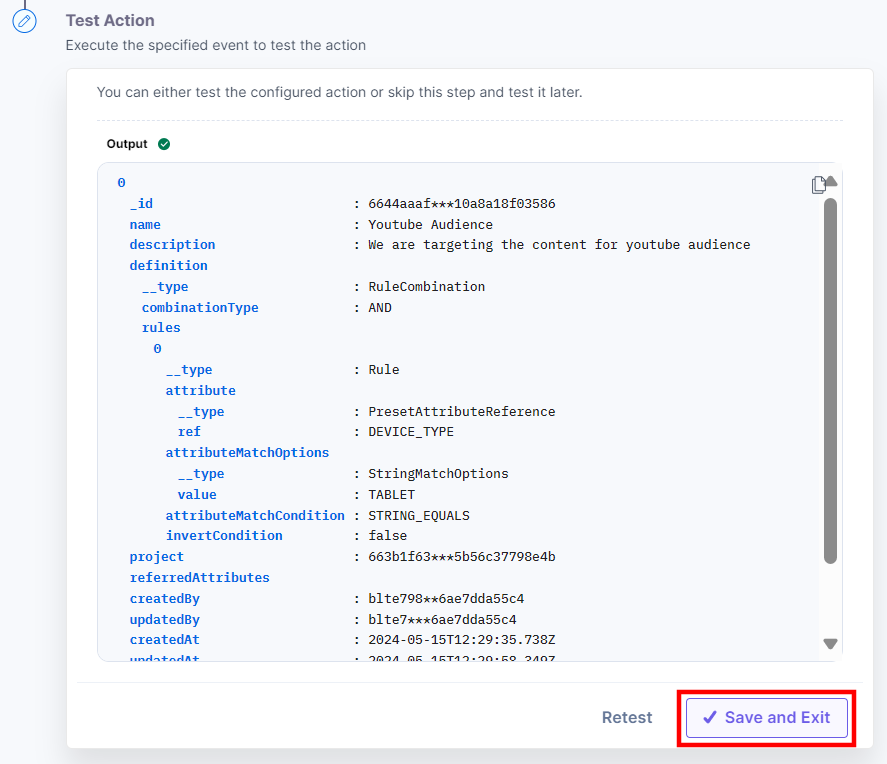
- Click Test Action to test the configured action.

- The output will be shown as below. Click the Save and Exit button.
Get All Experiences
This action fetches the details of all the experiences from a Personalize project.
- Under Choose an Action tab, select the Get All Experiences action.
- On the Get All Experiences Configure Action page, enter the details given below:
- Click + Add New Account button to connect your Personalize account as shown in the Connect your Personalize Account to Automate step.
- Select a Project from the Lookup list.

- Once done, click Proceed.
- Click Test Action to test the configured action.

- The output will be shown as below. Click the Save and Exit button.

Get All Versions
This action fetches the details of all the versions of an experience from a Personalize project.
Note: By default, the audiences of the active version will be fetched.
- Under Choose an Action tab, select the Get All Versions action.
- On the Get All Versions Configure Action page, enter the details given below:
- Click + Add New Account button to connect your Personalize account as shown in the Connect your Personalize Account to Automate step.
- Select a Project and Experience from the Lookup list. This will fetch all the versions of an experience.

- Once done, click Proceed.
- Click Test Action to test the configured action.

- The output will be shown as below. Click the Save and Exit button.

Get a Single Audience
This action fetches the details of a single audience from a Personalize project.
- Under Choose an Action tab, select the Get a Single Audience action.
- On the Get a Single Audience Configure Action page, enter the details given below:
- Click + Add New Account button to connect your Personalize account as shown in the Connect your Personalize Account to Automate step.
- Select a Project and an Audience from the Lookup list.

- Once done, click Proceed.
- Click Test Action to test the configured action.

- The output will be shown as below. Click the Save and Exit button.

Get a Single Experience
This action fetches the details of a single experience from a Personalize project.
- Under Choose an Action tab, select the Get a Single Experience action.
- On the Get a Single Experience Configure Action page, enter the details given below:
- Click + Add New Account button to connect your Personalize account as shown in the Connect your Personalize Account to Automate step.
- Select a Project and an Experience from the Lookup list.

- Once done, click Proceed.
- Click Test Action to test the configured action.

- The output will be shown as below. Click the Save and Exit button.

Get Audience(s) of a Variant
This action fetches the details of all the audiences of a variant in a variant group.
- Under Choose an Action tab, select the Get Audience(s) of a Variant action.
- On the Get Audience(s) of a Variant Configure Action page, enter the details given below:
- Click + Add New Account button to connect your Personalize account as shown in the Connect your Personalize Account to Automate step.
- Select a Stack, Variant Group, and Variant from the Lookup list.

- Optionally, enable the Show Optional Fields toggle to mark the Fetch audiences of the draft version checkbox. This will fetch the audiences defined in the draft version of the variant.

- Once done, click Proceed.
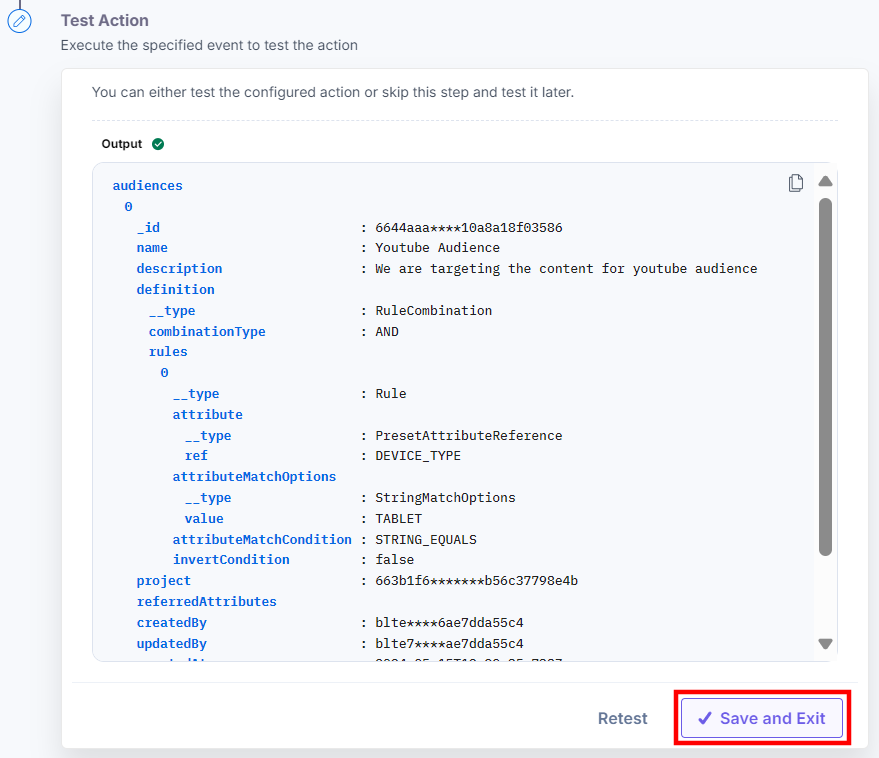
- Click Test Action to test the configured action.

- The output will be shown as below. Click the Save and Exit button.
This sets the Personalize connector.


.svg?format=pjpg&auto=webp)
.svg?format=pjpg&auto=webp)
.png?format=pjpg&auto=webp)


.png?format=pjpg&auto=webp)