Notion
Notion is an all-in-one productivity and collaboration platform, combining note-taking, task management, databases, and project organization in a single, customizable space – ideal for both individual and team workflows.
The Notion connector enhances your Notion experience by enabling automated content management through creation, deletion, addition, and retrieval of data in your workspace via Automate. By integrating multiple tools in one space, it streamlines workflows for optimized productivity, seamless collaboration, and efficient knowledge management.
This guide provides step-by-step instructions for using the Notion Automate connector. For instance, you can set up automation with a Contentstack Entry Trigger and Notion’s "Create a Page" action. When a user publishes an entry in a selected environment, a new page with entry details is automatically generated in your Notion workspace.
Prerequisites
- Notion account
- Contentstack account
- Access to an organization that has Automate enabled
Connect your Notion Account to Automate
Perform the following steps to set up the Notion account:
- Click Configure Action Step from the left navigation panel.
- Click Action Step to configure third-party services.
- Within the Configure Action Step, click the Notion connector.
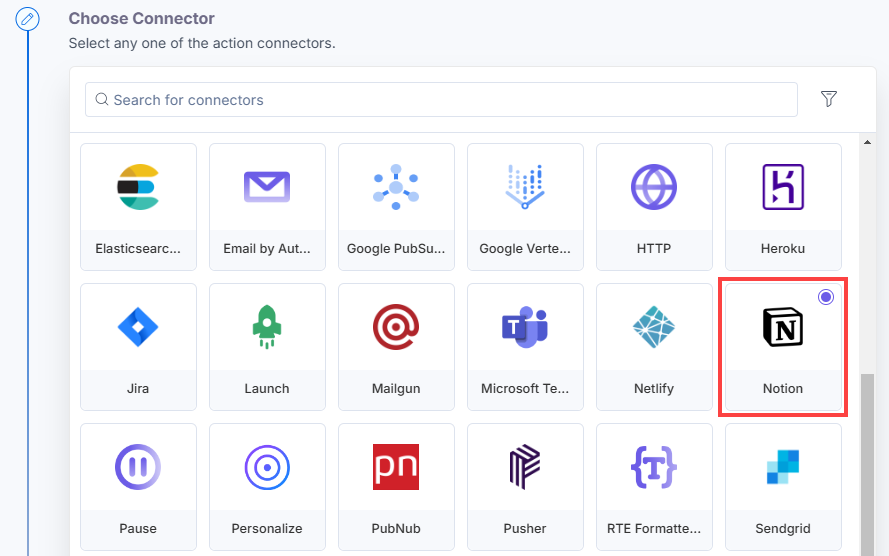
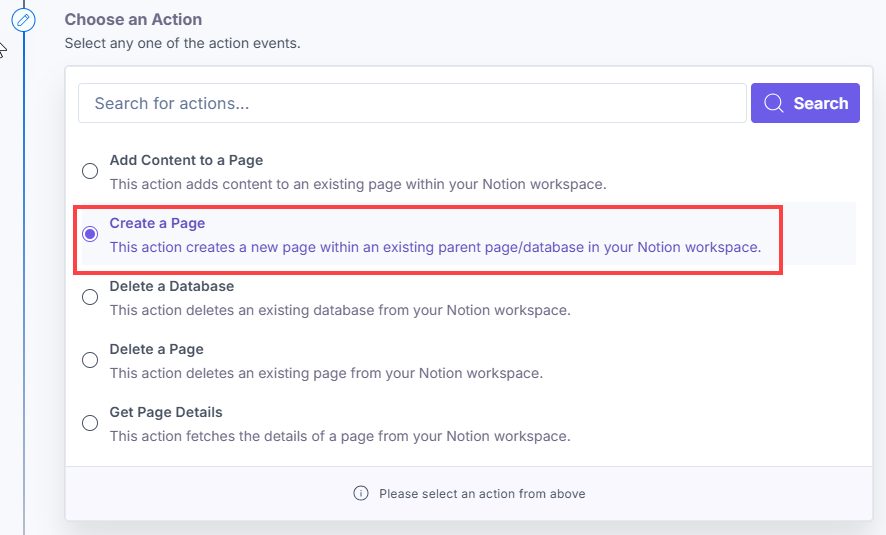
- Under Choose an Action tab, select any one action from the list. Here, we are selecting the Create a Page action.
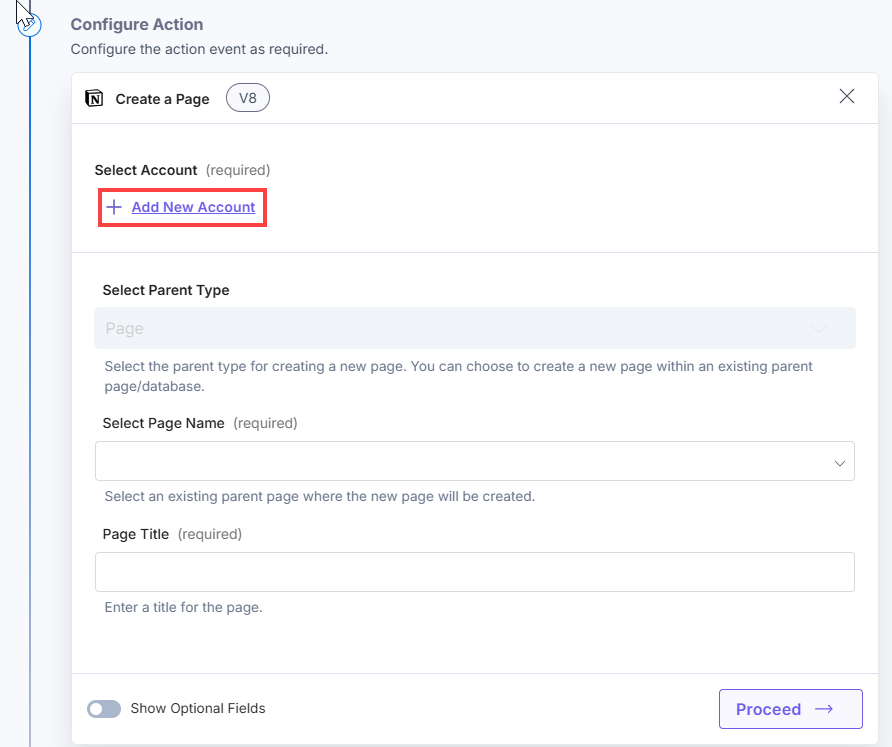
- On the Configure Action page, click the + Add New Account button to add your Notion account.
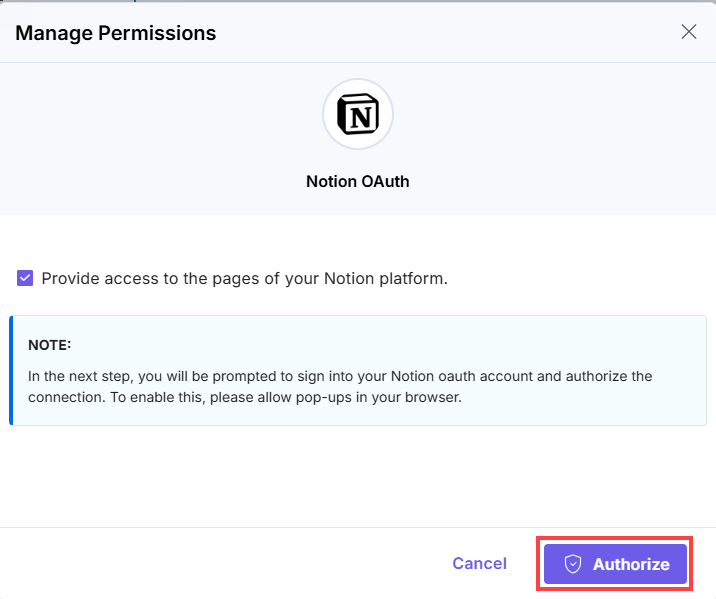
- Select the permission level needed to access your pages in Notion, then click the Authorize button.
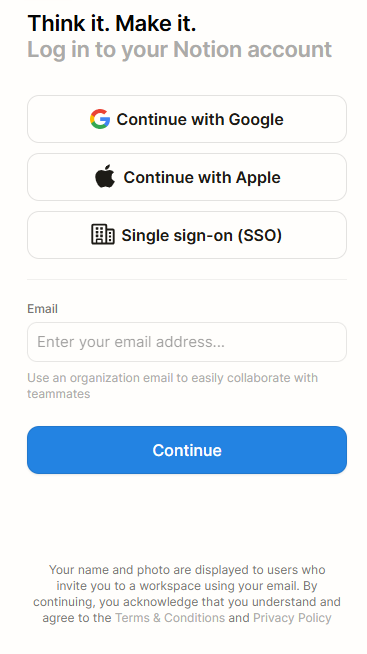
- Log in to your Notion workspace using your email ID. You can also opt for Single Sign-On if preferred.
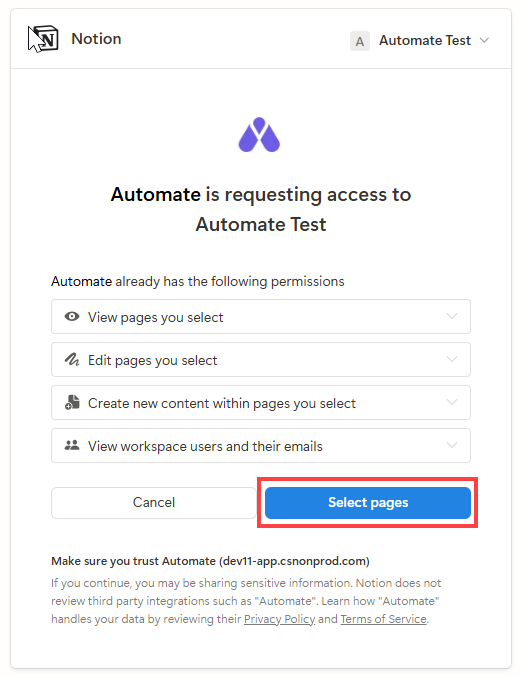
- In the pop-up, go to the top-right corner, select your workspace, and click the Select Pages button.
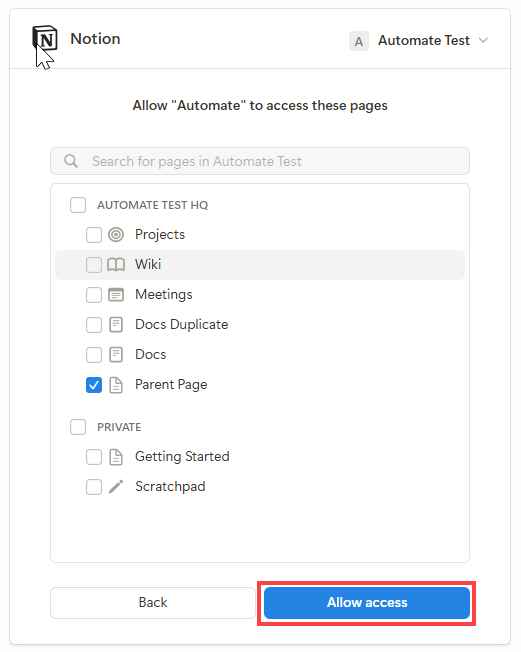
- Pick the specific pages to grant Automate access to in your Notion workspace.
- Provide an Account Name and then click Save.
This sets up your Notion account for the Notion connector.
Set up the Notion Connector
Perform the following steps to set up the Notion action connector:
- From the left navigation panel, click Configure Action Step.
- Then, click Action Step to configure third-party services.
- Within the Configure Action Step, click the Notion connector.

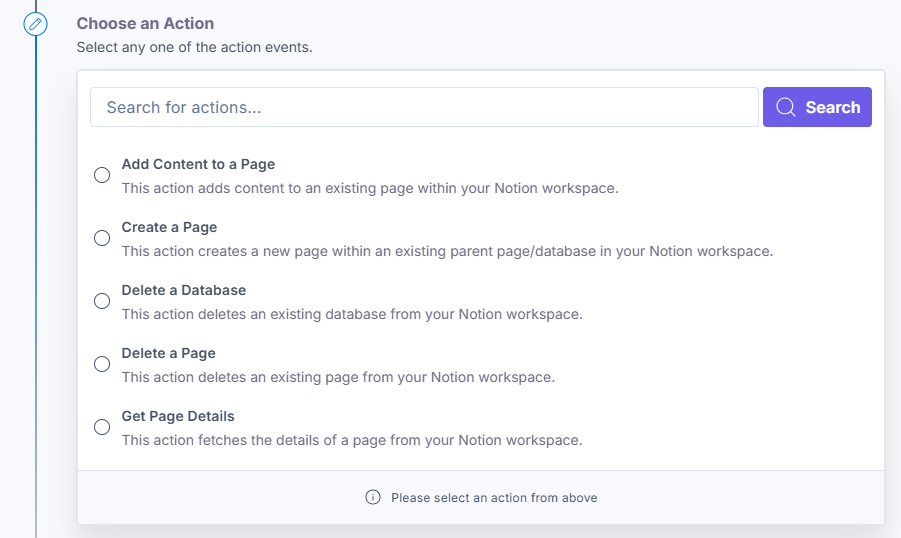
- Under Choose an Action, you will see these actions: Add Content to a Page, Create a Page, Delete a Database, Delete a Page, and Get Page Details.
Once done, you can go ahead and set up your Notion connector.
Action 1: Select the Add Content to a Page action
- Under Choose an Action tab, select the Add Content to a Page action.
- On the Add Content to a Page Configure Action page, enter the details given below:
- Click + Add New Account button to connect your Notion account as shown in the Connect your Notion Account to Automate step.
- Select a parent Page Name where you wish to add the content.
- In the Select Content Schema Type field, select the format for the content either Text or JSON.
- In the Text/JSON Content Type field, enter the content to be added. If you select JSON as the Content Schema Type, you can click the Template icon to fetch the predefined schema template for your page.
Note: The Content Schema Type has a maximum character limit of 2000 characters.
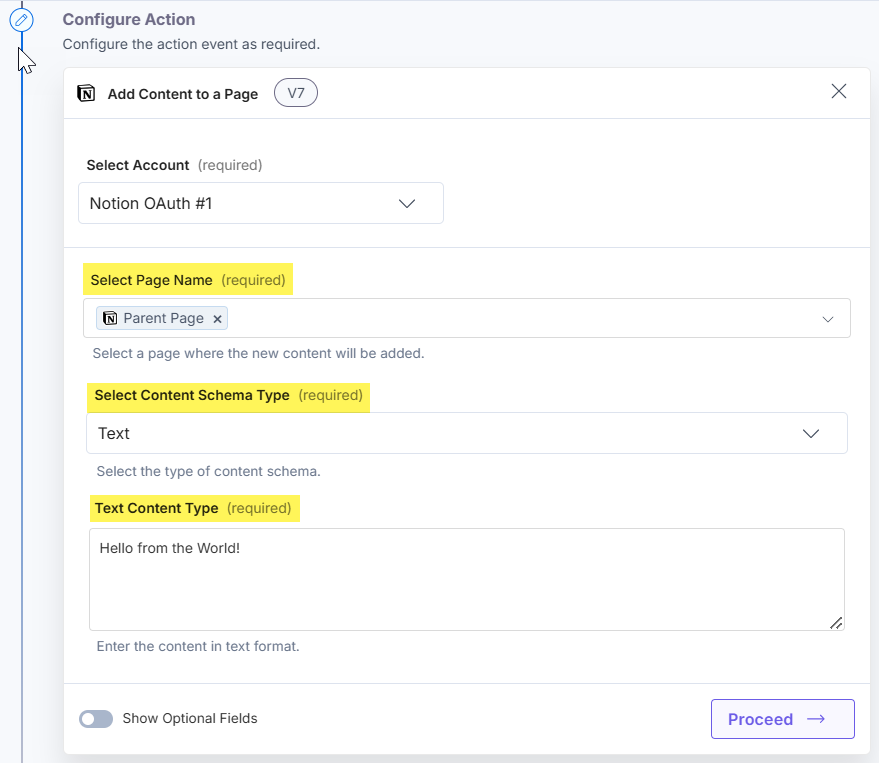
- Optionally, enable the Show Optional Fields toggle button to select the Block Name. This ensures that the content is added to your page after the selected block.

- Click Proceed.
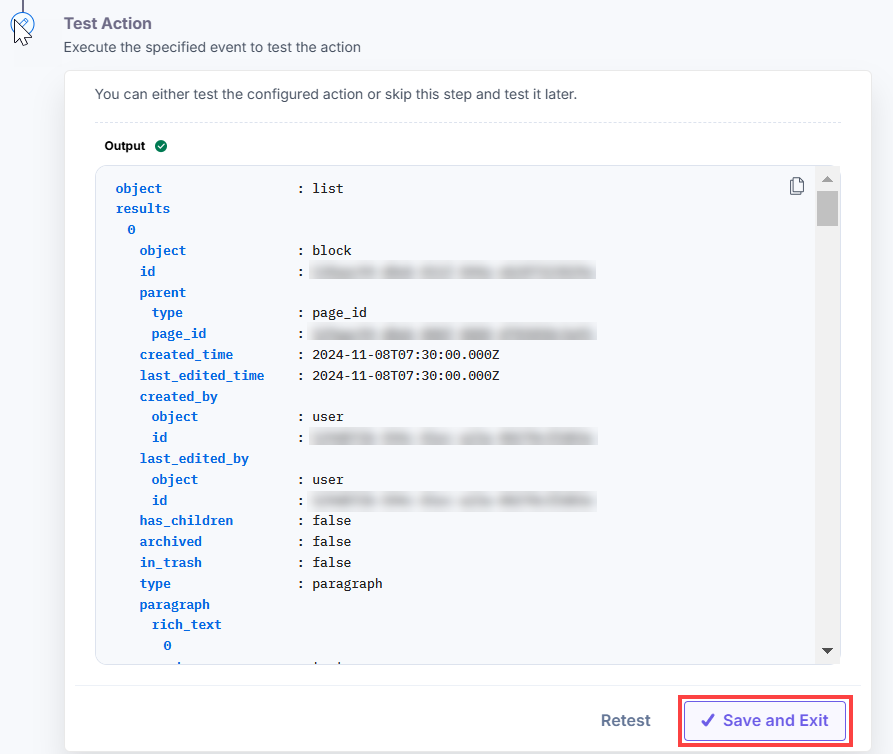
- Check if the details are correct. If yes, click Test Action.

- Once set, click Save and Exit.
Action 2: Select the Create a Page action
- Under Choose an Action tab, select the Create a Page action.
- On the Create a Page Content Configure Action page, enter the details given below:
- Click + Add New Account button to connect your Notion account as shown in the Connect your Notion Account to Automate step.
- Select the Parent Type for the new page. You can create the page within an existing parent page or database.
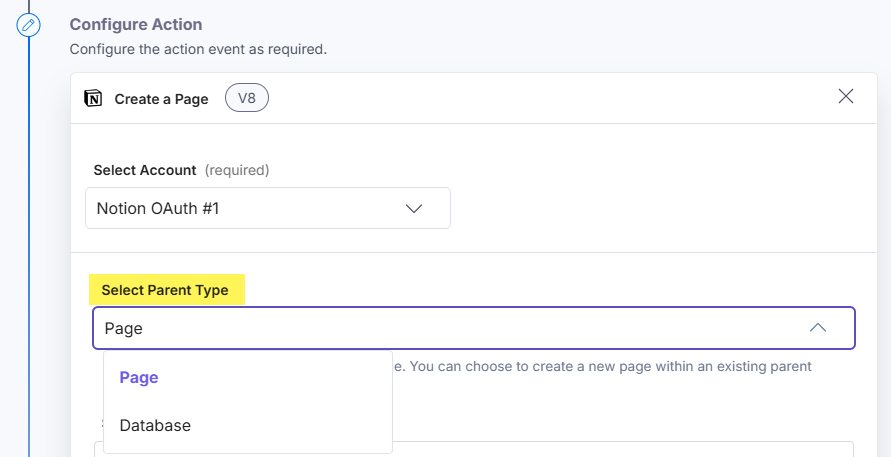
When Selecting Parent as Page
- In the Select Page Name field, select a parent page where the new page will be created. Enter a page title for the new page in the Page Title field.

- Optionally, enable the Show Optional Fields toggle button to view the following fields:
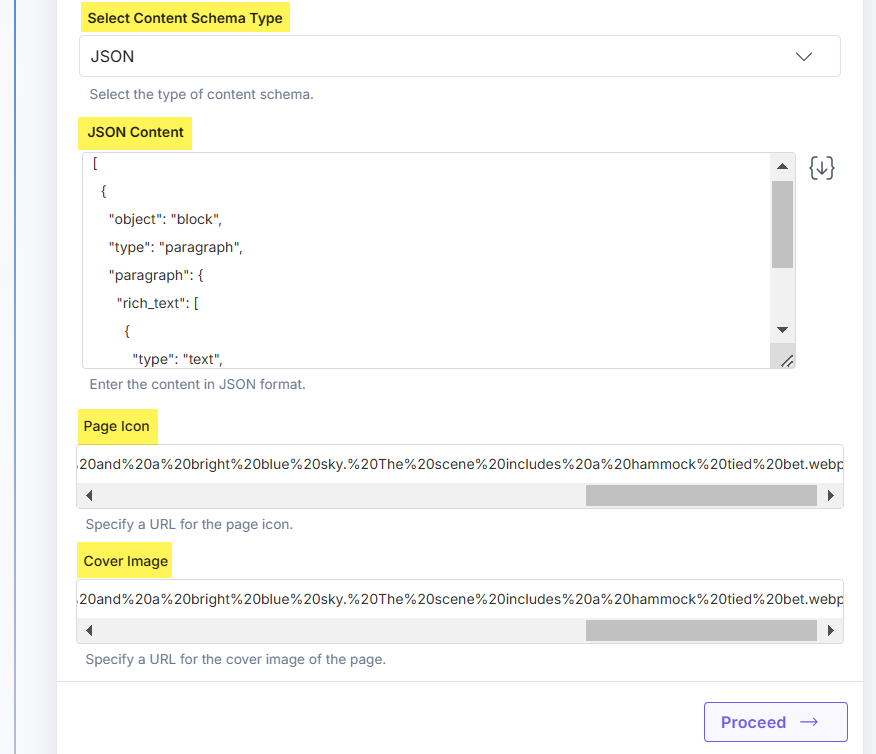
- In the Select Content Schema Type field, select the content format as either Text or JSON format.
- In the Text/JSON Content Type field, enter the content you wish to add. If you select JSON as the Content Schema Type, you can click the Template icon to fetch the predefined schema template for your page.
Note: The Content Schema Type has a maximum character limit of 2000 characters.
- Enter the URLs for the Page Icon and Cover Image.
When Selecting Parent as Database
- In the Select Database Name field, select an existing database where the new page is created.
- In the Database Properties field, enter the content for the appropriate database columns. Ensure the data is in JSON format or use the predefined template for your database.
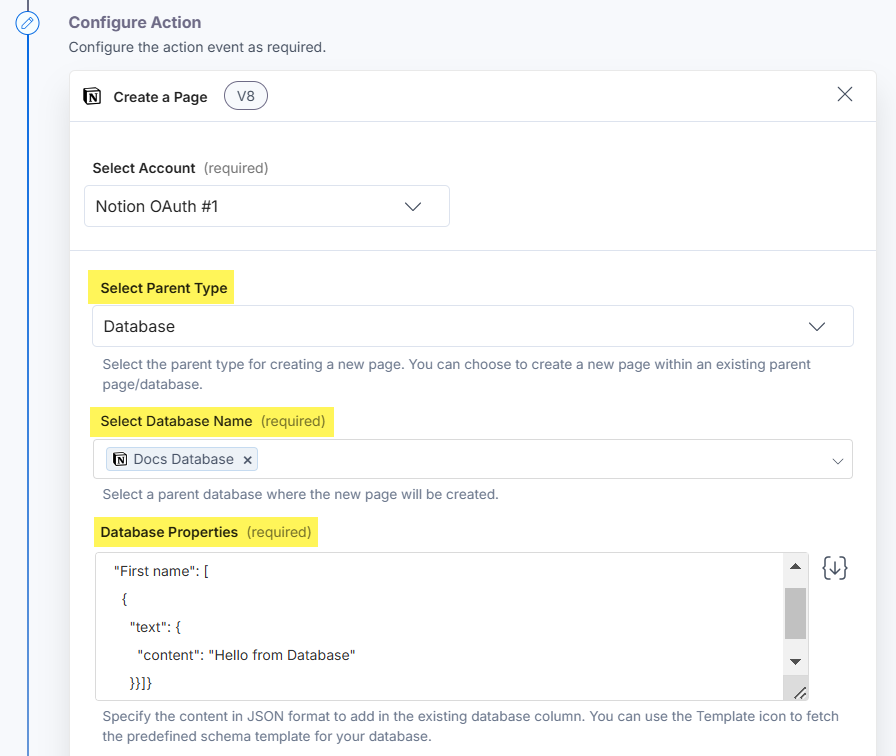
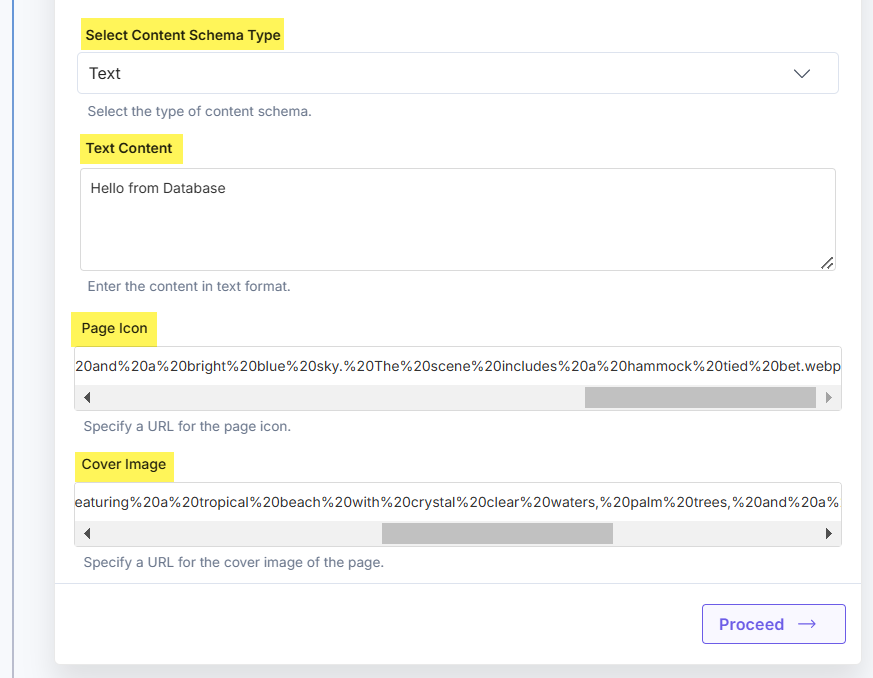
- Optionally, enable the Show Optional Fields toggle button to view the following fields:
- In the Select Content Schema Type field, select the content format as either Text or JSON.
- In the Text/JSON Content Type field, enter the content you wish to add.
- If you select JSON as the Content Schema Type, you can click the Template icon to fetch the predefined schema template for your database.
Note: The Content Schema Type has a maximum character limit of 2000 characters.
- Enter the URLs for the Page Icon and Cover Image.
- In the Select Page Name field, select a parent page where the new page will be created. Enter a page title for the new page in the Page Title field.
- Click Proceed.
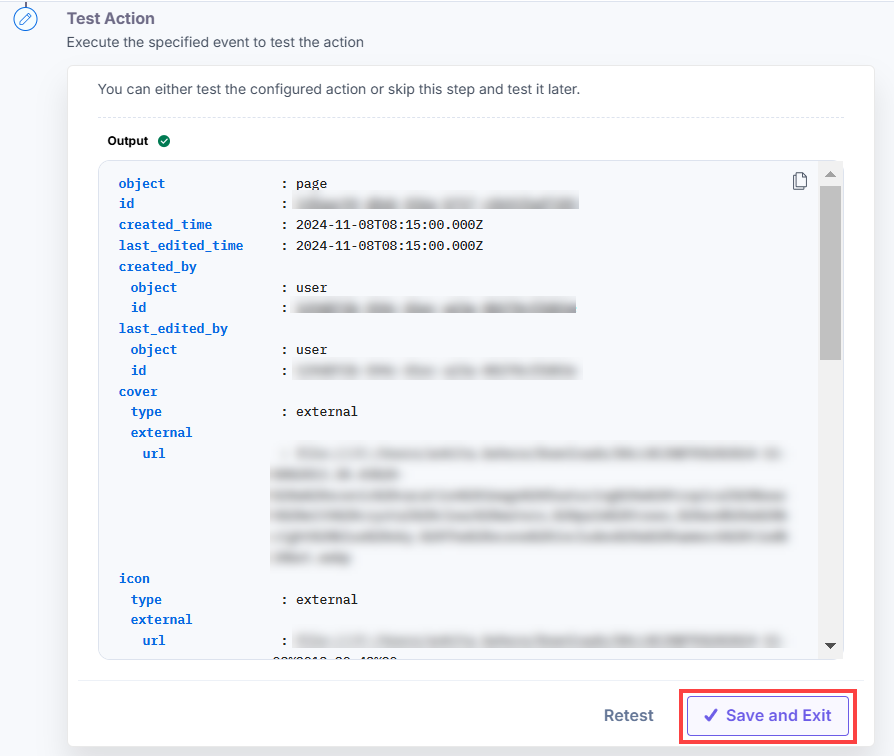
- Check if the details are correct. If yes, click Test Action.

- Once set, click Save and Exit.
Action 3: Select the Delete a Database action
- Under Choose an Action tab, select the Delete a Database action.
- On the Delete a Database Configure Action page, enter the details given below:
- Click + Add New Account button to connect your Notion account as shown in the Connect your Notion Account to Automate step.
- Select a Database Name to delete.
Warning: This action will permanently remove all the content within the database.

- Click Proceed.
- Check if the details are correct. If yes, click Test Action.

- Once set, click Save and Exit.

Action 4: Select the Delete a Page action
- Under Choose an Action tab, select the Delete a Page action.
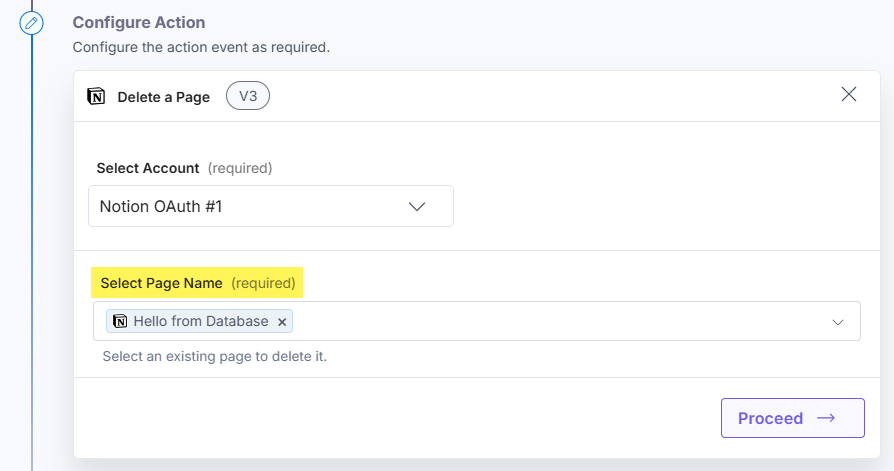
- On the Delete a Page Configure Action page, enter the details given below:
- Click + Add New Account button to connect your Notion account as shown in the Connect your Notion Account to Automate step.
- Select a Page Name to delete.
Warning: This action will permanently remove all the content within the selected page.
- Click Proceed.
- Check if the details are correct. If yes, click Test Action.

- Once set, click Save and Exit.

Action 5: Select the Get Page Details action
- Under Choose an Action tab, select the Get Page Details action.
- On the Get Page Details Configure Action page, enter the details given below:
- Click + Add New Account button to connect your Notion account as shown in the Connect your Notion Account to Automate step.
- Select a Page Name to fetch its details.
- Optionally, enable the Show Optional Fields toggle button to check the Include page content box. This retrieves details of all the child elements within the page.

- Click Proceed.
- Check if the details are correct. If yes, click Test Action.

- Once set, click Save and Exit.

This sets the Notion connector.


.svg?format=pjpg&auto=webp)
.svg?format=pjpg&auto=webp)
.png?format=pjpg&auto=webp)


.png?format=pjpg&auto=webp)