Contentstack Management - Releases Actions
A Release comprises entries and assets that need to be deployed at the same time, either in a published or unpublished state, to a designated environment. You can perform release based operations using the Contentstack Management Releases actions.
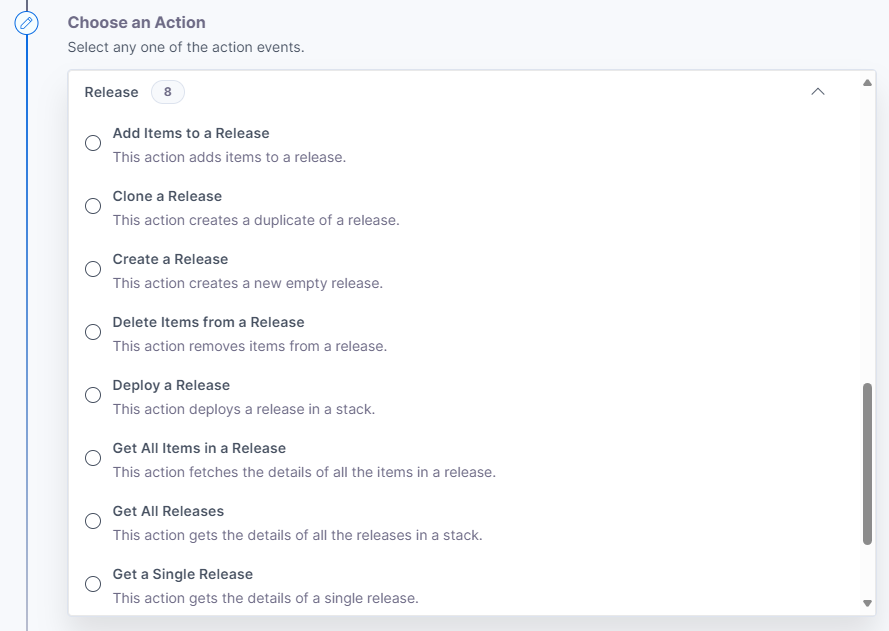
Let’s look at each of these in detail.
Add Items to a Release
This action lets you add multiple items to a release.
- Under Choose an Action tab, select the Add Items to a Release action.
- Click + Add New Account button to connect your Contentstack account as shown in the Connect your Contentstack Account to Automate step.
- Select a Stack, Branch, and Release from the Lookup list. Provide your item data in the Release Item Data field.
Note: Provide your entry data as per the schema in JSON format only. Both entries and assets can be added to the release. In case of assets, the value for the content_type_uid key should be built_io_upload.
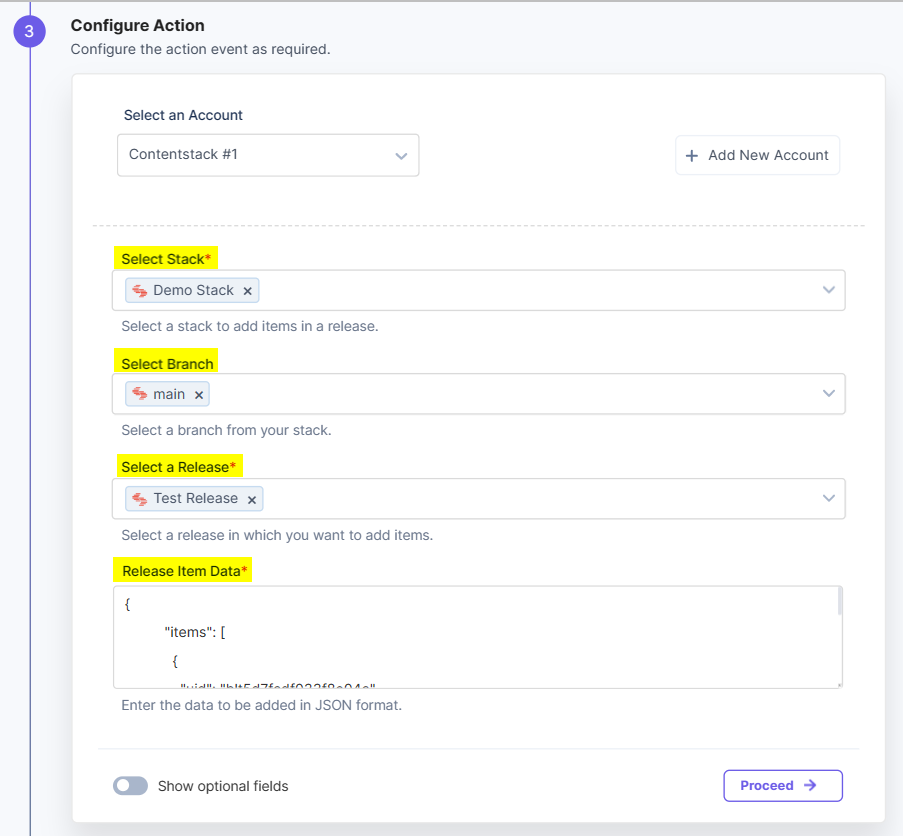
Note: By default, the main branch is selected (even if the Branch field is empty).
- [Optional] Enable the Show Optional Fields toggle button to display the branch details by clicking the Include branch checkbox.
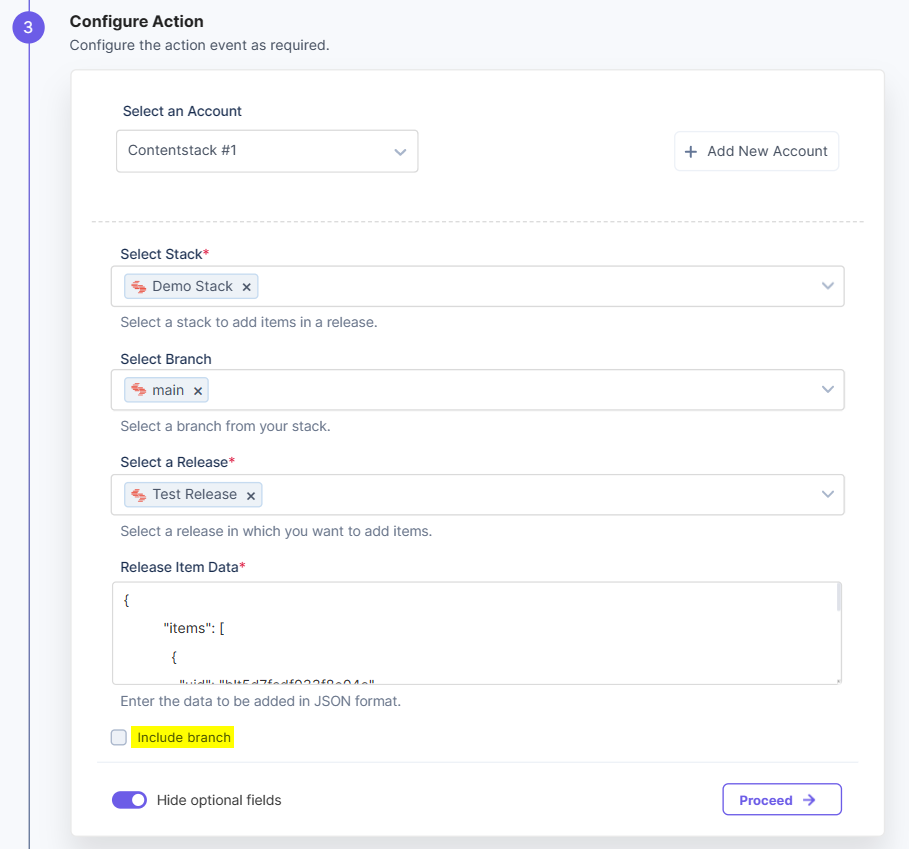
- Once done, click Proceed.
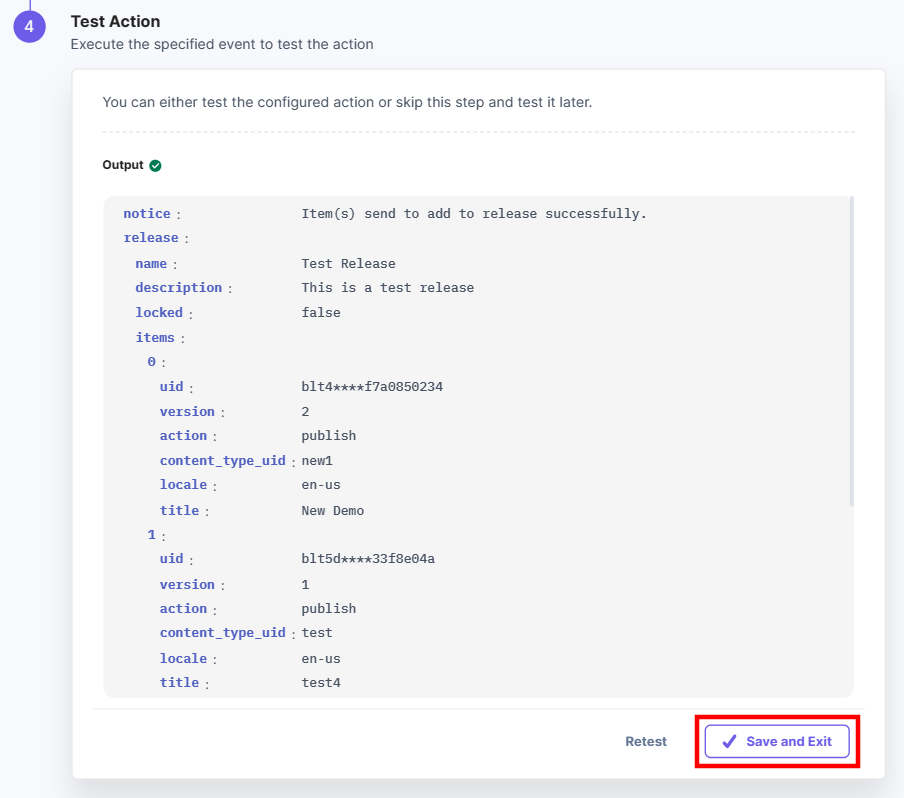
- Click Test Action to test the configured action.

- The output will be shown as follows. Click the Save and Exit button.
Clone a Release
This action lets you create a copy of a release.
- Under Choose an Action tab, select the Clone a Release action.
- Click + Add New Account button to connect your Contentstack account as shown in the Connect your Contentstack Account to Automate step.
- Select a Stack, Branch, and Release from the Lookup list.

Note: By default, the main branch is selected (even if the Branch field is empty).
- Provide a Release Name and a Release Description for the release to be created.
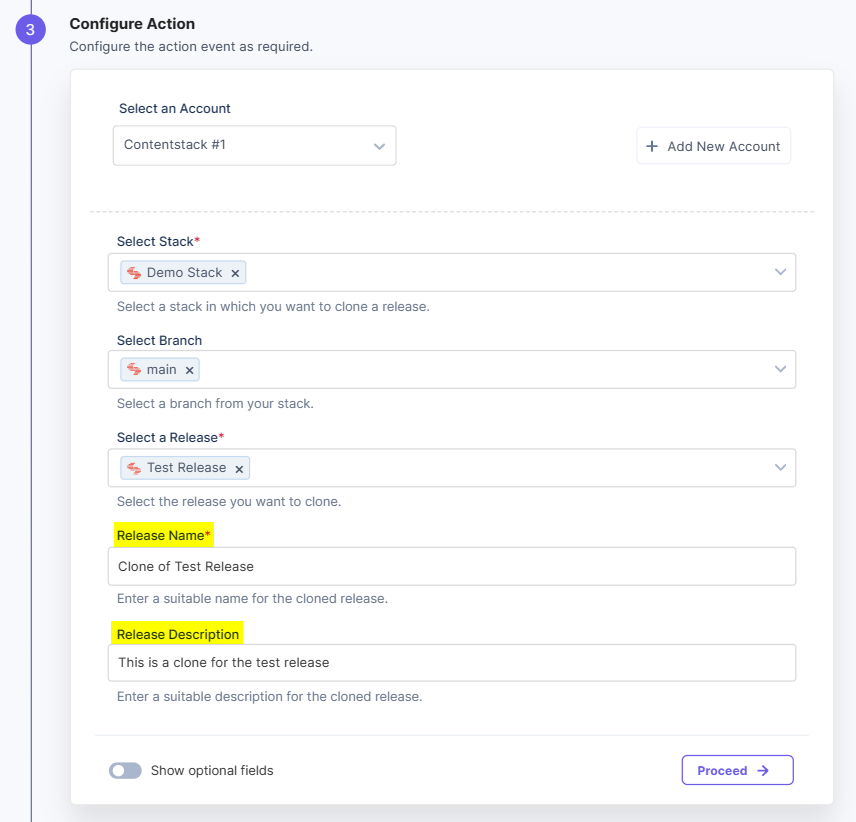
- [Optional] Enable the Show optional fields toggle button to display the branch details by clicking the Include branch checkbox.

- Once done, click Proceed.
- Click Test Action to test the configured action.

- The output will be shown as follows. Click the Save and Exit button.

Create a Release
This action lets you create a release.
- Under Choose an Action tab, select the Create a Release action.
- Click + Add New Account button to connect your Contentstack account as shown in the Connect your Contentstack Account to Automate step.
- Select a Stack, Release Name, Release Description, and Branch from the Lookup list.

Note: By default, the main branch is selected (even if the Branch field is empty).
- [Optional] Enable the Show Optional Fields toggle button to display the branch details by clicking the Include branch checkbox.

- Once done, click Proceed.
- Click Test Action to test the configured action.

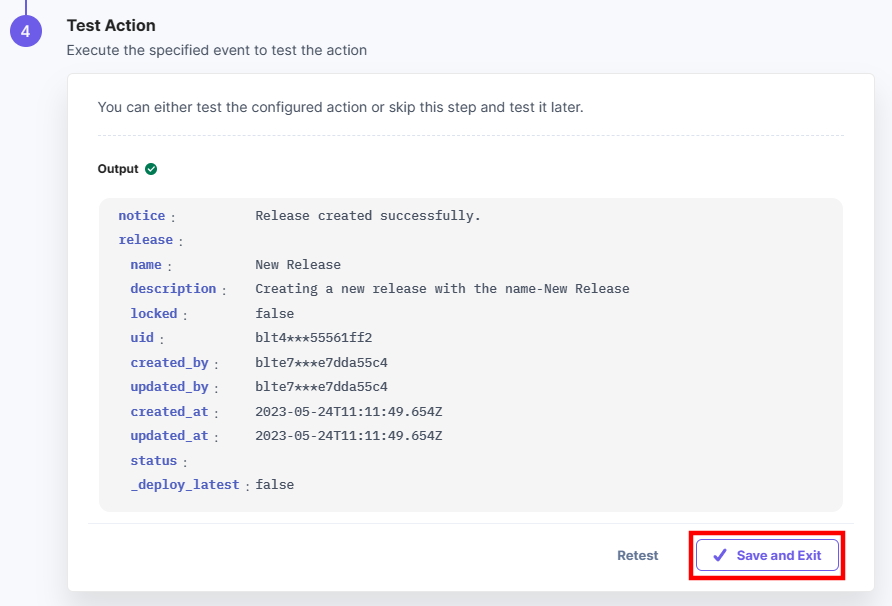
- The output will be shown as follows. Click the Save and Exit button.
Delete Items from a Release
This action lets you delete multiple items from a release.
- Under Choose an Action tab, select the Delete Items from a Release action.
- Click + Add New Account button to connect your Contentstack account as shown in the Connect your Contentstack Account to Automate step.
- Select a Stack, Branch, and Release from the Lookup list. Provide your item data in the Release Item Data field.
Note: Provide your entry data as per the schema in JSON format only.

Note: By default, the main branch is selected (even if the Branch field is empty).
- [Optional] Enable the Show Optional Fields toggle button to display the branch details by clicking the Include branch checkbox.

- Once done, click Proceed.
- Click Test Action to test the configured action.

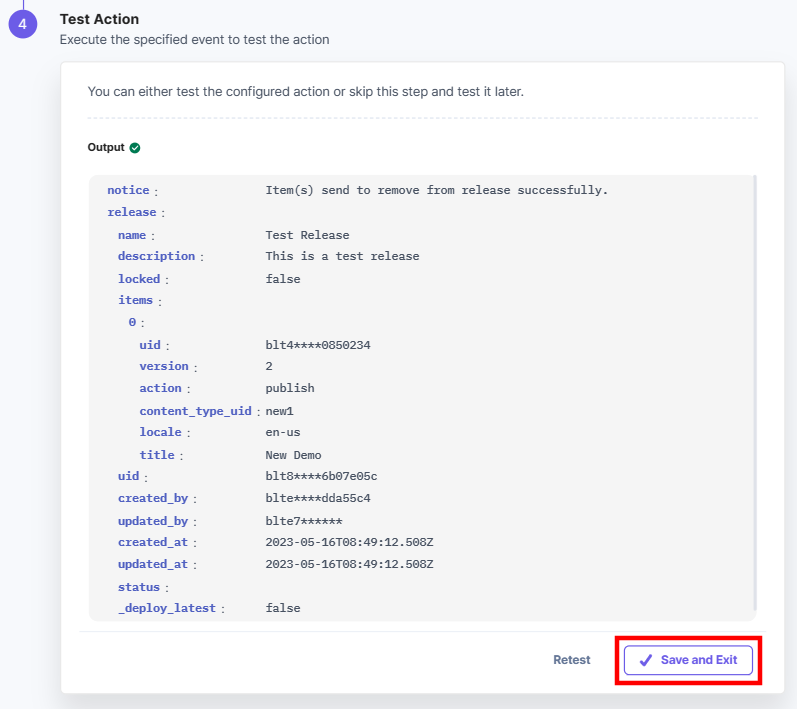
- The output will be shown as follows. Click the Save and Exit button.
Deploy a Release
This action lets you deploy a release to an environment.
- Under Choose an Action tab, select the Deploy a Release action.
- On the Deploy a Release Configure Action page, enter the details given below:
- Click + Add New Account button to connect your Contentstack account as shown in the Connect your Contentstack Account to Automate step.
- Select a Stack, Branch, and Release from the Lookup list.
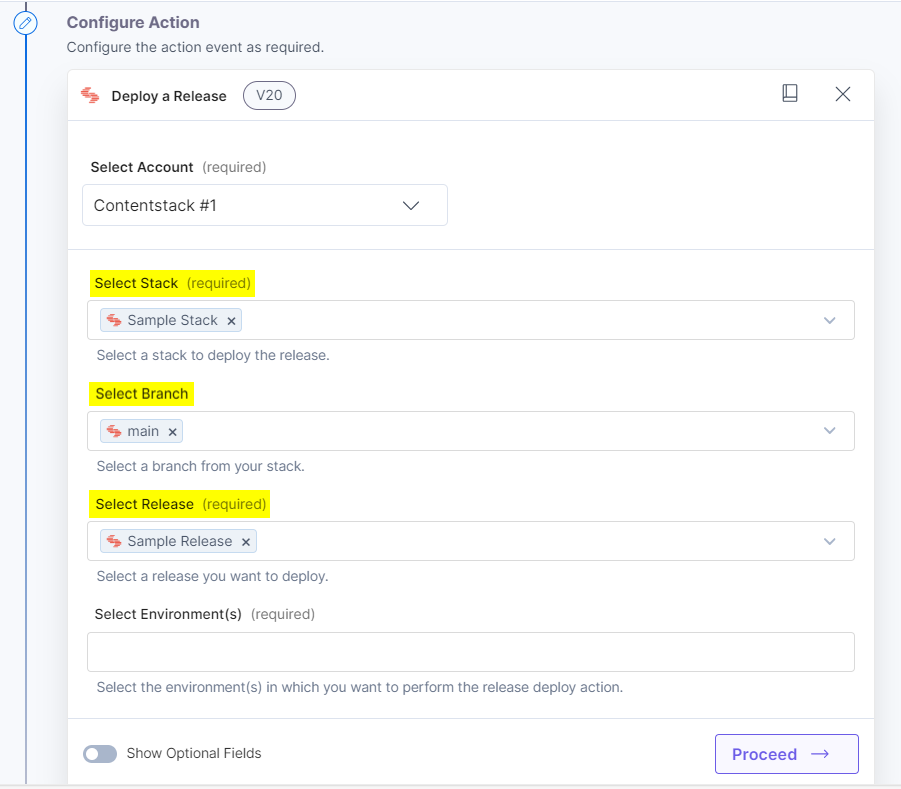
Note: By default, the main branch is selected (even if the Branch field is empty).
- Select the Environment(s) to deploy the release from the Lookup list.
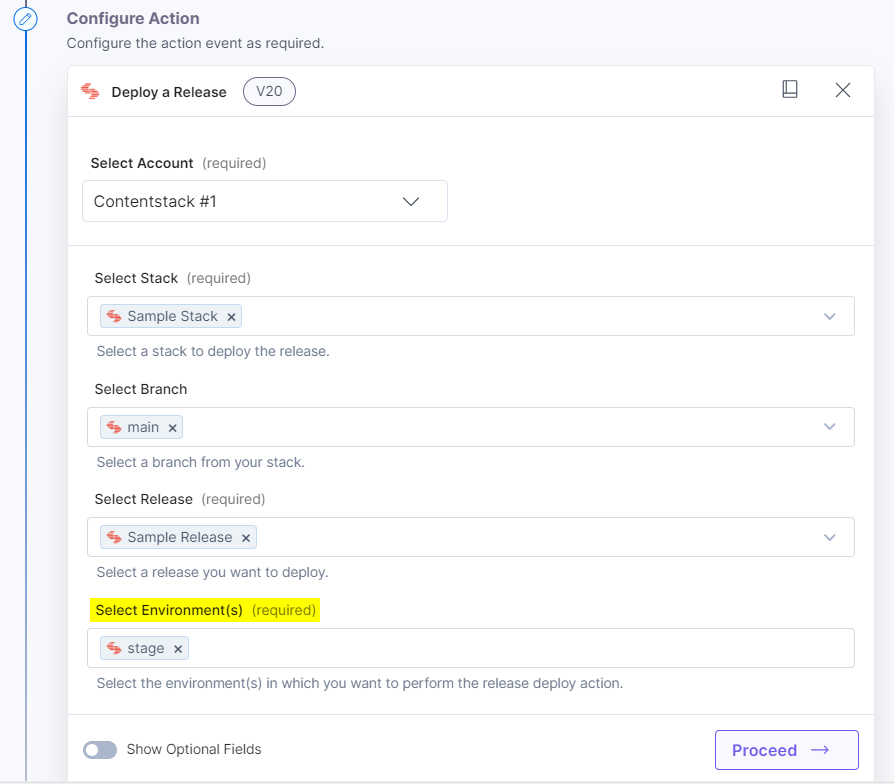
- [Optional] Enable the Show Optional fields toggle button to display the Publish Schedule field to schedule the deployment of the release.
Note: The release will be published immediately if the Publish Schedule field is empty.

- Once done, click Proceed.
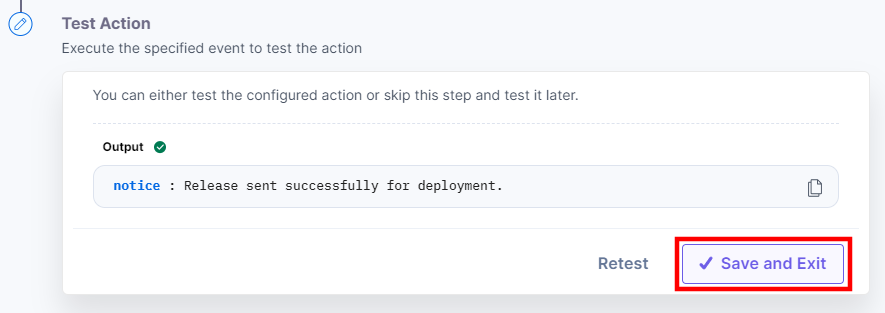
- Click Test Action to test the configured action.

- The output will be shown as follows. Click the Save and Exit button.
Get All Items in a Release
This action fetches all the items present in a release.
- Under Choose an Action tab, select the Get All Items in a Release action.
- Click + Add New Account button to connect your Contentstack account as shown in the Connect your Contentstack Account to Automate step.
- Select a Stack, Branch, and Release from the Lookup list.

Note: By default, the main branch is selected (even if the Branch field is empty).
- [Optional] Enable the Show Optional Fields toggle button to display the Locale. You can also include the branch details by clicking the Include branch checkbox.

- Once done, click Proceed.
- Click Test Action to test the configured action.

- The output will be shown as follows. Click the Save and Exit button.

Get All Releases
This action fetches all the releases present in a stack.
- Under Choose an Action tab, select the Get All Releases action.
- Click + Add New Account button to connect your Contentstack account as shown in the Connect your Contentstack Account to Automate step.
- Select a Stack, and Branch from the Lookup list. Click the checkboxes for Include Count and Include count of release items to fetch the release details.

Note: By default, the main branch is selected (even if the Branch field is empty).
- [Optional] Enable the Show Optional Fields toggle button to display the Limit Release, and Skip Release fields. You can also include the branch details by clicking the Include branch checkbox.

- Once done, click Proceed.
- Click Test Action to test the configured action.

- The output will be shown as follows. Click the Save and Exit button.

Get a Single Release
This action fetches the details of a single release.
- Under Choose an Action tab, select the Get a Single Release action.
- Click + Add New Account button to connect your Contentstack account as shown in the Connect your Contentstack Account to Automate step.
- Select a Stack, Branch, and Release from the Lookup list.

Note: By default, the main branch is selected (even if the Branch field is empty).
- [Optional] Enable the Show Optional Fields toggle button to display the branch details by clicking the Include branch checkbox.

- Once done, click Proceed.
- Click Test Action to test the configured action.

- The output will be shown as follows. Click the Save and Exit button.


.svg?format=pjpg&auto=webp)
.svg?format=pjpg&auto=webp)
.png?format=pjpg&auto=webp)


.png?format=pjpg&auto=webp)