Create New Page
Contentstack's Visual Builder empowers users to effortlessly create and customize web pages without the need for coding expertise. This document provides a comprehensive guide on utilizing the Visual Builder to create new pages.
To create a new page, log in to your Contentstack account, and perform the following steps:
- Go to your stack where you want to preview and manage your website.
- In the left panel, click the Visual Experience icon. By default you would see the Timeline preview. Click Builder from the pill at the bottom to switch to Visual Builder.
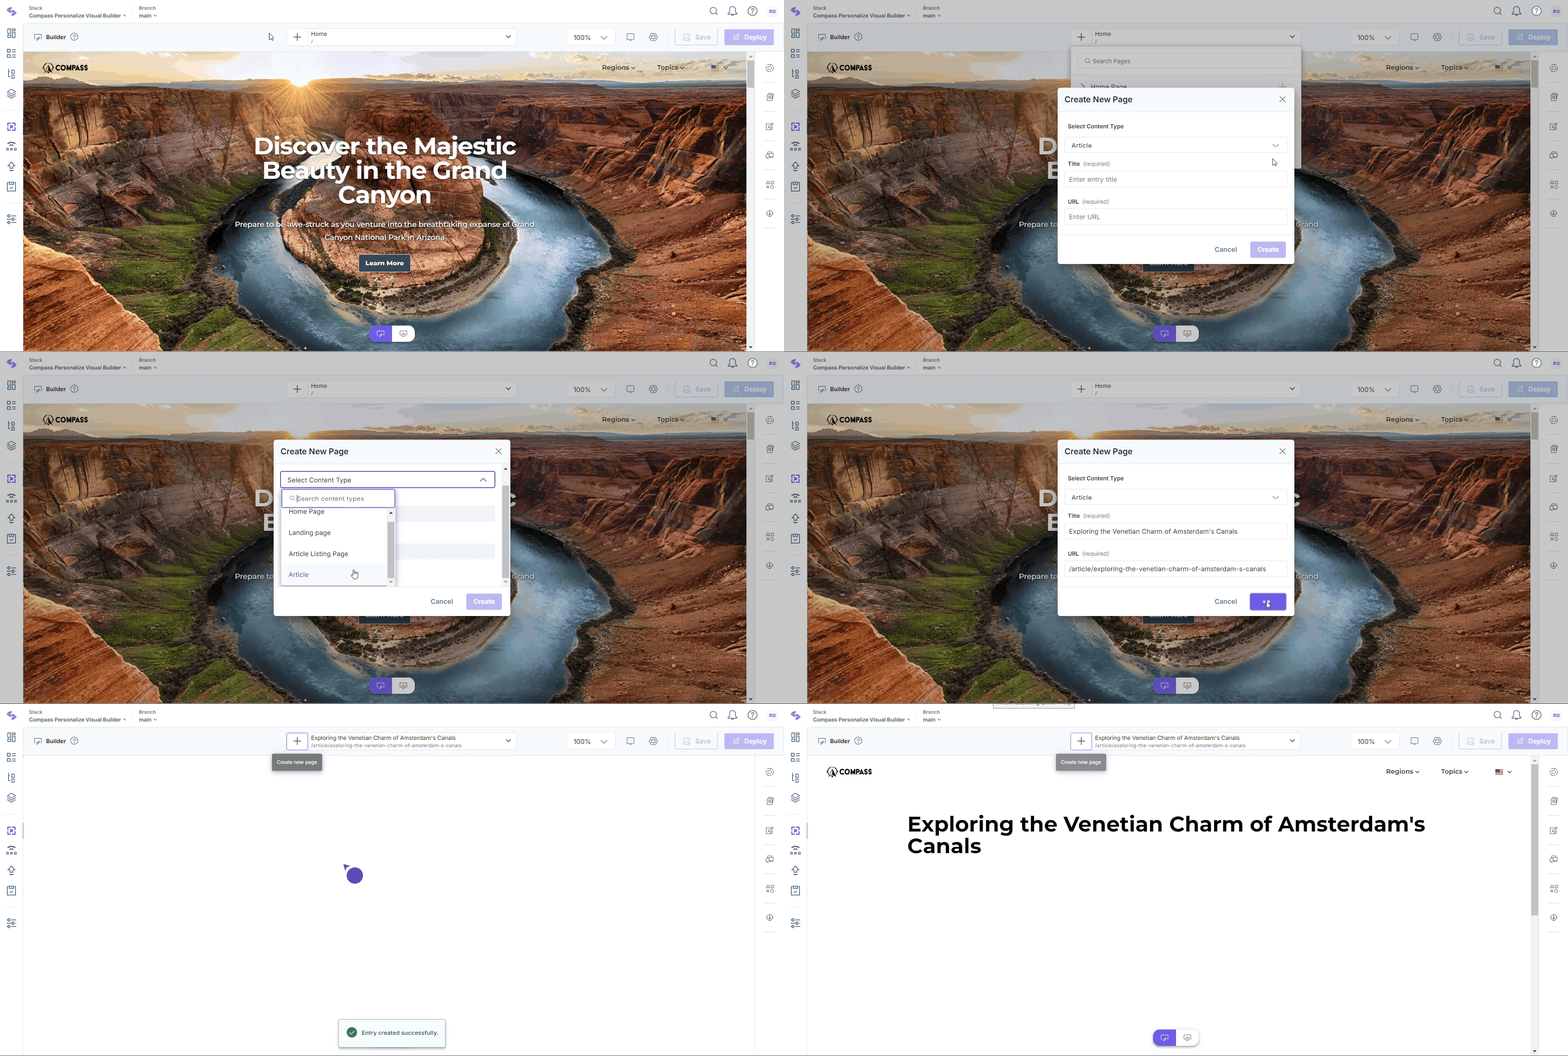
- In the URL bar, click the “+” icon. In the Create New Page modal that appears, add the following details:
- Select Content Type: Select a content type in which you want to create the new page.
- Title: Enter the title of the page. This also corresponds to the entry title.
- URL: The URL is auto-generated based on the title. You can edit the URL, if needed.
- Click the Create button to create the page.

- Alternatively, click the dropdown in the URL bar to view the available content types, then click the “+” icon next to the content type where you want to create a new page.
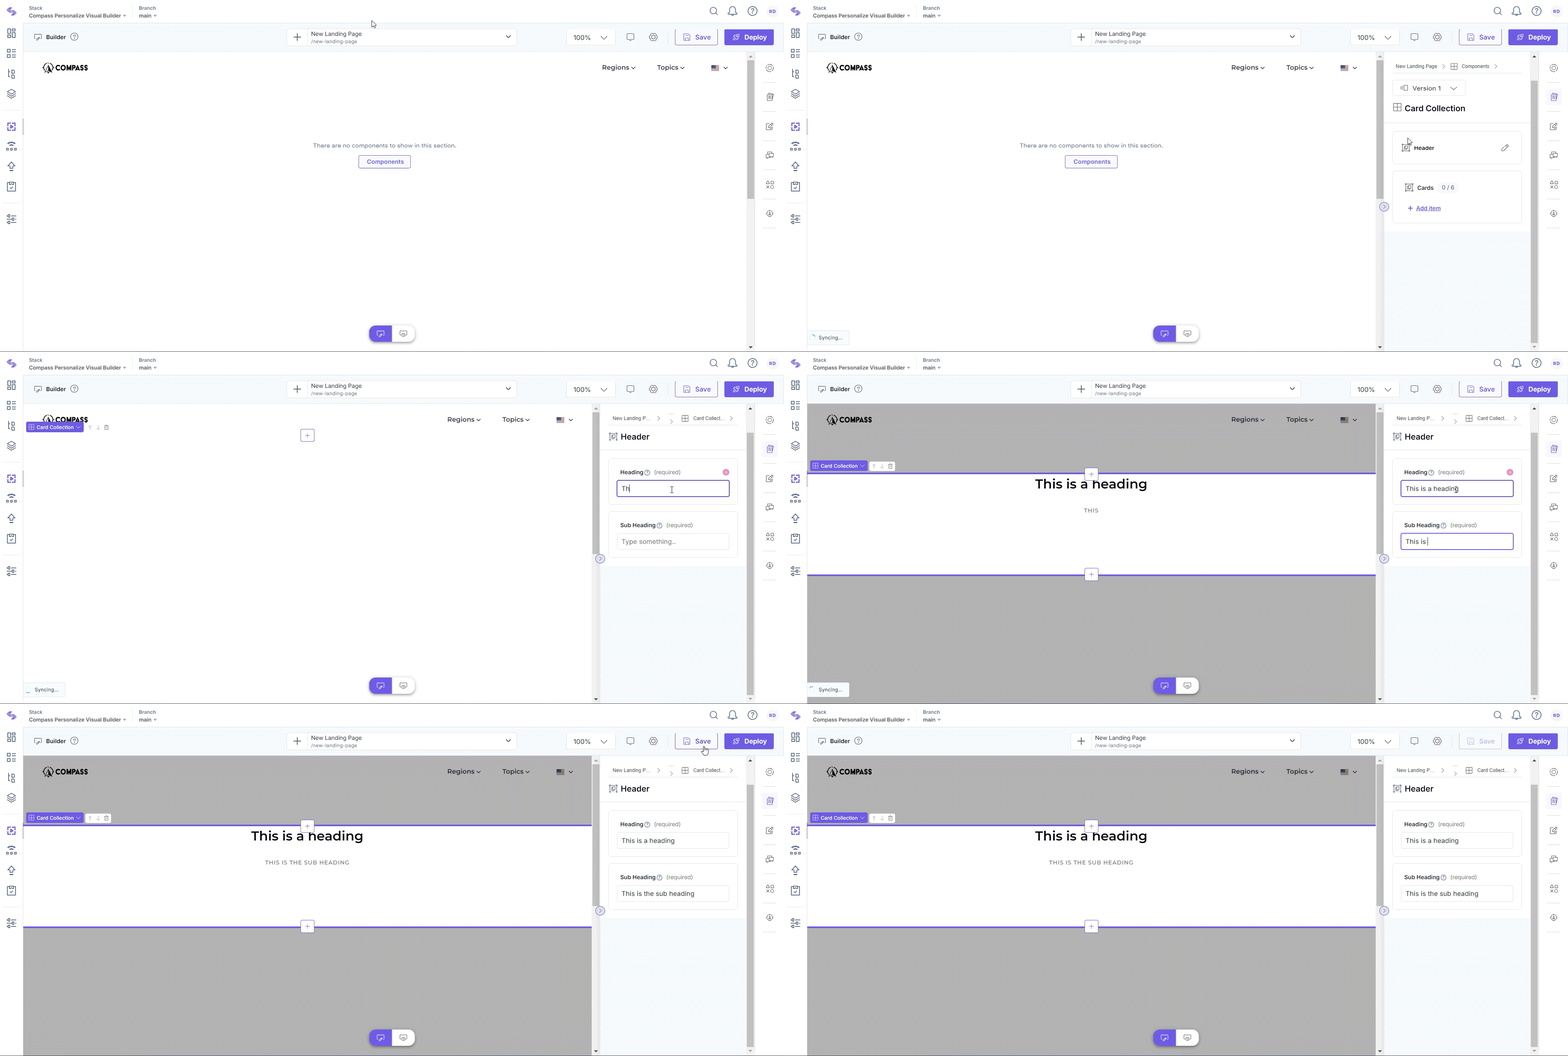
- You will see the new URL in the URL bar. Now, you can build your page by adding page components to it. Click the Components button.
Note: These page components are based on the content model of the selected content type.
- Select the desired page component, and in the right panel that appears, enter the content for your page.
- As you add content to the entry, a preview of your page will be displayed on the canvas. Once satisfied with the changes, click Save in the top-right corner. Confirm the action by clicking Save in the Save Changes modal.

With Visual Builder, the process of page creation is effortless, enabling users of all technical levels to design, preview, and publish engaging digital experiences. By following these guidelines, you can harness the full potential of the Visual Builder to bring your web page visions to life.


.svg?format=pjpg&auto=webp)
.svg?format=pjpg&auto=webp)
.png?format=pjpg&auto=webp)


.png?format=pjpg&auto=webp)