Add Entry/Asset to a Release
After creating a release, you can start adding entries or assets to it.
Additional Resource: You can now bulk add multiple entries to a release.
To add entries or added to a release, log in to your Contentstack account and follow these steps:
- Navigate to the desired stack, then click the “Entries” or “Assets” icon on the left navigation panel and select an existing entry or asset.
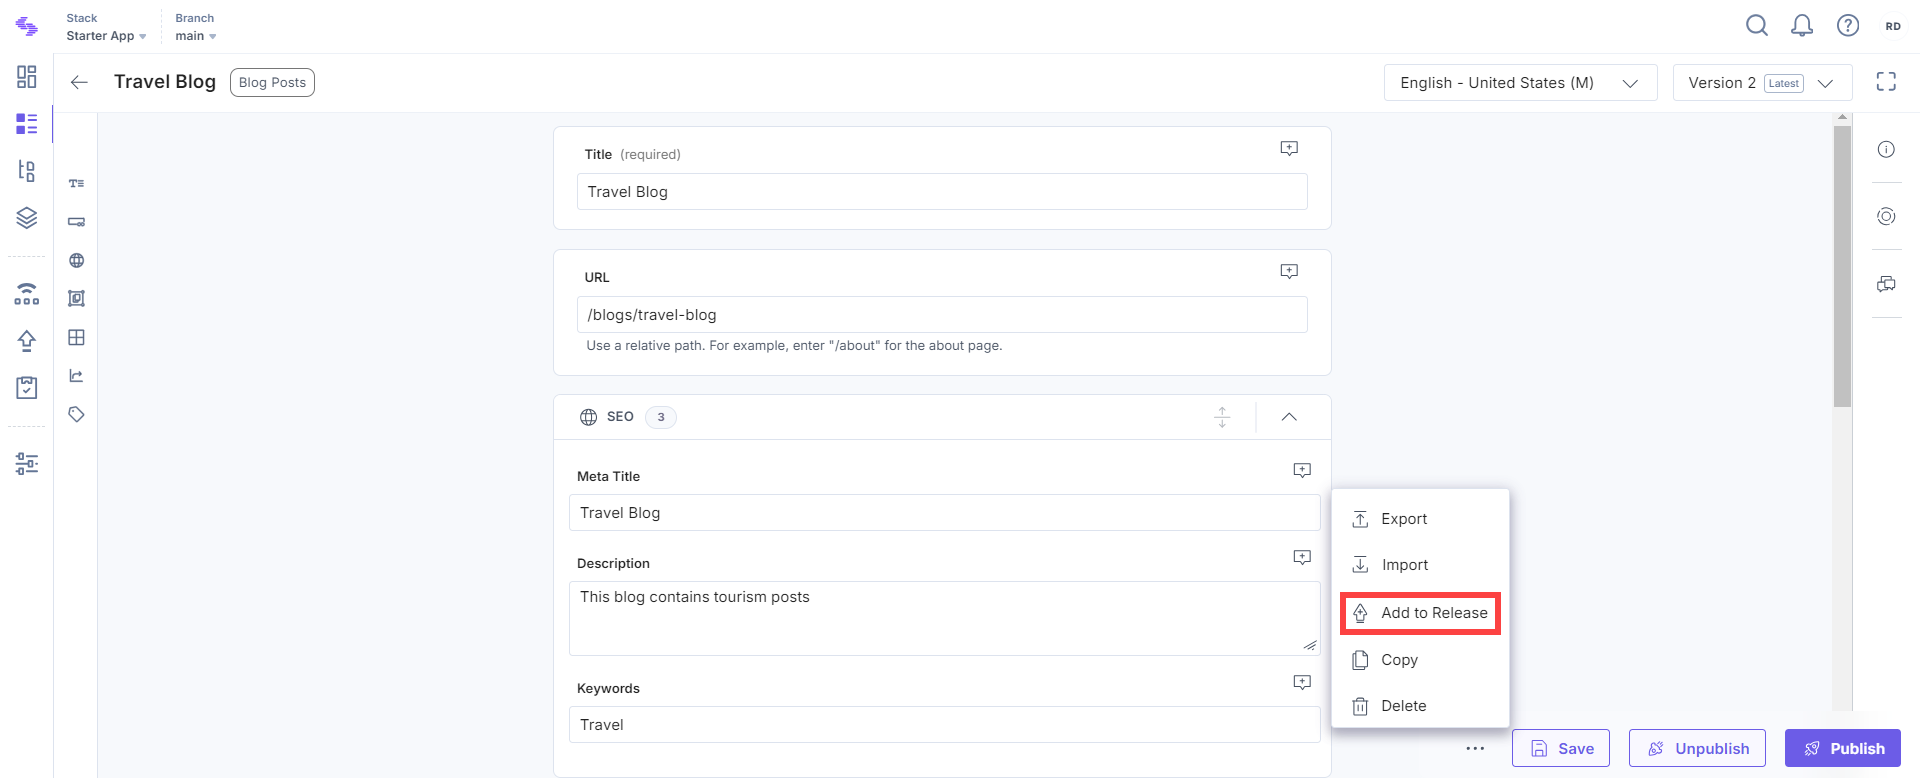
- Click the horizontal ellipsis at the bottom of the entry editor and click Add to Release.

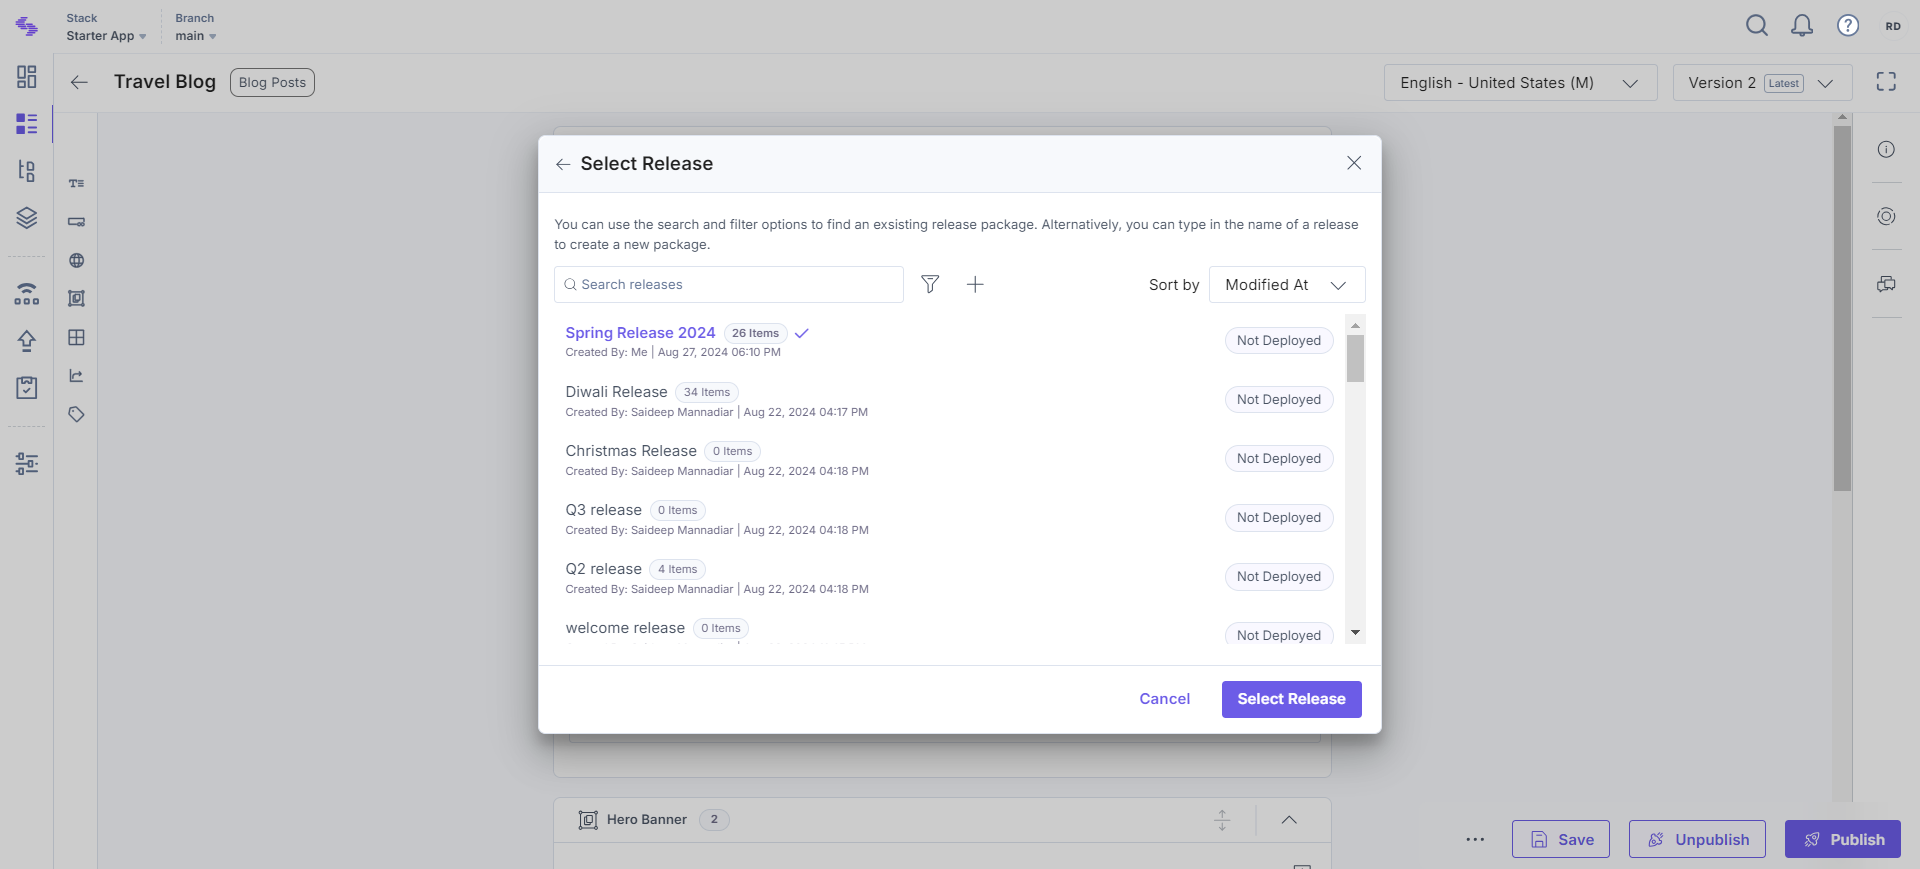
- In the Add to Release modal, either select an existing release or create a new one.

Note: For older releases, you may receive a warning message indicating that references will not be included, or that only one level of nesting is published/unpublished for single items. To avoid this, create a new release or clone the older release.
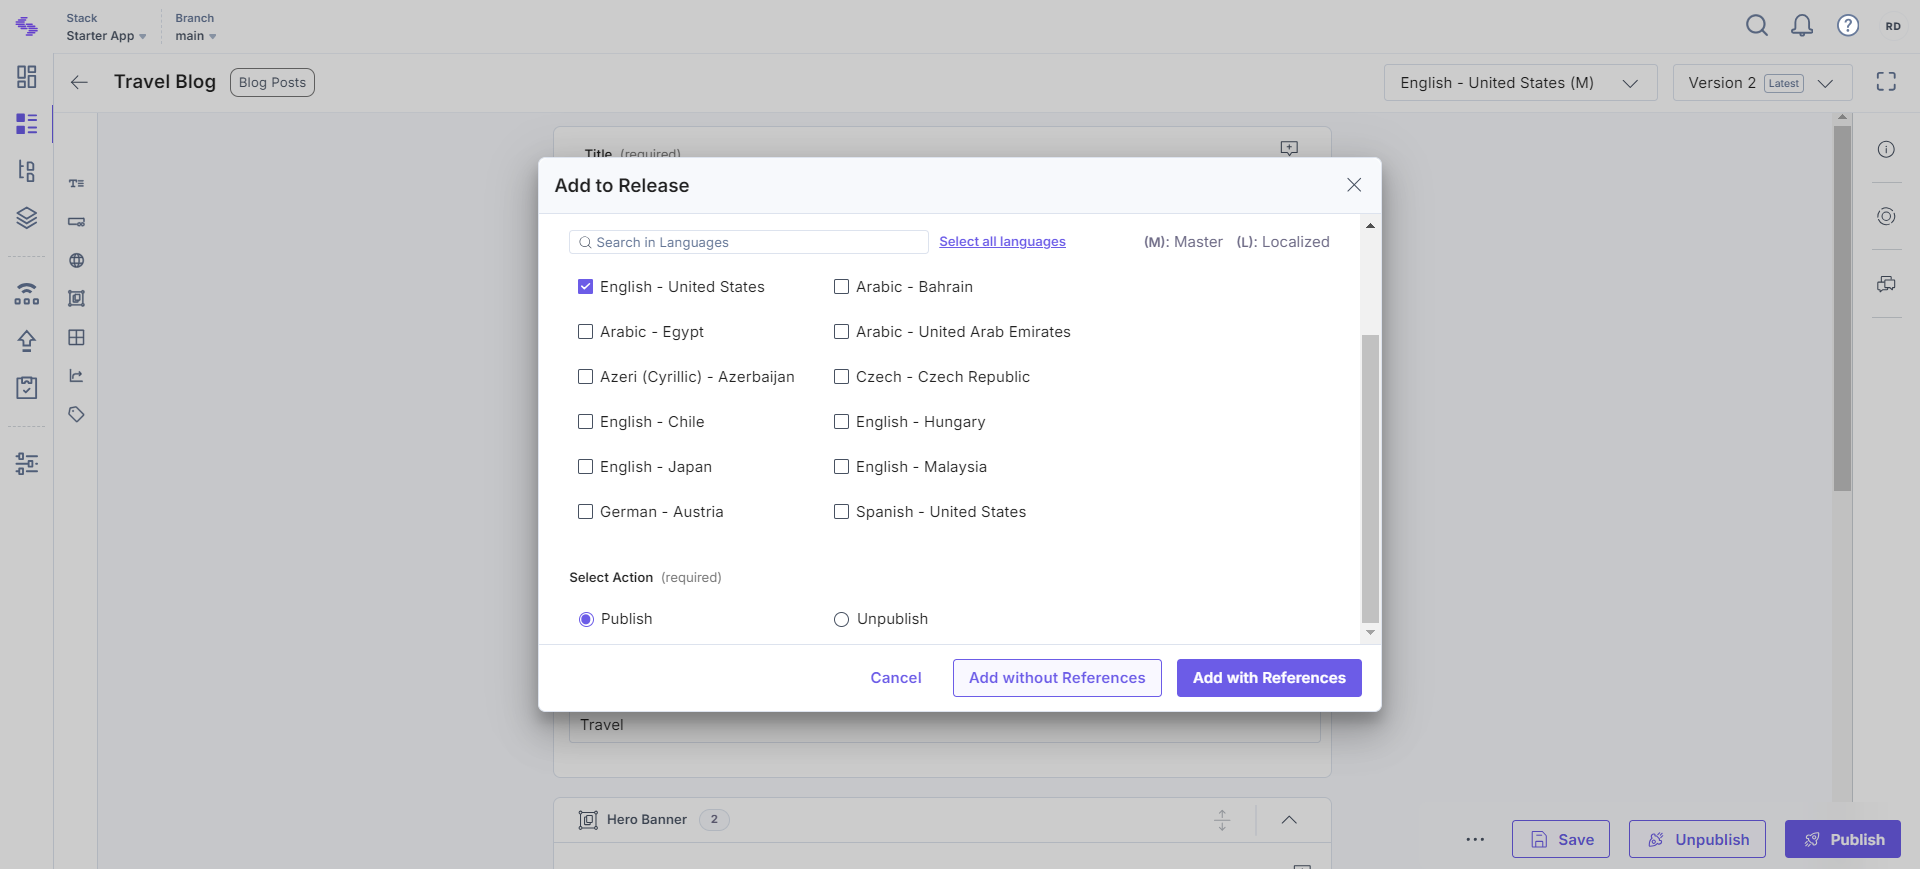
- Select the languages in which you want to deploy the entries. Specify the Publish or Unpublish action you want to perform.

Note: The option to select multiple locales is only available when using the latest release. Get in touch with our support team for more information.
- Select Add with References to include all referenced entries or Add without References to add only the selected entry.
Note: You can view the release action logs in the Stack Bulk Task Queue.
- Select the languages in which you want to deploy the entries. Specify the Publish or Unpublish action you want to perform.
After successfully adding items to a release, you can deploy the release to an environment.
Note: You can update the release items to their latest versions before you deploy the release. Refer to our Update Release items to their Latest Versions documentation for more information.
API Reference
To add entries or assets to a release via API, refer to the Add a single item to a Release and Add multiple items to a Release API requests.


.svg?format=pjpg&auto=webp)
.svg?format=pjpg&auto=webp)
.png?format=pjpg&auto=webp)


.png?format=pjpg&auto=webp)