
.svg?format=pjpg&auto=webp)
.svg?format=pjpg&auto=webp)
.png?format=pjpg&auto=webp)


.png?format=pjpg&auto=webp)
Taxonomy for a Basic Blog Website
Taxonomy is a tool that helps you categorize the content on your website, making it easier to manage and share with your team. This example will guide you through setting up a taxonomy for a basic blog website using Contentstack.
Consider you have a blog website focused on Information Technology, with a range of blog posts covering different topics. To streamline your website, you can create a taxonomy named “Blog Posts” and define specific terms such as AI, Data Science, Java, etc., to categorize your blog posts.
To create this taxonomy, log in to your Contentstack account, and perform the following steps:
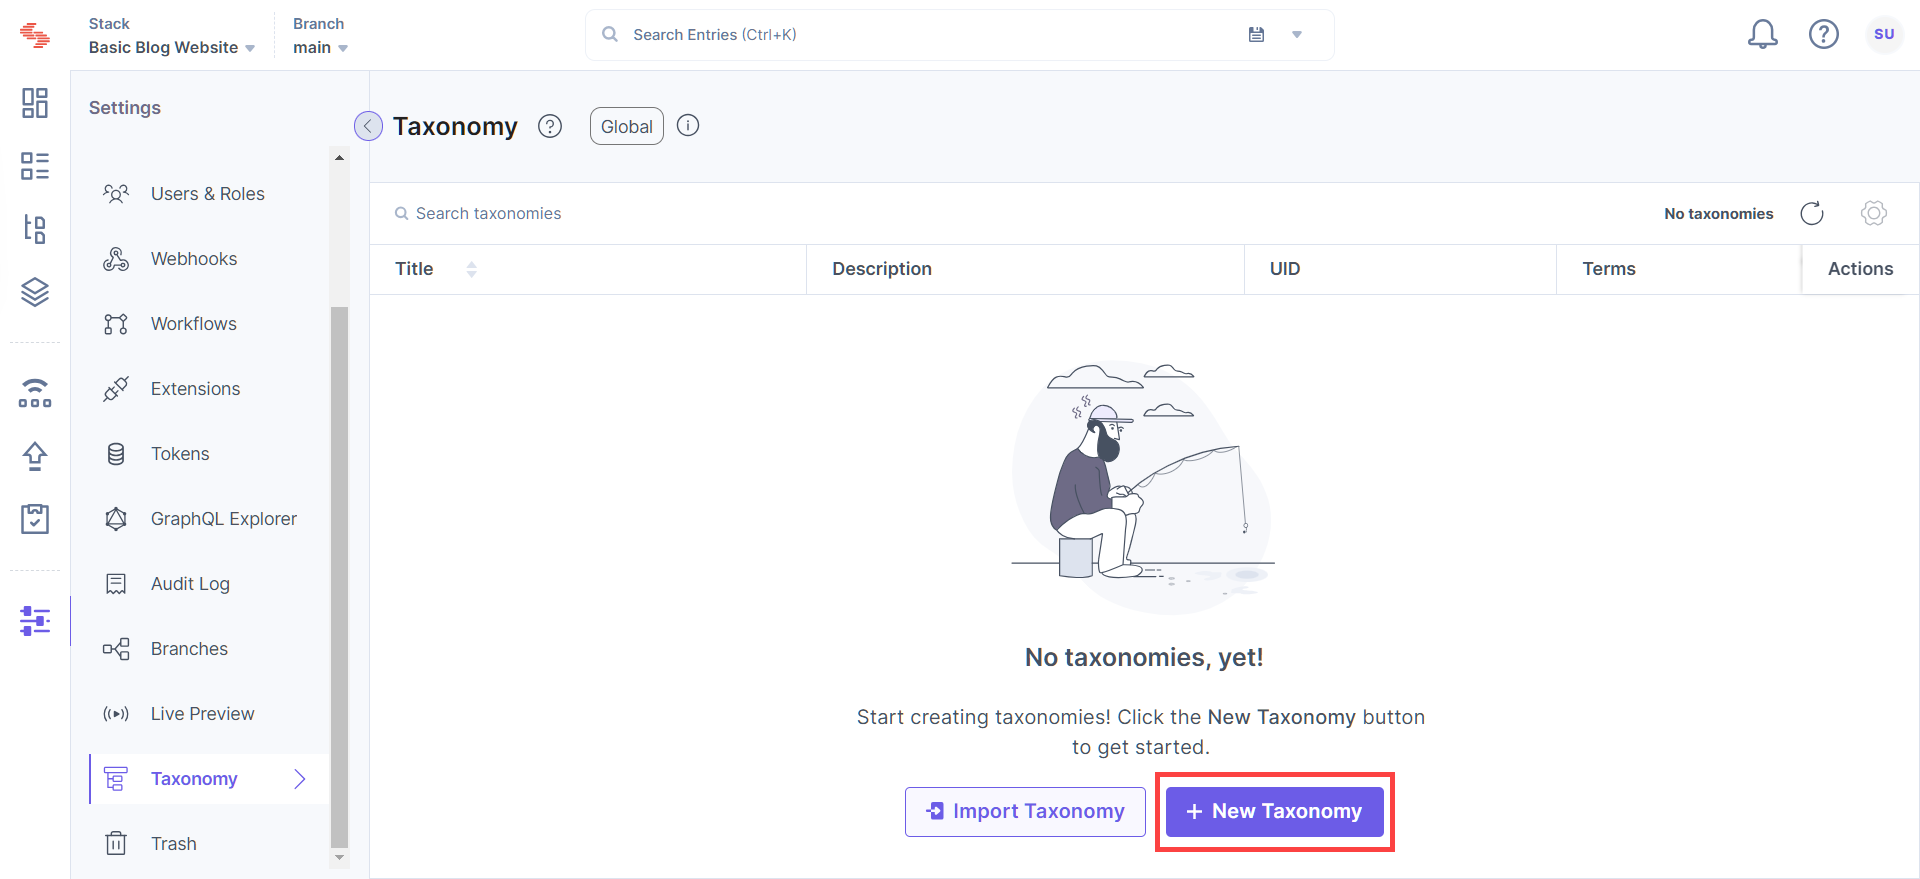
- Go to your stack where you want to create a taxonomy, navigate to the “Settings” icon (press “S”) on the left navigation panel, and select Taxonomy.
- Click the + New Taxonomy button.
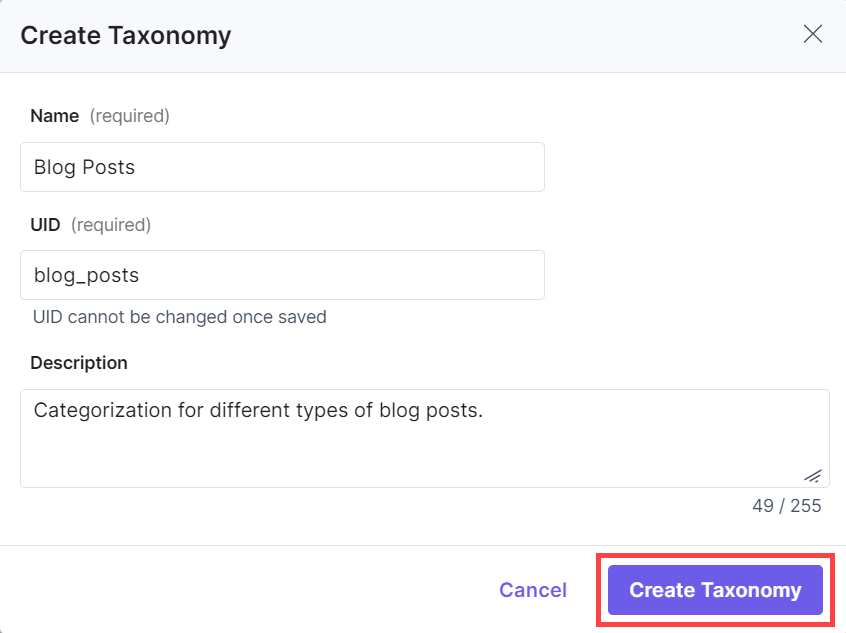
- In the Create Taxonomy modal that appears, add the following details:
- Enter the Name for the taxonomy such as Blog Posts. The Unique ID will be auto-generated.
Note: Once saved, you cannot change the UID.
- Add a Description for your taxonomy. This is an optional step.
- Enter the Name for the taxonomy such as Blog Posts. The Unique ID will be auto-generated.
- Finally, click Create Taxonomy.
- You can now begin the process of defining terms within this taxonomy to categorize the entries in your blog posts stack.
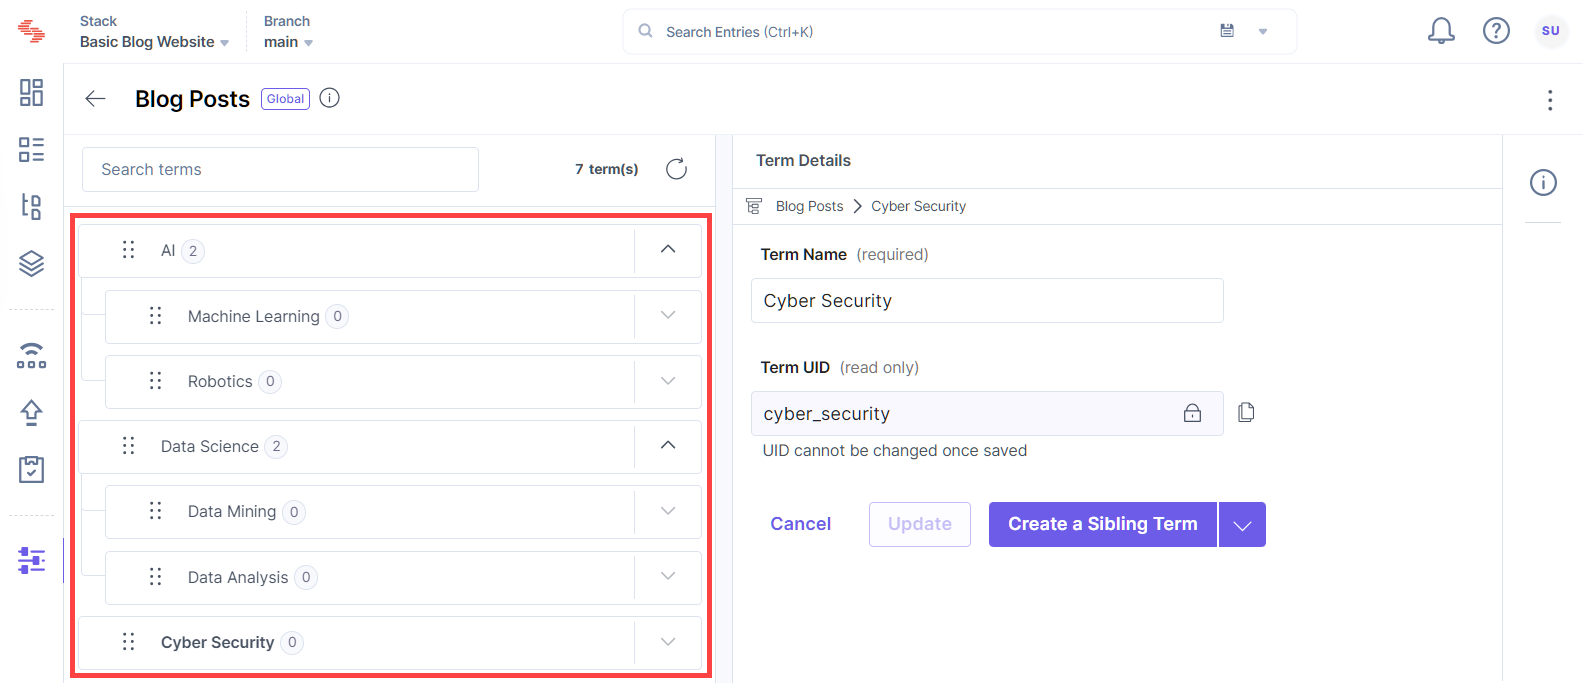
Start by creating a term called Artificial Intelligence and save it. To add child (nested) terms under it, simply click the Create a Child Term button.
Continue creating terms within the Blog Post taxonomy as needed.
- After successfully creating the terms, the left panel will provide you with an outline of all the terms present within the taxonomy.
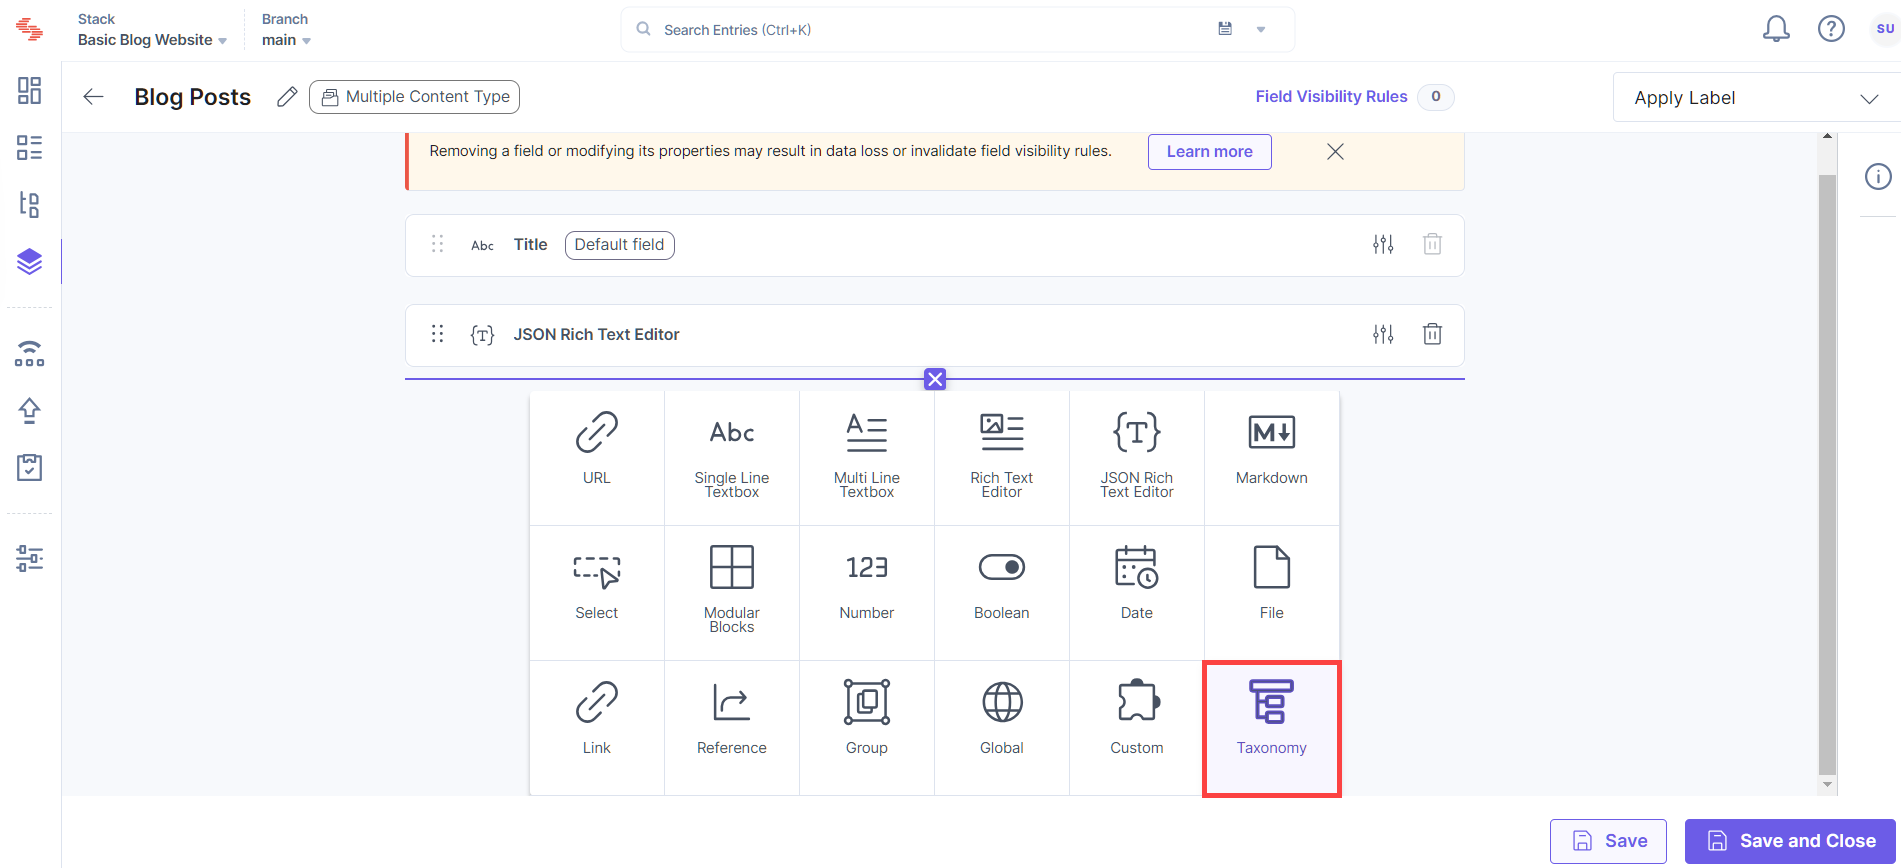
- Choose the Blog Posts content type and within the “Content Type Builder” page, hover your cursor and click the “+” icon to insert a field, then select Taxonomy from the list of available fields.
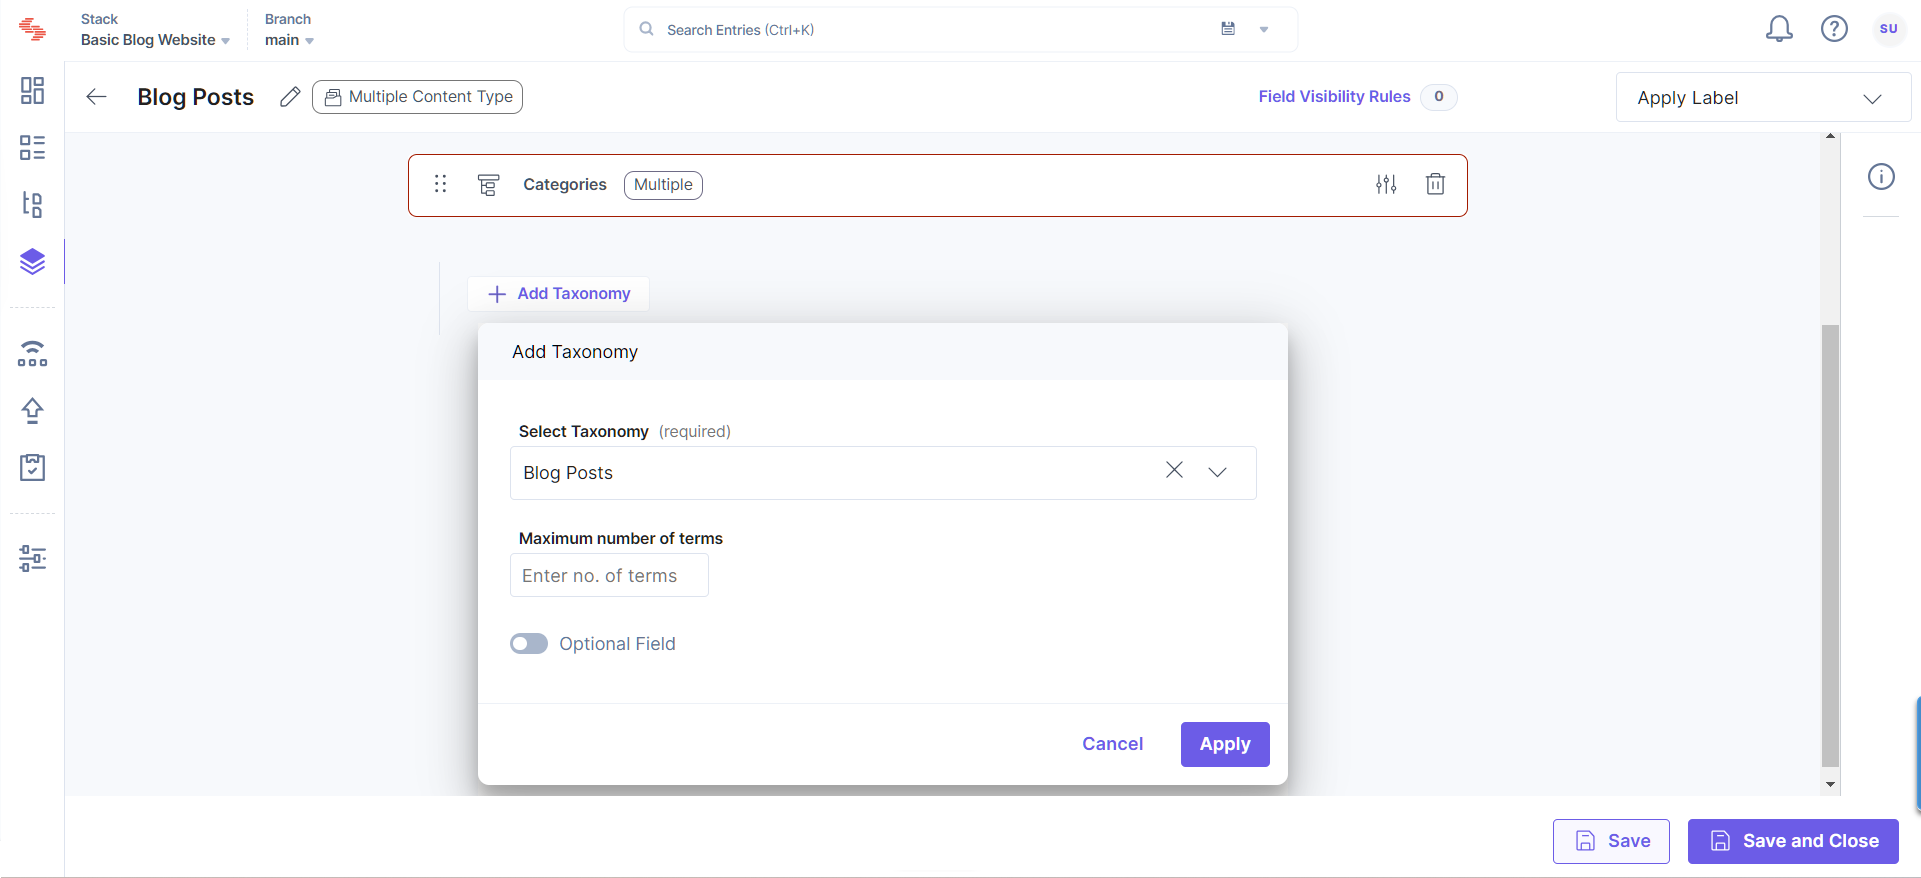
- Name the field Categories.
- Click the + Add Taxonomy button.
- Select Blog Posts from the dropdown menu, which lists the available taxonomies within the stack.
- The field by default is set as mandatory; to make it optional, toggle the Optional field switch.
- Optionally, you can set a maximum number of terms that can be applied to the entry when classifying it.
- Click Apply to add the taxonomy to your content type, and then Save and Close to save your changes.
- Now, when creating a new entry for the Blog Posts content type, you can select term(s) from the dropdown menu within the Categories field.

More articles in "Taxonomy Use-cases"
