Trados App Installation Guide
Trados is a computer-assisted translation software suite created by the company RWS, which helps language professionals manage and streamline their translation projects. It includes tools for communication, workflow management, terminology management, text analysis, and quality assurance.
With the Contentstack Marketplace Trados app, you can easily translate your Releases content (entries) into multiple languages and provide localized versions within your Contentstack entries. You can create a project using the Trados app Dashboard Widget and view the translation status of your projects.
Prerequisites
- Trados account
- Contentstack account
- Access to the Contentstack Organization/Stack as the Owner/Admin
Let's follow this step-by-step guide to install and configure the Trados app within your stack.
Steps for Execution
- Retrieve Configuration Details from Trados
- Install and Configure the Trados app in Contentstack Marketplace
- Use Trados within your Stack
-
Retrieve Configuration Details from Trados
To get your configuration details for Trados, follow the steps given below:
- Log in to the Trados account using your Trados account credentials.
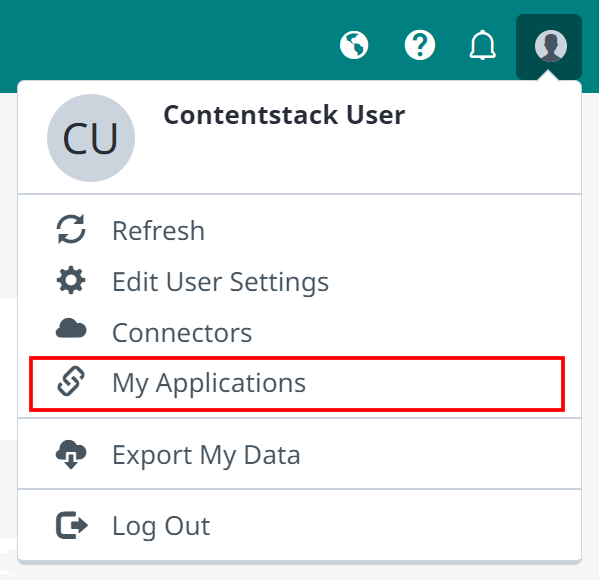
- In the top-right corner of the Dashboard, click the My Account icon and then click My Applications.
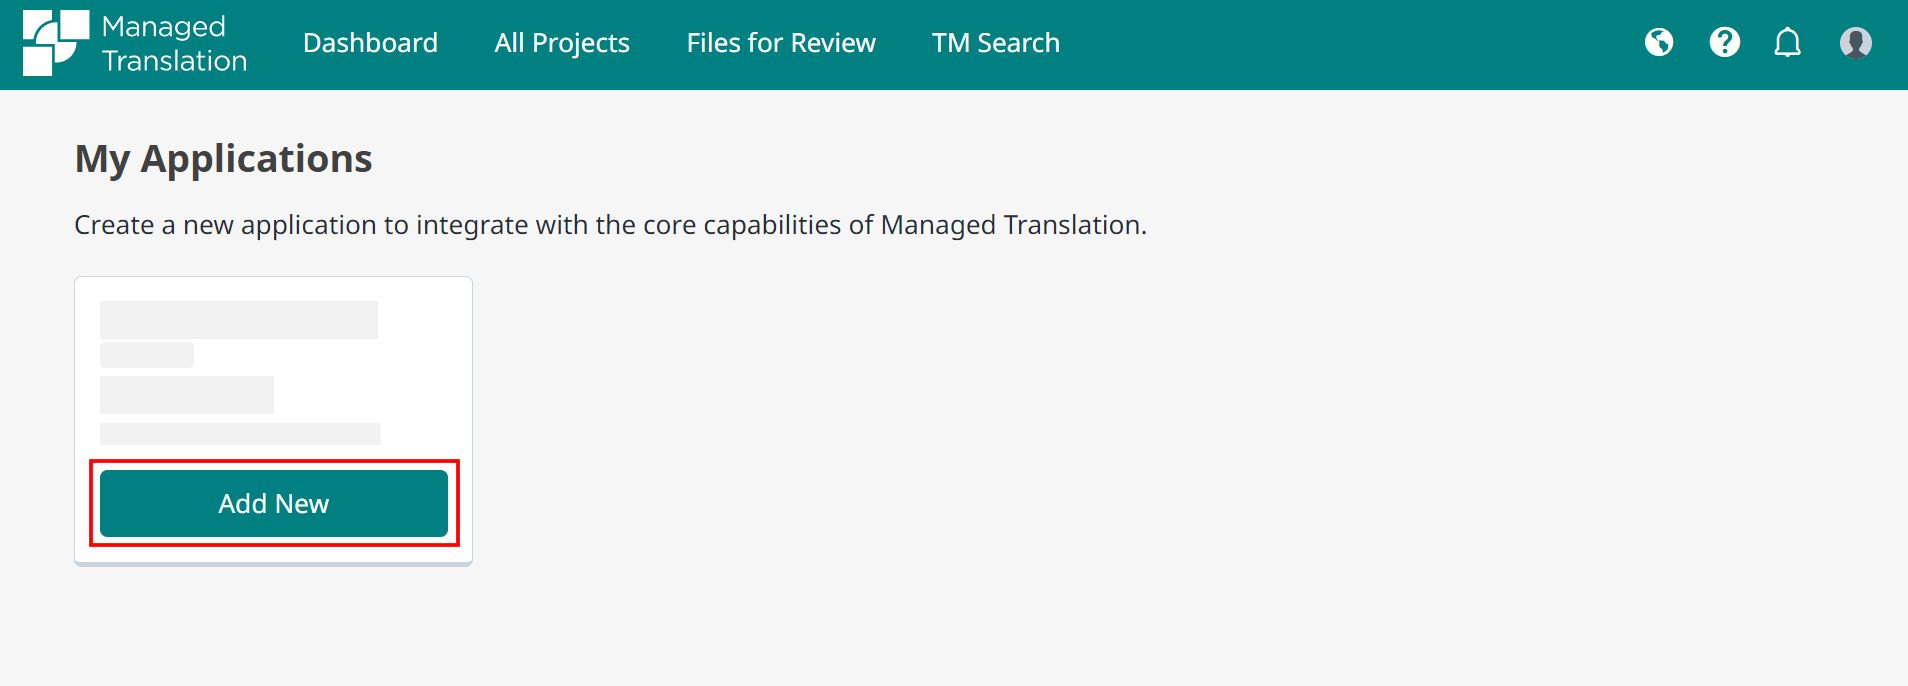
- Now, click the Add New button to create a new application.
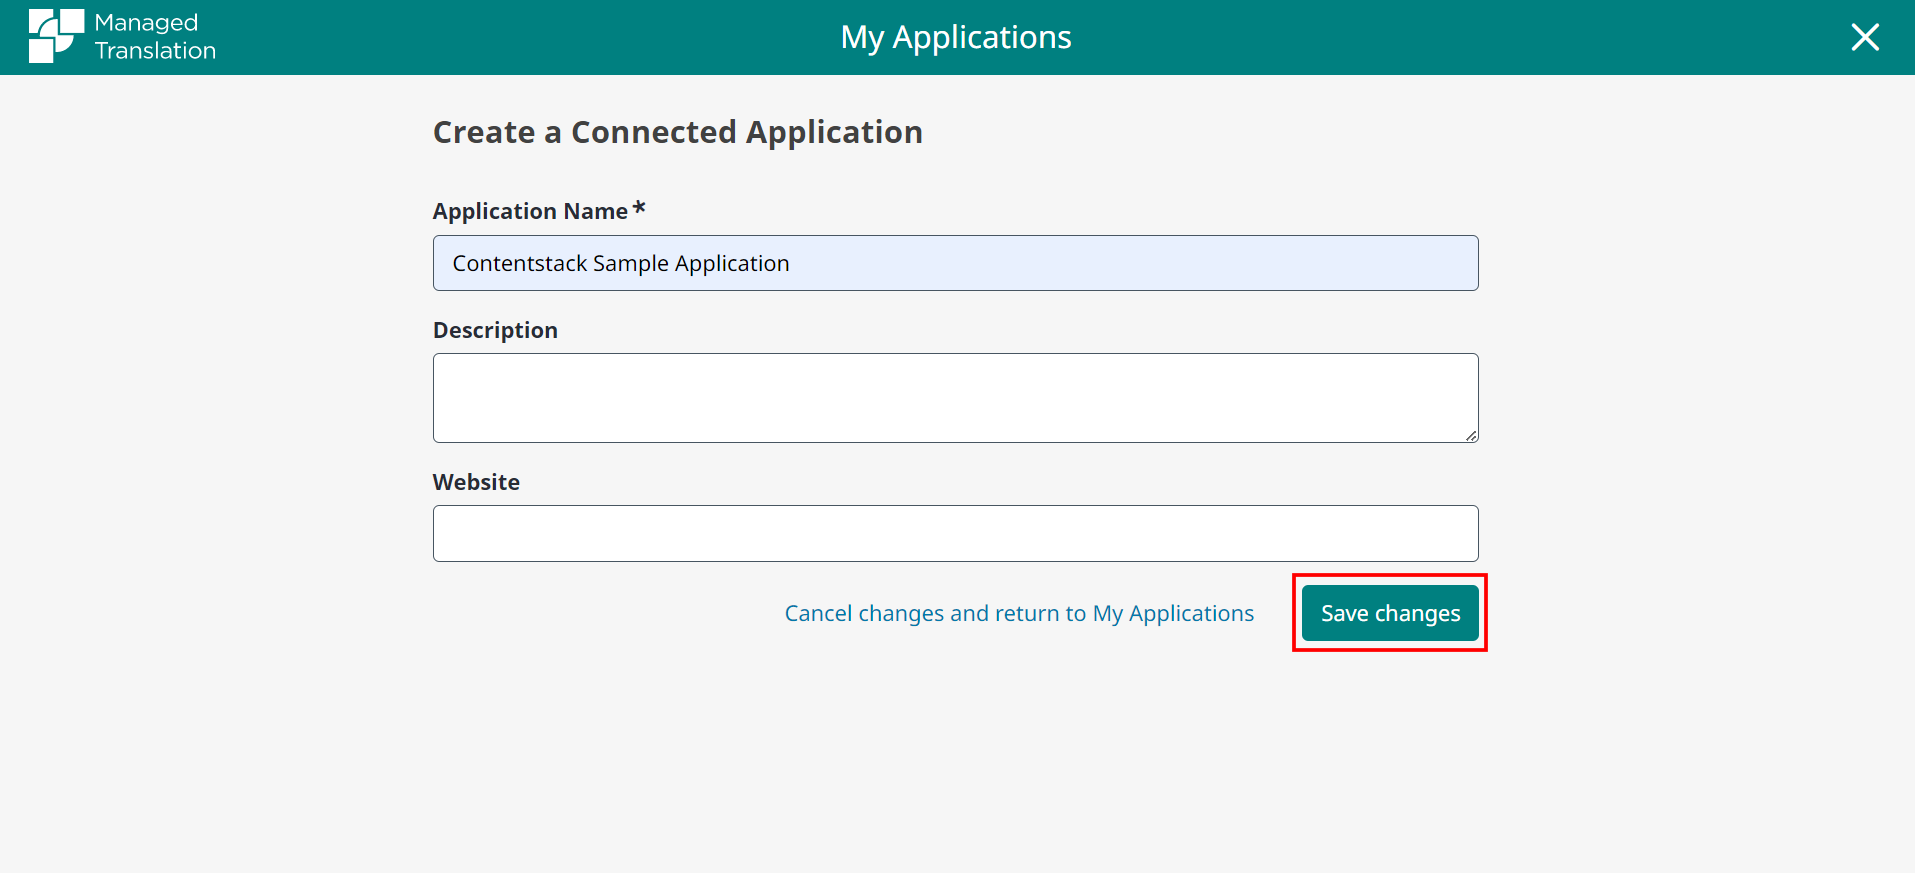
- Enter the Application Name (mandatory), Description (optional), and Website URL (optional), and then click the Save changes button.
You can now see the Edit a Connected Application screen.
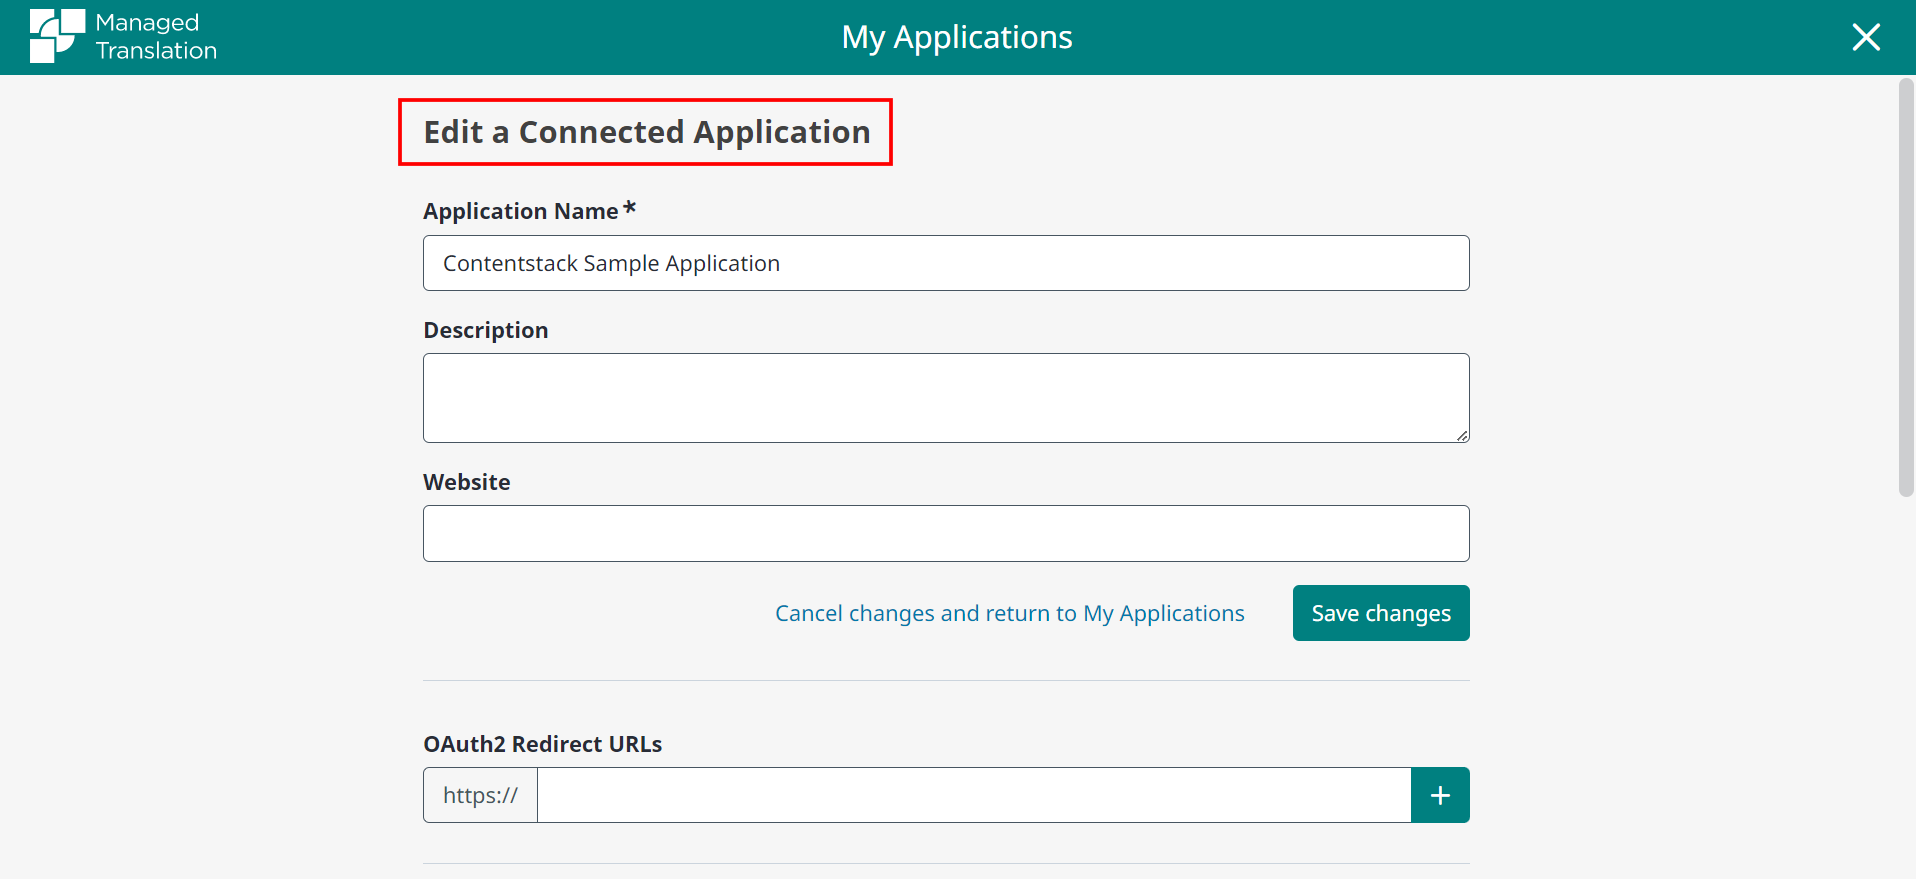
- Scroll down to get the Trados app Client-Id and Secret.
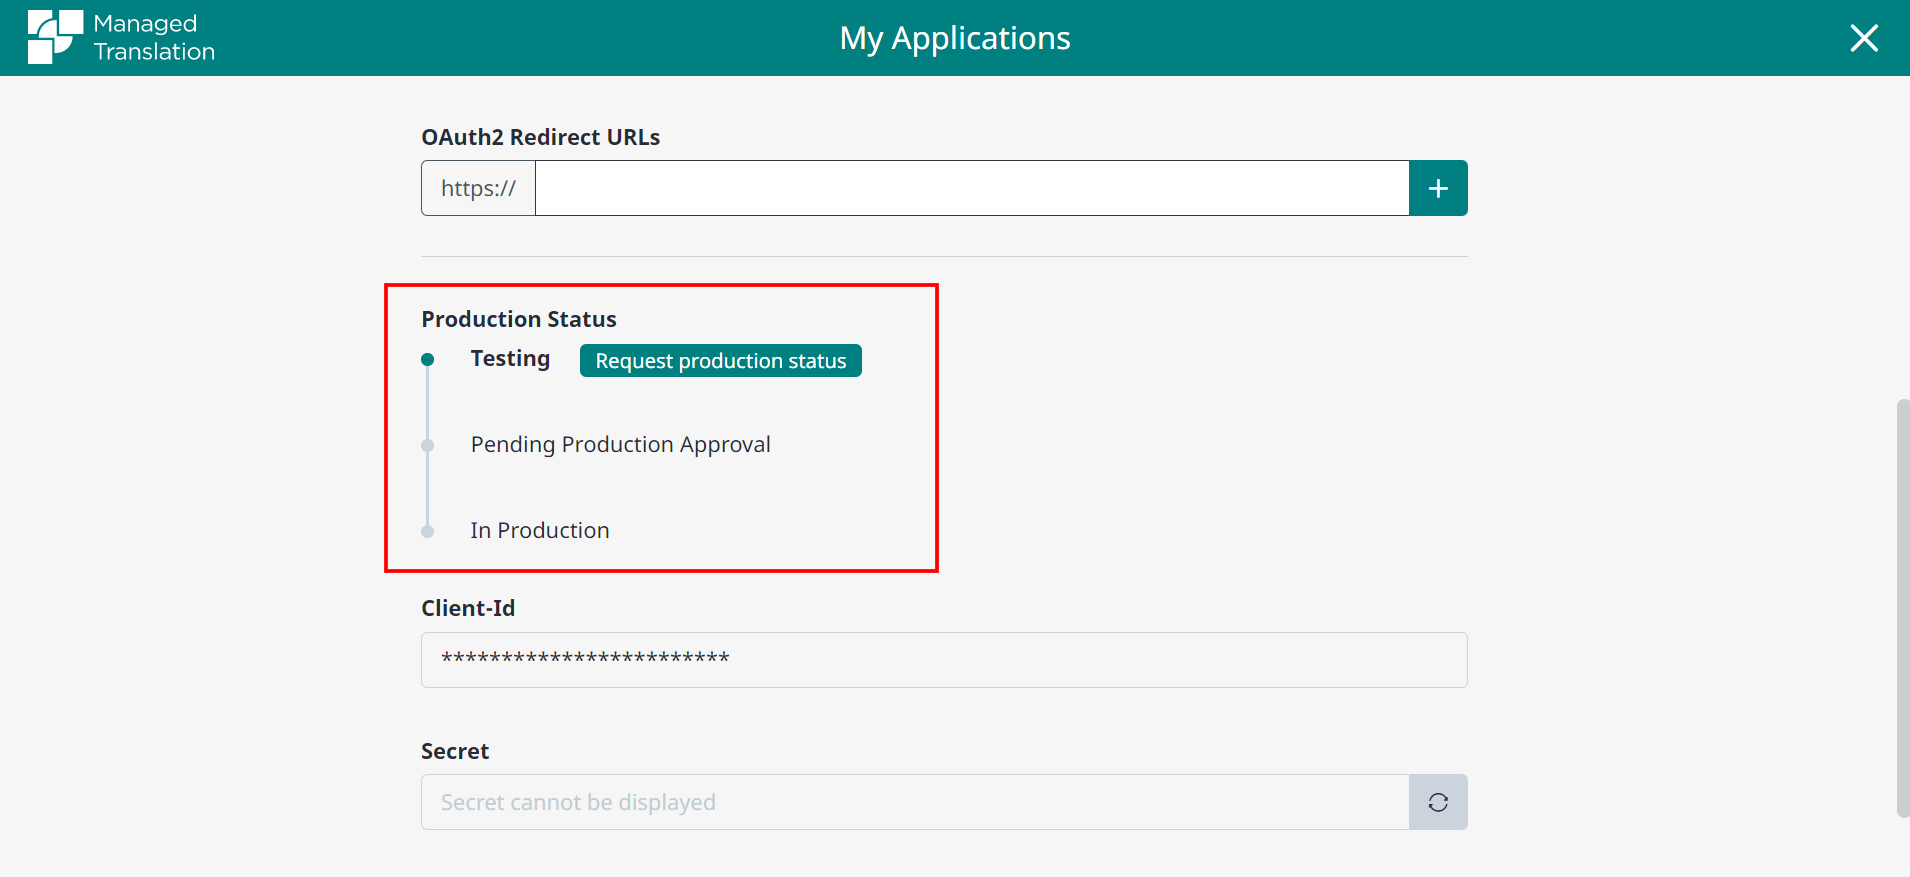
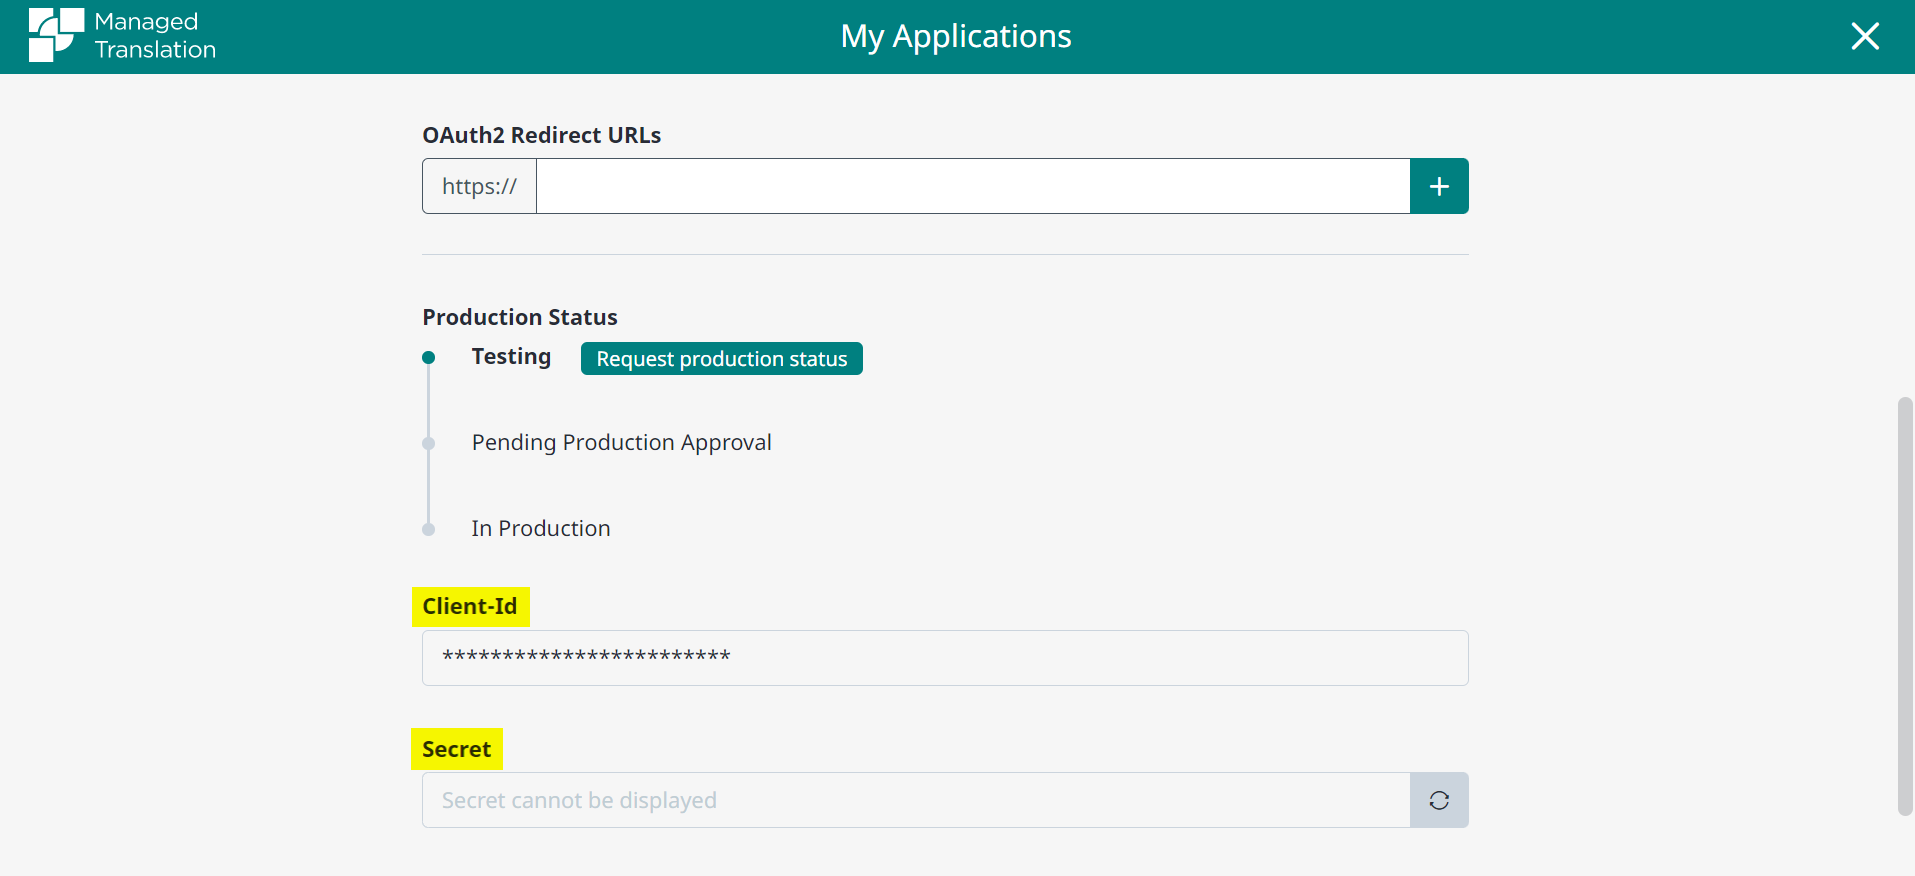 Secret is generated after the Production Status is approved by the Trados authority.
After getting the Client-Id and Secret, copy and paste the information to your clipboard.
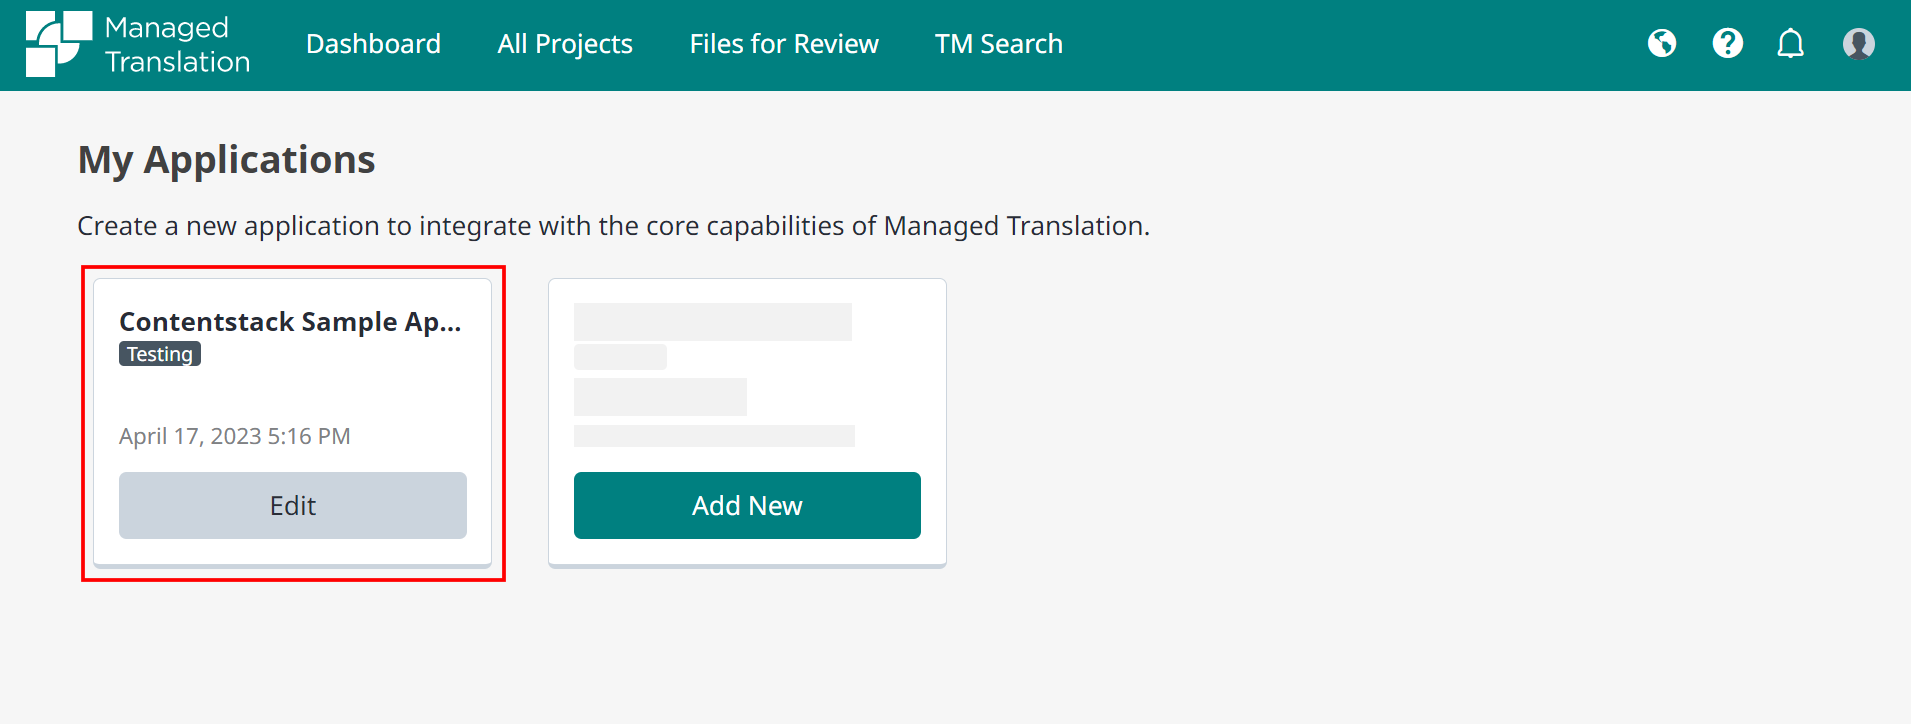
You can see your application in the Trados dashboard.
-
Install and Configure the Trados app in Contentstack Marketplace
To install the app in Contentstack, log in to your Contentstack account and follow the steps below:
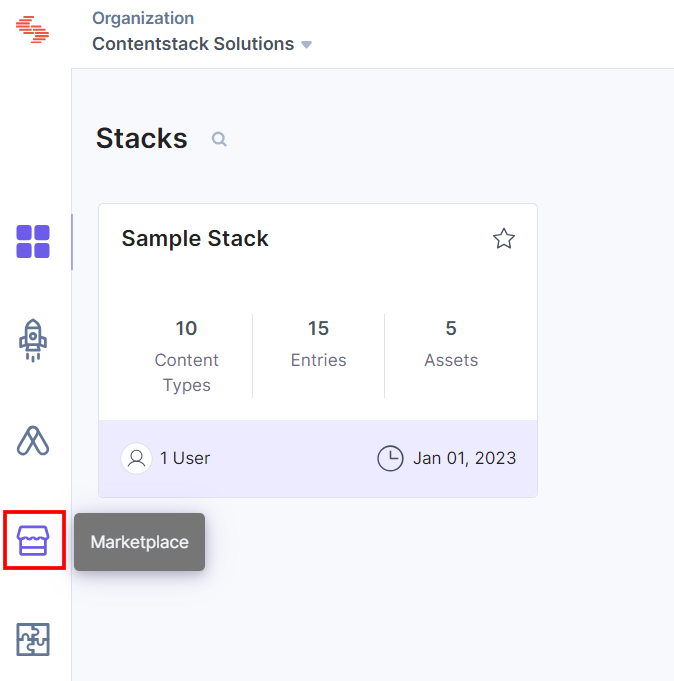
- From the left-hand side primary navigation, click the Marketplace icon.
-
Click Apps from the left panel.
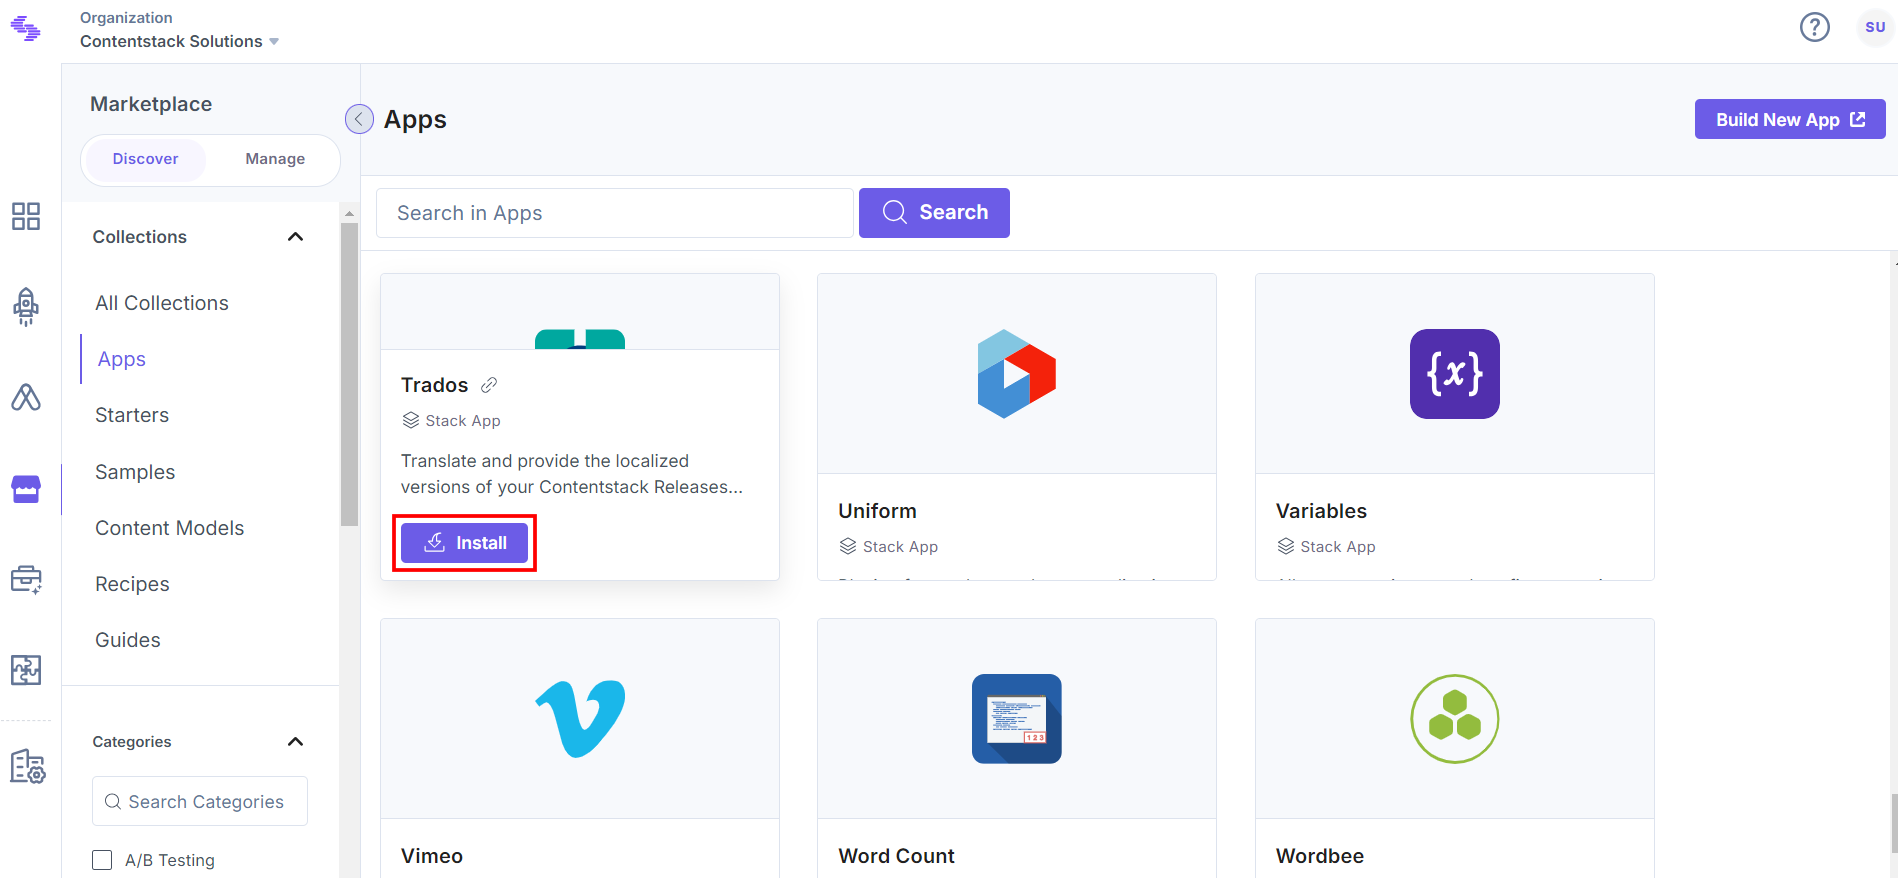
- Within the Marketplace, you can see all the available apps. Hover over the Trados app and click Install.
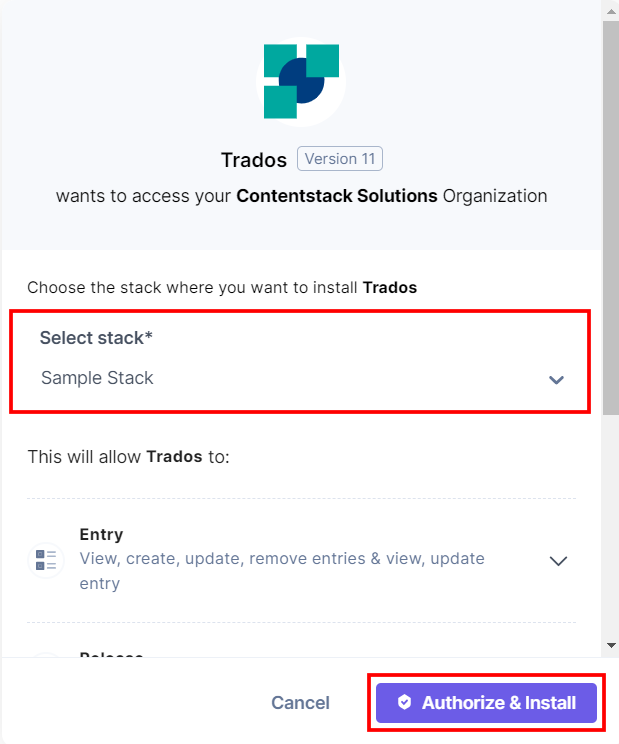
- In the pop-up window, select the stack where you want to install the Trados app, accept the Terms of Service, and click the Authorize and Install button.
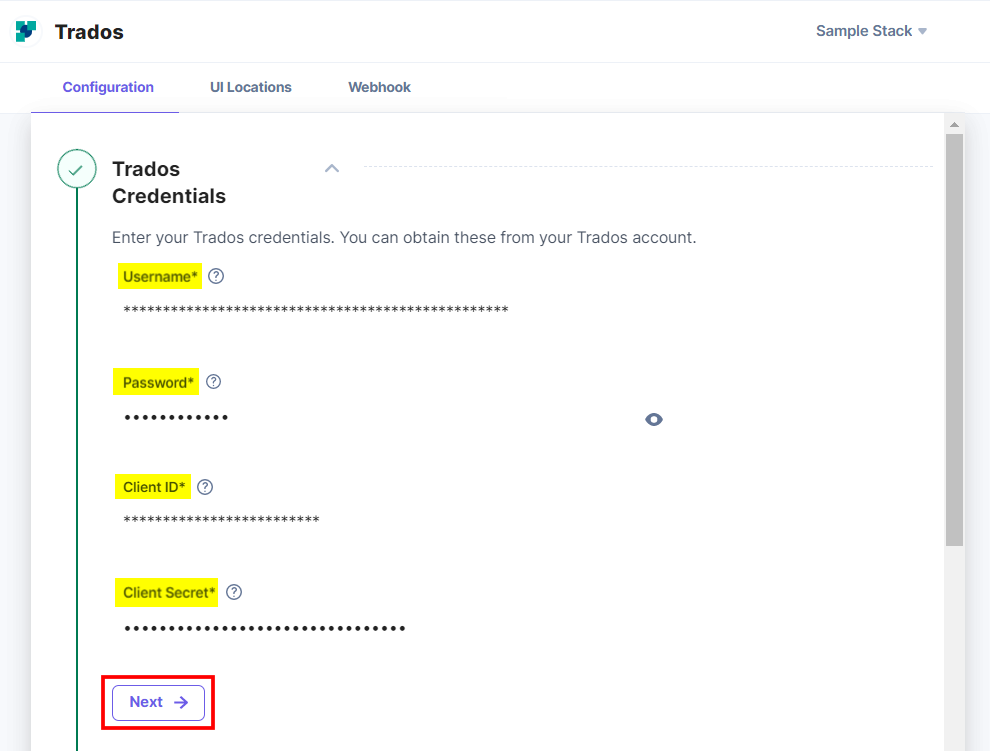
- On the Configuration screen, enter the following details:
- Trados Credentials:
- Enter the Username and Password of your Trados Account.
- Enter the Client ID and Client Secret retrieved from your Trados Account in step 1.
- Click the Next button.
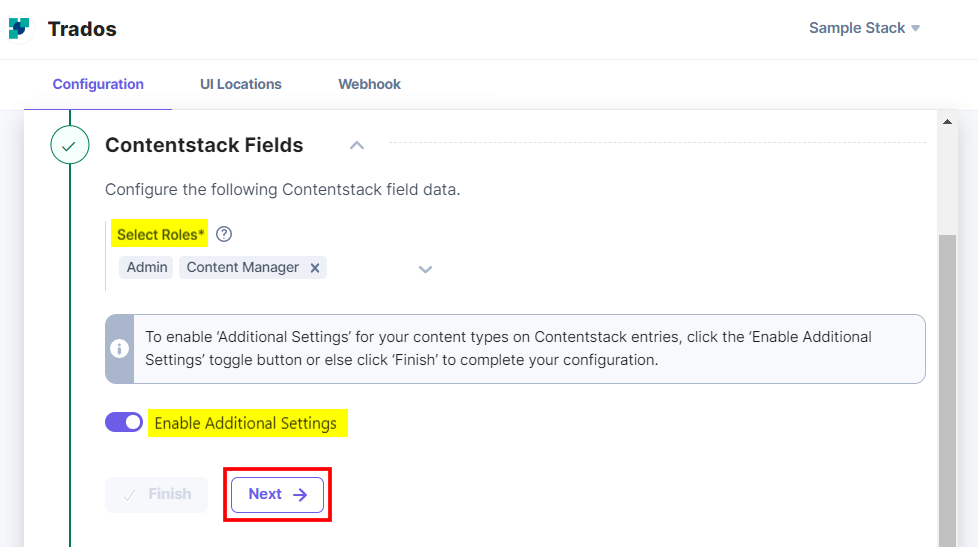
- Contentstack Fields:
- Select the Roles which provide access to create and delete a project in the Contentstack Trados Dashboard Widget.
By default, Admin can manipulate the app configuration settings and create and delete project(s) from the Dashboard.
- Click the Enable Additional Settings toggle button to define the scope of your fields for translation.
- Select the Roles which provide access to create and delete a project in the Contentstack Trados Dashboard Widget.
- Click the Next button.
- Additional Settings:
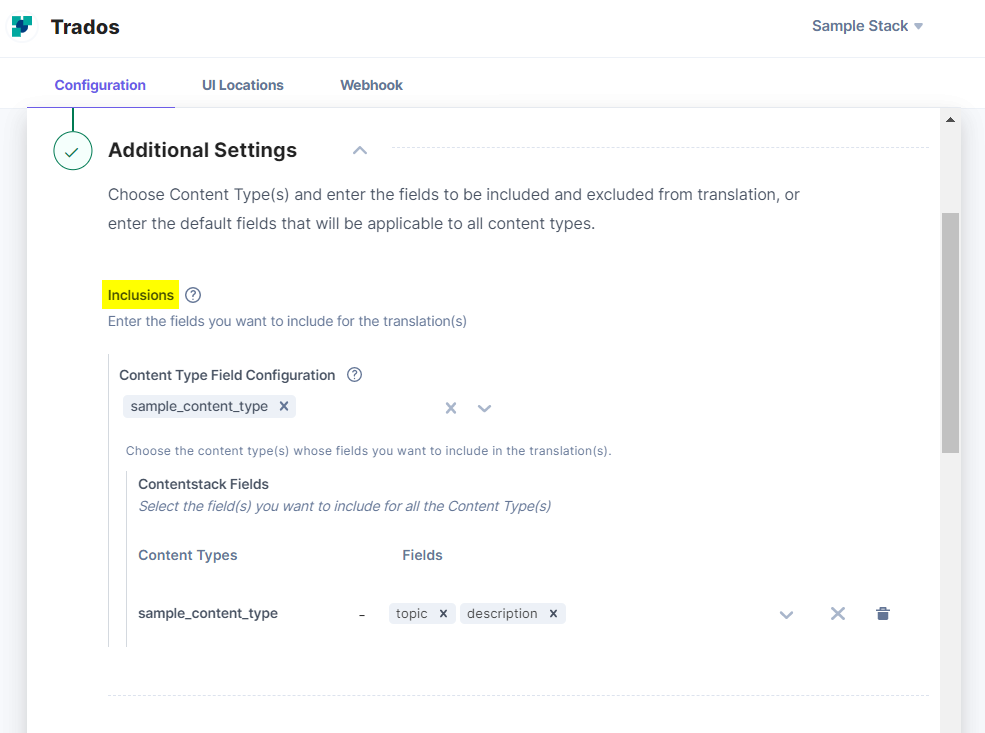
- Inclusions: In the Content Type Field Configuration dropdown, define the fields of a particular content type you want to include in the translation.
- Exclusions:
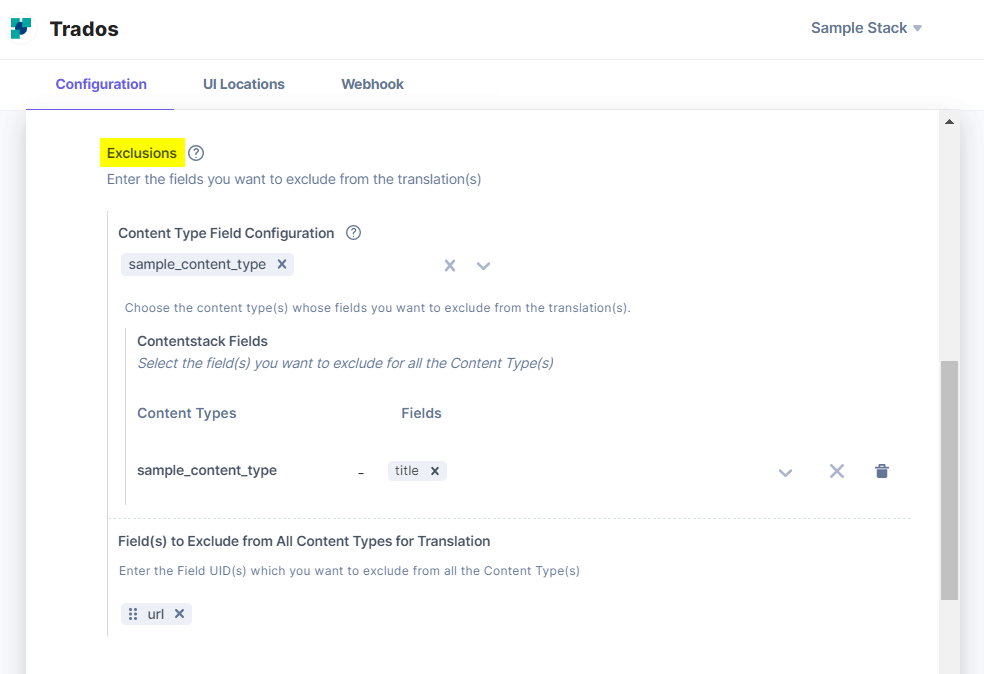
- In the Content Type Field Configuration dropdown, define the fields of a particular content type you want to exclude from the translation.
- In the Field(s) to Exclude from All Content Types for Translation field, define specific fields of all the content types you want to exclude from the translation.
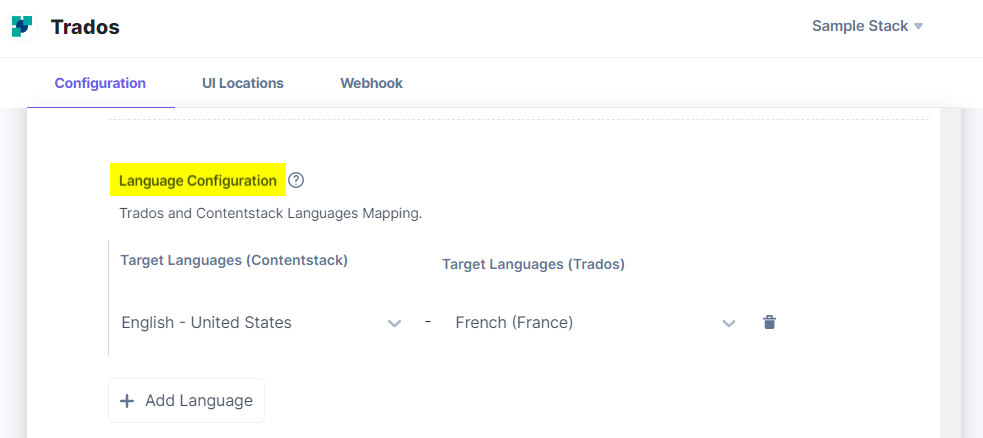
- Language Configuration: In the Language Configuration section, map the content translation languages for Contentstack and Trados. All the entries from Trados languages will be localized into Contentstack languages. For any target languages not selected, the app uses the default language code of the stack.
Click the + Add Language button to add and map Contentstack languages with their relevant Trados languages.
- JSON RTE Configuration: The JSON RTE to HTML conversion feature enables the transformation of the JSON RTE object into a single HTML code block. This simplifies the translation process for translators by making the content easier to interpret and process within Trados.
Enabling the Enable JSON RTE Object to HTML Conversion toggle button, allows the conversion of complex JSON data structures into HTML, making the content more accessible and manageable.
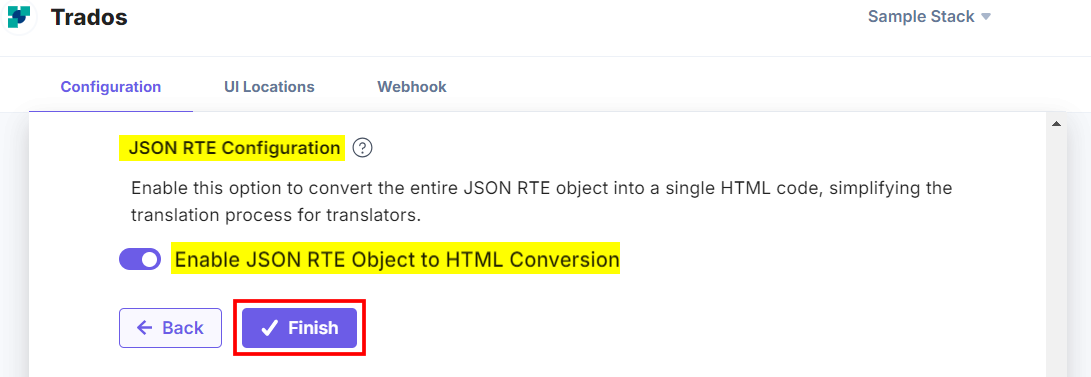
Warning: Do not change the toggle button during Project Translation, as it may disrupt the Translation process.
Once done, click the Finish button.
You can reset your configuration by clicking the Reset Configuration button.
- Inclusions: In the Content Type Field Configuration dropdown, define the fields of a particular content type you want to include in the translation.
- After configuring all the details, click the Save button.
- On the UI Locations tab, you can see the predefined app locations. You can use the toggle button corresponding to each UI location to enable or disable it based on your requirements.
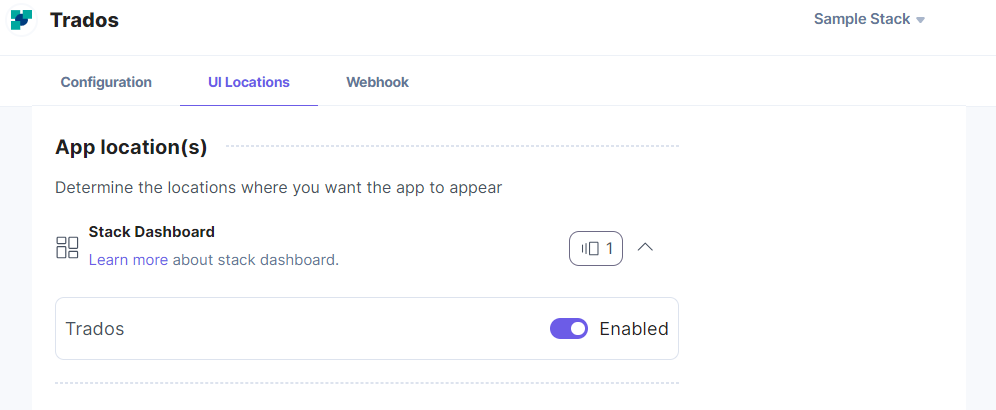
- If the webhook is enabled for your app, you can view the webhook logs under the Webhook tab.
Additional Resource: For more information on UI location and webhooks, please refer to the Installed Apps guide.
- Click the Open Stack button to start using the Trados application.
- Trados Credentials:
- From the left-hand side primary navigation, click the Marketplace icon.
-
Use Trados within your Stack
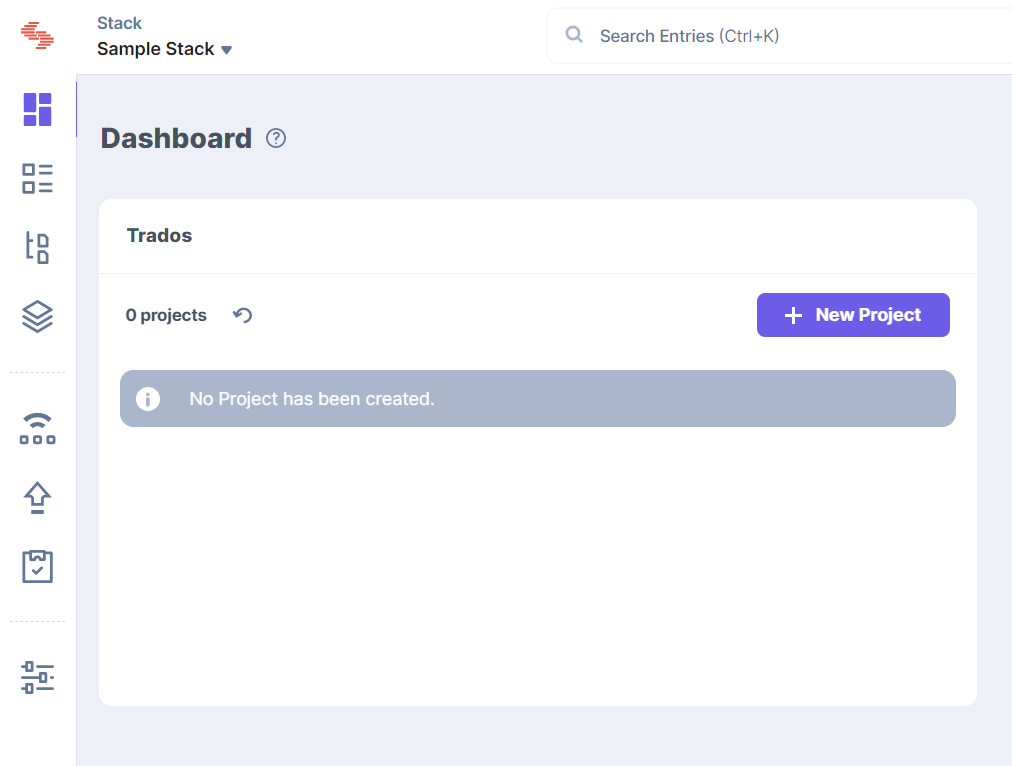
To use the Trados application in your stack, you can use the Dashboard Widget.
- Log in to your Contentstack account.
- Go to the stack dashboard to view the Trados app Dashboard Widget within your CMS.
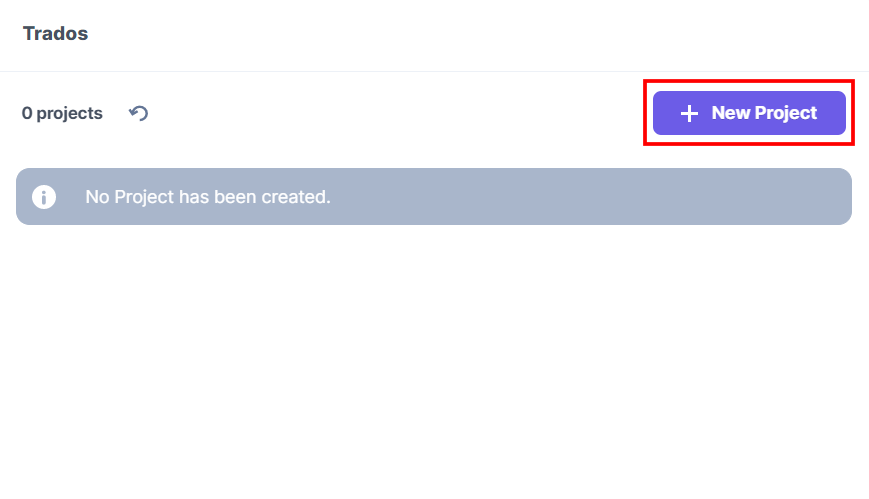
- Click + New Project to create a project for translation.
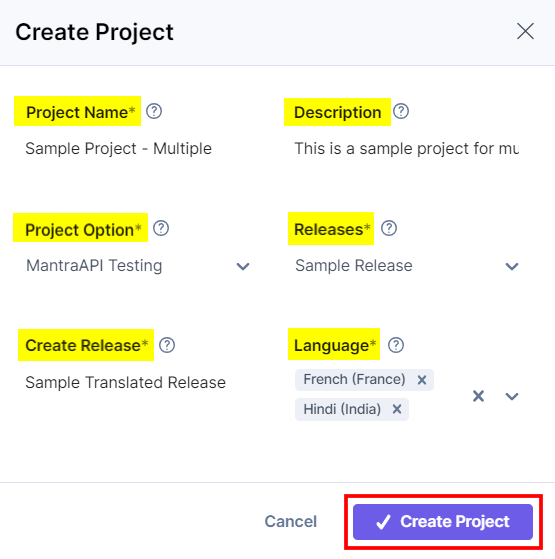
- In the Create Project Modal, enter the Project Name, and Description, choose the Project Option, select the Releases to be translated, provide the new release name in the Create Release field, choose the target Language, and then click the Create Project button.
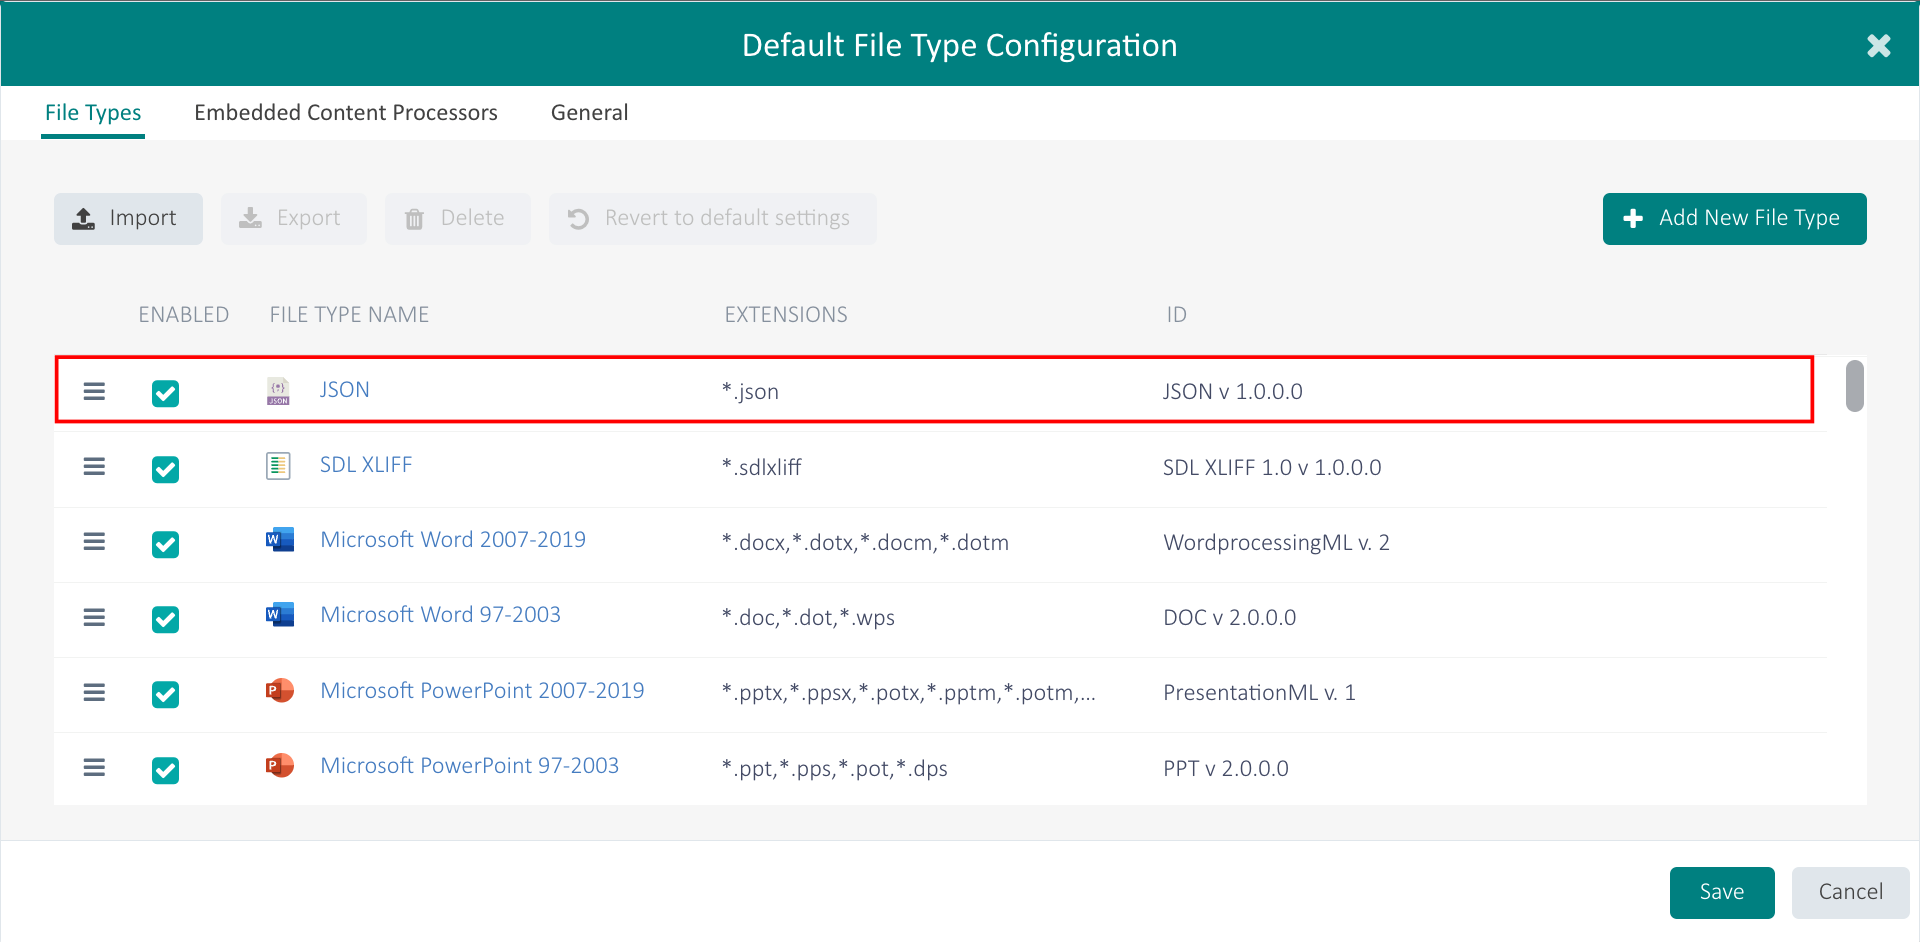
Project Option lets you select a pre-configured Trados template, which automates the process of translating content quickly and accurately.
Note: You can configure the templates in the Resources section of your Trados account. You must enable the JSON file type in the Trados template configurations. Go to your Trados account > Resources section, click File Type Configurations, select your configuration, and then enable the JSON file type and save.
You can provide a release name in the Create Release field; this new release will contain all the translated entries.
You can also add multiple languages for translation.
 Note:
Note:- The Trados app does not support Assets in Contentstack Releases. All the assets must be removed from the release before adding it to the translation project.
- Target language(s) are fetched from Trados Project Templates.
- You can translate up to 500 entries (including the locale versions) at once.
- In the Trados Dashboard, you can see the project Name, translation Status, and the Target Language in which the release content is translated.
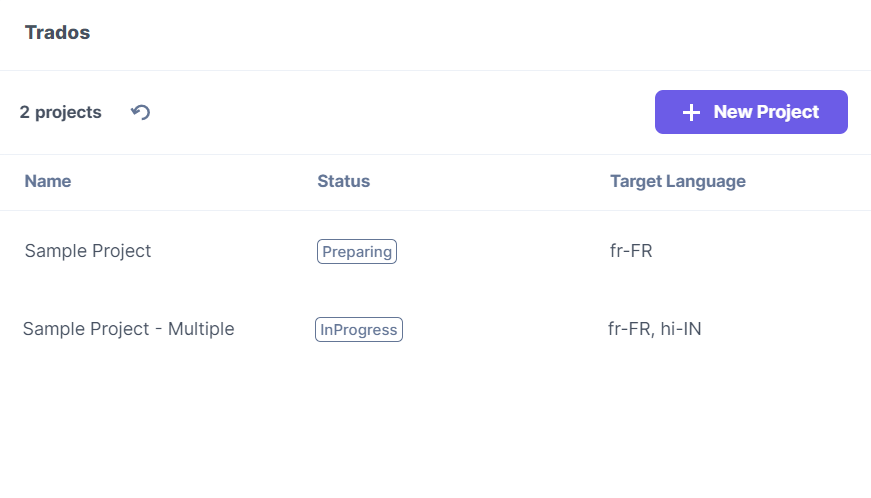
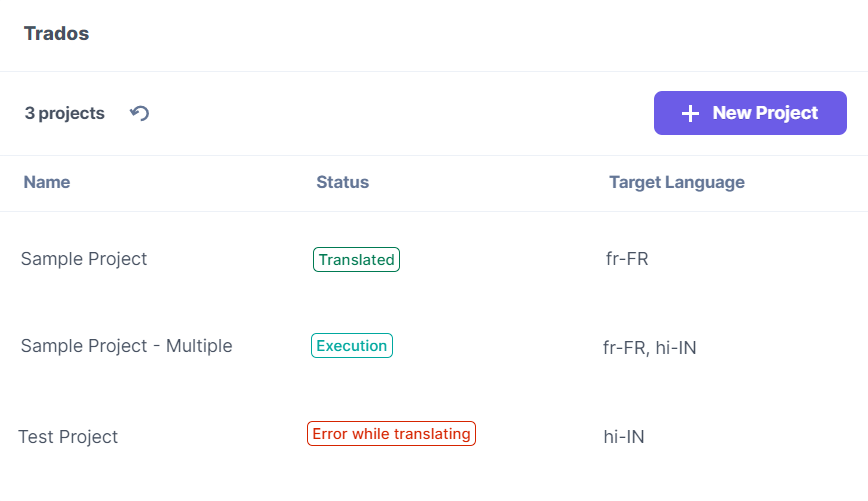
You can see different statuses on the Trados app Dashboard Widget as the status of the translation project keeps changing with the translation process.
- After the translation is completed, the status changes to Translated. Hover over the project, and you see the Remove and Delete icons.
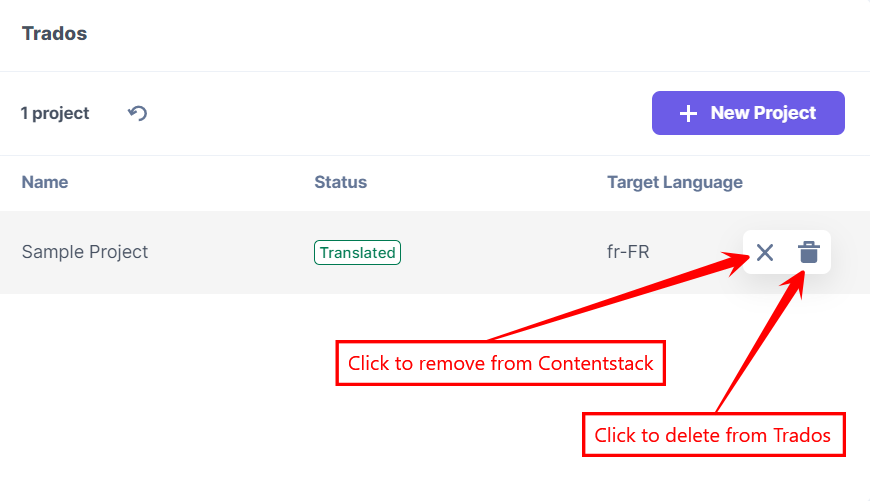
- Click the Remove icon to remove the project from Contentstack.
- Click the Delete icon to delete the project from Trados and Contentstack.Note:
- Trados marks the project as complete on deleting the project.
- Deleting a project does not delete the translated entries.
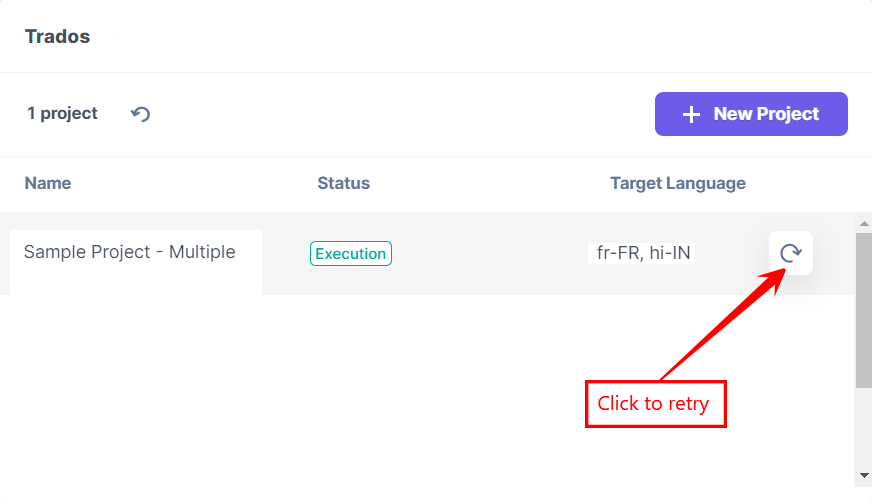
- After the In Progress state, the translation status changes to Execution. If the project is delayed during the translation, hover over the project, and click the Retry icon to start the translation again.
- When the error occurs during the translation, the status changes to Error while Translating. Hover over the project, and you can see the Error, Retry, and Delete icons.
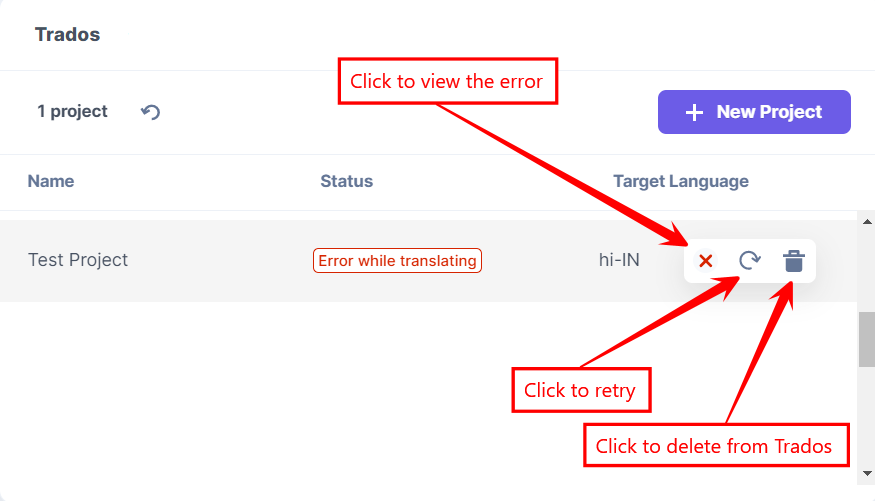
- Click the Error icon to see the error details.
- Click the Retry icon to start the translation again.
- Click the Delete icon to delete the project from Trados and Contentstack.
Note: Deleting a project does not delete the translated entries.
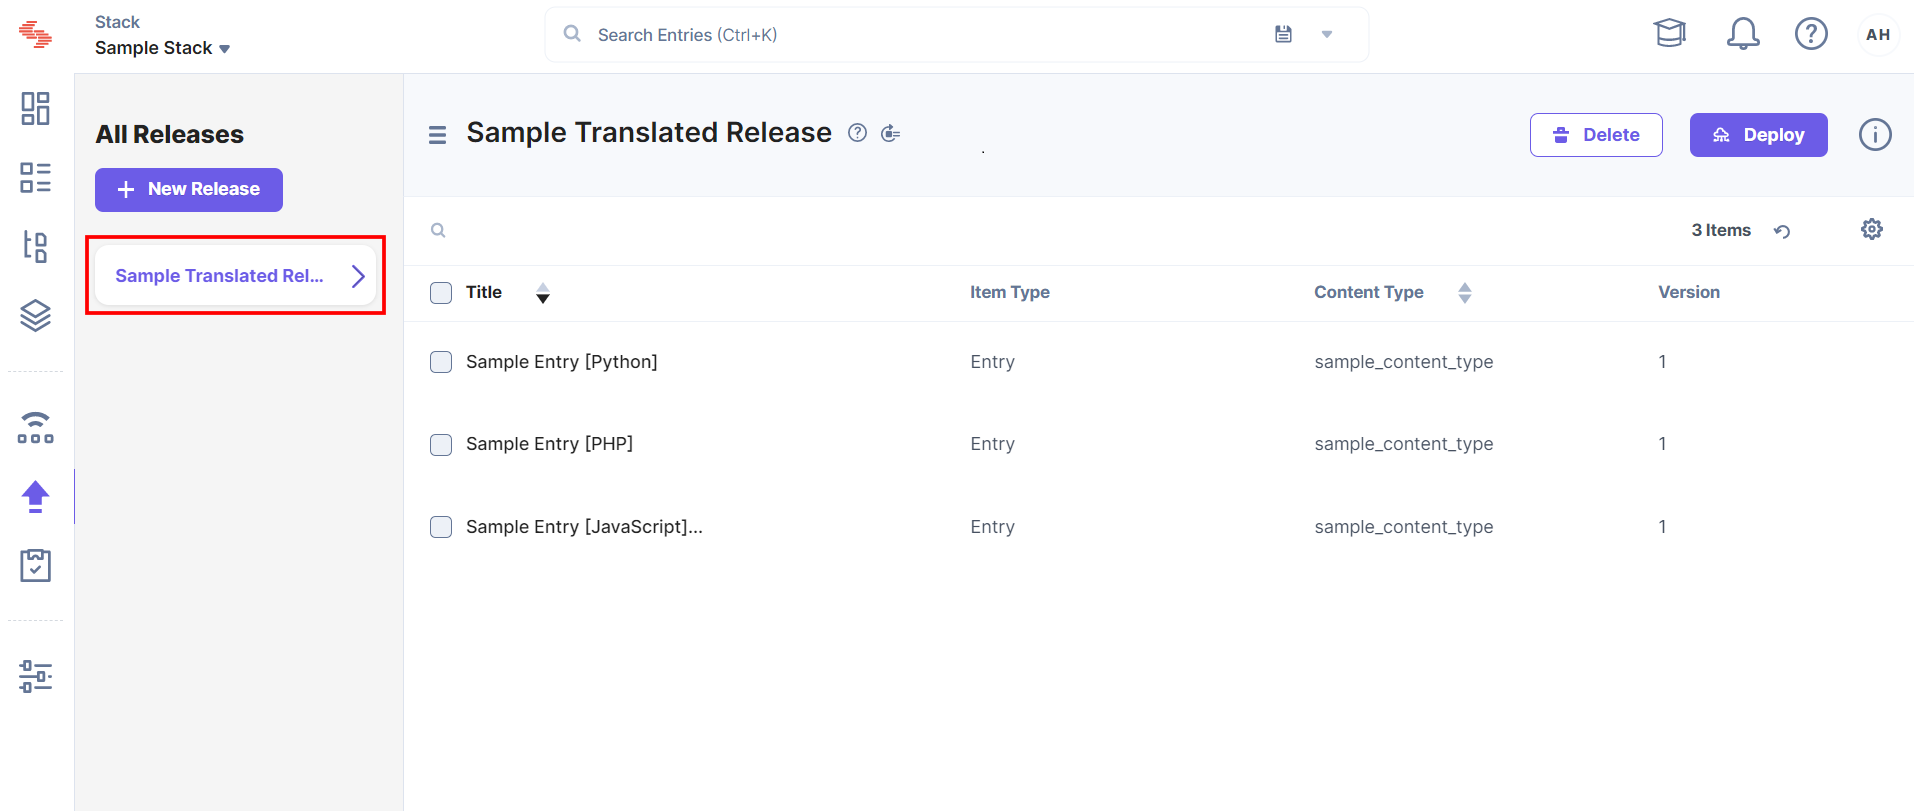
- In the left navigation panel, navigate to the Releases and select the translated release.
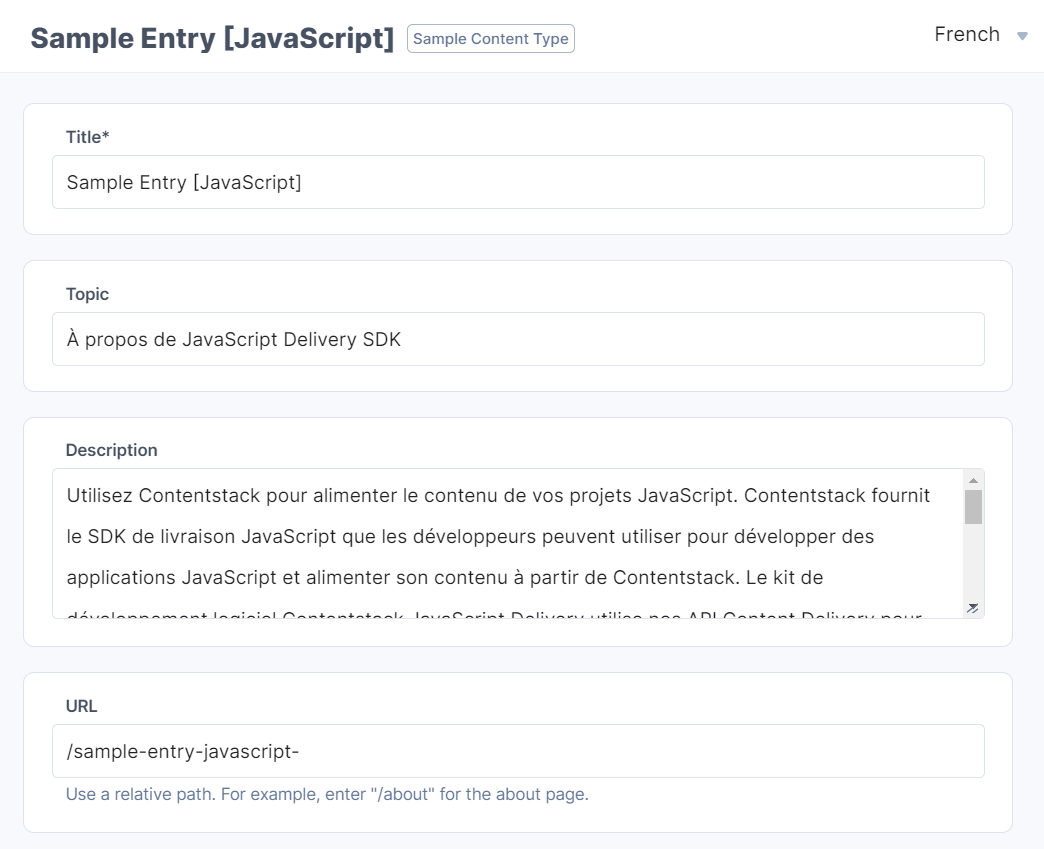
- Click the entry to view the translated content.
-
Note: The Trados app does not support Select, Date, Boolean, and Custom fields for content translation. You can add these fields in the Exclusions section in the configuration settings.


.svg?format=pjpg&auto=webp)
.svg?format=pjpg&auto=webp)
.png?format=pjpg&auto=webp)


.png?format=pjpg&auto=webp)