
.svg?format=pjpg&auto=webp)
.svg?format=pjpg&auto=webp)
.png?format=pjpg&auto=webp)


.png?format=pjpg&auto=webp)
Info Panel App Installation Guide
Info Panel is a user interface component that displays additional context, details, and insights related to the content or data being viewed or edited.
It typically displays metadata, version history, user activity, and other relevant information to help users understand and manage the content more effectively. The Info Panel enhances usability by offering quick access to critical information without navigating away from the main content interface.
By installing the Info Panel app from the Contentstack Marketplace you can add a Info Panel feature within your JSON Rich Text Editor as a plugin.
Prerequisites
- Contentstack account
- Access to the Contentstack Organization/Stack as the Owner/Admin
Let's follow this step-by-step guide to install and configure the Info Panel app within your stack.
Steps for Execution
Install and Configure the Info Panel App in Marketplace
To install the app, log in to your Contentstack account and follow the steps below:
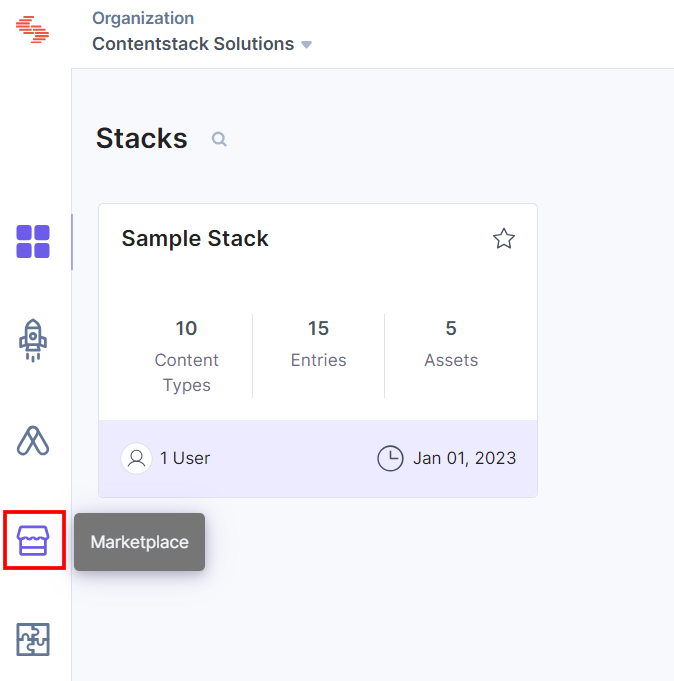
- From the left-hand side primary navigation, click the Marketplace icon.
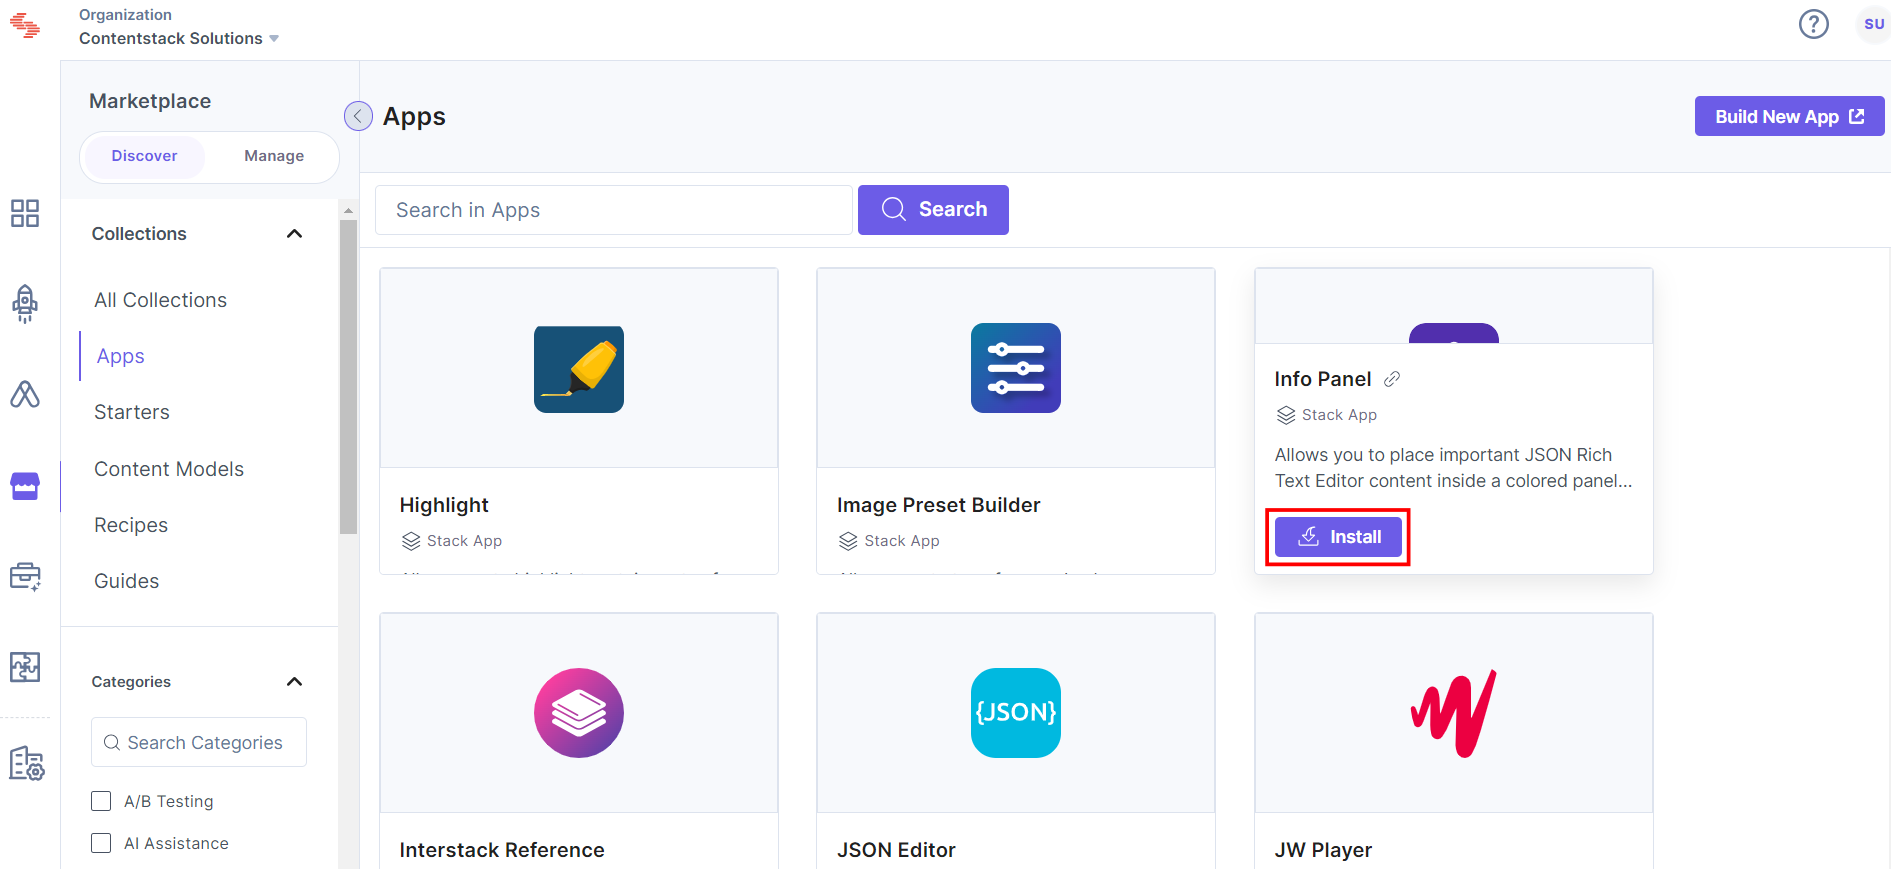
- Click Apps from the left panel.
- Within the Marketplace, you can see all the available apps. Hover over the Info Panel app and click Install.
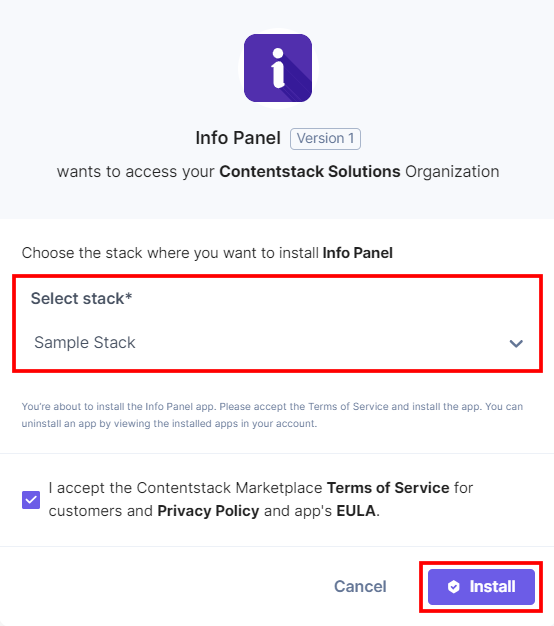
- In the pop-up window, select the stack where you want to install the app, accept the Terms of Service, and click the Install button.
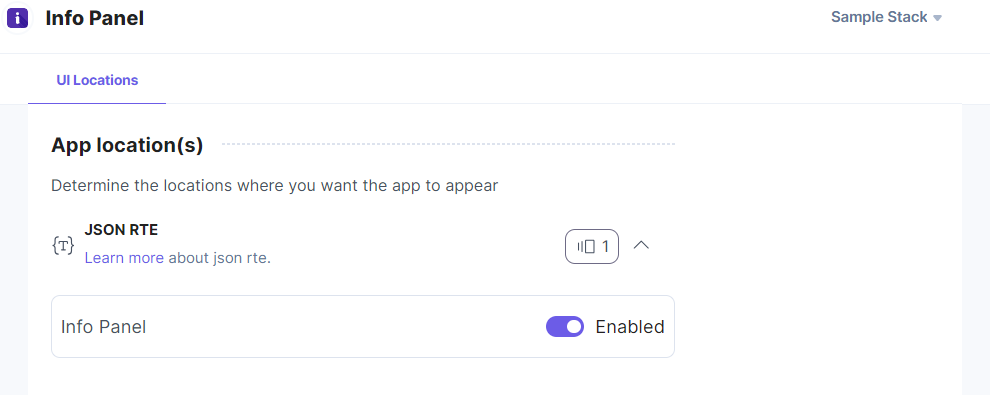
- On the UI Locations tab, you can see the predefined app location. If you disable the UI location, you will not be able to save the configuration as it requires at least one UI location.
Additional Resource: For more information on UI locations, please refer to the Installed Apps guide.
- Click Open Stack to start using the Info Panel application.
- From the left-hand side primary navigation, click the Marketplace icon.
Use the Info Panel App within your Entry
To use the Info Panel app within an entry of your stack, follow the steps given below:
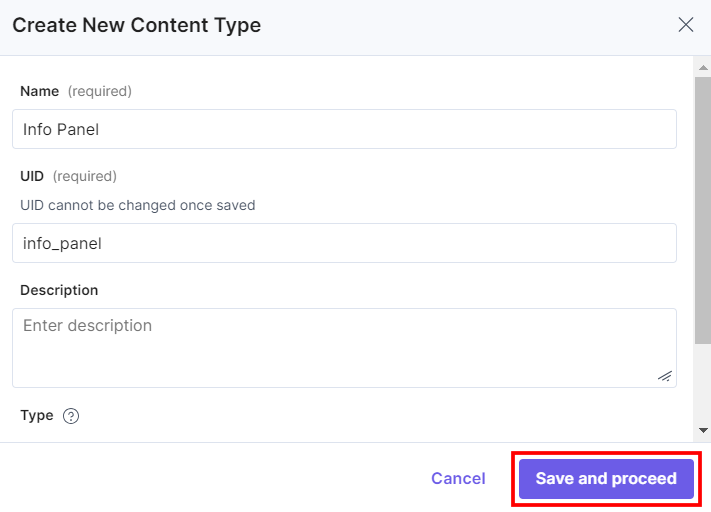
- Go to your stack, click the Content Models icon from the left navigation panel, and click the + New Content Type button.
- Create a content type by adding relevant details as displayed below:
- In the Content Type Builder page, add a JSON Rich Text Editor field in your content type by clicking the Insert a field link represented by a + sign.
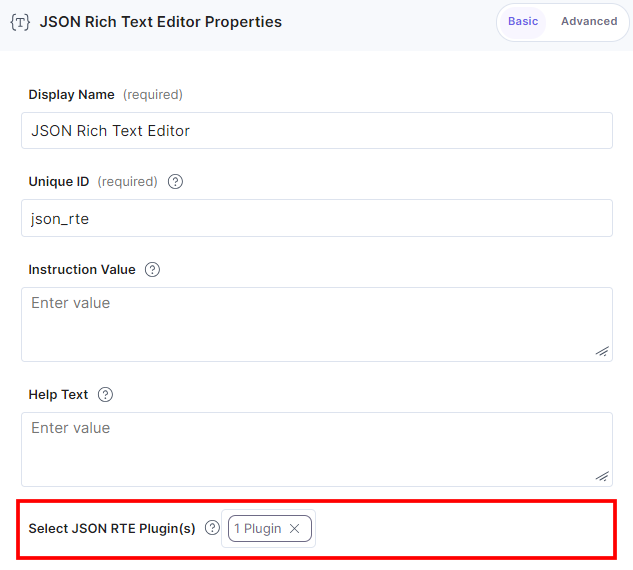
- On the JSON Rich Text Editor Properties modal, enter the following:
- Enter a Display Name for the field, for example, Info Panel.
- (Optional) Enter an Instruction Value and Help Text for the field.
- Click inside the Select JSON RTE Plugin(s) field, select Info Panel from the list of plugins, and then click Add Plugin(s).
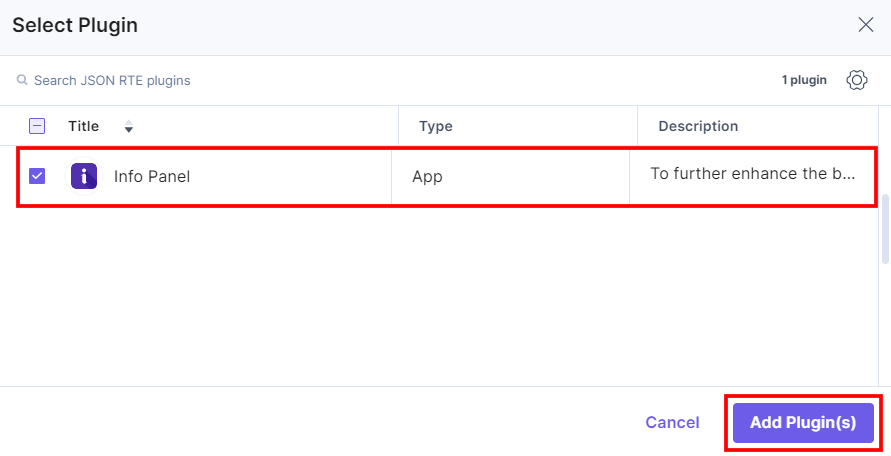
This adds Info Panel in the JSON Rich Text Editor.
- After adding the app in a JSON Rich Text Editor field, click Save or Save and Close to save your changes.
- To use the Info Panel app, create an entry for this content type. In the left navigation panel, navigate to the Entries page, click + New Entry to create a new entry for the above content type, and then click Proceed.
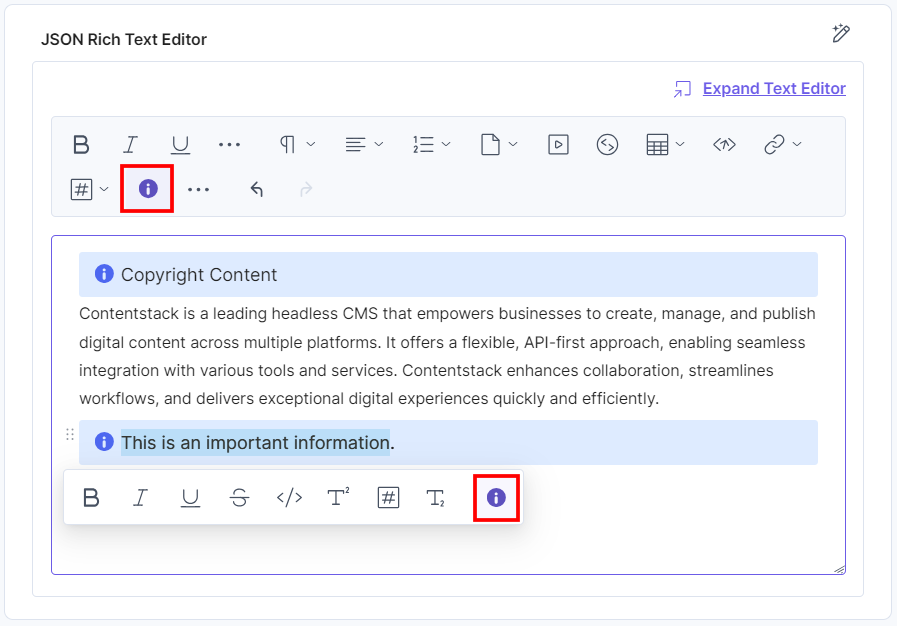
Click the Info Panel icon from the panel and write the important information. You can also select the text and click the Info Panel icon from the toolbar.
- You can then proceed to Save and Publish your entry.
More articles in "Editor Productivity"
