Amazon S3 App Installation Guide
Amazon S3 (Simple Storage Service) is a scalable, high-speed, web-based cloud storage service designed for storing and retrieving any amount of data from anywhere. Amazon S3 seamlessly integrates with Contentstack to offer scalable and secure storage for your digital assets.
With this integration, you can upload, store, retrieve, and manage large volumes of media files and documents directly from your Contentstack environment. It ensures high availability and durability, making it ideal for enterprise-grade content management workflows.
By leveraging Amazon S3, teams can enhance performance, reduce latency, and streamline asset delivery across global audiences. Whether you are hosting images, videos, or backups, the combination of Amazon S3 and Contentstack delivers a reliable, efficient, and future-ready content infrastructure for modern digital experiences.
After installing the Amazon S3 app from the Contentstack Marketplace, you can use it within your stack to upload, manage, store, and distribute the digital assets from the Amazon S3 account within your entries.
Prerequisites
- Amazon S3 account
- Contentstack account
- Access to the Contentstack Organization/Stack as the Owner/Admin
Let's follow this step-by-step guide to install and configure the Amazon S3 app within your stack.
Steps for Execution
- Retrieve the Credentials for your Amazon S3 account
- Install and Configure the Amazon S3 app in Marketplace
- Use the Amazon S3 app within your entry
Retrieve the Credentials for your Amazon S3 account
To authenticate and authorize access to AWS services, the AWS Access Key ID and Secret Access Key credentials are required during the app configuration in step 2.
The Access Key ID is a unique identifier for the user or app and the Secret Access Key is used to sign requests and must be kept confidential.
- Log into the AWS Management Console, navigate to the IAM (Identity and Access Management) service, and create a new user or access key.
- When you create an Access Key pair, you should download and securely store the Secret Access Key immediately, as it cannot be retrieved later.
Note: Each user can have up to two access keys at any time. If you lose your Secret Access Key, you must delete the access key and create a new one.
If you have any queries, you can contact the Amazon S3 Support team.
Install and Configure the Amazon S3 app in Marketplace
To install the app in Contentstack, log in to your Contentstack account and follow the steps below:
- From the left-hand side primary navigation, click the Marketplace icon.
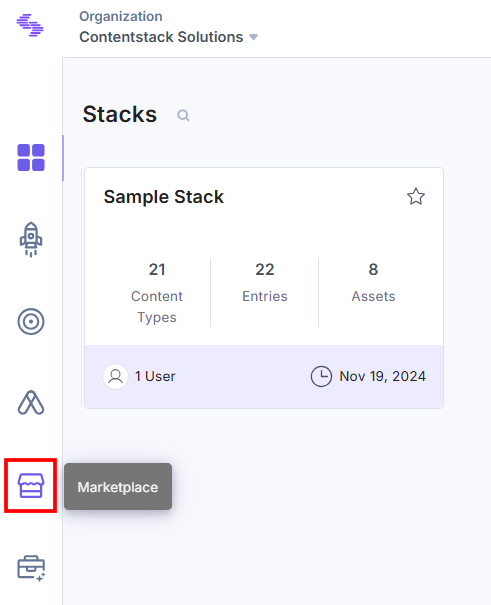
- Click Apps from the left panel.
- Within the Marketplace, you can see the available apps. Hover over the Amazon S3 app and click Install.
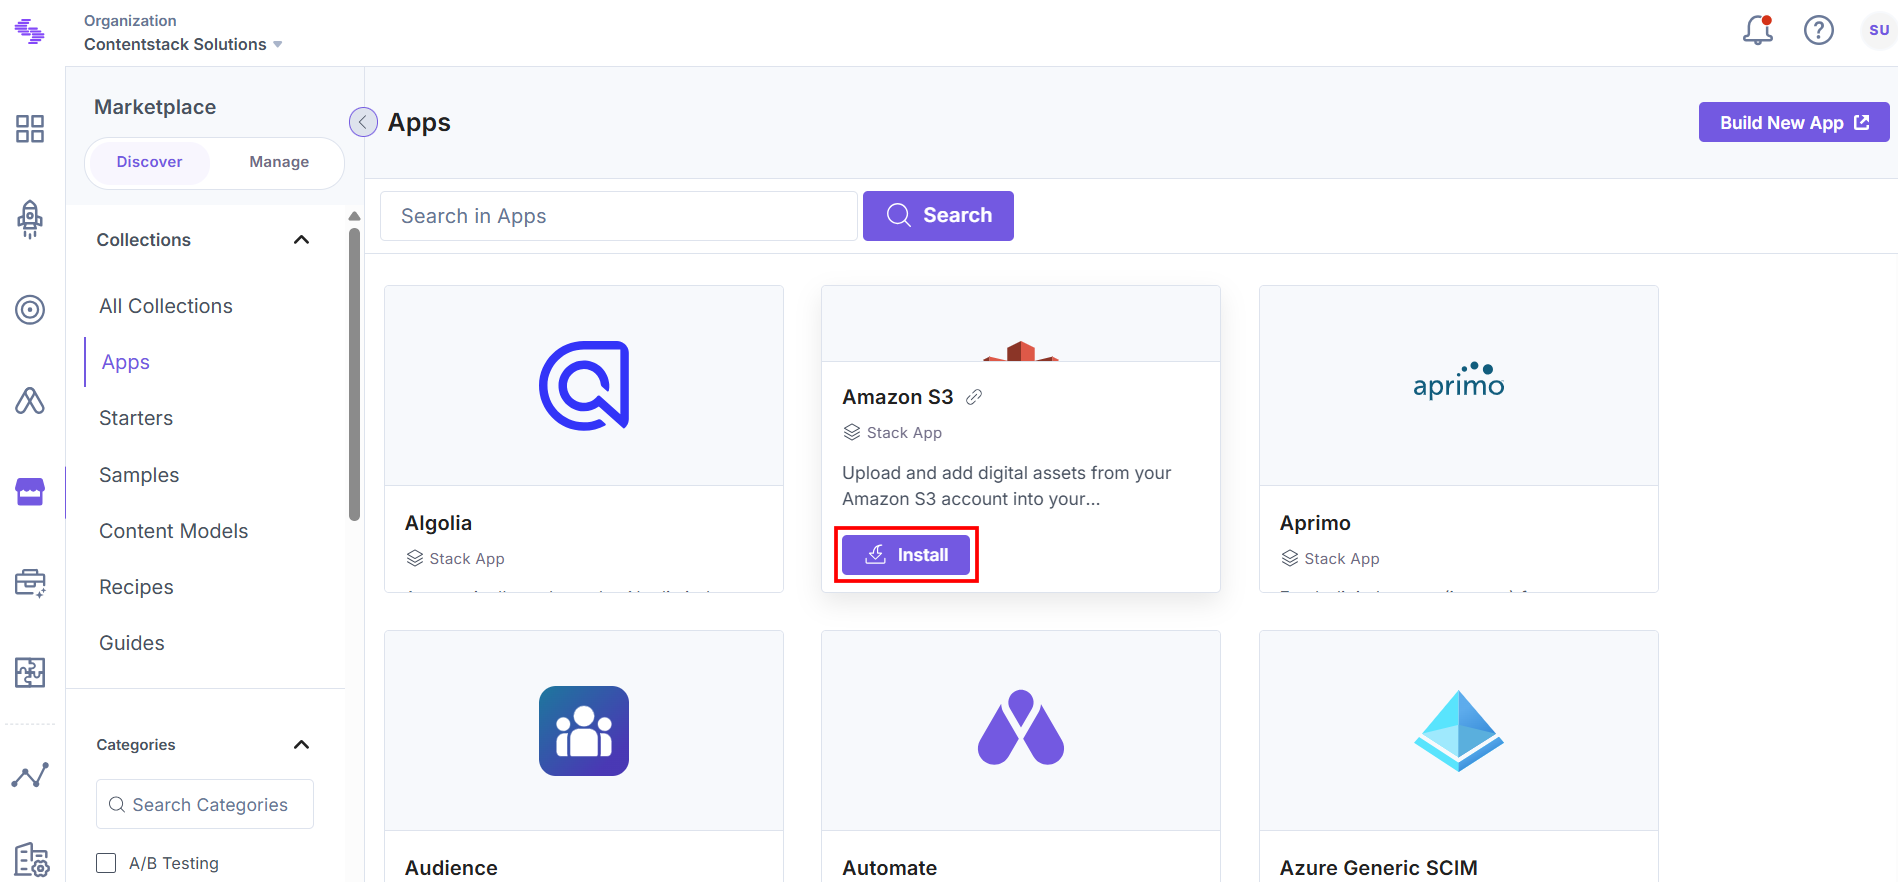
- In the pop-up window, select the stack where you want to install the Amazon S3 app, accept the Terms of Service, and click the Install button.
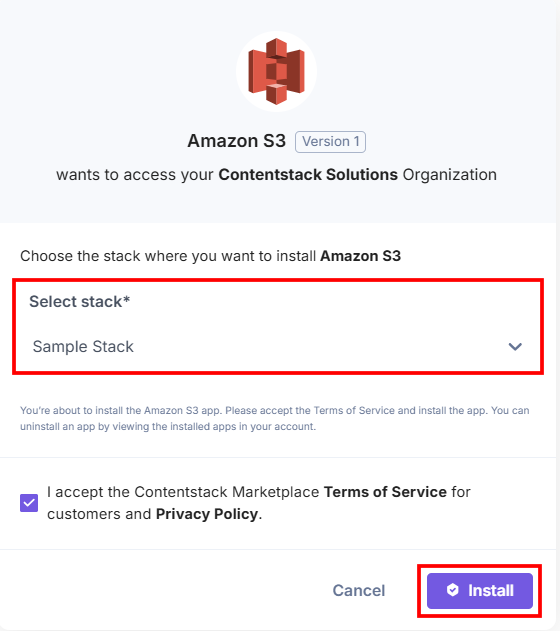
- On the Configuration screen, enter the following:
- AWS S3 Access Key ID: Enter the Amazon S3 Access Key ID retrieved from your Amazon S3 account in step 1.
- AWS S3 Secret Access Key: Enter the Amazon S3 Secret Access Key retrieved from your Amazon S3 account in step 1.
- Region Selector: Select the region from the provided options.
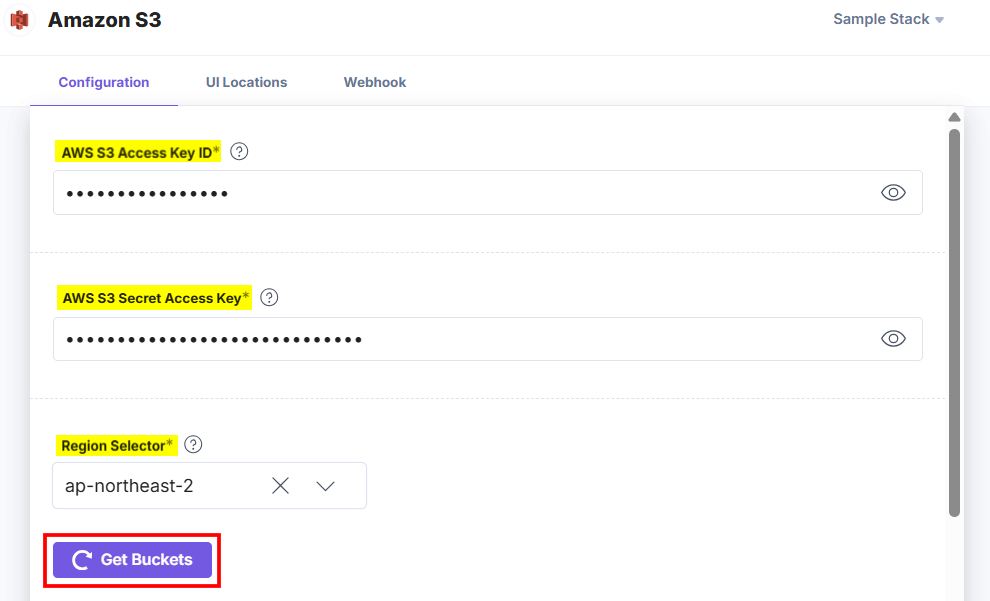
- Bucket Selector: Based on the credentials and regions selected, add the desired buckets from the drop-down.

- Choose the Amazon S3 Keys to Save in Entry: Choose how to save the data fetched from the Amazon S3 account in Contentstack entries.
- If you select the All Fields option, you can select only a limited number of assets in the entry.
- For Custom Fields, you can search and add specific Amazon S3 you want to save in entries.
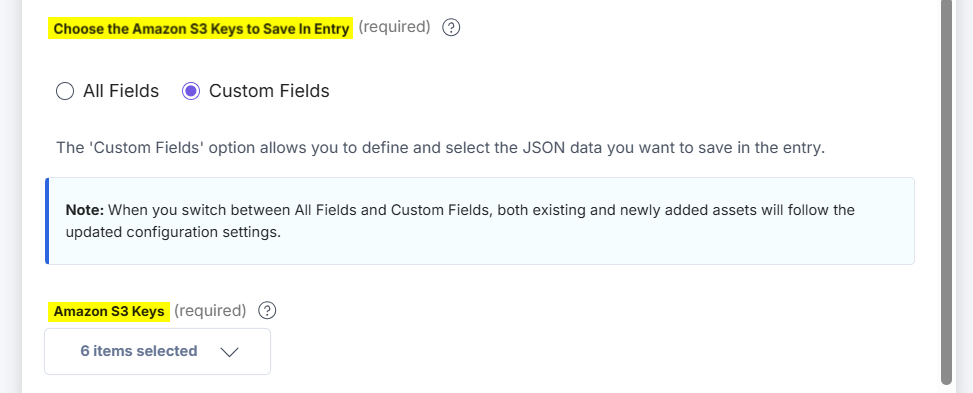
Note: When you change the settings from All Fields to Custom Fields, and vice versa, any existing and newly added assets in the entry will store the data according to the updated configuration settings. This is applicable to Custom and JSON RTE fields.
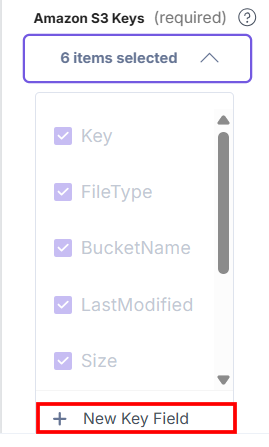
If you select Custom Fields then the Amazon S3 Keys drop-down appears. By default, Key, FileType, BucketName, LastModified, Size, and SignedUrl keys are already selected inside the dropdown. If you want to create a new key, click the + New Key Field option.
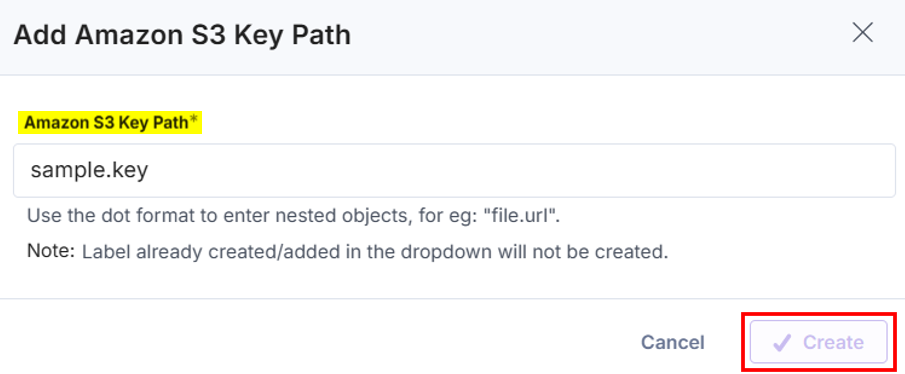
In the Add Amazon S3 Key Path modal, enter the Amazon S3 Key Path and click the Create button to create a new key.
- Click the Save button.
- On the UI Locations tab, you can see the predefined app locations. You can use the toggle button corresponding to each UI location to enable or disable it based on your requirements.
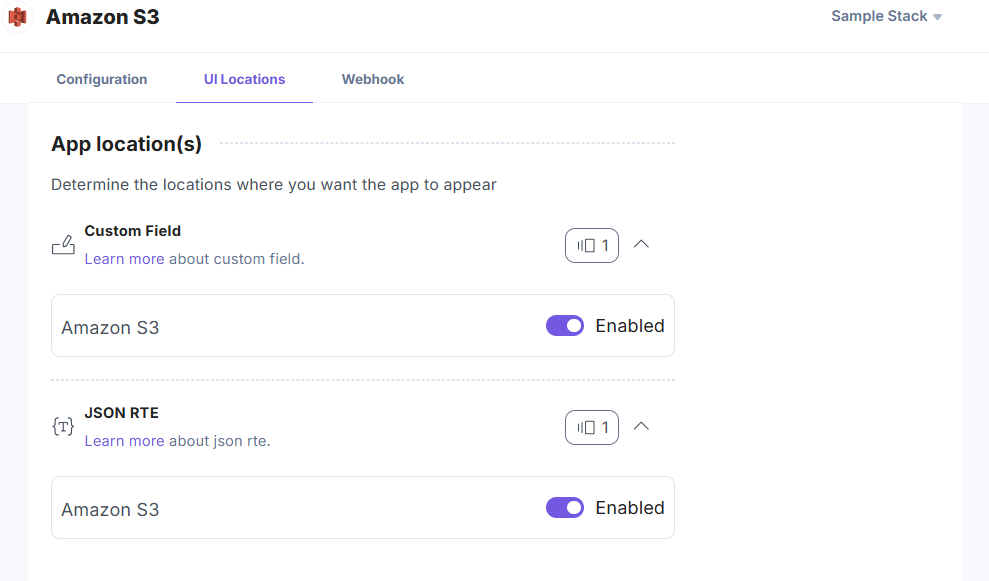
Note: The app requires at least one UI location to be enabled, otherwise you will not be able to save your app configuration settings.
- If the webhook is enabled for your app, you can view the webhook logs under the Webhook tab.
Additional Resource: For more information on UI location and webhooks, please refer to the Installed Apps guide.
- Click Open Stack to start using the Amazon S3 app.
- From the left-hand side primary navigation, click the Marketplace icon.
Use the Amazon S3 App within your Entry
To use the Amazon S3 app within an entry of your stack, follow the steps given below:
- Go to your stack, click the Content Models icon in the left navigation panel, and click the + New Content Type button.
- Create a content type by adding relevant details as displayed below:
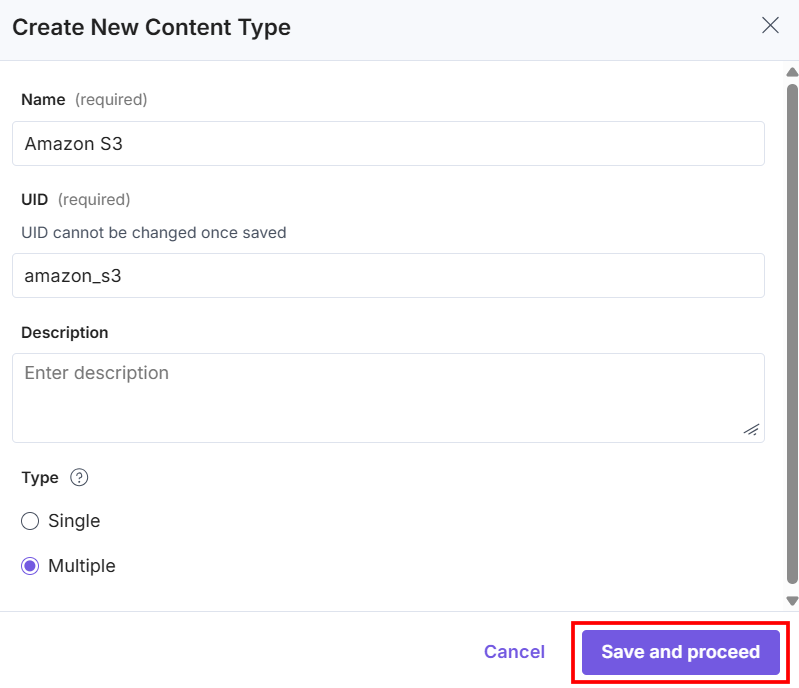
There are two ways to use the Amazon S3 app in your entry:
Steps to Use the Amazon S3 App as a Custom Field
- In the Content Type Builder page, add a Custom field in your content type by clicking the Insert a field link represented by a + sign.
- Under Select Extension or App, select Amazon S3 and click the Proceed button.
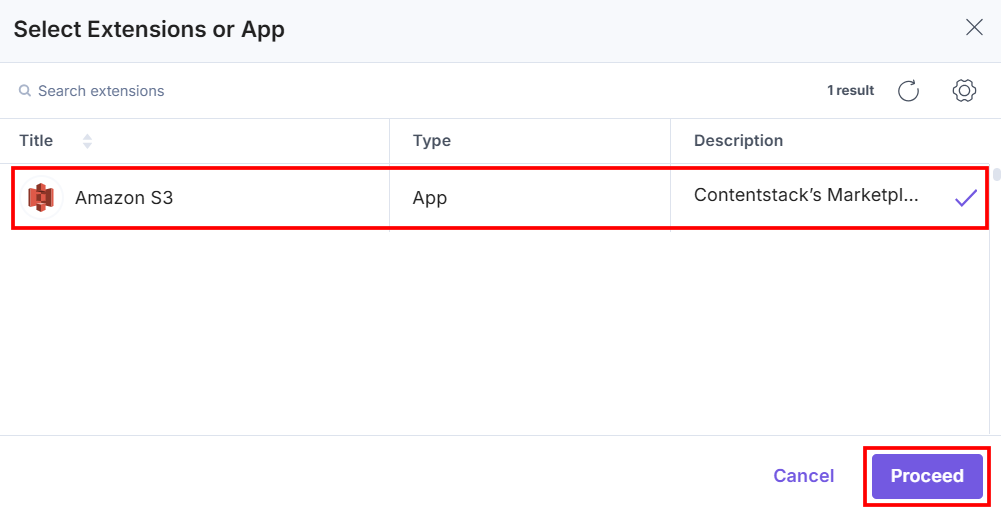
This adds Amazon S3 to the custom field.
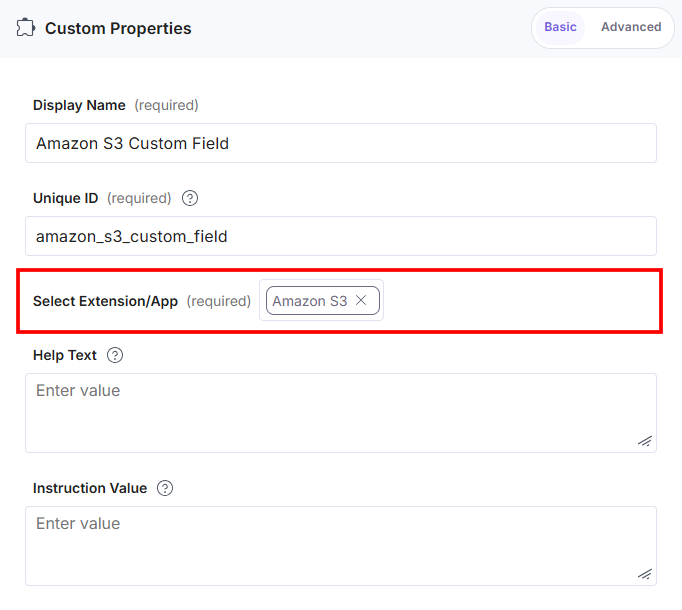
- After adding the app in a custom field, click Save or Save and Close to save your changes.
- To use the Amazon S3 app, create an entry in this newly created content type. In the left navigation panel, navigate to the Entries page, click + New Entry to create a new entry for the above content type, and then click Proceed.
You can see the Amazon S3 app’s custom fields on your entry page, as shown below:
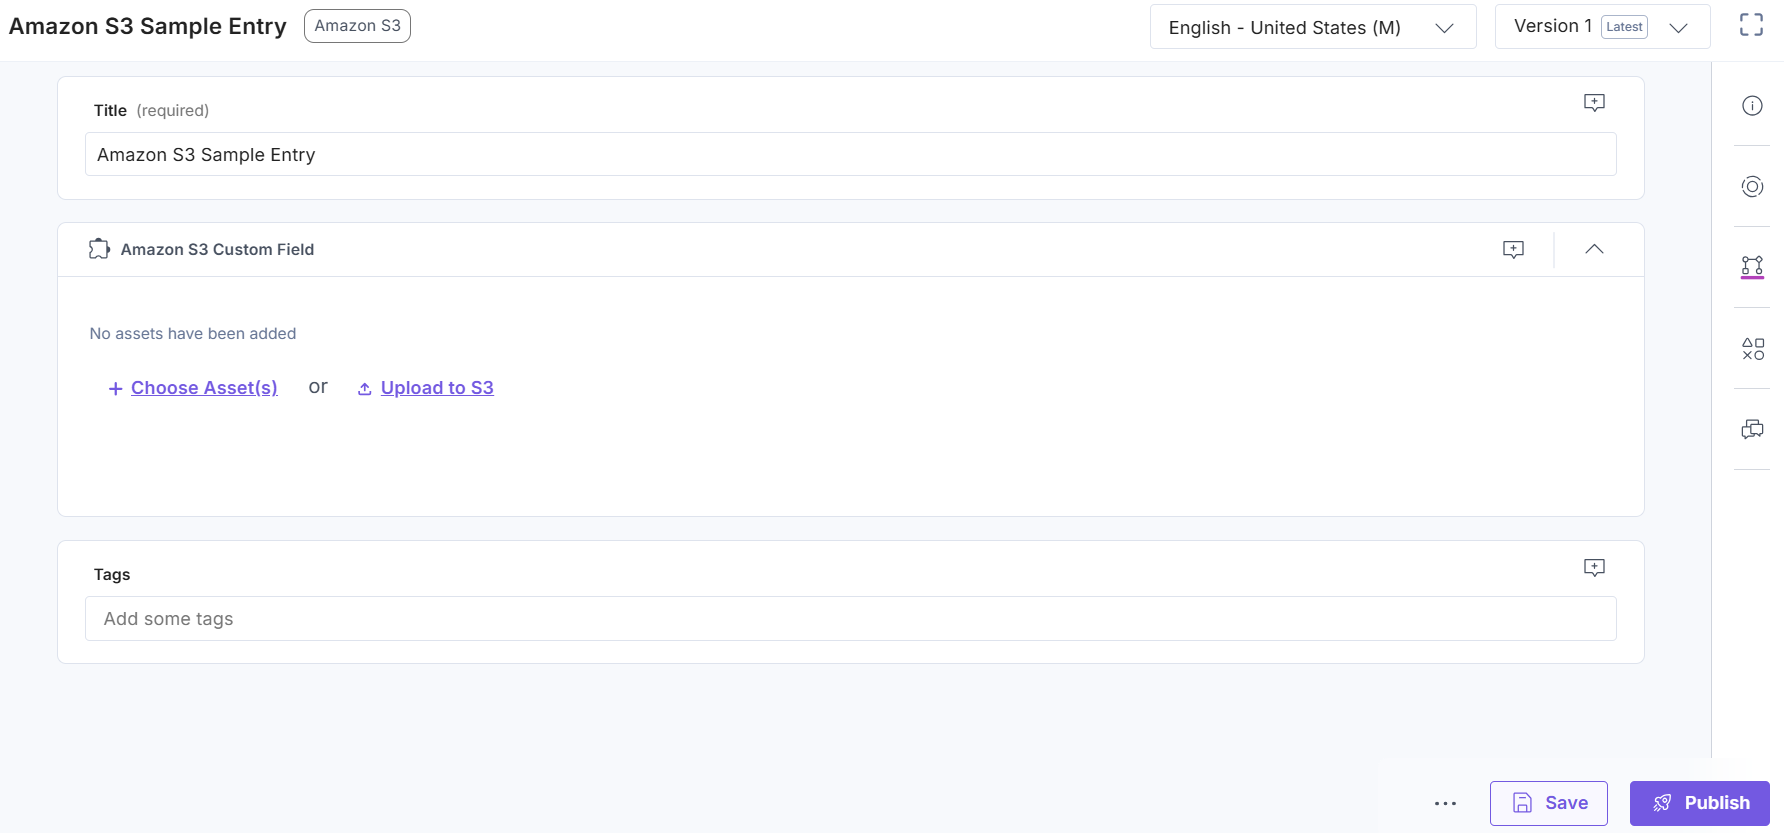
- You can now directly Upload Assets in the selected bucket from the custom field using the given steps:
- Click the Upload to S3 button.

- Select the Bucket from the top-right drop-down and then click Choose File(s) to add new assets.
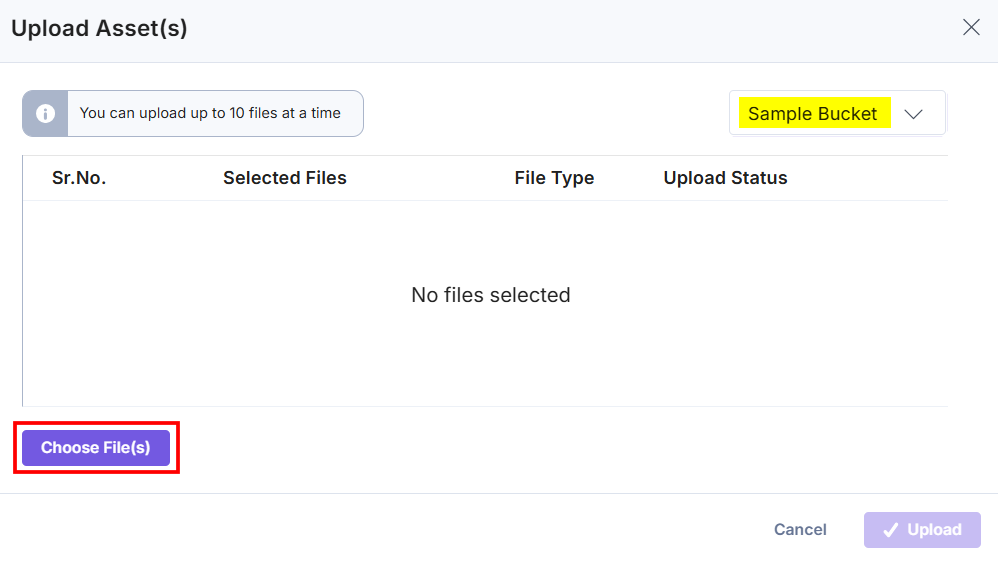
Note: You can add up to 10 assets in one go.
- After selecting the files, click the Upload button.
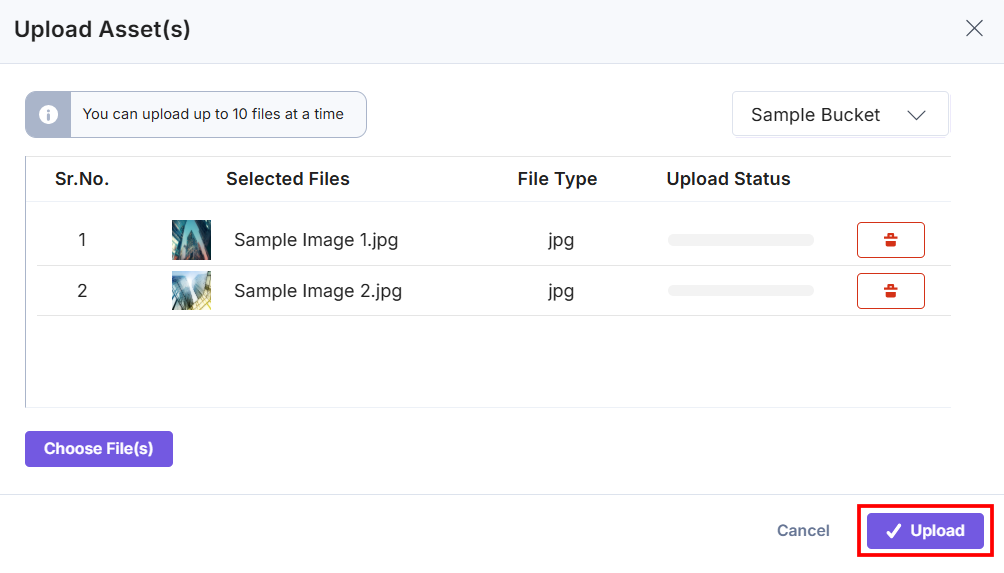
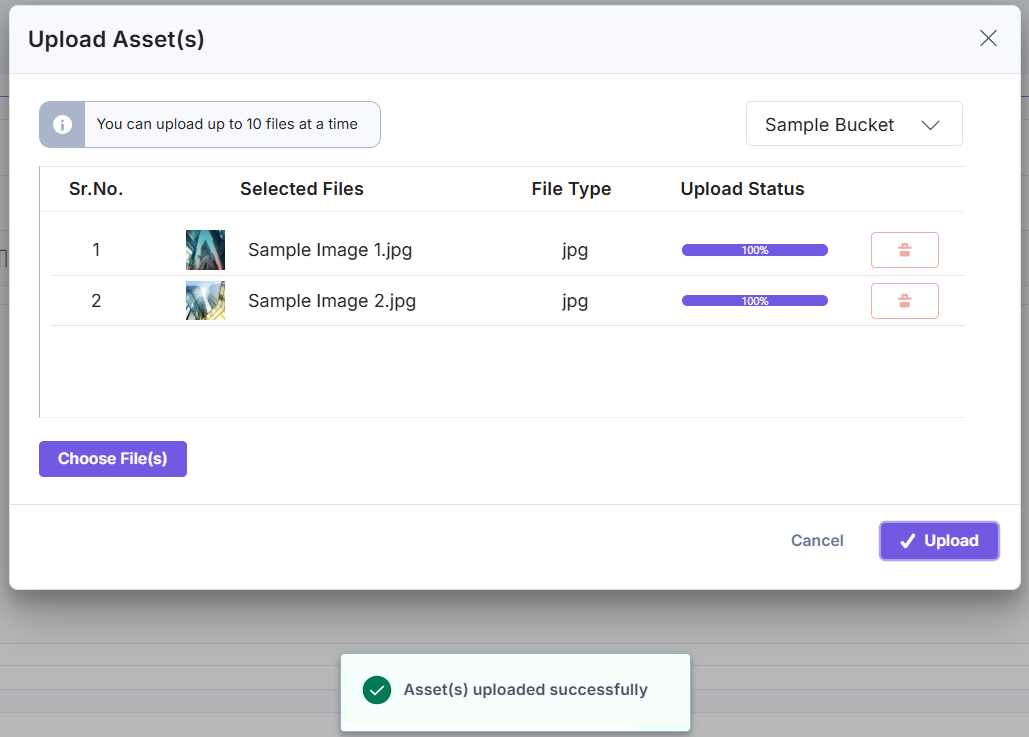
- After uploading the assets successfully, the Upload Status bar will be marked as 100% and you will also get the confirmation message.
- Click the Upload to S3 button.
- Now, click + Choose Asset(s) button.

- Choose the required assets from the Amazon S3 selector page and click + Add Assets to add them to your entry.
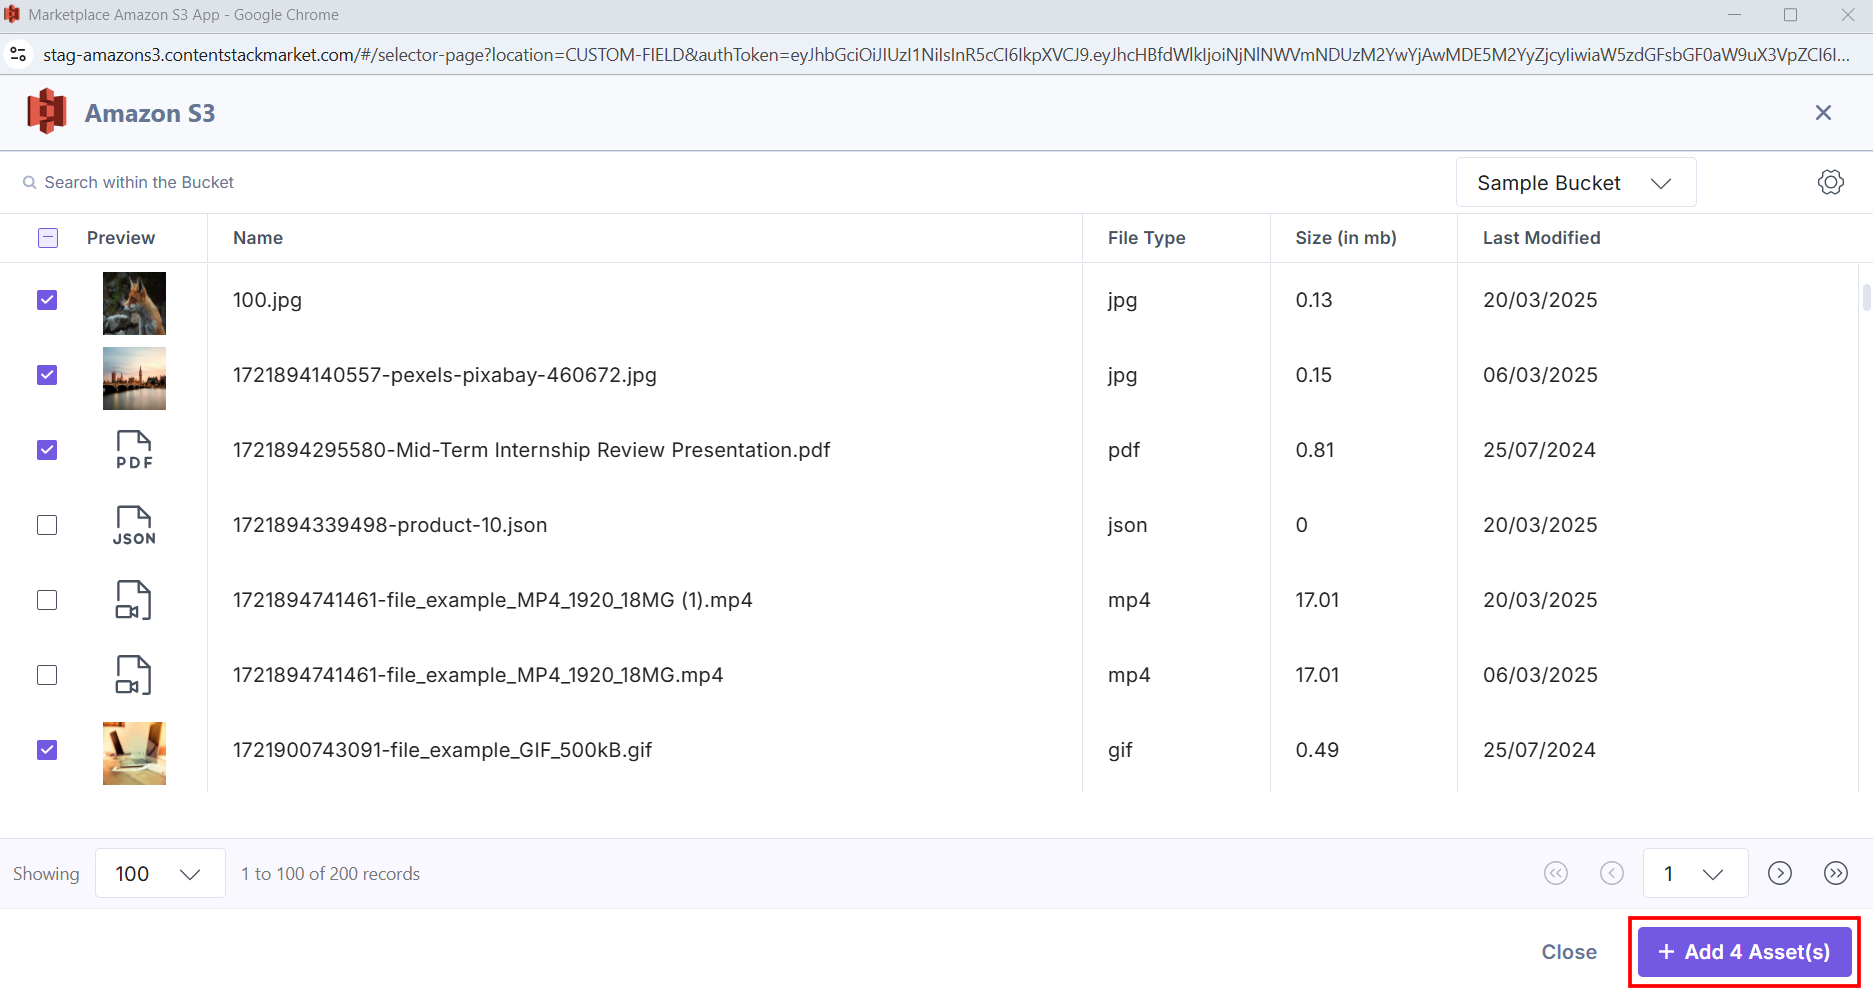
You can also search for assets in the selected bucket within the Amazon S3 selector page.
Note:
- Search is case-sensitive.
- In case of renamed or deleted assets, a warning icon is visible along with the notification.
- The assets you select get added to your entry in the thumbnail view.
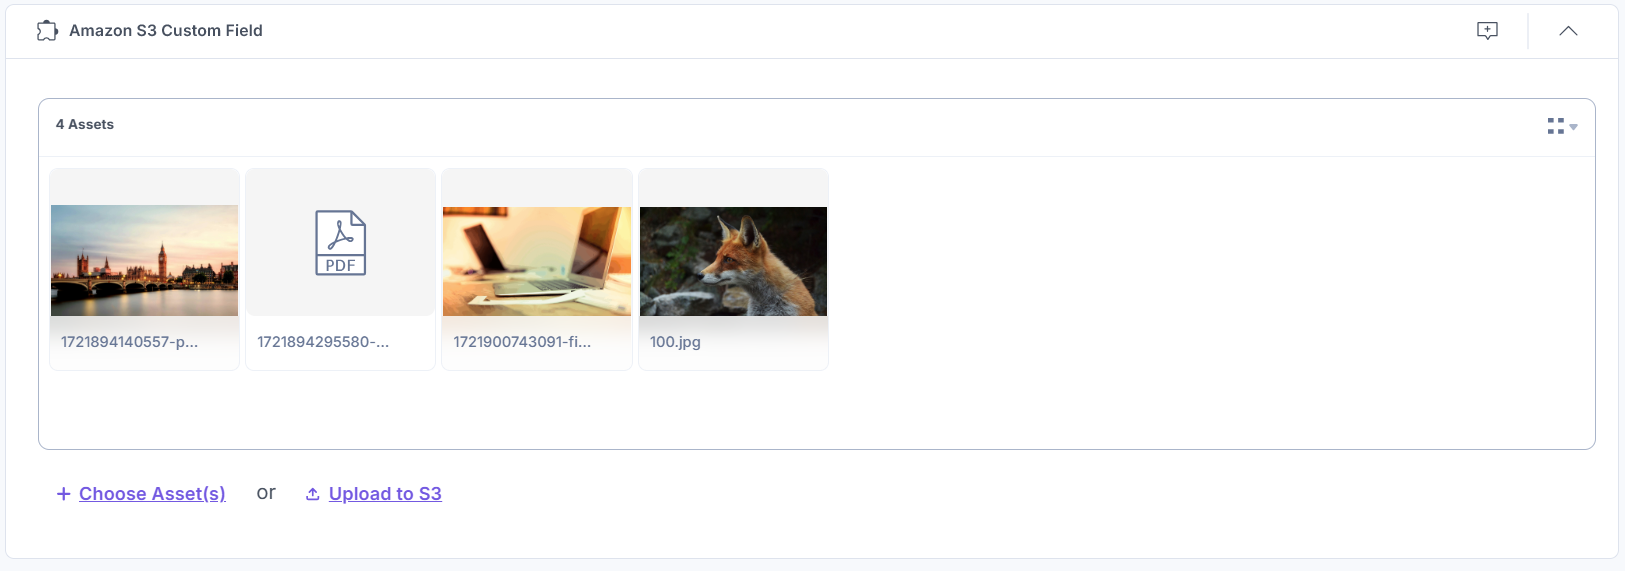
To view the assets in the list view, select the List view option from the dropdown.
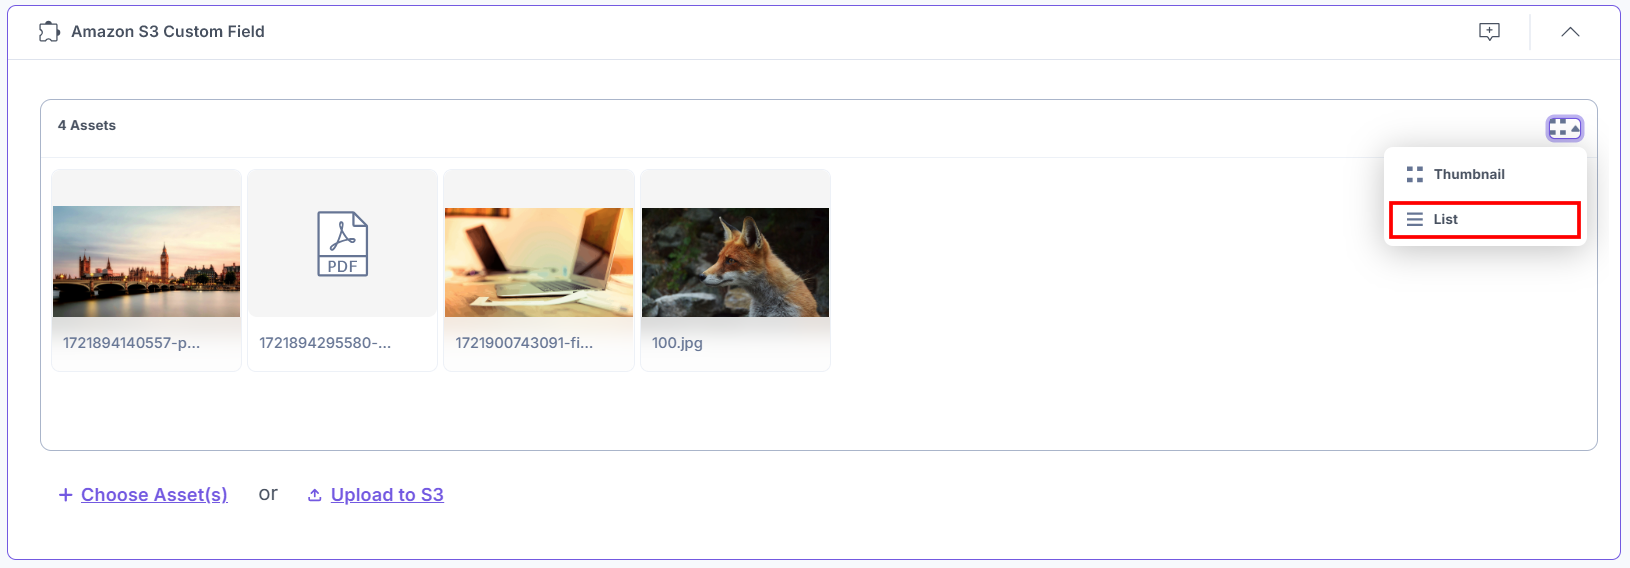
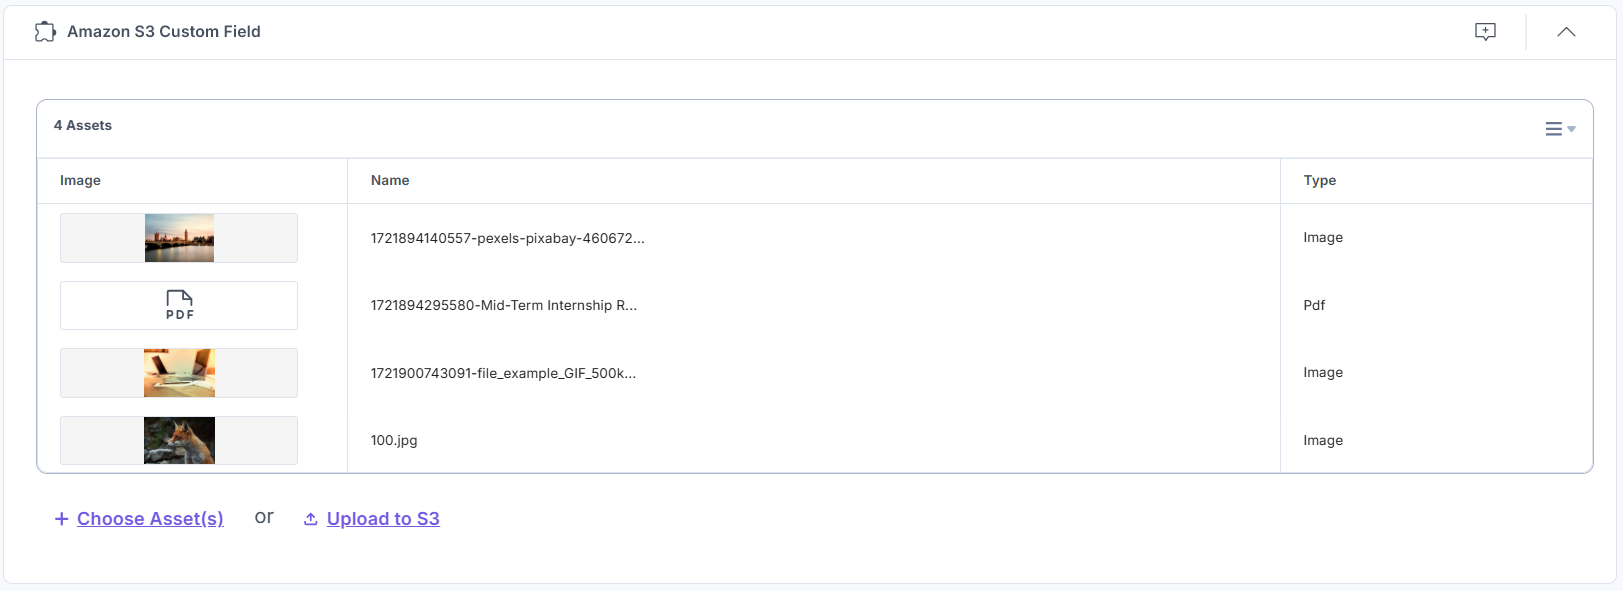
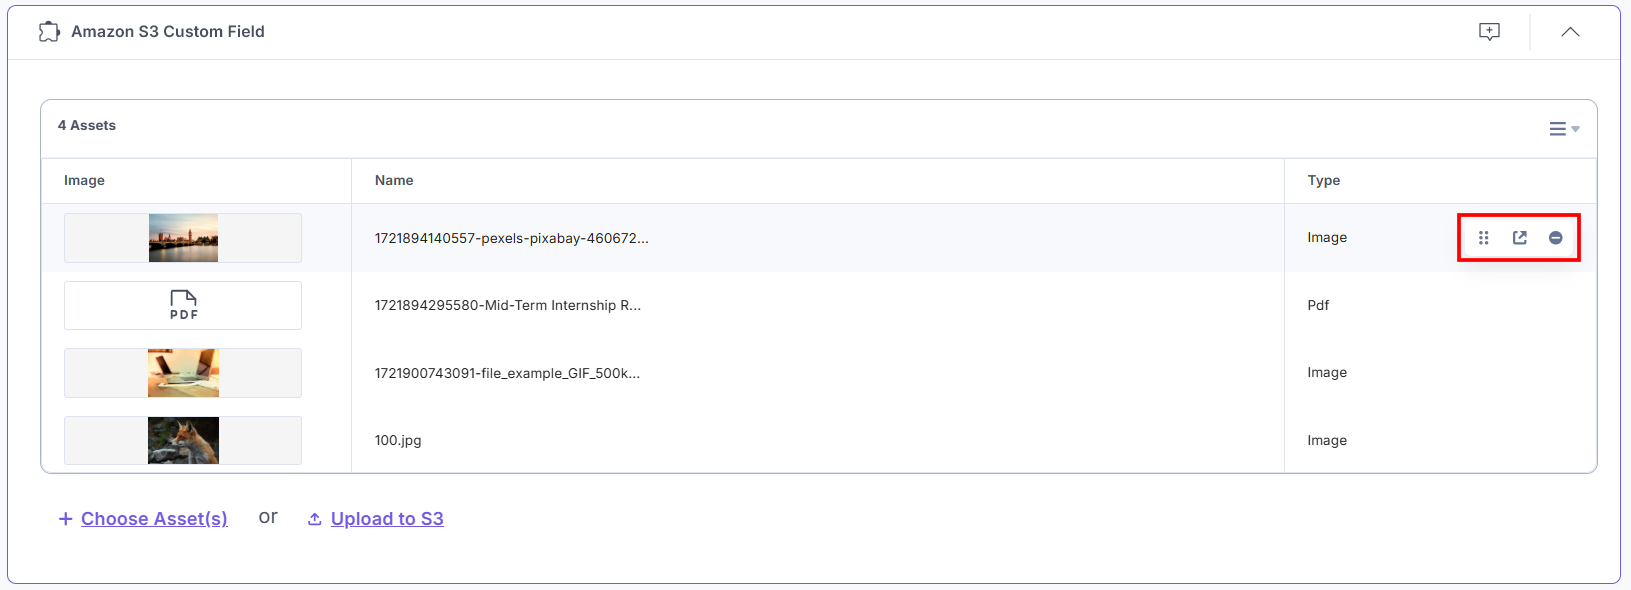
The assets you select get added to your entry in the list view.
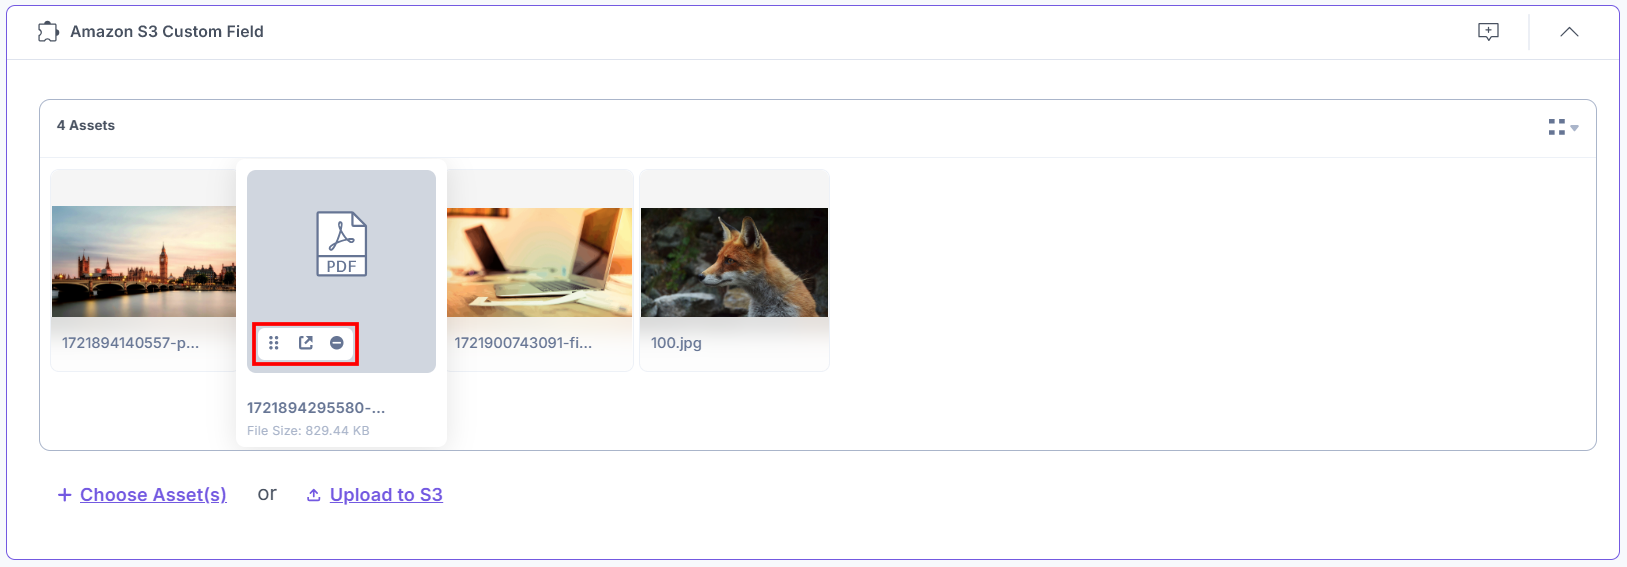
- Hover over the image to view the following options:
- Click the Reorder icon to drag and reorder the asset.
- Click the Open in New Tab icon to open the asset in the new tab to preview.
- Click the Remove icon to remove the asset.
Thumbnail View
List View
- After adding the asset(s), Save and Publish your entry.
Steps to Use the Amazon S3 App as a JSON RTE Plugin
- In the Content Type Builder page, add a JSON Rich Text Editor field in your content type by clicking the Insert a field link represented by a + sign.
- Under Select Plugin(s), select Amazon S3, and then click Add Plugin(s).
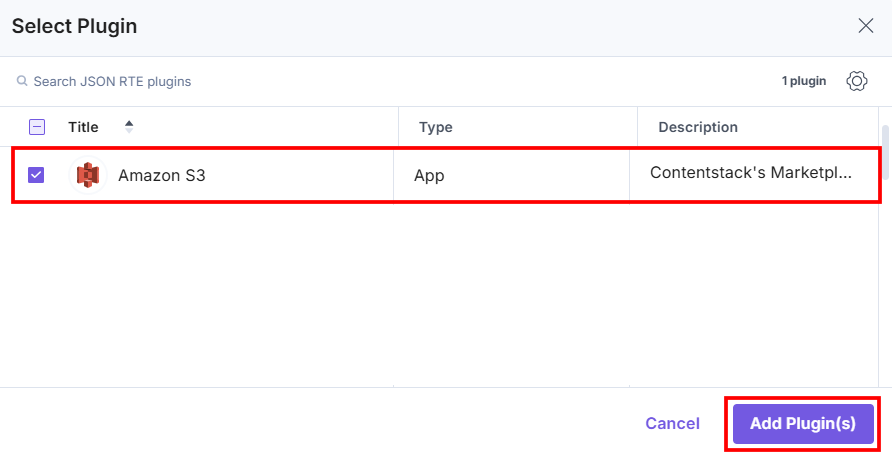
This adds Amazon S3 in the JSON Rich Text Editor.
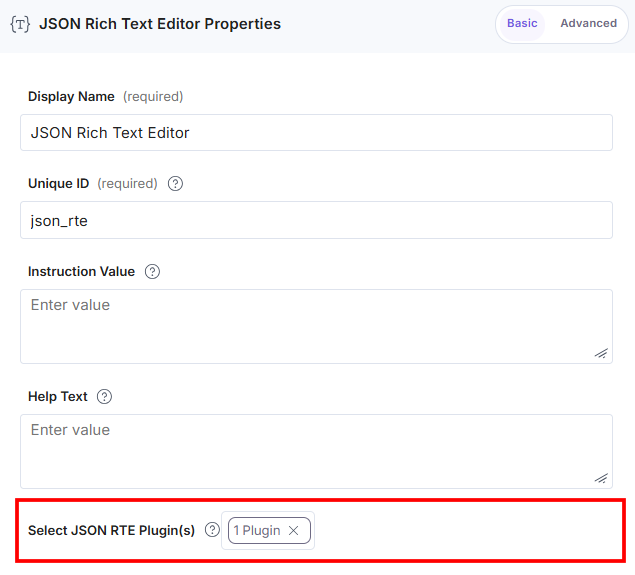
- After adding the app in a JSON Rich Text Editor field, click Save or Save and Close to save your changes.
- To use the Amazon S3 app, create an entry for this content type. In the left navigation panel, navigate to the Entries page, click + New Entry to create a new entry for the above content type, and then click Proceed.
You can see the Amazon S3 icon in the JSON Rich Text Editor field on your entry page, as shown below:
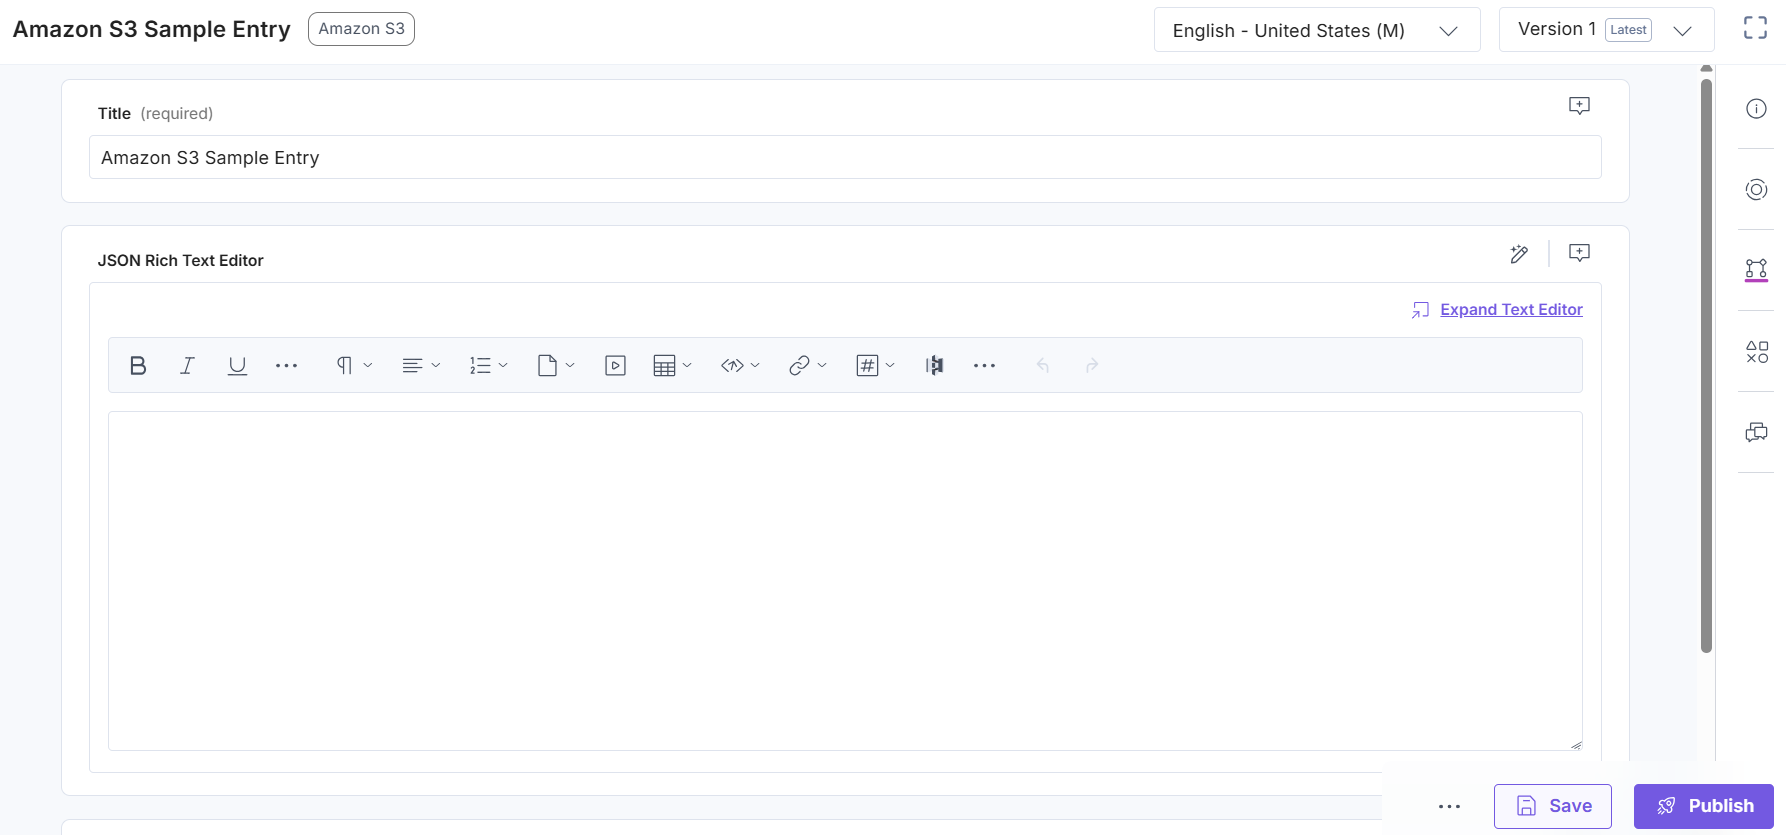
- Click the Amazon S3 app icon.
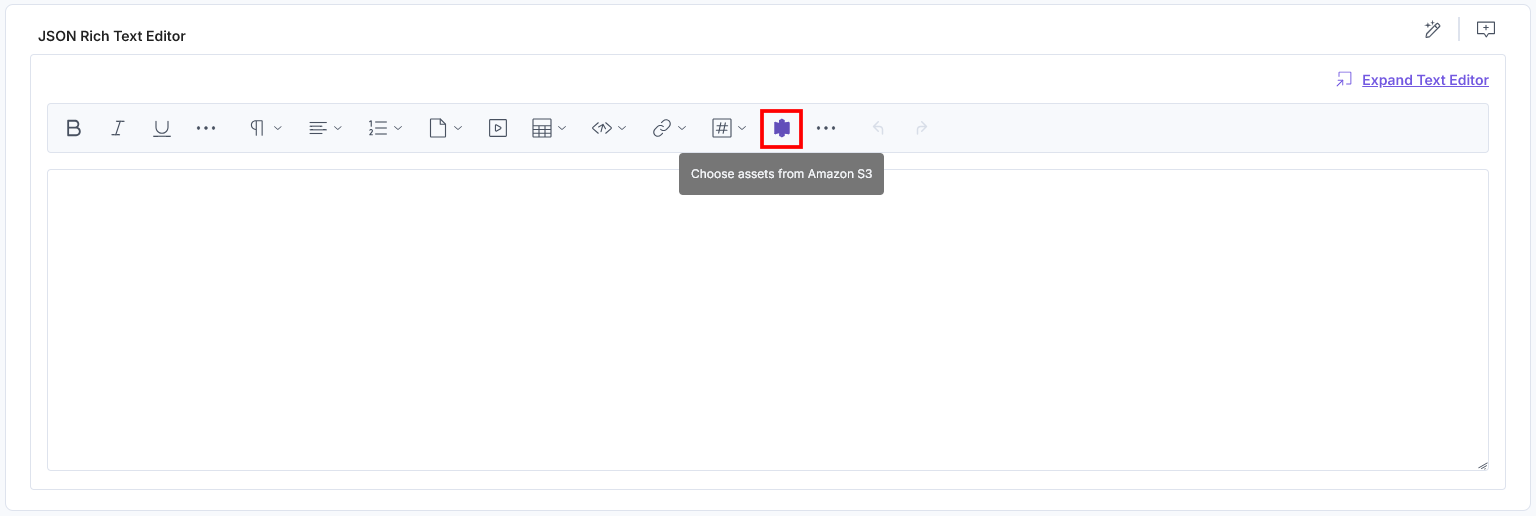
- Choose the required assets from the Amazon S3 selector page and click + Add Assets to add them to your entry.

You can also search for assets in the selected bucket within the Amazon S3 selector page.
Note: Search is case-sensitive.
- The assets you select get added to your entry.
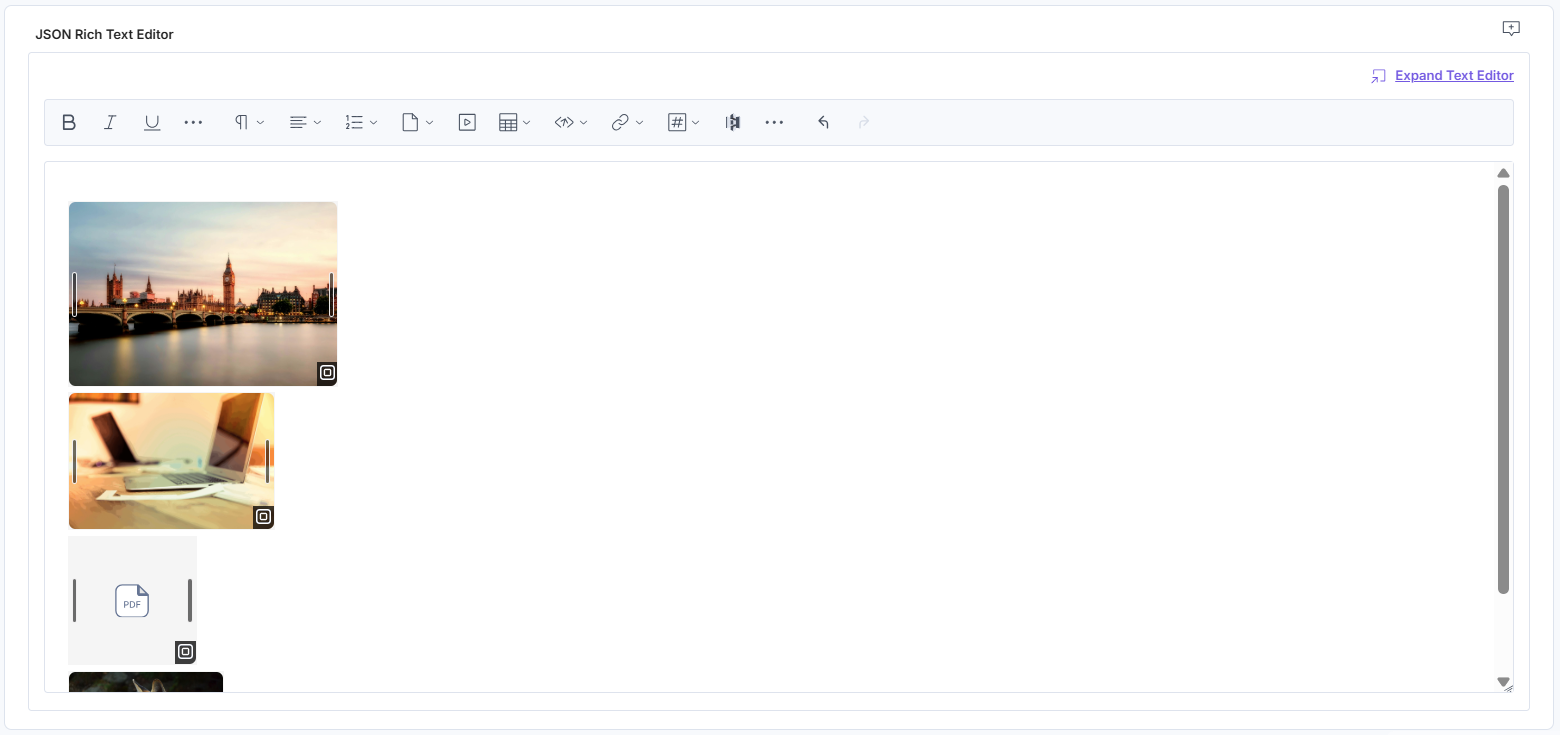
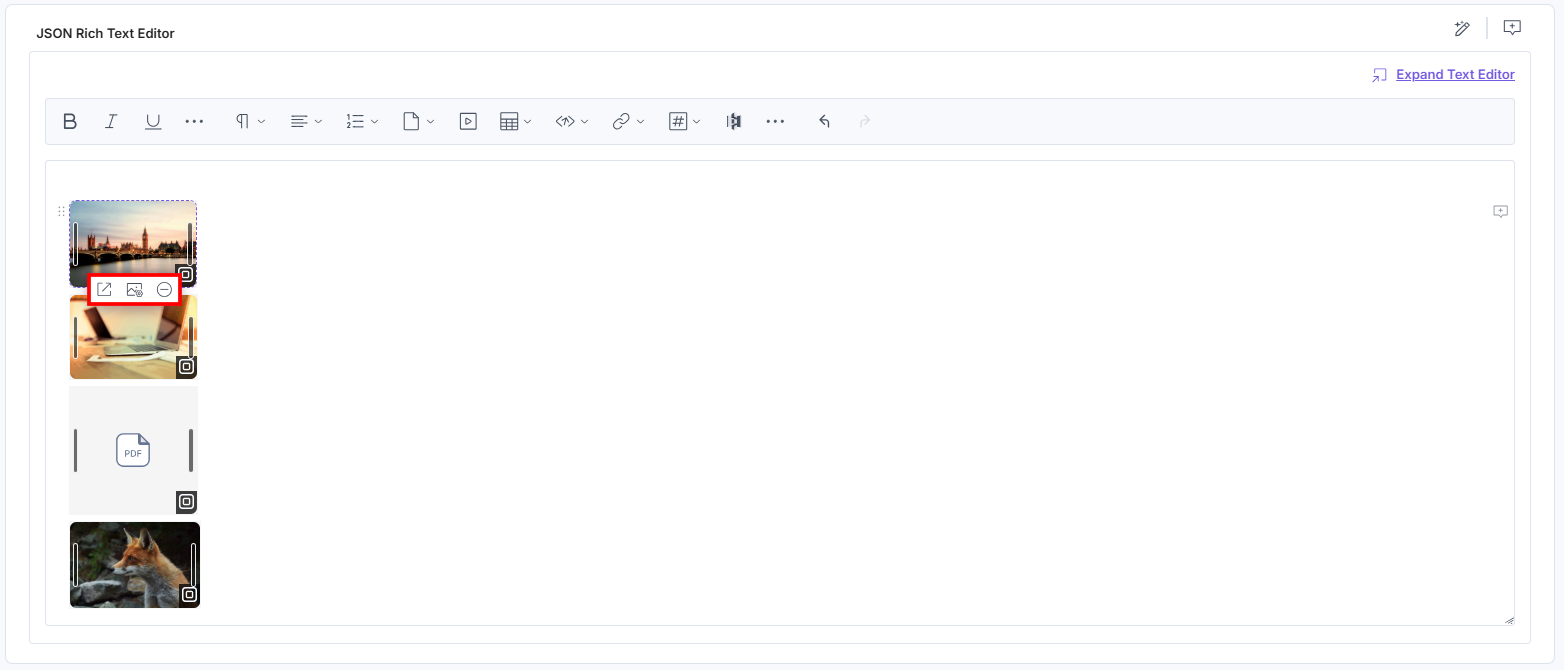
- To resize the image, drag the corner of the image and adjust the size as required. Hover over the image to view the options to Open in New Tab, Edit Properties, and Remove the asset.
Additional Resource: You can use alignment and inline asset features to edit the asset placement within the JSON Rich Text Editor field.
- After adding the asset(s), Save and Publish your entry.


.svg?format=pjpg&auto=webp)
.svg?format=pjpg&auto=webp)
.png?format=pjpg&auto=webp)


.png?format=pjpg&auto=webp)