Vimeo
Note: This documentation uses the legacy approach with extensions. We have launched Vimeo as a Marketplace App. For more information on Vimeo, please refer to the Vimeo App Installation Guide.
The Vimeo custom extension lets you fetch Vimeo videos and display them into a field in your content type. Subsequently, while creating entries, content managers can select multiple videos at a time as the input value for that field.
This step-by-step guide explains how to create a Vimeo custom field extension for your content types in Contentstack.
Steps for Execution
Prerequisites
-
Get the Vimeo Access Token
In order to set up this extension, we need to generate the Vimeo account’s access token.
Follow the steps below to create an app and generate a Vimeo access token.- Visit the Vimeo log in page and create a new account. You can also log in using your Google, Facebook, or the suggested accounts.
- Once you log in, you will be on the Vimeo's Home page. Hover over the New Video tab and click on the Upload button. Add the videos of your choice and proceed to create an app in Vimeo.

- Next, go to the developer’s page and click on the New app button at the top right corner.
- On the Create a new app page, fill in the mandatory details i.e. your App name, App description.
You can decide if you want others to access your app besides you by selecting the appropriate option. - Select the terms of service checkbox and click on Create App.

- This will successfully create your app. Now open your newly created app and click on Generate Access Token under the Authentication section, from the left navigation panel.
- Now, select the Authenticated (you) option and under the Scopes section select the Private option. Finally, click on the Generate button to get your access token as shown below.
- Note down the access token, as you will need it while configuring this extension in Contentstack ( in Step 3).
-
Additional Resource: To learn more about access token in Vimeo refer the documentation.
-
Add the Vimeo Custom Field Extension to Your Stack
To add the Vimeo Custom field to your stack, log in to your Contentstack account and perform the following steps:
- For this extension, we have created the example code. If Extensions are part of your plan, contact our Support team to get the code for the extension. You'll be provided the source code that contains the following files:
- vimeo: Navigate to vimeo/build/index.html file. We will upload the code in this file in the extension source code field of our extension in the next step.
- vimeo-popup: Navigate to vimeo-popup/build/index.html, upload this file as an asset in your stack by referring to the Create/Upload Assets guide. After uploading this file, make a note of the asset URL. To view the asset URL, open the asset and copy the File URL.
- Go to your stack and click on the “Settings” icon on the left navigation panel.
- Click on Extensions. You can also use the shortcut keys “alt + X” for Windows OS users, and “option + X” for Mac OS users to access the extensions menu.
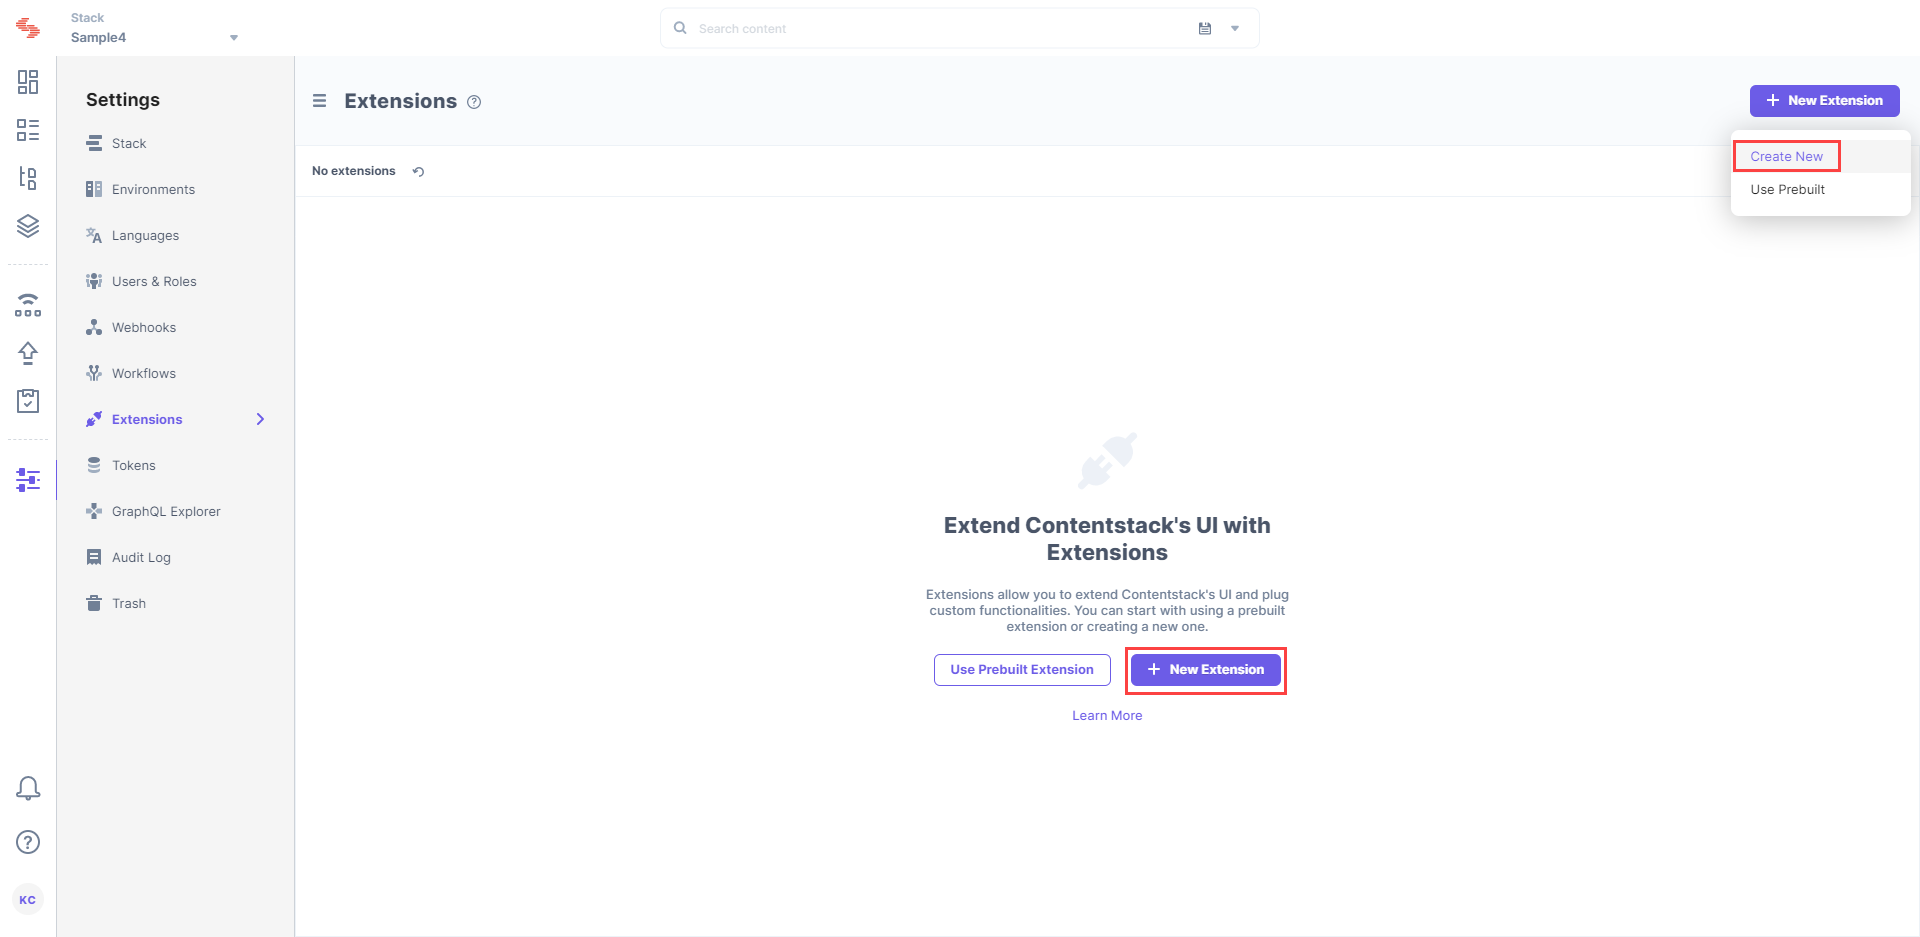
- On the Extensions page, click on the + New Extension button, and select Create new.

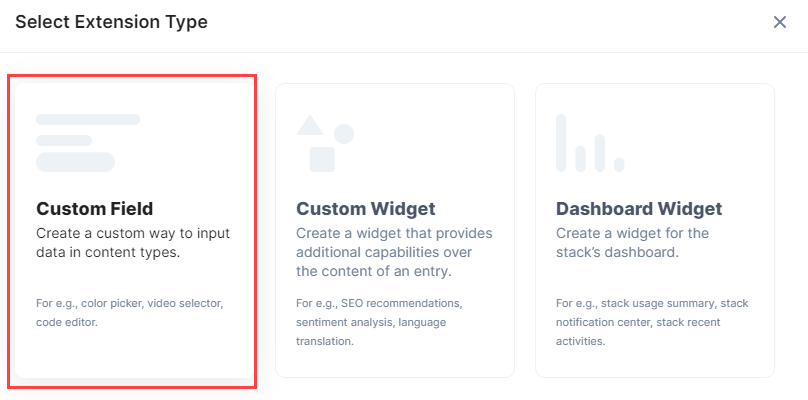
- In the Select Extension Type window, select Custom Field.

- On the Create New Extension page, enter values in the fields as given below:
- Title (required): Provide a suitable title, for example “Vimeo,” for your custom field. This title will be visible when you select the extension in the custom field in your content type.
- Field data type (required): Select the data type in which the input data of the field should be saved in Contentstack. In this case, select JSON.
- Hosting method (required): Select Hosted by Contentstack as the hosting method for this content type.
- Extension source code (required): Enter the downloaded extension source code here. Navigate to vimeo/build/path from the downloaded folder, copy and add the code of the index.html file here.
- Config Parameter (required): Enter the following configuration details as the extension's config parameter.
{ "accessToken": <<AccessToken>>, "saveFullResponse": true, "redirectUrl": <<URL of the asset file>> }- accessToken: Add the Vimeo access token that you generated in step 1.
- saveFullResponse: If we keep the value of this parameter to "true" then the entire video JSON response will be saved in the entry. If we keep it as "false" then only video IDs will be saved in the entry response. So you can set this parameter as per your requirement.
- redirectUrl: The URL of the redirect.html file, which you have uploaded as an asset in the stack.
-
Save the custom field.
Now, let’s understand how you can start using this custom field in your content type.
- For this extension, we have created the example code. If Extensions are part of your plan, contact our Support team to get the code for the extension. You'll be provided the source code that contains the following files:
-
Use Your Custom Field
Once you have added a custom field, you can use it in your content type like any other field. To add a custom field in your content type, perform the following steps:
- Create a content type and add the Custom field to it.
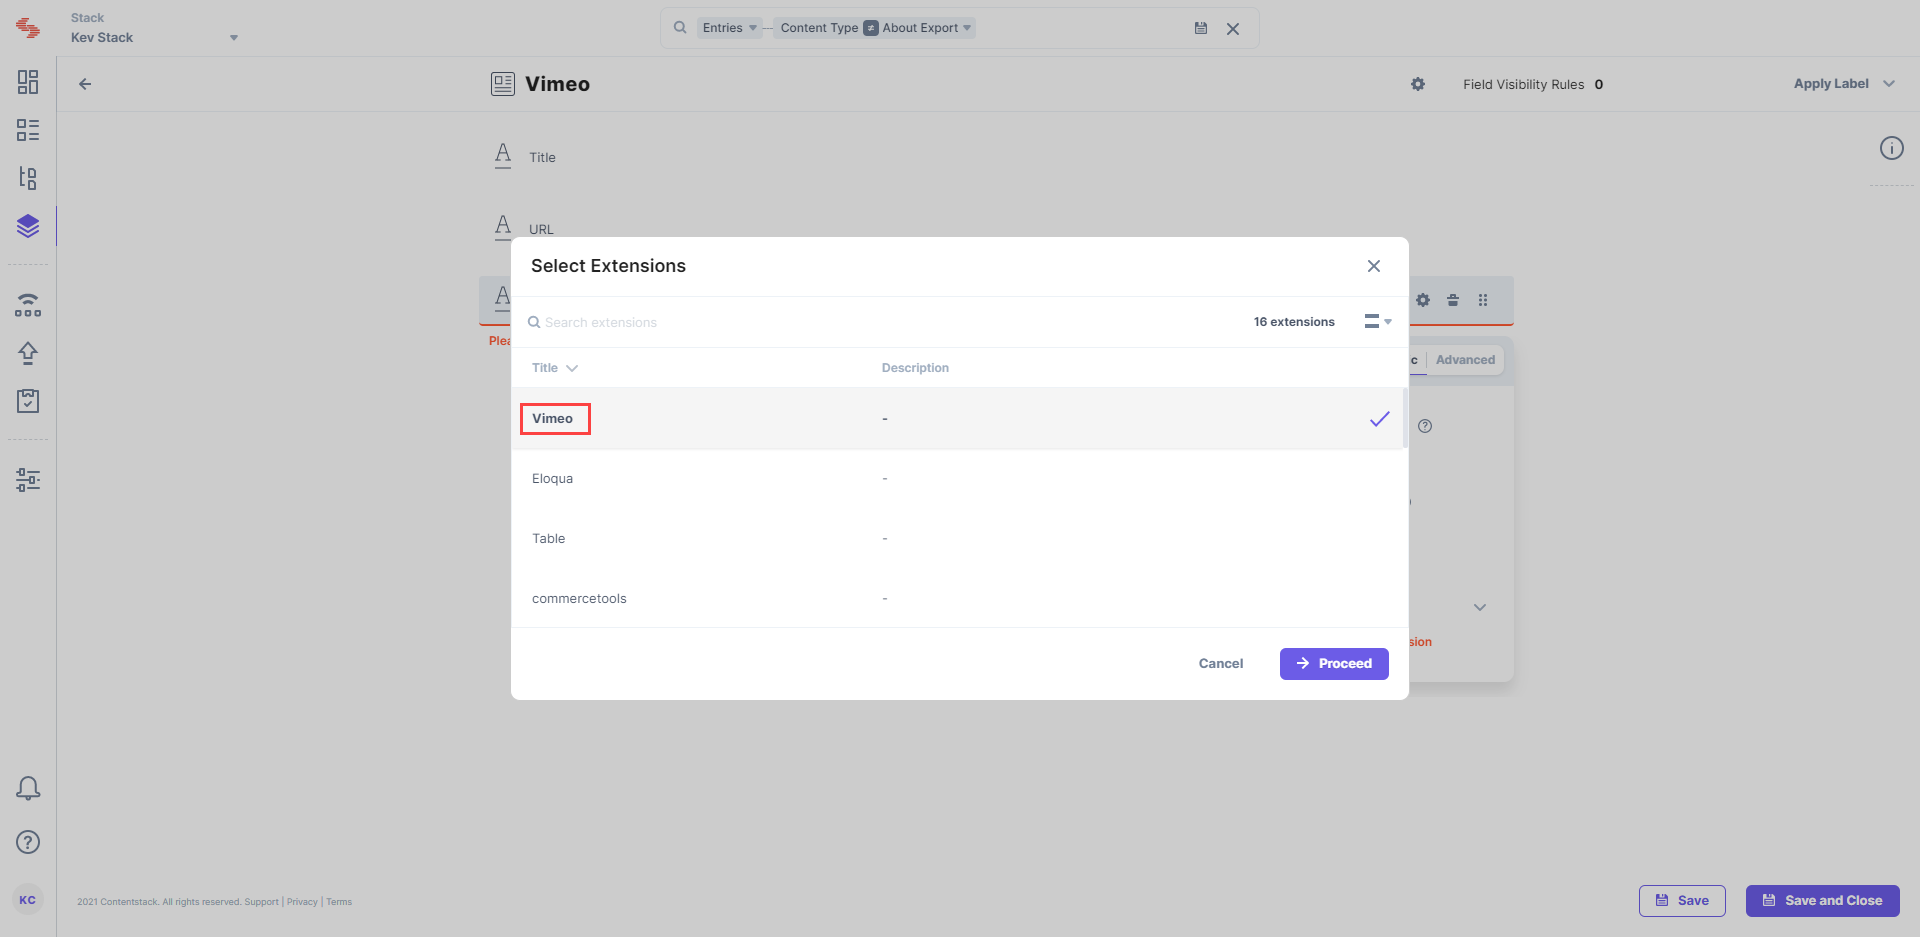
- Under Select Extension, select the “Vimeo” field that you created and set the other properties. You can add other fields as per requirements.

- Finally, click on either Save or Save and Close to save your changes.
- Next, create an entry for this content type, and you will see the Vimeo field in action.
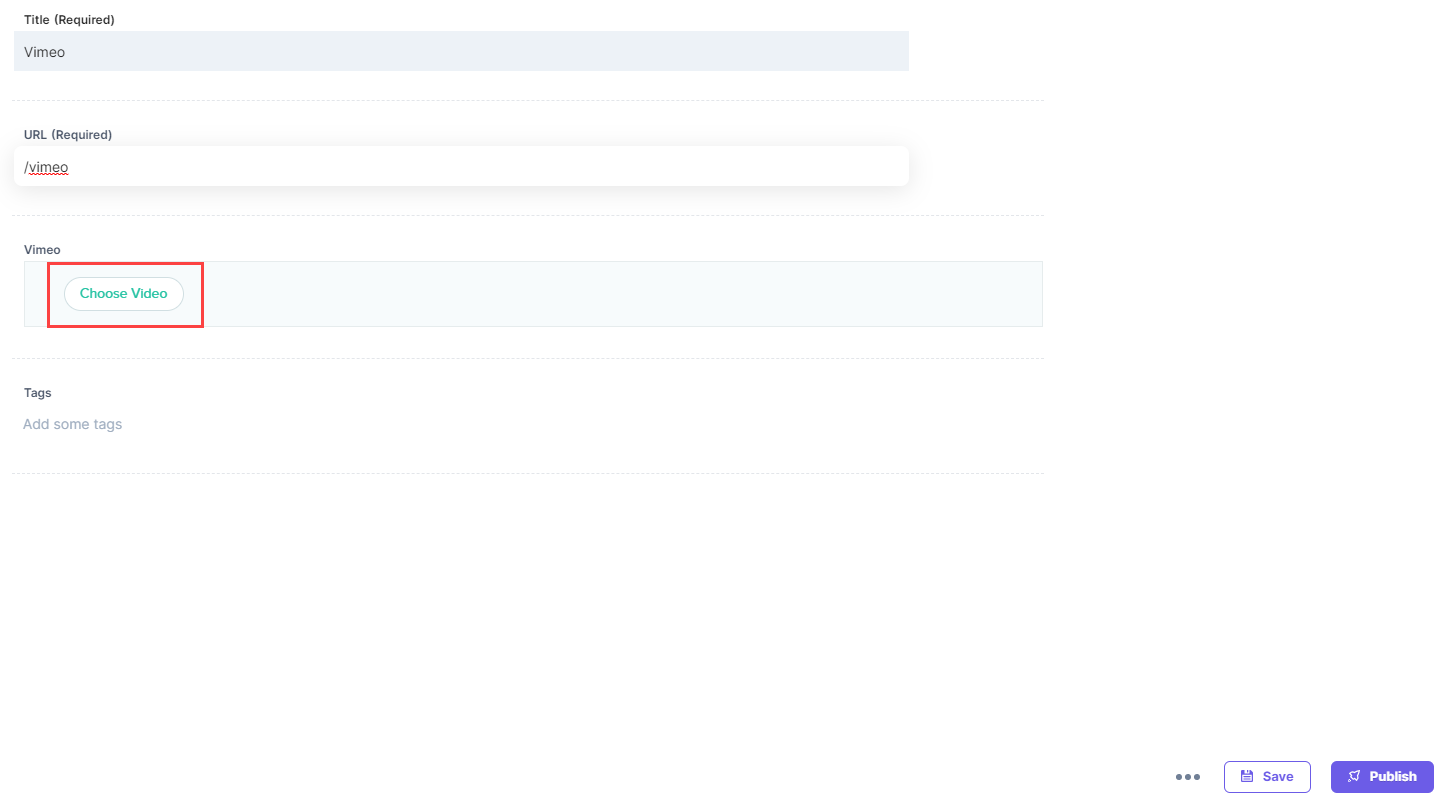
- Click Choose Video. This will redirect you to a new page which displays a list of videos.

- You can also choose the grid view for easy access. Select the videos you want to add and click on Add Selected Videos. The videos will be displayed in your custom field.

-
Additional Resource: You can also refer to our other documents on custom video extensions such as YouTube, Brightcove, and Ooyala.


.svg?format=pjpg&auto=webp)
.svg?format=pjpg&auto=webp)
.png?format=pjpg&auto=webp)


.png?format=pjpg&auto=webp)