JW Player
Note: This documentation uses the legacy approach with extensions. We have launched JW Player as a Marketplace App. For more information on JW Player, please refer to the JW Player App Installation Guide.
The JW Player custom field extension allows you to fetch your videos from JW Player and display them into a field of your Content type. Thus, while creating entries, you can select one or more videos as the input values for the field.
To create the JW Player custom field extension for your content types, follow the steps given below.
Steps for Execution
- Create a JW Player account
- Add the JW Player custom field extension to your stack
- Use your custom field
Prerequisites
-
Create a JW Player account
Firstly, you have to create a JW Player account to use this extension. Follow the steps given below to create and set up you JW Player account:
- Go to the JW Player website and create a new account.
- Click on the Pricing. Now, select Try Today under the TRIAL SUBSCRIPTION option.

- To Sign up and validate your profile, enter your email address and click on the Start for free button. An activation link will be sent on the email address that you provided. Go to your email account and click on the ACTIVATE NOW button and complete the signup process.
Note : If the account activation email is not received then you can re-enter your email address and check for the activation link.
- Configure your JW Player account by providing the necessary details such as Full Name, Country, and New Password. Once you have done that, click on Create Account.
- You will be directed to the Complete Your Profile modal. You can provide the required information or you can skip it for now to move to your dashboard.
- You are now ready to upload your videos to JW Player. To do this, click on the Upload or + Add button to start uploading.

- You can either Drop your files or click on select a file option to upload your videos on JW Player.
- Once the videos are uploaded, click on Exit. Your uploaded videos will be seen under Recent Videos. To check the Video Summary of any video click on the video, scroll down to add Title and a suitable Description of your video and Save it. These details will be visible in the Custom Field of Contentstack.
- Now for Contentstack to fetch videos from your JW Player in the custom field, it requires your accounts API Key and Secret Key. To get these, click on the Settings gear icon at top right corner and select the API Credentials option.
- On the API Credentials screen, under the v1 API Credentials click on Show Credentials to view the API Key as shown below.

- Next we proceed to create a Secret Key under v2 API Credentials section. Click on the Add button to add a new API key. Enter a suitable Name for your API key, select the Read-Only option from the User Role dropdown, and click on the Save button.

- Once you create the API Key, click on Show Secret to view the Secret Key as shown below.

Note: Save the API key and the Secret key we created in the above step, it will be required when we set up an extension in Contentstack.
-
Add the JW Player Custom Field Extension to your Stack
-
To set up an extension in Contentstack, log in to your Contentstack account and follow the steps given:
- If Extensions are part of your plan, contact our Support team to get the code for the extension. The support team will provide you with the source code that contains the following files:
- jw: Navigate to jw/build/index.html file. We will upload the code in this file in the extension source code field of our extension in the next step.
- jw-popup: Navigate to jw-popup/build/index.html, upload this file as an asset in your stack by referring to the Create/Upload Assets guide. After uploading this file, make a note of the asset URL. To view the asset URL, open the asset and copy the File URL.
- Go to your stack, navigate to the “Settings” icon on the left navigation panel.
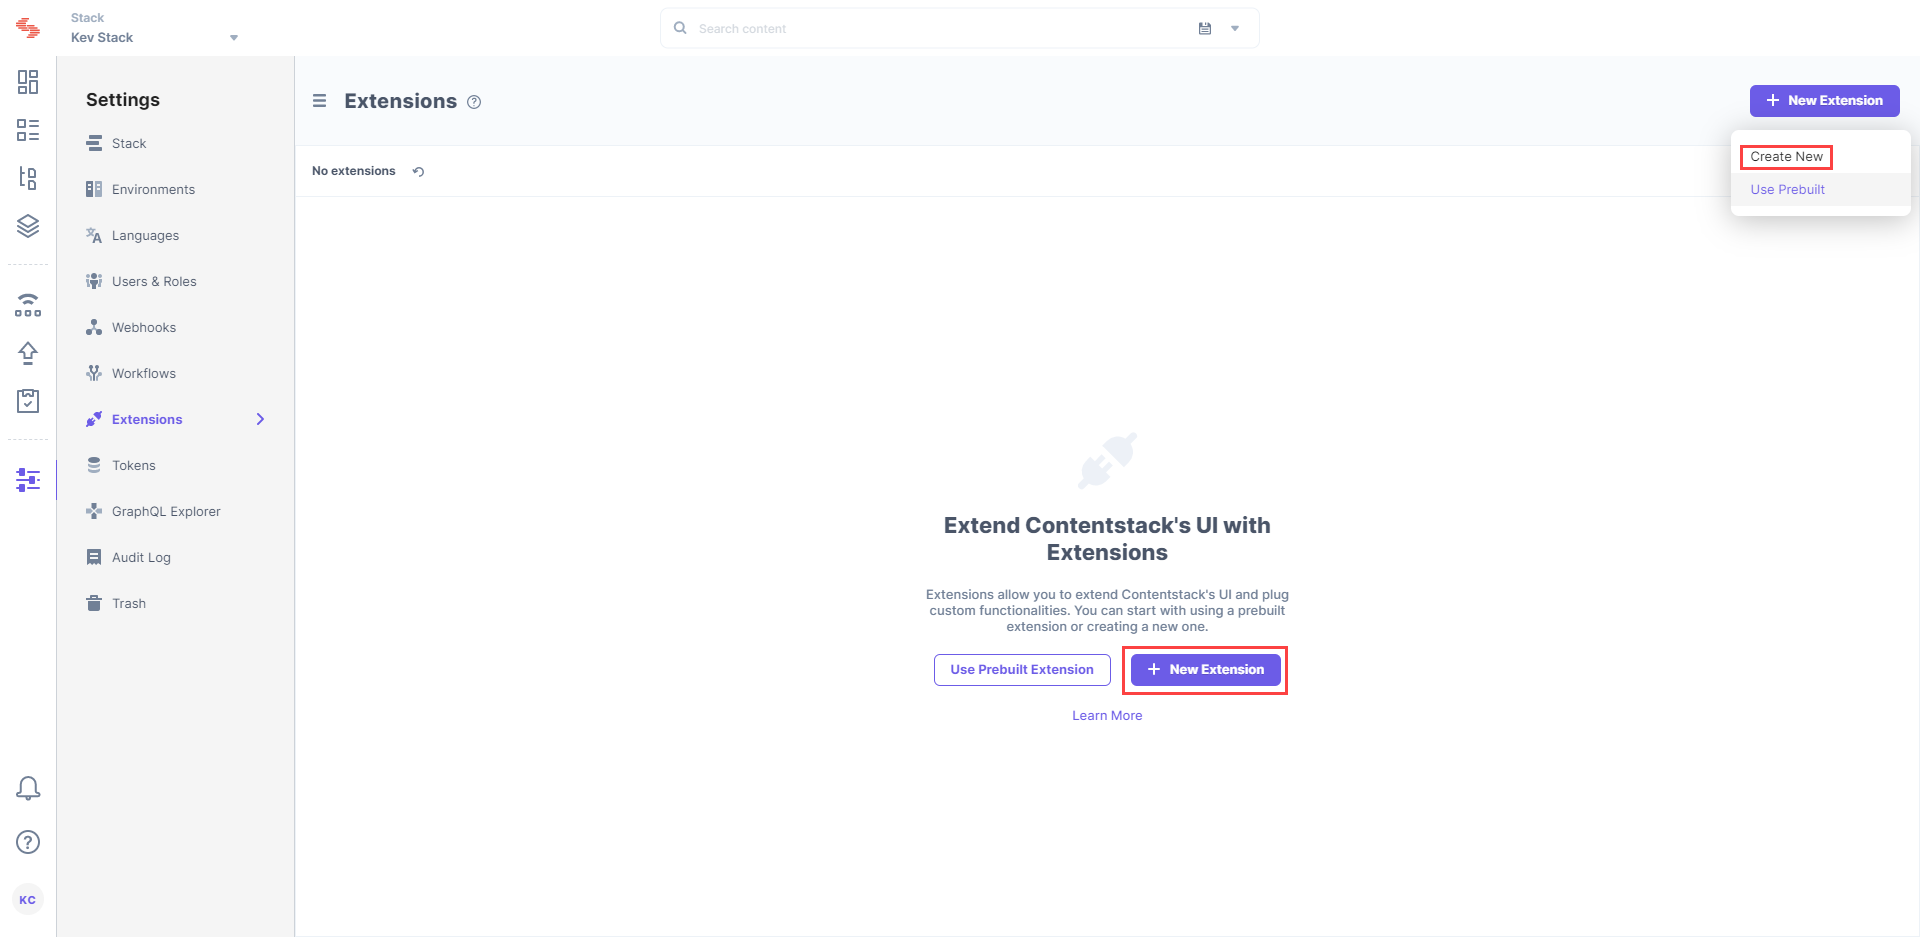
- Click on Extensions. You can also use the shortcut keys “alt + X” for Windows OS users, and “option + X” for Mac OS users to access the extensions menu.
- Click on the + New Extension button, and select Create new.

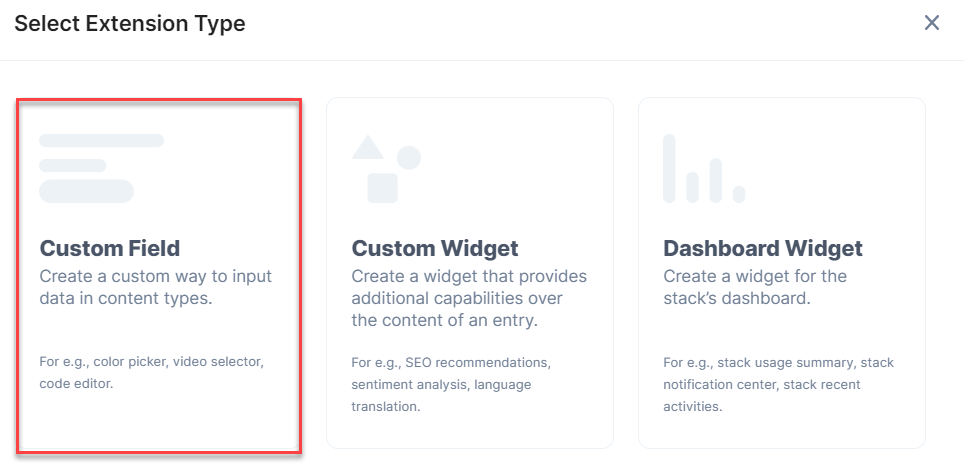
- Select the Custom Field option in the Select Extension Type window. This Custom field extension will fetch videos from JW Player to your Contentstack field.

- On the Create New Extension page, enter values in the fields as given below:
- Title (required): Provide a suitable title, for example “JW Player” for your custom field. This title will be visible when you select the extension in the custom field in your content type.
- Field data type (required): Select the data type in which the input data of the field should be saved in Contentstack. In this case, select JSON.
- Multiple (required) : Check this field.
- Hosting method (required): Select Hosted by Contentstack as the hosting method for this content type.
- Extension Source Code (required): Enter the downloaded extension source code here. Navigate to jw/build path from the downloaded folder, copy and add the code of the index.html file here.
- Config Parameter (required): Enter the following configuration details as the extension's config parameter:apiKey: Add the API Key you generated in step 1.
{
  "apiKey": <ApiKey>,
  "apiSecret": <SecretKey>,
  "saveFullResponse": true,
  "redirectUrl": <URL of the asset file>
}
apiSecret: Add the Secret Key you generated in step 1.
saveFullResponse: If we keep the value of this parameter to "true" then the entire video JSON response will be saved in the entry. If we keep it as "false" then only video IDs will be saved in the entry response. So you can set this parameter as per your requirement.
redirectUrl: The URL of the redirect.html file, which you have uploaded as an asset in the stack.
- Confirm your settings by clicking on the Save button.
- If Extensions are part of your plan, contact our Support team to get the code for the extension. The support team will provide you with the source code that contains the following files:
-
Now, let's use this custom field in our content-type.
-
Use your Custom Field
Once you have added a custom field, you can use it in your content type like any other field. Perform the following steps to add a custom field
- Create a content type and add the Custom field to it.
- Under the Select Extension dropdown, select the “JW Player” extension that you created and set the other properties. You can add other fields if required.

- Finally, click on Save and Close to save your changes.
- Now create an entry for this content type, and you will see the JW Player field in action.
- Under your custom field you will find all the videos that you have uploaded on JW Player when you click on the Choose Video button. Select the videos you want to add to this field.


.svg?format=pjpg&auto=webp)
.svg?format=pjpg&auto=webp)
.png?format=pjpg&auto=webp)


.png?format=pjpg&auto=webp)