Project Variables
The Project Variables section helps you add project variables to use the same key-value pair across different automations. You can view and use the project variables under the “Output from Previous Steps” dropdown inside an automation.
To add the Project Variables, log in to your Contentstack account, go to your project, and perform the following steps:
- On the left navigation panel, click Project Variables. You will see all the project variables defined in your project.
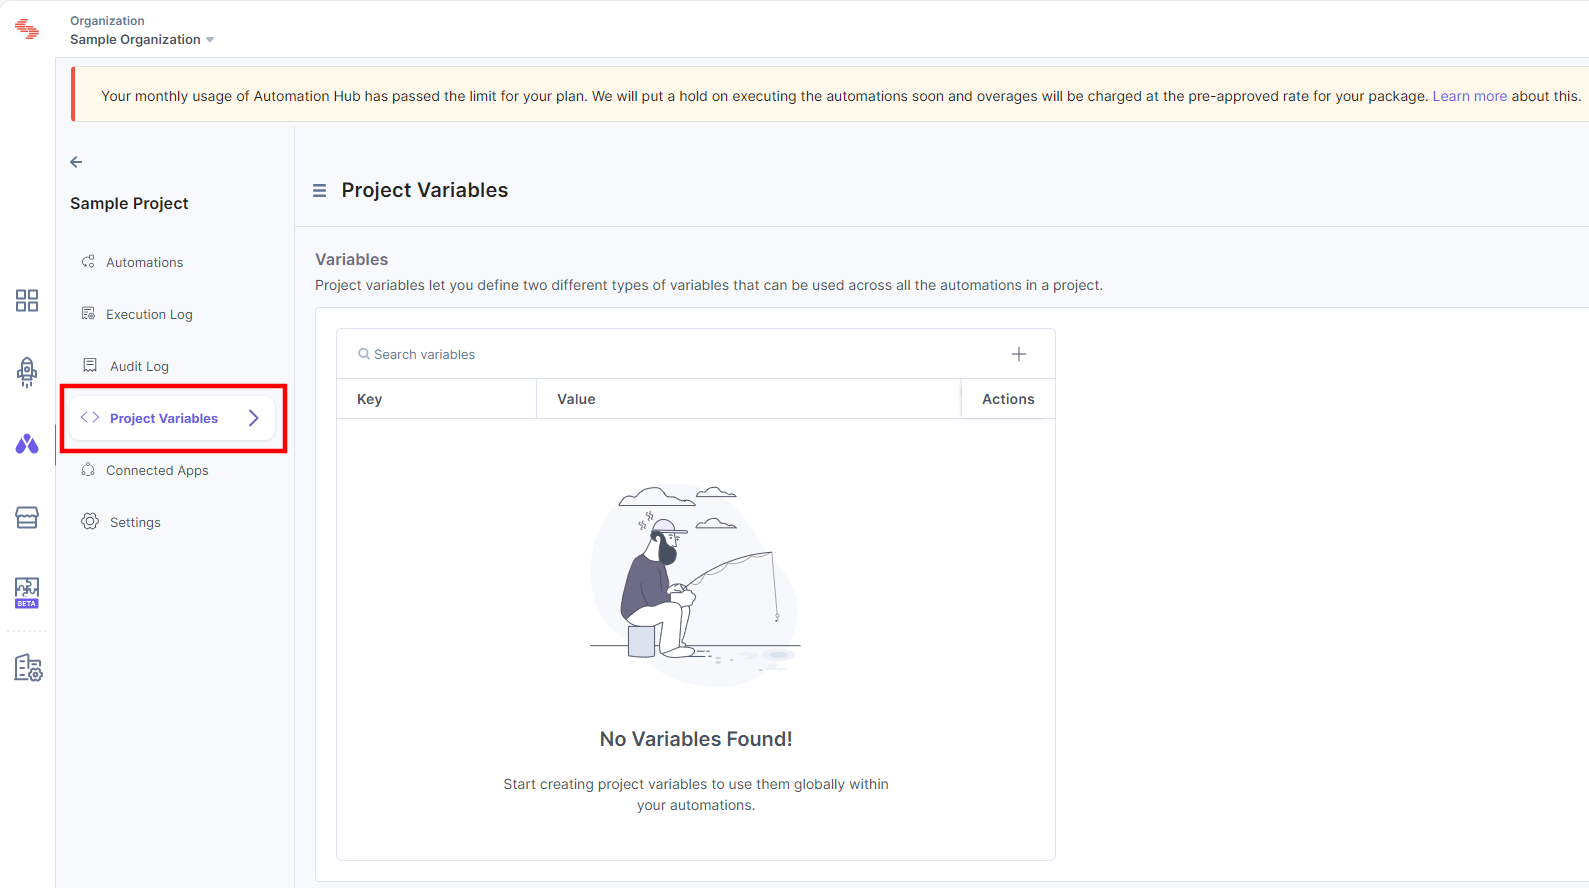
To add a new project variable, follow the steps below.
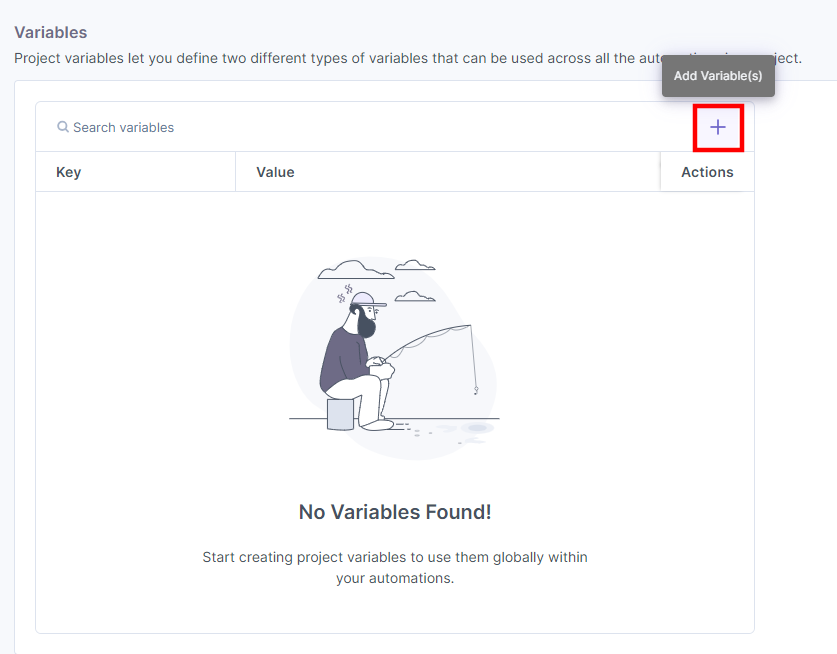
- Click the "+" icon on the Project Variables screen to add a new project variable.
- A pop-up screen appears. Select a Variable Type to add a Plain Text or Secret variable.
Note: Secret value cannot be viewed in an automation once saved.
- Enter the variable’s name in the Key field and value in the Value field.
Note: Each Key must be unique in a project.
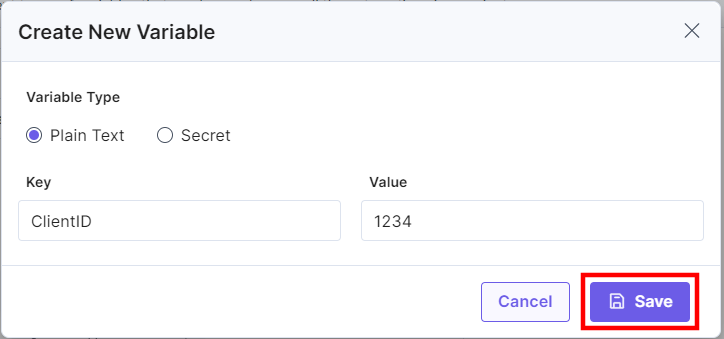
- Click the Save button to create a project variable.
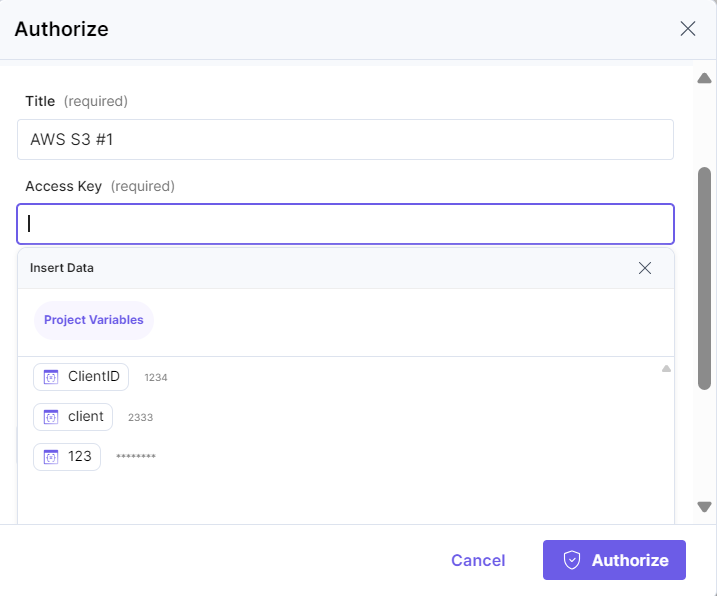
You can view the project variables in all the connectors with custom authentication.
For example, in the AWS S3 connector, you will see a list of all the project variables defined in your project as shown below:
Let's see how to add and use project variables in automation.
In this use case, we will cover a scenario where you can add project variables to create entries using the Contentstack Content Management API.
We create two project variables: management token and stack key respectively. Once the variables are created, configure the HTTP Trigger, HTTP Action, and Response connector.
Configure the HTTP Trigger to trigger the action. Later configure the HTTP Action to fetch the entries dynamically via the Content Management API. You can display the response sent by the HTTP Action connector in the Response connector.
Let's break this scenario to see what must be the trigger event and the consequent action required to execute the Automation:
- Set up the “HTTP Trigger" Event: This trigger event is activated whenever a user makes a HTTP GET/POST request to the configured URL.
- Set up the Contentstack “HTTP Action”: Once the above event triggers the automation, you can fetch the data from the URL and add the Headers to authenticate the URL.
- Set up the Contentstack “Response Action”: You can check the data sent from the HTTP Action in the Response connector.
The steps to set up the Automation are as follows:
Let’s look at the setup in detail.
Configure HTTP Trigger
- Select Configure Trigger from the left navigation panel.
- Within the Configure Trigger Step, click the HTTP trigger connector.
- Select HTTP Request Trigger. This trigger will be activated whenever you make an HTTP GET/POST request to a specific webhook URL.
- Select a Method, i.e., GET/POST.
- Click the Proceed button.
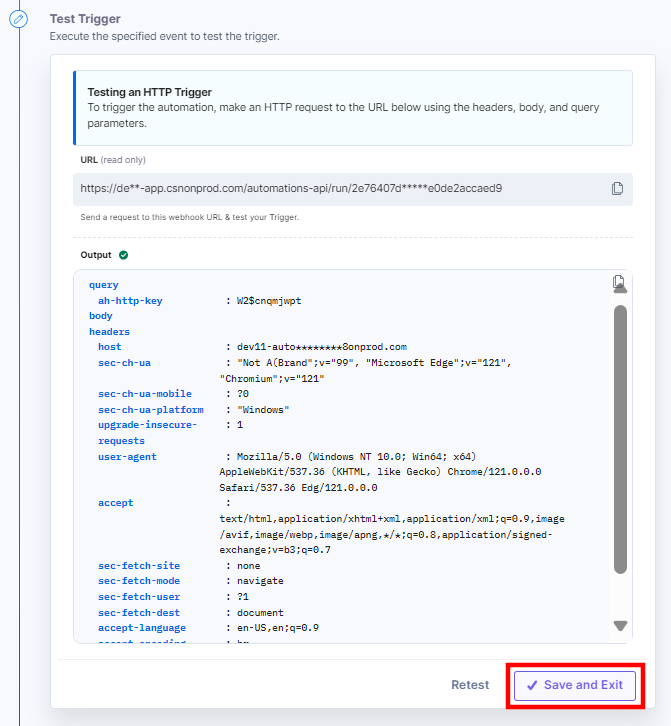
- You will find the applicable input “URL.” This URL will be the webhook URL to see the automation working.
- Click the Test Trigger button to test the configured trigger.
- On successful configuration, you can see the below output. Click the Save and Exit button.
Configure HTTP Action
- Within the Configure Action Step, click the HTTP connector.
Note: You can sort and search the connector(s) based on the filter.
- Under Choose an Action tab, select the HTTP Request action.
- On the Configure Action page, enter the URL. You can use any URL to fetch the data. Here, we are using a Content Management API URL to create an entry.
Select any one HTTP method from GET, POST, PUT, DELETE, and PATCH. For this example, we are choosing the POST HTTP method. - In the Post Body, enter the entry data you want to fetch in JSON format.
- Click the Show Optional Fields toggle button to enter the respective names and values for Headers. Here we use the Header parameters defined in the Content Management API.
Use the Contentstack-defined header parameter in the Header Name field and the project variables in the Value field.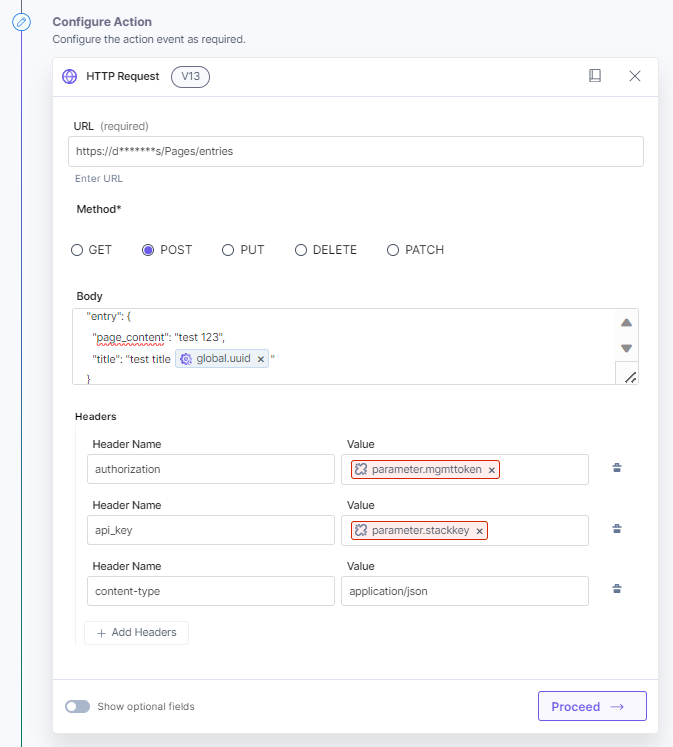
- Click the Proceed button.
- Click the Test Action button to test the configured action.
- Click the Save and Exit button.
- You will see an entry created in the defined content type.
- Within the Configure Action Step, click the HTTP connector.
Configure Response Connector
- Within the Configure Action Step, click the Response connector.
Note: You can sort and search the connector(s) based on the filter.
- Under Choose an Action tab, select the Response action.
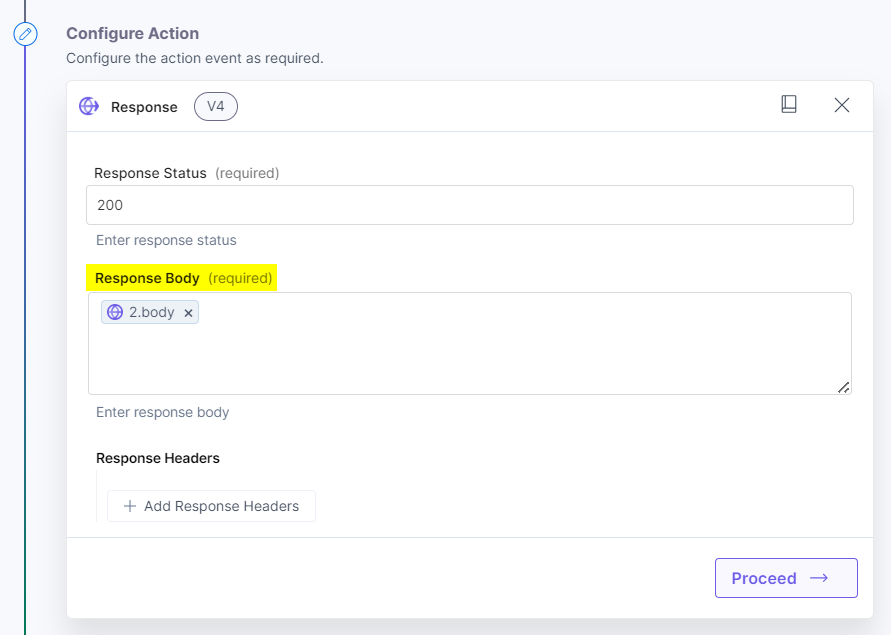
- Based on the results of your configured action, enter the Response Status.
- In the Response Body field, you can add the data that you want to send as the response. Fetch the data from the HTTP action.
- Click the Proceed button.
- Click the Test Action button to test the configured action.
- Click the Save and Exit button.
- Within the Configure Action Step, click the Response connector.
Test the Automation
Now, let’s see how you can test out your Automation. To do so, perform the steps given below:
- Toggle the Activate Automation button to activate the automation.
- Hit the trigger URL to see the response generated.
- To check the entries created in Contentstack, go to Contentstack, navigate to the desired content type. You will see entries created.


.svg?format=pjpg&auto=webp)
.svg?format=pjpg&auto=webp)
.png?format=pjpg&auto=webp)


.png?format=pjpg&auto=webp)