Automation Sharing
Automation Sharing enables you to seamlessly share automation workflows across different organizations. By generating a sharable recipe link, you can easily create a copy of your automation in another organization, without affecting the original version.
This streamlines collaboration and allows you to replicate successful automations efficiently, saving time and effort.
To share an Automation, log in to your Contentstack account and perform the steps given below:
Access the Automations Listing:
- Select Automation from the left navigation panel.
- On the Automations listing page, select the automation you want to share.
- Click the three dots icon under the Actions column.
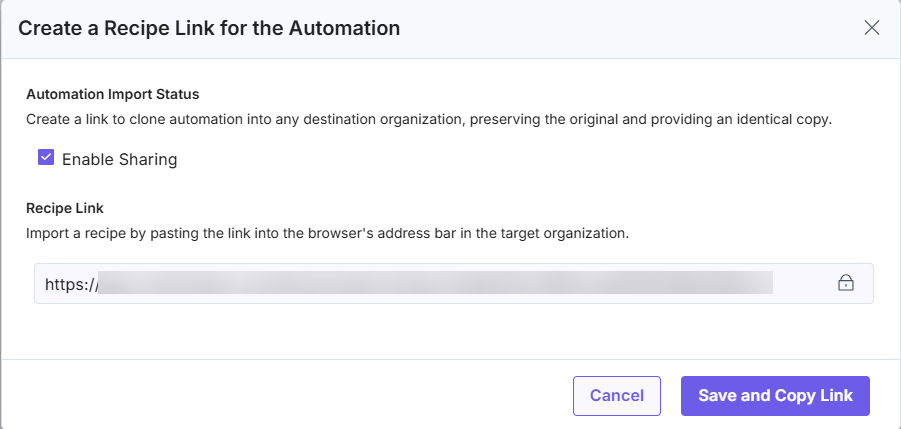
- Select the Get Recipe Link option. A pop-up modal named Create a Recipe Link for the Automation appears.

Create a Recipe Link:
- In the Create a Recipe Link for the Automation modal, check the box to save and copy the automation recipe link.
- Once done, click Save and Copy Link.
Import the Automation:
- Move to your target organization and paste the copied link into your browser's address bar.
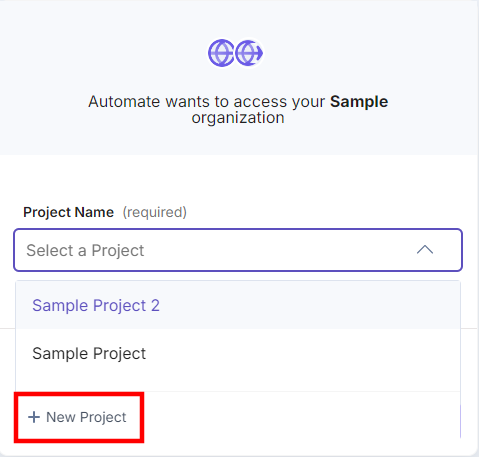
- On the Import Automation screen, select a project from the Project Name drop-down where you want to import the automation.
- If needed, create a new project by clicking + New Project.
Complete the Import:
- After selecting the project, click the Confirm and Import button.
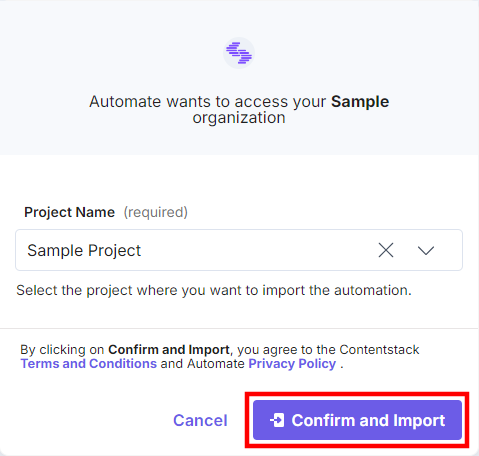
- You will be redirected to the cloned automation. From here, you can activate and start using the automation.
Handling Project Variables
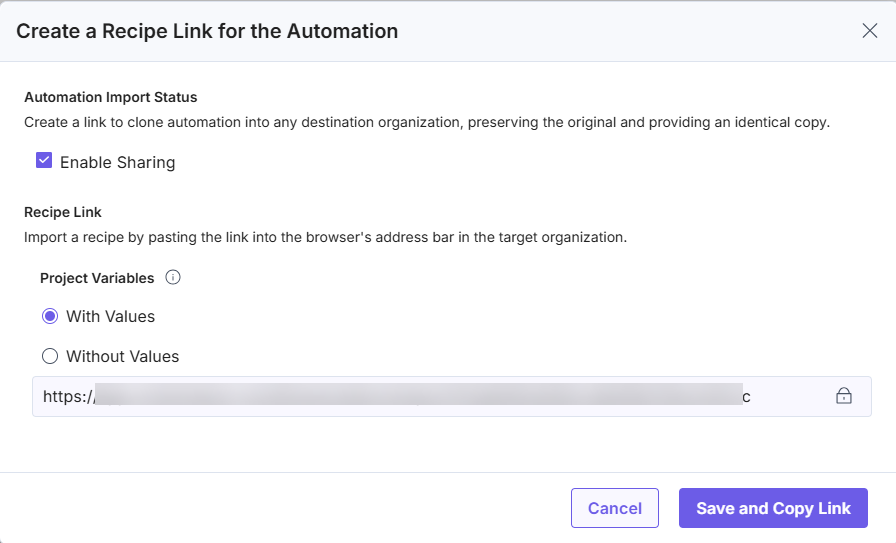
If your automation includes Project Variables, you can choose how to handle them during the sharing process. You have two options when creating the recipe link:
- With Values: Share non-sensitive data along with the recipe. This is useful if the values are safe to be shared across organizations.
- Without Values: Omit values to avoid sharing sensitive information. This is recommended for secure data handling.
With Values Option:
Import with Values:
- Paste the recipe link in the target organization’s browser.
- On the Import Automation screen, select the project and click the Next Step button.
Copy Project Variables:
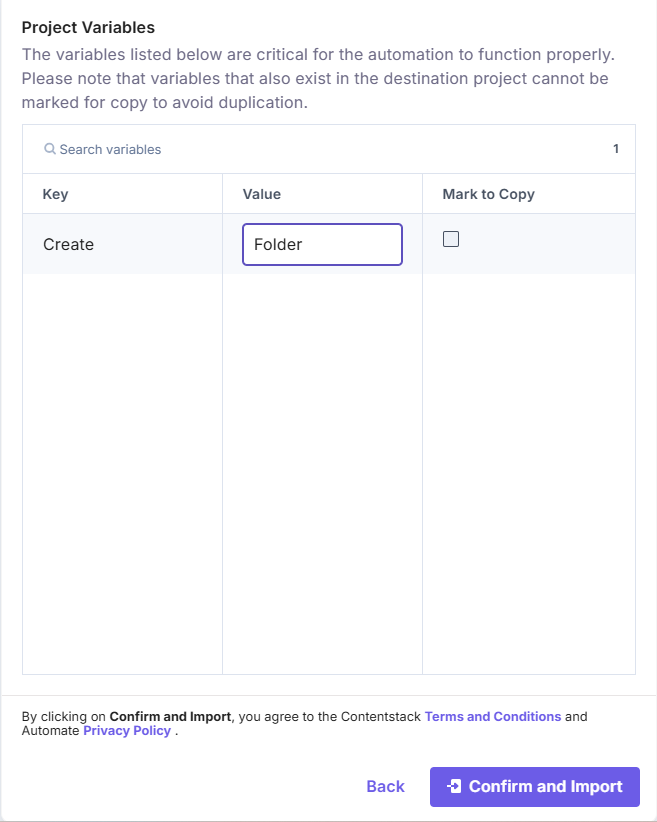
- On the Project Variables screen, a list of variables will appear with both Keys and Values.
- Check the Mark to Copy box to include these values in the imported automation.
Note: You can change the variable Value during the automation import process. The recipe and Project Variables tab update to reflect the project variable changes.
Finalize the Import:
- Click Confirm and Import to complete the process. The cloned automation will include the selected project variables.
Without Values Option:
Import without Values:
- Paste the recipe link in the target organization’s browser.
- On the Import Automation screen, select the project and click the Next Step button.
Copy Keys Only:
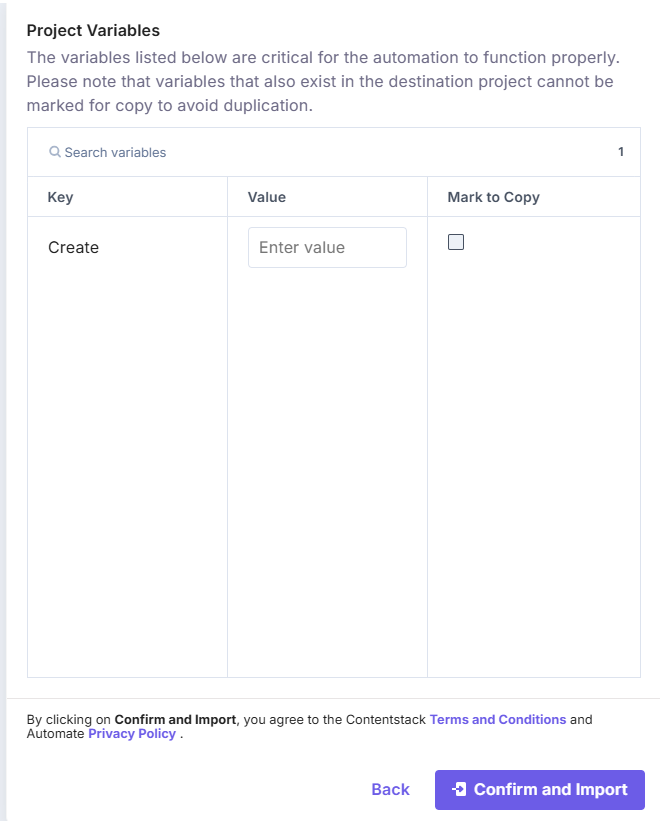
- On the Project Variables screen, only the Keys will be listed.
- Check the Mark to Copy box to include just the keys in the automation.
Finalize the Import:
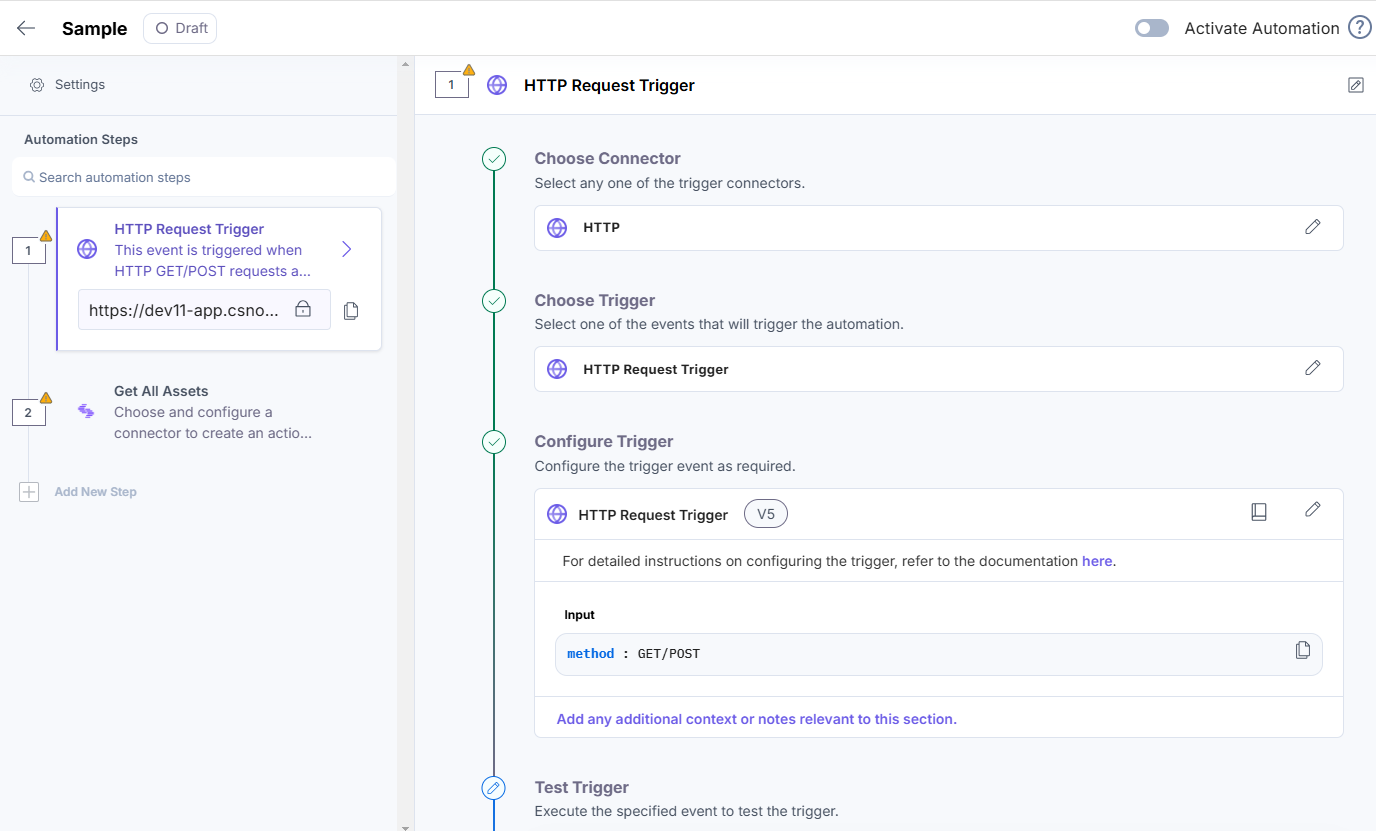
- Click Confirm and Import. The cloned automation will include the project variables without their values.
Managing Project Variables Post-Import
To review and update the Project Variables after import:
Navigate to Project Variables:
- Go to the Project Variables tab in the left navigation panel.
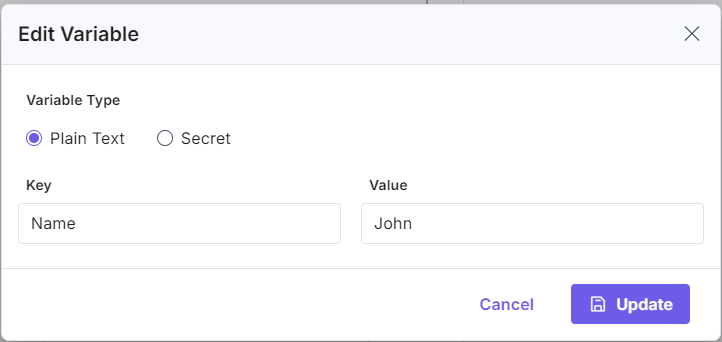
- In the Actions column, click the three dots next to a variable, then select Edit.
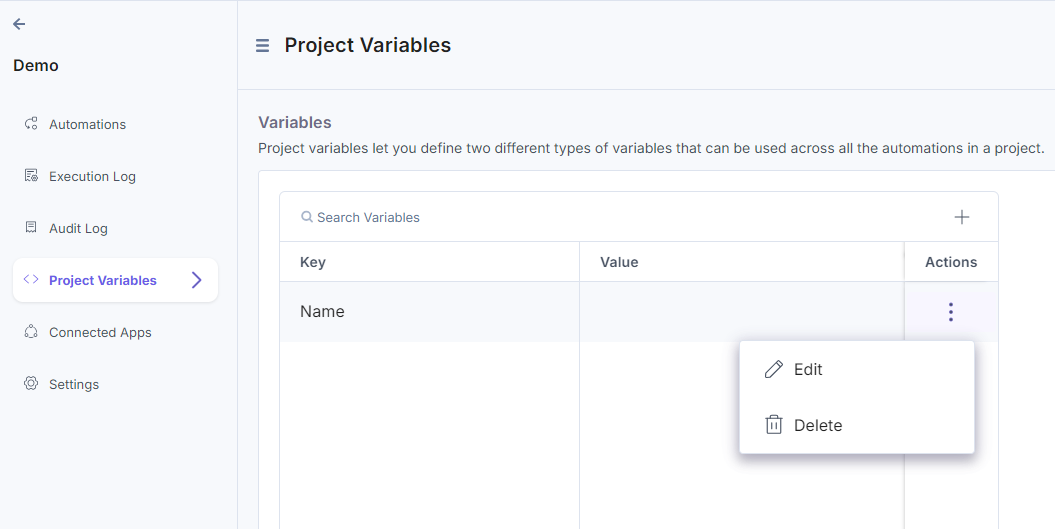
- Enter the appropriate values and click Update.
- After updating the variables, revisit your automation to ensure it is correctly configured with the new values.
Pre-installation Information for Recipe
When creating an automation, add important context in the Pre-installation Information for Recipe section within the Automation Settings. This helps users importing the automation understand the recipe clearly.
You can include:
- Estimated Setup Time: Specify the approximate setup time (in minutes) for the automation to help users plan effectively.
- Additional Setup Details: Provide essential information, including trigger configurations, setup tips, or important considerations to simplify the automation process.
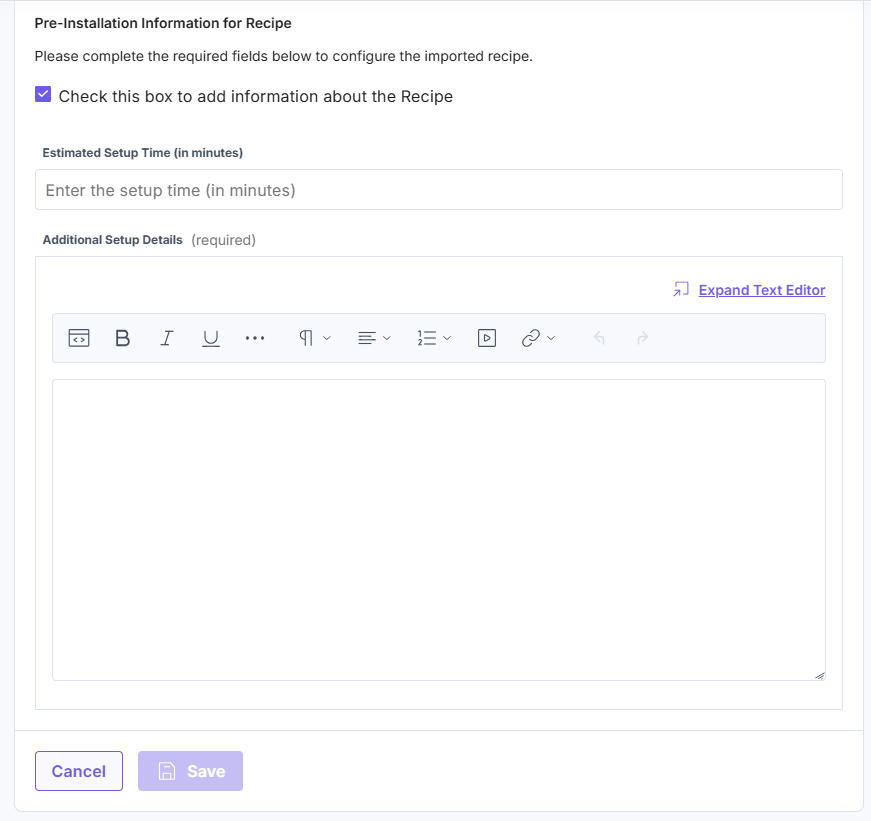
This added context improves the user experience and simplifies the implementation of imported recipes.


.svg?format=pjpg&auto=webp)
.svg?format=pjpg&auto=webp)
.png?format=pjpg&auto=webp)


.png?format=pjpg&auto=webp)