Smartling
Smartling is one of the most widely used cloud-based language translation platforms. It helps you to localize content across different digital properties.
The Smartling Connector enables you to add content for translation and download the translated content from your Smartling project.
Set up Smartling
Perform the following steps to set up the Smartling action connector:
- Click Configure Action Step from the left navigation panel.
- Click Action Step to configure third-party services.
- Within the Configure Action Step, click the Smartling connector.
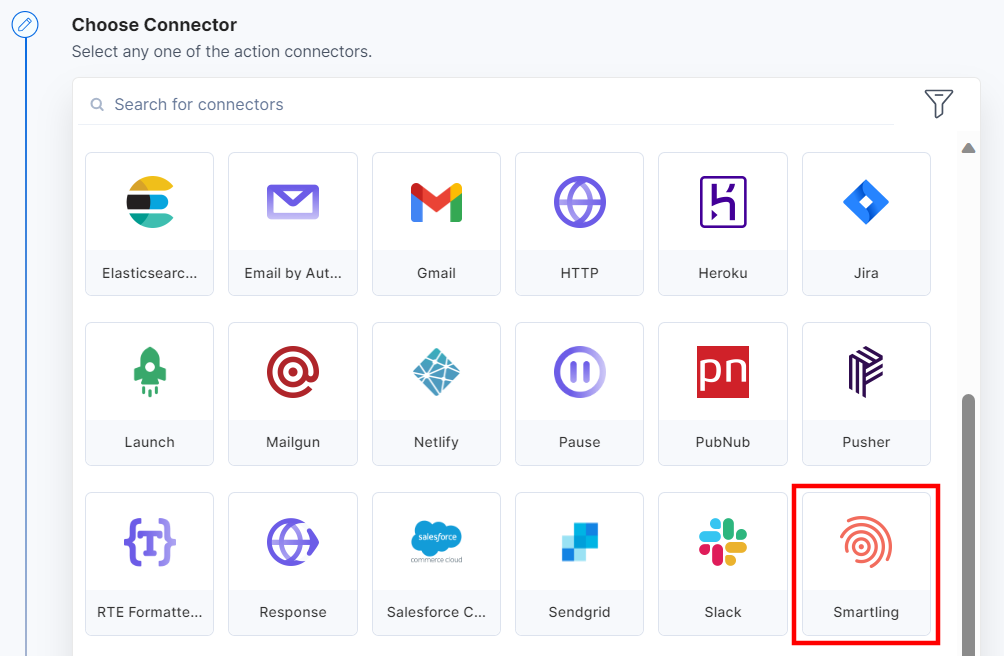
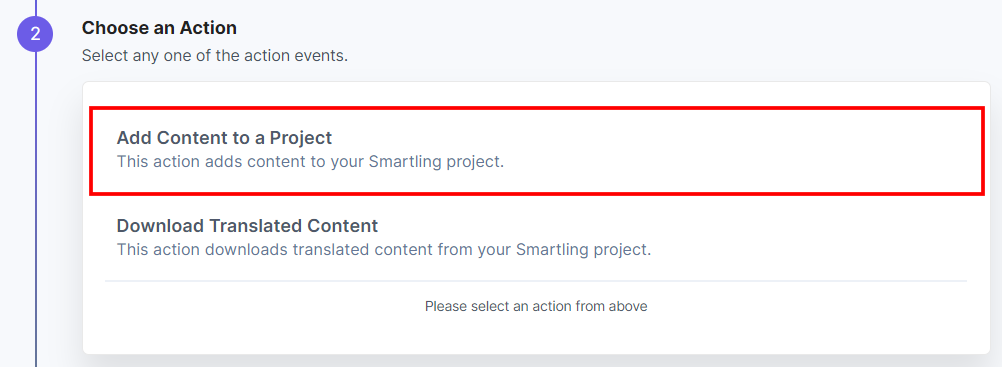
- Under Choose an Action tab, you will see two actions:
- Add Content to a Project: This action helps you send data to your Smartling project for translation.
- Download Translated Content: This action helps you download the translated content from your Smartling project.
Let's take the first example of the Download Translated Content action to download the translated content from your Smartling project.
Action 1: Select the Download Translated Content action: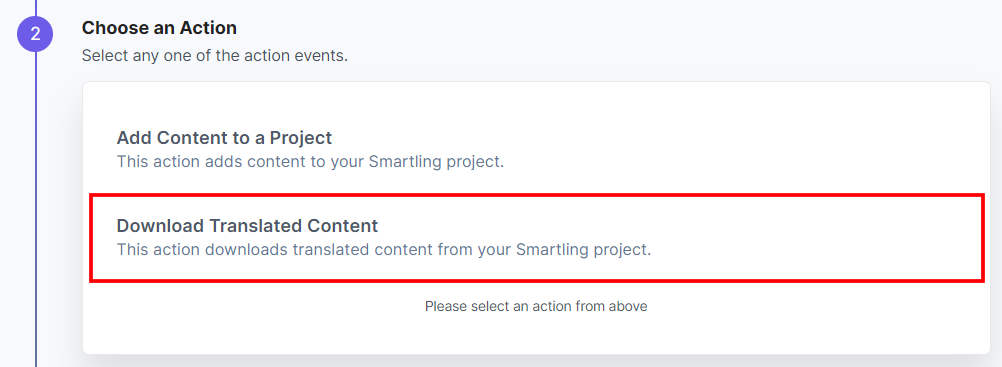
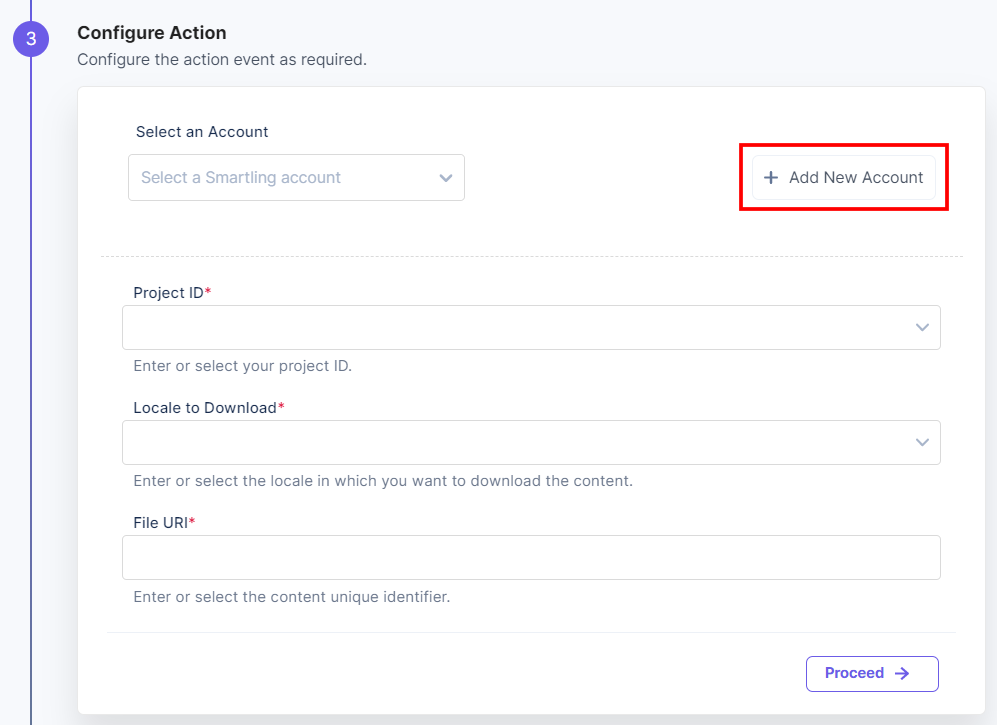
- Click the + Add New Account button to set up your Smartling account (see screenshot in next step).
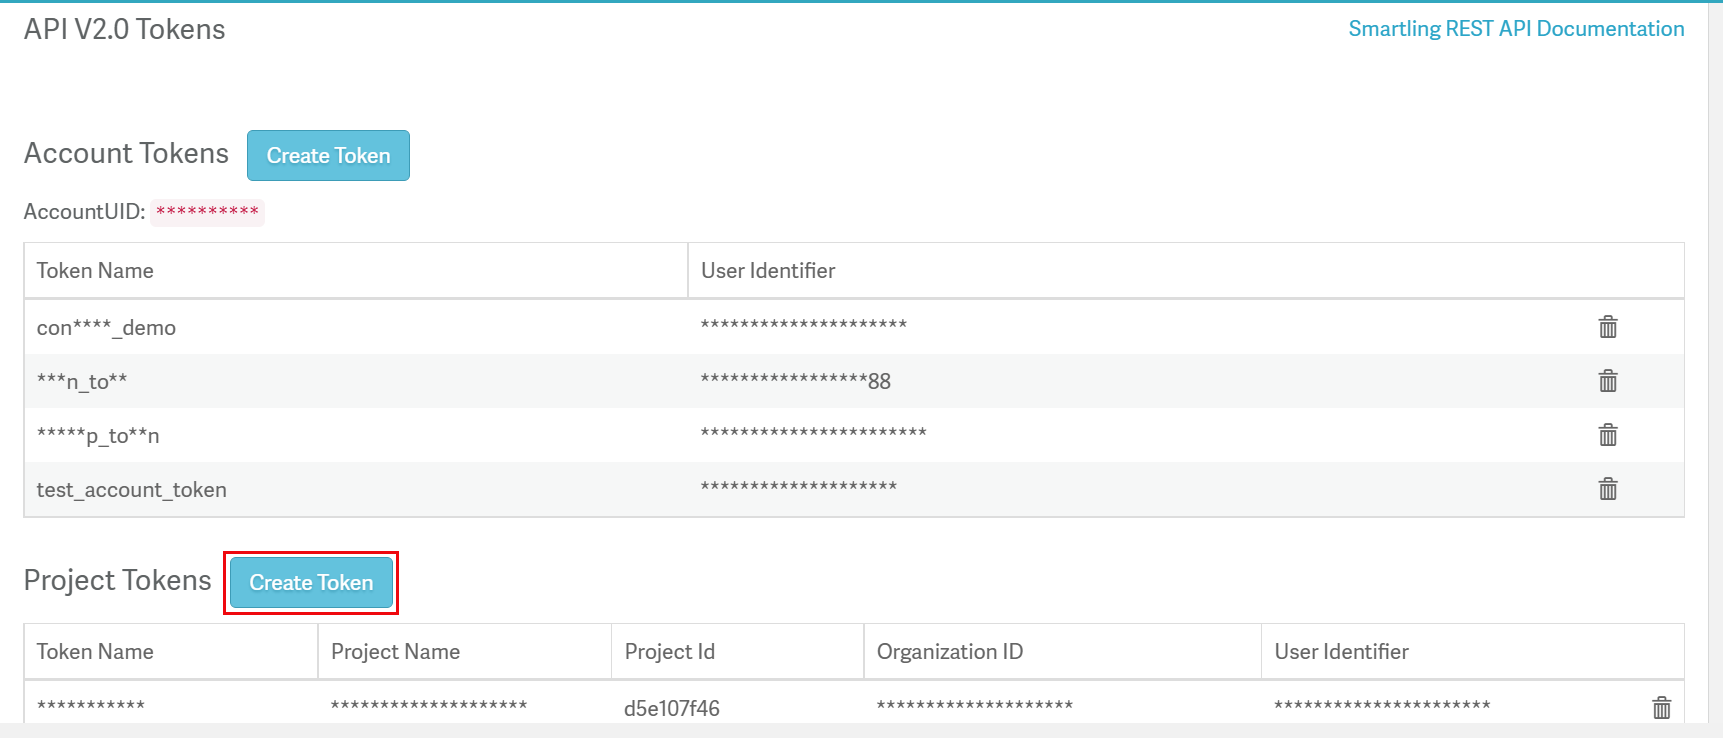
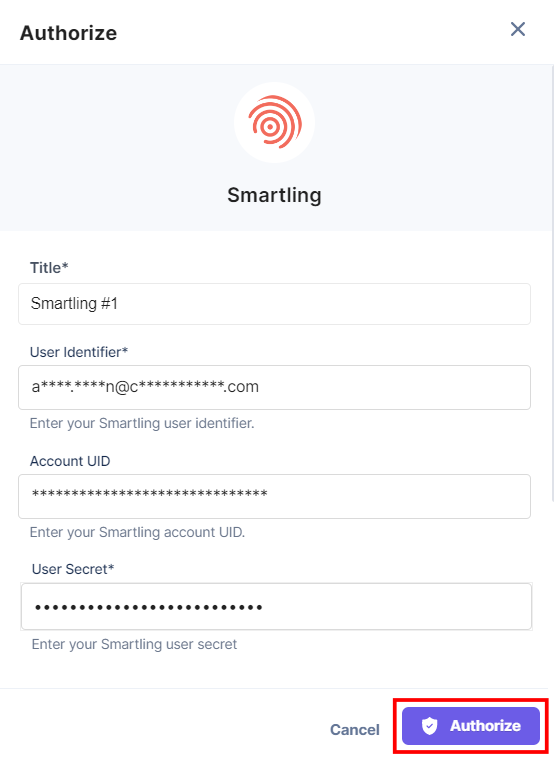
- In the Authorize modal, enter the Title, User Identifier, User Secret ID, and Account UID of your Smartling account.
You can create the User Secret ID and Account UID by navigating through Account Settings > API > Create Token in your Smartling account.
Additional Resource: Refer to the Integrating Smartling Guide for more details.
Then, click Authorize. - On the Configure Action page, enter the following details while configuring the action:
- Project ID: Select the Smartling project ID from the Lookup drop-down.
- Locale to Download: Select the locale in which you want the content to be downloaded.
- File URI: Enter the file url/path to invoke the download action.
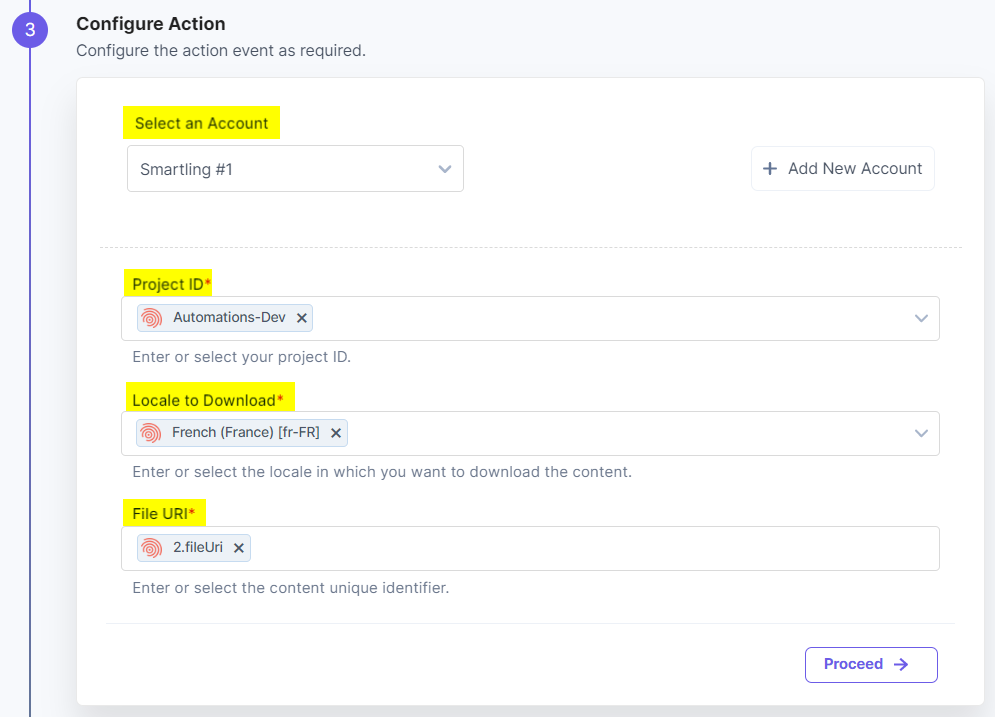
- Click Proceed.
- You will see the input values which you have configured in the Configure Action modal.

- Check if the details are correct. If yes, click Test Action.

- Once set, click Save and Exit.
 Action 2: Select the Add Content to a Project action:
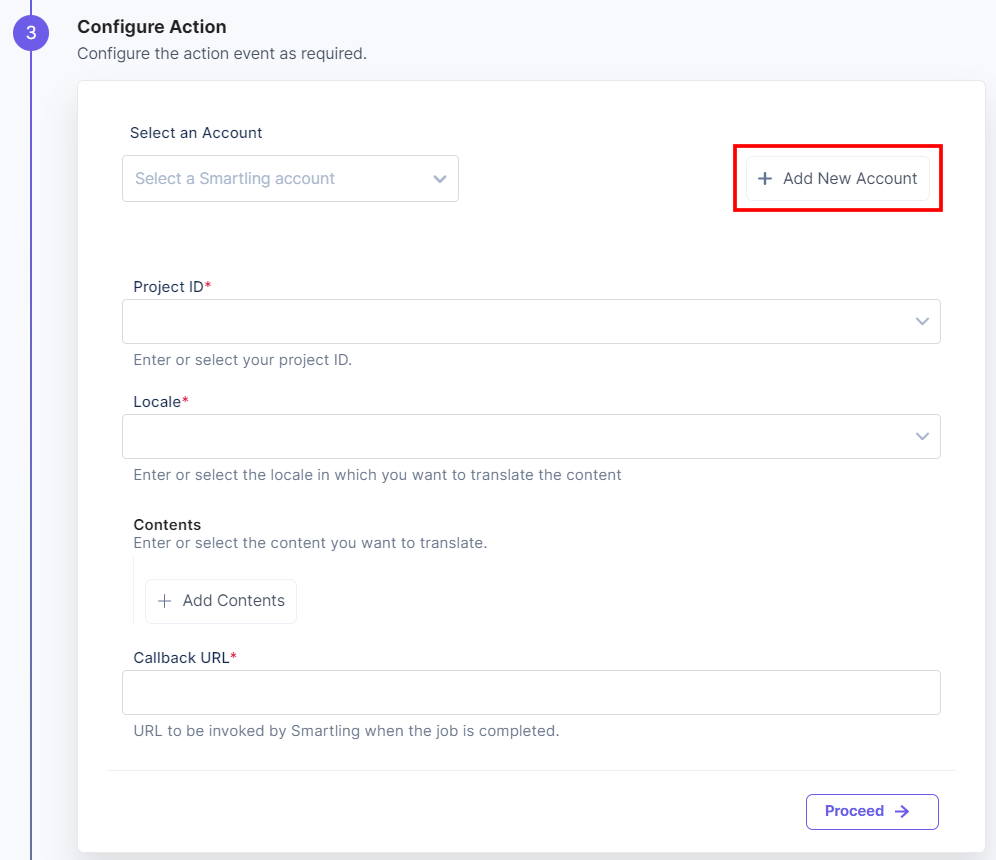
- Click the + Add New Account button to set up your Smartling account (see screenshot in next step).
- In the Authorize modal, enter the Title, User Identifier, User Secret ID, and Account UID of your Smartling account.
You can create the User Secret ID and Account UID by navigating through Account Settings > API > Create Token in your Smartling account.

Additional Resource: Refer to the Integrating Smartling Guide for more details.
Then, click Authorize. - On the Configure Action page, enter the following details while configuring the action:
- Project ID: Select the Smartling project ID from the Lookup drop-down.
- Locale: Select the locale in which you want to translate the content from the list of locales fetched from your Smartling project.
- Contents: Add the content you want Smartling to translate.
- Callback URL: Mention the callback URL for Smartling to invoke when the translation is completed.
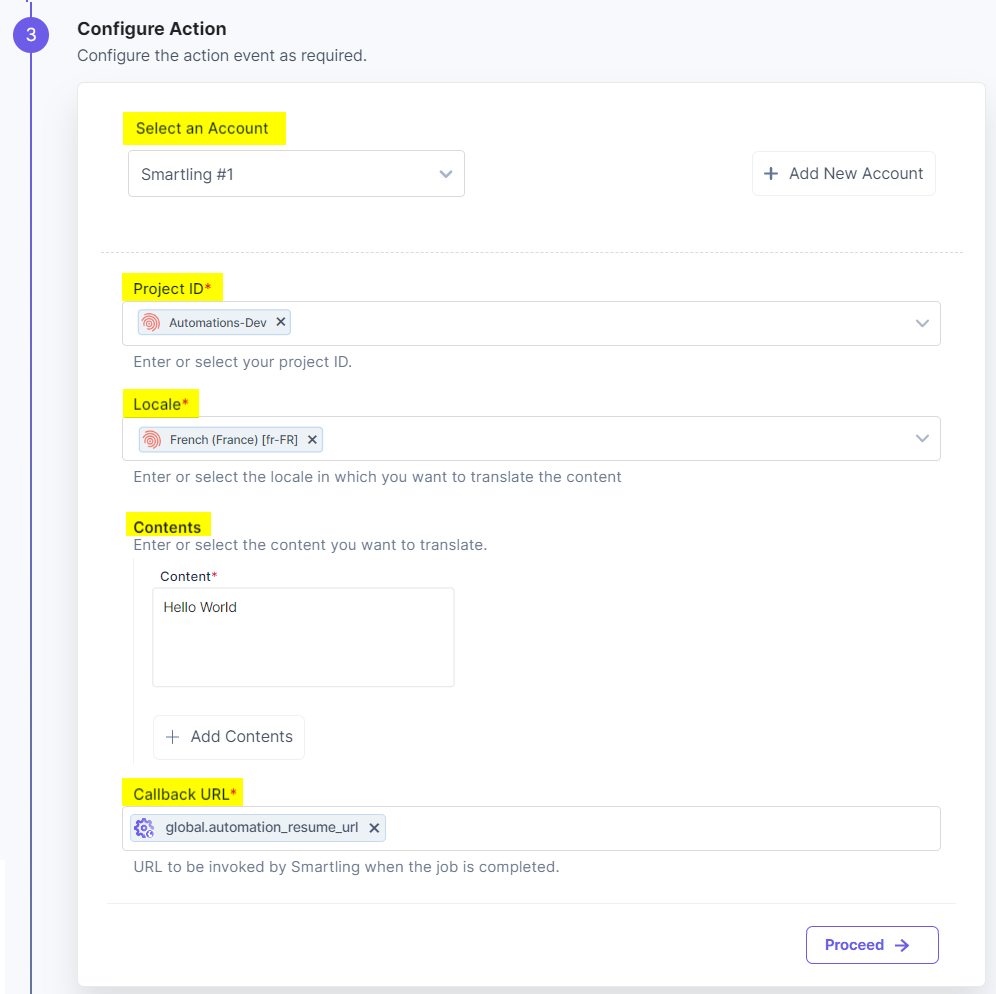
- Click Proceed.
- You will see the input values which you have configured in the Configure Action modal.
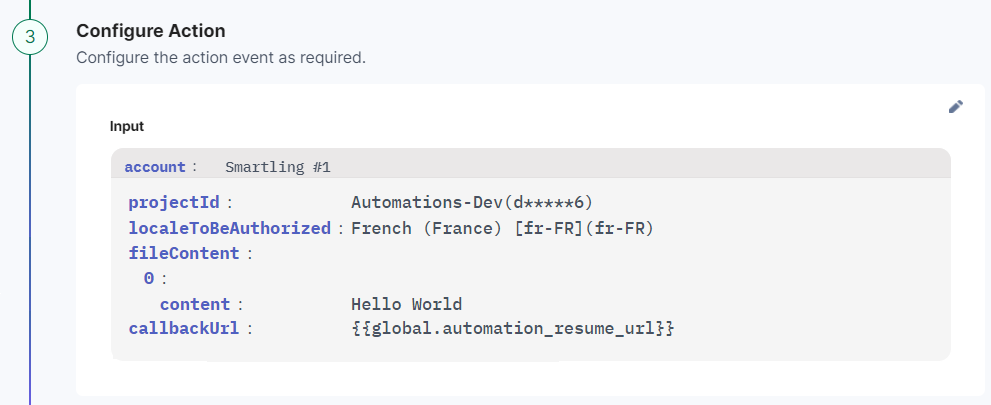
- Check if the details are correct. If yes, click Test Action.

- Once set, click Save and Exit.

To use the Pause connector to store the output from the previous action and use it as the input to download the translated content from the same project, refer to the Pause Connector documentation
This completes the setup for Smartling action connector.


.svg?format=pjpg&auto=webp)
.svg?format=pjpg&auto=webp)
.png?format=pjpg&auto=webp)


.png?format=pjpg&auto=webp)