Coveo
The Coveo connector allows you to efficiently push new items from your website or remove outdated ones, ensuring your content stays up-to-date and relevant in your search experiences.
This guide offers a step-by-step approach to using the Coveo Automate connector to manage content on the Coveo platform.
You will learn how to use the connector into your workflow and perform essential content management tasks such as pushing and deleting items, making it easier to maintain and optimize your website's search content on Coveo.
Example
Set up an automation using Contentstack Entry Publish Trigger and Coveo Push Content action. When a user publishes an entry in a specific environment, the entry URL is fetched, and the content is pushed to the selected Coveo Source.
Prerequisites
- Coveo account
- Contentstack account
- Access to organization that has Automate enabled
Retrieve the Coveo API Key and Organization ID
To use the Coveo Connector, you need the API Key and Organization ID. To fetch these details, follow the steps given below:
- Log in to your Coveo account.
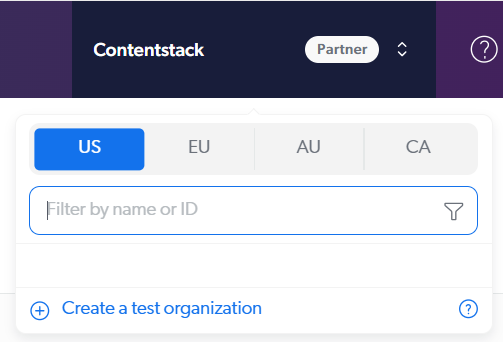
- From the top navigation, click Contentstack. You will see four regions listed (US EU AU CA).
- Click Create a test organization.
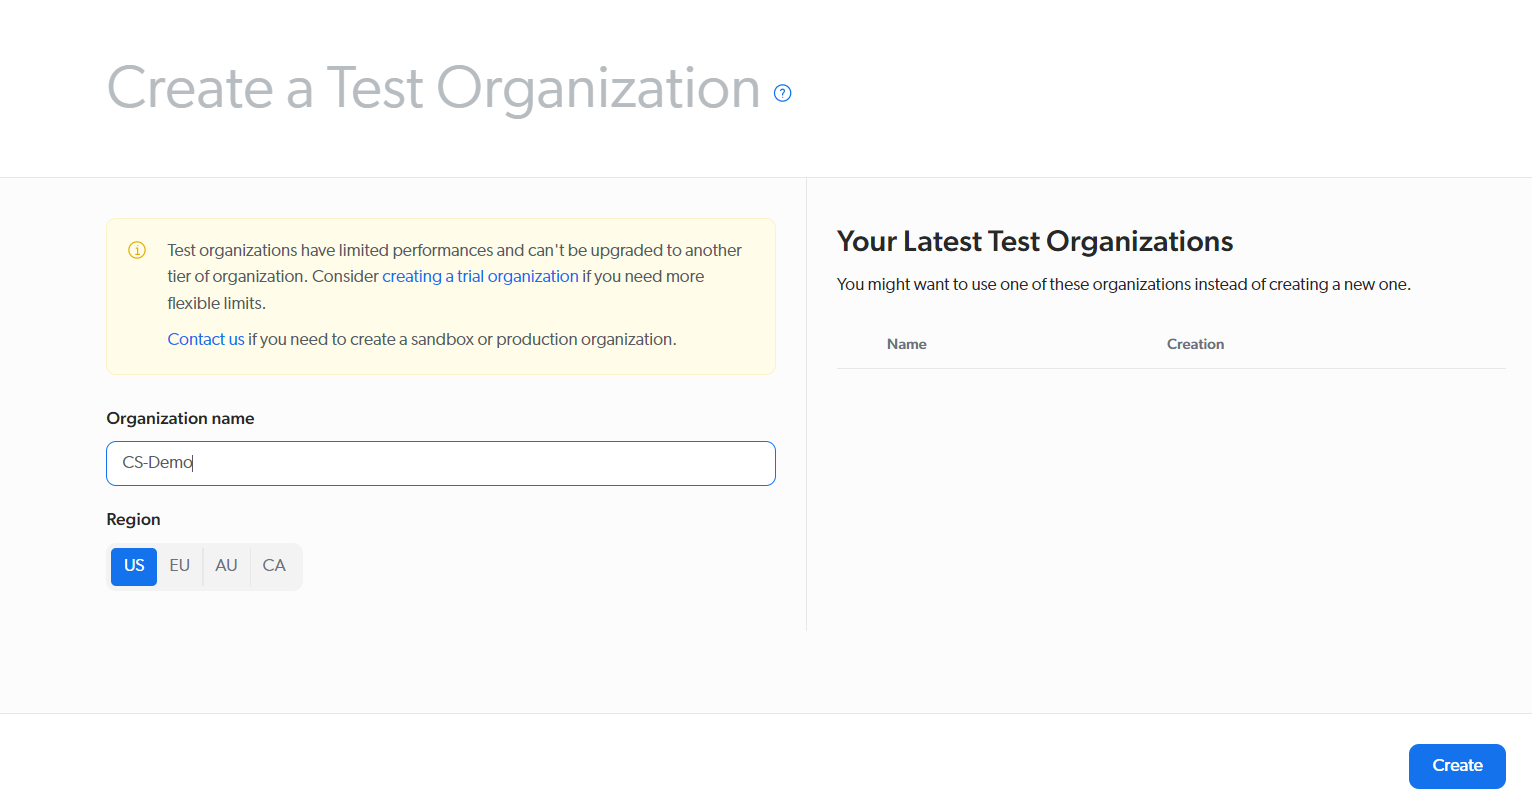
- On the Create a Test Organization page, enter a name for your organization in the Organization name field.
- Select your preferred region for the available options and click the Create button.
- Click Create a test organization.
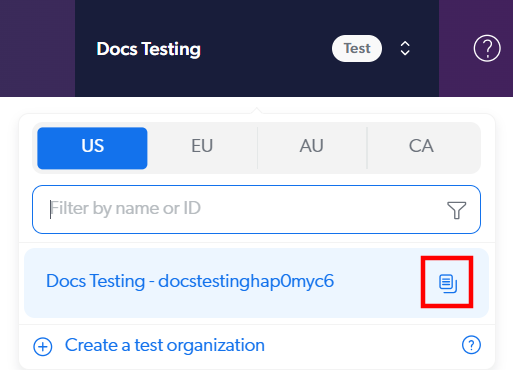
- Your Organization ID will be displayed. Please note or copy the Organization ID as (shown below). We will need this ID while setting up the connector.
- Now, we need to obtain the API Key. To do this, follow the steps given below:
- From the left navigation panel, click Organization, and then go to the API Keys tab.
- On the API Keys page, click the Add key button to create a new API key.

- You will be navigated to the Add an API key screen. By default, the Configuration tab will be selected. Enter a name for the key inside the Key name field and an optional description.
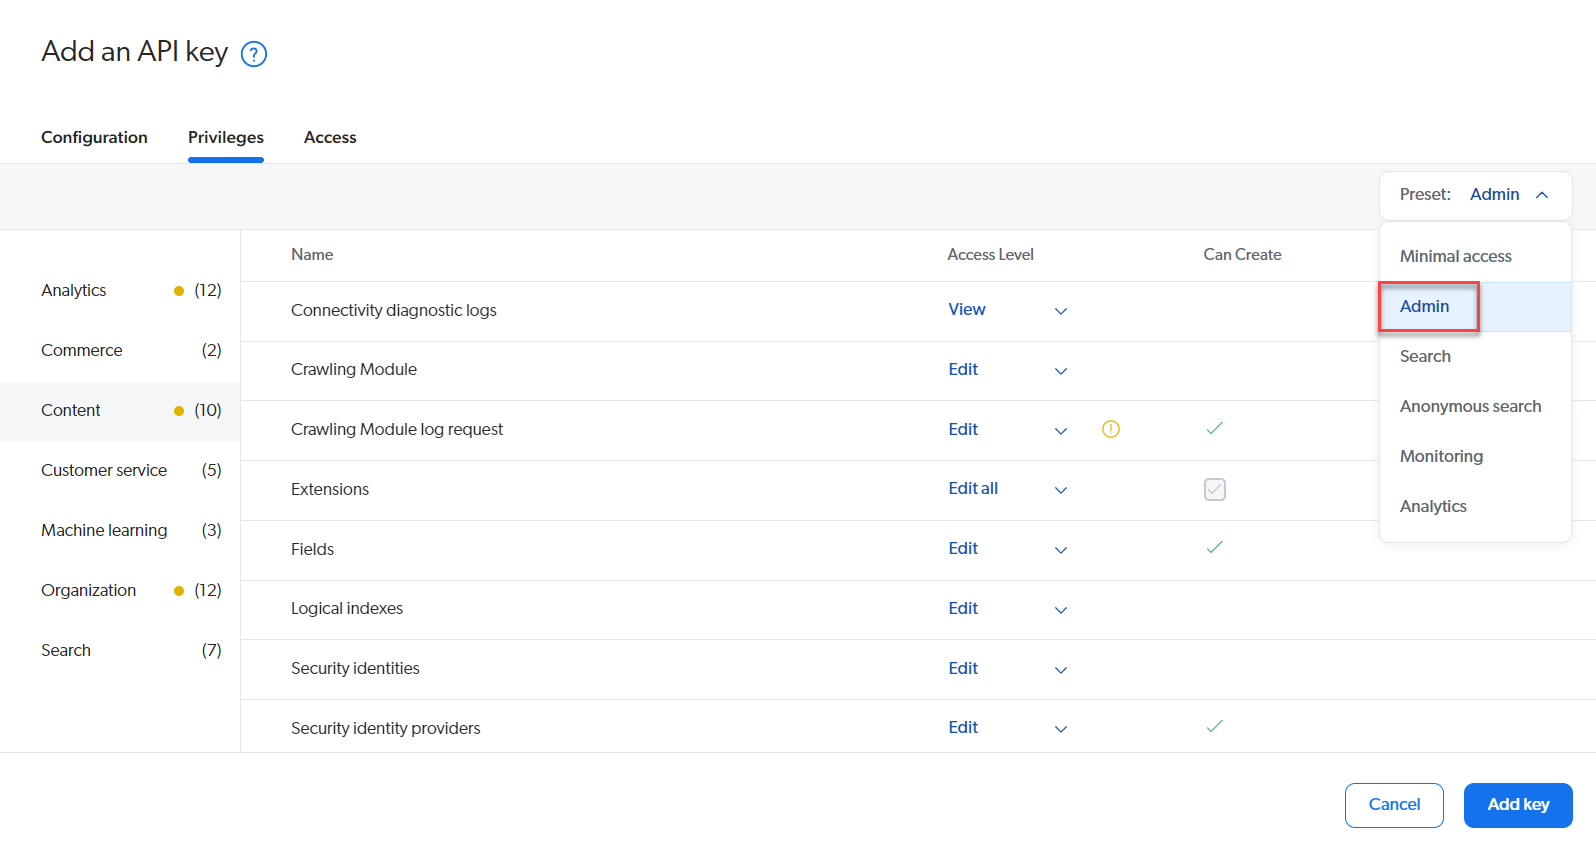
- In the Privileges tab, select Admin from the Preset drop-down.
- Click the Add key button, copy the API key, and then click the Ok button. You will see the API key.
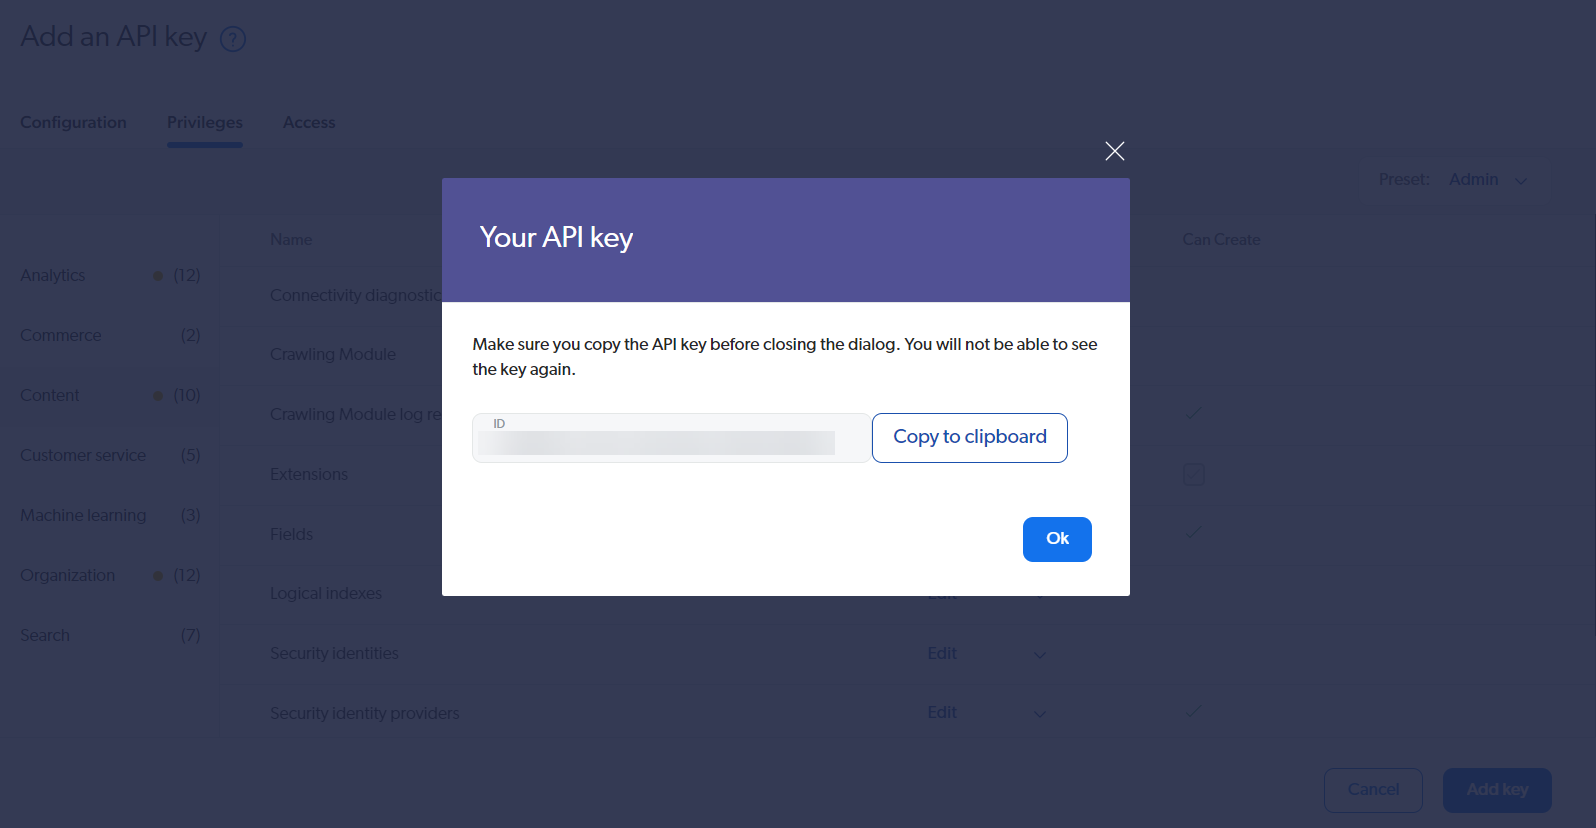
Note: Please ensure you copy the API key to your clipboard. You will not be able to view it again.
- To push (add) or delete items, you must create a source. To do so, follow the steps below:
- From the left navigation, under Content, click Sources. Click the Get started button.
If you are added to an existing Coveo organization, you will see the Add source button. Else, you will see the Get started button where you can start setting up the source.
Additional Resource: Refer to the Manage your sources document to learn more.
- In the Add a source of content window, click the Push tab and click the Push card.
- In the Add a Push Source screen, enter a name for the source in the Source name field and then, click Add source button. Read the terms, check the 'I understand' box, and click the Continue button. Your source will be created.
- From the left navigation, under Content, click Sources. Click the Get started button.
Note: Make note of the API key and the Organization ID that we have fetched, we will need this while setting up the account in Automate.
Connect your Coveo Account to Automate
Perform the following steps to set up the Coveo account:
- Click Configure Action Step from the left navigation panel.
- Click Action Step to configure third-party services.
- Within the Configure Action Step, click the Coveo connector.
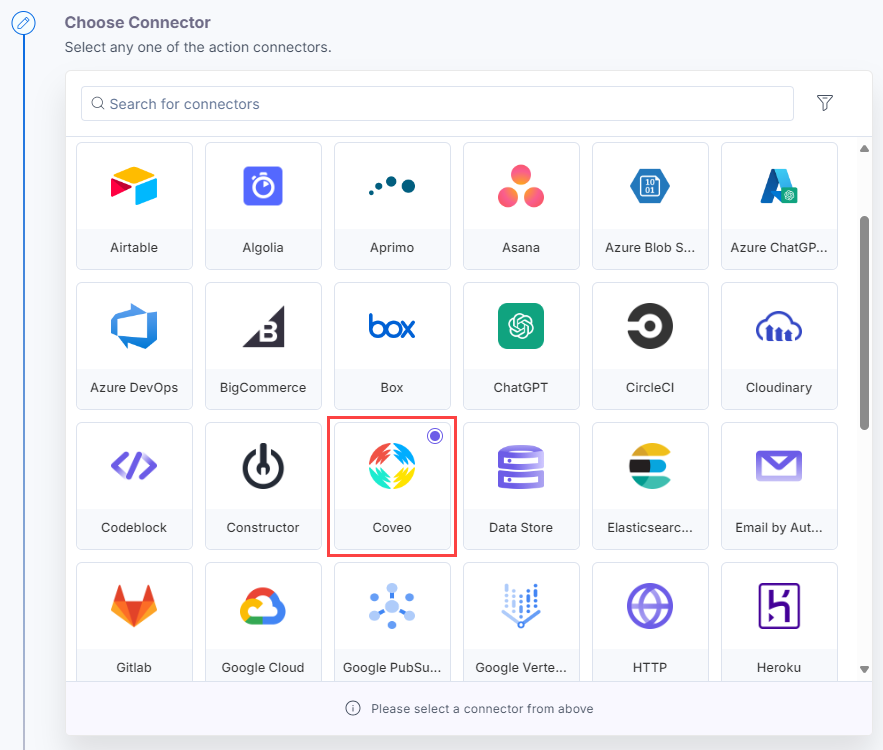
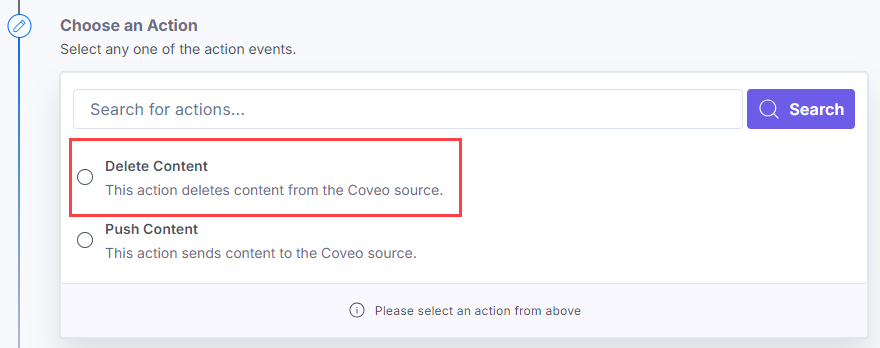
- Under Choose an Action tab, select any one action from the list. Here, we are selecting the Delete Content action.
- On the Configure Action page, click the + Add New Account to add your Coveo account.
- In the Authorize modal, enter the following:
- Title (required)
- API Key (required): Enter the API key that we retrieved from the above step.
- Organization ID (required): Enter the Organization ID retrieved from the above step.
- Select Region (required): Select the region as shown in the above step.
- Once done, click Authorize.
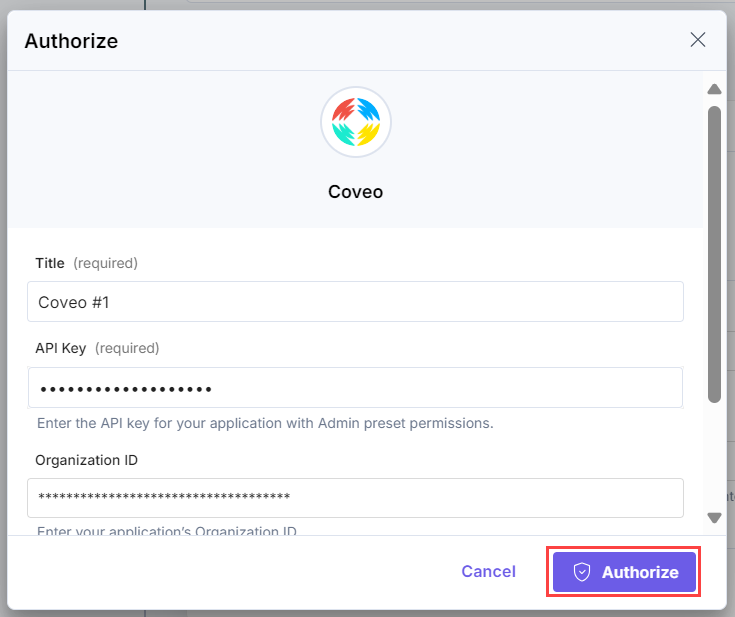
This sets up your Coveo account for the Coveo connector.
Set up the Coveo Connector
Perform the following steps to set up the Coveo action connector:
- From the left navigation panel, click Configure Action Step.
- Then, click Action Step to configure third-party services.
- Within the Configure Action Step, click the Coveo connector.

- Under Choose an Action, you will see these actions: Delete Content and Push Content.
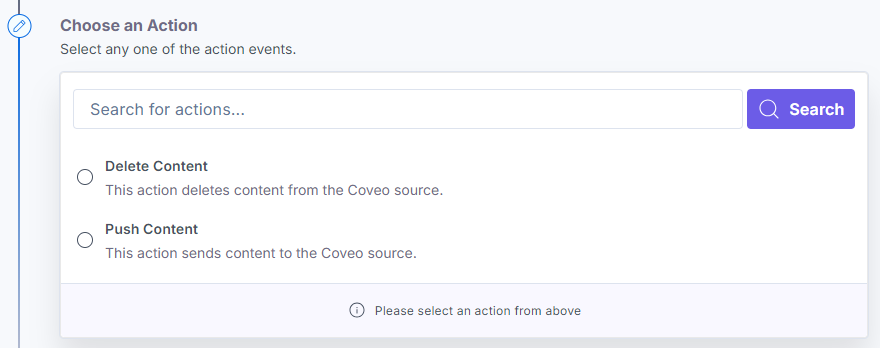
Once done, you can go ahead and set up your Coveo connector.
Action 1: Select the Delete Content action:
- Under Choose an Action tab, select the Delete Content action.
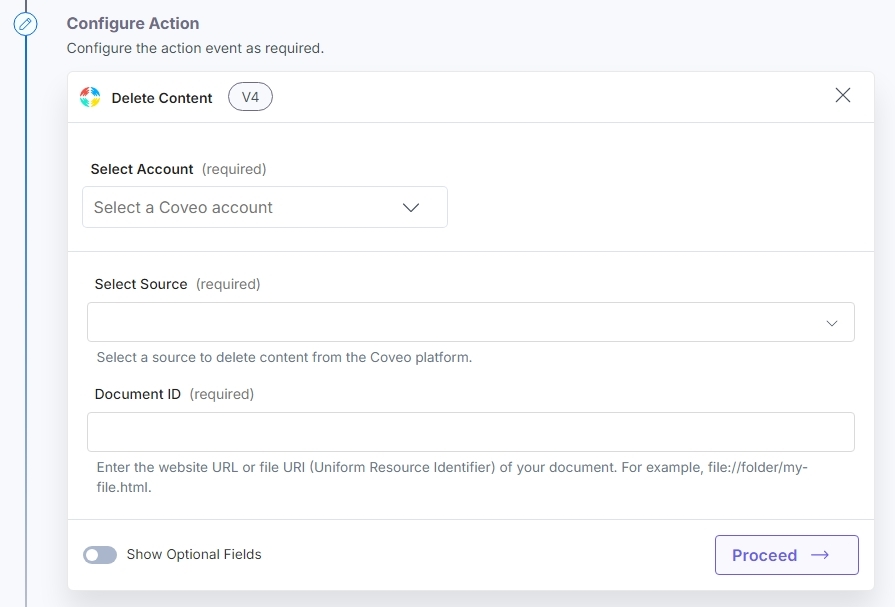
- On the Delete Content Configure Action page, enter the details given below:
- Click + Add New Account button to connect your Coveo account as shown in the Connect your Coveo Account to Automate step.
- Select a Source to delete the content from.
- In the Document ID field, enter the website URL or a file URI you wish to delete.
The example below includes a website URL, followed by the file URI fetched from the previous step.
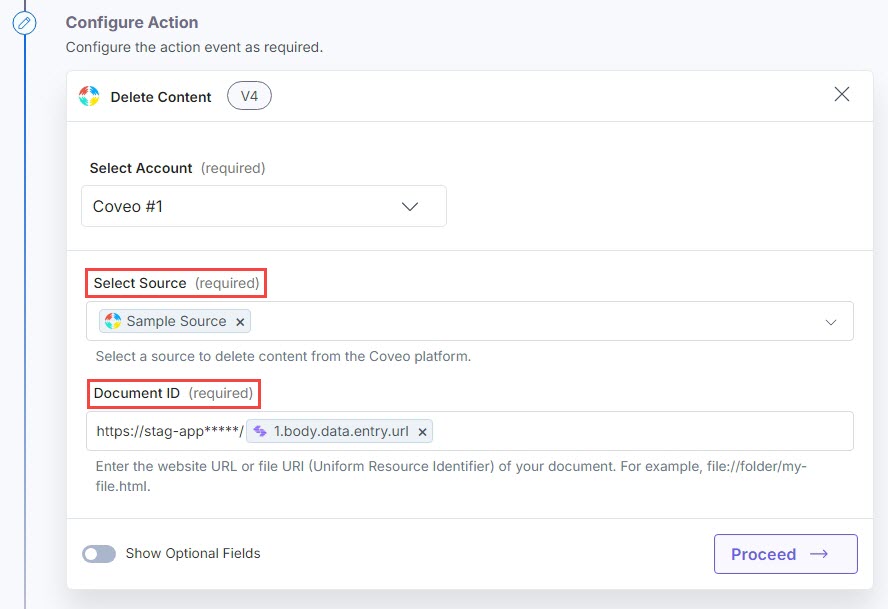
- Optionally, enable the Show Optional Fields toggle button to check the Remove all child elements from the document box, which will delete all items and references.
Additional Resource: Refer to the deleteChildren documentation to learn more.

- Click Proceed.
- Check if the details are correct. If yes, click Test Action.

- Once set, click Save and Exit.
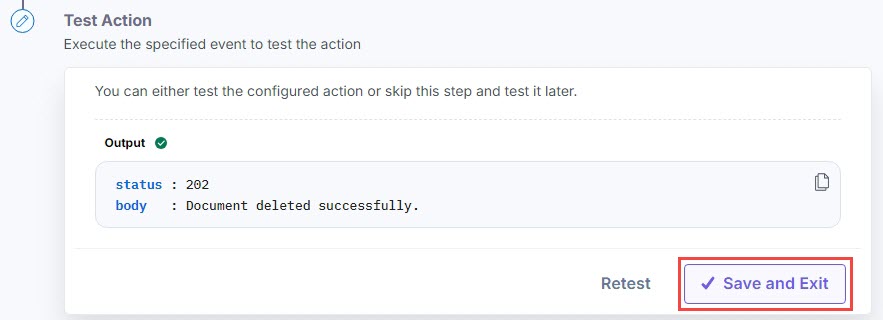
Action 2: Select the Push Content action:
- Under Choose an Action tab, select the Push Content action.
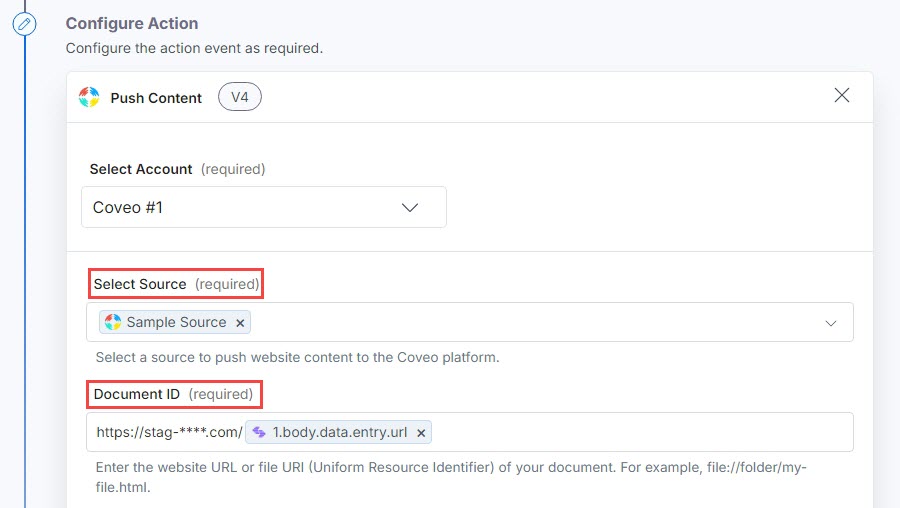
- On the Push Content Configure Action page, enter the details given below:
- Click + Add New Account button to connect your Coveo account as shown in the Connect your Coveo Account to Automate step.
- Select a Source to delete the content to.
- In the Document ID field, enter the website URL or a file URI you wish to push.
The example below includes a website URL, followed by the file URI fetched from the previous step.
Additional Resource: Refer to the Swagger UI documentation to learn more.
- In the Document Body field, enter the content items you want to add. You must define “data” and “title” as keys and pass strings as values for both, as shown below:

- Click Proceed.
- Check if the details are correct. If yes, click Test Action.

- Once set, click Save and Exit.

This sets the Coveo connector.


.svg?format=pjpg&auto=webp)
.svg?format=pjpg&auto=webp)
.png?format=pjpg&auto=webp)


.png?format=pjpg&auto=webp)