


.jpg?format=pjpg&auto=webp)


Contentstack Trigger
The Contentstack trigger lets you add Contentstack-specific trigger events, such as the creation/updating/publishing/unpublishing/deletion/deployment, etc., of workflows, entries, releases, global fields, assets, branches, and/or content types. With the Entry Comment Trigger, you can trigger an automation when an entry comment is created, updated or deleted.
Prerequisites
To use the Contentstack Management connector, you first need to add your Contentstack account. To do so, follow the steps given below:
Connect your Contentstack Account to Automate
- Click Configure Trigger from the left navigation panel.
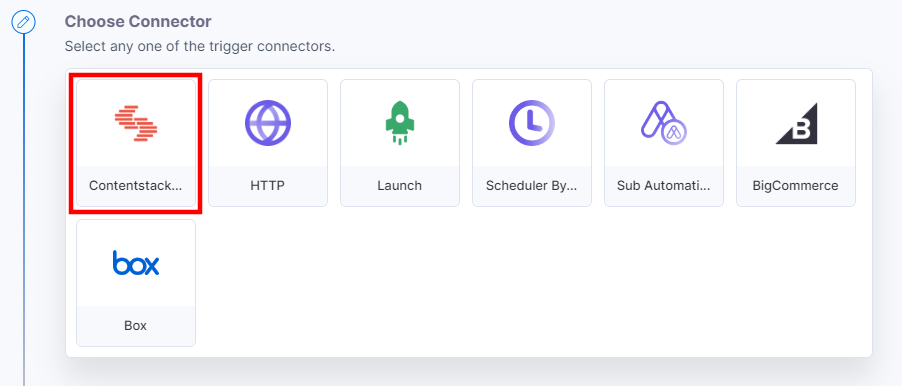
- Within the Configure Trigger, click the Contentstack connector.
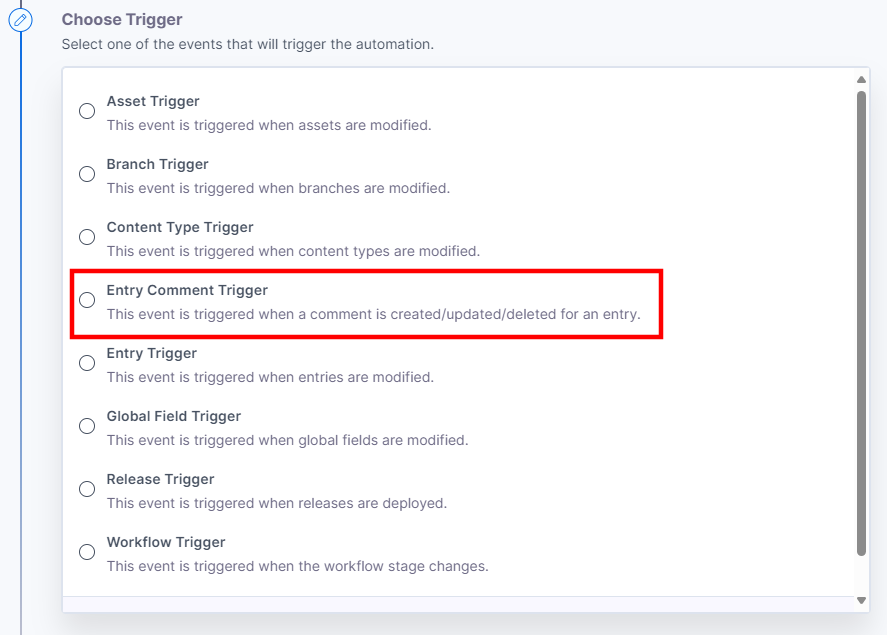
- Under Choose Trigger tab, select any one trigger event from the list. Here, we are selecting the Entry Comment trigger.
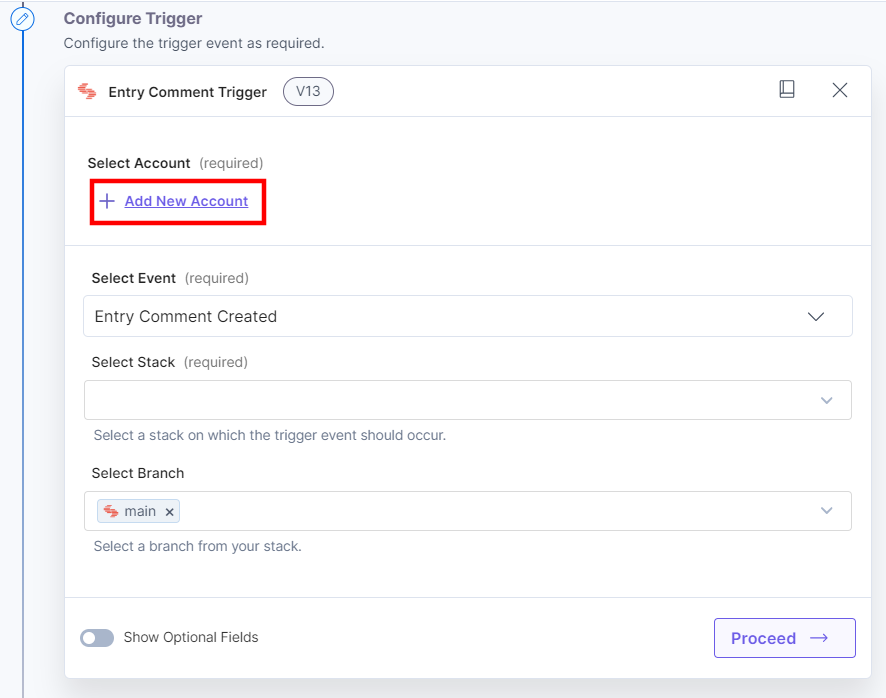
- On the Configure Trigger page, click the + Add New Account to add your Contentstack account.
- Select a way to add a new account. You can authenticate your account in two ways: Contentstack OAuth or Management Token.
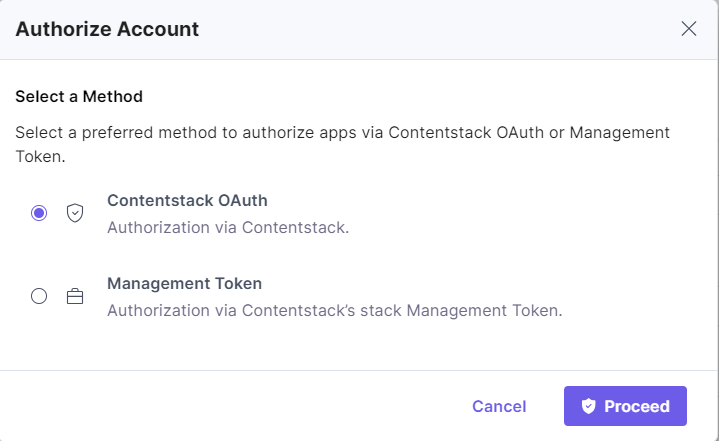
- If you select Contentstack OAuth and click Proceed, the Manage Permissions modal will open, as shown below. Provide the OAuth permissions for all the values by checking the boxes and click Authorize.
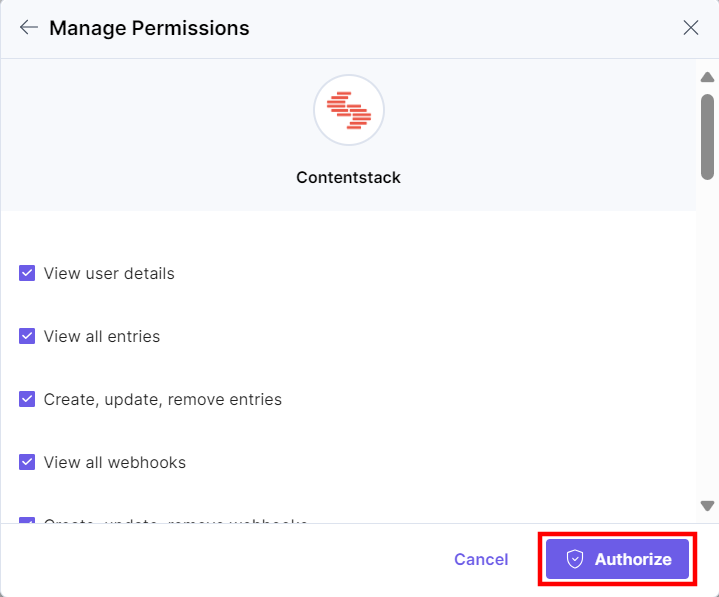
Note: Contentstack offers support for Branches in Automate. You must authenticate and re-authorize your existing account by checking all the permissions to add your Contentstack account.
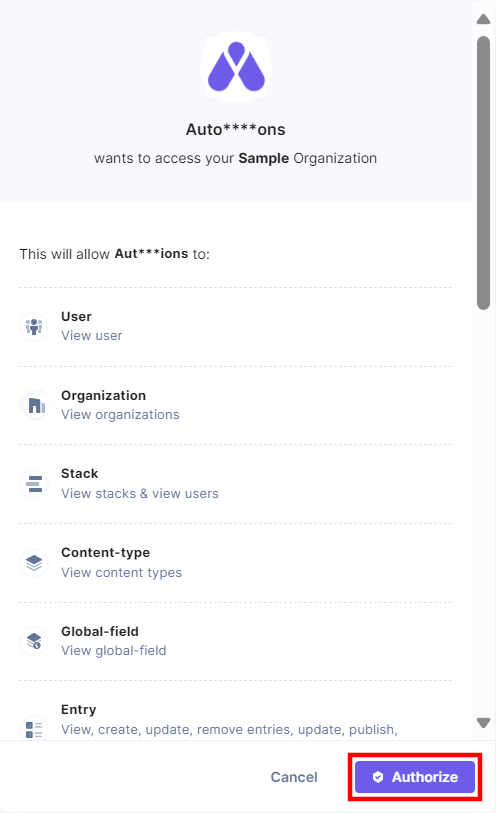
- In the pop-up, select your organization to complete the authorization.

- In the pop-up that appears, view the module-specific access rights provided to the app. Click Authorize to complete authorization.
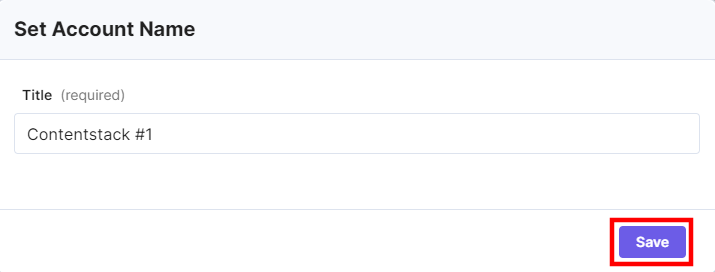
- Provide an Account Name and then click Save.
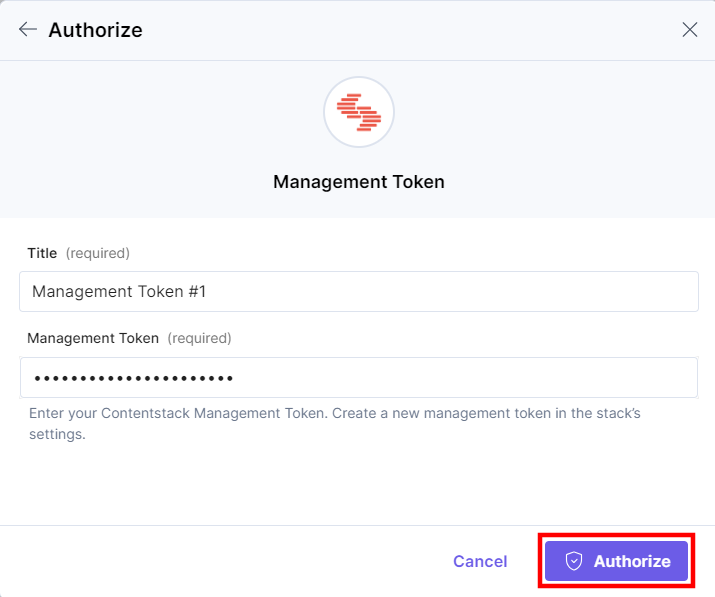
- If you select Management Token and click Proceed, the Authorize modal will open, as shown below. Enter a Title and the Management Token of your stack and click Authorize.
- If you select Contentstack OAuth and click Proceed, the Manage Permissions modal will open, as shown below. Provide the OAuth permissions for all the values by checking the boxes and click Authorize.
Once done, you can go ahead and set up your Contentstack Trigger.
Set up the Contentstack Trigger
Perform the following steps to set up the Contentstack Trigger:
- From the left navigation panel, click Configure Trigger.
- Within the Configure Trigger Step, click the Contentstack connector.
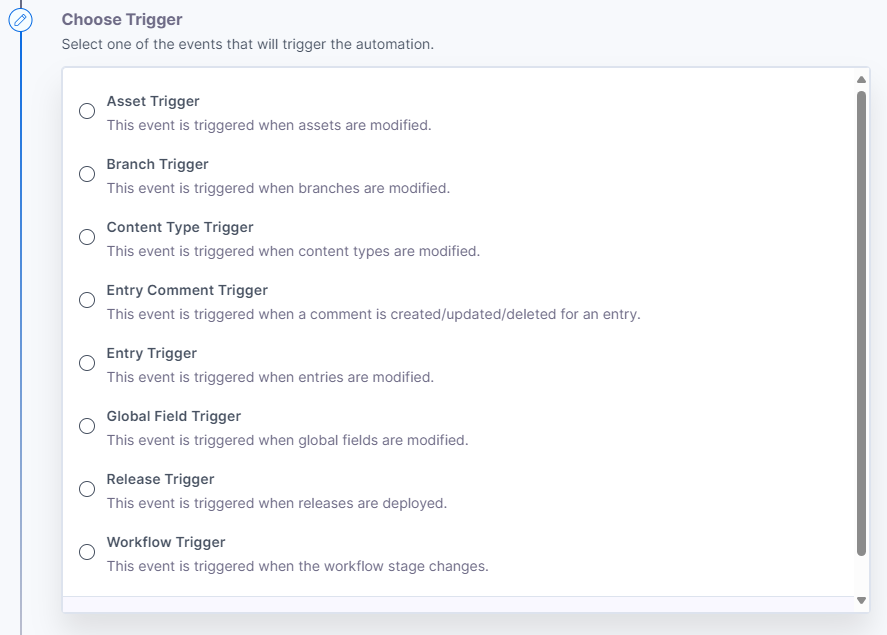
- Under Choose Trigger, you will find the following trigger events for the Contentstack trigger:
- Asset Trigger: Triggered when you create/update/publish/unpublish/delete assets.
- Branch Trigger: Triggered when you create/delete branch and assign/unassign branch aliases.
- Content Type Trigger: Triggered when you create/update/delete content types.
- Entry Comment Trigger: Triggered when you create/update/delete entry comments.
- Entry Trigger: Triggered whenever you create/update/publish/unpublish/delete entries.
- Global Field Trigger: Triggered when you create/update/delete global fields.
- Release Trigger: Triggered when you deploy a release to an environment.
- Workflow Trigger: Triggered when a workflow stage changes.
Note: After successfully configuring a trigger, if you re-configure any other trigger you will be prompted to revert to the previously configured trigger. You can revert back to the last trigger configurations by clicking the Revert Changes button.
Let’s look at each of them in detail.
Asset Trigger
The Asset Trigger event lets you trigger an automation when you create/update/publish/unpublish/delete assets.
Let’s look at the steps to set up the trigger event.
- Under the Choose Trigger tab, select Asset Trigger.
- On the Asset Trigger Configure Trigger page, enter the details given below:
- Click + Add New Account button to connect your Contentstack account as shown in the Connect your Contentstack Account to Automate step.
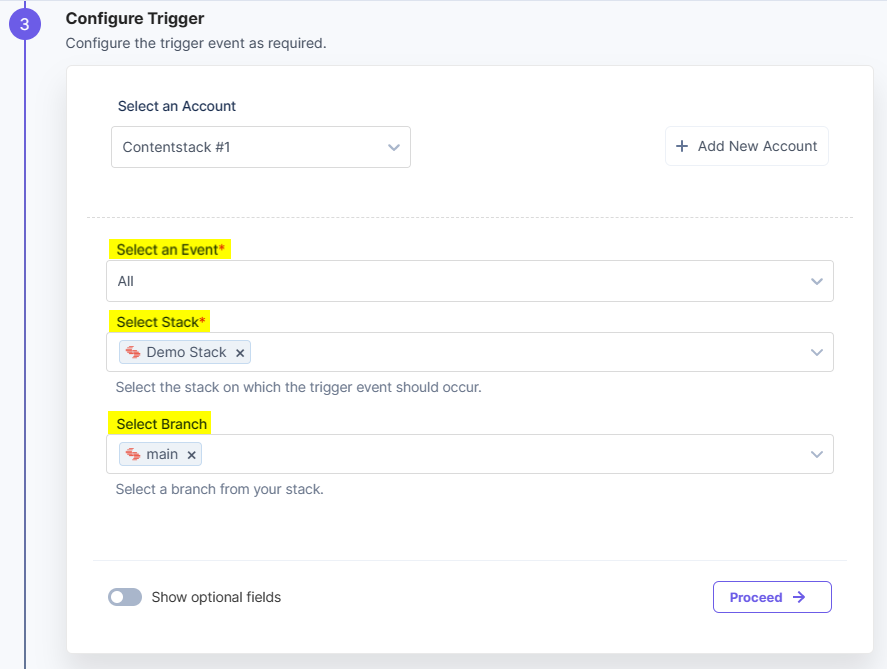
- Select the trigger event from the dropdown, i.e., Asset Created and select a Stack, and Branch from the Lookup dropdown.
For Asset Trigger, you will find the following events:- Asset Created: When you create a new asset in your stack.
- Asset Updated: When you update an asset.
- Asset Deleted: When you delete an asset.
- Asset Published: When you publish your assets to a publishing environment.
- Asset Publish Failed: When asset publishing fails due to error.
- Asset Unpublished: When you unpublish or remove your assets from a publishing environment.
- Asset Unpublish Failed: When the asset unpublishing activity fails.
- ALL: When you perform any of the above activities on an asset.

Note: By default, the main branch is selected (even if the Branch field is empty).
- Click Proceed.
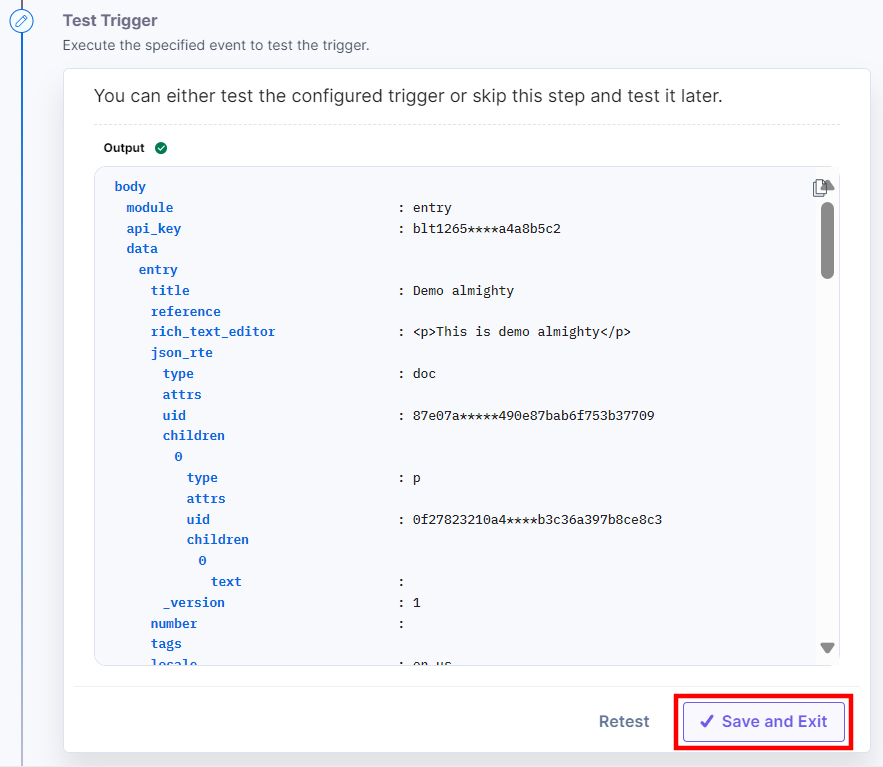
- Click Test Trigger to execute and test the trigger that you configured.

- If successful, you will see an output as follows. If it looks appropriate, click Save and Exit.
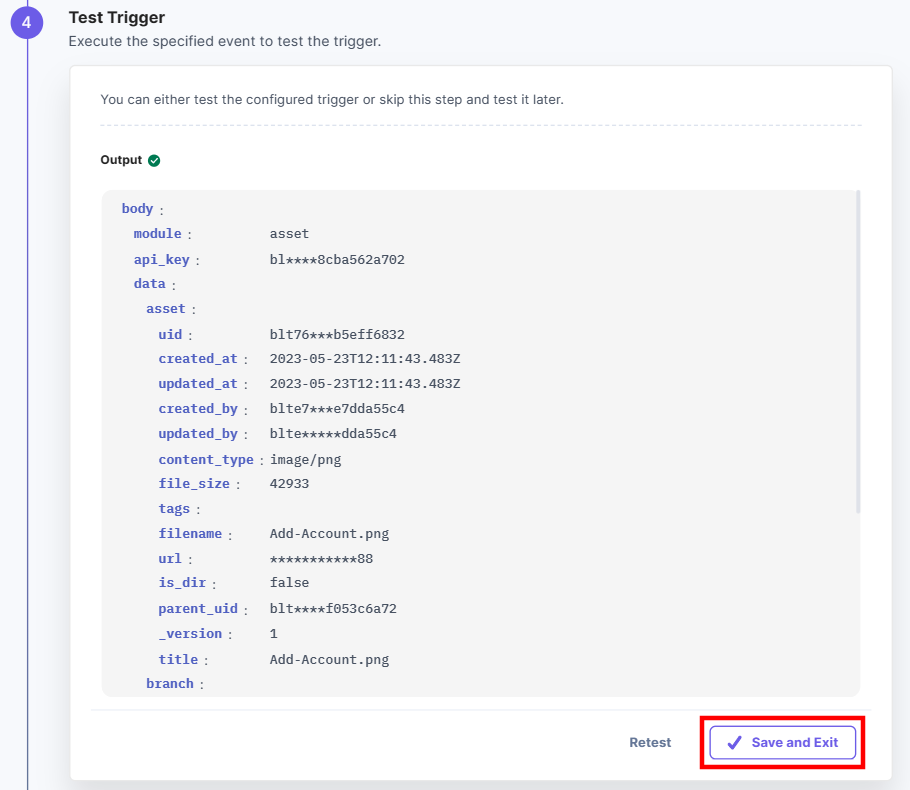
This sets your Asset Trigger.
Branch Trigger
The Branch Trigger event lets you trigger an automation when you create or delete a branch. It also invokes the trigger when branch aliases are assigned or unassigned.
Example:
Set up an automation with the Branch Trigger and Slack Action. With this automation, you can send a slack notification to the relevant team members/Slack channel when a new branch is created, informing the users about the purpose of the new branch.
Note: You must have the Branches feature enabled for your stack. For more information, please reach out to our Support Team.
Let’s look at the steps to set up the trigger event.
- Under the Choose Trigger tab, select Branch Trigger.
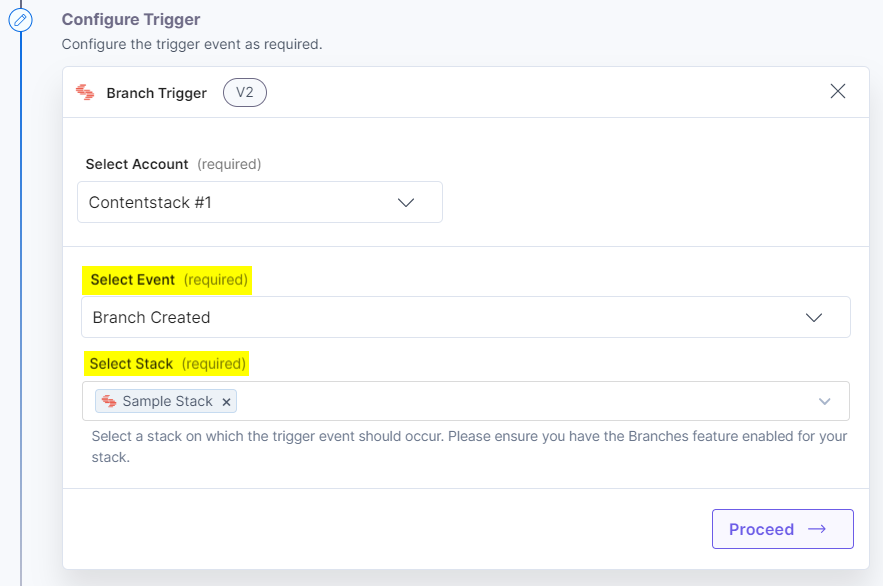
- On the Branch Trigger Configure Trigger page, enter the details given below:
- Click + Add New Account button to connect your Contentstack account as shown in the Connect your Contentstack Account to Automate step.
- Select the trigger event from the drop-down, i.e, Branch Created. Select a Stack from the Lookup drop-down.
For Branch Trigger, you will find the following module-specific sub-events:- Branch Created: Triggers when you create a new branch in the selected stack.
- Branch Deleted: Triggers when you update a branch in the selected stack.
- Branch Alias Assigned: Triggers when you assign an alias to a branch in the selected stack.
- Branch Alias Unassigned: Triggers when you unassign an alias from a branch in the selected stack.
- All: Triggers when you perform any of the above activities on a branch or branch alias in the selected stack.
- Click Proceed.
- Click Test Trigger to execute and test the trigger that you configured.
Note: You can preview the latest data created in Contentstack without performing the trigger event. The latest data will be fetched and displayed to you after you test the trigger. You must click Retest to fetch the data you created in Contentstack.
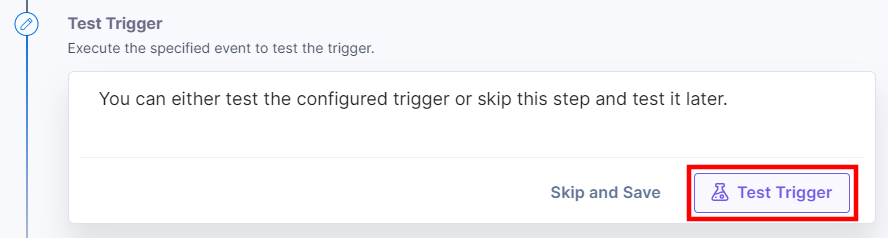
- When successful, you will see an output as follows. If it looks appropriate, click Save and Exit.
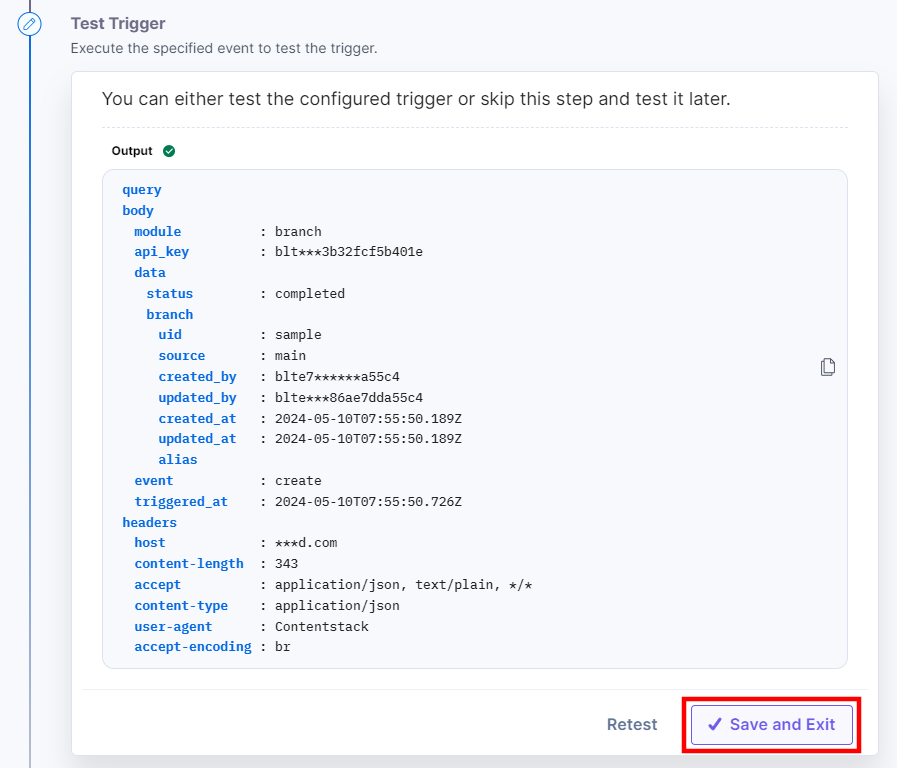
This sets your Branch Trigger.
Content Type Trigger
The Content Type Trigger event lets you trigger an automation when you create/update/delete content types.
Let’s look at the steps to set up the trigger event.
- Under the Choose Trigger tab, select Content Type Trigger .
- On the Content Type Trigger Configure Trigger page, enter the details given below:
- Click + Add New Account button to connect your Contentstack account as shown in the Connect your Contentstack Account to Automate step.
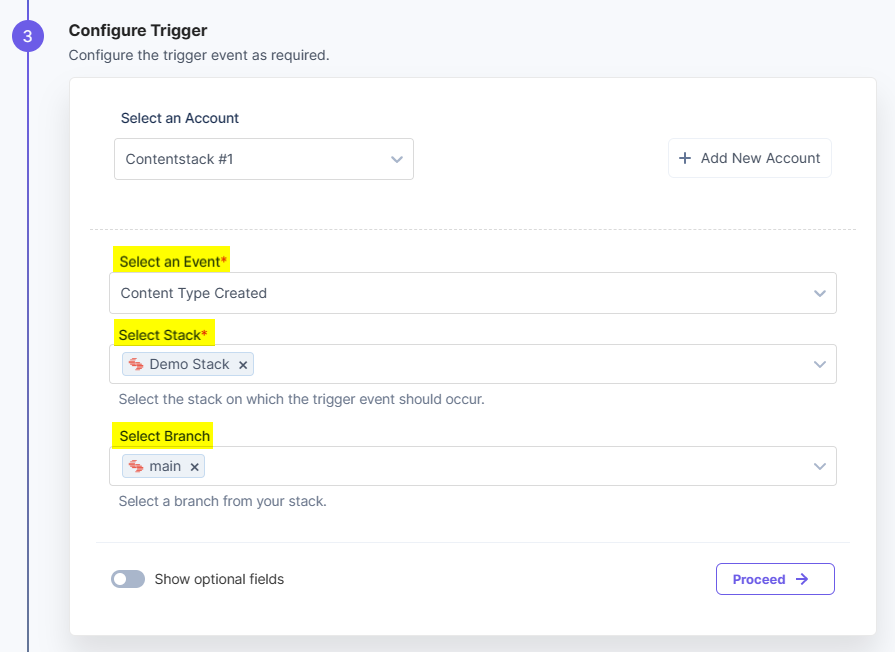
- Select the trigger event from the dropdown, i.e., Content Type Created and select a Stack, and Branch from the Lookup dropdown
For Content Type Trigger, you will find the following events:- Content Type Created: When you create a new content type.
- Content Type Updated: When you update a content type.
- Content Type Deleted: When you delete a content type.
- ALL: When you perform any of the above activities on a content type.
Note: By default, the main branch is selected (even if the Branch field is empty).
- [Optional] Enable the Show Optional Fields toggle button to display the specific Content Type.
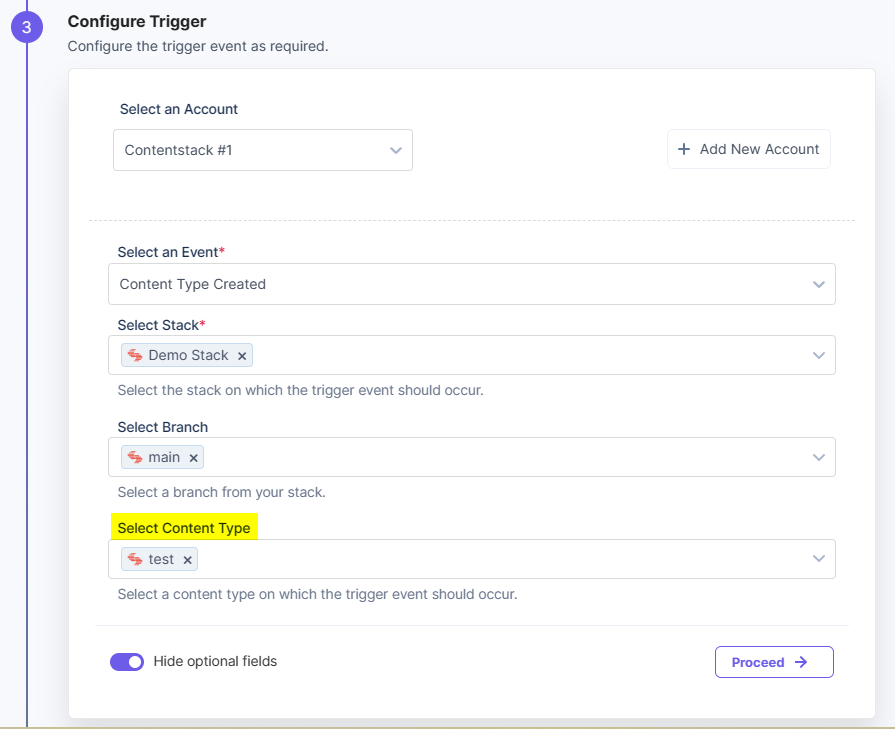
- Click Proceed.
- Click Test Trigger to execute and test the trigger that you configured.
Note: You can preview the latest data created in Contentstack without performing the trigger event. The latest data will be fetched and displayed to you after you test the trigger. You must click Retest to fetch the data you created in Contentstack.

- If successful, you will see an output as follows. If it looks appropriate, click Save and Exit.
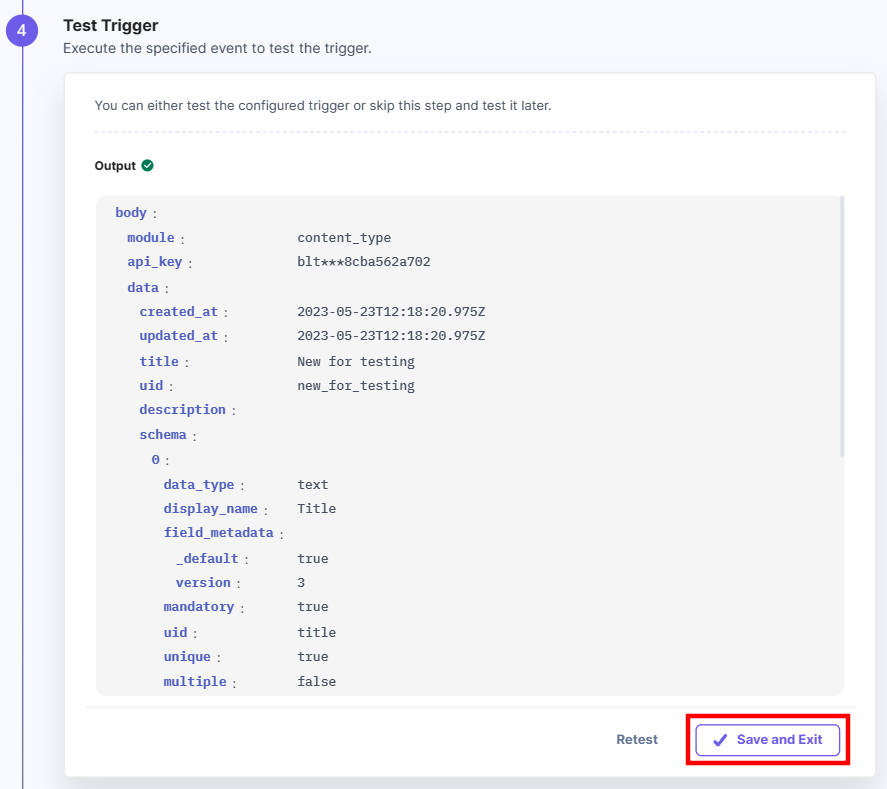
This sets your Content Type trigger.
Entry Trigger
The Entry Trigger event lets you trigger an automation when you create/update/publish/unpublish/delete entries.
Let’s look at the steps to set up the trigger event.
- Under the Choose Trigger tab, select Entry Trigger .
On the Entry Trigger Configure Trigger page, enter the details given below:
- Click + Add New Account button to connect your Contentstack account as shown in the Connect your Contentstack Account to Automate step.
- Select the trigger event from the dropdown, i.e, All. Select a Stack, and Branch from the Lookup dropdown.
For Entries, you will find the following module-specific sub-events:- Entry Created: Triggers when you create a new entry
- Entry Updated: Triggers when you update an entry
- Entry Deleted: Triggers when you delete an entry
- Entry Published: Triggers when you publish an entry
- Entry Unpublished: Triggers when you unpublish an entry
- Entry Publish Failed: Triggers when an entry publish activity fails
- Entry Unpublish Failed: Triggers when an entry unpublish activity fails
- ALL: Triggers when you perform any of the above activities on an entry
Note: By default, the main branch is selected (even if the Branch field is empty).
- [Optional] Enable the Show Optional Fields toggle button to display the Content Type and Environment fields.
- Click Proceed.
- Click Test Trigger to execute and test the trigger that you configured.
Note: You can preview the latest data created in Contentstack without performing the trigger event. The latest data will be fetched and displayed to you after you test the trigger. You must click Retest to fetch the data you created in Contentstack.

- If successful, you will see an output as follows. If it looks appropriate, click Save and Exit.
This sets your Entry trigger.
Entry Comment Trigger
The Entry Comment Trigger event lets you trigger an automation when a comment is created/updated/deleted for an entry.
Example:
Set up an automation with the Entry Comment Trigger and Slack Action. With this automation, you can send a slack notification to the relevant team members/Slack channel when a user creates, updates or deletes an entry’s comment.
Let’s look at the steps to set up the trigger event.
- Under the Choose Trigger tab, select Entry Comment Trigger.
- On the Entry Comment Trigger Configure Trigger page, enter the details given below:
- Click + Add New Account button to connect your Contentstack account as shown in the Connect your Contentstack Account to Automate step.
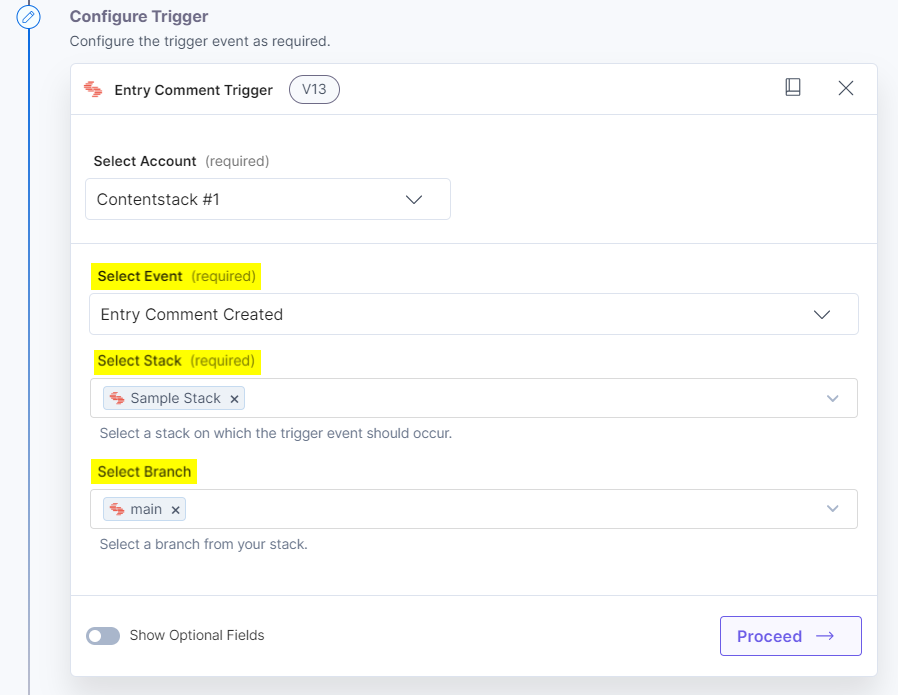
- Select the trigger event from the drop-down, i.e, Entry Comment Created. Select a Stack, and Branch from the Lookup drop-down.
For Entry Comment Trigger, you will find the following module-specific sub-events:- Entry Comment Created: Triggers when you create a new entry comment.
- Entry Comment Updated: Triggers when you update an entry comment.
- Entry Comment Deleted: Triggers when you delete an entry comment.
- All: Triggers when you perform any of the above activities on an entry comment.
Note: By default, the main branch is selected (even if the Branch field is empty).
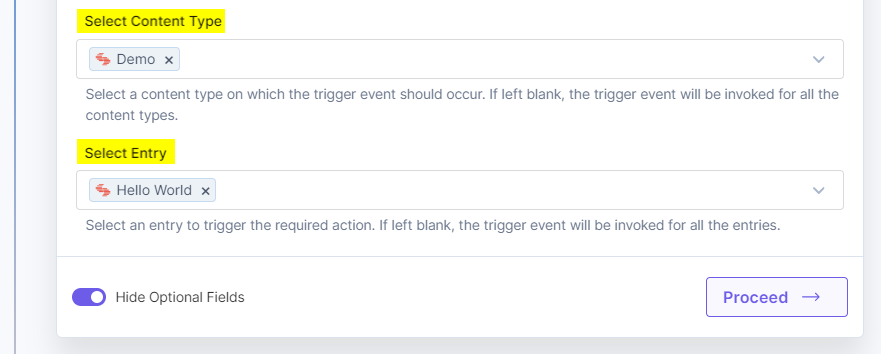
- [Optional] Enable the Show Optional Fields toggle button to display the Content Type and Entry fields.
Note: If you do not select any content type or entry, you will be able to invoke the trigger event on all entries or content types within the selected stack.
- Click Proceed.
- Click Test Trigger to execute and test the trigger that you configured.
Note: You can preview the latest data created in Contentstack without performing the trigger event. The latest data will be fetched and displayed to you after you test the trigger. You must click Retest to fetch the data you created in Contentstack.

- When successful, you will see an output as follows. If it looks appropriate, click Save and Exit.
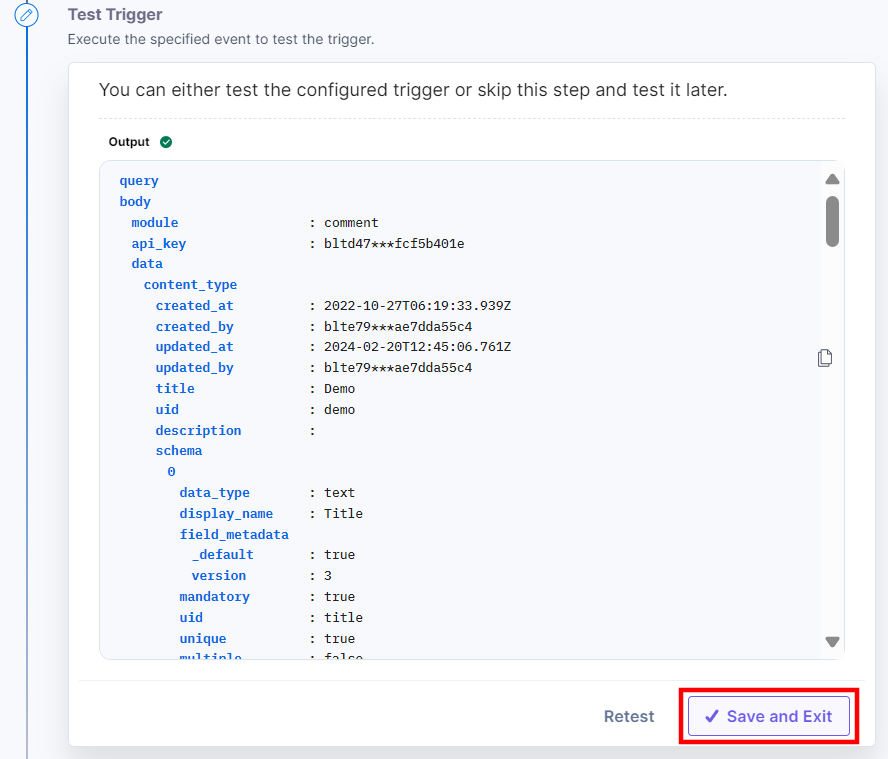
This sets your Entry Comment Trigger.
Global Field Trigger
The Global Field Trigger event lets you trigger an automation when you create/update/delete global fields.
Let’s look at the steps to set up the trigger event.
- Under the Choose Trigger tab, select Global Field Trigger .
- On the Global Field Trigger Configure Trigger page, enter the details given below:
- Click + Add New Account button to connect your Contentstack account as shown in the Connect your Contentstack Account to Automate step.
- Select the trigger event from the dropdown, i.e., Global Field Created and select a Stack, and Branch from the Lookup dropdown.
For Global Field, you will find the following events:- Global Field Created: When you create a global field.
- Global Field Updated: When you update a global field.
- Global Field Deleted: When you delete a global field.
- ALL: When you perform any of the above activities on a global field.
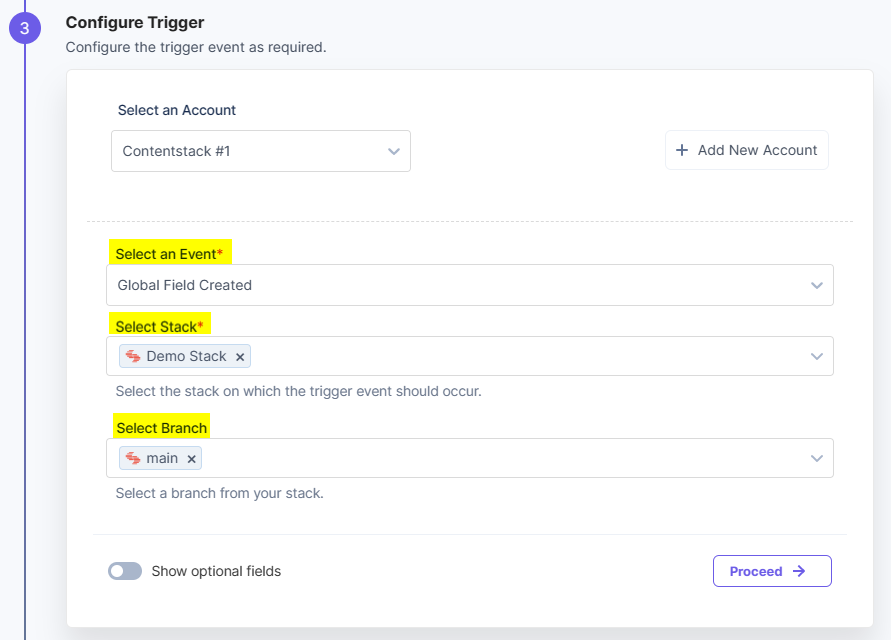
Note: By default, the main branch is selected (even if the Branch field is empty).
- [Optional] Enable the Show Optional Fields toggle button to display the specific Global Field.
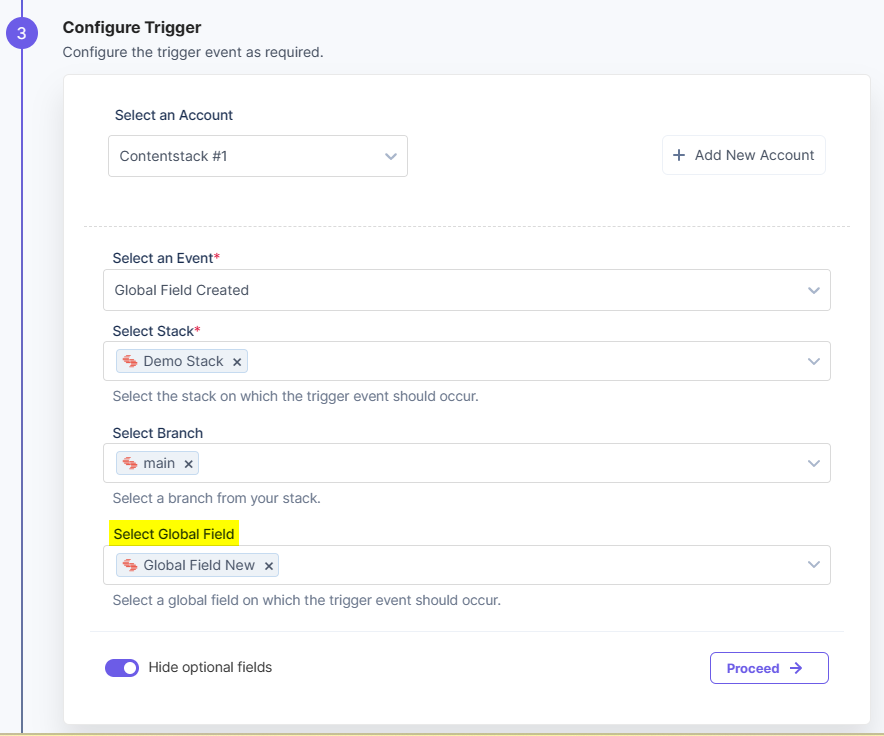
- Click Proceed.
- Click Test Trigger to execute and test the trigger that you configured.
Note: You can preview the latest data created in Contentstack without performing the trigger event. The latest data will be fetched and displayed to you after you test the trigger. You must click Retest to fetch the data you created in Contentstack.

- If successful, you will see an output as follows. If it looks appropriate, click Save and Exit.
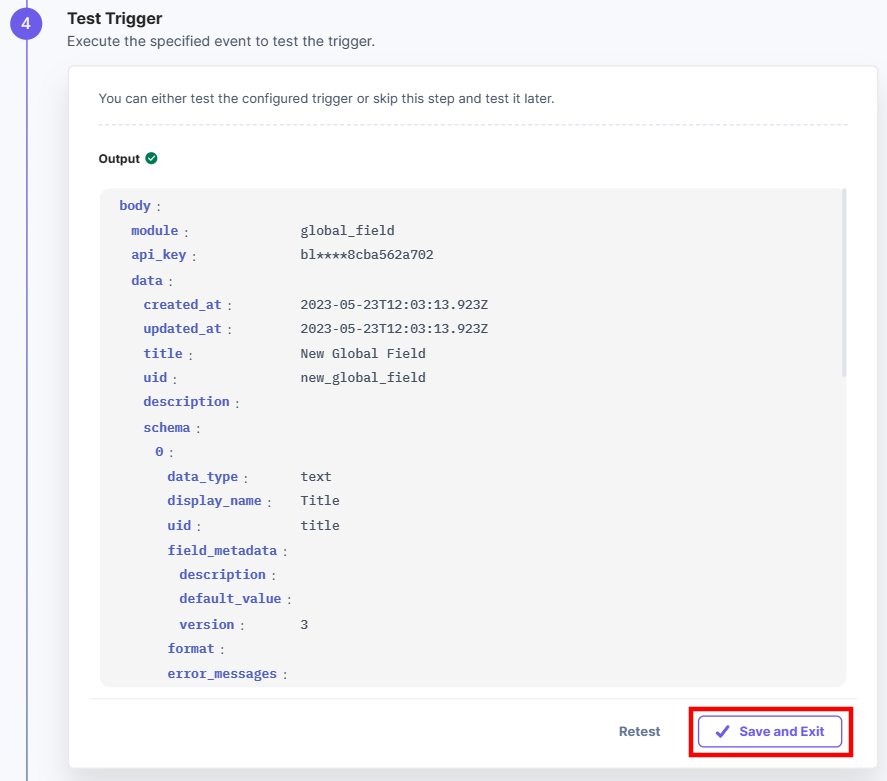
This sets your Global Field trigger.
Release Trigger
The Release Trigger event lets you trigger an automation when you deploy a release in an environment.
Let’s look at the steps to set up the trigger event.
- Under the Choose Trigger tab, select Release Trigger .
- On the Release Trigger Configure Trigger page, enter the details given below:
- Click + Add New Account button to connect your Contentstack account as shown in the Connect your Contentstack Account to Automate step.
- Select the trigger event from the dropdown, i.e., Release Deployed and select a Stack , and Branch from the Lookup dropdown.
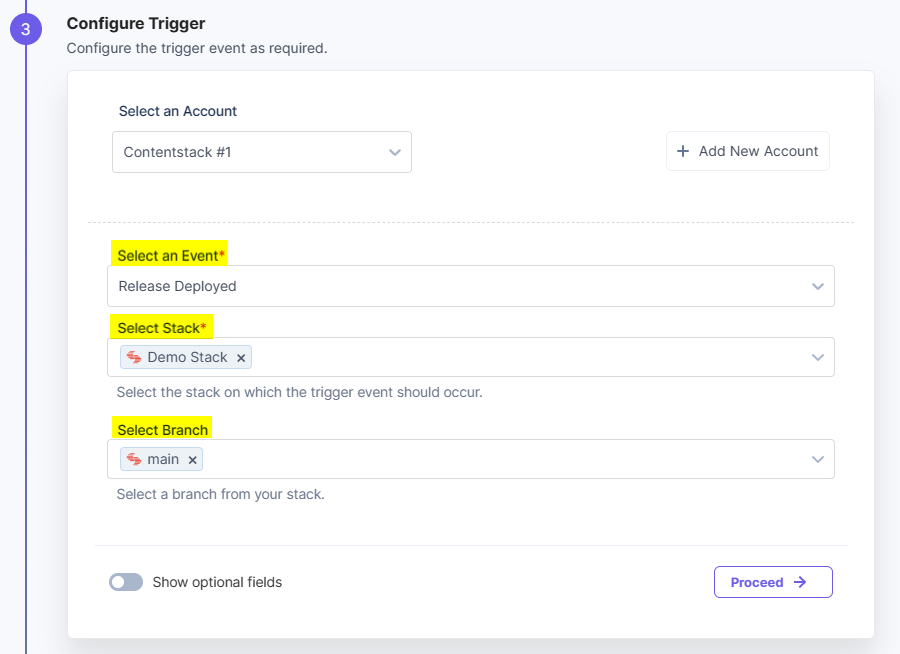
Note: By default, the main branch is selected (even if the Branch field is empty).
- [Optional] Enable the Show Optional Fields toggle button to display the Release , and Environment fields.
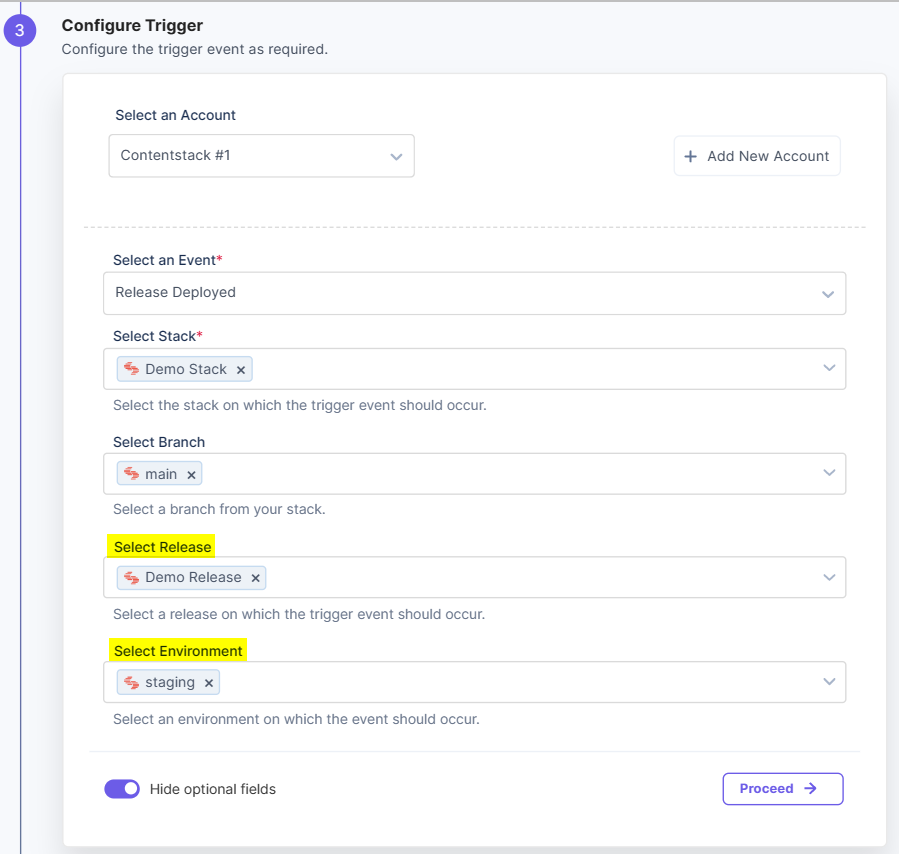
- Click Proceed.
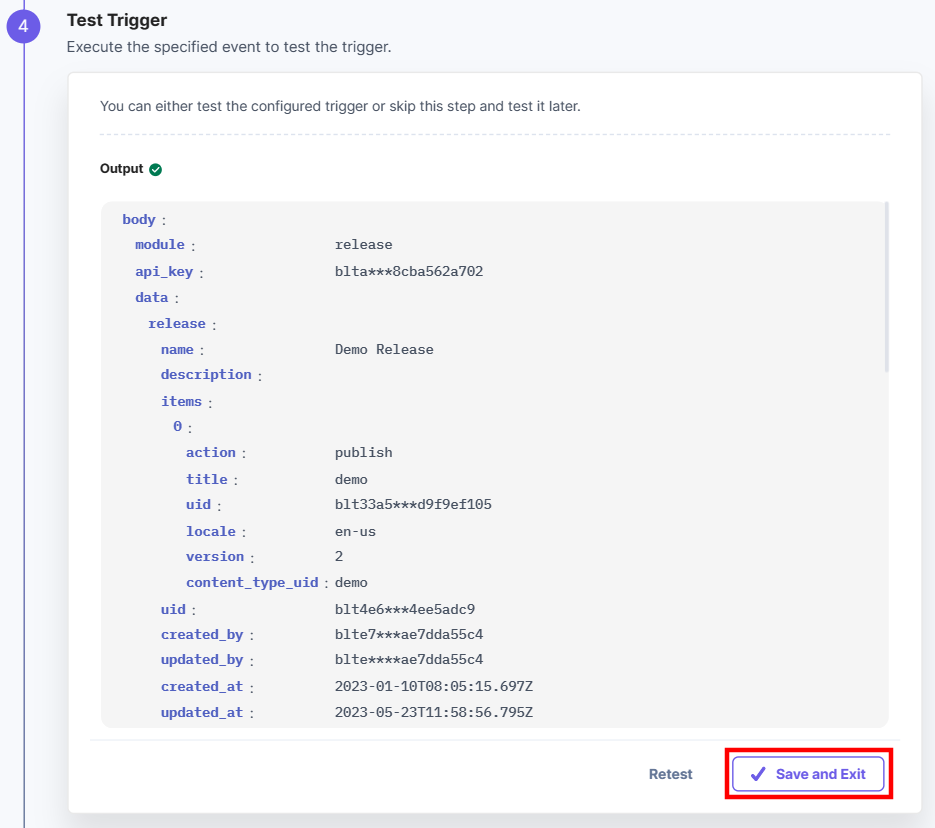
- Click Test Trigger to execute and test the trigger that you configured.
Note: You can preview the latest data created in Contentstack without performing the trigger event. The latest data will be fetched and displayed to you after you test the trigger. You must click Retest to fetch the data you created in Contentstack.
- If successful, you will see an output as follows. If it looks appropriate, click Save and Exit .
This sets your Release trigger.
Workflow Trigger
The Workflow Trigger event lets you trigger an automation when a workflow stage changes.
Let’s look at the steps to set up the trigger event.
- Under the Choose Trigger tab, select Workflow Trigger.
- On the Workflow Trigger Configure Trigger page, enter the details given below:
- Click + Add New Account button to connect your Contentstack account as shown in the Connect your Contentstack Account to Automate step.
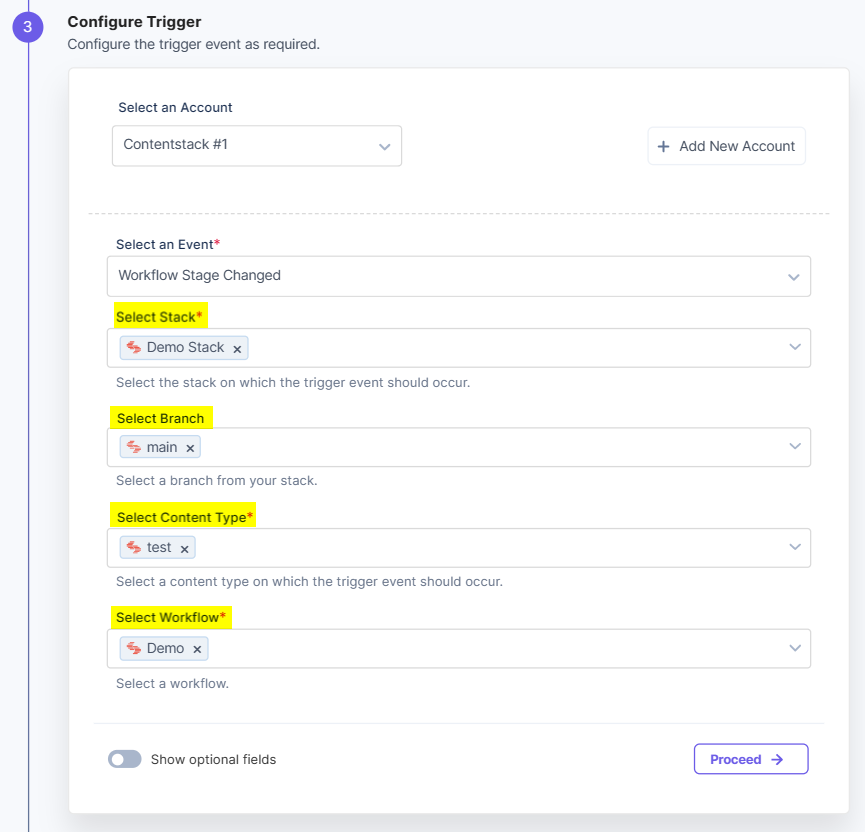
- Select the trigger event from the dropdown, i.e., Workflow Stage Changed .
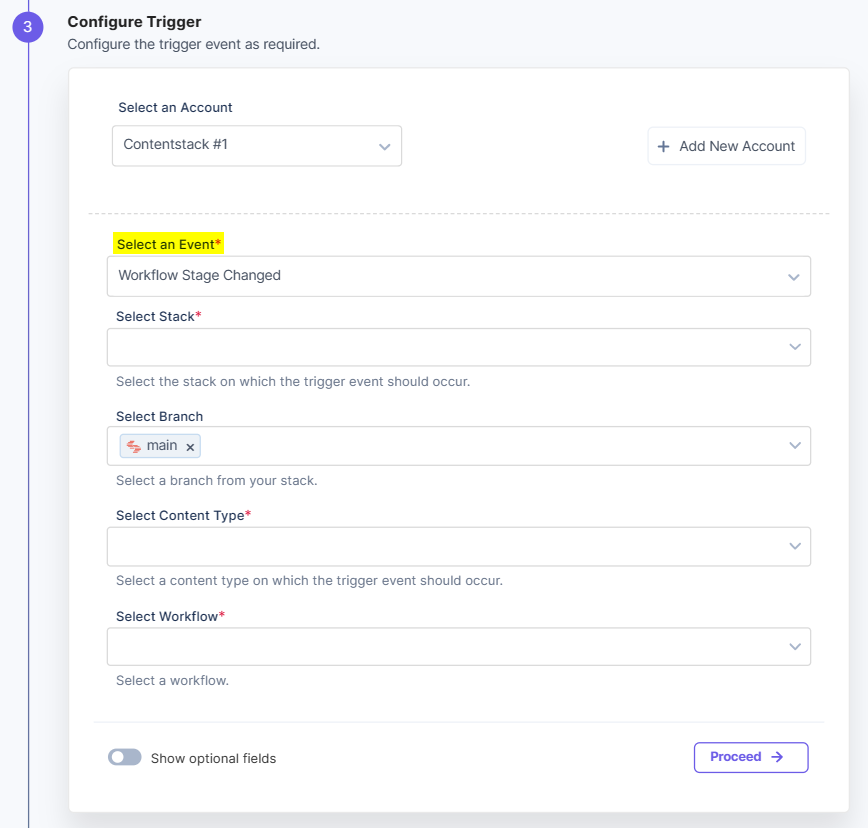
- Select a Stack , Branch, Content Type , and Workflow from the Lookup dropdown.
Note: By default, the main branch is selected (even if the Branch field is empty).
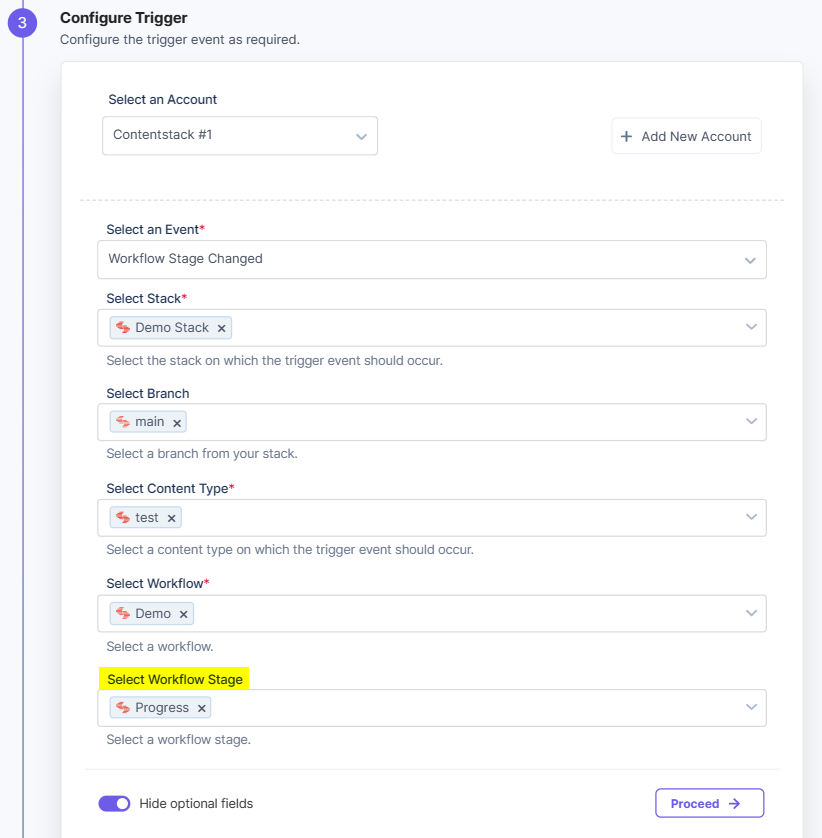
- [Optional] Enable the Show Optional Fields toggle button to display the Workflow Stage field.
- Select the trigger event from the dropdown, i.e., Workflow Stage Changed .
- Click Proceed.
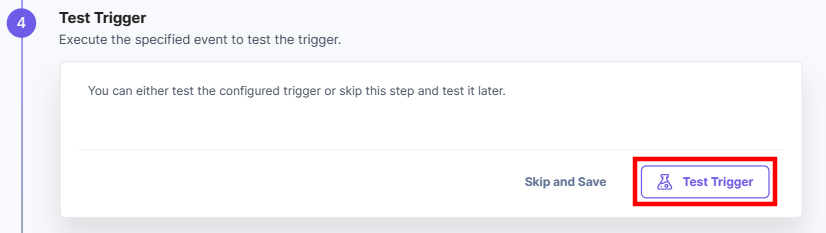
- Click Test Trigger to execute and test the trigger that you configured.
- If successful, you will see an output as follows. If it looks appropriate, click Save and Exit .
This sets your Workflow trigger.
More articles in "Triggers"
