
.svg?format=pjpg&auto=webp)
.svg?format=pjpg&auto=webp)
.png?format=pjpg&auto=webp)


.png?format=pjpg&auto=webp)
Contentstack Management - Branch Alias Actions
Contentstack enables the assignment of aliases to any branch of your stack, acting as pointers to specific branches. With the Branch Alias actions, you can retrieve details of all branch aliases, assign or reassign aliases to a specific branch, and delete them as required. These actions streamline branch control, ensuring an organized and efficient development process with Contentstack Management Branch Alias.
Note: You must have the Branches feature enabled for your stack to use the Branch Alias actions. For more information, please reach out to our Support Team.
Let’s look at the action in detail.
Assign/Reassign a Branch Alias
This action assigns/reassigns an existing/new alias to a branch in a stack.
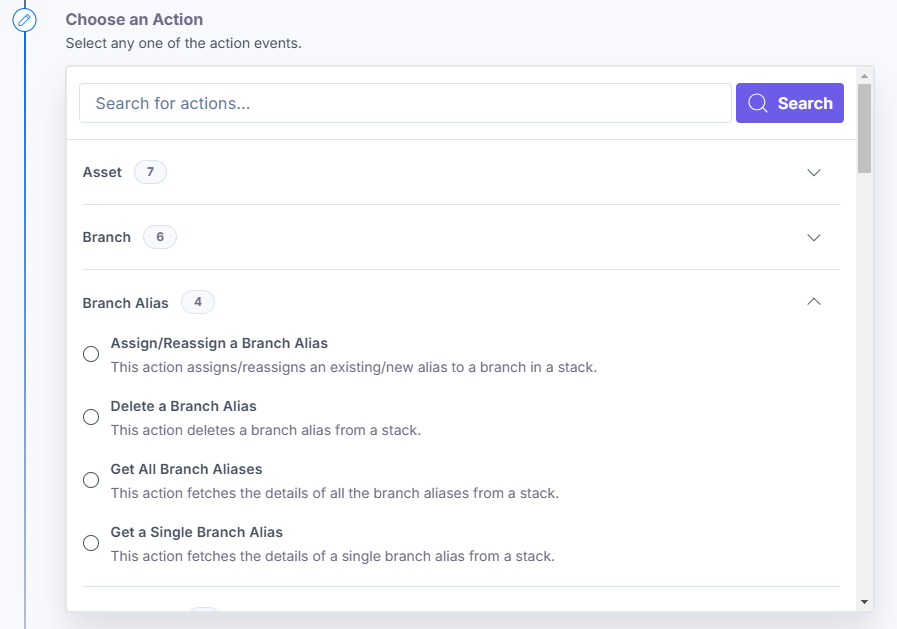
- Under the Choose an Action tab, select the Assign/Reassign a Branch Alias action.
- On the Assign/Reassign a Branch Alias Configure Action page, enter the details given below:
- Click + Add New Account button to connect your Contentstack account as shown in the Connect your Contentstack Account to Automate step.
- Select a Stack from the Lookup list.
- Select an Action from the dropdown. You have two options: Assign and Reassign.
- Assign: Select this option to assign a new alias name to a branch.
- Reassign: Select this option to assign an existing alias to a branch.
- Select or enter a Branch Alias from the Lookup list.
Note: If you select the Assign action, make sure to manually enter the new alias name before assigning it to the branch to prevent errors.
- Select the Target Branch from the Lookup list.
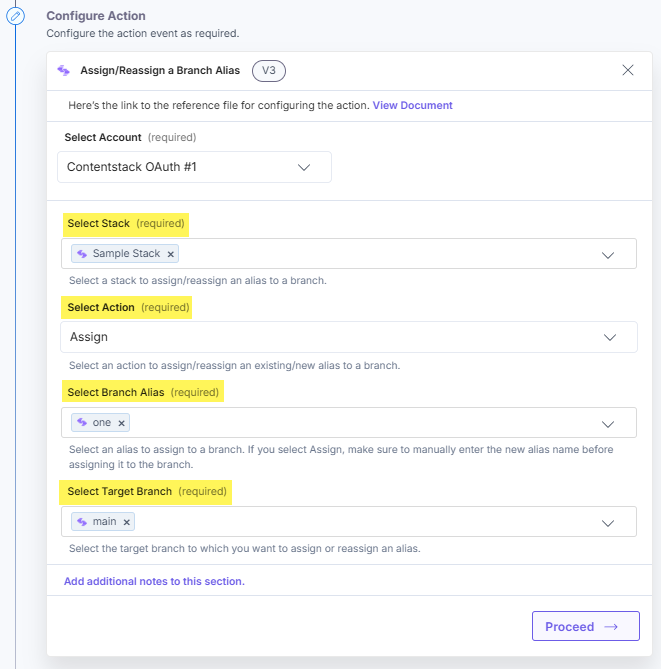
- Click the Proceed button.
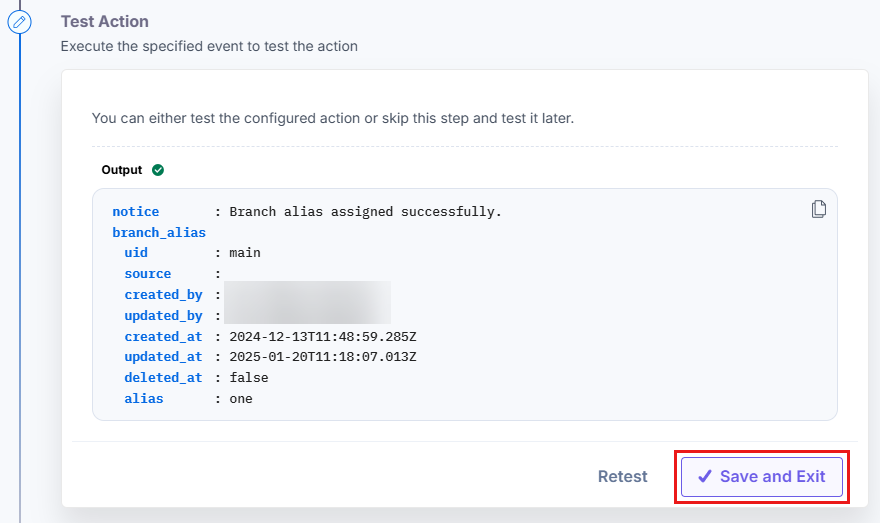
- Click the Test Action button to test the configured action.

- The output will be shown as below. Click the Save and Exit button.
Delete a Branch Alias
This action deletes a branch alias from a stack.
- Under the Choose an Action tab, select the Delete a Branch Alias action.
- On the Delete a Branch Alias Configure Action page, enter the details given below:
- Click + Add New Account button to connect your Contentstack account as shown in the Connect your Contentstack Account to Automate step.
- Select a Stack and a Branch Alias from the Lookup list.
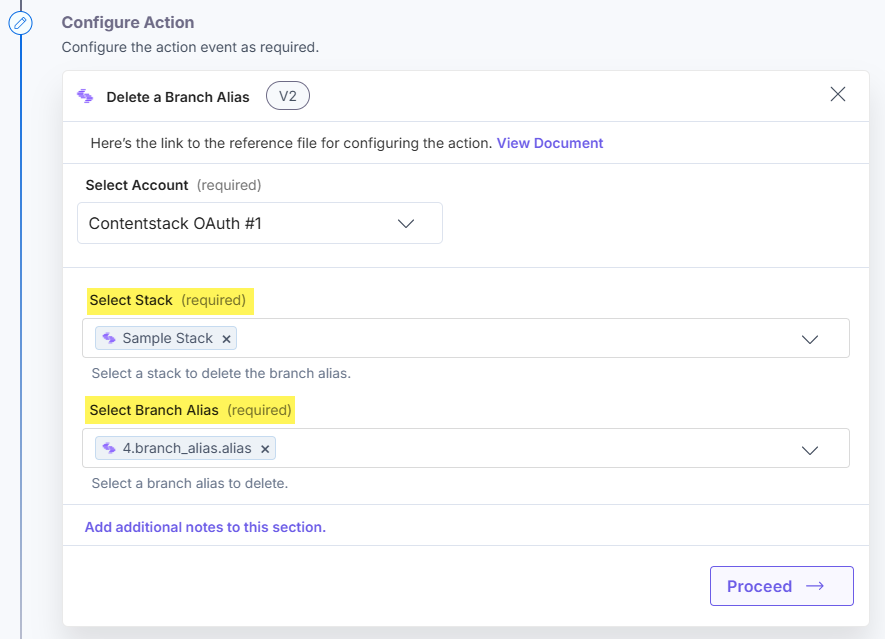
- Click the Proceed button.
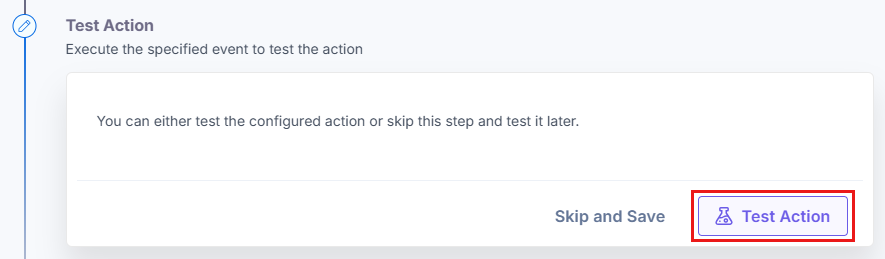
- Click the Test Action button to test the configured action.
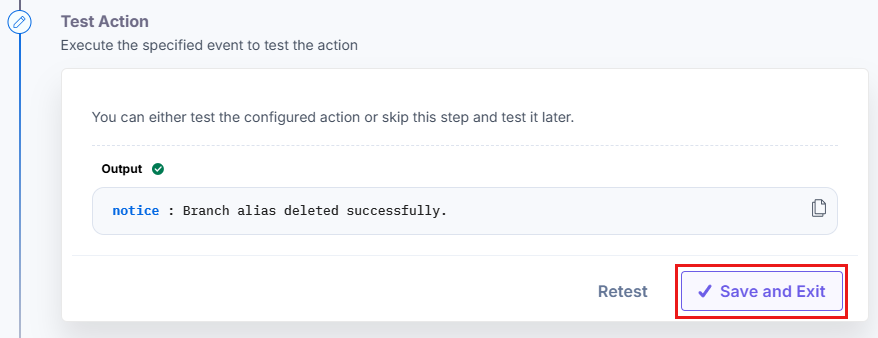
- The output will be shown as below. Click the Save and Exit button.
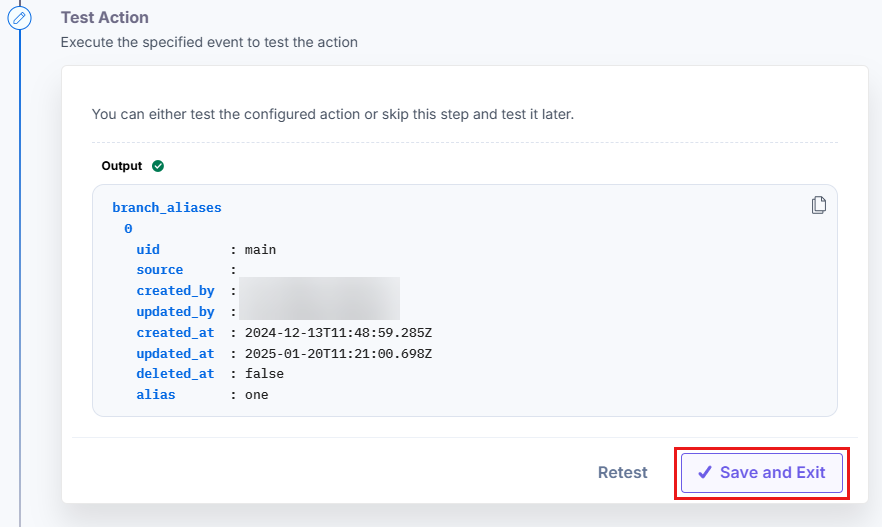
Get All Branch Aliases
This action fetches the details of all the branch aliases from a stack.
- Under the Choose an Action tab, select the Get All Branch Aliases action.
- On the Get All Branch Aliases Configure Action page, enter the details given below:
- Click + Add New Account button to connect your Contentstack account as shown in the Connect your Contentstack Account to Automate step.
- Select a Stack from the Lookup list.
- Optionally, enable the Show Optional Fields toggle button to display the Branch Alias Limit and Skip Branch Alias (Pagination) fields.
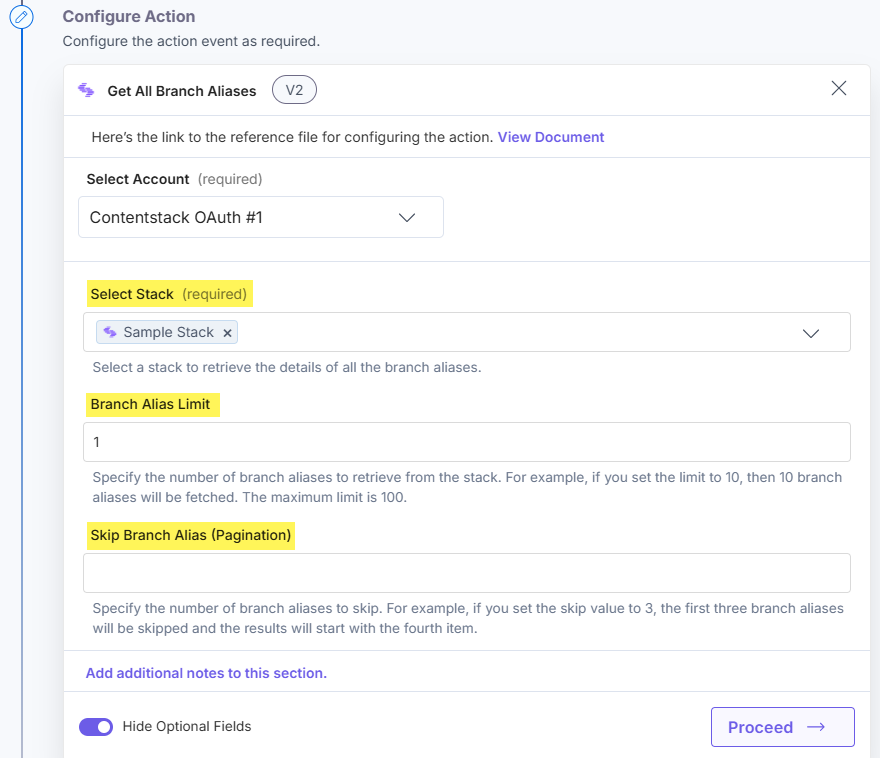
- Click the Proceed button.
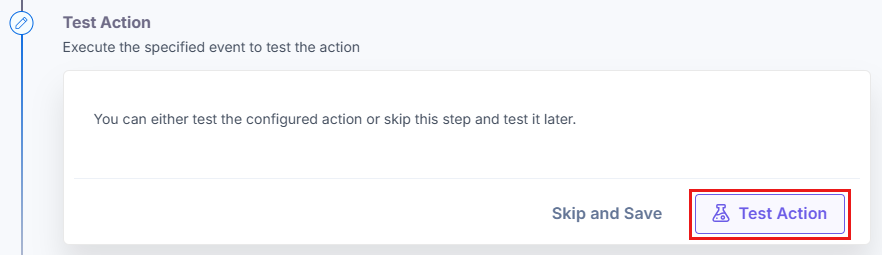
- Click the Test Action button to test the configured action.
- The output will be shown as below. Click the Save and Exit button.
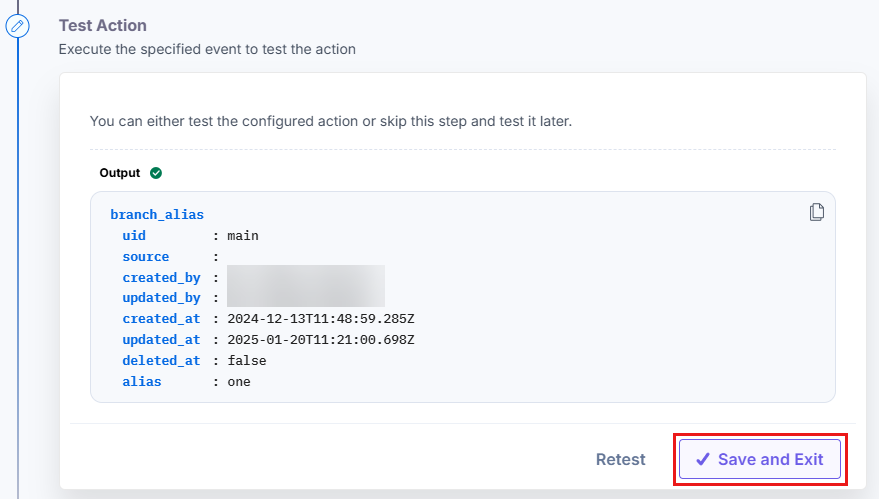
Get a Single Branch Alias
This action fetches the details of a single branch alias from a stack.
- Under the Choose an Action tab, select the Get a Single Branch Alias action.
- On the Get a Single Branch Alias Configure Action page, enter the details given below:
- Click + Add New Account button to connect your Contentstack account as shown in the Connect your Contentstack Account to Automate step.
- Select a Stack and Branch Alias from the Lookup list.
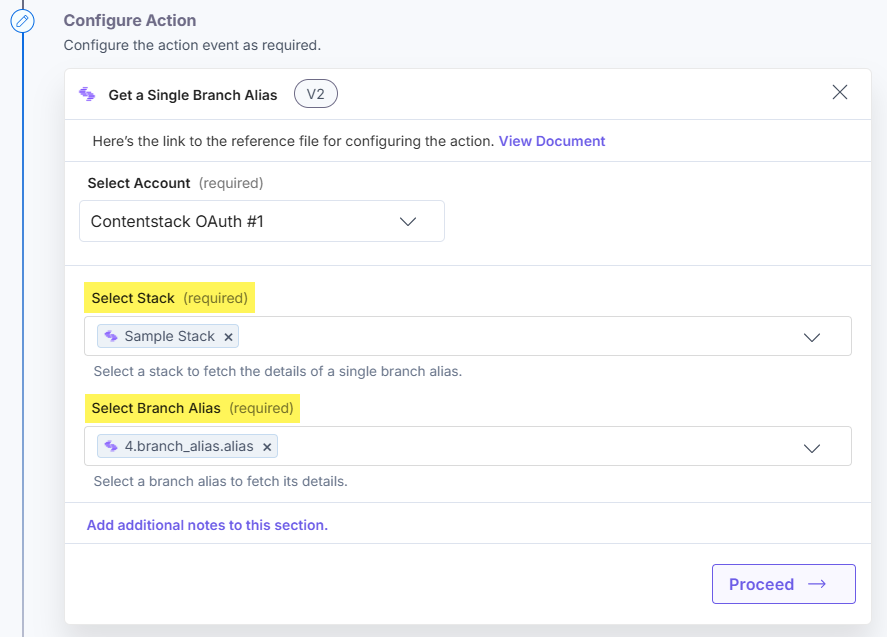
- Click the Proceed button.
- Click the Test Action button to test the configured action.
- The output will be shown as below. Click the Save and Exit button.
More articles in "Contentstack Management"
