Set Up Live Preview for your Stack
To set up Live Preview for the entries of your stack, you need to perform the following steps:
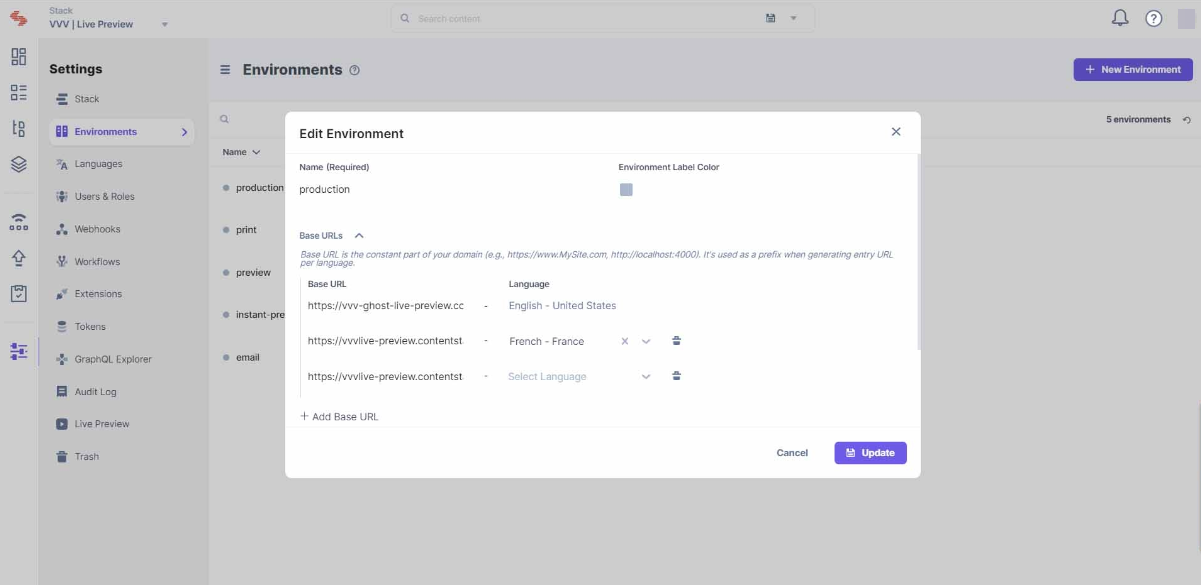
- Navigate to Settings and select Environments.
- Set the base URLs for different locales under the selected environment(s).

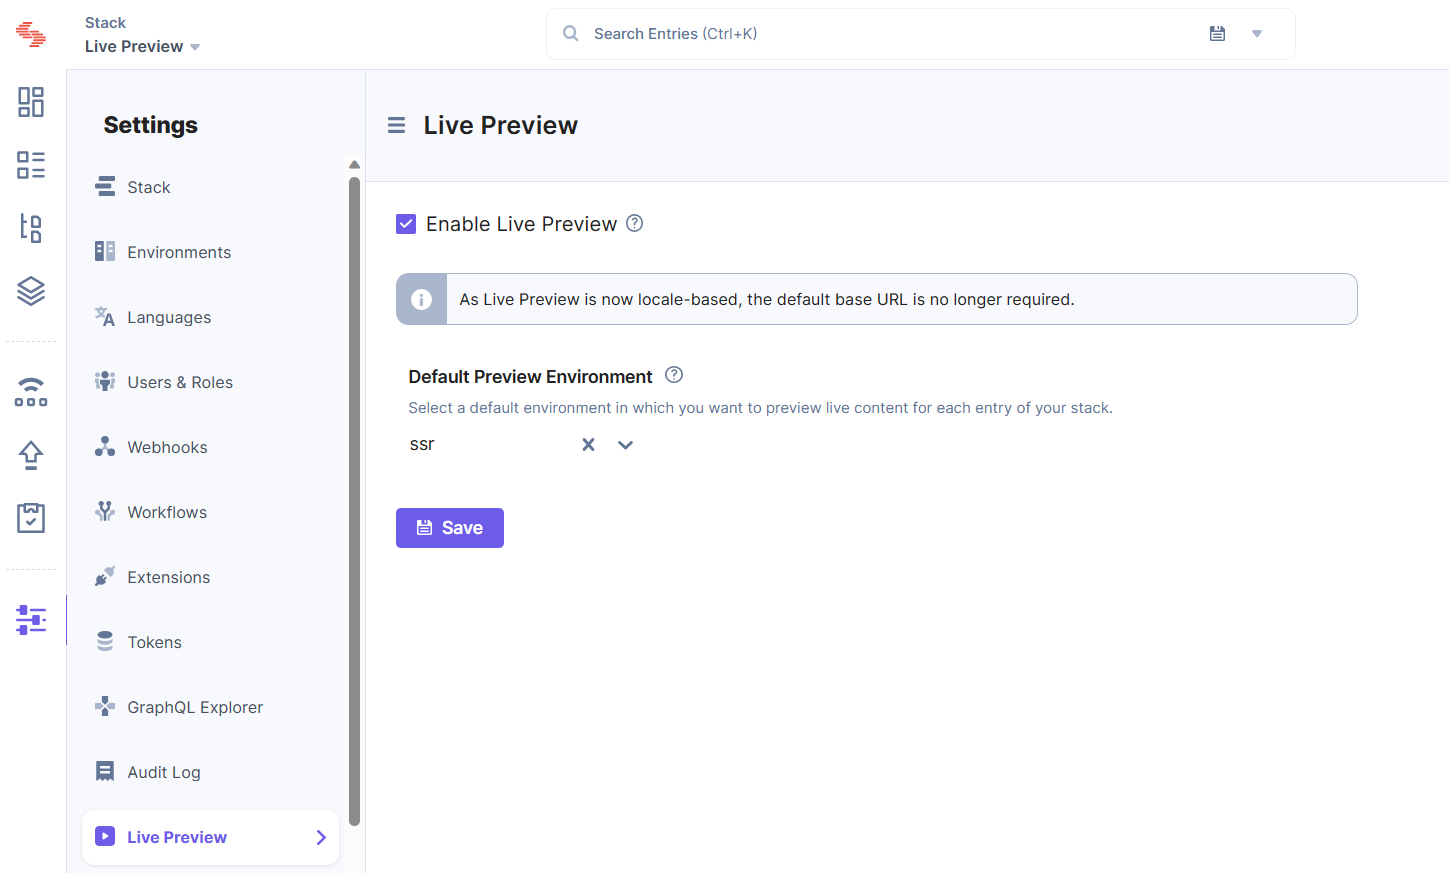
- Now, navigate to Live Preview in the left navigation panel and select the Enable Live Preview checkbox.
- Set the Default Preview Environment and click Save to save the settings.

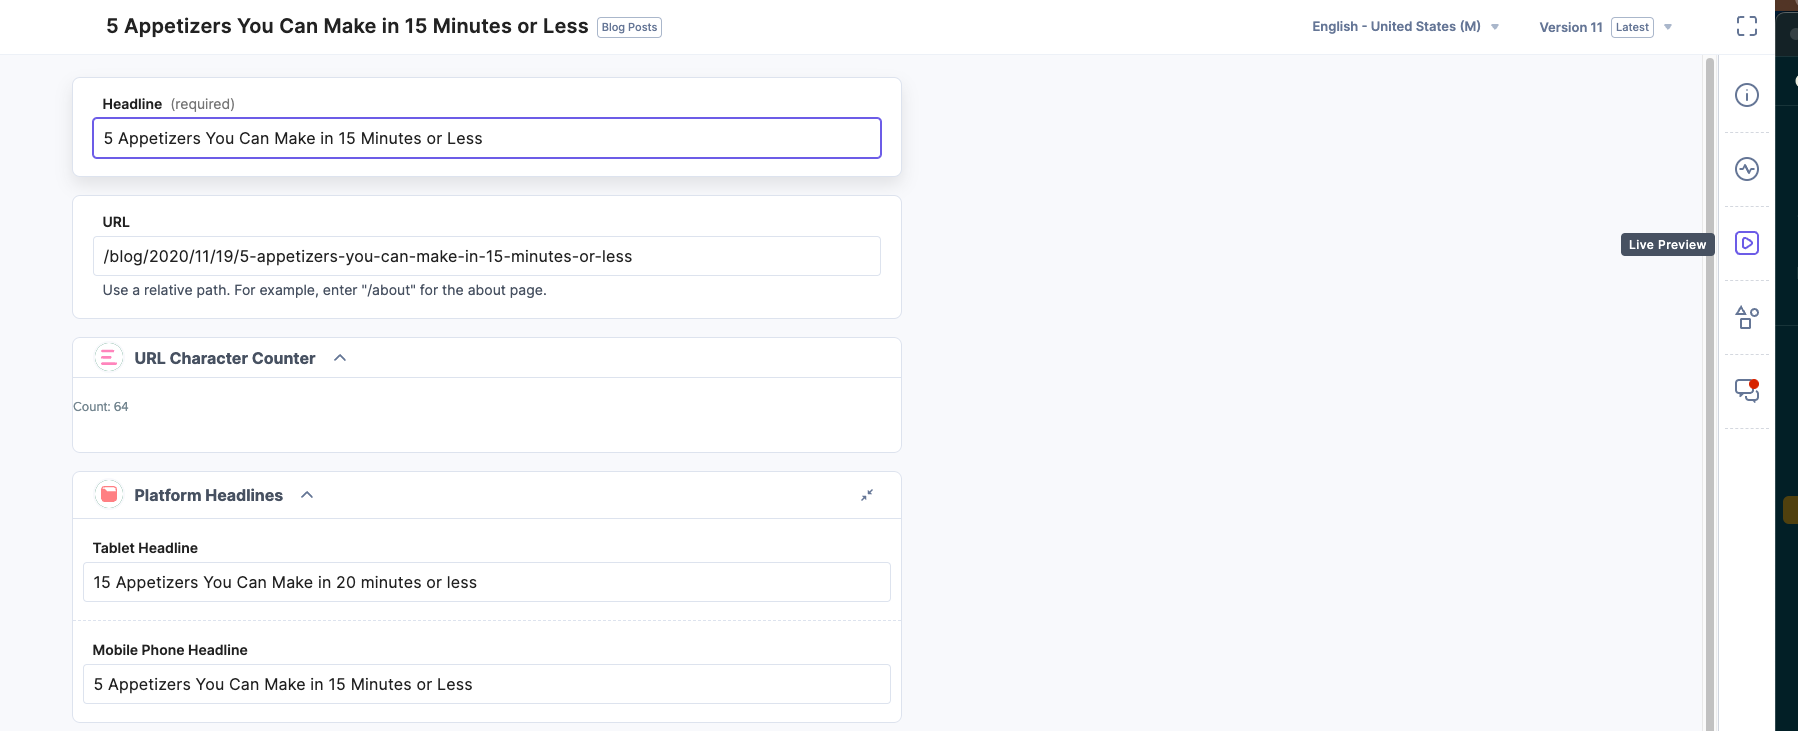
You will now be able to see the Live Preview icon in the right-hand side panel of all your entries. You can start previewing content on the locale-specific URL that you set for the preview environment.
To test the content changes across different locales, perform the following steps:
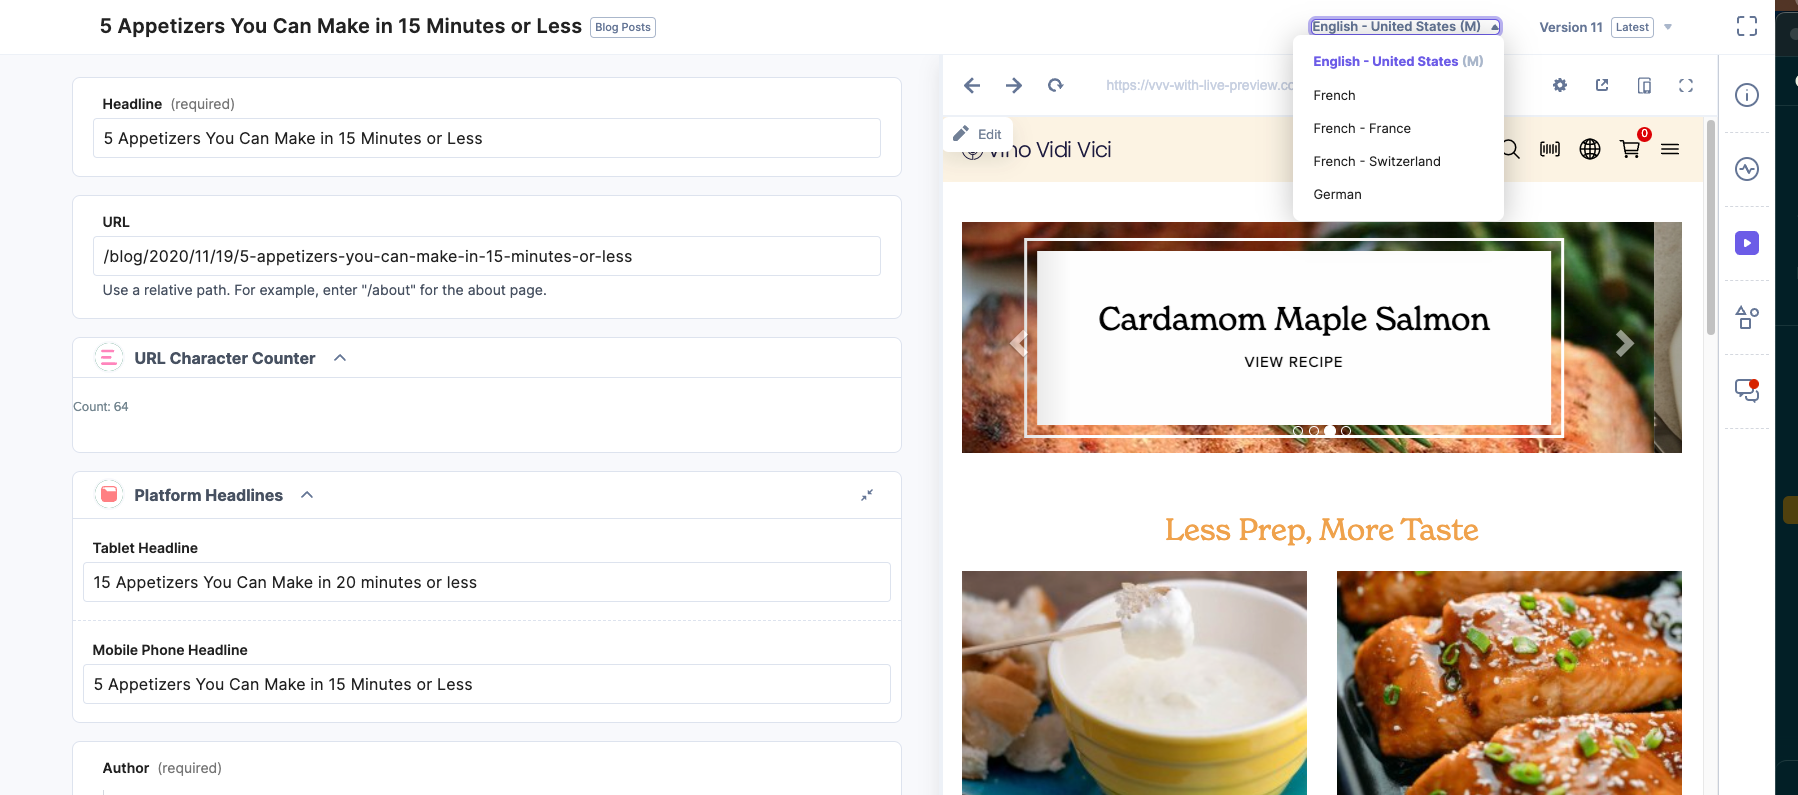
- Select the entry for which you want to test the content changes and click the “Live Preview” icon on the right-hand side panel.

- Select the locale of which you want to preview the content. Now, you can preview the content in the selected locale for the selected preview environment.

Note: As Live Preview is locale-based, you just need to set a default preview environment. In the Live Preview portal, you can view your locale-specific content at the base URLs that you set while setting up the preview environment.


.svg?format=pjpg&auto=webp)
.svg?format=pjpg&auto=webp)
.png?format=pjpg&auto=webp)


.png?format=pjpg&auto=webp)