Calendar App Installation Guide
The Calendar is a Full Page Location app that displays the Workflow tasks, entries, and releases in a Calendar format. The app enables you to view all the events in the Calendar app quickly. You can view all the details of the scheduled events within your Contentstack environments. Also, you can apply various filters to view the events.
Contentstack Marketplace lets you integrate the Calendar app directly into your headless CMS. You can easily use this app to view the workflow tasks and scheduled events, such as Publish Entries and Releases of your stack in a Calendar view.
Prerequisites
- Contentstack account
- Access to the Contentstack Organization/Stack as the Owner/Admin
Let's follow this step-by-step guide to install and configure the Calendar app within your stack.
Steps for Execution
- Install and Configure the Calendar app in Contentstack Marketplace
- Use the Calendar app within your Stack
-
Install and Configure the Calendar app in Contentstack Marketplace
Follow the steps to install the application in Contentstack.
- Log in to your Contentstack account.
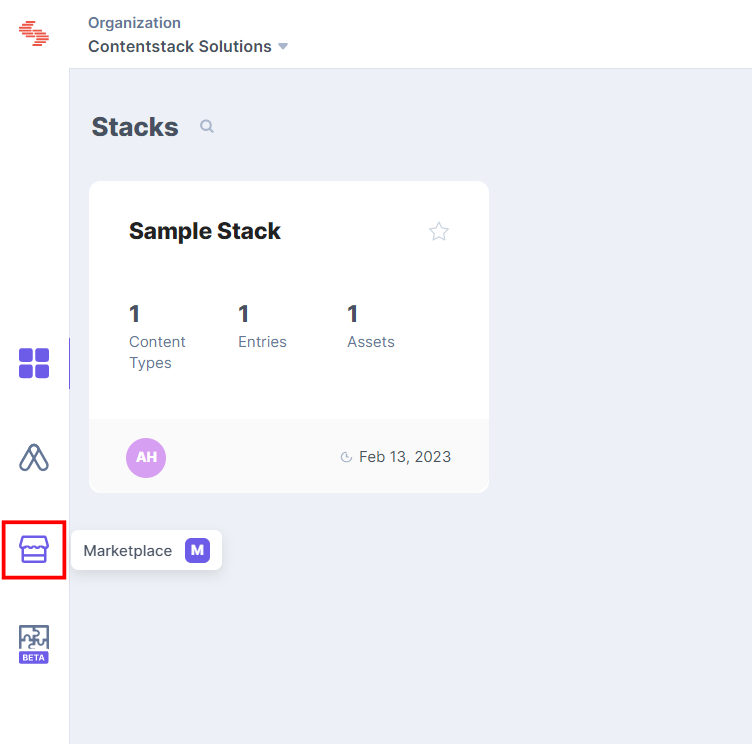
- In the left-hand side primary navigation, click the Marketplace icon to go to the Marketplace.
- Click Apps from the left panel.
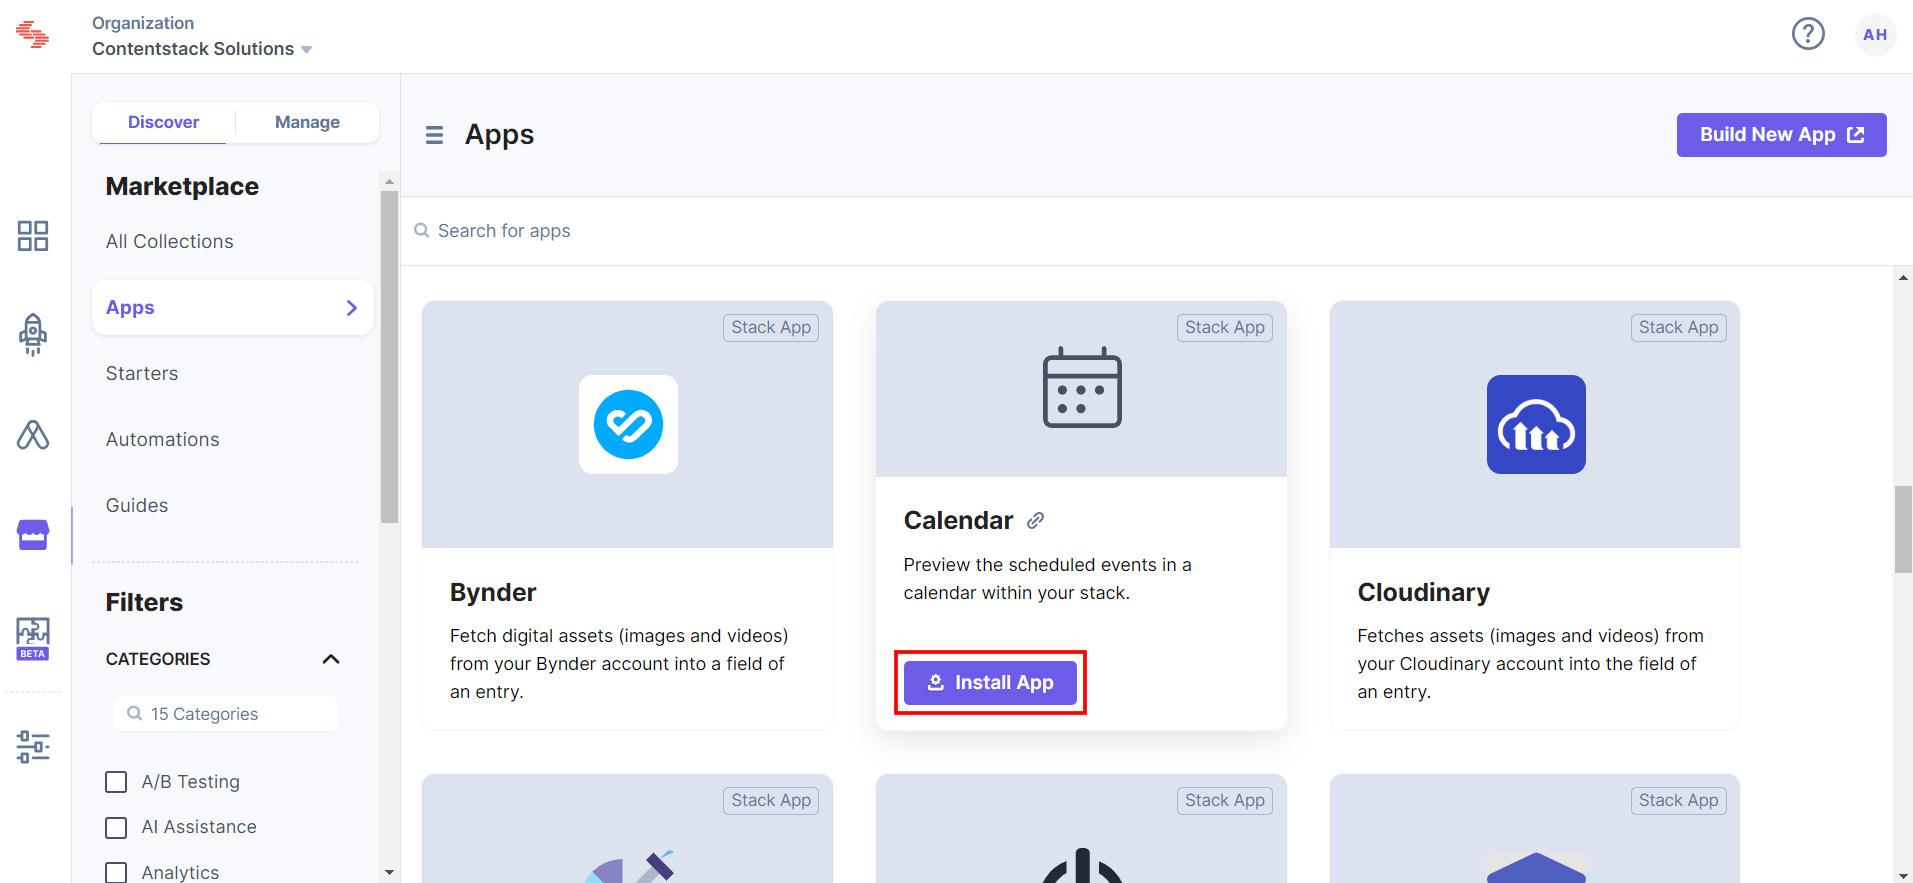
- Within the Marketplace, you can see all the available apps. Hover over the Calendar app and click Install App.
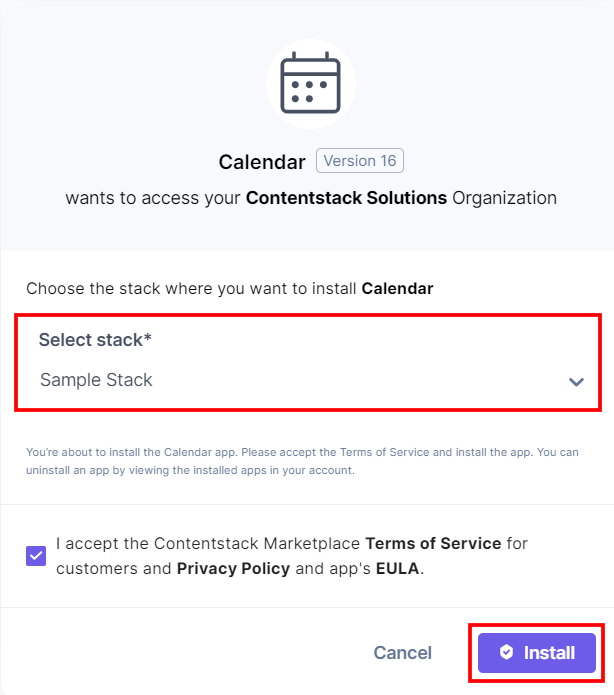
- In the popup window, select the stack where you want to install the Calendar app and click the Install button.
- On the UI Locations tab, you can see the predefined app locations. You can use the toggle button corresponding to each UI location to enable or disable it based on your requirements.
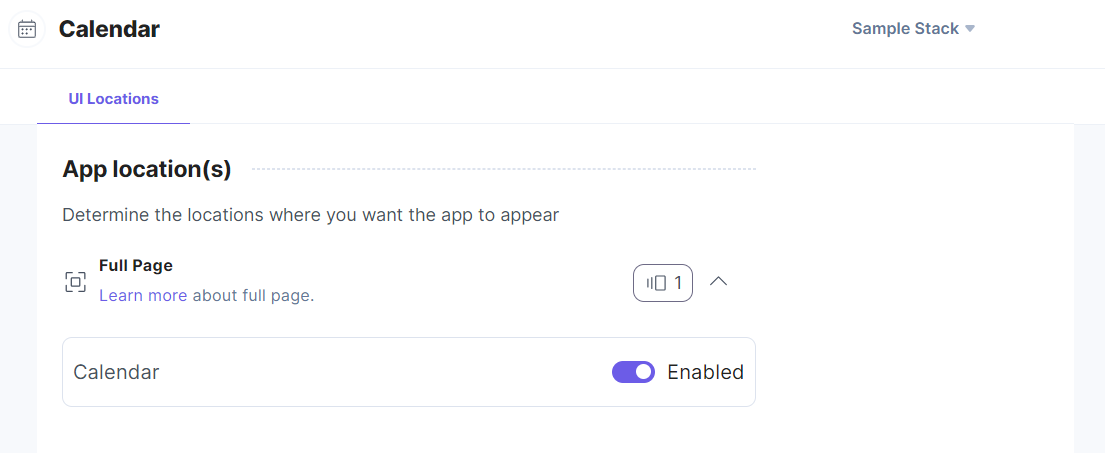
Note: No additional configuration is required to use the Calendar app.
-
Use the Calendar app within your Stack
Note: Calendar is a Full Page Location app. For more information, refer to the Full Page Location documentation.
To use the Calendar application in your stack, follow the steps given below:
- Log in to your Contentstack account.
- Now, go to the stack dashboard. In the left-hand side primary navigation, you will find the Calendar app icon (as shown below).
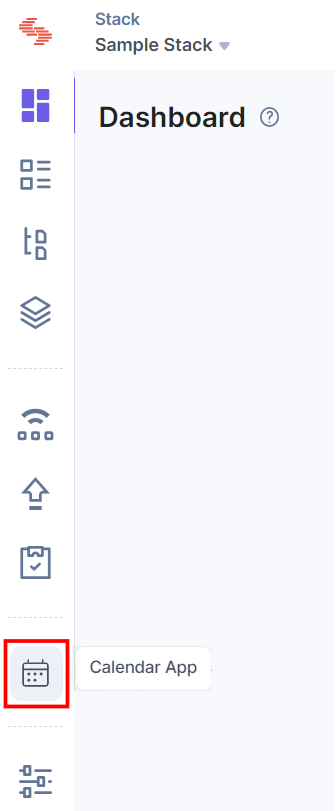
- Click the app icon to view the Calendar app within your CMS.
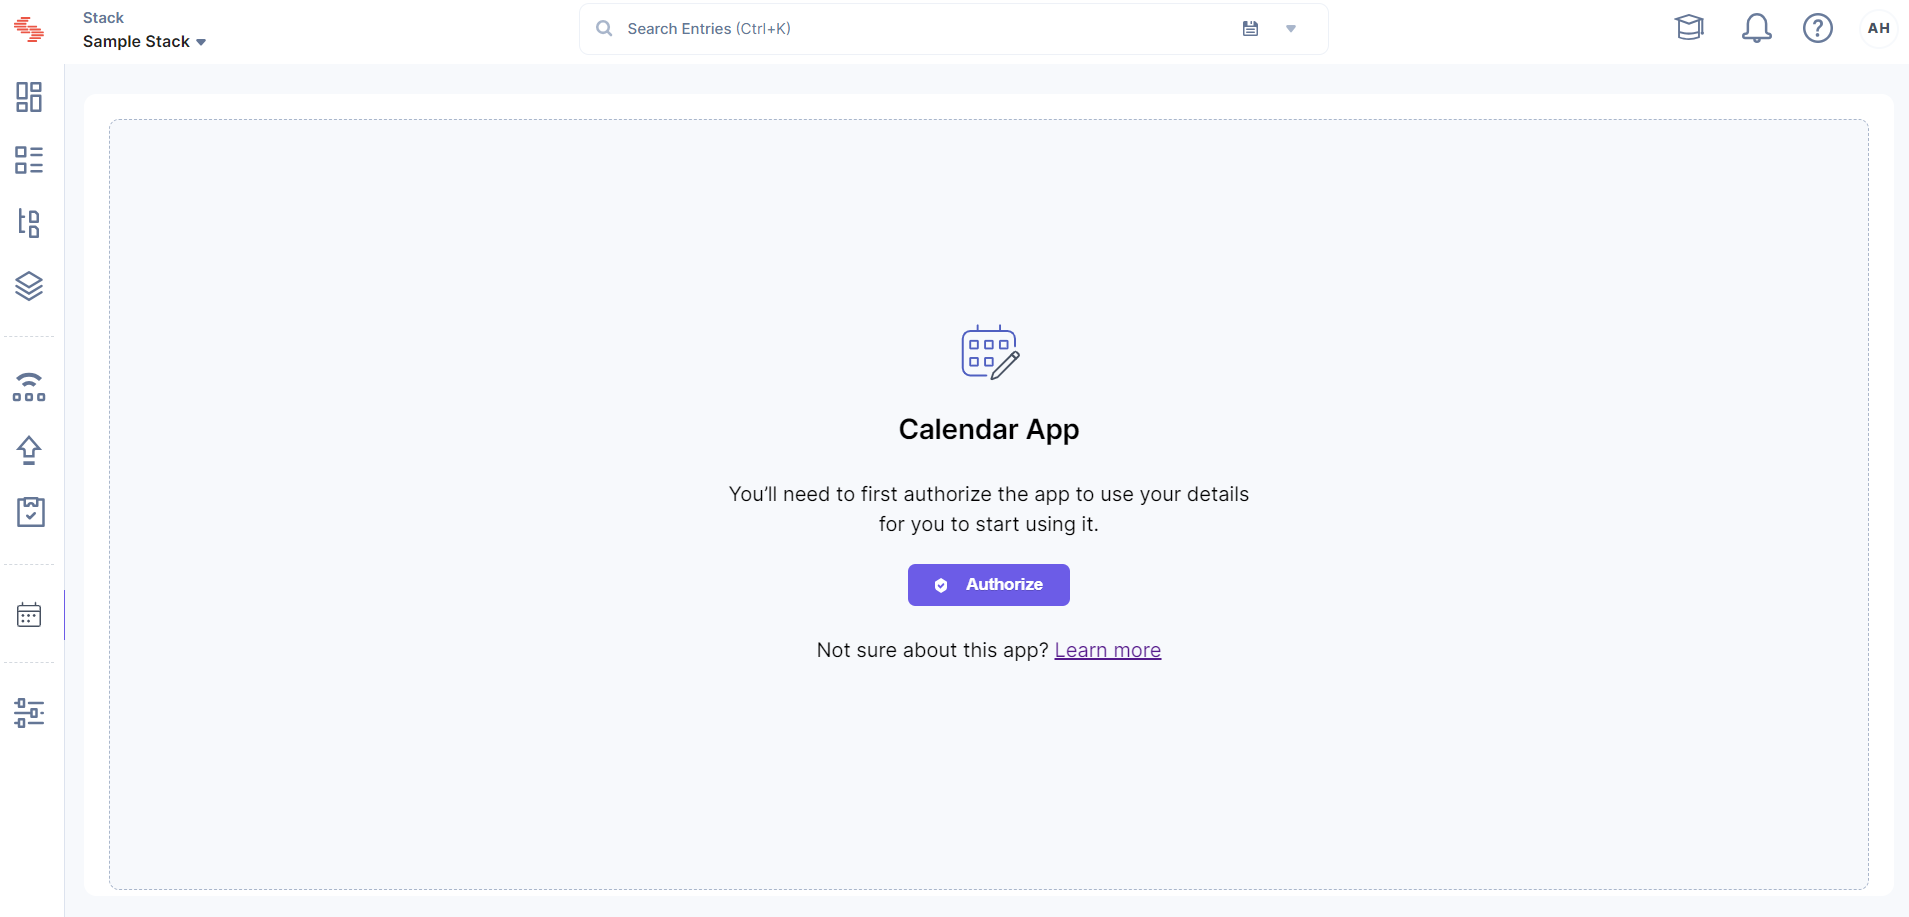
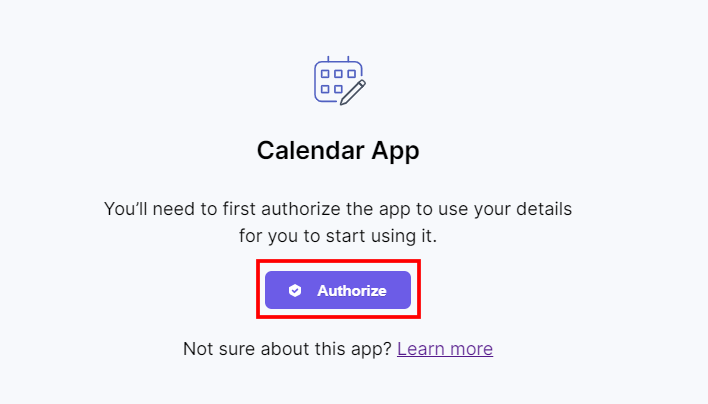
- You first need to authorize the app by providing access to your stack. Click the Authorize button to start using the app.
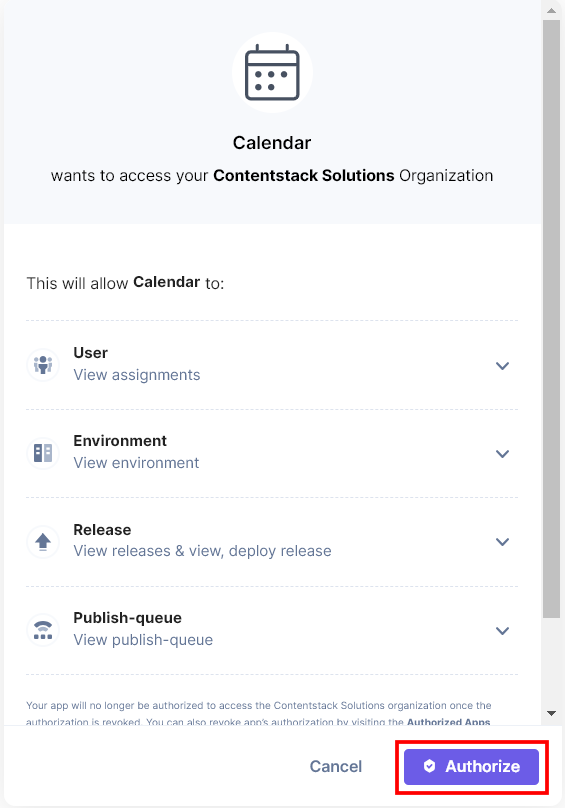
- In the popup window, click the Authorize button again to authenticate the Calendar app.
The Calendar app shows the total number of events scheduled per day. By default, the Calendar app highlights today's date and displays today's scheduled events in the right-hand side panel.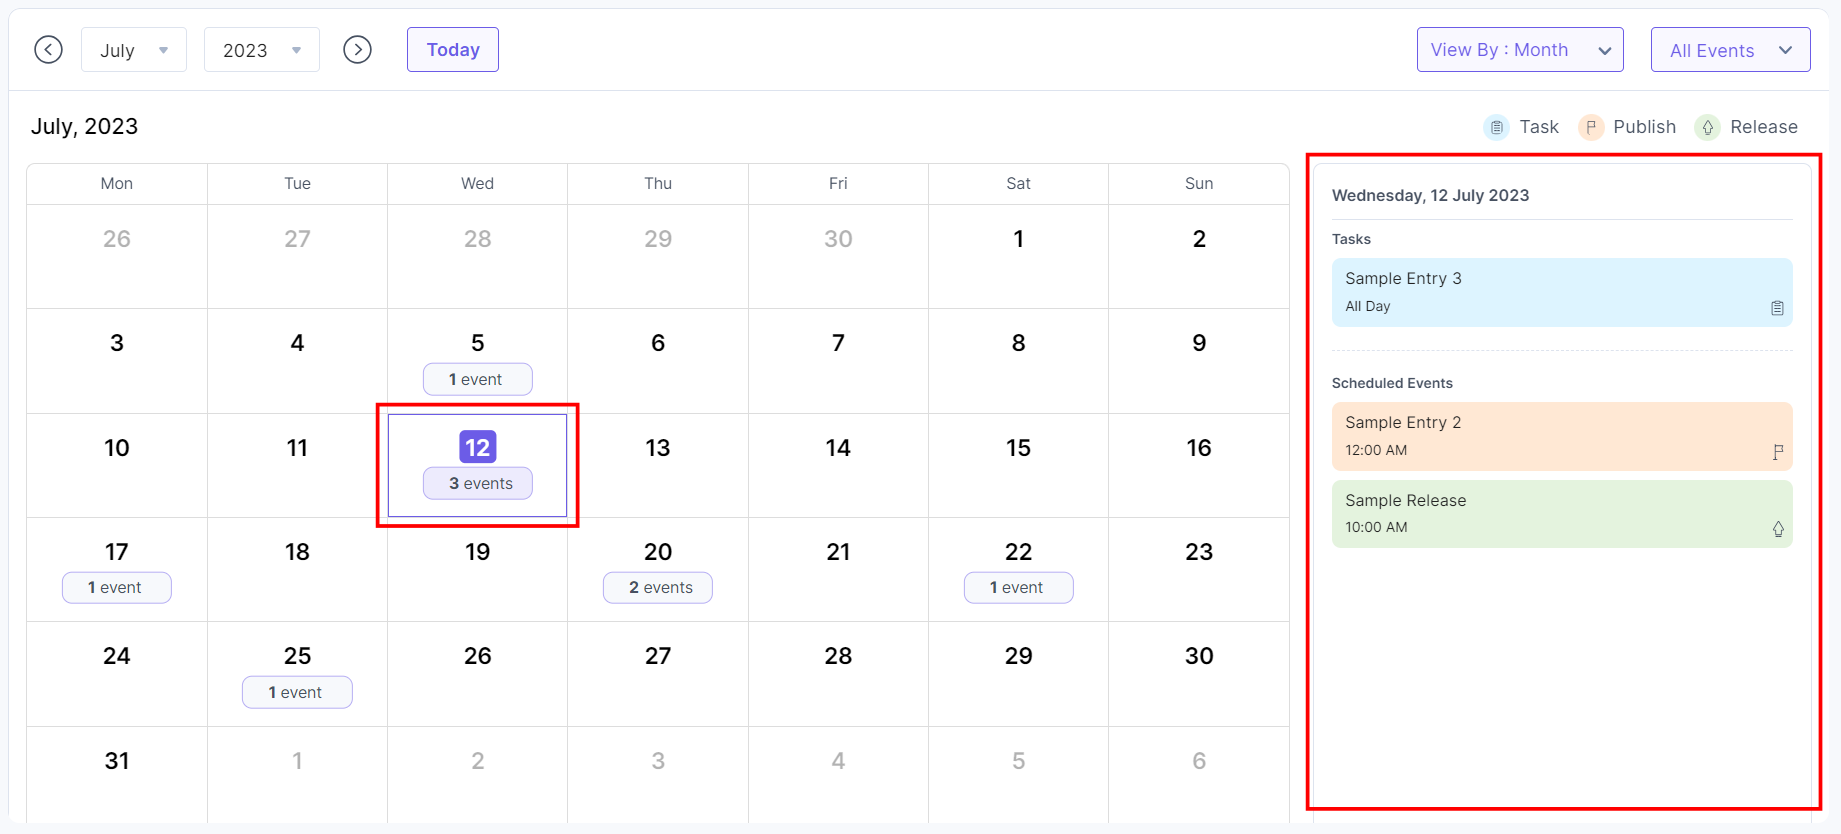
The app uses color codes and icons to differentiate the Task, Publish, and Release events. The workflow task remains always on top, and the scheduled events include all the publishing entries and releases to be deployed. Scheduled events are sequenced based on the time of publishing.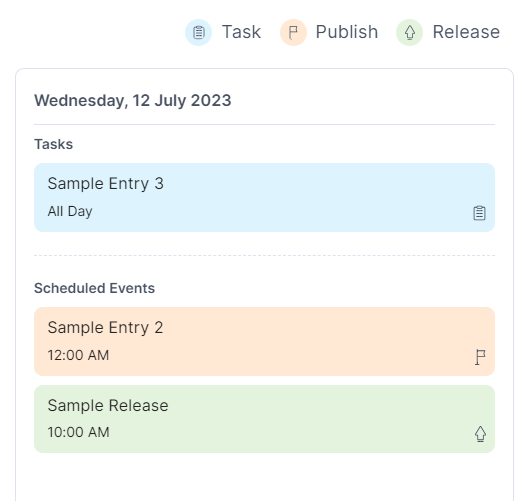
Additional Resource: For more information about Task, Publish, and Release, please refer to the Workflow Tasks, Publish an Entry, and Releases documentation.
Tasks
- Click the Tasks item to view the workflow task details in the Calendar app.
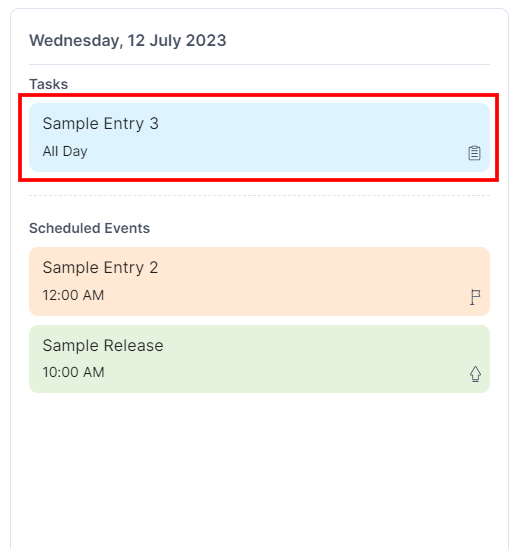
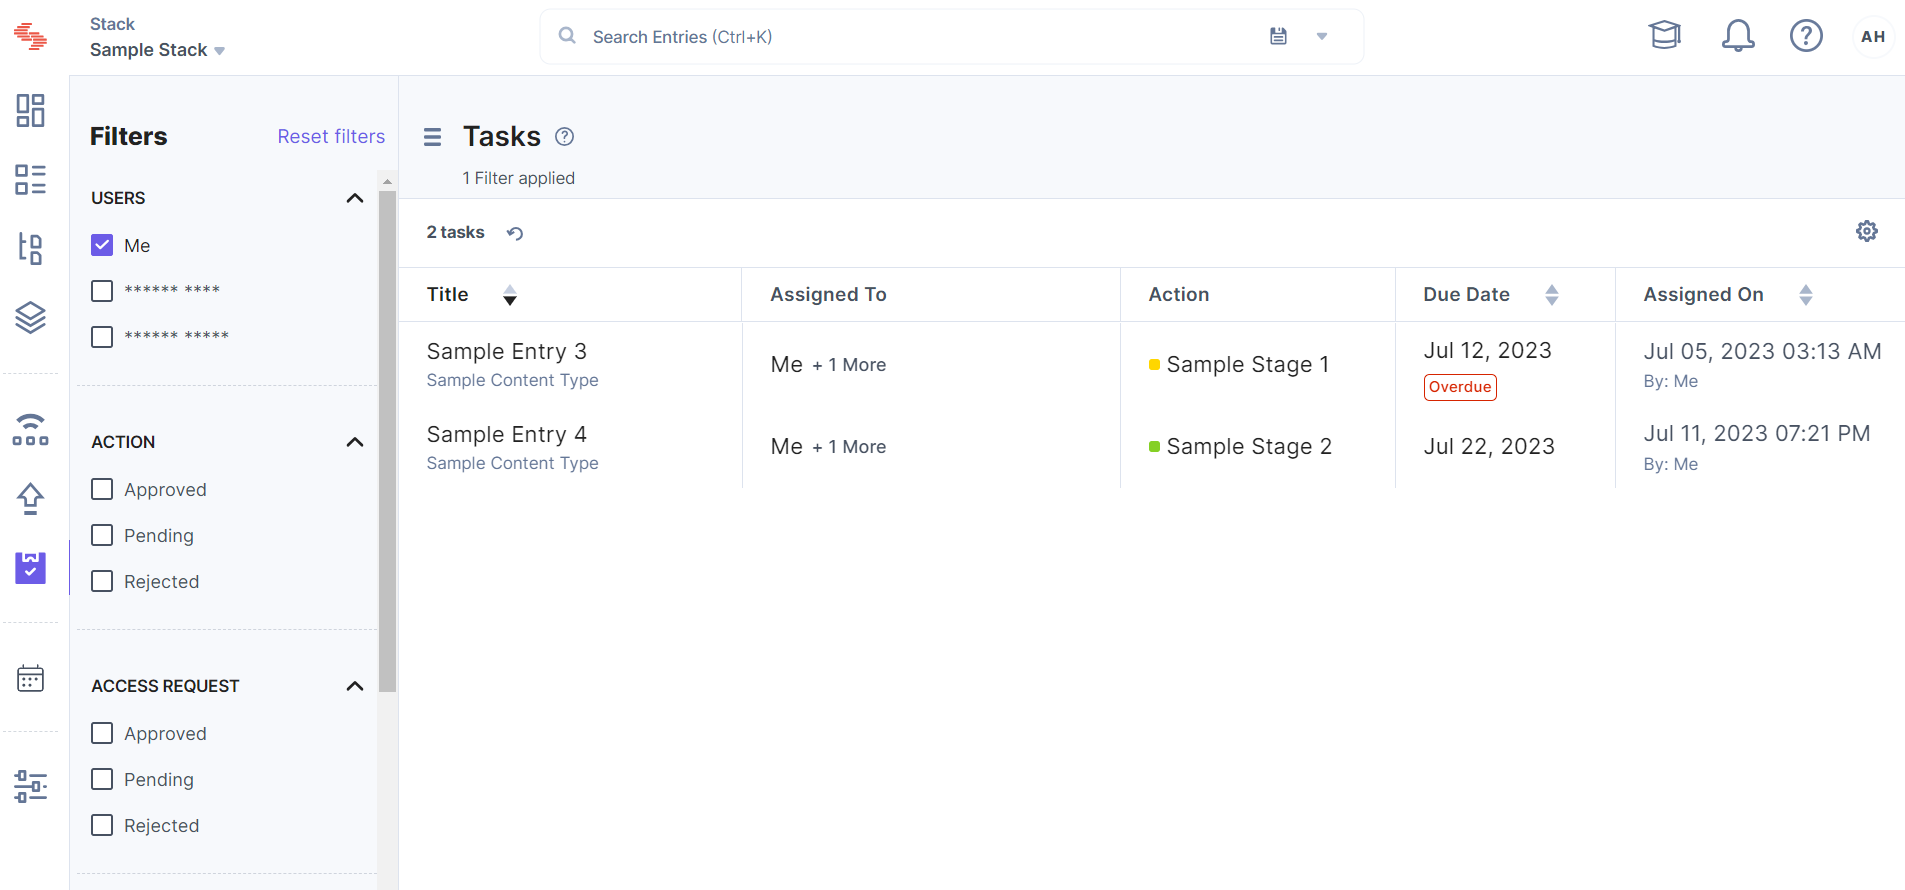
You can see all the details of the task.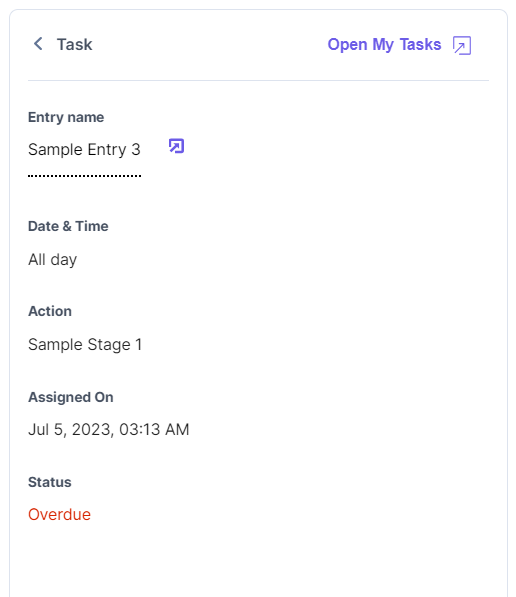
- Click the Entry name to go to the entry editor.
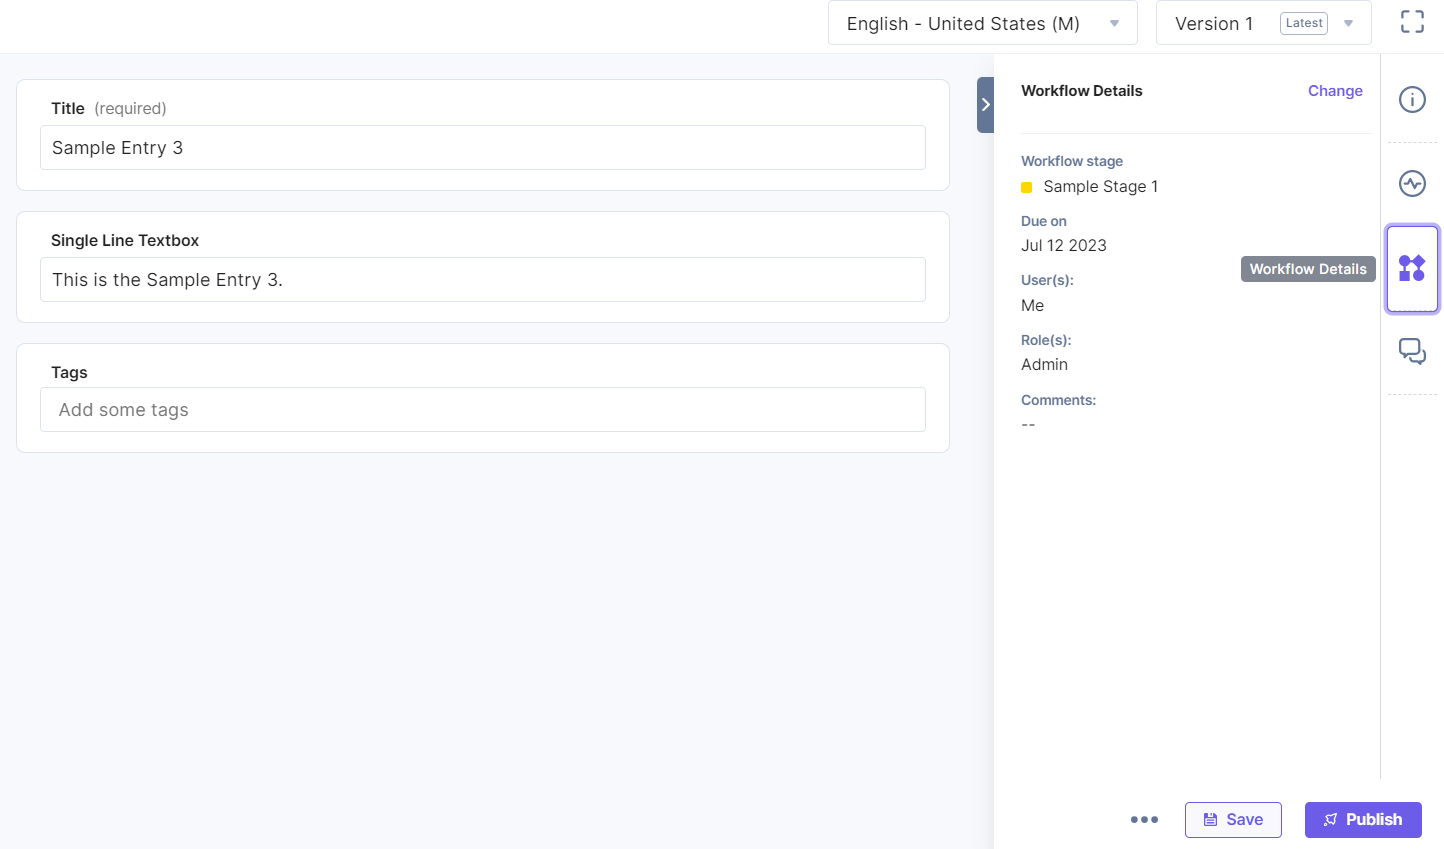
- Click Open My Tasks to view all the workflow tasks.
Publish
- Click the Publish entry to view the entry details in the Calendar app.
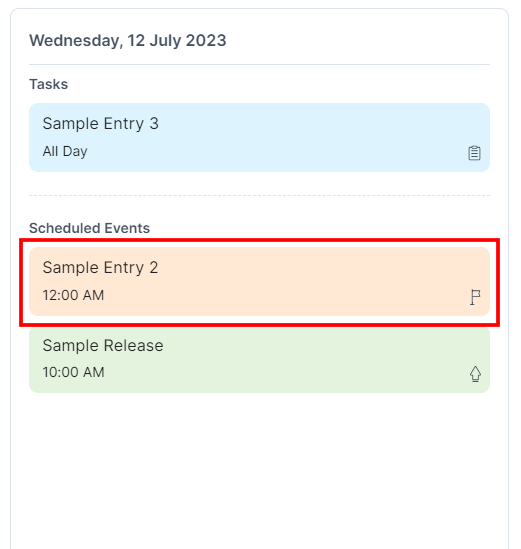
You can view all the details of the entry.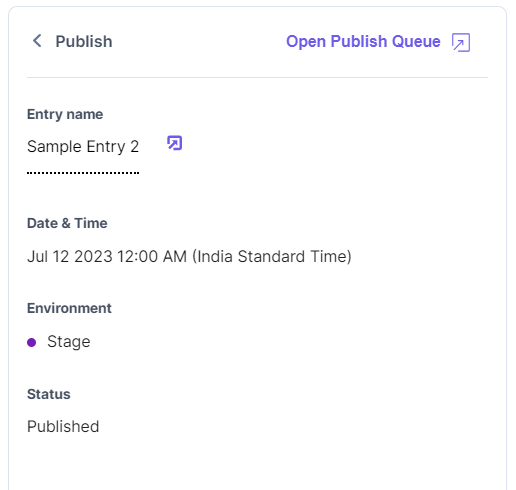
- Click the Entry name to go to the entry editor.
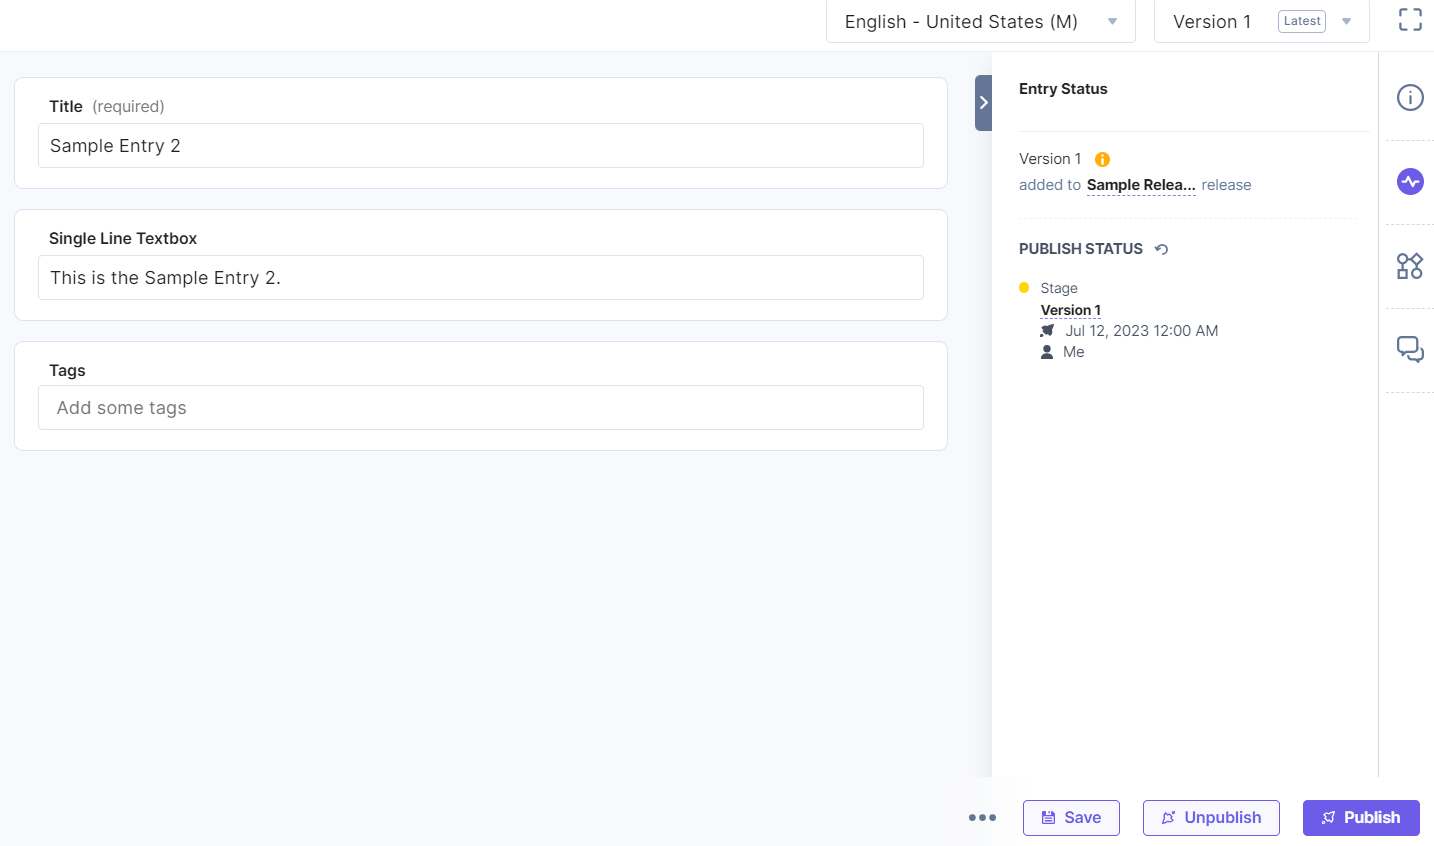
- Click Open Publish Queue to view the status of all the publishing events.
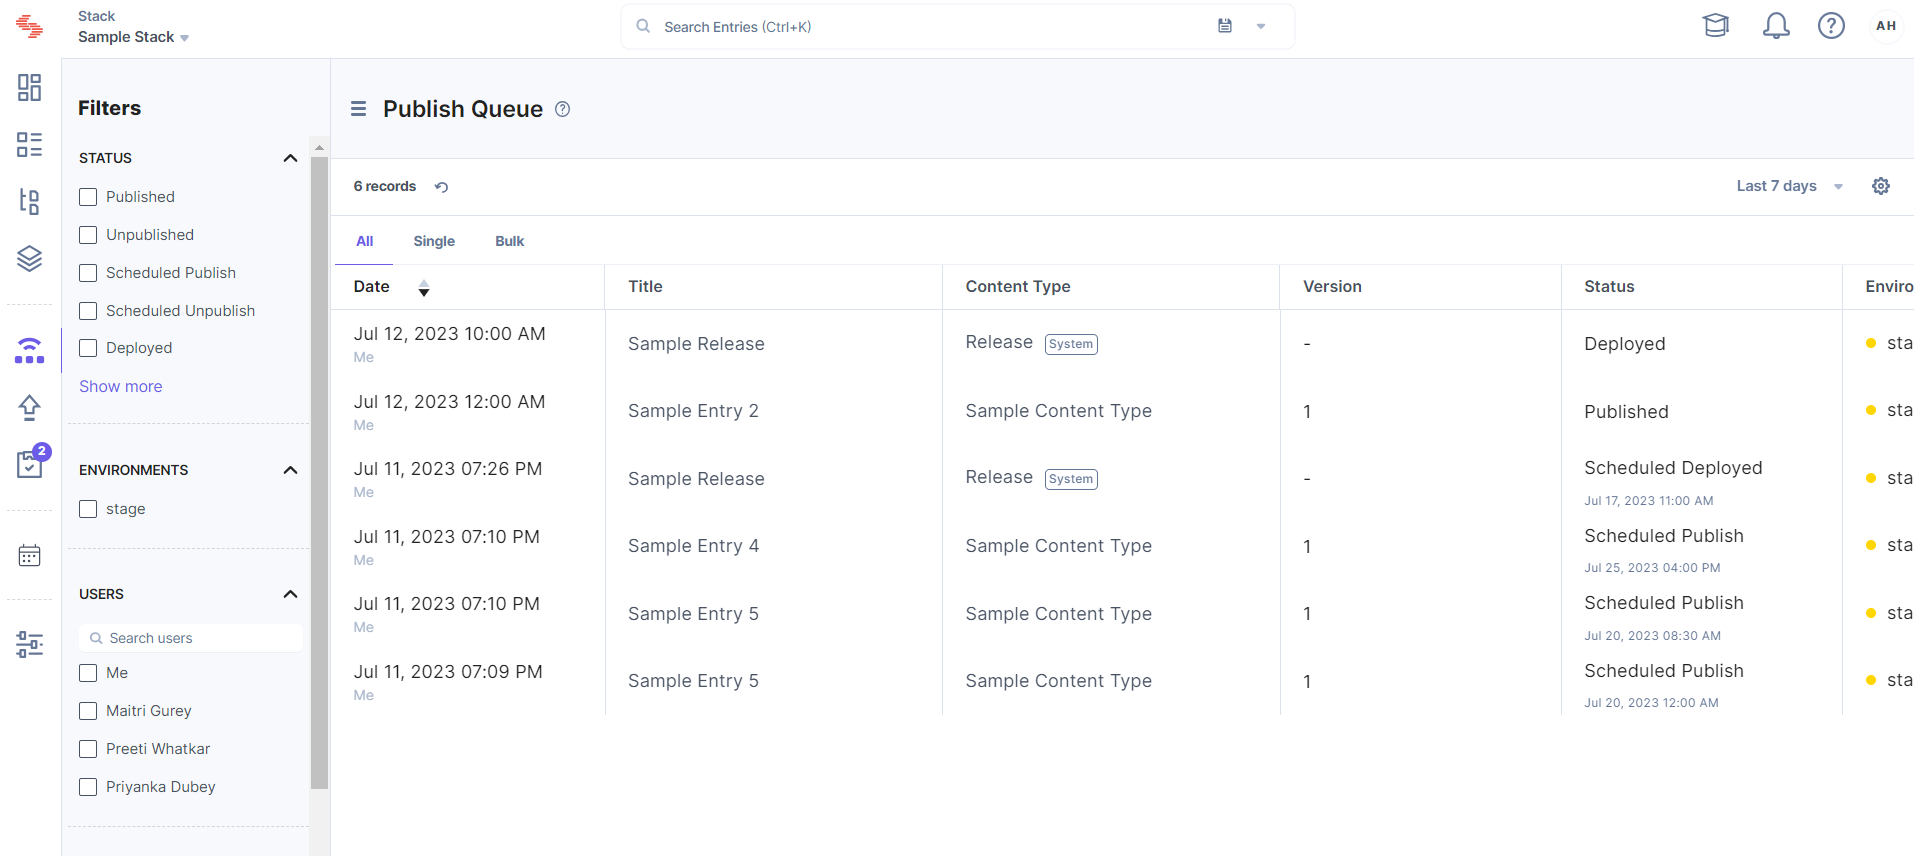
Release
- Click the Release item to view the release details in the Calendar app.
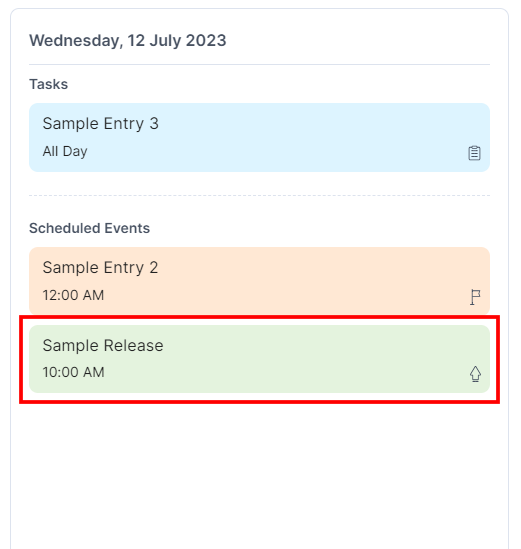
You can view all the details of the release.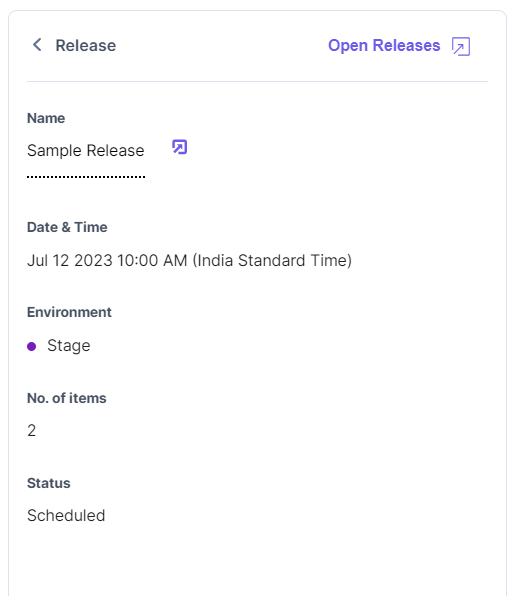
- Click the Name to view the release details.
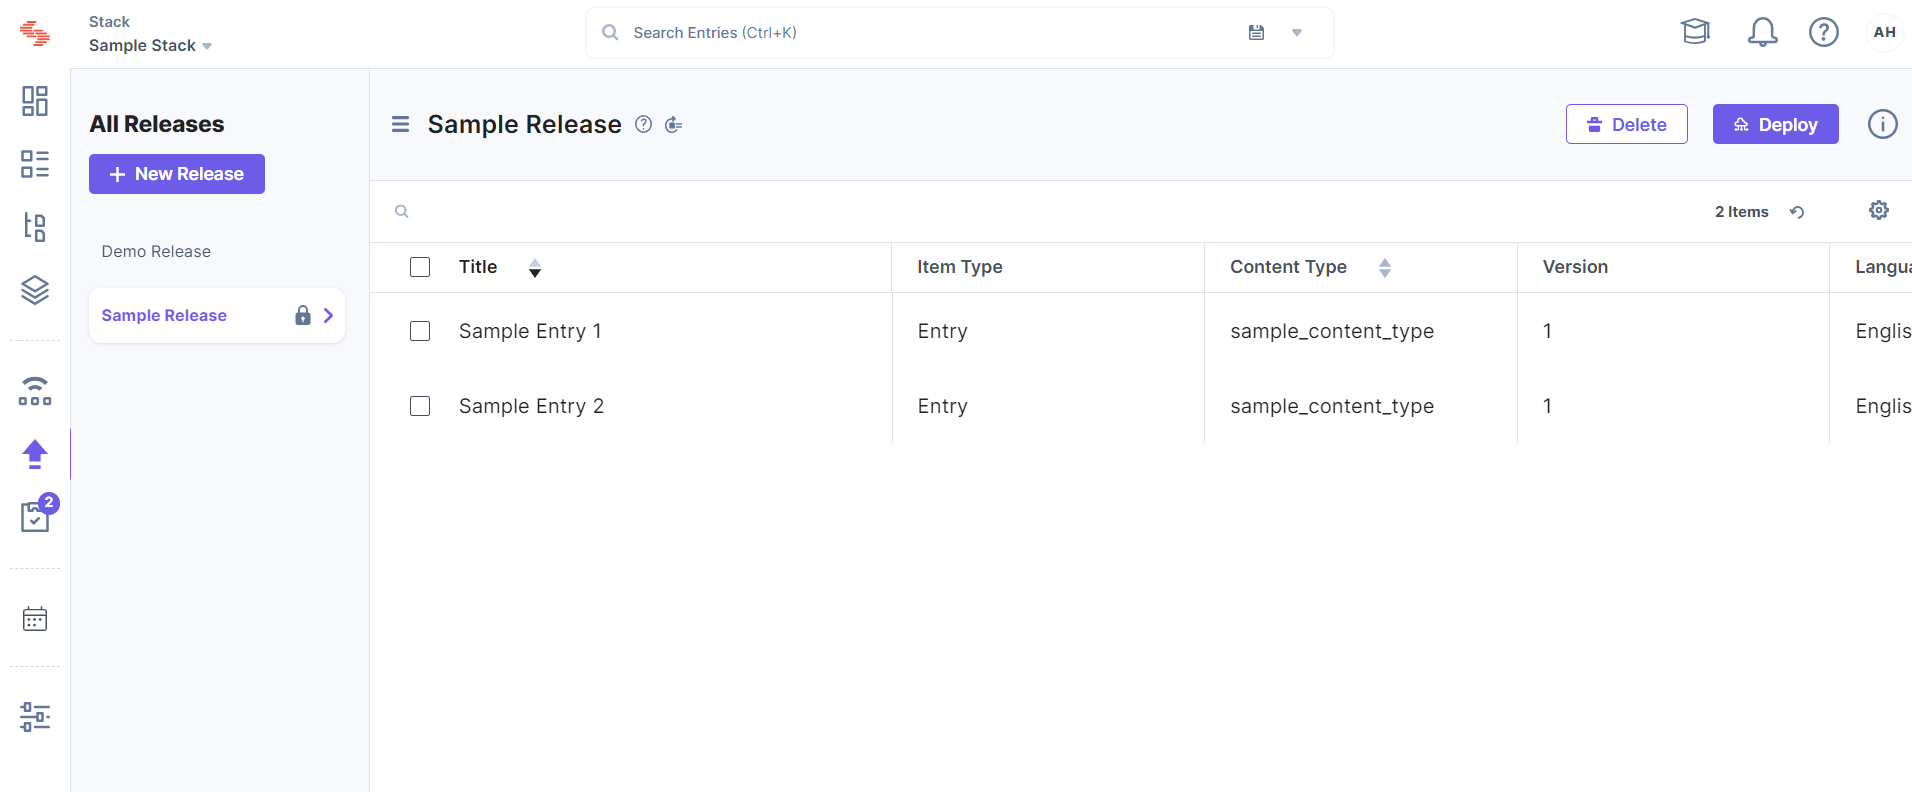
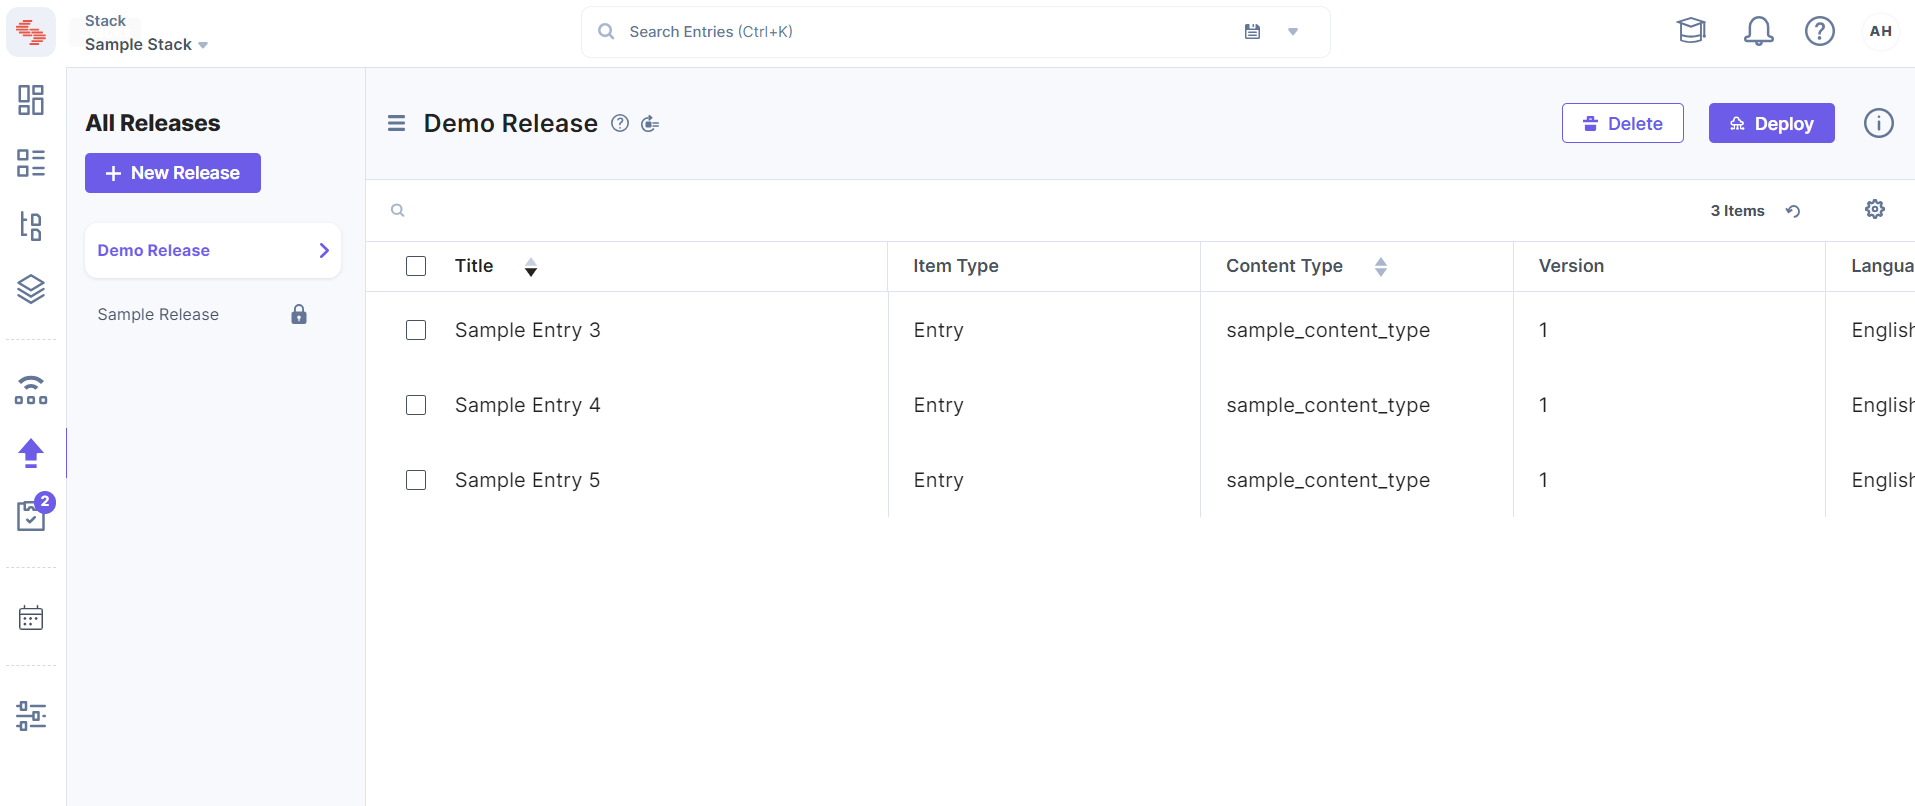
- Click Open Releases to view the list of all the releases added to the CMS.
Filters
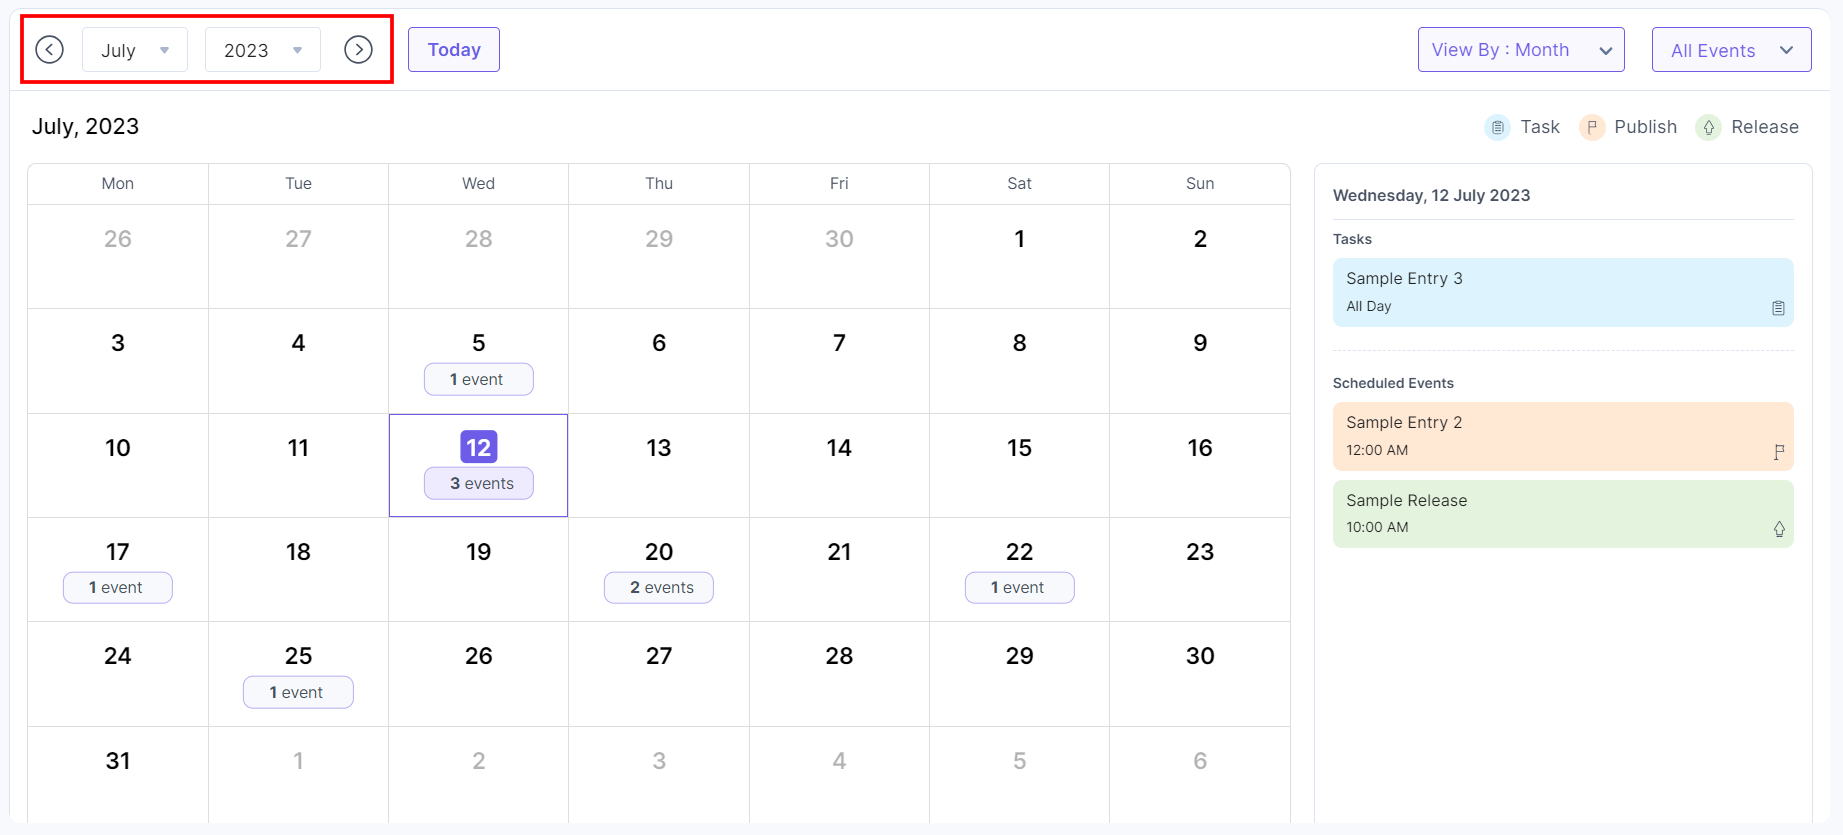
- You can select any month or year by clicking the dropdowns or using the Previous month and Next month icons.
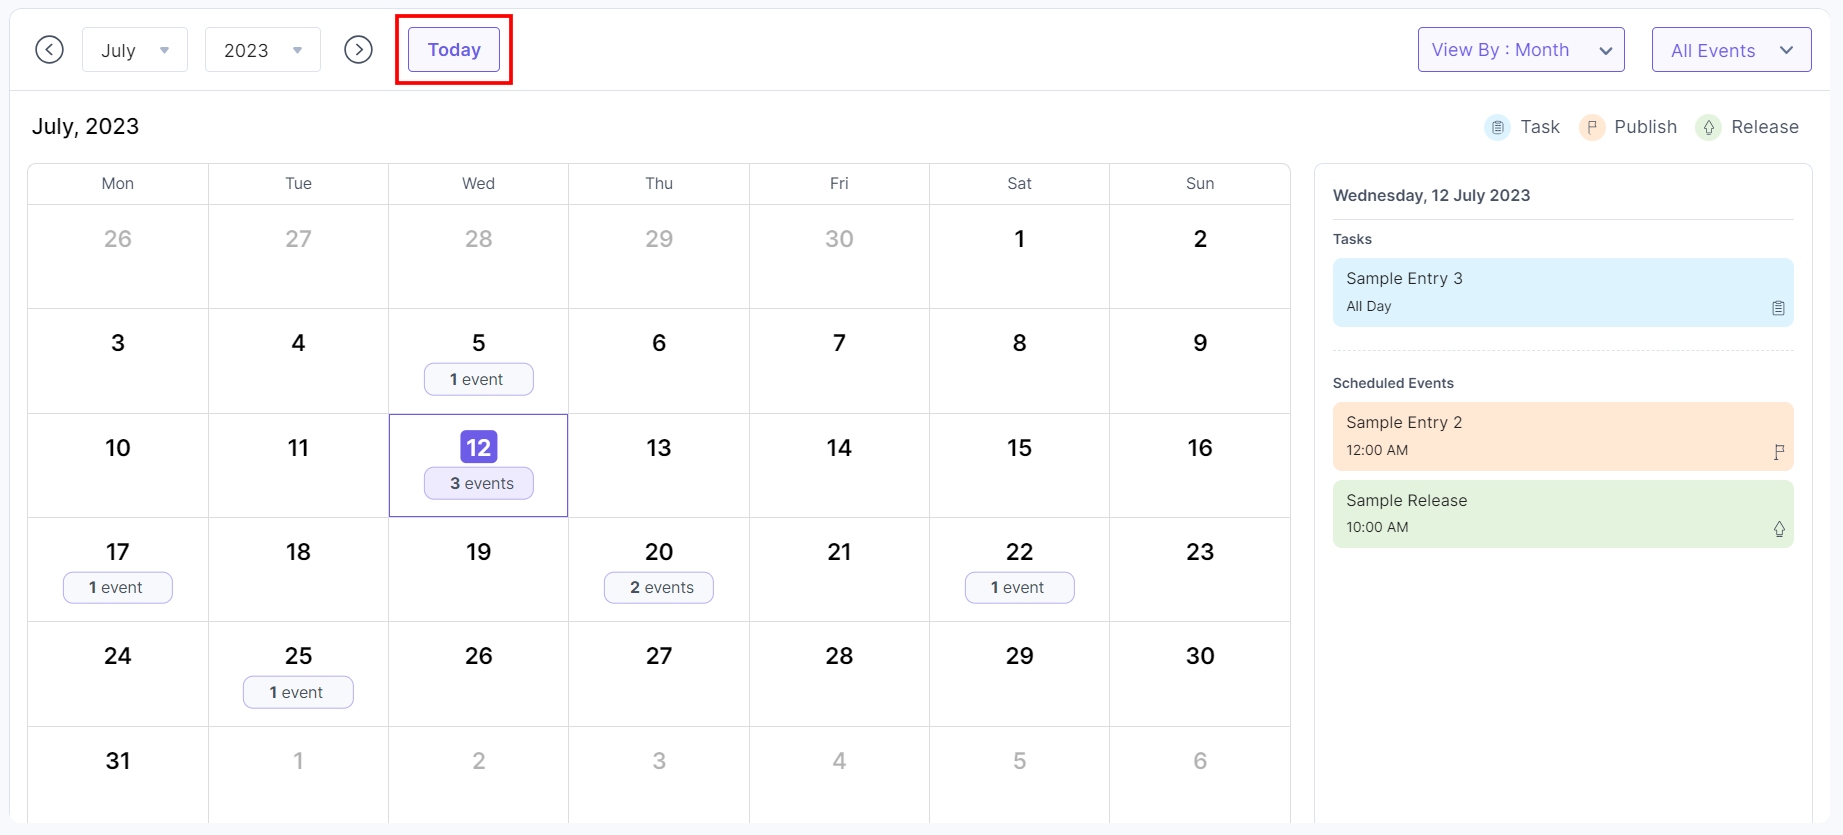
- Click the Today button to view the events scheduled for the current date.
- Using the View By filter, you can preview the scheduled events in Month, Timeline, or Week view.
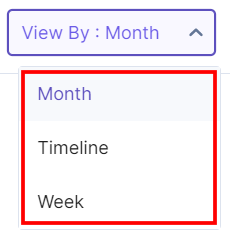
By default, the Calendar app displays the Month view.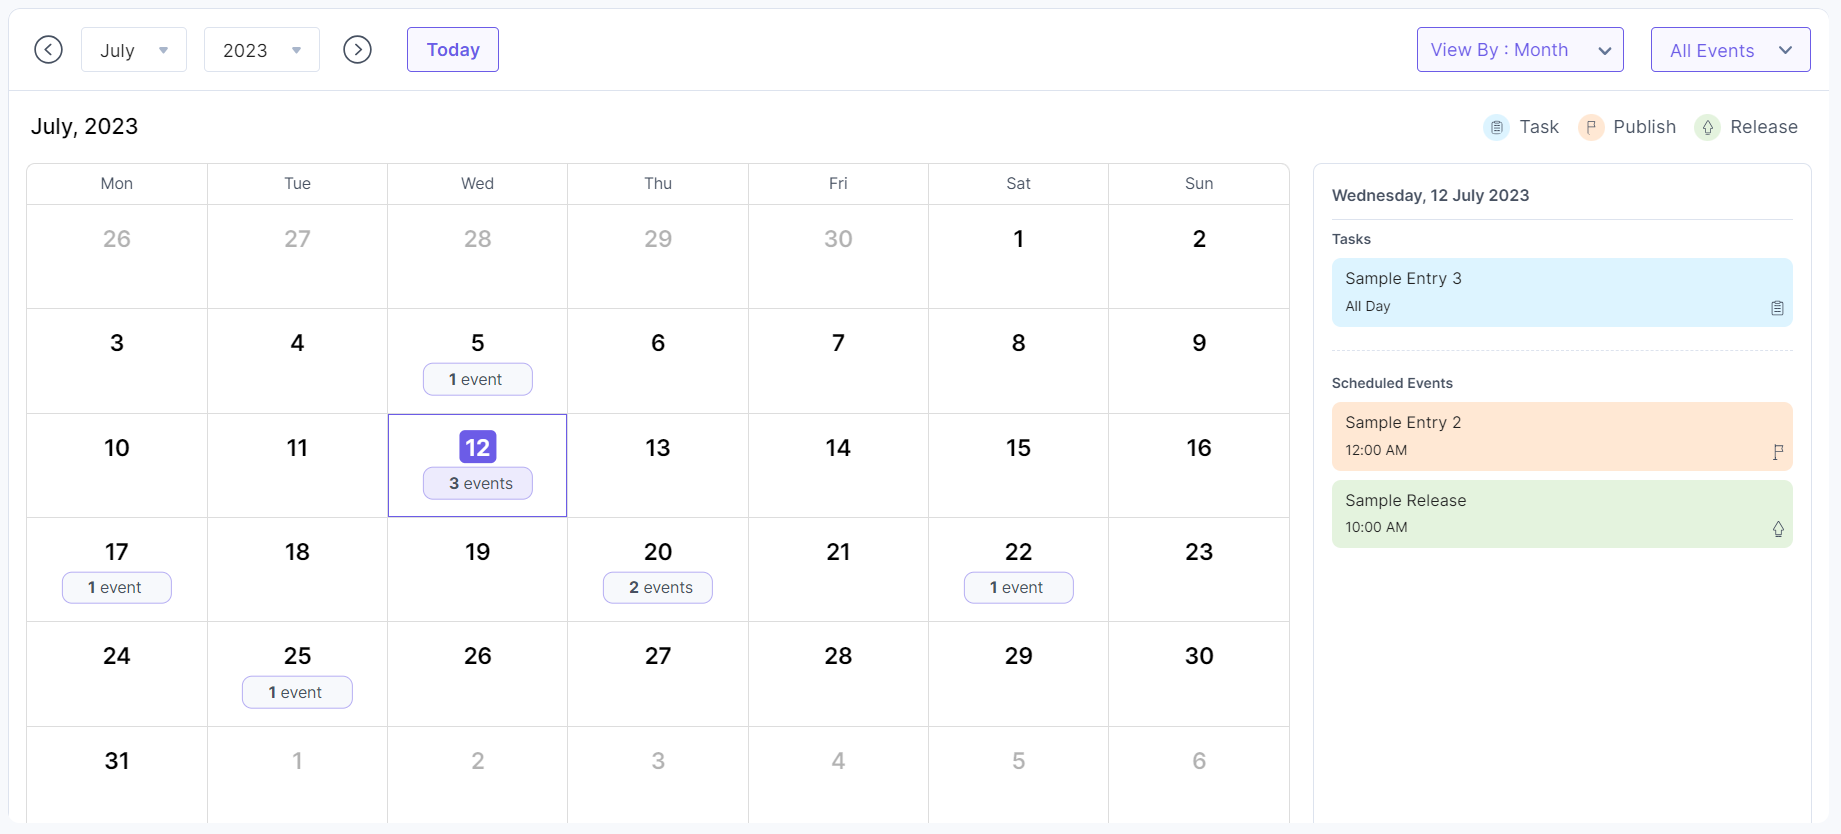
Select the Timeline option from the View By dropdown to view the workflow tasks and scheduled events in a timeline view.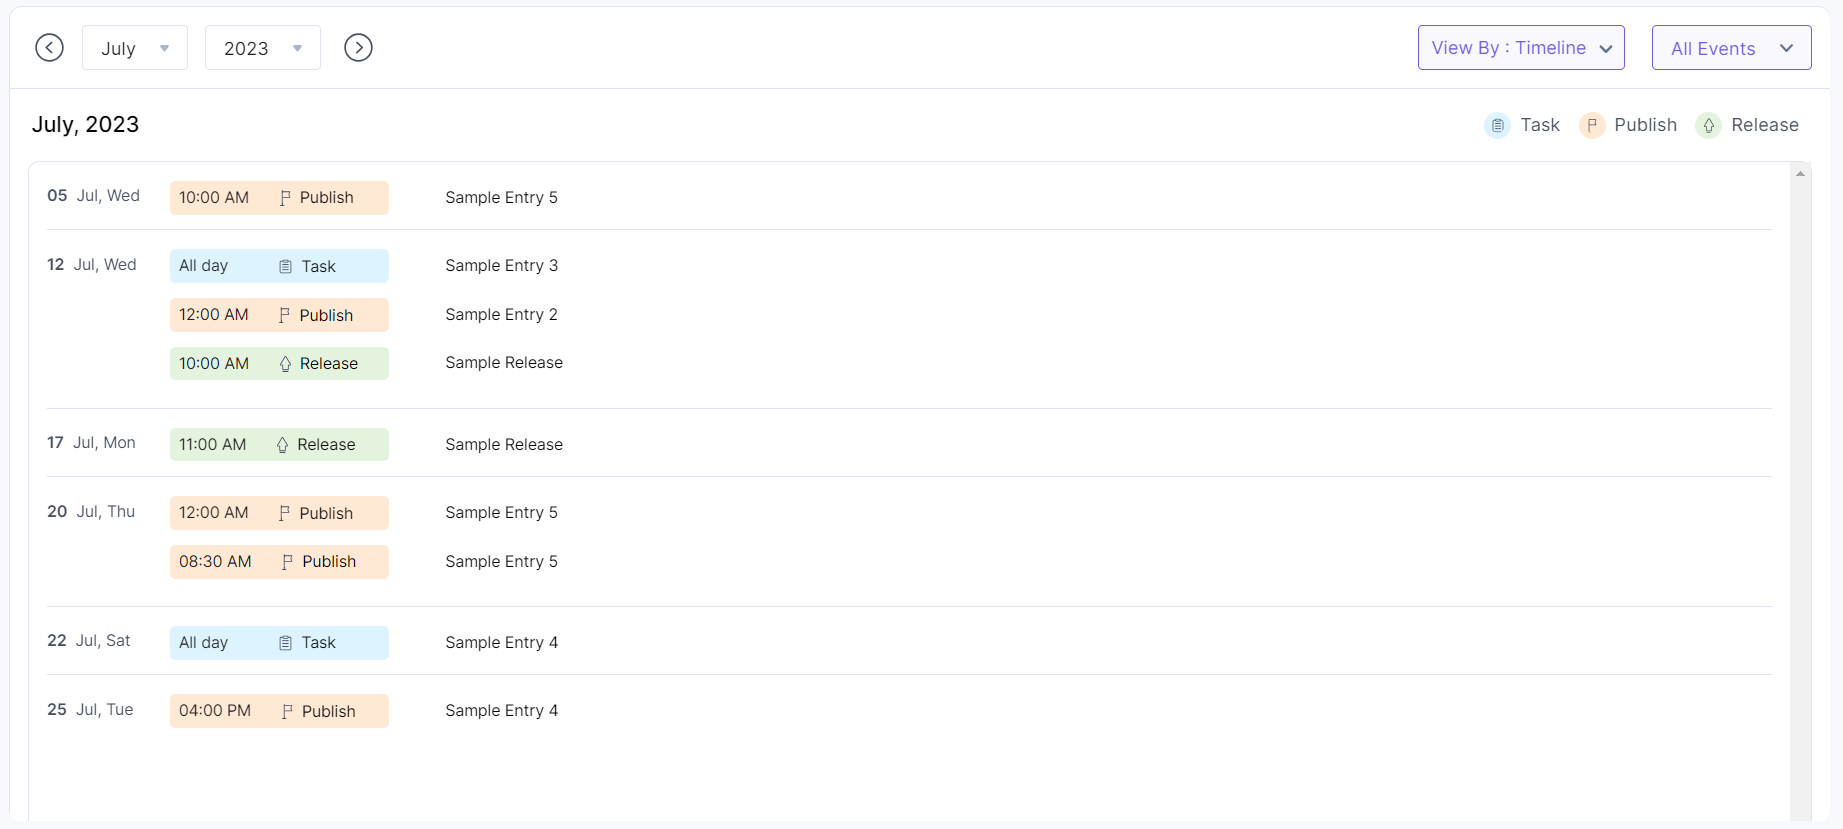
Select the Week option from the View By dropdown to view the workflow tasks and scheduled events in a week view.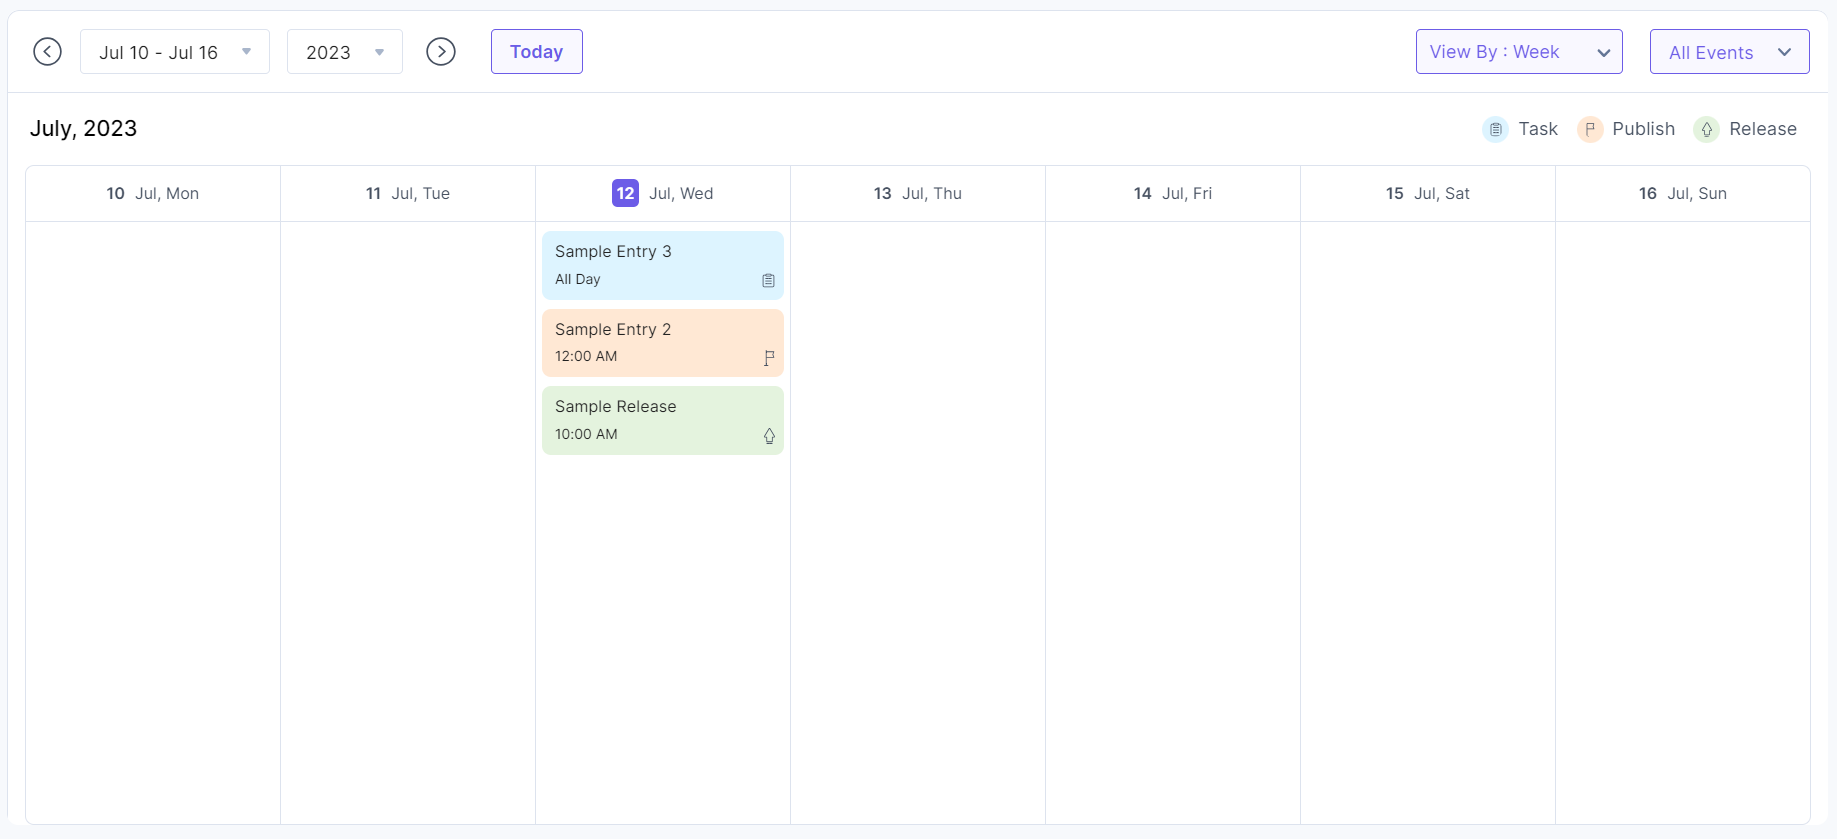
- Using the All Events filter, you can select the Task, Publish, and Release options. By default, all three options are selected.
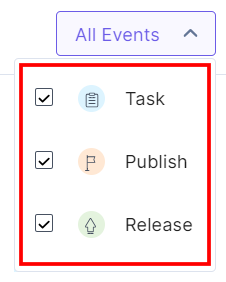
Note: You can view the Task, Publish, and Release event details by clicking them.


.svg?format=pjpg&auto=webp)
.svg?format=pjpg&auto=webp)
.png?format=pjpg&auto=webp)


.png?format=pjpg&auto=webp)