Auto-populate Environment Variables from a Linked Stack
Importing a Starter app or any application with the Contentstack SDK requires adding key-value pairs of environment variables like CONTENTSTACK_API_KEY, CONTENTSTACK_DELIVERY_TOKEN, etc. Adding these environment variables manually is a tedious task.
Launch allows you to auto-populate the Environment Variables from your stack, by linking the stack to your project. This allows you to easily use the CMS environment variables while deploying your Launch project.
This step-by-step guide lets you link a stack to your project to auto-populate Environment Variables.
Note: This feature can also be used when creating or configuring an environment.
Prerequisites
- Contentstack account
- Access to Launch for your organization
Steps for execution
Follow the steps to link a stack to your project:
- Click Launch from the left navigation panel.
- Click the + New Project button.
- Select Import from a Git Repository or Upload a file as usual from the Create New Project modal.
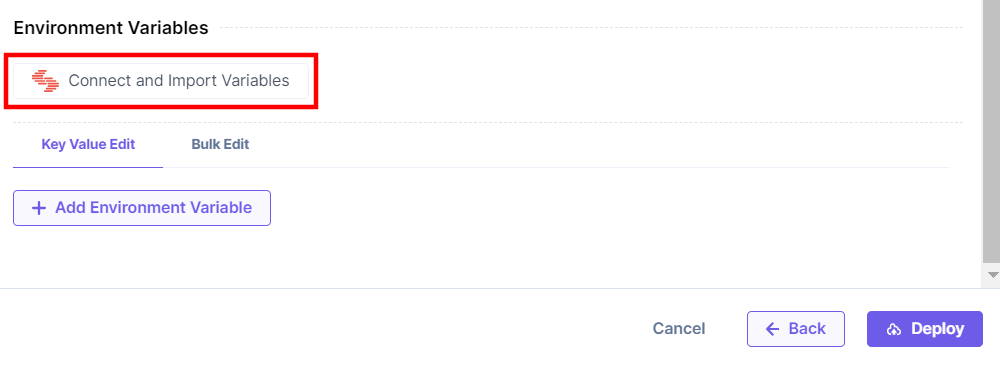
- In the Environment Variables section, click the Connect and Import Variables button.
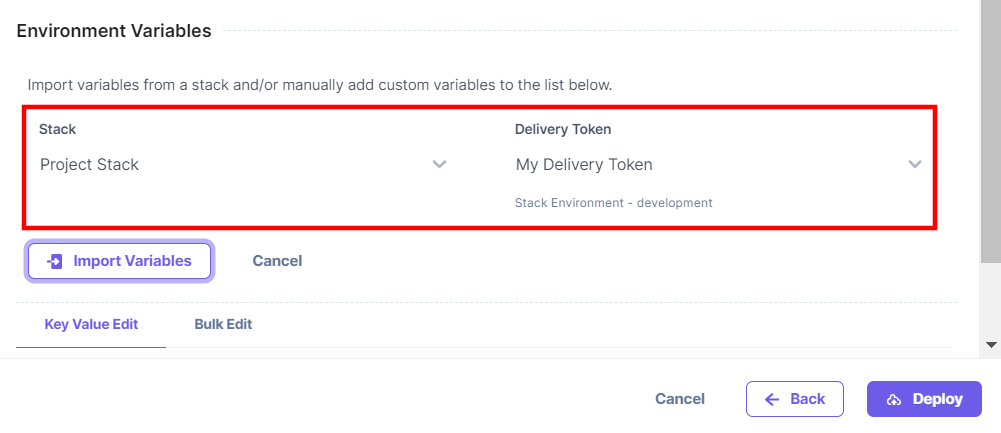
- Select the Stack which has the Starter app installed and then select the Delivery Token for your stack.
Note: On selecting a delivery token, Launch automatically selects a Stack environment available for the selected token.
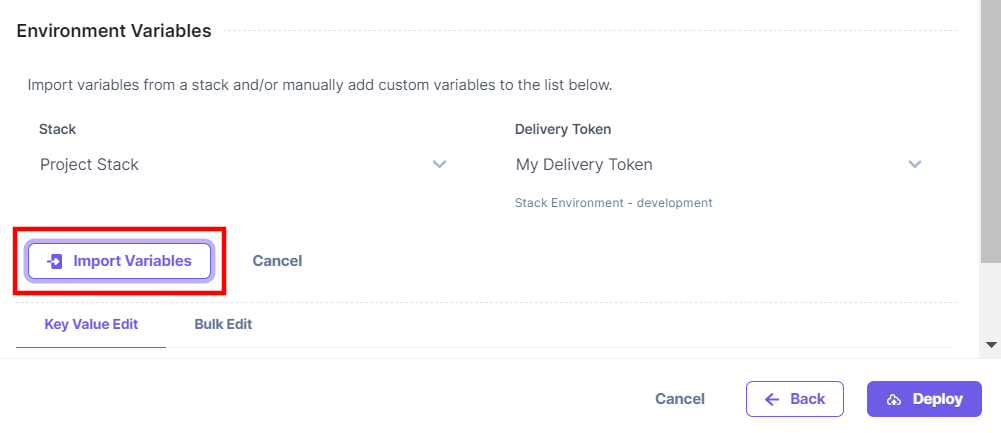
- Click the Import Variables button.
You can see that the Environment Variables were auto-populated from your selected stack.
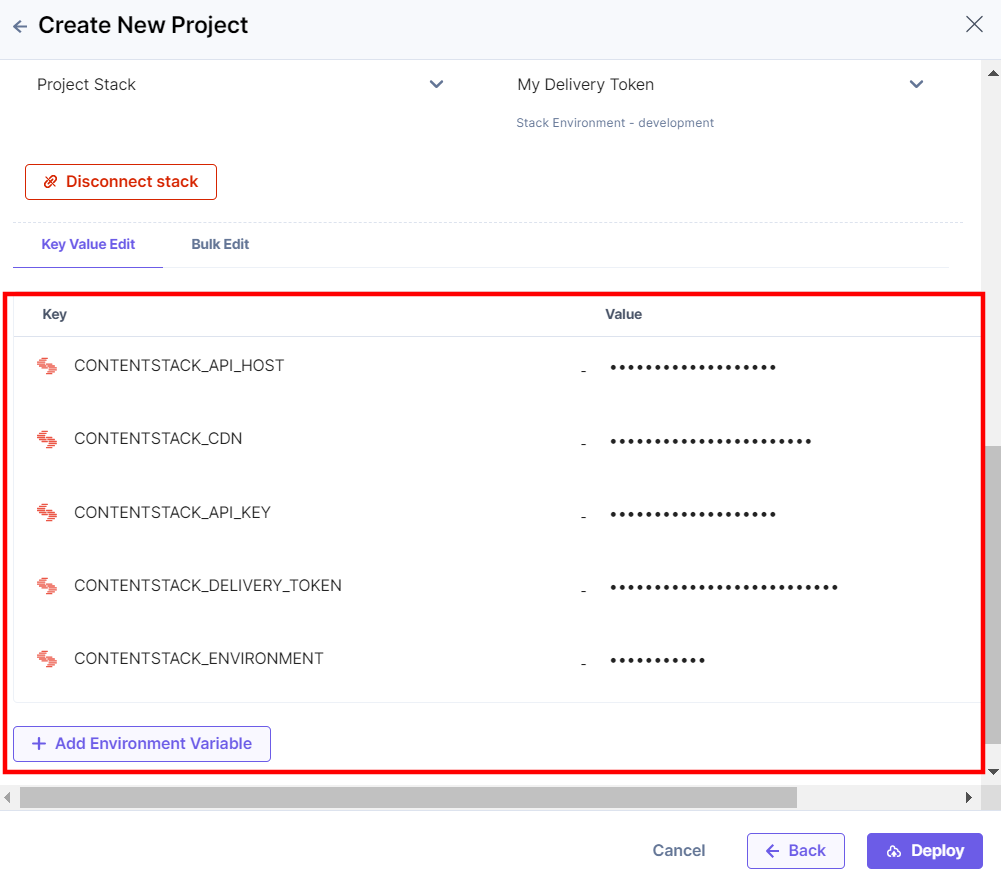
- Click the Deploy button.
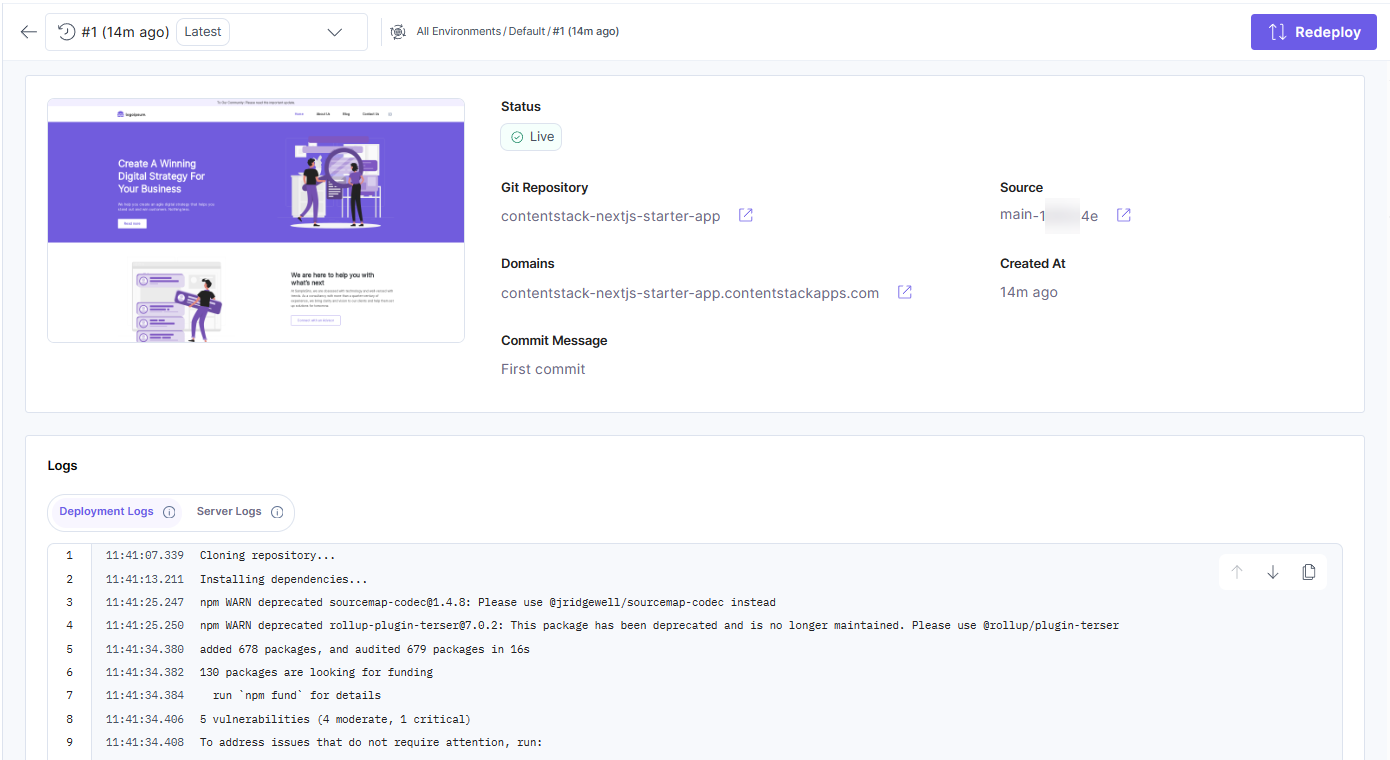
Your project is now deployed.
View a linked stack
Follow the step to view the linked stack after project creation:
- Click the Settings icon in the left panel and then click Stack Integration to view the linked stack.
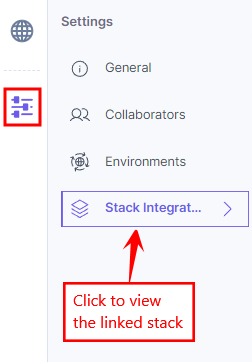
You can see the linked stack.
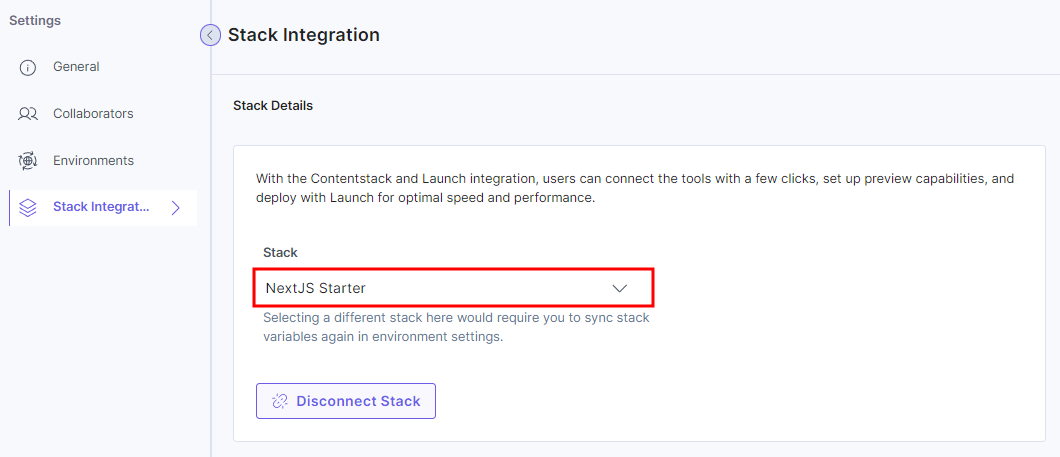
Update a linked stack
Follow the steps below to update a linked stack:
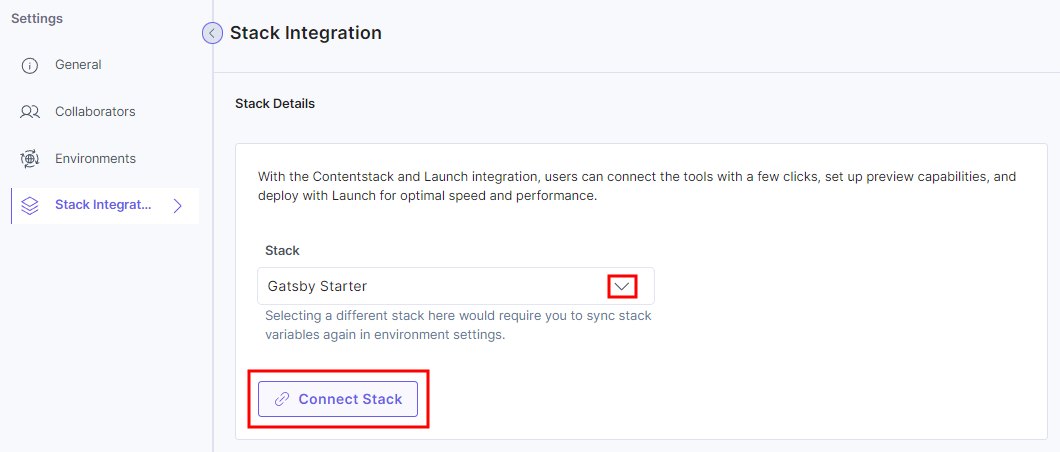
- Click the Settings icon in the left panel and then click Stack Integration.
- Choose a stack from the dropdown and then click Connect Stack button.
- Once you choose a different stack, you must sync the stack variables. To do this, follow the steps below:
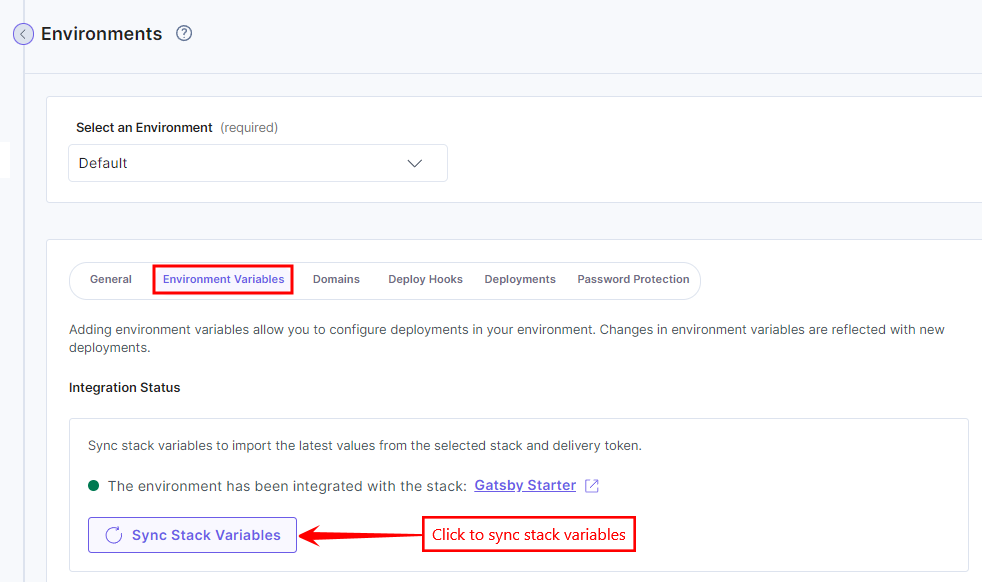
- Click Environments under Settings.
- Select your environment (Default in this example).
- Click Environment Variables.
- Click Sync Stack Variables.
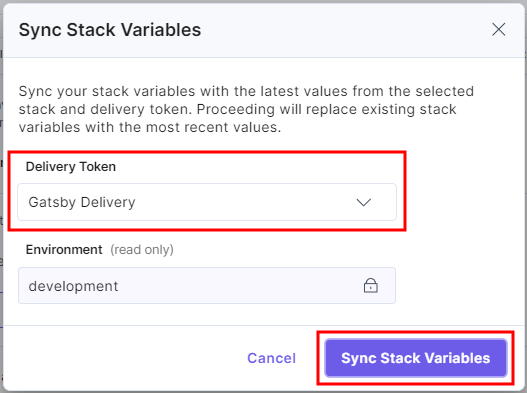
- A popup displays asking for your confirmation. Select your delivery token and then click the Sync Stack Variables button.
- Click the Save button.
This will sync your new stack’s Environment Variables to your project.


.svg?format=pjpg&auto=webp)
.svg?format=pjpg&auto=webp)
.png?format=pjpg&auto=webp)


.png?format=pjpg&auto=webp)