Get Started With Building a Website
This guide will lead you through the process of integrating Contentstack, a headless Content Management System (CMS), with a React application.
It is designed for users with no prior experience in Contentstack or React integration, breaking down the process into clear, actionable steps with explanations and code examples along the way.
Prerequisites
- Contentstack Account (with Admin access to your Org)
- Node.js version 18 or later
- Git
- GitHub account (Git configured in Local)
- VS code (preferred) or any code editor
Steps To Be Followed
You need to perform the following steps to get started:
- Set up Contentstack
- Create a New Stack
- Import Content Types
- Create Environment and Delivery Token
- Create Entries (For “Header,” “Footer,” and the “Page” content types)
- Set Up The Starter App
- Deploy and host the application using Launch
Your final web page will look like below:
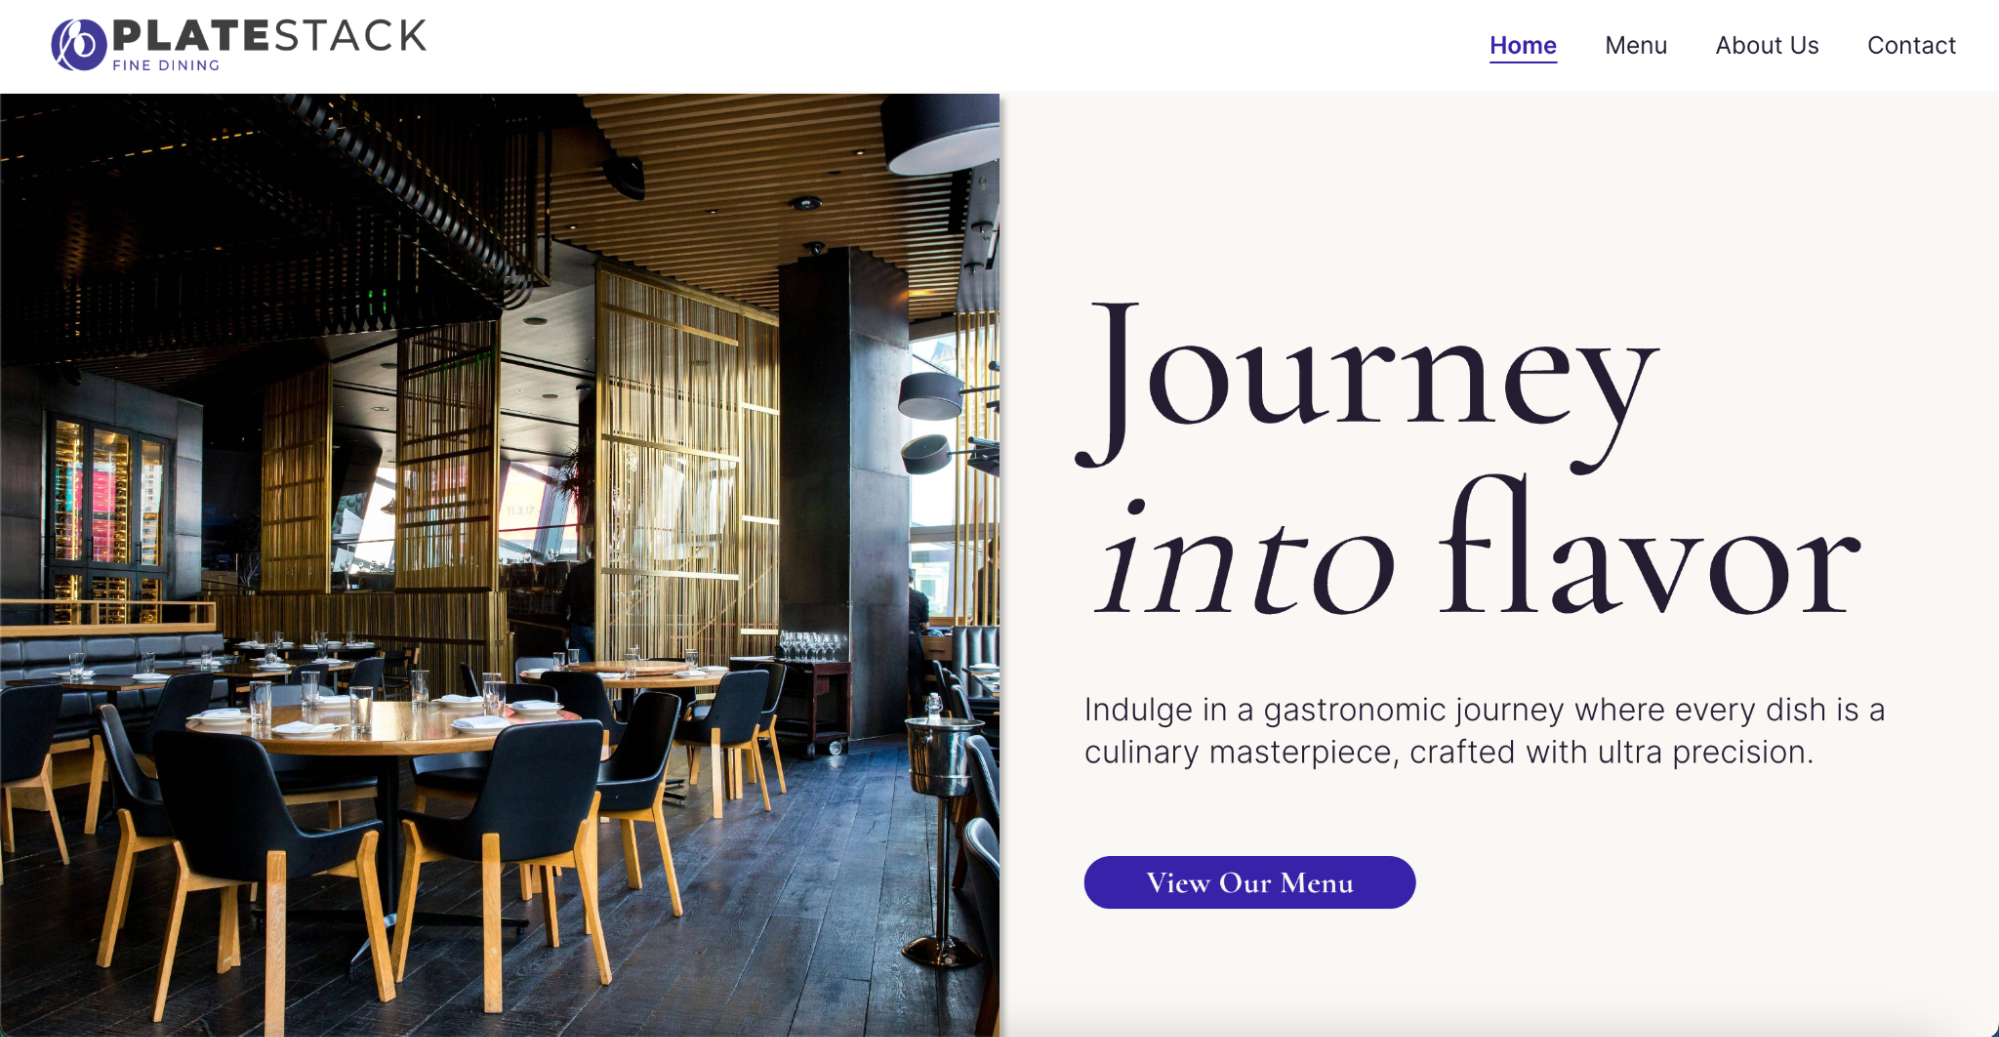
Let’s get started!
Set Up Contentstack
This section will guide you through the process of creating a new stack in Contentstack, which will function as the central repository for your website's content.
Create a New Stack
Note: If you are using a trial account with a sample stack, you can select that stack and move on to the next step.
Perform the steps given below to start creating your stack:
- Log in to your Contentstack account and navigate to the organization in which you want to create a stack.
- Click on either the + New Stack button located at the top-right corner or in the middle of the page, and select Create New.
- In the Create New Stack dialog box that appears, enter the following details:
- Name (mandatory): Enter a name for the stack
- Description (optional): Enter a relevant description for the stack
- Set Master Language (mandatory): Select a master language that you want to set as the primary language of the stack
- Click on Create.
Congratulations! You've successfully created a new stack in Contentstack. You will be redirected to the Stack Dashboard.
The next step will be exploring Contentstack's content modeling features to define the structure of your website's content.
Import Content Types
In this section, we will import four content types - “Dishes,” “Header,” “Footer,” and “Page.”
- Download and extract this .zip file that contains folders with the required Assets (images) and Content Types (JSON files) for this application.
- Go to your stack where you want to create a content type, and click on the “Content Models” icon on the left navigation panel (or press “C”).
- Click on the Import Content Type button.
- In the Import Content Type modal, click on the Choose a file button and select the dishes.json file under the Dishes folder from the downloaded file.
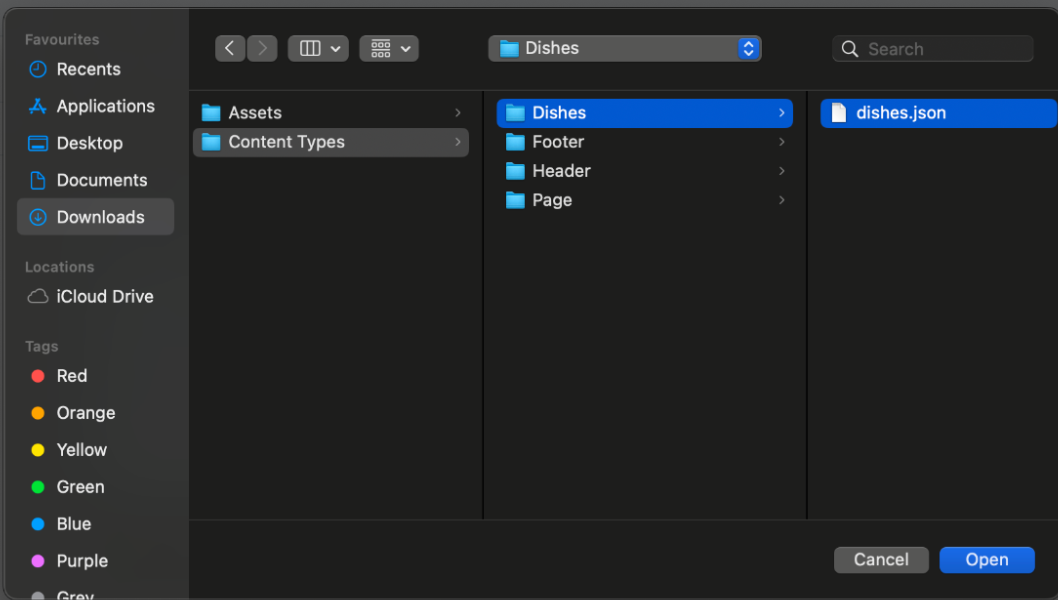
- Once your file is selected, click on Import and the Content Type is Imported into your stack.
- Similarly, import the other Content Types namely Header, Footer, and Page in the same order.
After importing all the Content Types, you will see them in your Stack as follows:
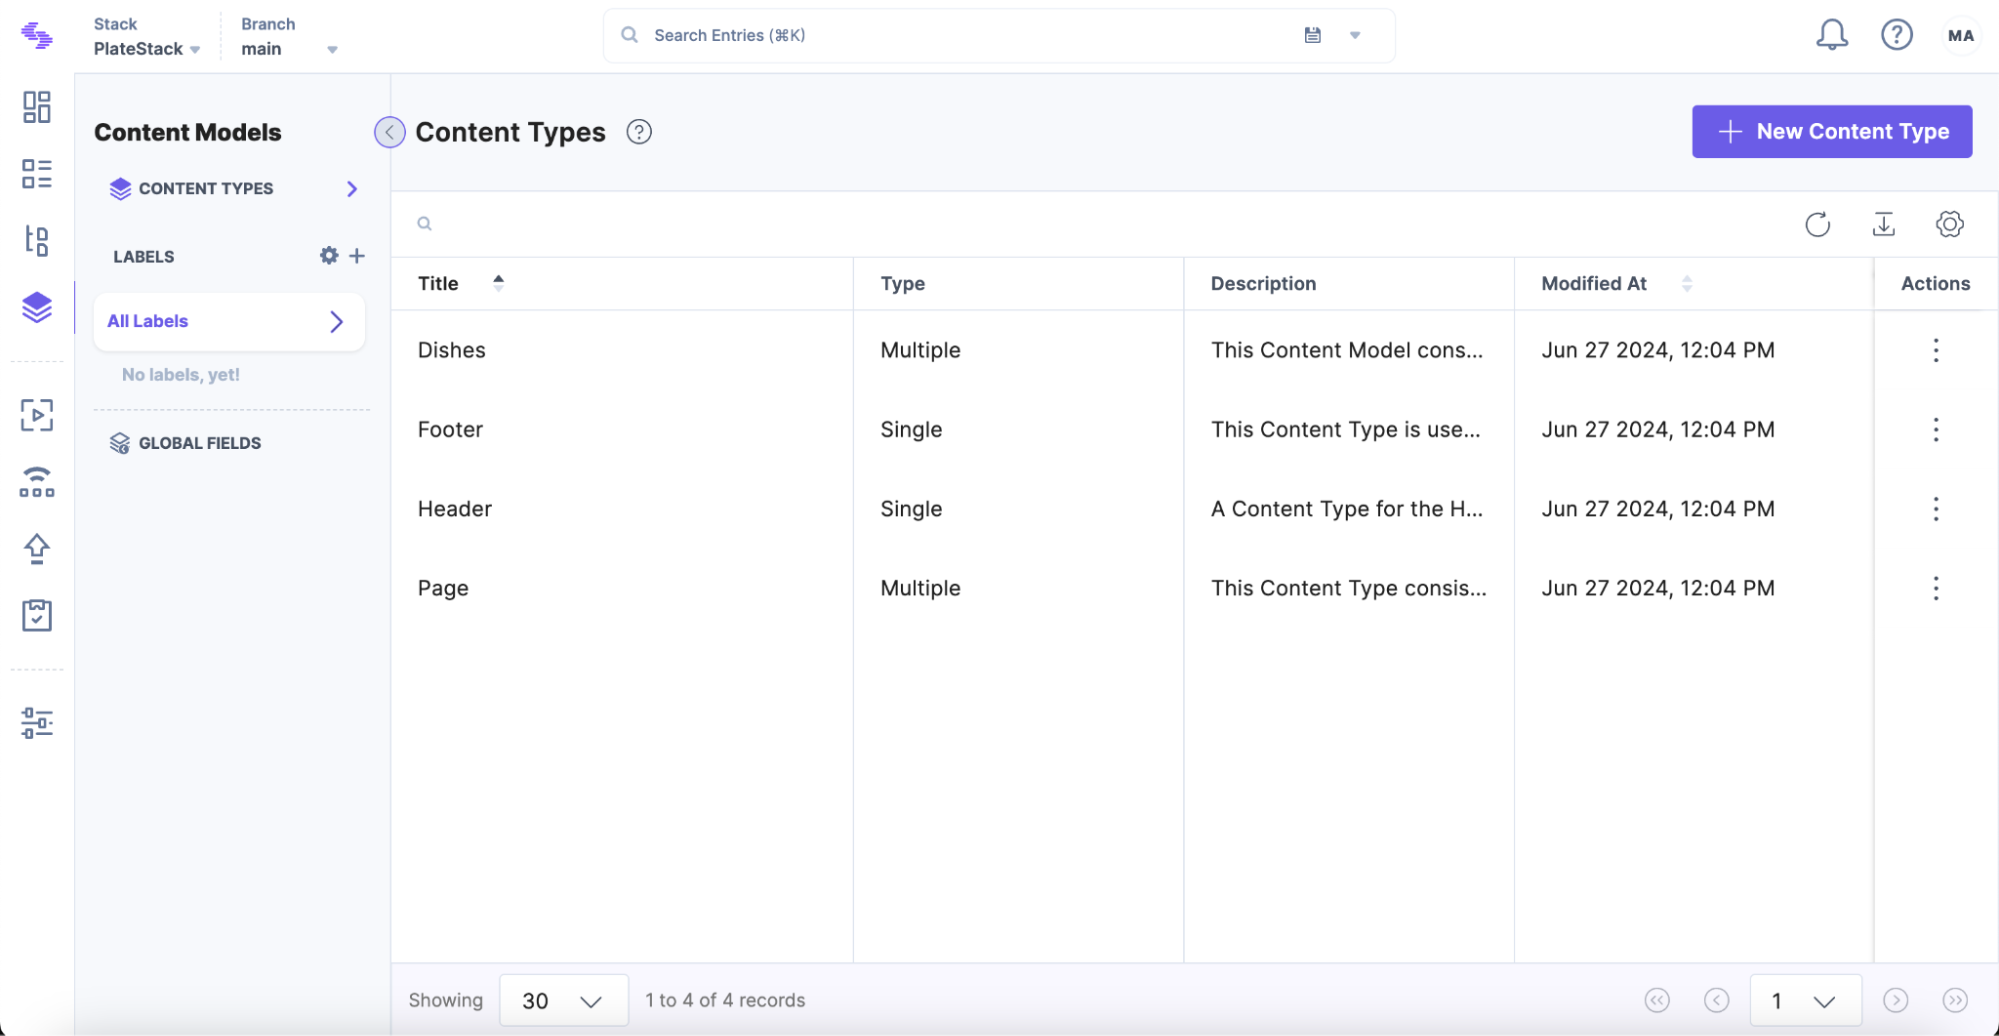
Create Environment and Delivery Token
To fetch content from Contentstack for your website/app via Contentstack APIs, create an environment and generate a Delivery Token.
First, perform the steps in the create an environment guide. In the Create Environment modal, enter the following details, and click on Create:
- Name: development
- Base URL: http://localhost:3000/
Here's how the modal will look like:
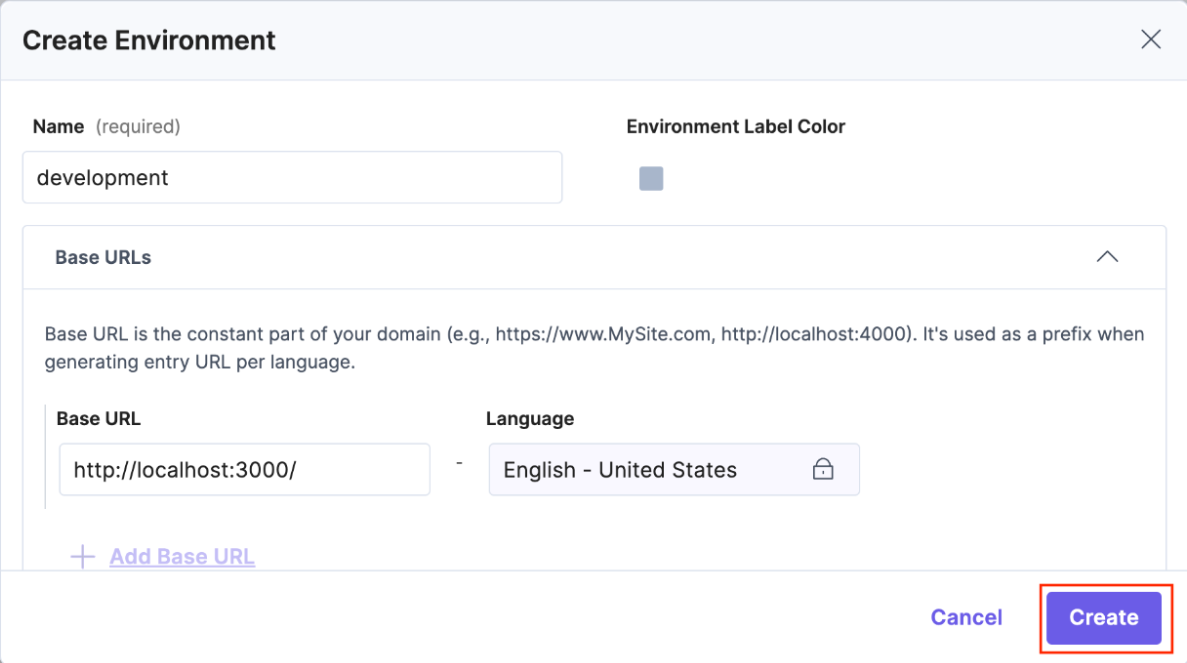
Next, perform the steps in the generate a Delivery Token guide. In the Create New Delivery Token page, enter/select the following values for these fields:
- Name: Enter “PlateStack”
- Description: Enter “A Delivery Token Created to fetch the Content for the PlateStack Restaurant Website”
- Branch: Select main from the dropdown
- Publishing Environments: Select development
After entering these details, click on Generate Token and save your Stack API Key, Delivery Token, and Publishing Environment from the token details section. You’ll need to use these variables later in the code repository, in the Configure Contentstack section.
Click on Save to save the Delivery token.
Create Entries
Let’s start creating the entries for the Header, Footer, and Page Content Types.
Create Entries for the “Header” Content Type
To create an entry, perform the following steps:
- Click on the “Entries” icon (press “E”) on the left navigation panel.
- Click on the + New Entry button on the top, select the content type (in our case, Header), and click on Proceed.
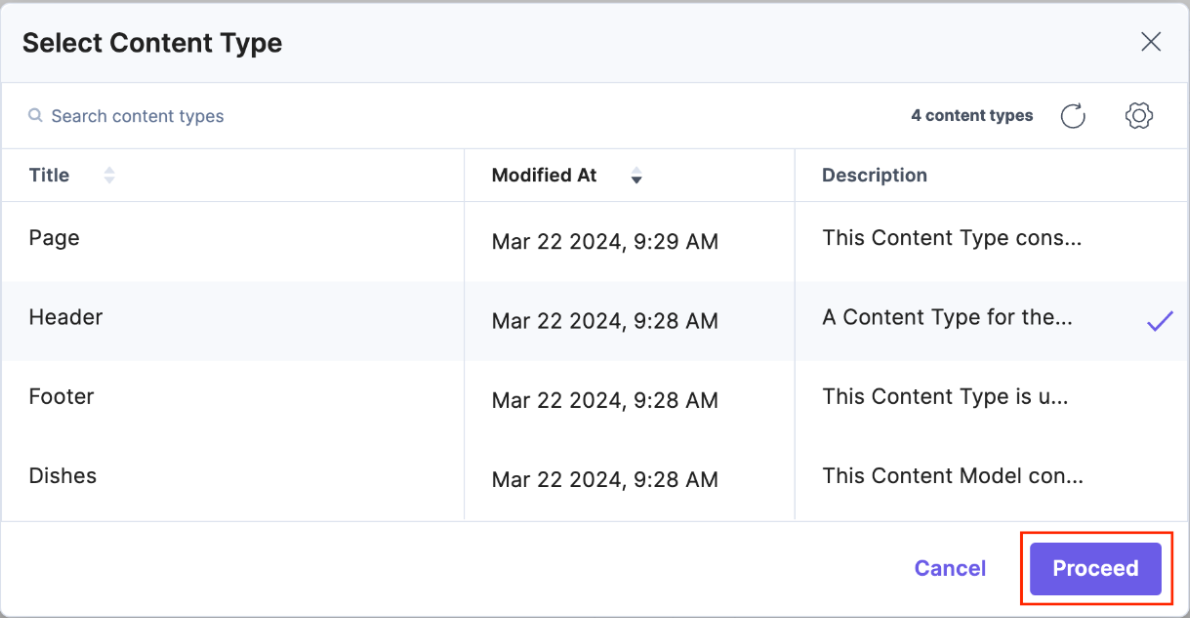
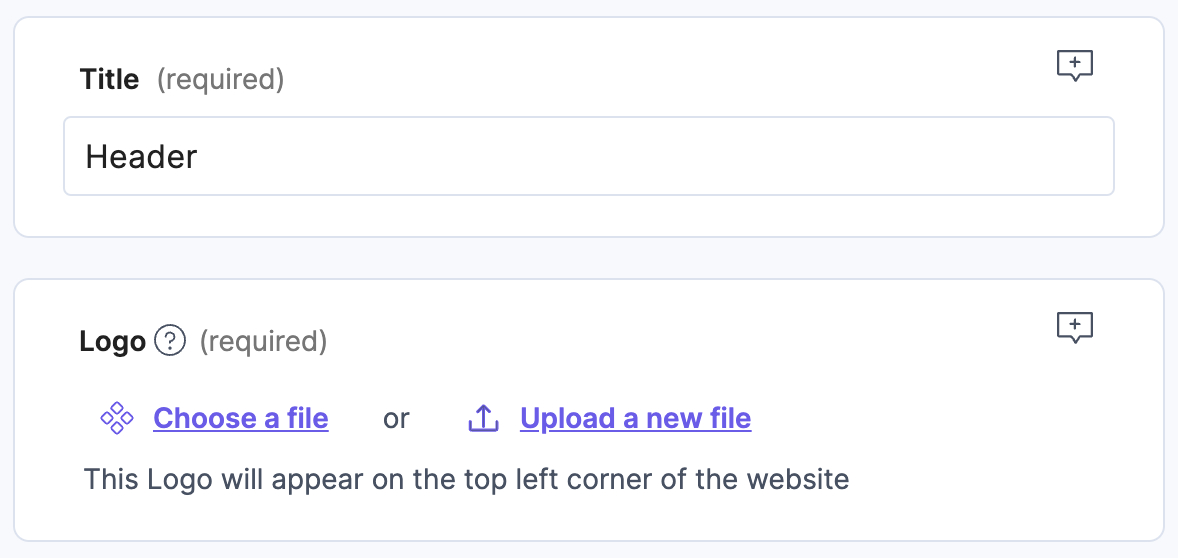
- Within the Entry Editor page, enter/select the following content against the respective fields:
- Title: Enter “Header.”
- Logo : To upload the logo, perform the following set of actions:
- Click on Upload a new file.
- Click on Choose files and select the desired asset file (in our case, select the Assets/Header/Header Logo.png), then click on Open.
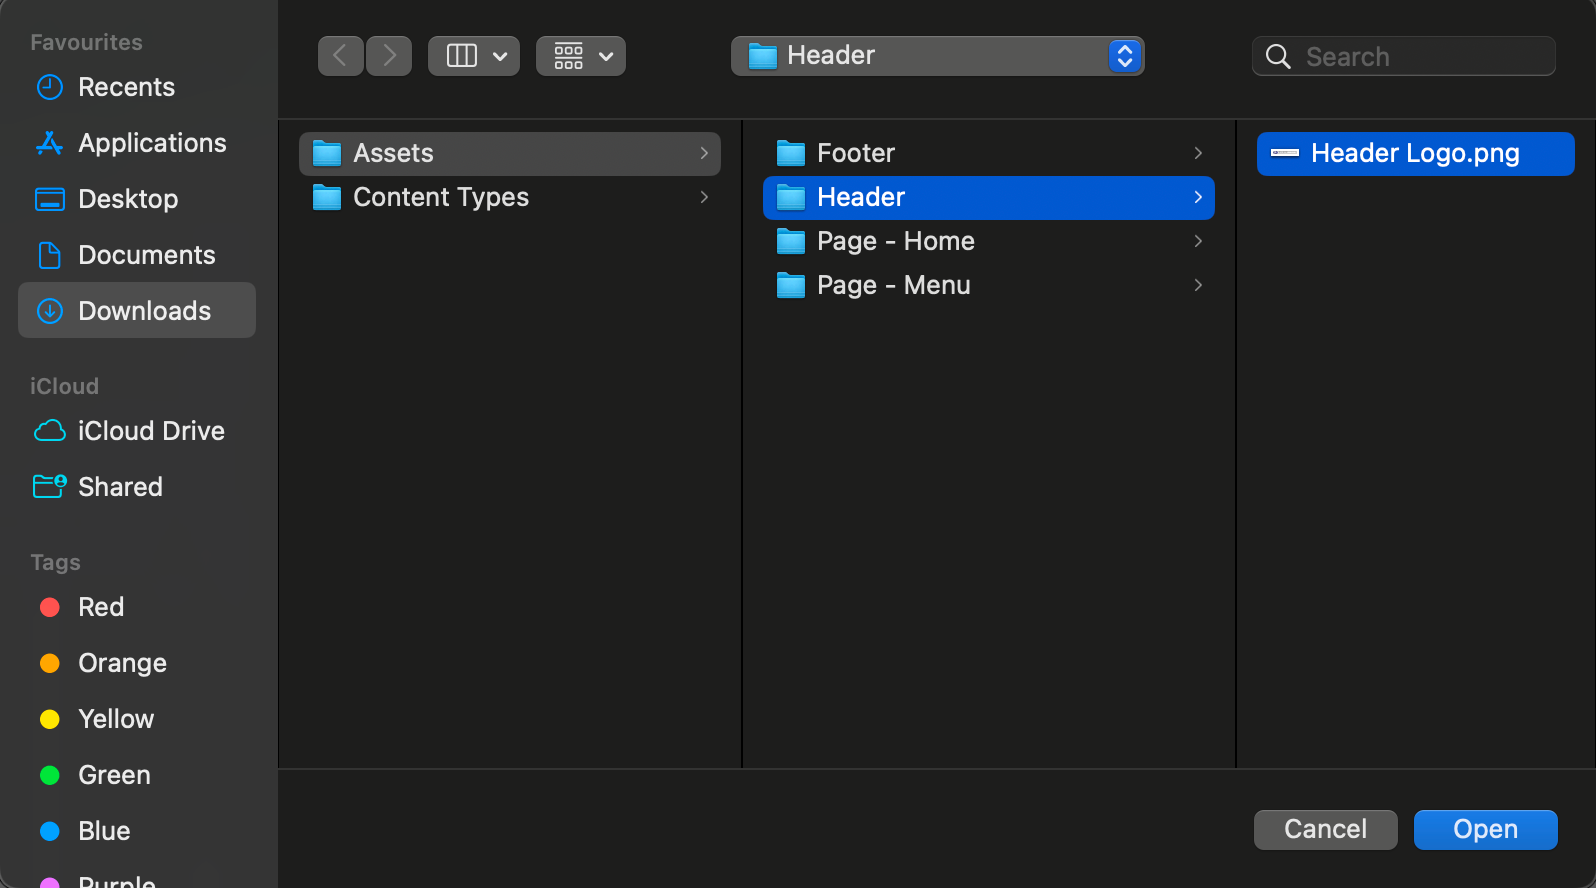
This uploads and successfully adds the asset uploaded into your entry.
Note: This guide uses relative paths to reference asset files within the downloaded asset folder. To ensure proper functionality, you'll need to add these same files as assets within the corresponding entries.
- Click on Upload a new file.
- Navigation Links: You will need to add multiple instances for this field with the values mentioned below.
Note: If an entry field is designated as “Multiple,” you will see the Add “+” icon located beside the existing instance.
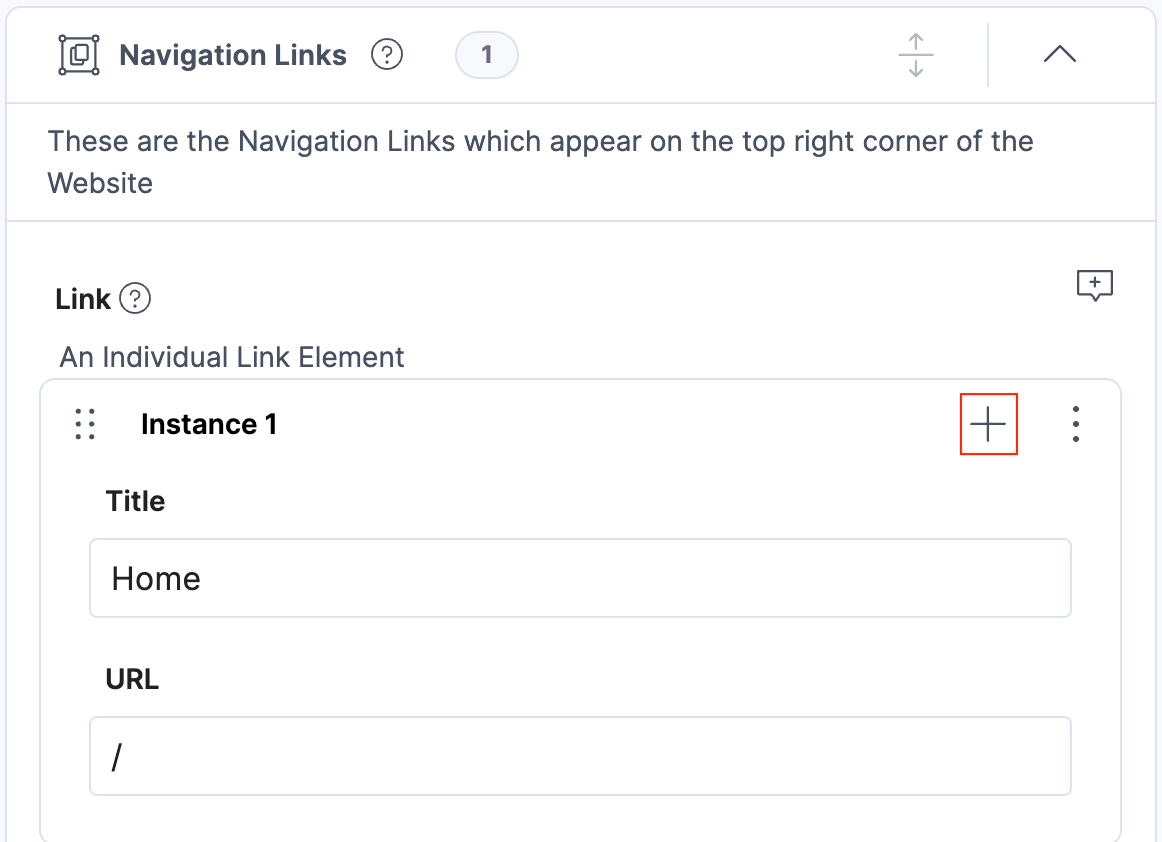
Here are the instances you need to add:
- Instance 1: (Title: Home, URL: /)
- Instance 2: (Title: Menu, URL: /menu)
- Instance 3: (Title: About us, URL: /about-us)
- Instance 4: (Title: Contact, URL: /contact)
- After successfully entering the details of the entry, click on Publish.
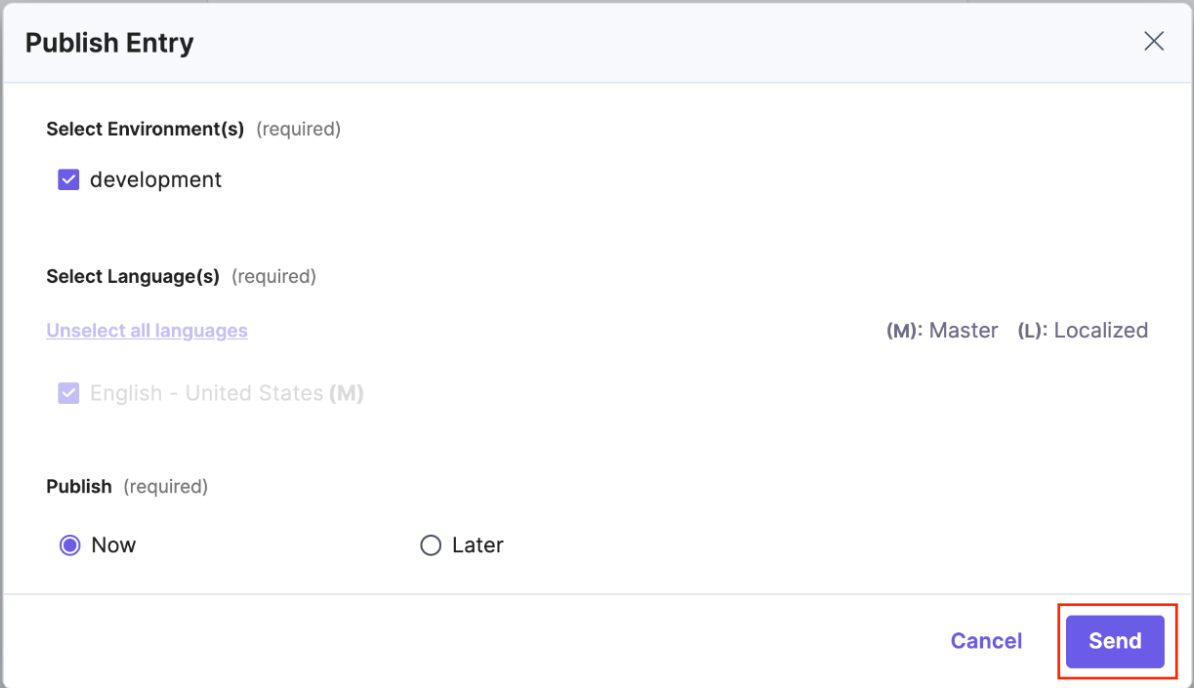
- Select the development environment and click on Send.
- You need to publish this entry along with its references, i.e., the Asset file. So, click on Send With References.
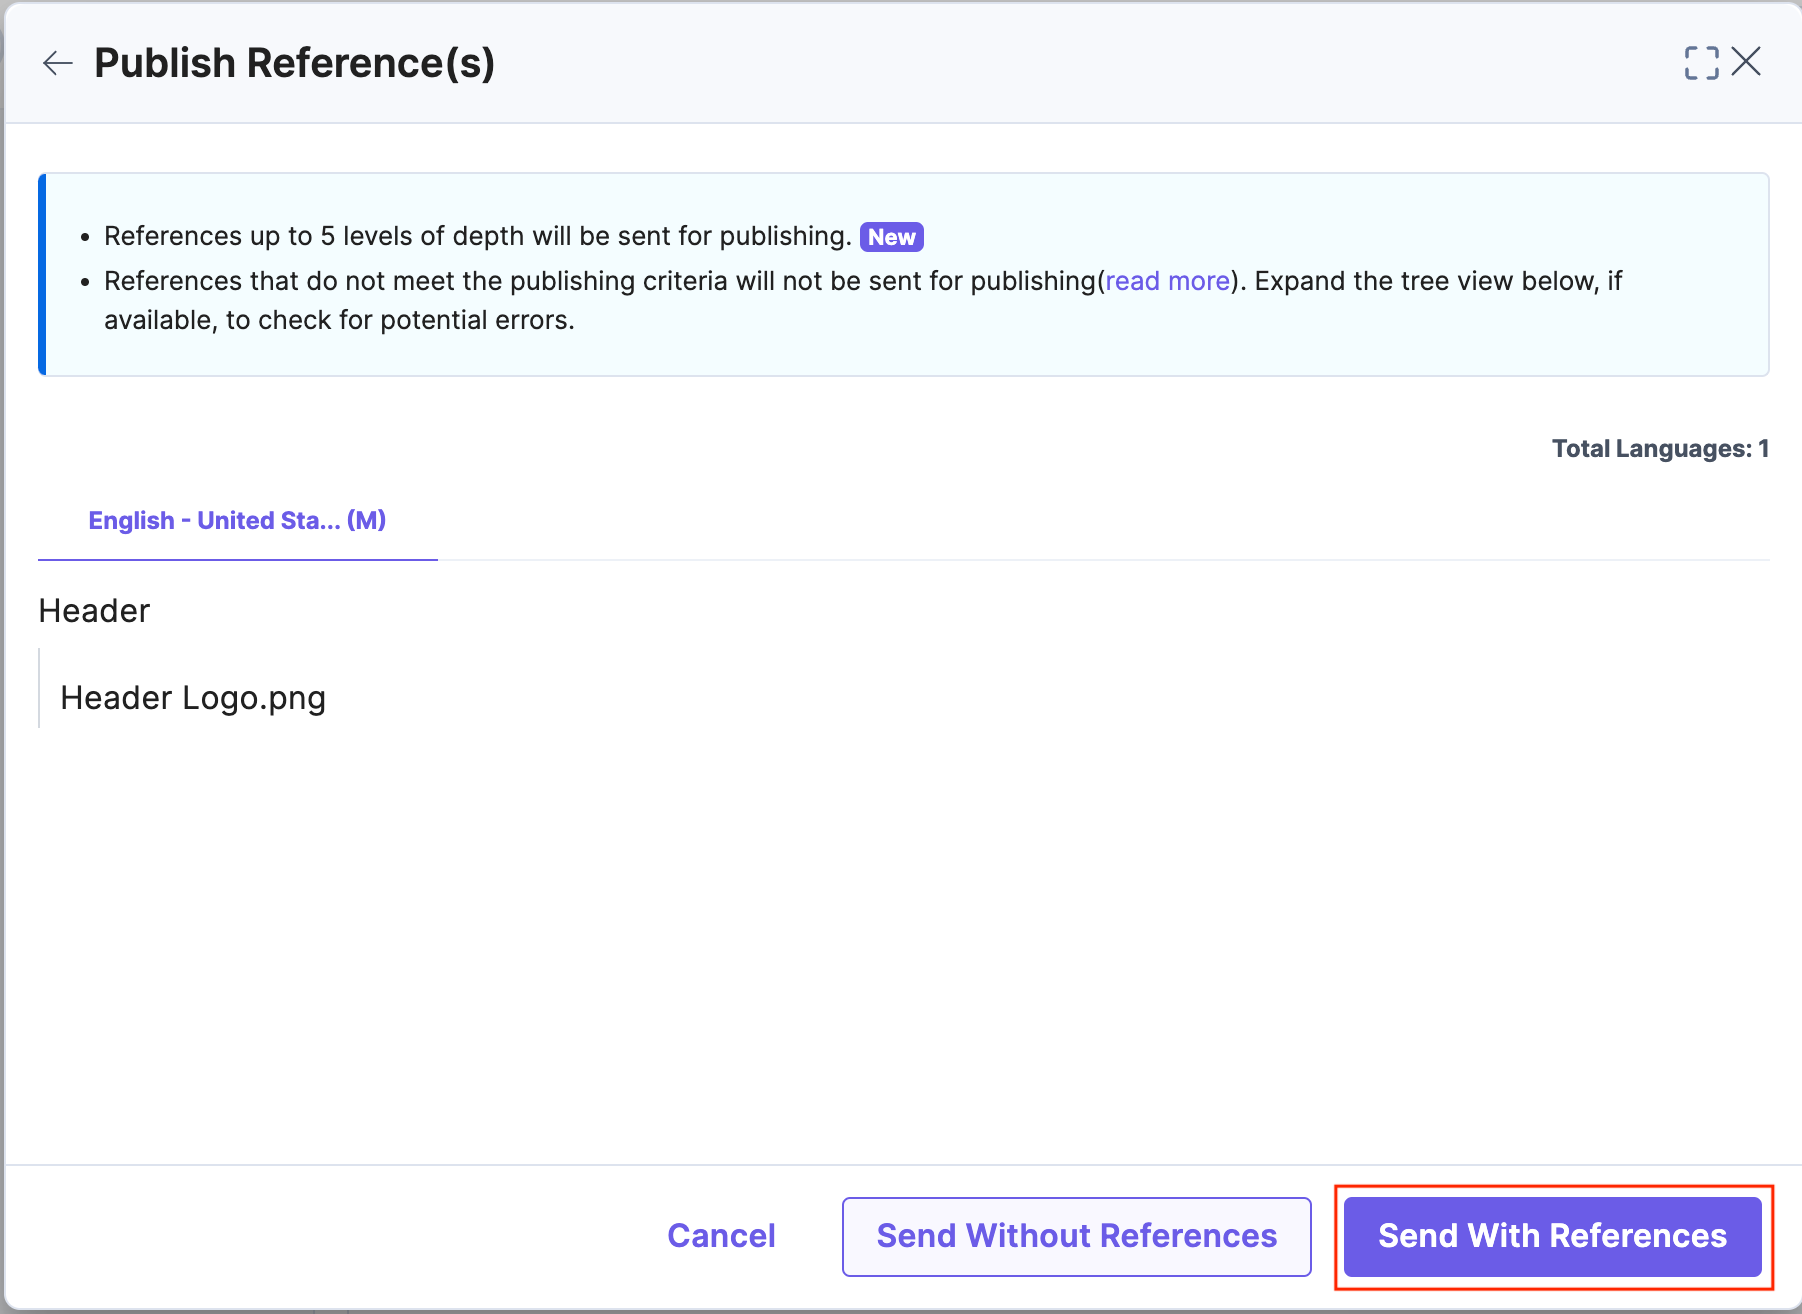
Note: By clicking on Send with References, you can publish all referenced entries along with their parent entry, all at once. For more information, you can read our guides on publishing referenced entries and publishing nested references.
Create Entries for the “Footer” Content Type
Similarly, to create an entry for the “Footer” content type, you need to follow the same process as performed in step 2 of the Create Entries for the “Header” Content Type section.
Here, when selecting the content type, you need to select Footer and click on Proceed.
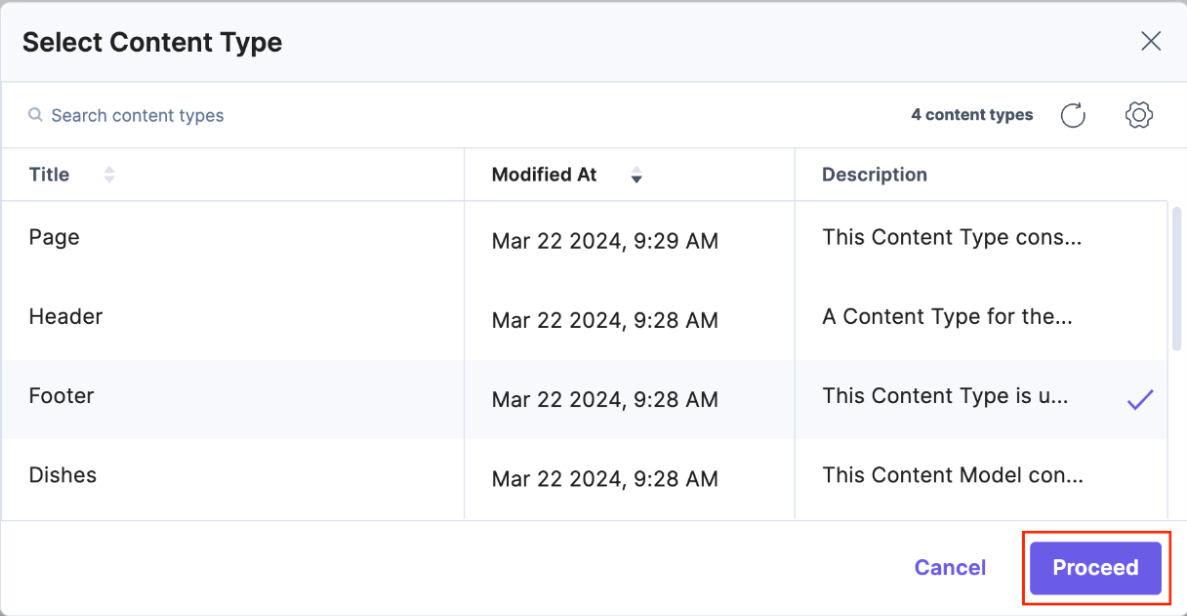
Within the Entry Editor page, enter/select the following content against the respective fields:
- Title: Enter “Footer.”
- Navigation Links: You will need to add the values mentioned below.
- Title: Enter “Links”
- Link: Add multiple instances for this field with the values mentioned below.
Note: If an entry field is designated as “Multiple,” you will see the Add “+” icon located beside the existing instance.
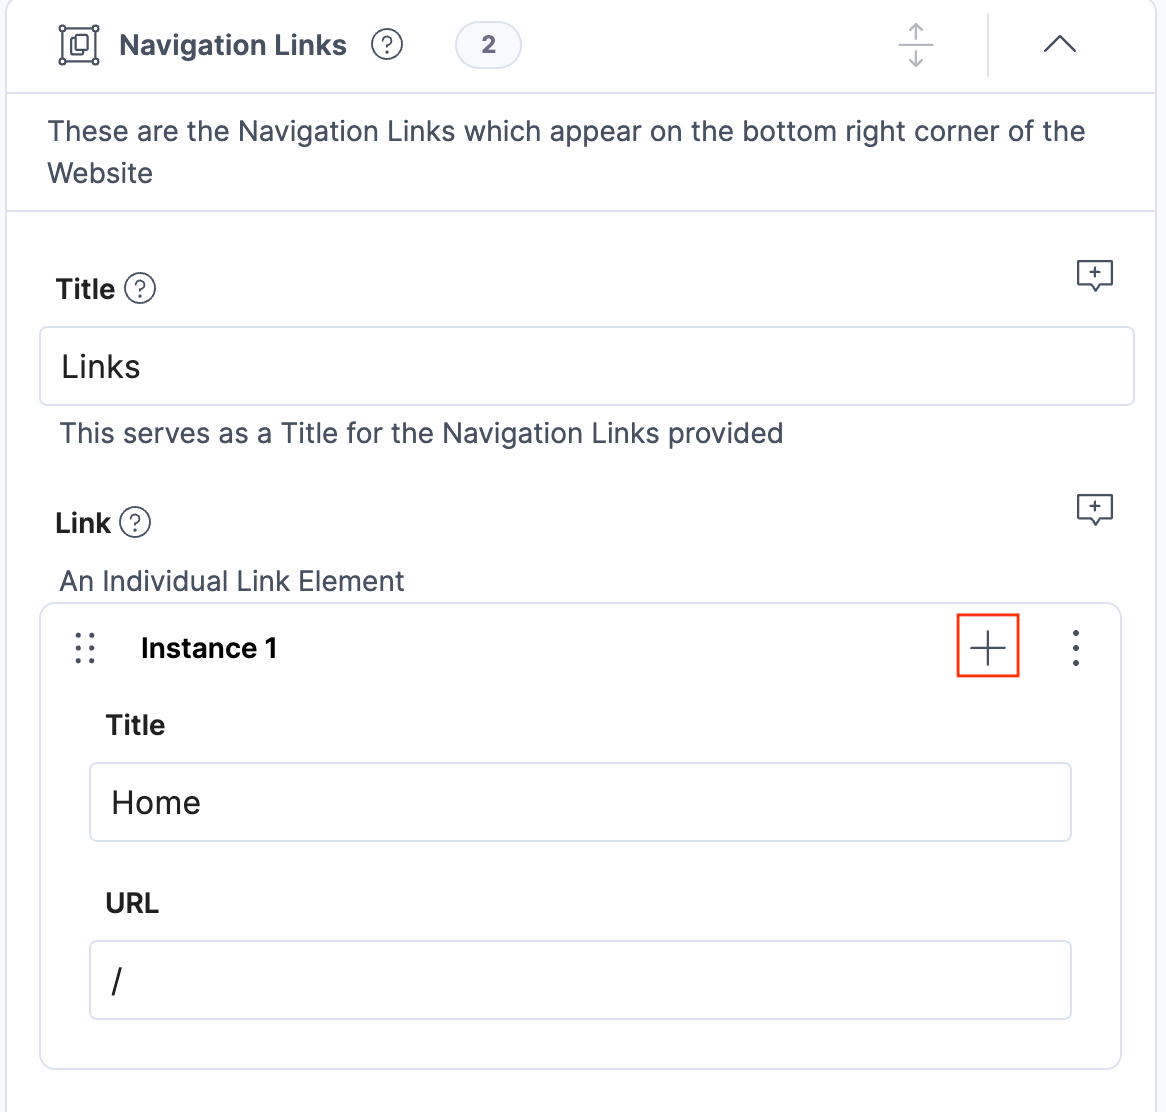
Here are the instances you need to add:
- Instance 1: (Title: Home, URL: /)
- Instance 2: (Title: Menu, URL: /menu)
- Instance 3: (Title: About us, URL: /about-us)
- Instance 4: (Title: Contact, URL: /contact)
- Information Section: You will need to add the values mentioned below.
- Logo: To upload the logo, perform the following set of actions (refer About File Field)
- Click on Upload a new file.
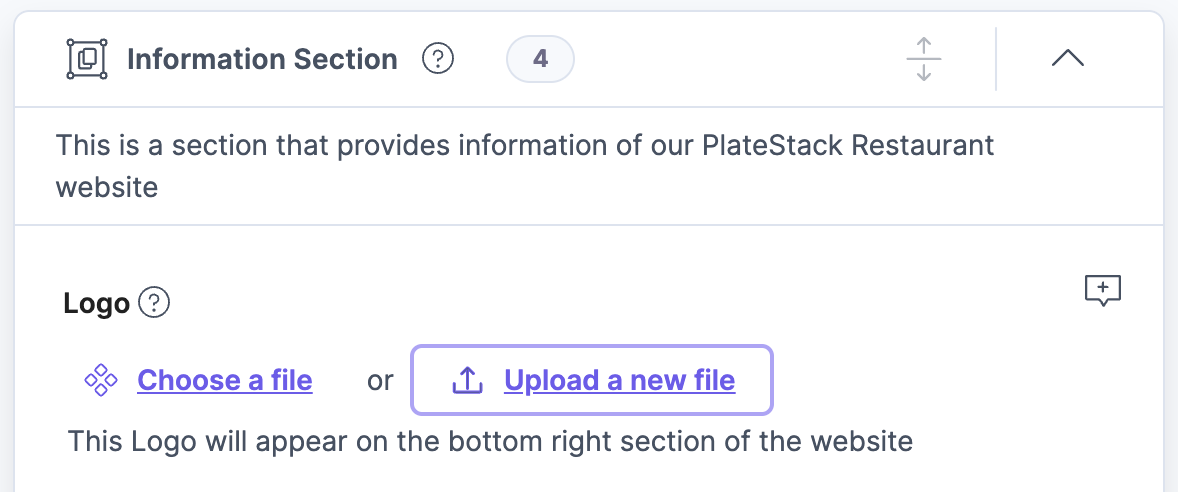
- Click on Choose files and select the desired asset file (in our case, select the Assets/Footer/Footer Logo.png), then click on Open.
- Click on Upload a new file.
- Description: Enter “At PlateStack, we’ve got great food and a better experience.”
- Timings: Enter “Tue - Sun ( 16:00 - 22:00 )”
- Holiday: Enter “Closed on Monday”
- Copyright: Enter “Copyright © PlateStack 2024. All rights reserved.”
- Logo: To upload the logo, perform the following set of actions (refer About File Field)
After entering the data, publish the entry to the development environment as we did in step 3 of the Create Entries for the “Header” Content Type section.
Create Entries for the “Page” Content Type
Similarly, to create an entry for the “Footer” content type, you need to follow the same process as performed in step 2 of the Create Entries for the “Header” Content Type section.
Here, when selecting the content type, you need to select Page and click on Proceed.
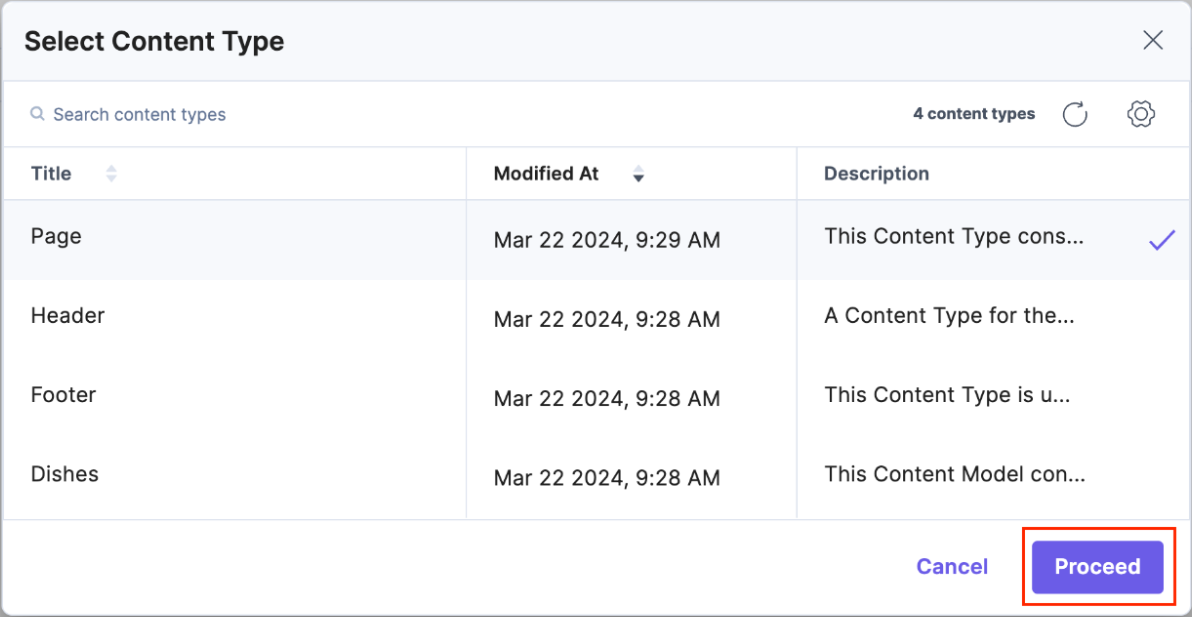
Within the Entry Editor page, enter the following content against the respective fields:
- Title: Enter “Home”
- URL: Enter “/”
- Home: Add the “Home” block by clicking on + Home and add the following details:
- Hero Section:
- Banner: Perform the same set of steps followed to upload the Logo in Step 3 of the Create Entries for the “Header” Content Type section. Here, you need to upload the Assets/Page - Home/Banner.jpeg file.
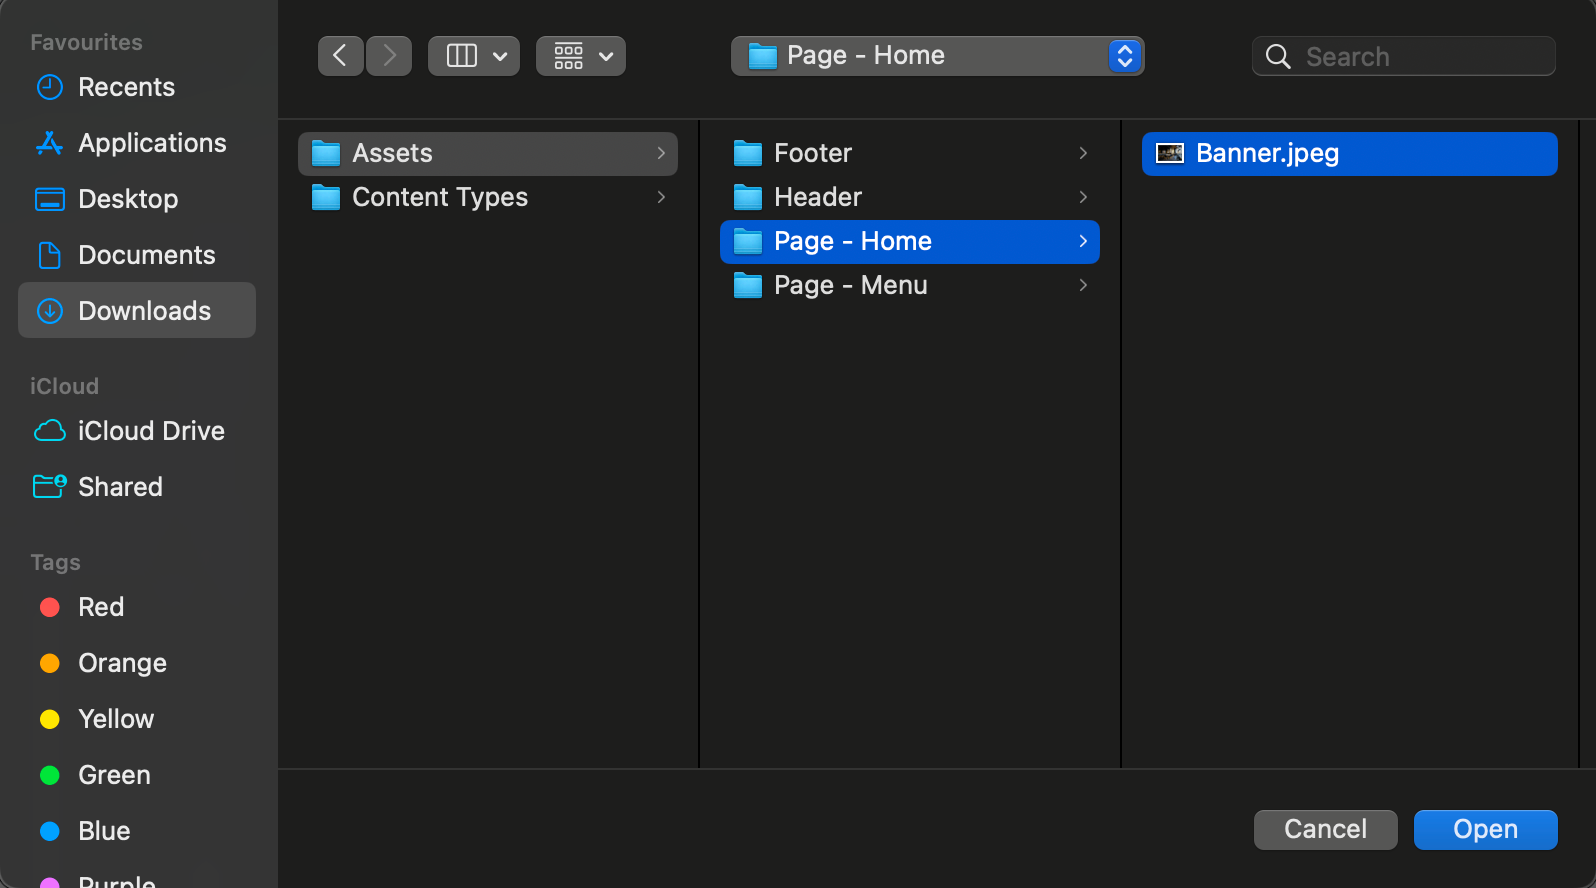
- Heading: Enter “Journey into flavor”
- Description: Enter “Indulge in a gastronomic journey where every dish is a culinary masterpiece, crafted with ultra precision.”
- Primary CTA: Enter “/menu”
- Banner: Perform the same set of steps followed to upload the Logo in Step 3 of the Create Entries for the “Header” Content Type section. Here, you need to upload the Assets/Page - Home/Banner.jpeg file.
- Hero Section:
After entering this data, publish the entry to the development environment as we did in step 3 of the Create Entries for the “Header” Content Type section.
Note: The URL for the Home page will be empty after publishing. So you need to update the URL with “/” and publish again. This is a bug that will be fixed soon.
Set Up The Starter App
To set up your starter app, you need to integrate the Contentstack APIs with your React application. You need to perform the following set of steps:
Let’s look at each of the steps in detail.
Fork the Starter App Repository
To fork the GitHub repository of the starter app into your account, perform the following set of steps:
- Login to Github, and visit the GitHub repository of the starter React app.
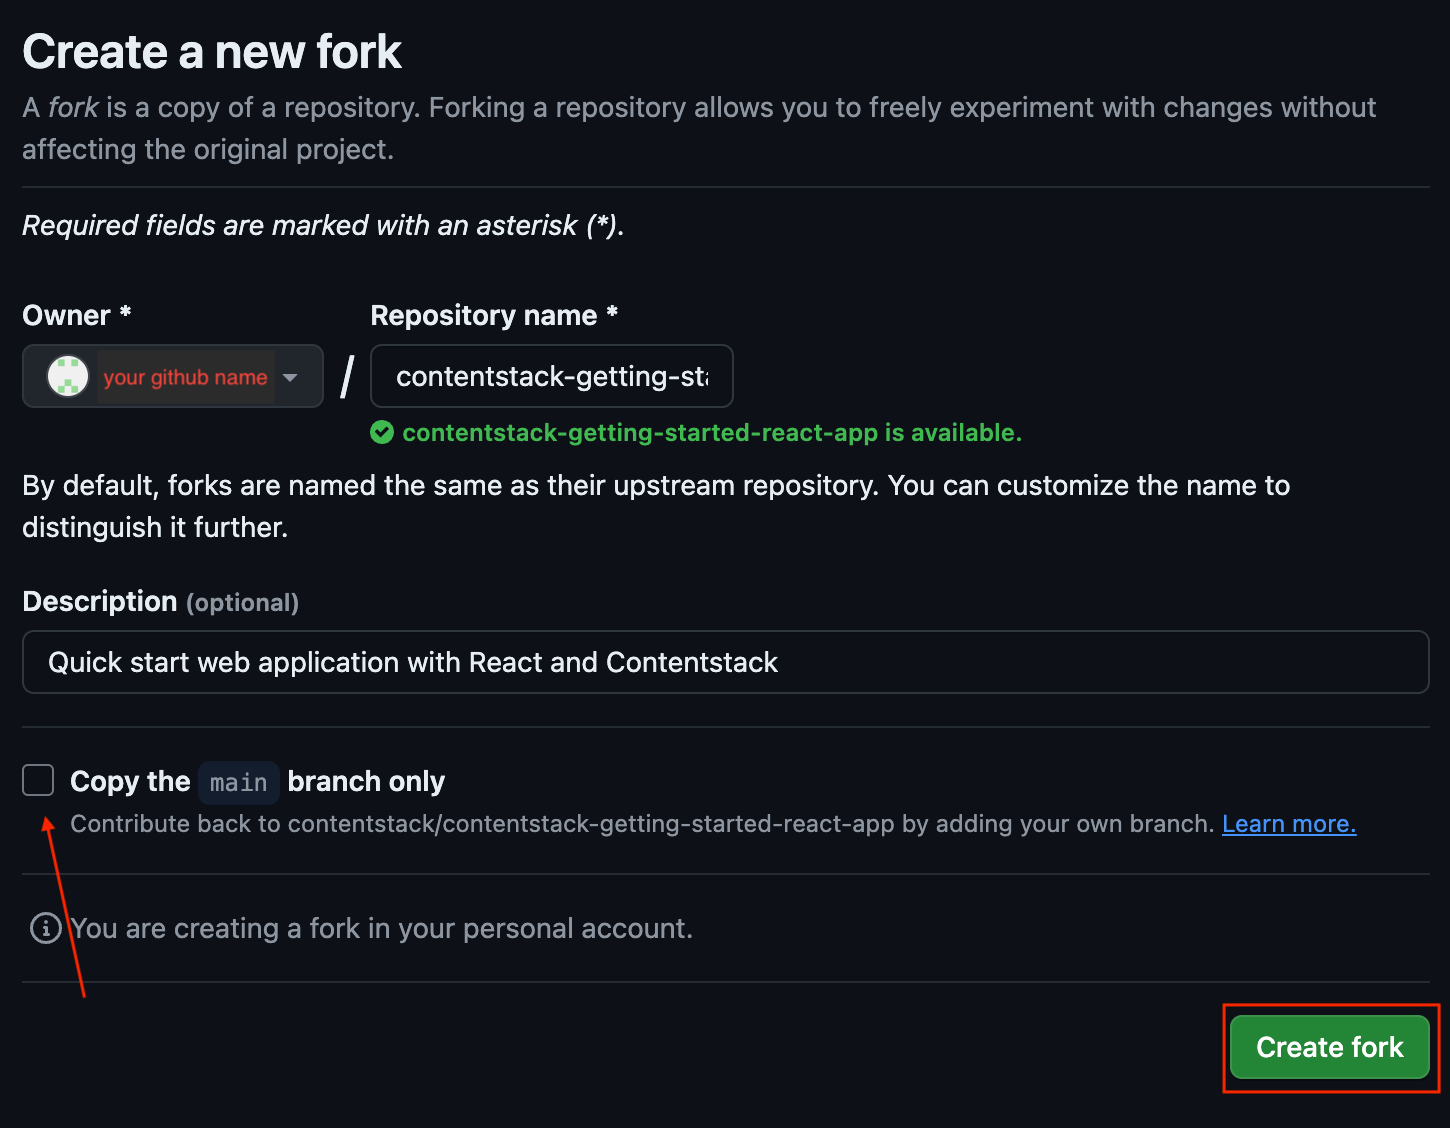
- Click on the Fork button (highlighted in the below screenshot).
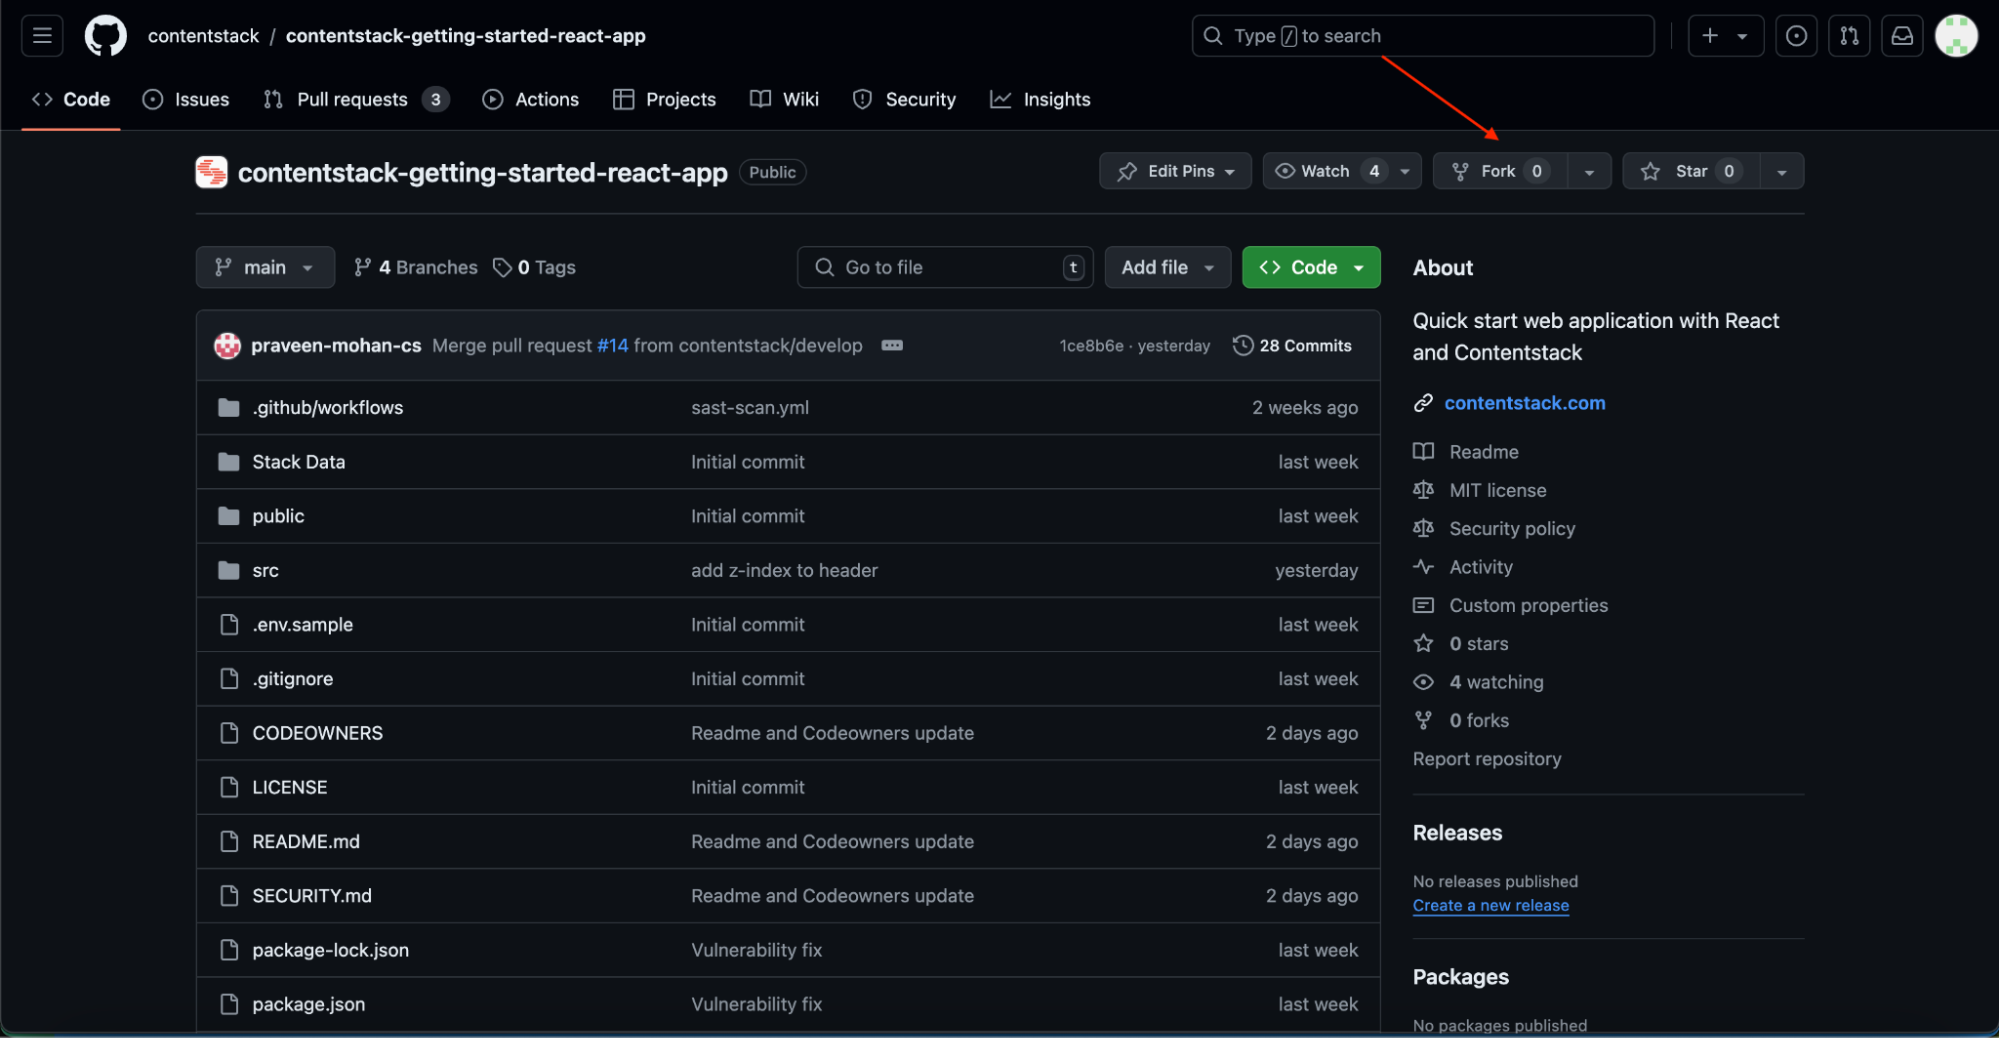
- Ensure to uncheck the Copy the main branch only checkbox and click on Create fork.
The repository is now forked, and you should see it in your personal GitHub account.
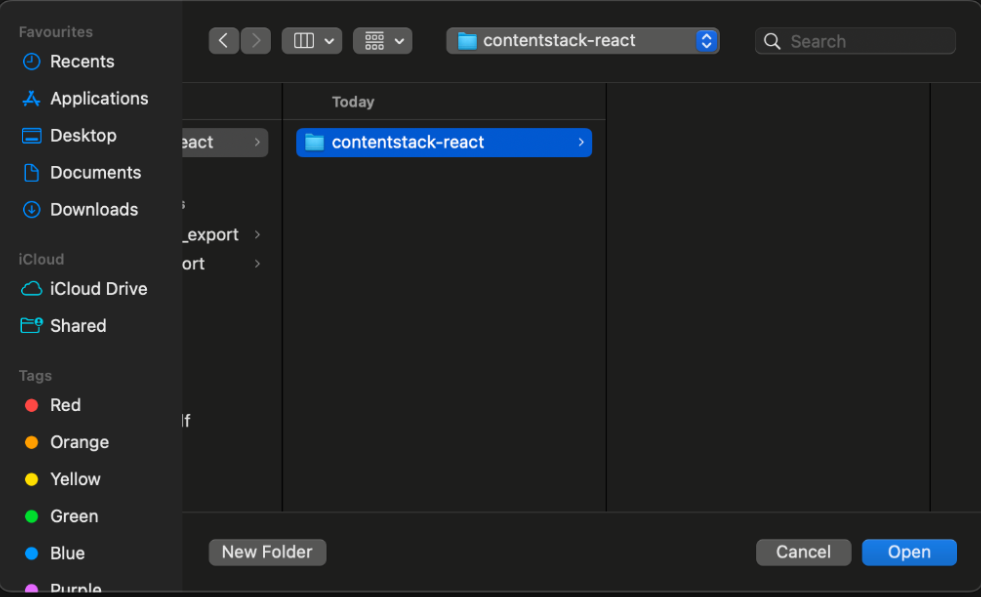
- Now, open VS code and click on Open Folder select Open from the File menu, or simply press. You can also use shortcut key command + O (Mac OS) or ctrl + O (Windows).
- In the “Open” dialog box, choose the directory (in our case, contentstack-react) to clone the repository. And click on Open.
Note: The directory name can be anything of your choice.
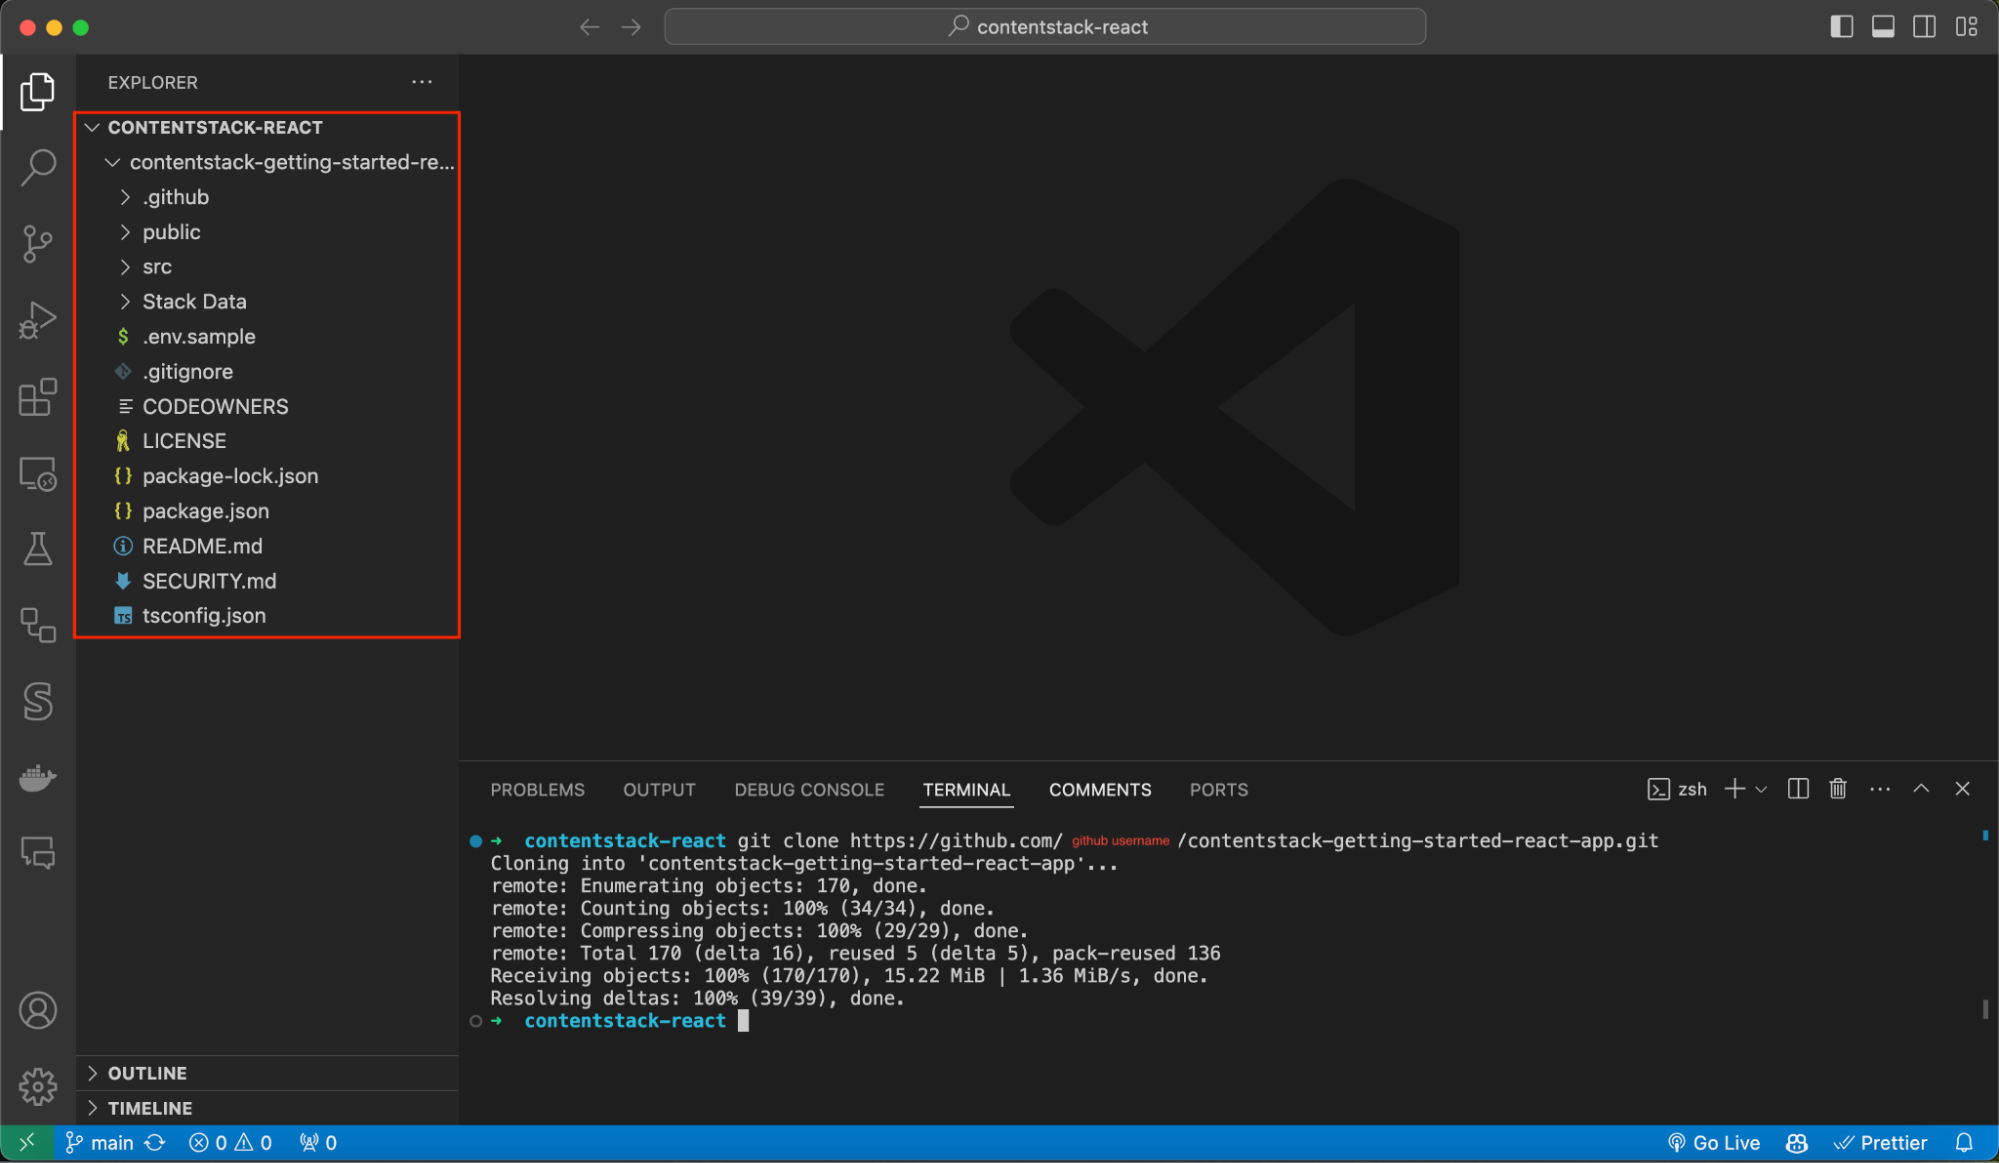
- Open a new terminal (Press control + shift + ` or click on Terminal > New Terminal) and run the below command to clone your forked repository:
git clone https://github.com/your-username/your-repo-name.gitNote: Make sure to replace placeholders such as your-username and your-repo-name in the above code snippets with your actual values.
Now you should be able to see the repository code in the directory as follows:
Install the Dependencies
Next we need to install the dependencies for your repository. To do so, perform the following steps:
- Navigate to the root directory of the cloned repository. You can do this using the command:
cd contentstack-getting-started-react-app/
- Run the following command to install dependencies using npm:
npm install
Note: The command result may differ for different versions.- You might get npm ERR! in this step, if you haven’t installed Node.js version 18 or later.
- In case of access related error, try running with the command sudo npm install.
Configure Contentstack
To configure Contentstack details into your app, perform the following set of steps:
- Locate the .env.sample file in the root directory and rename it to .env
- Update the .env file with your configuration details as follows:
In the above code snippet, make sure to replace placeholders such as YOUR_STACK_API_KEY, YOUR_DELIVERY_TOKEN, YOUR_ENVIRONMENT, and YOUR_STACK_REGION with the respective values related to your stack. You will find these details are under the Delivery Token that you created in step Create Environment and Delivery Token of your Contentstack account.
For YOUR_STACK_REGION, you can pass the respective region code of one of our supported regions:
- For AWS North America, set region as US
- For AWS Europe, set region as EU
- For Azure North America, set region as AZURE_NA
- For Azure Europe, set the region as AZURE_EU
- For GCP, set the region as GCP_NA
Run the Application
Lastly, you can run the app locally, use the following command:
npm start
You should see the message “No issues found” on your terminal and see the app running locally at http://localhost:3000.
Congratulations! You've successfully run the starter application in your local machine. The next step is to deploy your application using Launch.
Deploy and Host the Application Using Launch
To deploy your app using Launch, you need to first create a project in Launch and link your GitHub repository to it.
To do so, perform the following set of steps:
- Go to Launch and click on + New Project and select Import from a Git Repository.
Note: Connecting your Git repository with Launch provides various benefits like easy tracking and auto deployment.
- Click on Connect Account and enter login credentials of your GitHub account.
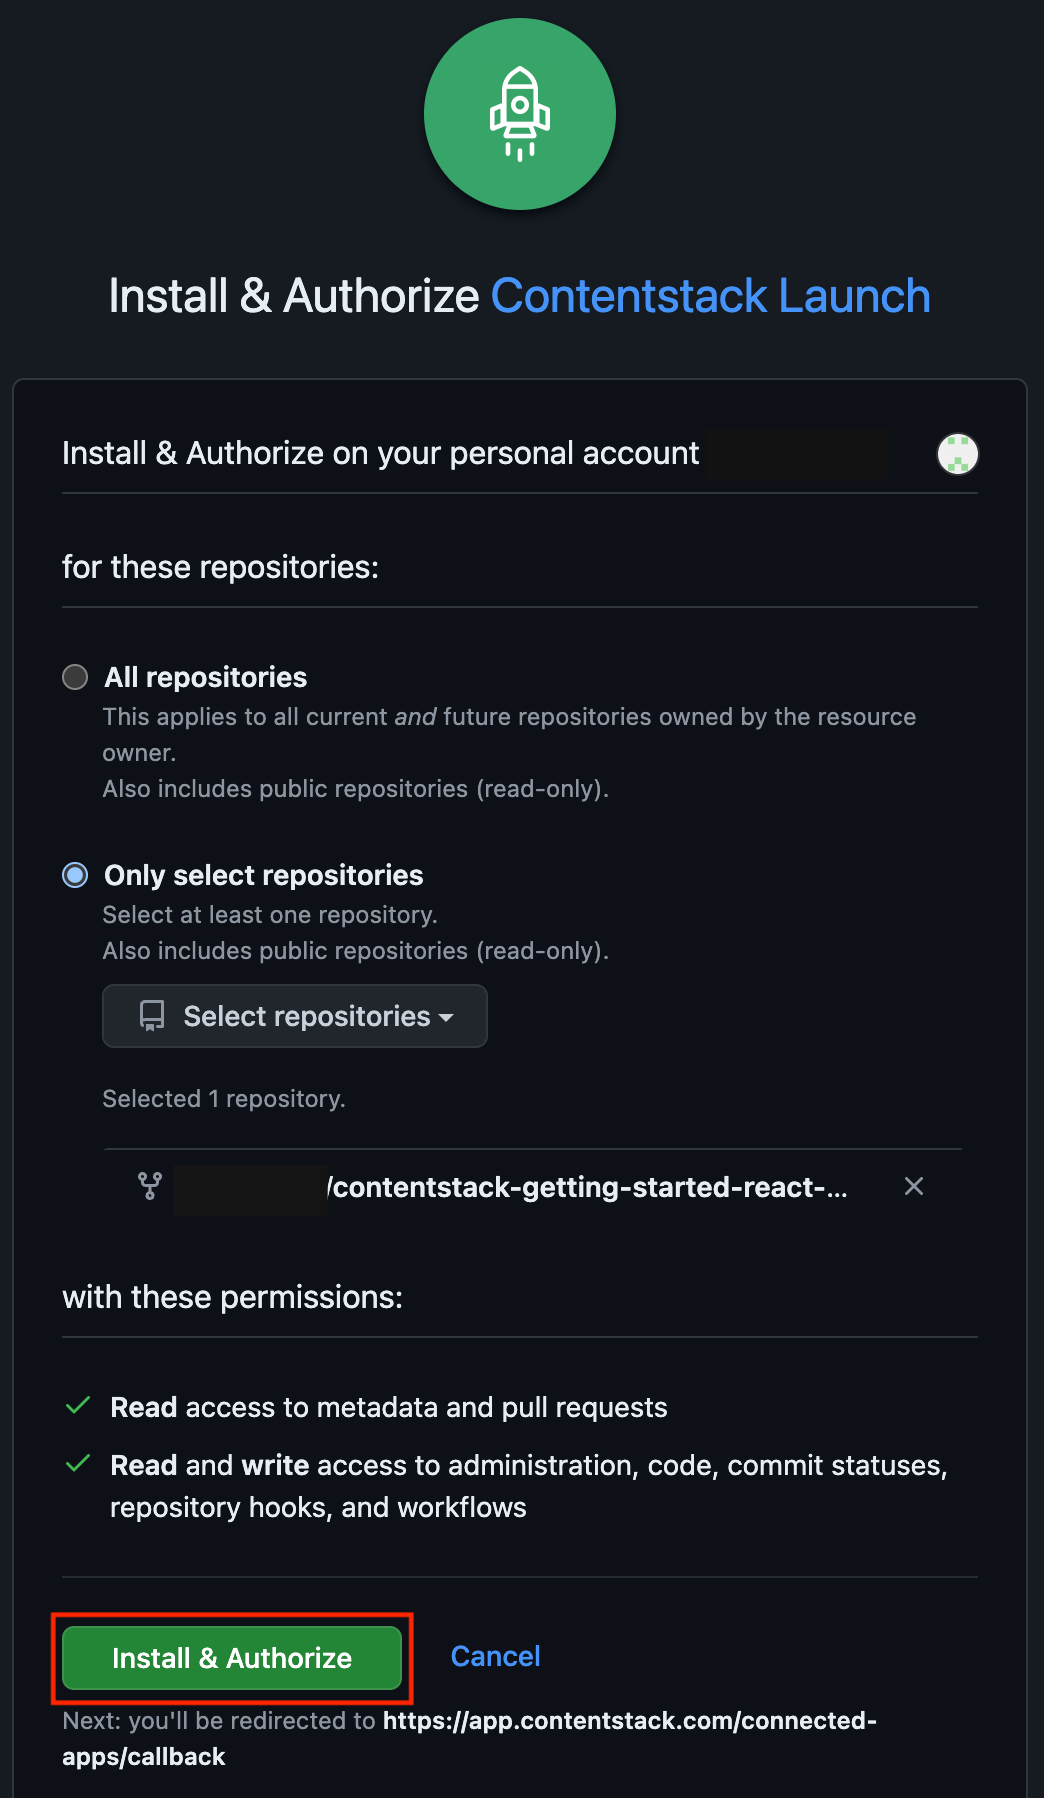
- Select Only select repositories and then on Save.
- In the Install & Authorize Contentstack Launch modal, select the contentstack-getting-started-react-app repository from the dropdown menu and then on Install & Authorize.
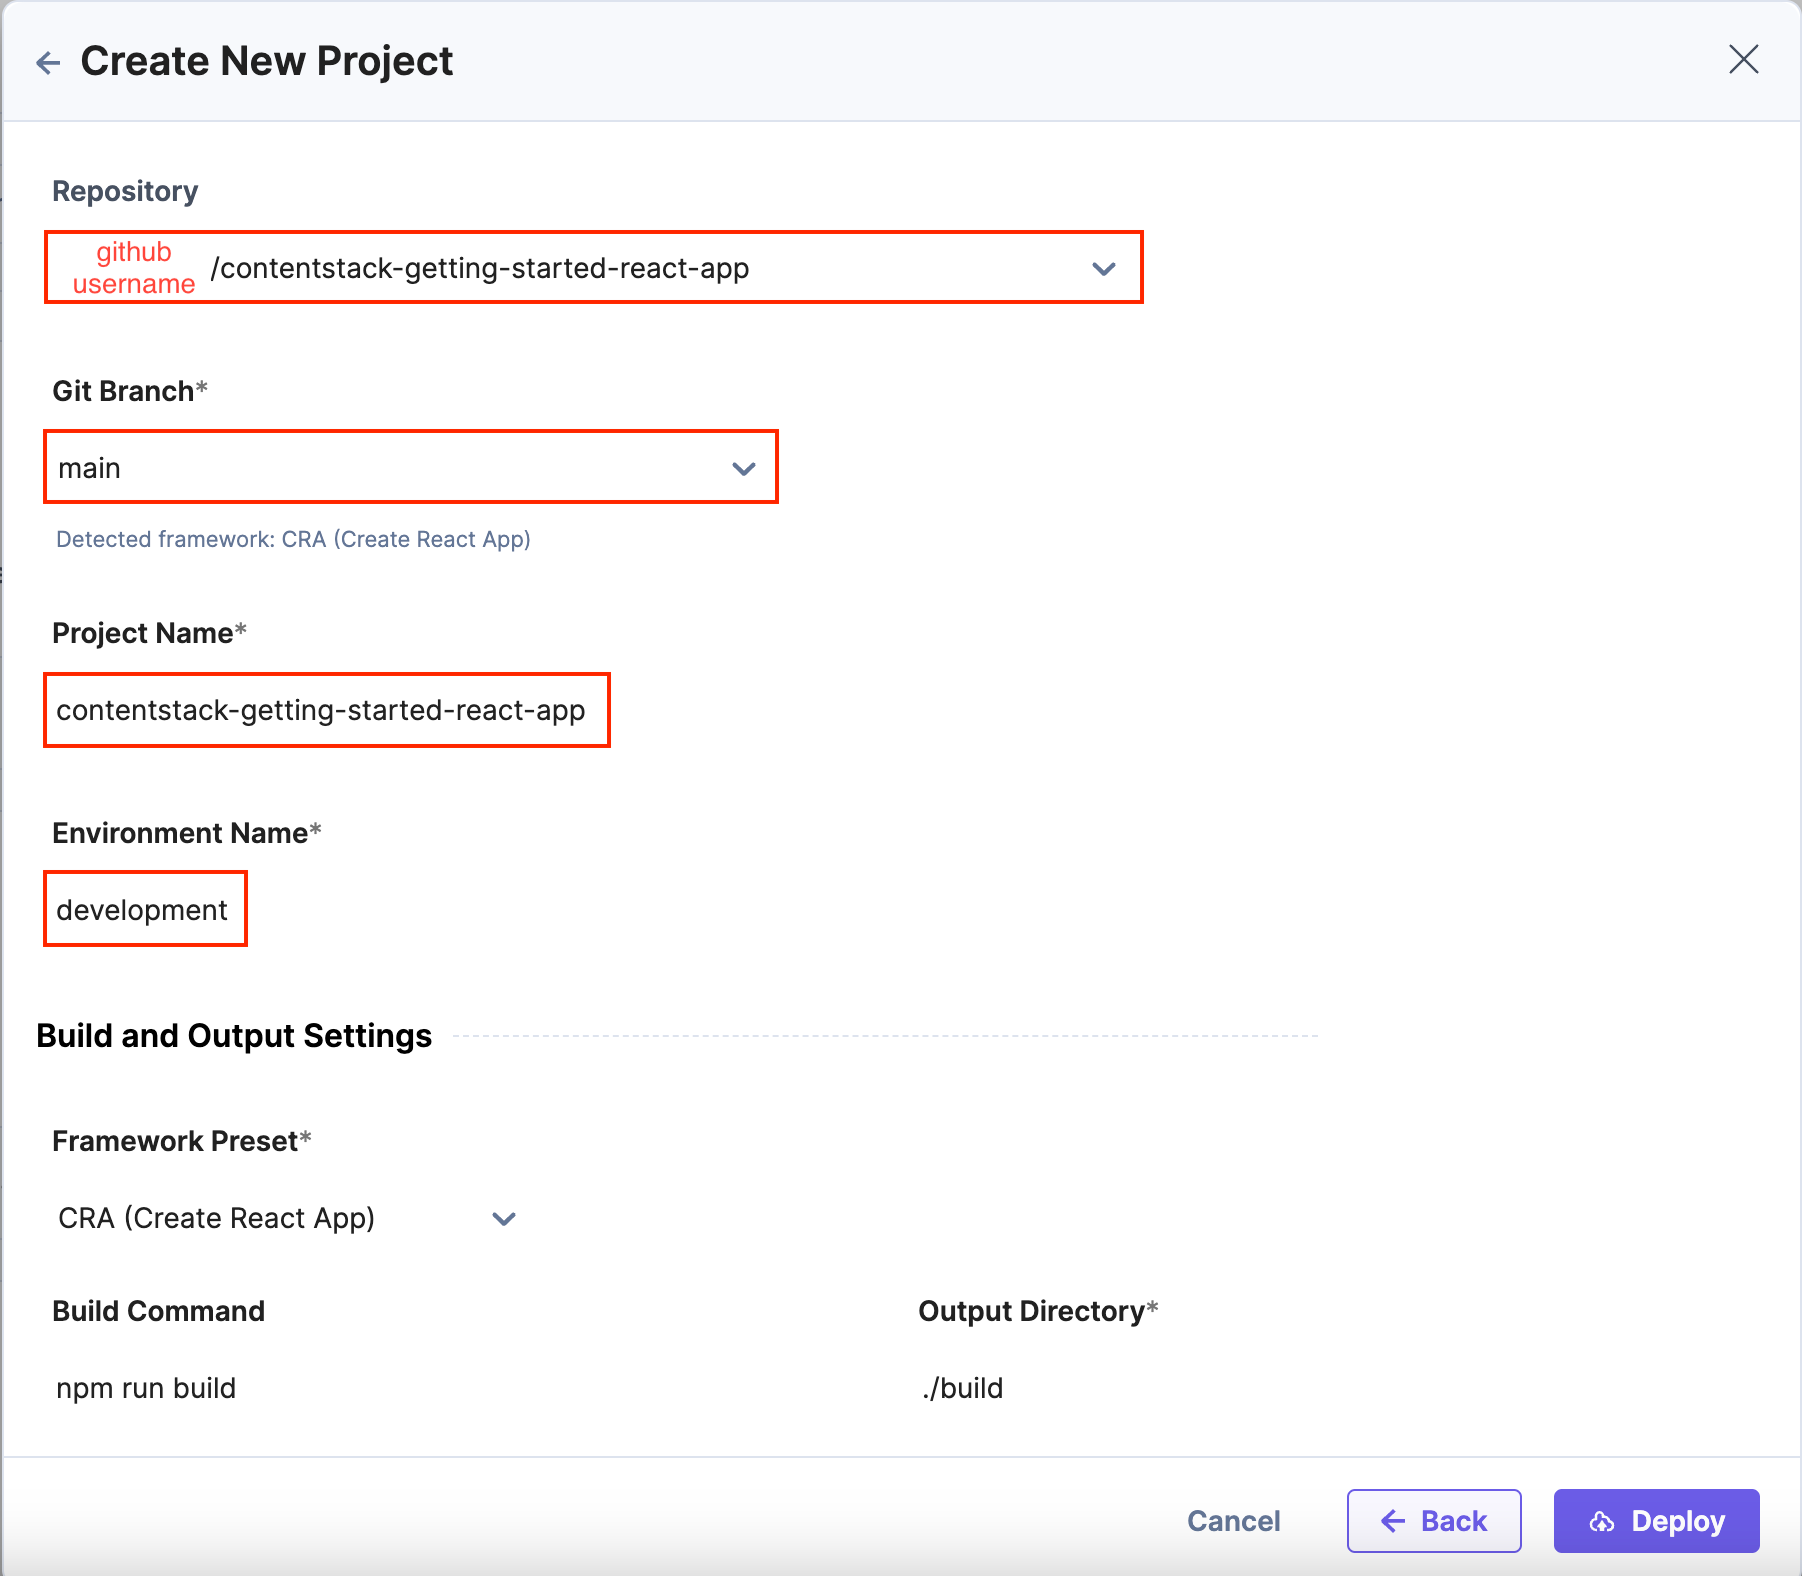
- You will be redirected to Contentstack Launch with the Create New Project pop up open. Enter the following details:
- Repository: Select the contentstack-getting-started-react-app repository from dropdown menu
- Git Branch: Select main
- Project Name: Enter “contentstack-getting-started-react-app”
- Environment name: Enter “development”
- Build and Output Settings: Details in this section will be auto generated. It can be the same as seen below.
This is how your details will look like:
- Now, to run our application we need the following four environment variables that you need to add to your .env file:
- REACT_APP_CONTENTSTACK_API_KEY=STACK_API_KEY
- REACT_APP_CONTENTSTACK_DELIVERY_TOKEN=STACK_DELIVERY_TOKEN
- REACT_APP_CONTENTSTACK_ENVIRONMENT=STACK_ENVIRONMENT_NAME
- REACT_APP_CONTENTSTACK_REGION=STACK_REGION_CODE
- Scroll a little bit down and under the Environment Variables section, Click on + Add Environment Variable and add these variables with their values one by one. Or, you can go to the Bulk Edit tab and copy paste the content of the .env file and proceed.
- After adding these variables your screen should look like below. Now, click on Deploy.
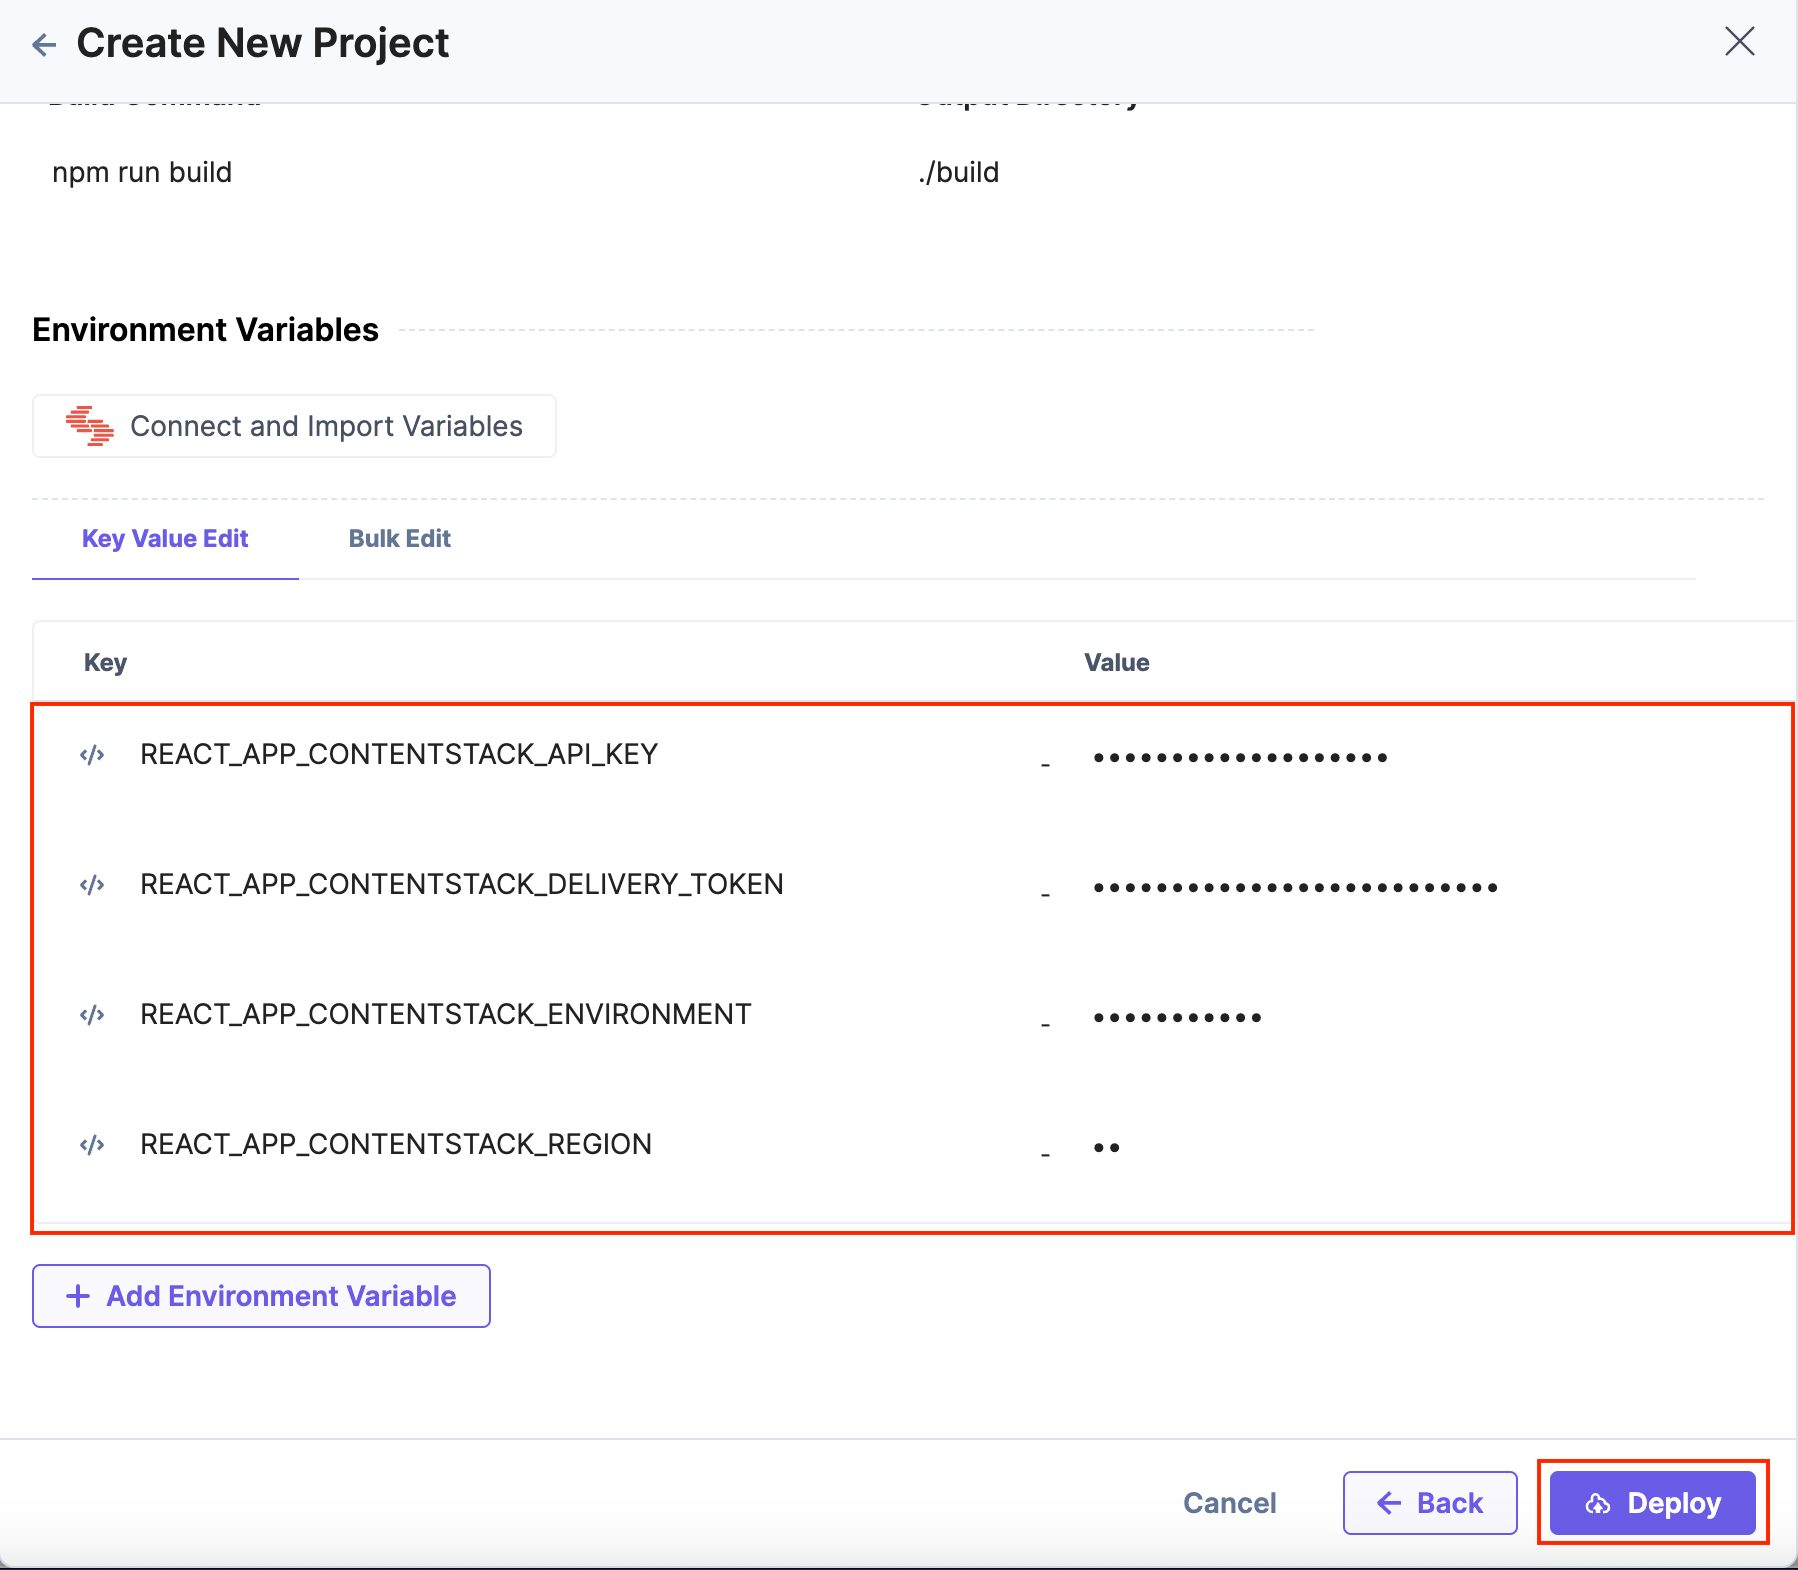
Note: We need to add the four environment variables highlighted in the above image during the project creation manually.
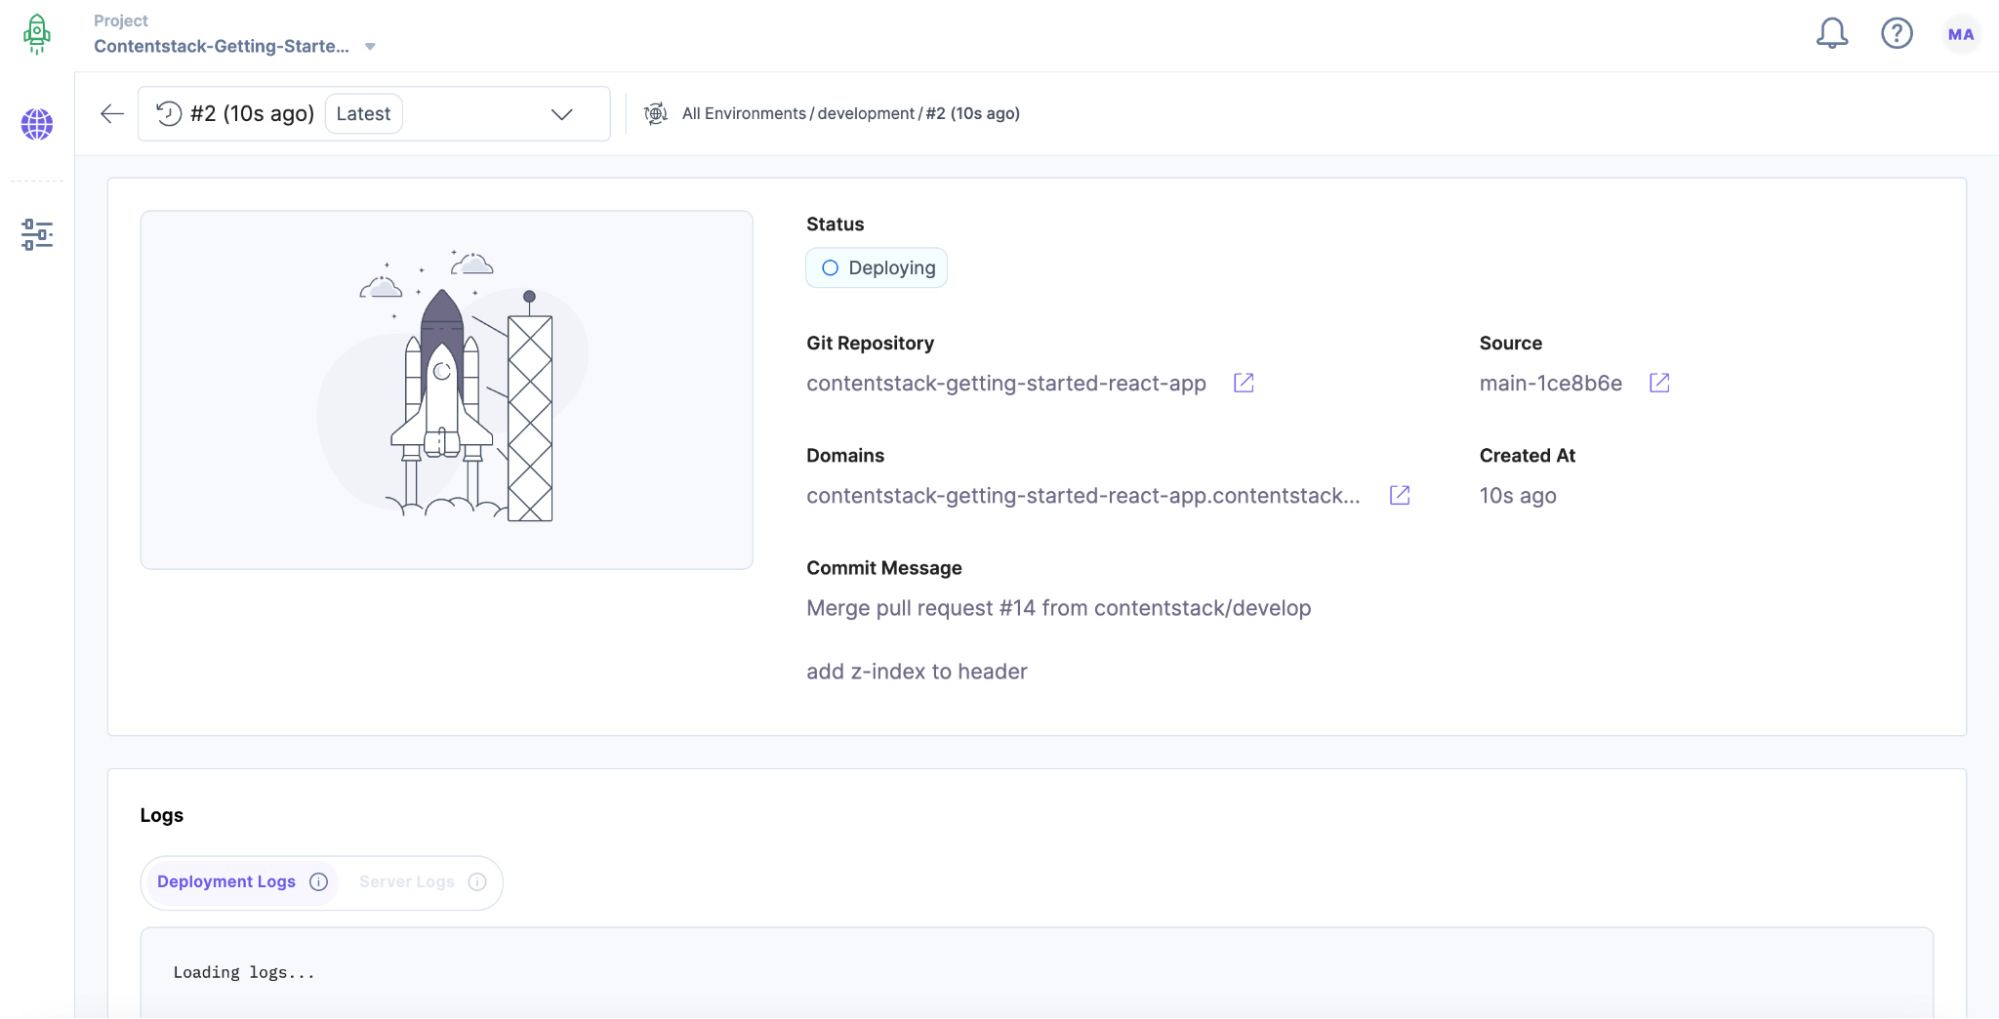
Once done, you will be redirected to the Deployment Information page as follows:
Once the deployment is complete, you will be able to see the snapshot of the application as follows:
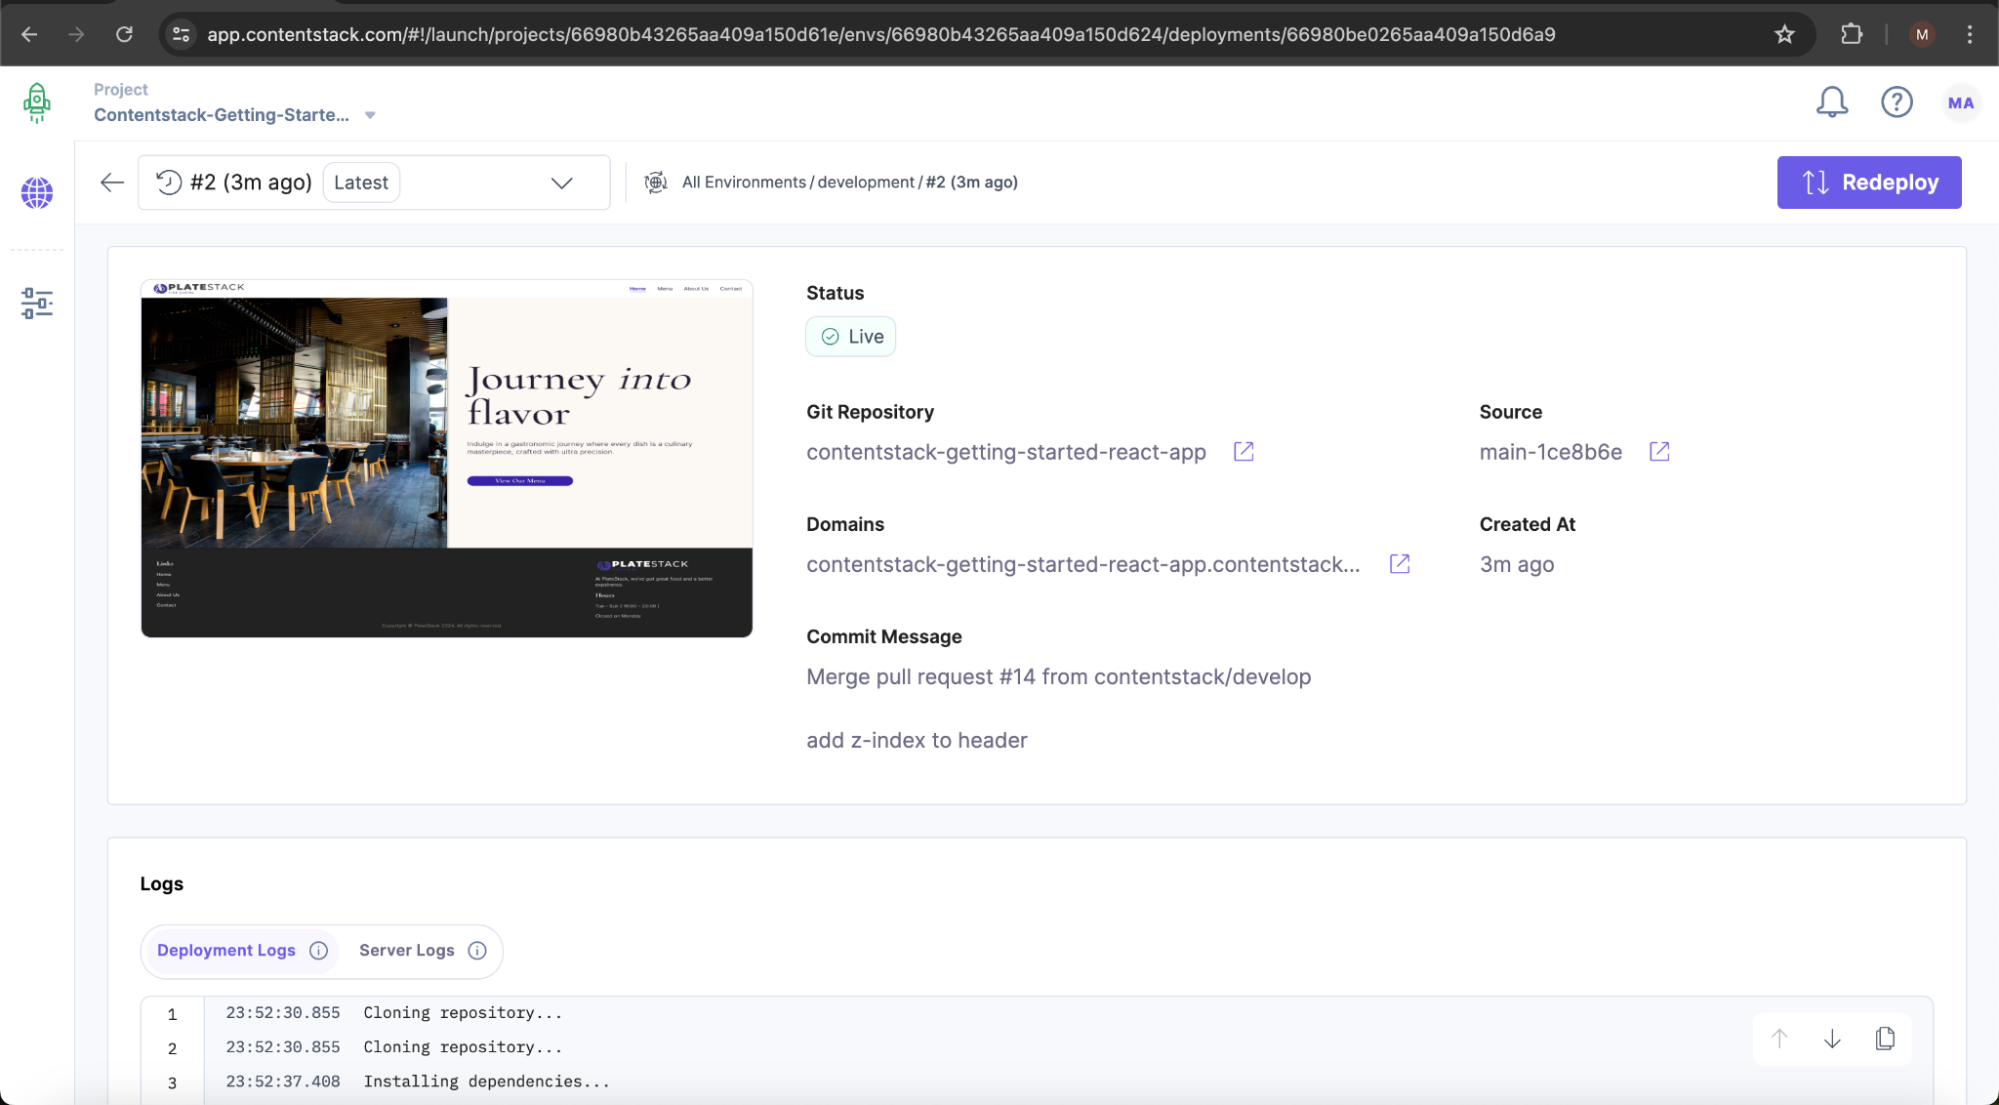
- Click on the URL displayed on the page. You will be redirected to the application deployed using Launch.
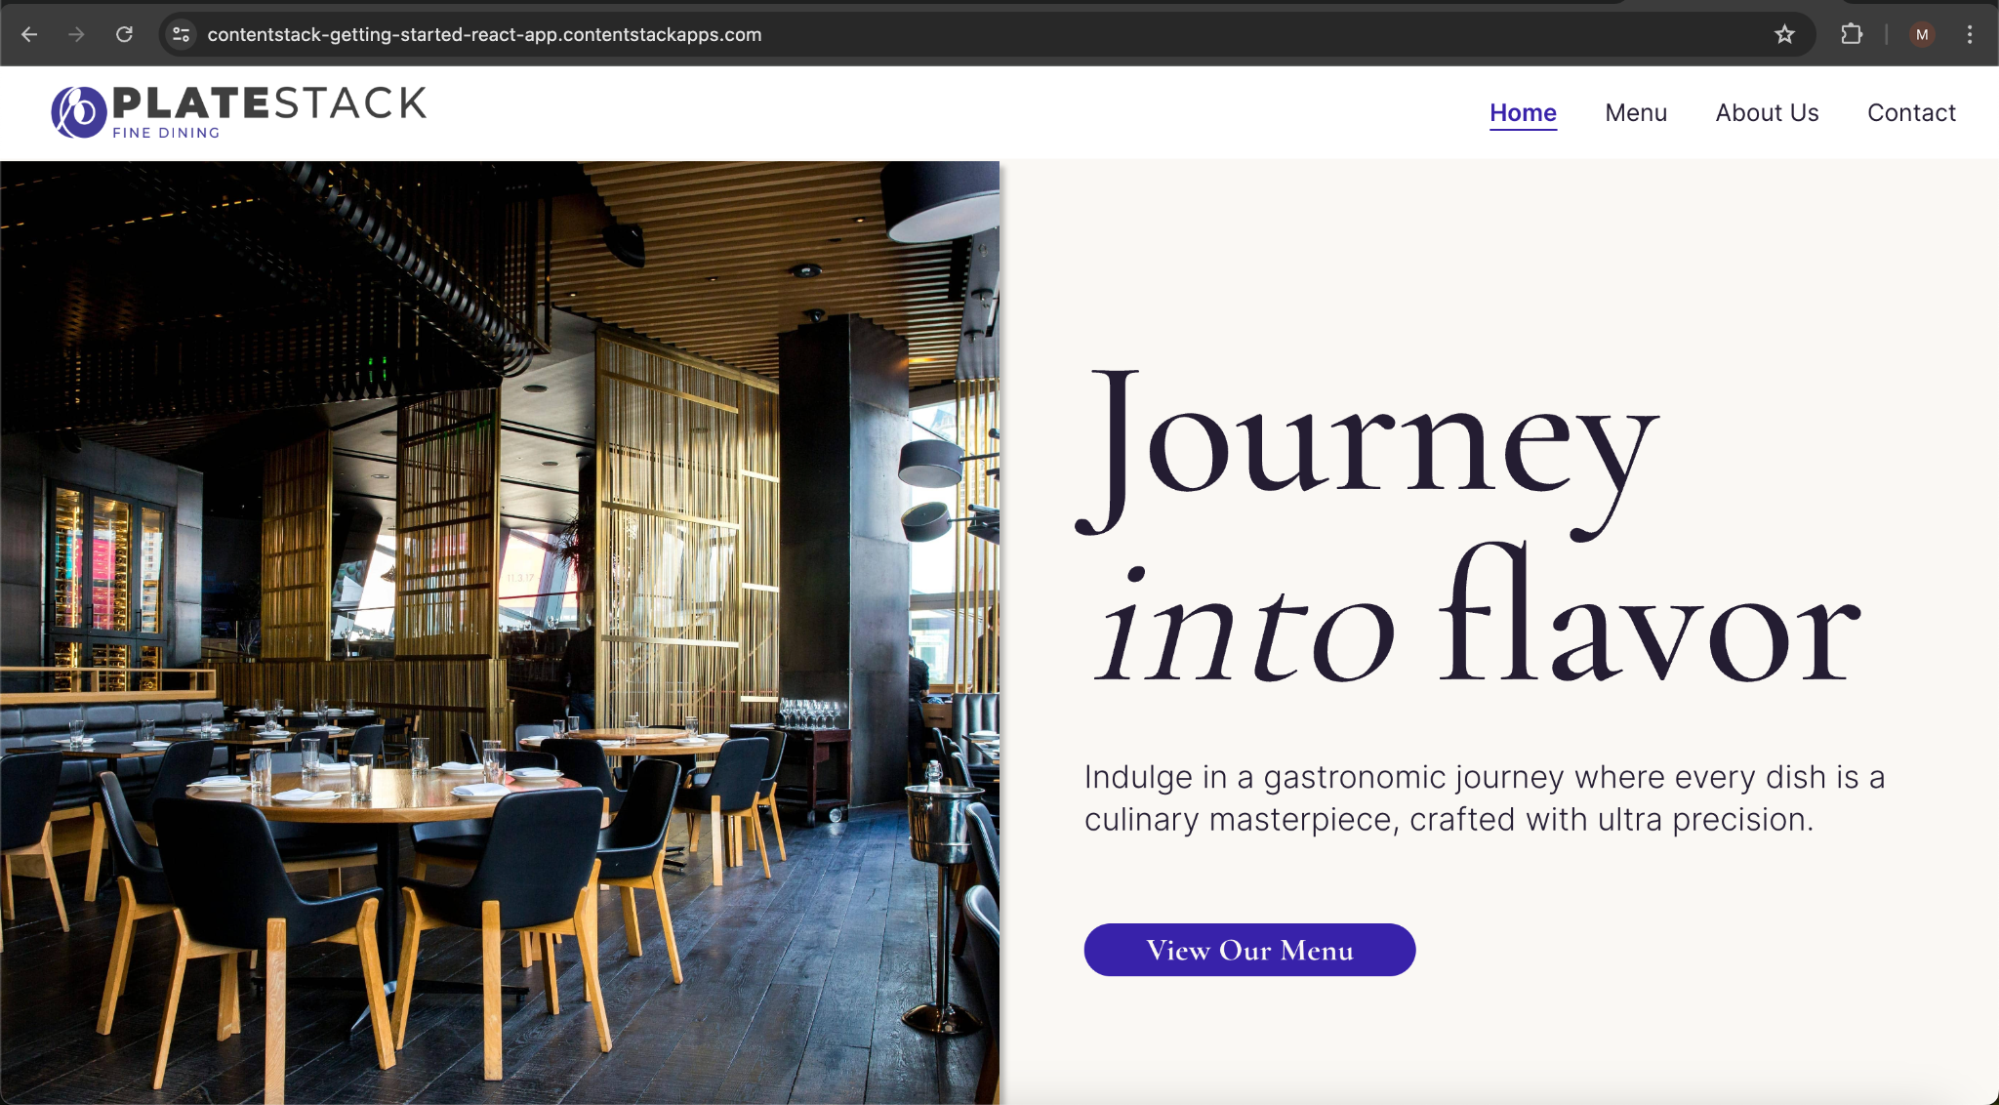
Congratulations! You have successfully connected your Github repository with Launch and deployed your application. Your application is live and it can be viewed anywhere with the generated URL.
Since you have linked your GitHub repository with Launch, whenever new code changes are pushed to the main branch, Launch will automatically detect and redeploy the new changes to keep your application up-to-date. You can disable this in Settings if you prefer not to automatically redeploy.
Next Steps
Project Structure of Getting Started With Building Your Sample Website


.svg?format=pjpg&auto=webp)
.svg?format=pjpg&auto=webp)
.png?format=pjpg&auto=webp)


.png?format=pjpg&auto=webp)