Automate App
The Automate App provides functionalities to integrate Automate into your stack. With the Automate App, you can bring all the capabilities of Automate to your entry editor in the CMS.
Let’s see how you can use and install the Automate app via the Marketplace to get started.
Prerequisites
- Contentstack Account
- Access to the Contentstack Organization/Stack as the Owner/Admin
Steps for Execution
Install Automate App
Follow the steps to install the Automate App in Contentstack.
- Log in to your Contentstack account.
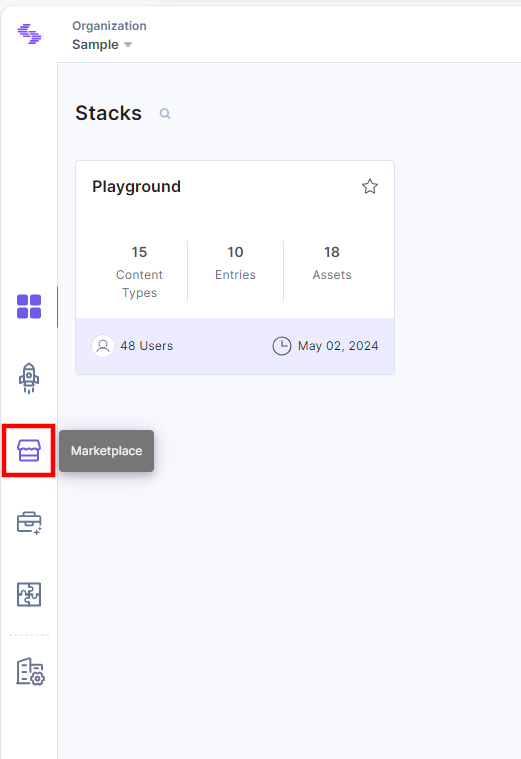
- From the left-hand side primary navigation, click the Marketplace icon to go to the Marketplace.
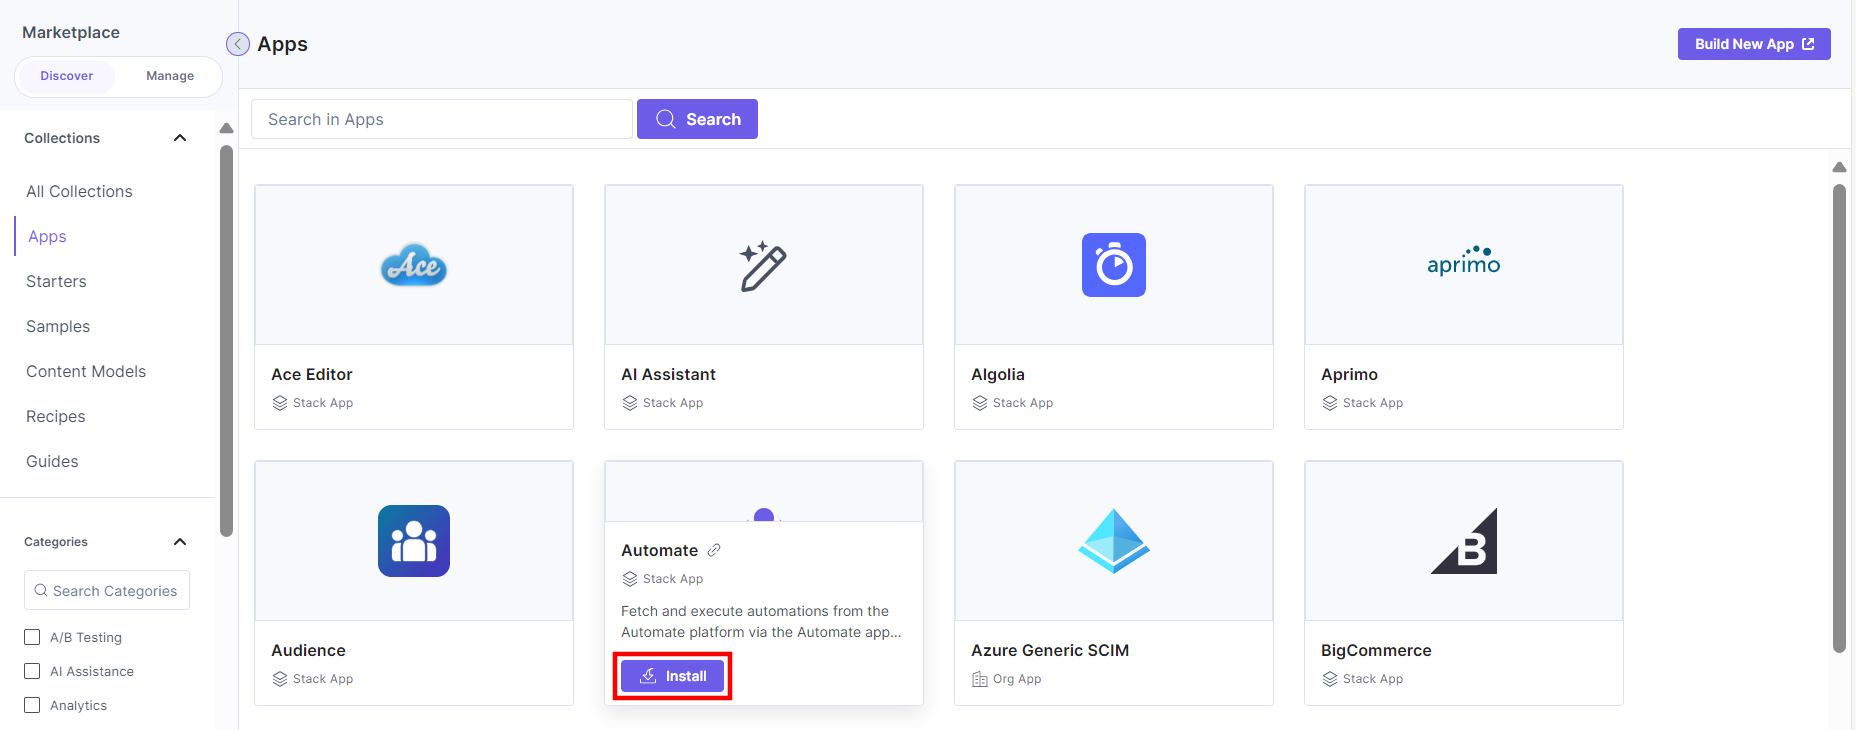
- Click Apps from the left panel.
- Within the Marketplace, you can see all the available apps. Hover over the Automate app and click Install.
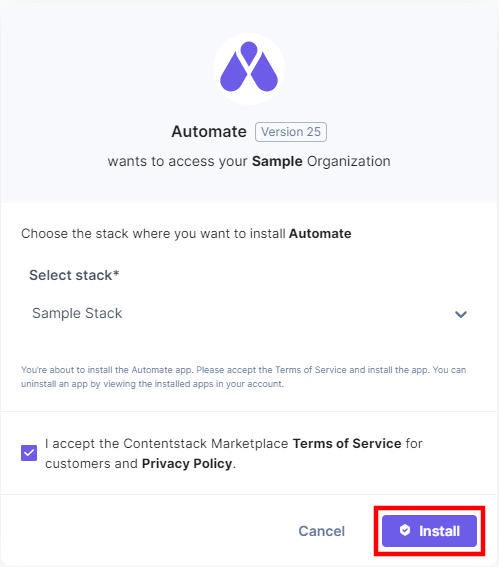
- In the pop-up window, select the stack where you want to install the Automate app, accept the terms and conditions, and click the Install button.
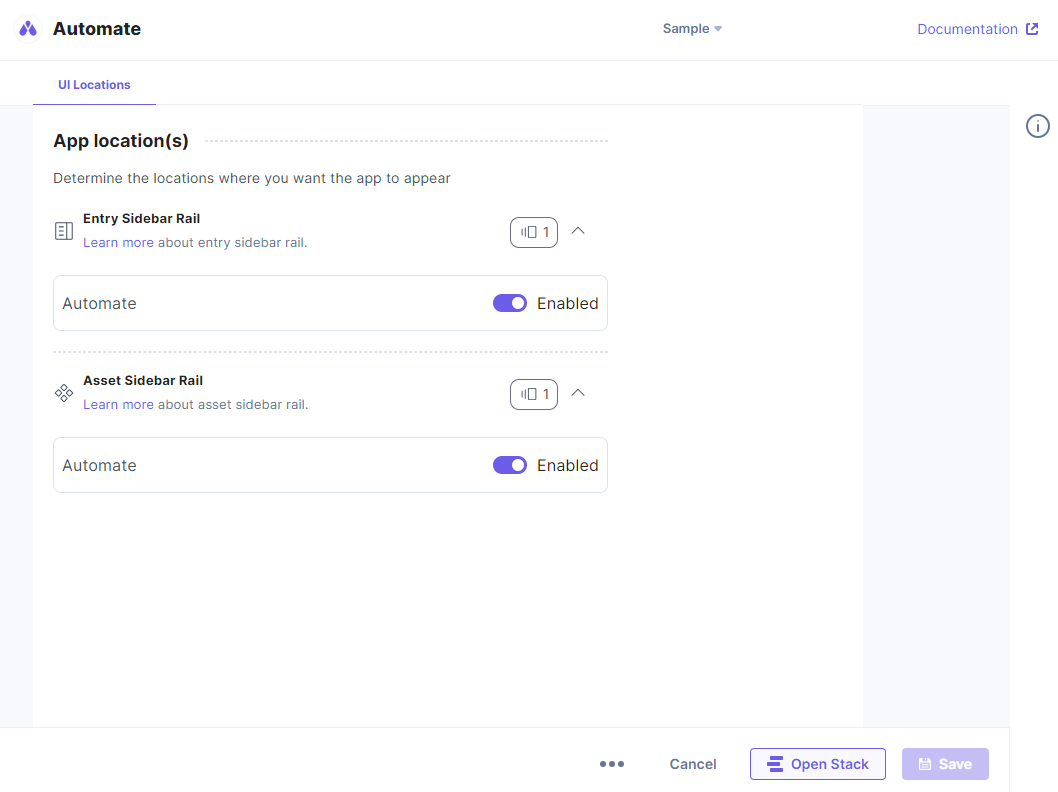
- On the configuration screen, you will see the Entry Sidebar Rail UI location and the Asset Sidebar Rail UI location enabled for the Automate app. Click the Open Stack button, which will redirect you to your stack.
Note: The Entry Sidebar Rail and the Asset Sidebar UI locations are enabled only for the Automate app.
You can view the Automate App on the Entry and Asset editor page in the Entry Sidebar and the Asset Sidebar Rail UI Locations.
Entry Editor Page
To view the Automate App in the Entry Editor page, follow the steps below:
- Go to your stack, click the Content Models icon in the left navigation panel, and click the + New Content Type button. In the drop-down, select Create New or Use Prebuilt options.
- Create a content type by adding relevant details and click the Save and proceed button.
- From the left navigation panel, navigate to the Entries page, click + New Entry to create a new entry for the above content type, and then click Proceed.
- In the right navigation panel, you will see the Automate App icon. Click to view the Automate App.
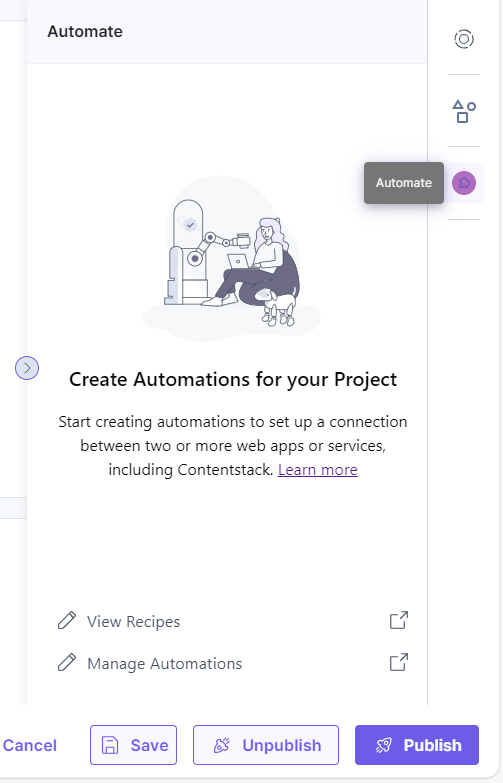
- You will see two icons: View Recipes and Manage Automations. Click Manage Automations to create a new automation.
On clicking the View Recipes icon, you can see the recipes list.
Note: View Recipes and Manage Automations icons are only visible to an organization’s Admin(s)/Owner(s). Standard users can only execute the automation that is visible via the Automate App in the Entry Sidebar location.
Create an Automation
To start executing the automation via the Automate App, you first need to create an automation. To do so, follow the steps below:
- From the left navigation panel, click Automate.
- On the Automations project page, click the On-demand Automation project.
- On the Automations page, click + New Automation.
- Provide an Automation Name and an optional Description. Click Create.
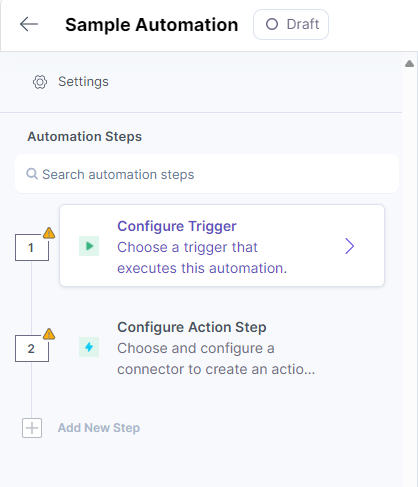
- After entering the basic details of the automation in the above step, the next set of actions can be broadly classified into the following two main steps:
- Configure Trigger
- Configure Action Step
-
Let’s look at the above steps in the next section.
Configure Trigger
Configuring a trigger can be broken into the following steps:
- From the left navigation panel, click Configure Trigger.
- Within the Configure Trigger step, click the On-Demand Automation trigger.
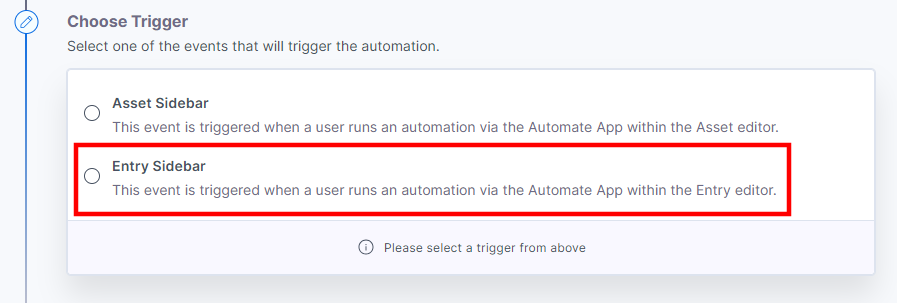
- Under the Choose Trigger section, select the Entry Sidebar trigger.
- On the Entry Sidebar Configure Trigger page, enter the details given below:
- Select a Stack and Branch from the Lookup list.
Note: You cannot configure a Response connector with the On-Demand Automate trigger.
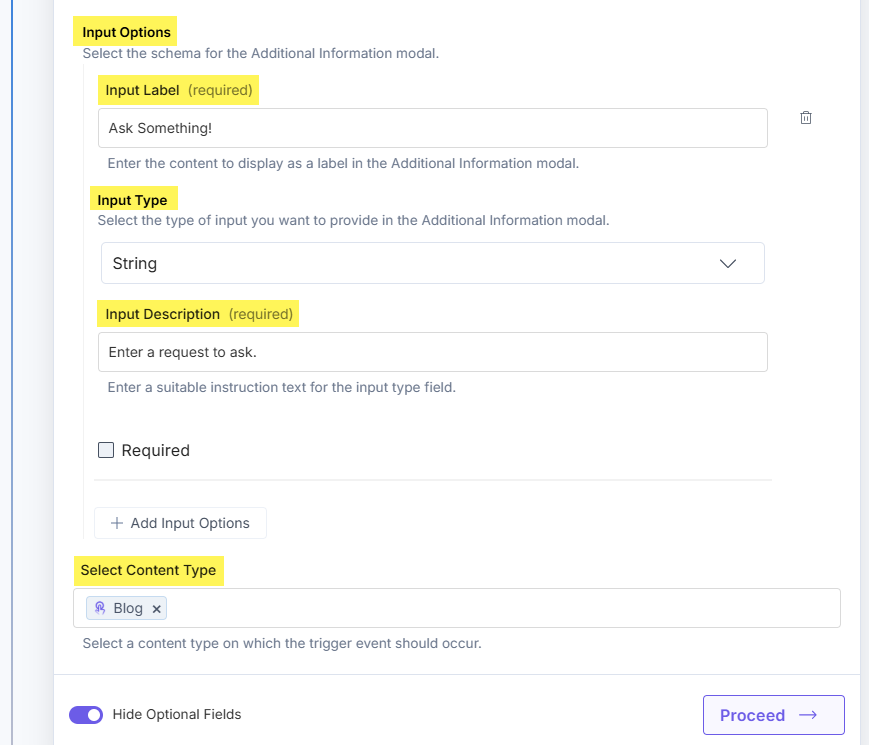
- Optionally, enable the Show Optional Fields toggle button to display the Select Content Type and Input Options fields.
- Click the + Input Options button to view an Additional Information modal in the Entry Sidebar.
- In the Input Label field, enter the content to display as a label in the Additional Information modal.
- From the Input Type drop-down, select the type of input you want to provide in the Additional Information modal.
- In the Input Description field, enter a suitable instruction text for the input type field.
- Select a Stack and Branch from the Lookup list.
- Click the Proceed button.
- Click the Test Trigger button to test the configured trigger.

- Click the Save and Exit button.
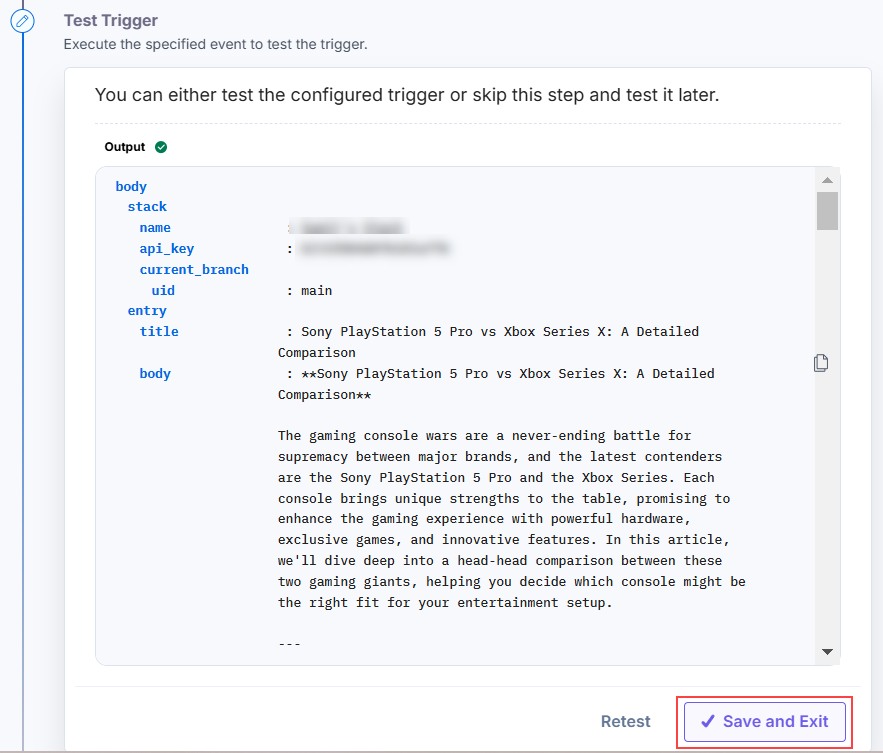
Note: After successfully configuring a trigger, if you re-configure any other trigger, you will be prompted to revert to the previously configured trigger. You can revert back to the last trigger configurations by clicking the Revert Changes button.
This completes the configuration of your On-Demand Automate trigger.
Configure Action Step
You can configure any action connector based on your configuration. For this guide, we are selecting Email by Automate connector.
To configure an action step follow the steps below:
- Click Configure Action Step from the left navigation panel.
- Click Action Step to configure third-party services.
- Within the Configure Action Step, click the Email by Automate connector.
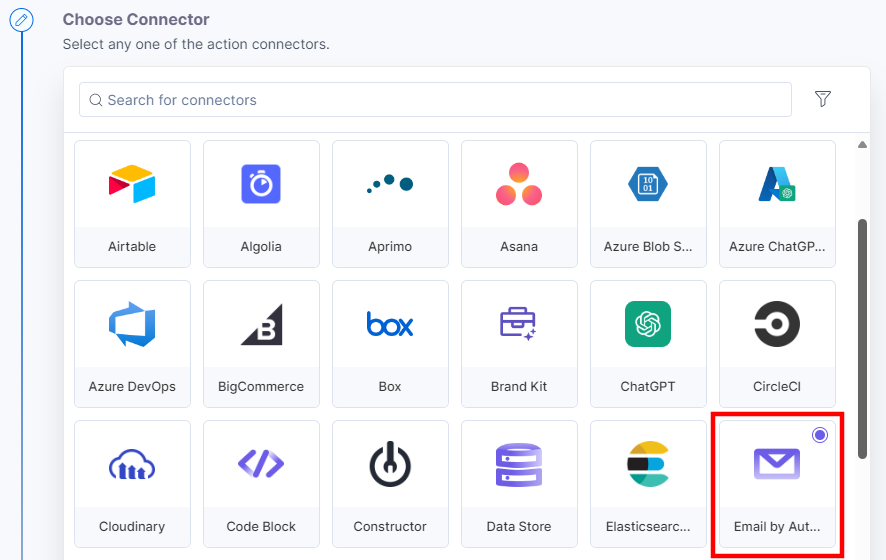
- Under Choose an Action tab, select the Email by Automate action.

- On the Configure Action page, enter the To email address, the Subject line, the Body Type, and the Body of the email. The Show Optional Fields toggle button allows you to enter the “CC” and “BCC” email addresses.
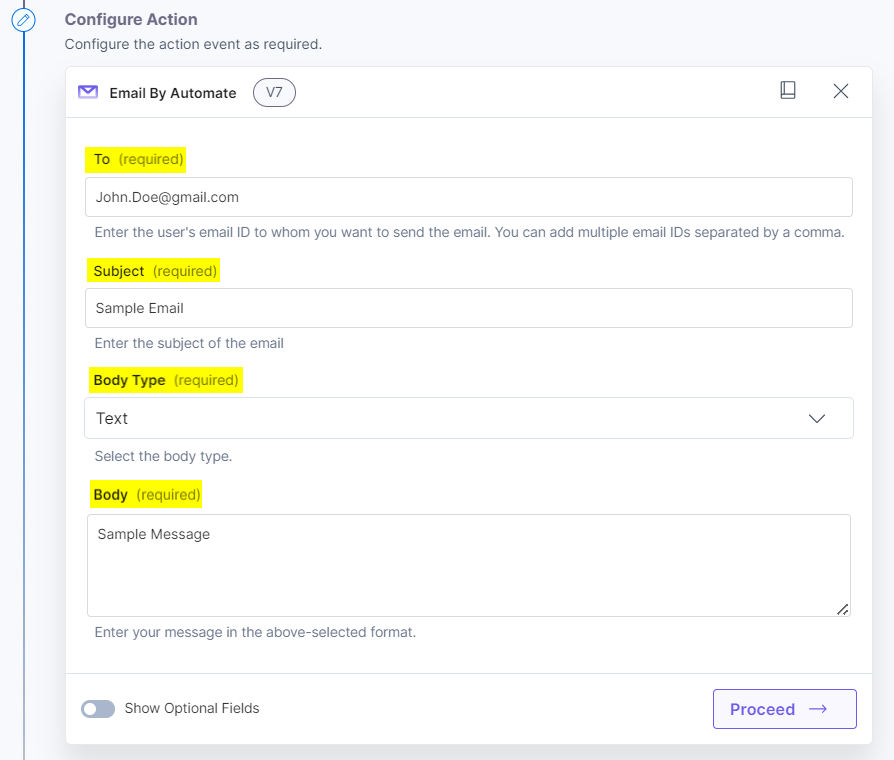
- Click Proceed after entering the details.
- Click Test Action to test if the email sending was a success or not.

- The email is queued and sent to the receiver’s email address. Click Save and Exit.
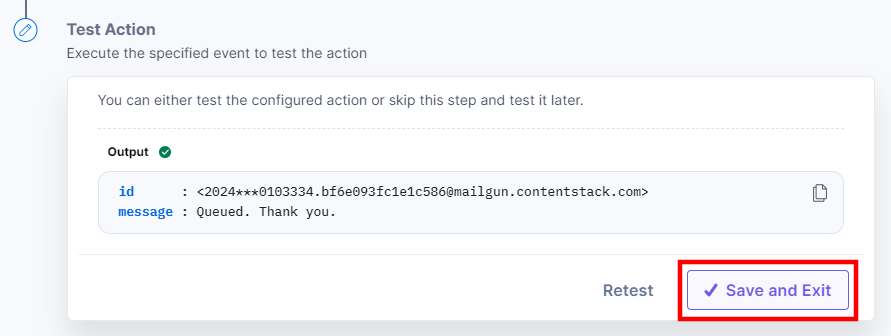
Activate the automation by clicking the Activate Automation toggle button.
Execute the Automation via Automate App
Once the automation is activated, you can check all the active automations in the Automate App. To do so, follow the steps below:
- Navigate to the Automate App in the entries page.
- You will see a list of all the active automations. Click the “Execute icon” to execute the automation.
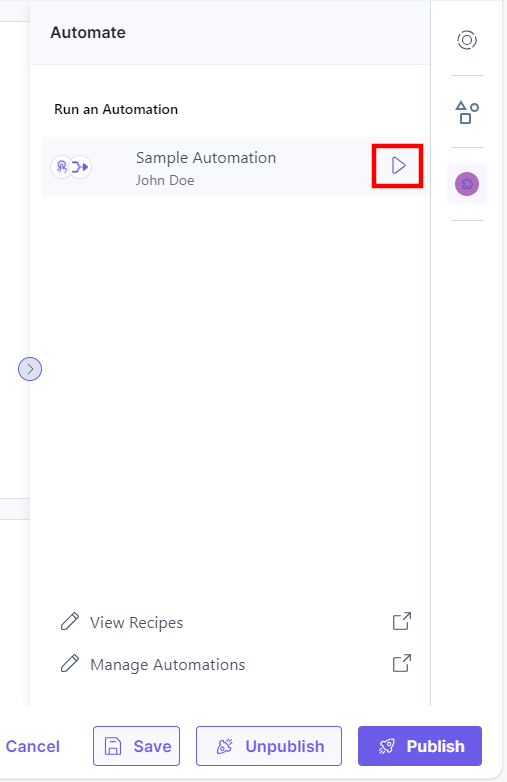
- Once the automation is executed successfully, you can check the receiver’s email address for the email sent via Automate.

Use Case Additional Information Modal
Let’s see a use case to understand how the users can view and interact with the Additional Information modal.
In this use case, we will cover a scenario where, if a user adds the Input Options in the Entry Sidebar, the ChatGPT Connector processes the request and provides a prompt. The On-Demand Automate Connector displays the response in the Results modal.
Let's break this scenario to see what must be the trigger event and the consequent action required to execute the Automation:
- Set up the On-Demand Automate “Entry Sidebar” Trigger Event: This trigger event is activated whenever a user runs the automation via the Automate App in the Entry Sidebar.
- Set up the ChatGPT “Chat” Action: Once the above event triggers the automation, the Chat action will provide a response based on the request.
- Set up the On-Demand Automate “Summary Overlay” Action: Once the above action is executed, the Summary Overlay action displays the response in the Results modal in the Entry Sidebar.
The steps to set up the Automation are as follows:
- Set up the On-Demand Automate Trigger
- Set up the ChatGPT Connector
- Set up the On-Demand Automate Connector
- Execute the Automation via Automate App
Let’s look at the setup in detail.
Set up the On-Demand Automate Trigger
- From the left navigation panel, click Configure Trigger.
- Within the Configure Trigger step, click the On-Demand Automate trigger.
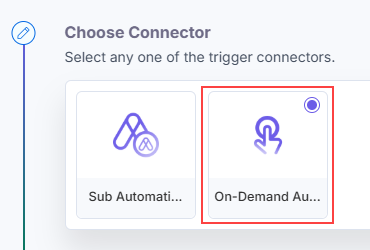
- Under the Choose Trigger section, select the Entry Sidebar trigger.

- On the Entry Sidebar Configure Trigger page, enter the details given below:
- Select a Stack and Branch from the Lookup list.
Note: You cannot configure a Response connector with the On-Demand Automate trigger.
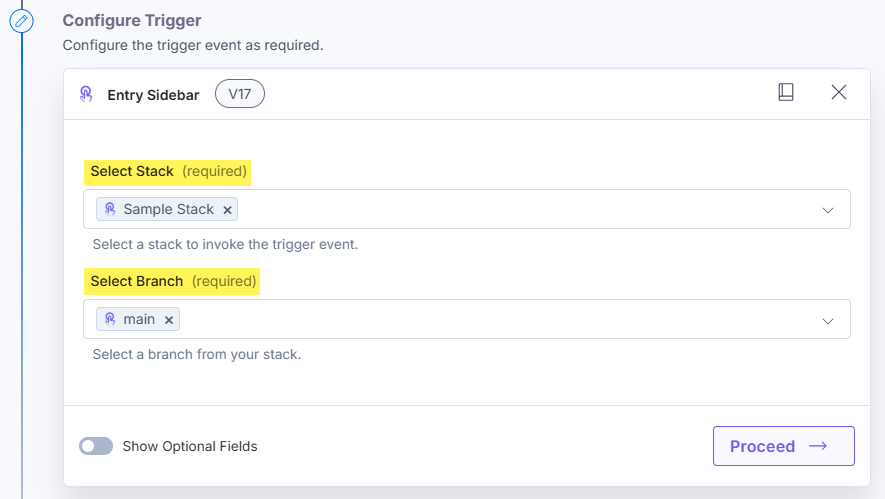
- Optionally, enable the Show Optional Fields toggle button to display the Select Content Type and Input Options fields.
- Click the + Input Options button to view an Additional Information modal in the Entry Sidebar.
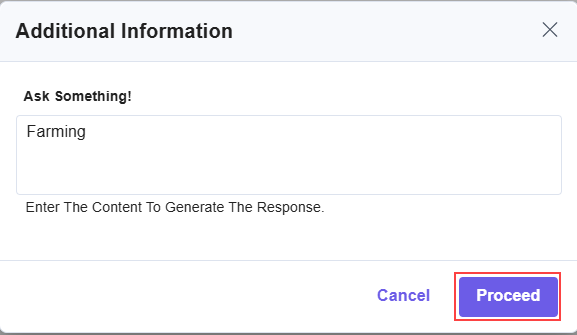
- In the Input Label field, enter the content to display as a label in the Additional Information modal. For example, enter Ask Something!.
- From the Input Type drop-down, select the type of input you want to provide. For example, select String.
- In the Input Description field, enter a suitable instruction text for the input type field. For example, Enter the content to generate the response.

- Select a Stack and Branch from the Lookup list.
- Click the Proceed button.
- Click the Test Trigger button to test the configured trigger.

- Click the Save and Exit button.

Set up the ChatGPT Connector
- From the left navigation panel, click Configure Action Step.
- Within the Configure Action Step, click the ChatGPT Connector.
- Under the Choose an Action tab, select the Chat action.
- On the Chat Configure Action page, enter the details given below:
- Click + Add New Account button to connect your ChatGPT account as shown in the Connect your ChatGPT Account to Automate step.
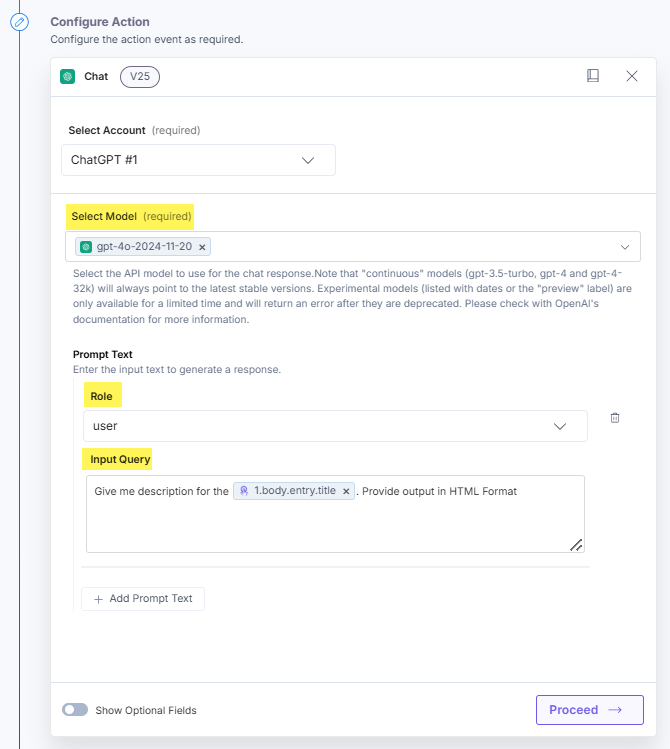
- Select the API Model from the dropdown list to generate content for the chat responses.
Note: Different models are available to different users based on the account the user holds such as paid accounts. You must check the account access before selecting the model.
- Provide the Prompt Text to generate response(s). Click + Add Prompt Text to enter multiple prompts.
- Select the Role from the dropdown options to send to the API model request. By default, the role is set to the user.
Additional Resource: There are three different types of roles provided by the OpenAI platform. The system role sets the response context, the assistant role provides the response content, and the user role asks the prompt.
- Enter the value in the Input Query field. For example, Give me description for the {{1.body.entry.title}}. Provide output in HTML format. This provides a description about the entry in the Results modal.
- Click the Show Optional Fields toggle button to use the optional fields.
Additional Resource: Refer to the ChatGPT Connector.
- Click the Proceed button.
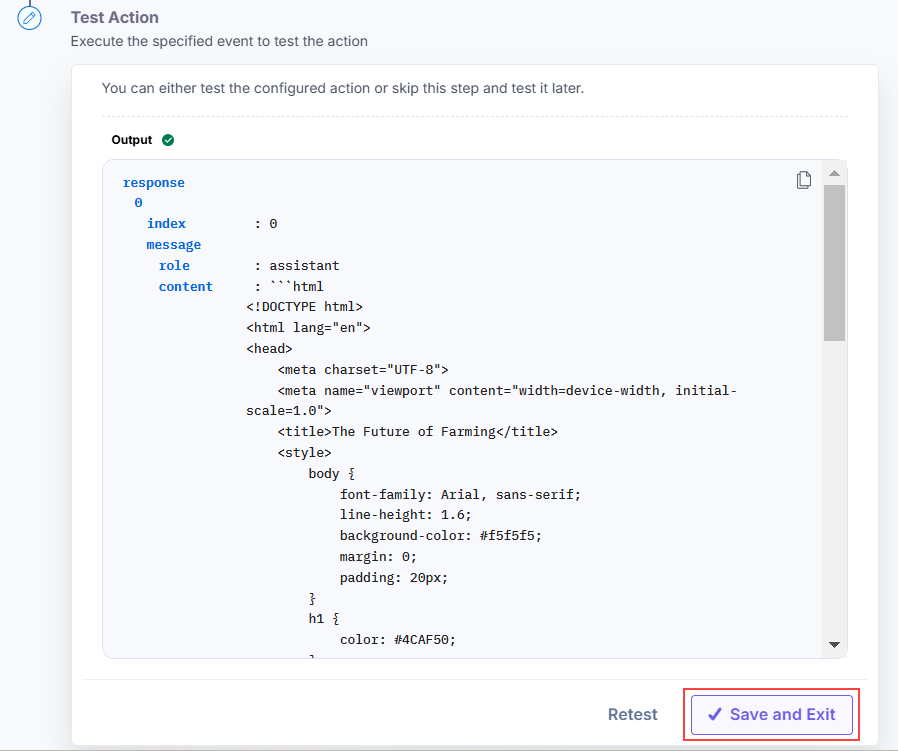
- Click the Test Action button to test the configured action.

- Click the Save and Exit button.
Set up the On-Demand Automate Connector
- From the left navigation panel, click Configure Action Step.
- Within the Configure Action Step, click the On-Demand Automate Connector.
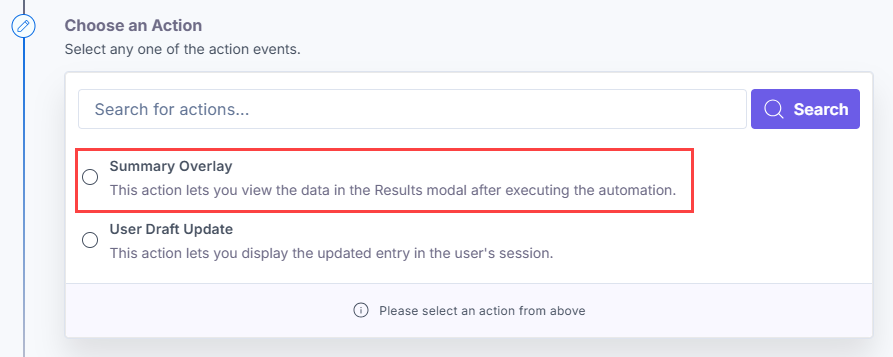
- Under the Choose an Action tab, select the Summary Overlay action.
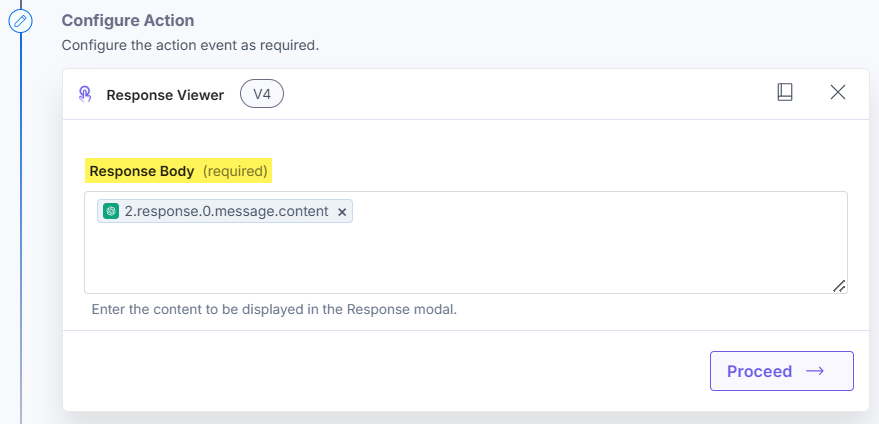
- In the Response Body field, enter the content to be displayed in the Results modal. Fetch the response from the Chat action, i.e., 2.message.0.message.content as shown below:
- Click the Proceed button.
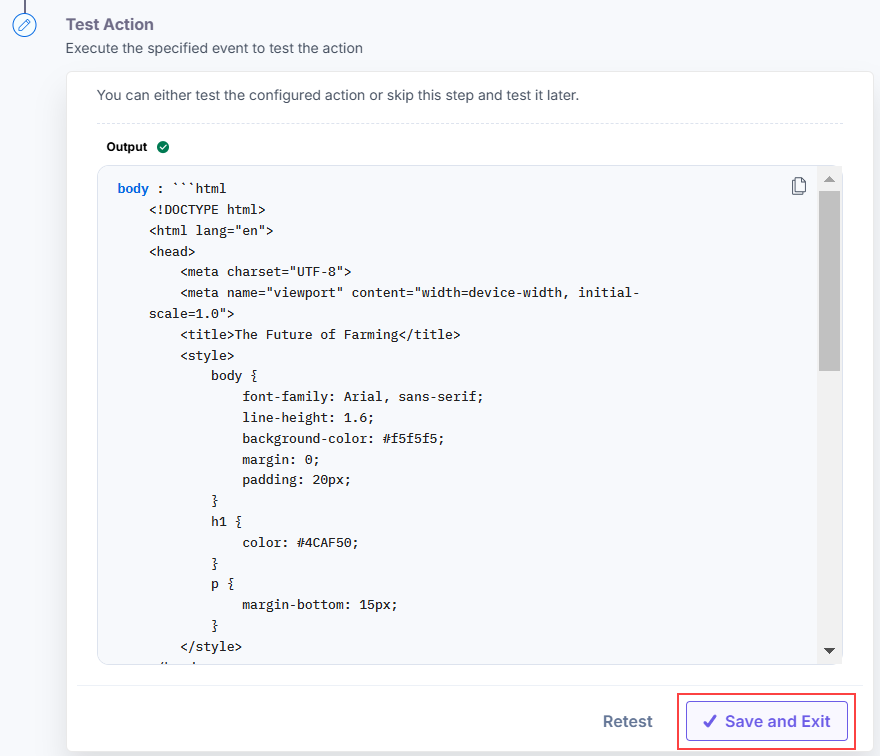
- Click the Test Action button to test the configured action.

- Click the Save and Exit button.
Execute the Automation via Automate App
Once the automation is activated, you can check all the active automations in the Automate App. To do so, follow the steps below:
- Navigate to the Automate App in the entries page.
- You will see a list of all the active automations. Click the “Execute icon (|>)” to execute the automation.
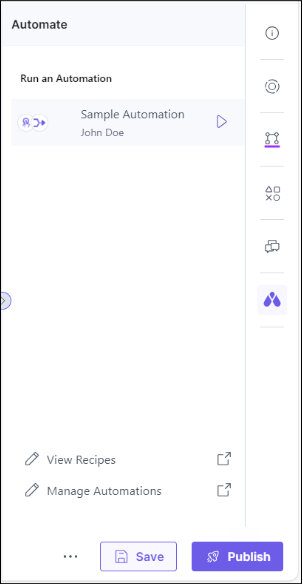
- A pop-up window will appear. Enter a prompt in the input field as shown below:
- You will get the response on the Results modal as shown below:
Use Case for the User Draft Update
Here is a use case to understand how the users can update an entry in real-time with the User Draft action. We will cover a scenario where, if a user executes an automation via the Automate app in the Entry Sidebar, the entry title is updated automatically.
Let's break this scenario to identify the trigger event and the necessary actions required to execute the automation.
- Set up the On-Demand Automate “Entry Sidebar” Trigger Event: This trigger event is activated whenever a user runs the automation via the Automate app in the Entry Sidebar.
- Set up the On-Demand Automate “User Draft Update” Action: Once the above action is executed, the User Draft Update action dynamically displays the updated entry title.
The steps to set up the Automation are as follows:
- Set up the On-Demand Automate Entry Sidebar Trigger
- Set up the On-Demand Automate User Draft Update Action
- Execute the Automation via Automate App in Entry Sidebar
Let’s look at the setup in detail.
Set up the On-Demand Automate Entry Sidebar Trigger
- From the left navigation panel, click Configure Trigger.
- Within the Configure Trigger step, click the On-Demand Automate trigger.

- Under the Choose Trigger section, select the Entry Sidebar trigger.
- On the Entry Sidebar Configure Trigger page, enter the details given below:
- Select a Stack and Branch from the Lookup list.
Note: You cannot configure a Response connector with the On-Demand Automate trigger.

- Optionally, enable the Show Optional Fields toggle button to display the Select Content Type and Input Options fields.
- Click the + Input Options button to view an Additional Information modal in the Entry Sidebar.
- In the Input Label field, enter the content to display as a label in the Additional Information modal. For example, enter Ask Something!.
- From the Input Type drop-down, select the type of input you want to provide. For example, select String.
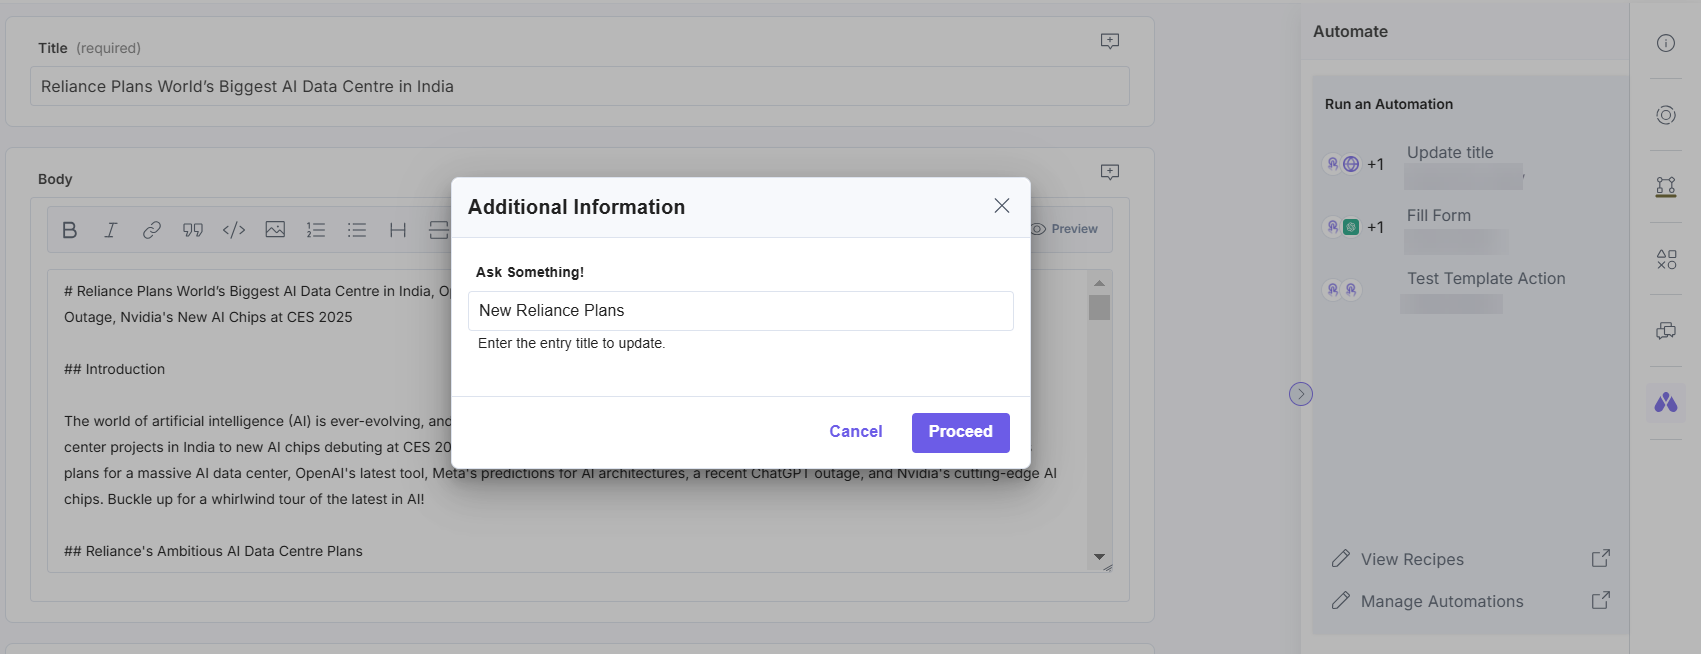
- In the Input Description field, enter a suitable instruction text for the input type field. For example, Enter the entry title to update.

- Select a Stack and Branch from the Lookup list.
- Click the Proceed button.
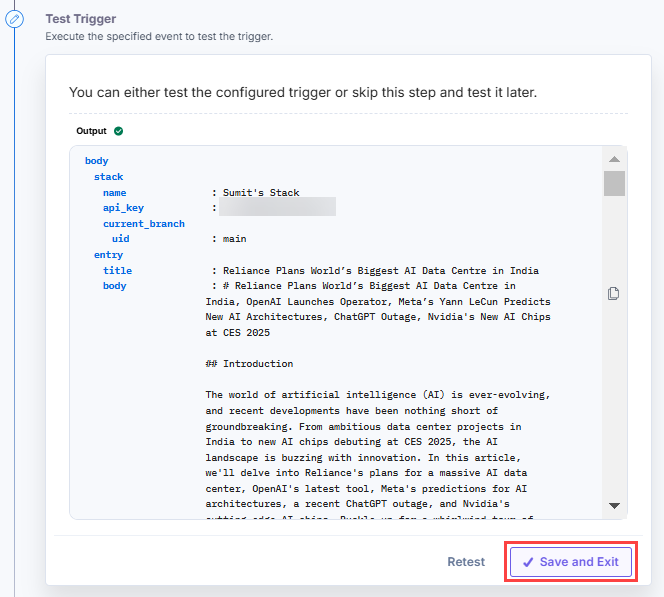
- Click the Test Trigger button to test the configured trigger.

- Click the Save and Exit button.
Set up the On-Demand Automate User Draft Update Action
- From the left navigation panel, click Configure Action Step.
- Within the Configure Action Step, click the On-Demand Automate Connector.
- Under the Choose an Action tab, select the User Draft Update action.
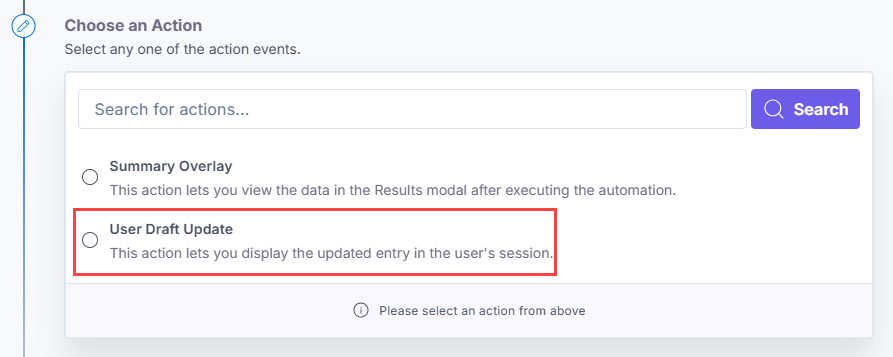
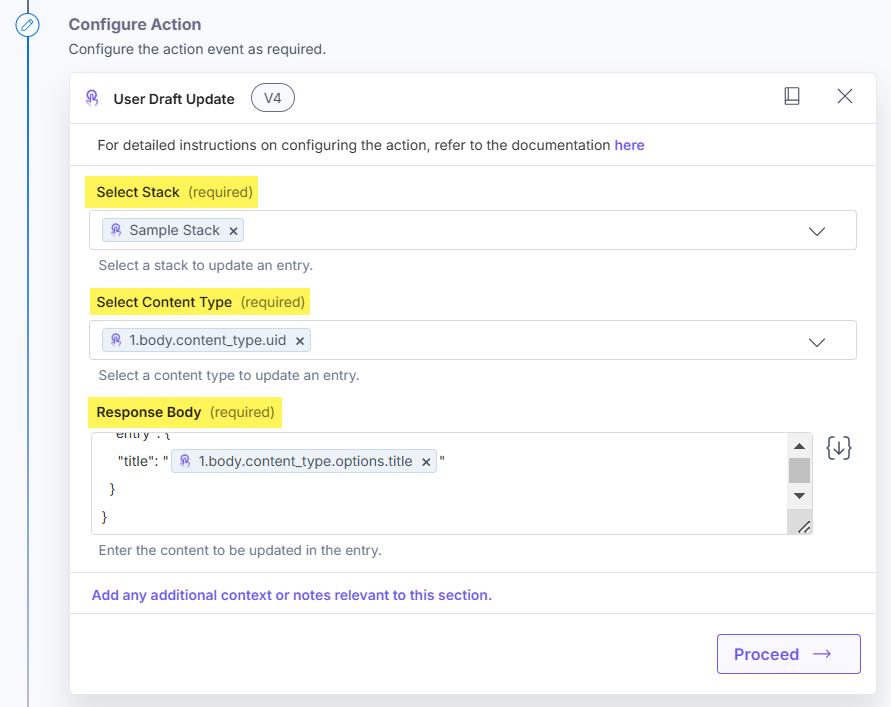
- Select a Stack and a Content Type from the Lookup list.
- In the Response Body field, enter the content to be updated in the entry as shown below:
- Click the Proceed button.
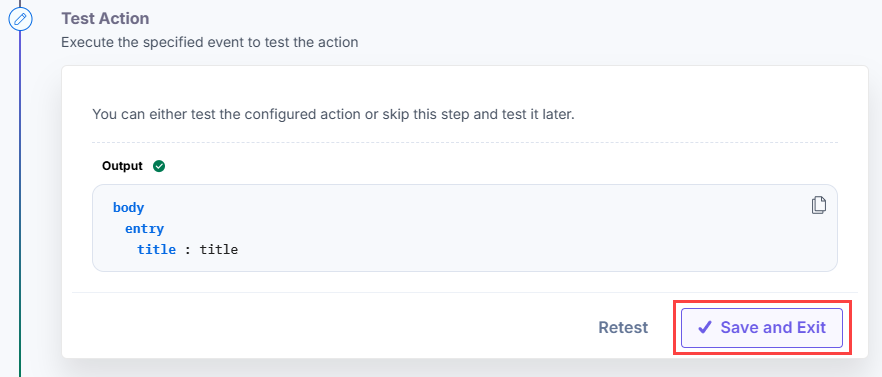
- Click the Test Action button to test the configured action.

- Click the Save and Exit button.
Execute the Automation via Automate App in Entry Sidebar
Once the automation is activated, you can check all the active automations in the Automate App. To do so, follow the steps below:
- Navigate to the Automate App in the entries page.
- You will see a list of all the active automations. Click the “Execute icon (|>)” to execute the automation.

- A pop-up window will appear. Enter a prompt in the input field as shown below:
- You will see the updated entry title in the entry view.
Asset Editor Page
To view the Automate App in the Asset Editor page, follow the steps below:
- Go to your stack, in the left navigation panel click the Assets icon, and then click the + New Asset button.
- In the Upload Asset(s) modal, click the + New Folder field, enter the Folder Name, and click the Mark icon to save the folder.
- Click the Choose files button to start adding assets in the folder created in the previous step.
- Once done, select the folder and the asset. Click the asset to navigate to the Asset Editor page.
- In the right navigation panel, you will see the Automate App icon. Click to view the Automate App.

- You will see two icons: View Recipes and Manage Automations. Click Manage Automations to create a new automation.
On clicking the View Recipes icon, you can see the Recipes list.
Note: View Recipes and Manage Automations icons are only visible to an organization’s Admin(s)/Owner(s). Standard users can only execute the automation that is visible via the Automate App in the Asset Sidebar location.
Create an Automation
To start executing the automation via the Automate App, you first need to create an automation. To do so, follow the steps below:
- From the left navigation panel, click Automate.
- On the Automations project page, click the On-demand Automation project.
- On the Automations page, click + New Automation.
- Provide an Automation Name and an optional Description. Click Create.
- After entering the basic details of the automation in the above step, the next set of actions can be broadly classified into the following two main steps:
- Configure Trigger
- Configure Action Step

-
Let’s look at the above steps in the next section.
Configure Trigger
Configuring a trigger can be broken into the following steps:
- From the left navigation panel, click Configure Trigger.
- Within the Configure Trigger step, click the On-Demand Automate trigger.
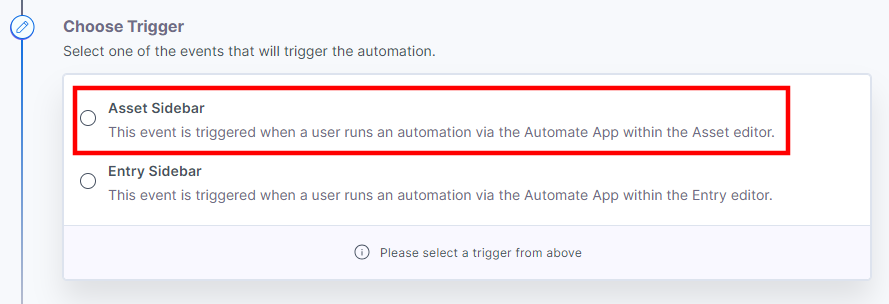
- Under the Choose Trigger section, select the Asset Sidebar trigger.
- On the Asset Sidebar Configure Trigger page, enter the details given below:
- Select a Stack and Branch from the Lookup list.
Note: You cannot configure a Response connector with the On-Demand Automate trigger.
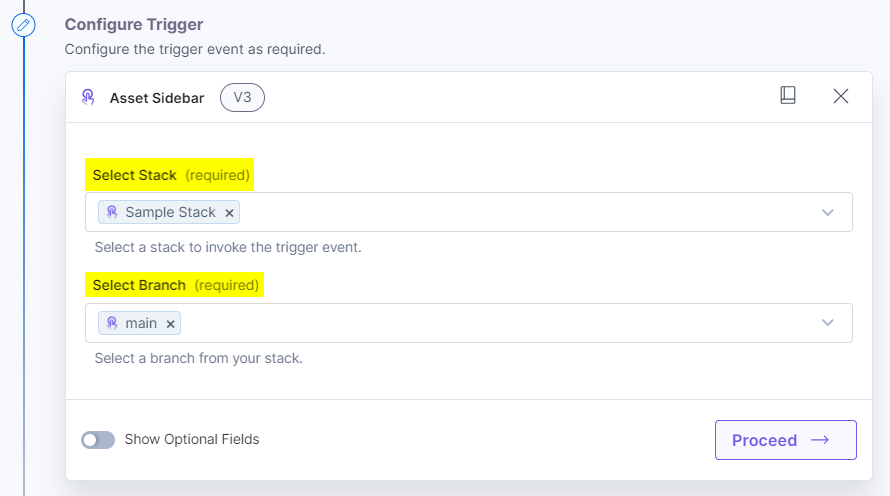
- Optionally, enable the Show Optional Fields toggle button to display the Select Asset Type field.
You can select the type of asset (Image, Video, Audio, PDF, Plain Text, Document, Presentation, Spreadsheet) on which the Automate App will appear.

- Select a Stack and Branch from the Lookup list.
- Click the Proceed button.
- Click the Test Trigger button to test the configured trigger.

- Click the Save and Exit button.
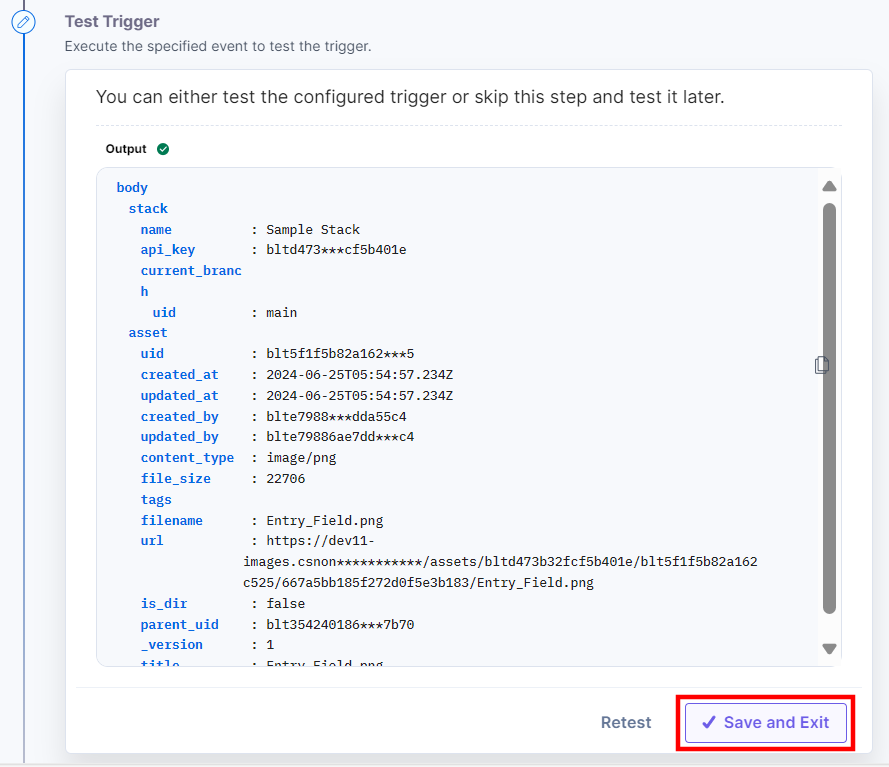
Note: After successfully configuring a trigger, if you re-configure any other trigger, you will be prompted to revert to the previously configured trigger. You can revert back to the last trigger configurations by clicking the Revert Changes button.
This completes the configuration of your Asset Sidebar trigger.
Configure Action Step
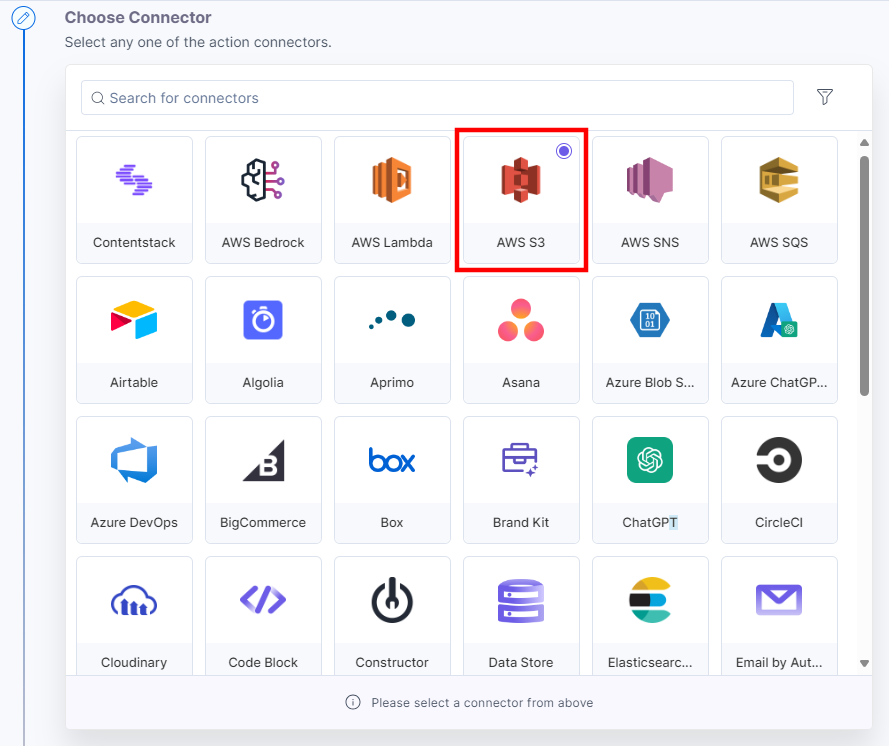
You can configure any action connector based on your configuration. For this guide, we are selecting AWS S3 connector to create an object in the AWS bucket, when an automation is executed in the Asset Sidebar via the Automate App.
To configure an action step follow the steps below:
- Click Configure Action Step from the left navigation panel.
- Click Action Step to configure third-party services.
- Within the Configure Action Step, click the AWS S3 connector.
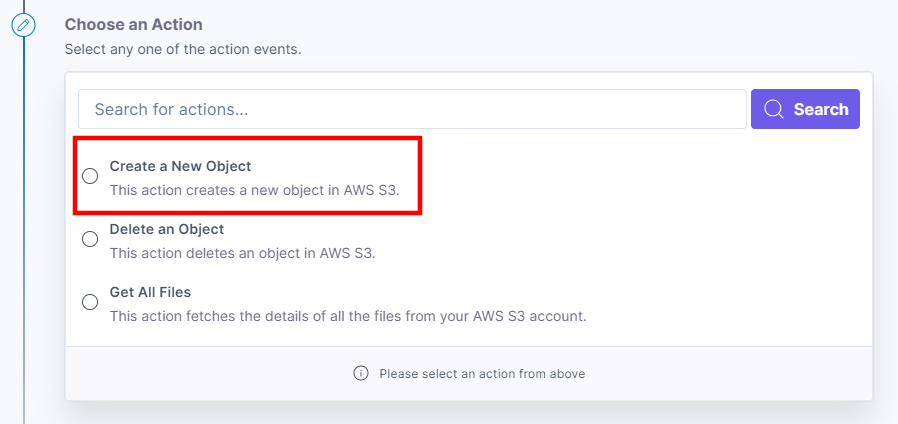
- Under Choose an Action tab, select the Create a New Object action.
- Click the + Add New Account button to add your AWS account. Refer to the AWS S3 documentation to add a new account.
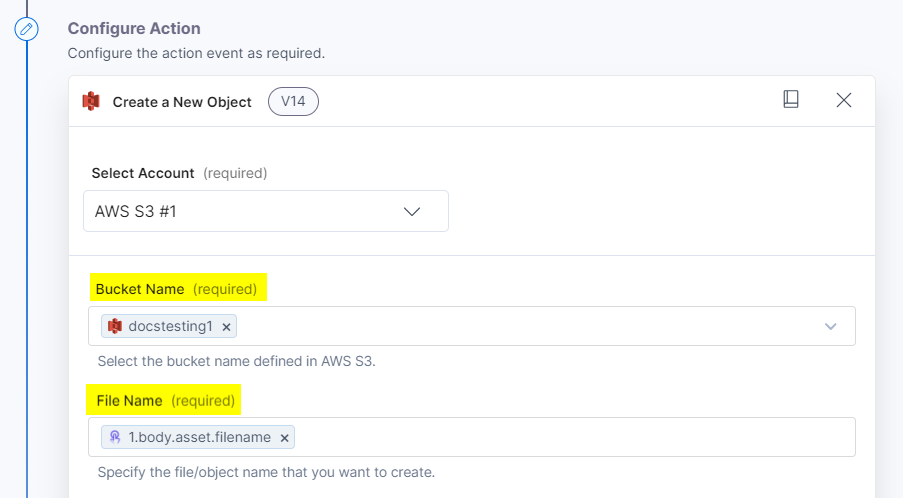
- On the Create a New Object Configure Action page, you need to enter the following details:
- Select the AWS Bucket Name from the Lookup list that appears when you click the textbox. The lookup drop-down loads the buckets already defined and present in your AWS account.
- Enter the File Name (for example, File01) or/and any value from the values list. For this example, select the asset name fetched from the Asset Sidebar trigger.
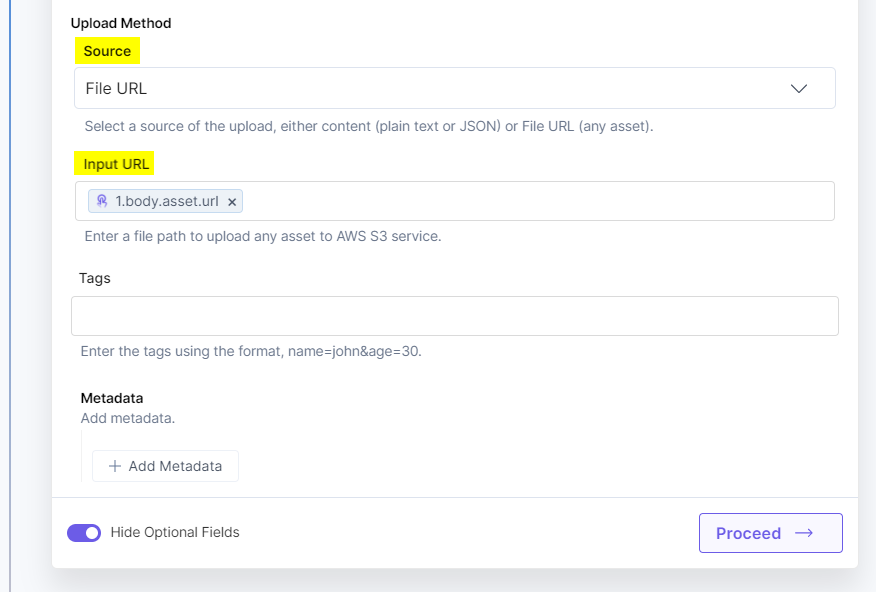
- In the Source dropdown, select the Source of the upload (Content or File URL) and the Input Value for each source.
For this example, select the Source as File URL and select the file URL fetched from the Asset Sidebar trigger in the Input URL field.
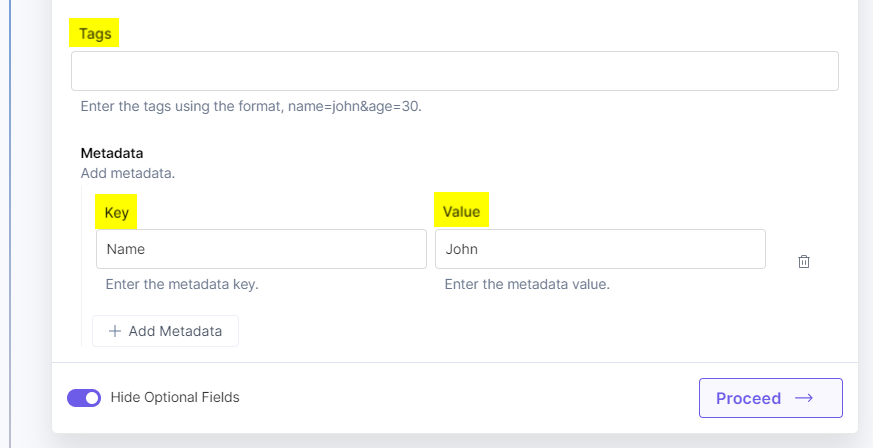
- Click the Show Optional Fields toggle button to enter the text for the Tags and Metadata optional fields.
- Click Proceed after entering the details.
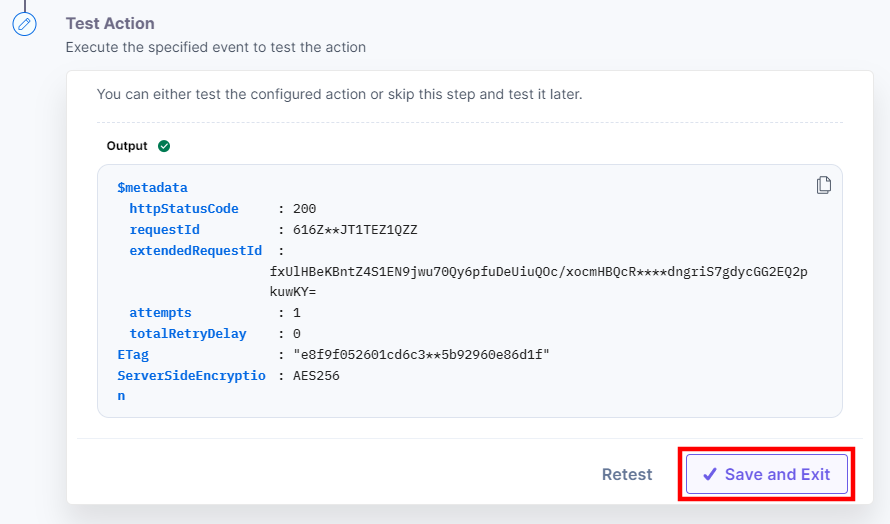
- Click Test Action to test if the email sending was a success or not.

- The email is queued and sent to the receiver’s email address. Click Save and Exit.
Activate the automation by clicking the Activate Automation toggle button.
Execute the Automation via Automate App
Once the automation is activated, you can check all the active automations in the Automate App. To do so, follow the steps below:
- Navigate to the Automate App in the Assets page.
- You will see a list of all the active automations. Click the “Execute icon” to execute the automation.

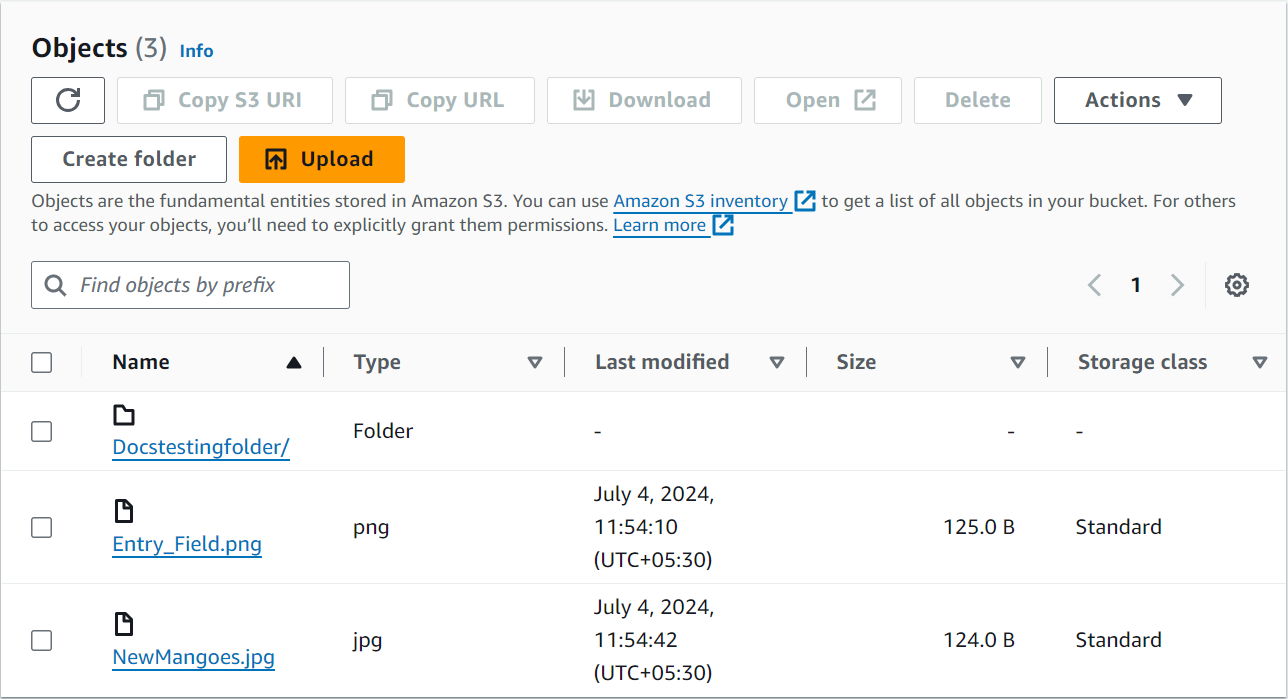
- Log into your AWS S3 account and see the list of files in the bucket. In the AWS account’s bucket, you can see the created file.


.svg?format=pjpg&auto=webp)
.svg?format=pjpg&auto=webp)
.png?format=pjpg&auto=webp)


.png?format=pjpg&auto=webp)