
.svg?format=pjpg&auto=webp)
.svg?format=pjpg&auto=webp)
.png?format=pjpg&auto=webp)


.png?format=pjpg&auto=webp)
Contentstack Management - Branches Actions
Branches offer isolated workspaces for safe, independent development of new features or updates. With branches you can create multiple copies of your stack content. You can perform branch-based operations using the following Contentstack Management Branches actions.
Note: You must have the Branches feature enabled for your stack. For more information, please reach out to our Support Team.
Let’s look at each of them in detail.
Create a Branch
This action creates a new branch in a stack.
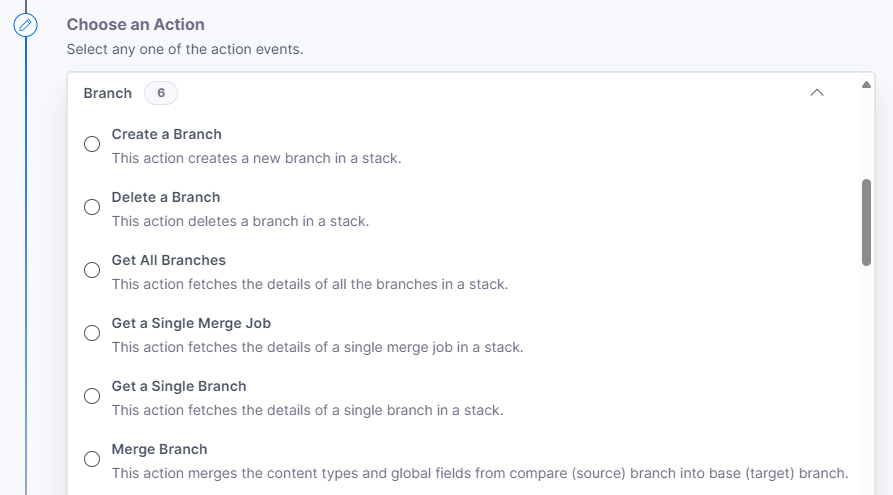
- Under Choose an Action tab, select the Create a Branch action.
- On the Create a Branch Configure Action page, enter the details given below:
- Click + Add New Account button to connect your Contentstack account as shown in the Connect your Contentstack Account to Automate step.
- Select a Stack and Branch from the Lookup list. The new branch will be a copy of the source branch.
Note: By default, the main branch is selected.
- Provide a Branch UID. The Branch UID must be lowercase, with no spaces, and maximum 15 characters.
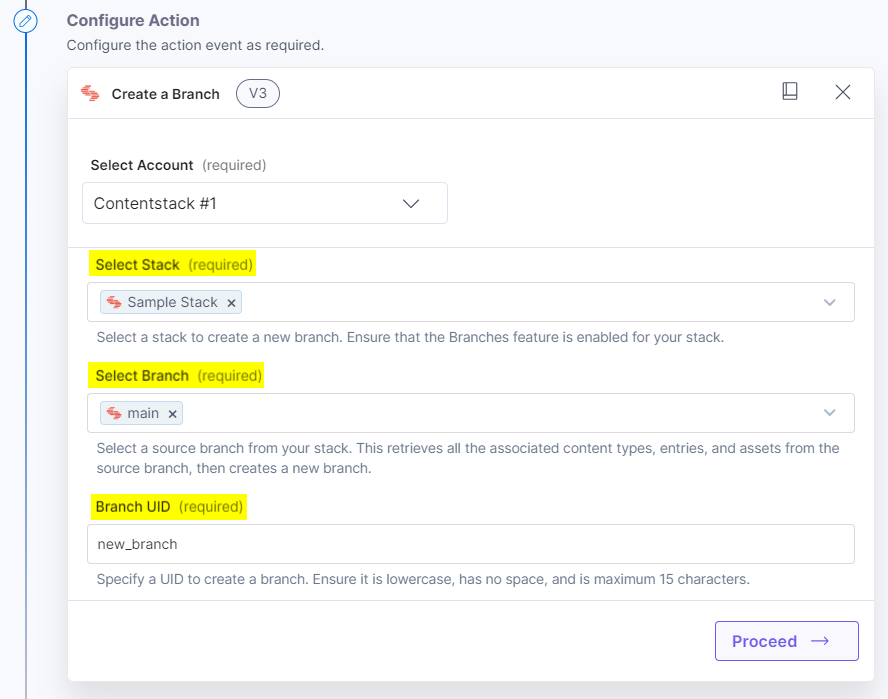
- Once done, click Proceed.
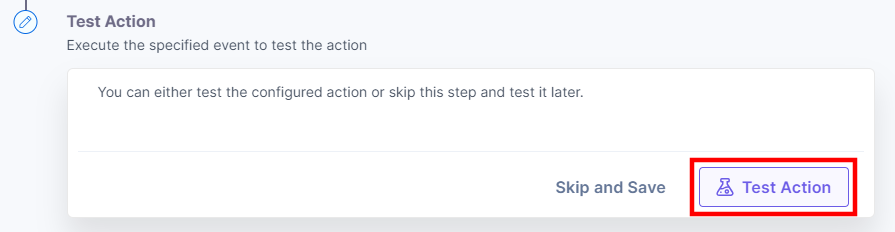
- Click Test Action to test the configured action.
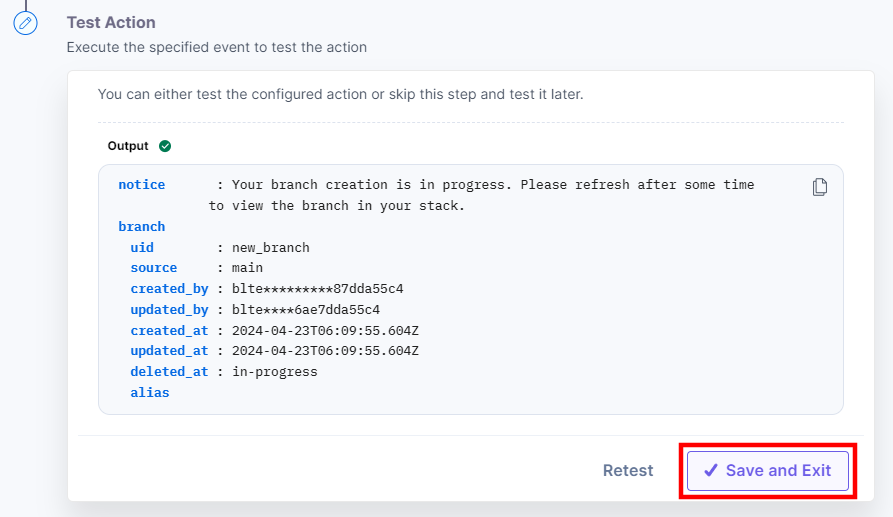
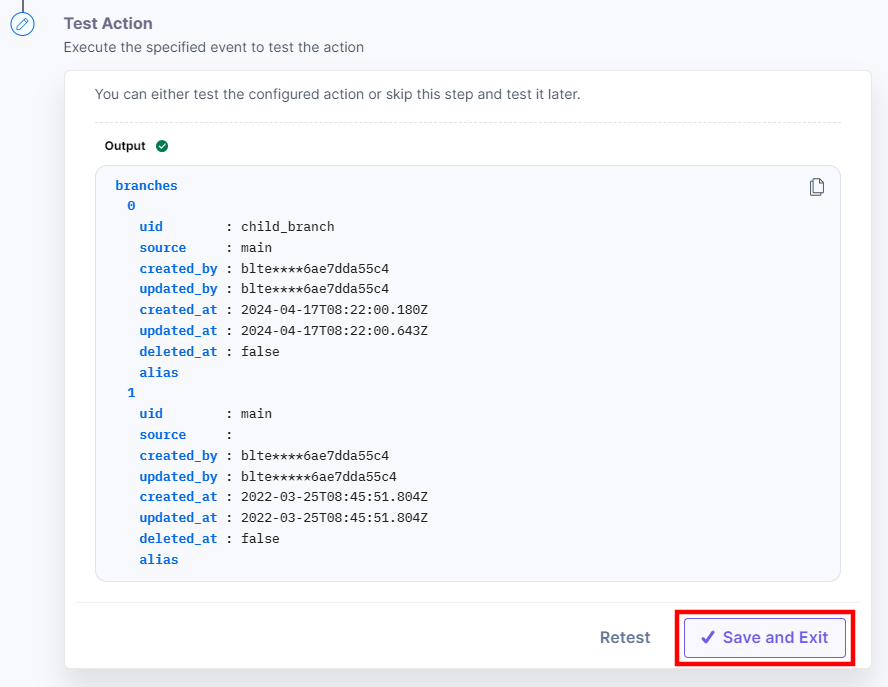
- On successful configuration, you can see the below output. Click Save and Exit.
Delete a Branch
This action deletes an existing branch in a stack.
- Under Choose an Action tab, select the Delete a Branch action.
- On the Delete a Branch Configure Action page, enter the details given below:
- Click + Add New Account button to connect your Contentstack account as shown in the Connect your Contentstack Account to Automate step.
Select a Stack and Branch from the Lookup list. The selected branch will be deleted.
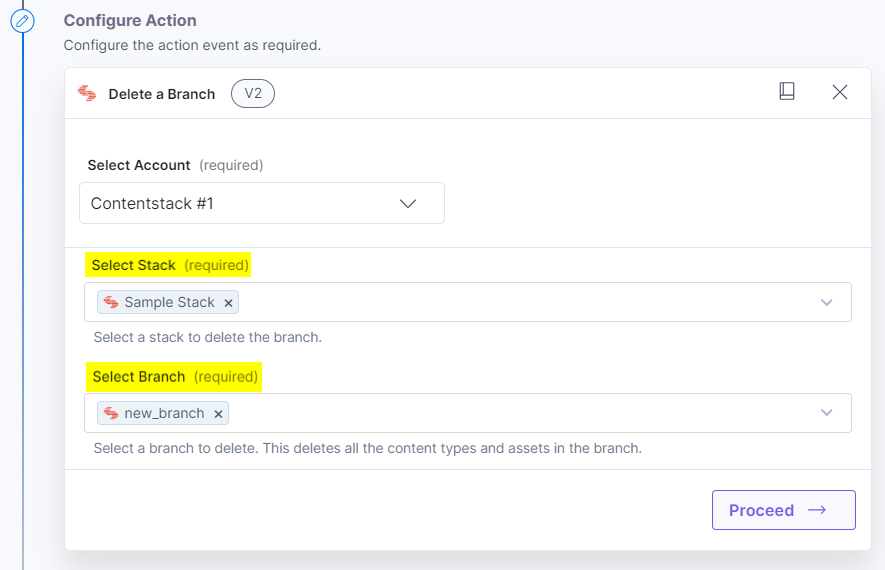
- Once done, click Proceed.
- Click Test Action to test the configured action.
Warning: This deletes all the content types and assets in the selected branch.
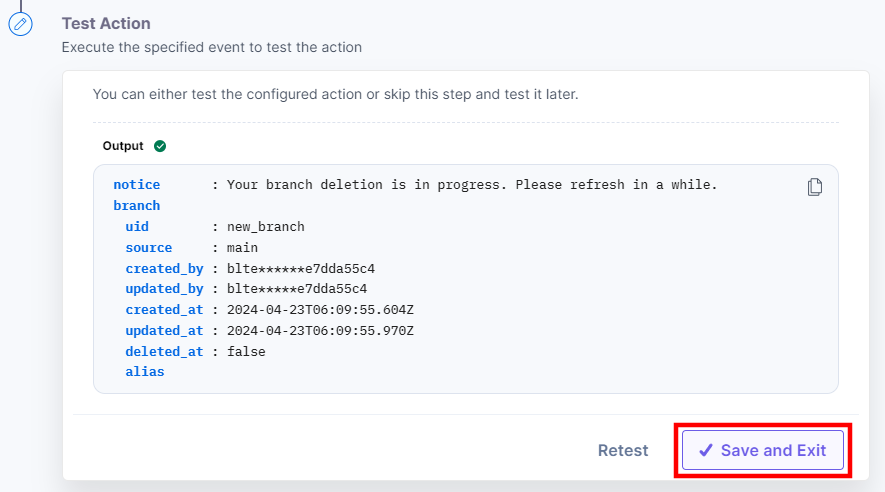
- The output will be shown as follows. Click the Save and Exit button.
Get All Branches
This action fetches the details of all the branches in a stack.
- Under Choose an Action tab, select the Get All Branches action.
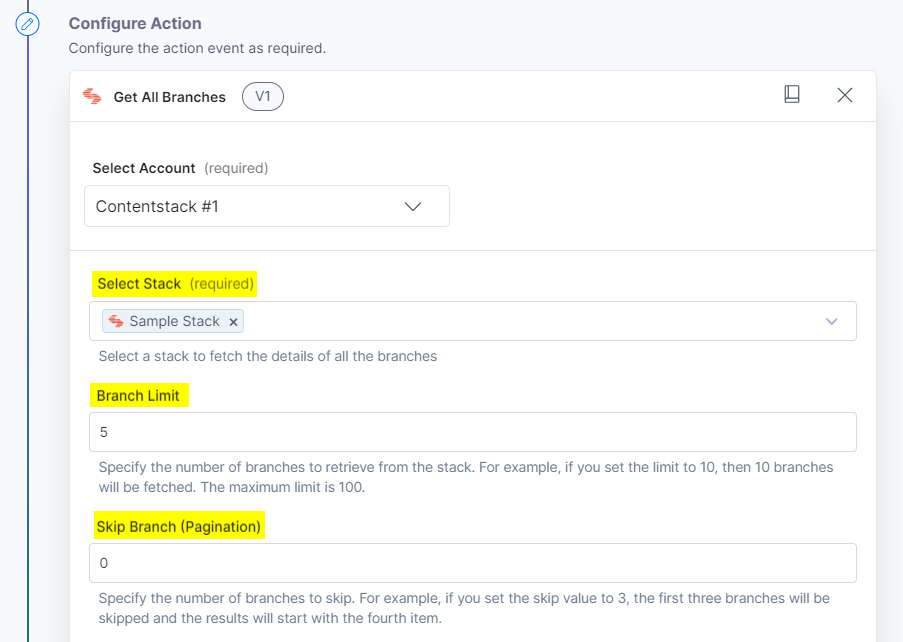
- On the Get All Branches Configure Action page, enter the details given below:
- Click + Add New Account button to connect your Contentstack account as shown in the Connect your Contentstack Account to Automate step.
- Select a Stack from the Lookup list.
- [Optional] Enable the Show Optional Fields toggle button to display the Branch Limit and Skip Branch (Pagination) fields.
- Once done, click Proceed.
- Click Test Action to test the configured action.
- The output will be shown as follows. Click the Save and Exit button.
Get a Single Branch
This action fetches the details of a single branch in a stack.
- Under Choose an Action tab, select the Get a Single Branch action.
- On the Get a Single Branch Configure Action page, enter the details given below:
- Click + Add New Account button to connect your Contentstack account as shown in the Connect your Contentstack Account to Automate step.
- Select a Stack and Branch from the Lookup list. The details of the selected branch will be fetched.
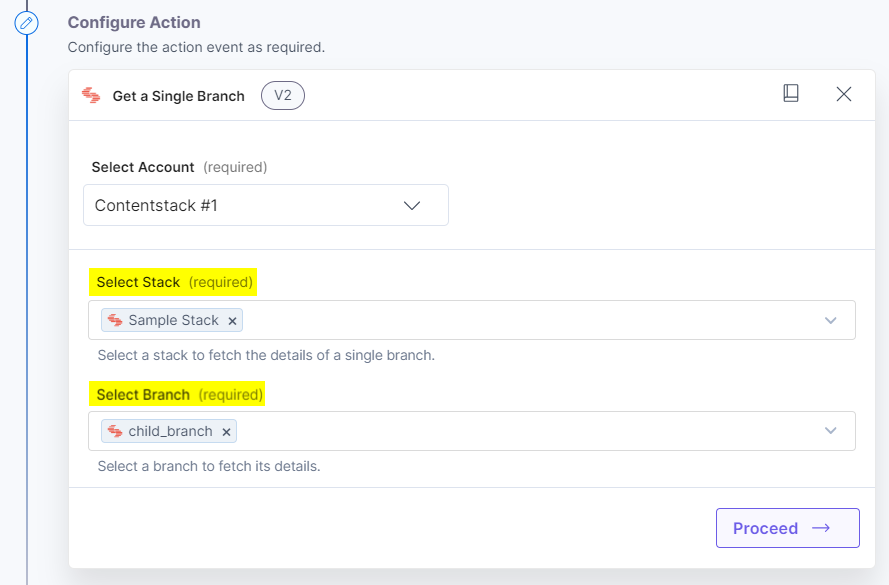
- Once done, click Proceed.
- Click Test Action to test the configured action.
- The output will be shown as follows. Click the Save and Exit button.
Merge Branch
This action lets you merge the content types and global fields from a compare branch into the base branch.
- Under Choose an Action tab, select the Merge Branch action.
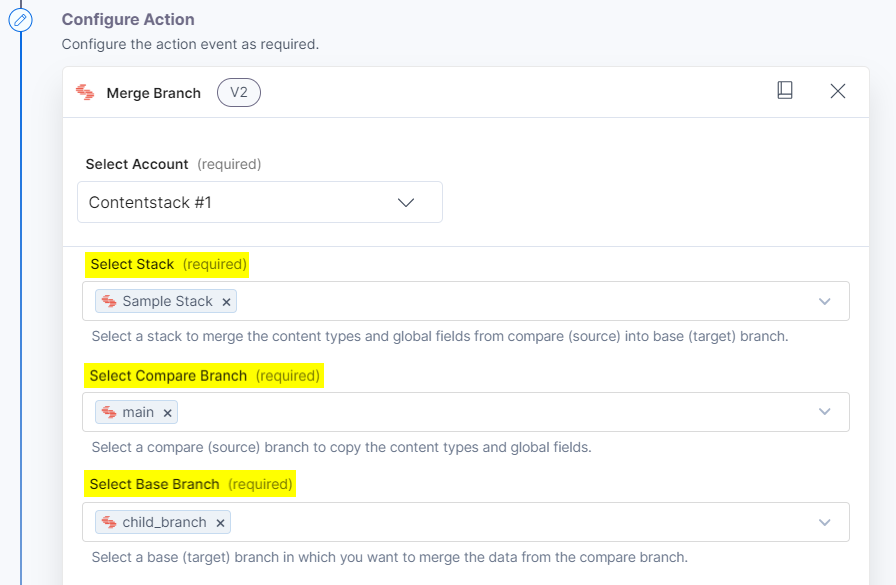
- On the Merge Branch Configure Action page, enter the details given below:
- Click + Add New Account button to connect your Contentstack account as shown in the Connect your Contentstack Account to Automate step.
- Select a Stack, Compare Branch, and Base Branch from the Lookup list.
The content types and global fields are copied from the Compare (source) branch into the Base (target) branch based on the Merge Strategy.
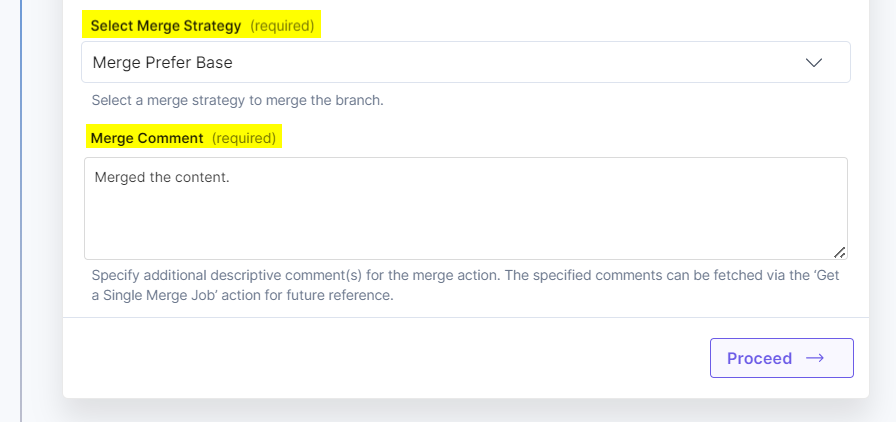
- Select a Merge Strategy to merge the branch content.
Let’s look at each of them in detail:
- Merge Prefer Base: This will merge the changes from the compare branch into the base branch. In case of conflicts, it will retain the base branch changes.
- Merge Prefer Compare: This will merge the changes from the compare branch into the base branch. In case of conflicts, it will retain the compare branch changes.
- Overwrite With Compare: This will overwrite the base branch changes with compare branch changes.
- Merge New Only: This will only merge the new changes in the base branch.
- Merge Modified Only Prefer Base: This will only merge the modified changes from the compare branch into the base branch, and will keep the base branch changes in case of conflicts.
- Merge Modified Only Prefer Compare: This will only merge the modified changes from the compare branch into the base branch, and will keep the compare branch changes in case of conflicts.
- Ignore: This is a default value, which will not merge the branch content.
- Enter additional descriptive comment(s) for the merge action in the Merge Comment field. The specified comments can be fetched via the ‘Get a Single Merge Job’ actions for future reference.
- Once done, click Proceed.
- Click Test Action to test the configured action.
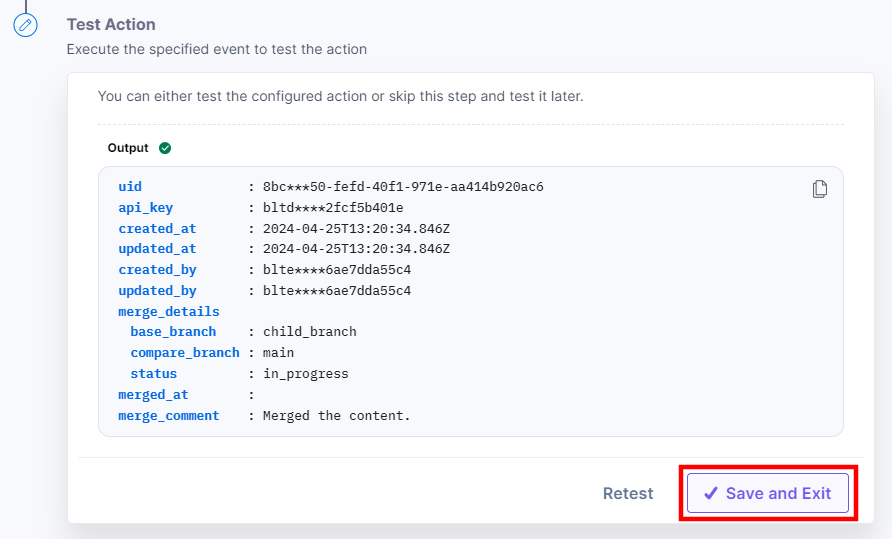
- On successful configuration, you can see the below output. Click Save and Exit button.
Get a Single Merge Job
This action fetches the details of a single merge job in a stack.
- Under Choose an Action tab, select the Get a Single Merge Job action.
- On the Get a Single Merge Job Configure Action page, enter the details given below:
- Click + Add New Account button to connect your Contentstack account as shown in the Connect your Contentstack Account to Automate step.
- Select a Stack and Merge Job from the Lookup list.
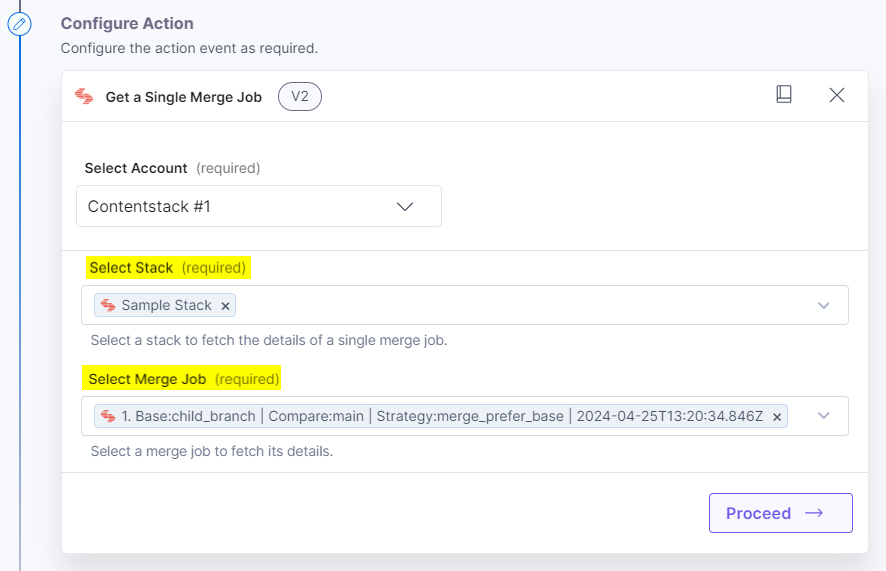
- Once done, click Proceed.
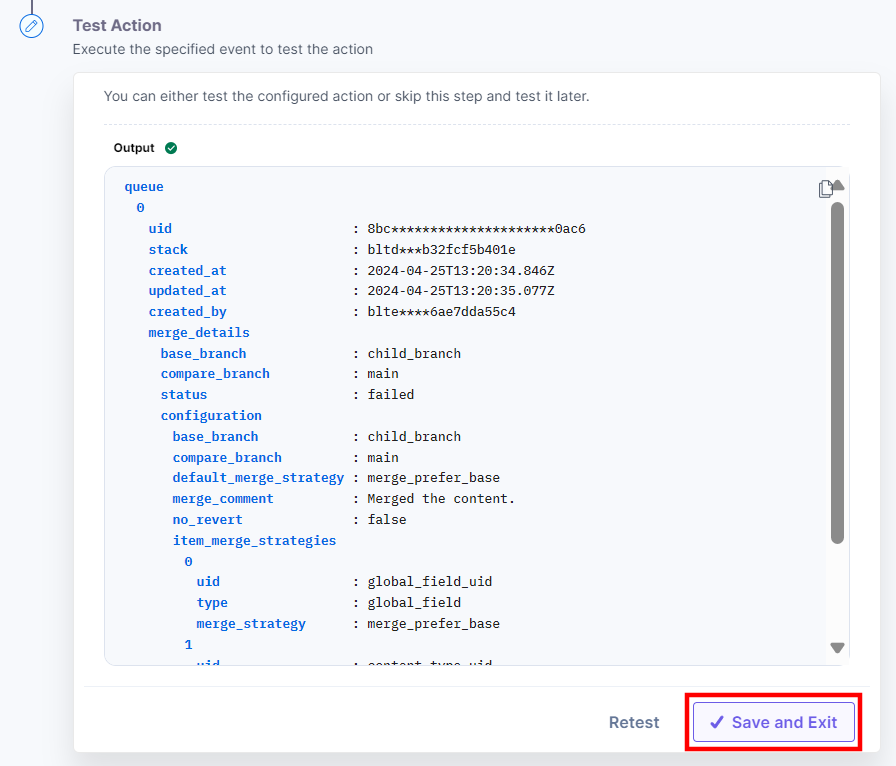
- Click Test Action to test the configured action.
- On successful configuration, you can see the below output. Click Save and Exit.
More articles in "Contentstack Management"
