


.jpg?format=pjpg&auto=webp)


Contentstack Management - Entries Actions
An entry is a specific piece of content that you intend to publish. This could be a blog post, article, product description, or any other type of content that you want to make available to your audience. You can perform entry based operations using the Contentstack Management Entries actions.
Let’s look at each of these in detail.
Create an Entry
This action lets you create an entry automatically in your stack. To know more, visit Create entries.
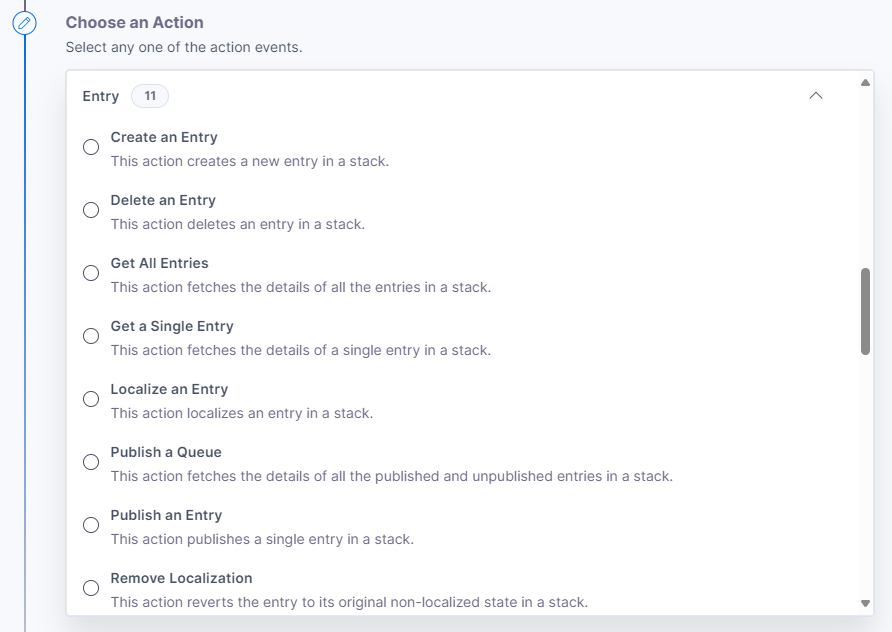
- Under Choose an Action tab, select the Create an Entry action.
- Click + Add New Account button to connect your Contentstack account as shown in the Connect your Contentstack Account to Automate step.
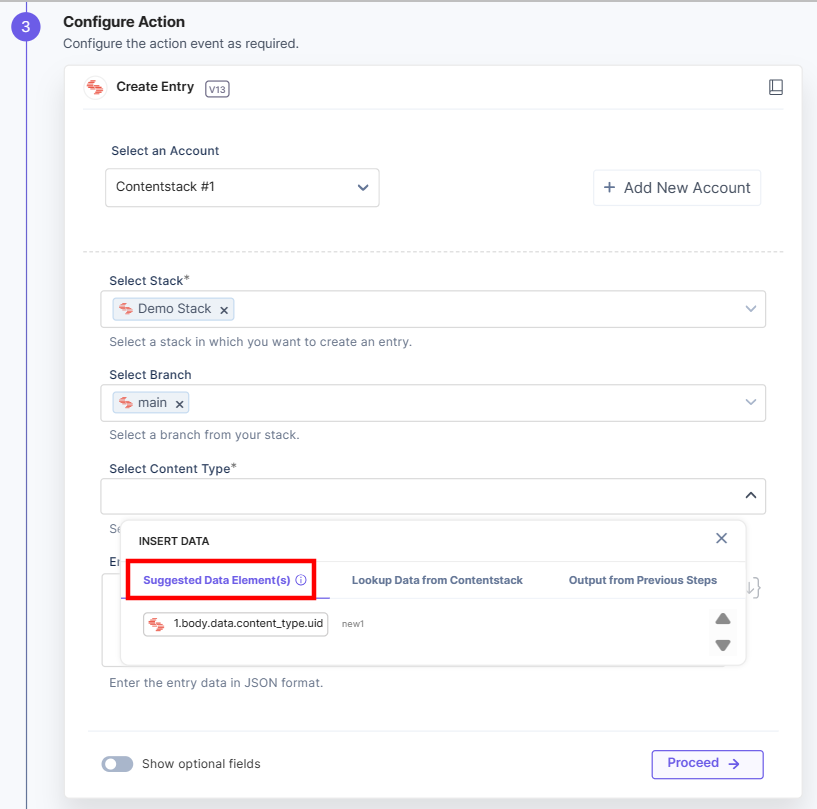
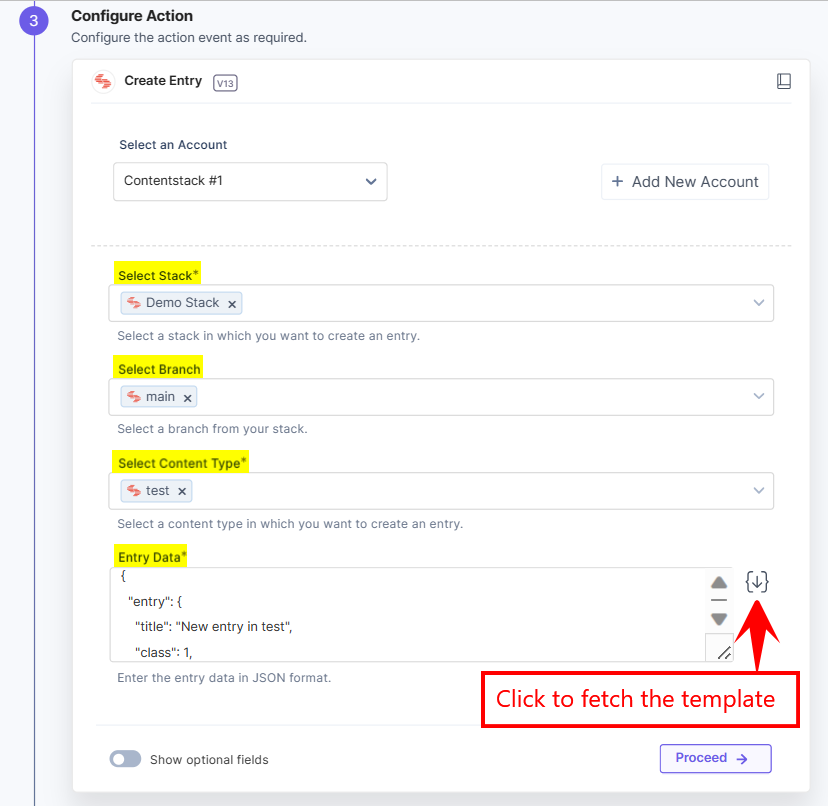
- Select a Stack, Branch, and Content Type from the Lookup list. Provide your entry data in the Entry Data field.
You can fetch the UID for all the previously configured automation steps directly from the Lookup list as shown below:
Note: Provide your entry data as per your content type schema in JSON format only.
Note: By default, the main branch is selected (even if the Branch field is empty).
- In the Entry Data field, you can add a predefined schema template for your entry data. This will add a structure to provide your entry data in a particular format for different fields.
Note: You must manually configure the entry data for JSON Rich Text Editor, Custom, and Experience Container fields.
- [Optional] Enable the Show Optional Fields toggle button to display the Locale. You can also include the branch details by clicking the Include branch checkbox.
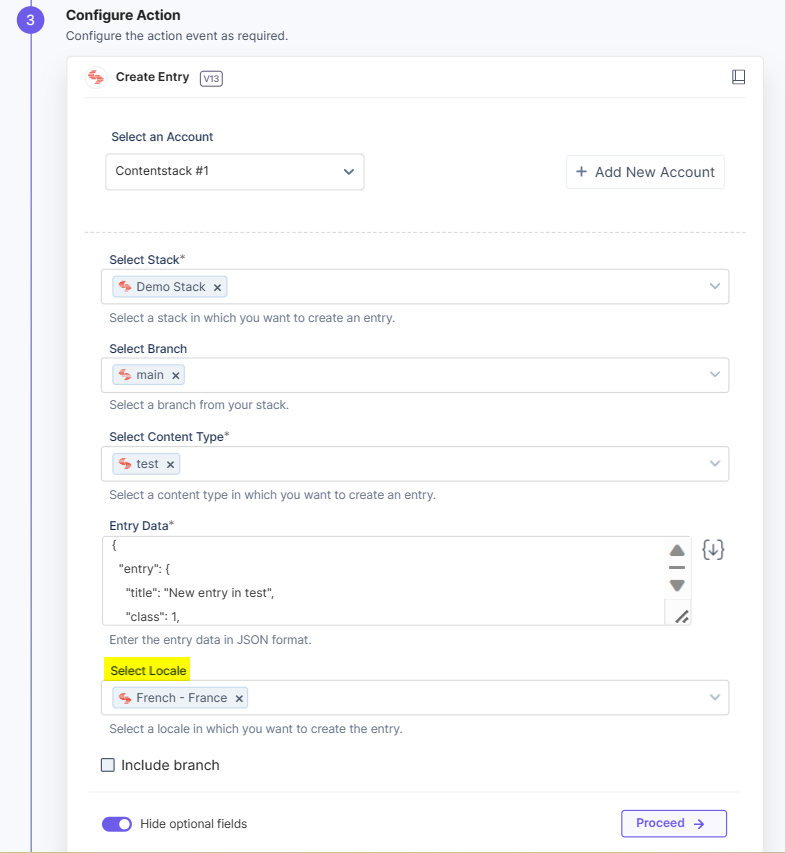
- Once done, click Proceed.
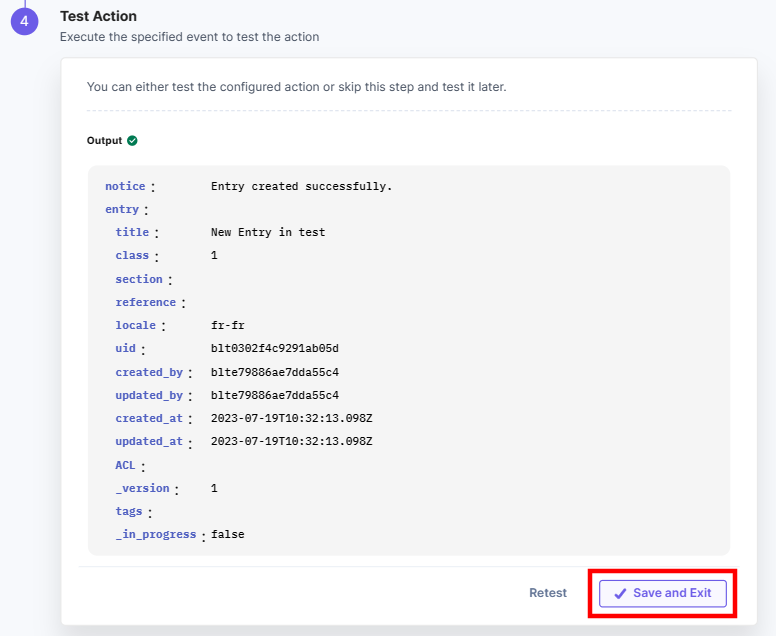
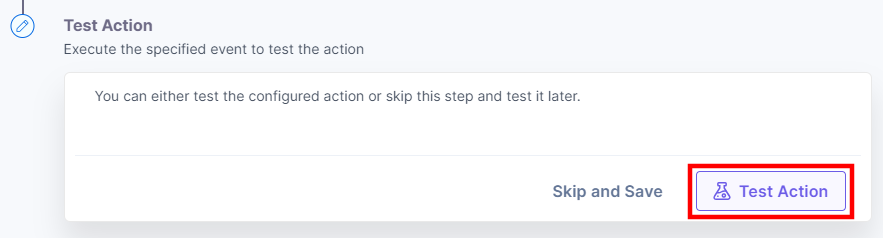
- Click Test Action to test the configured action.

- The output will be shown as follows. Click the Save and Exit button to finish setting up the Create Entry action for the Contentstack connector.
Delete an Entry
This action deletes an entry in a stack.
- Under Choose an Action tab, select the Delete an Entry action.
- On the Delete an Entry Configure Action page, enter the details given below:
- Click + Add New Account button to connect your Contentstack account as shown in the Connect your Contentstack Account to Automate step.
- Select a Stack, Branch, Content Type, and Entry from the Lookup list.
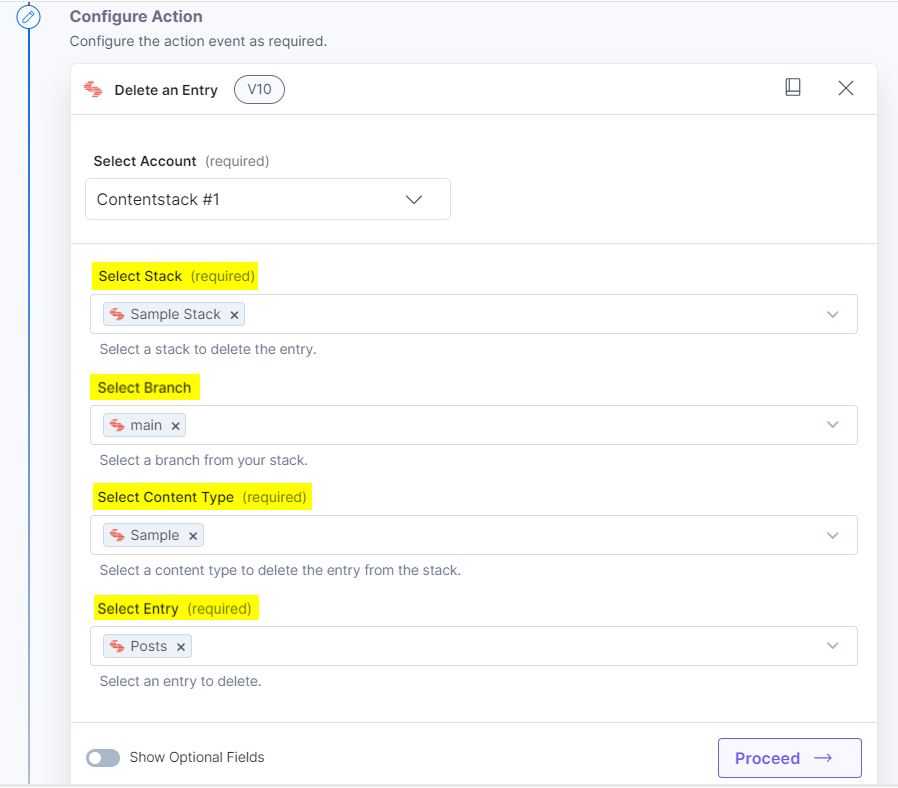
Note: By default, the main branch is selected (even if the Branch field is empty).
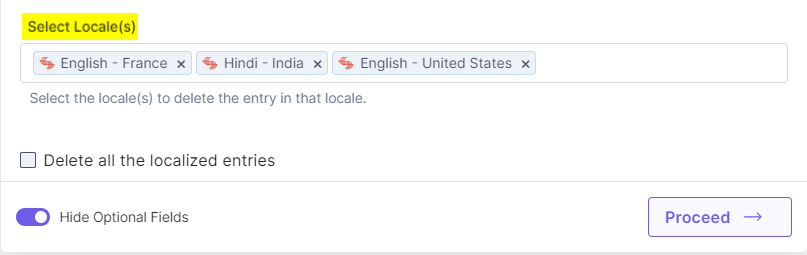
- [Optional] Enable the Show Optional Fields toggle button to display the Select Locale(s) field.
Note: You can select multiple Locale(s) to delete the entry saved in that locale.
- Click the Delete all the localized entries checkbox to delete all the localized versions of the entry.
Note: If you provide the locale and click the Delete all the localized entries checkbox, all the localized entries will be deleted along with the fallback language i.e., English-United States (M) and the value passed in the locale field will become null.
Note: If you select the fallback language in the locale field, i.e., English-United States (M), and uncheck the checkbox, the entry in the fallback language will be deleted and localized entries will be preserved.
- Once done, click Proceed.
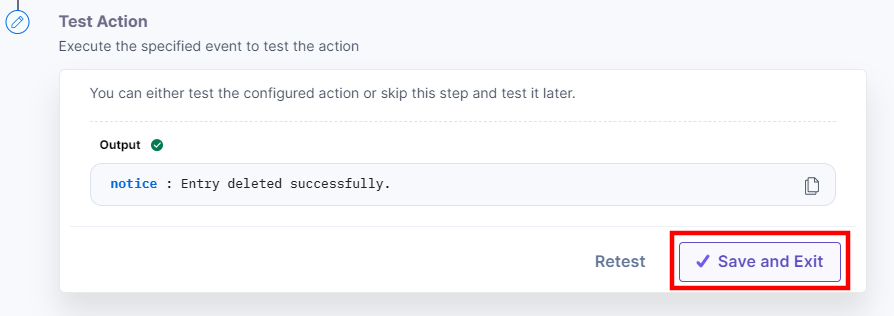
- Click Test Action to test the configured action.

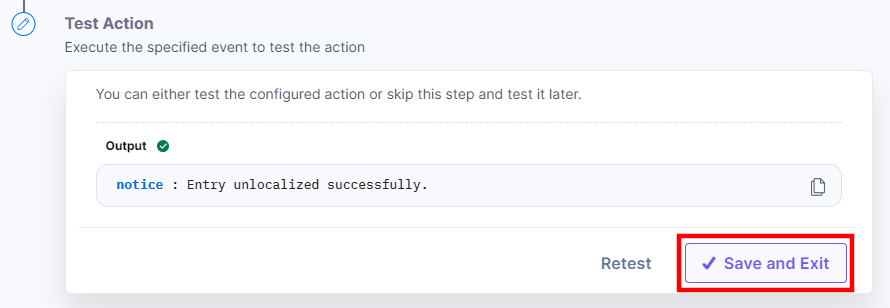
- The output will be shown as follows. Click the Save and Exit button.
Get All Entries
This action fetches all the entries present in a stack.
- Under Choose an Action tab, select the Get All Entries action.
- Click + Add New Account button to connect your Contentstack account as shown in the Connect your Contentstack Account to Automate step.
- Select a Stack, Branch, and Content Type from the Lookup list.
You can fetch the UID for all the previously configured automation steps directly from the Lookup list as shown below: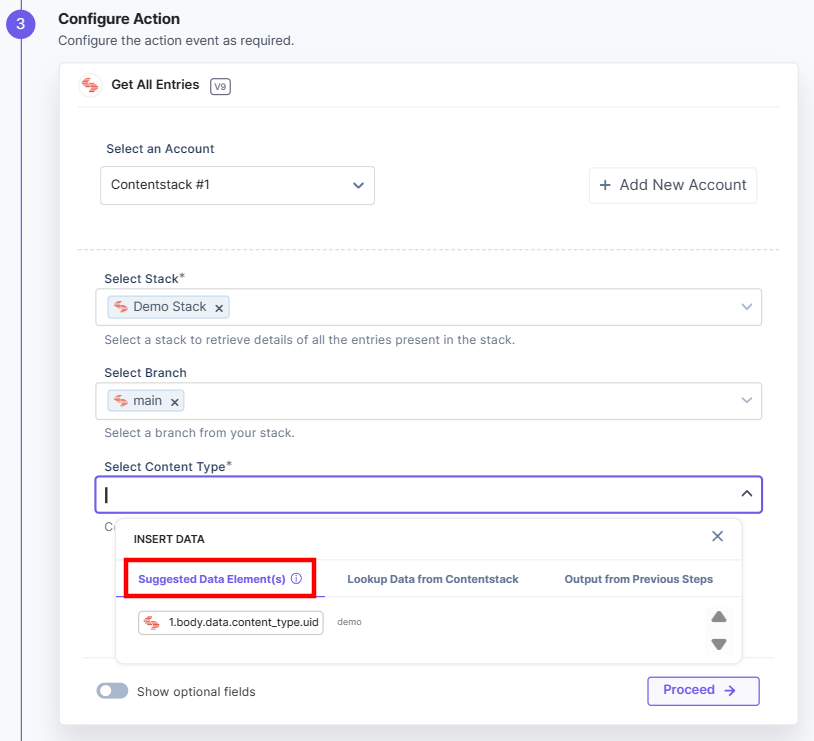
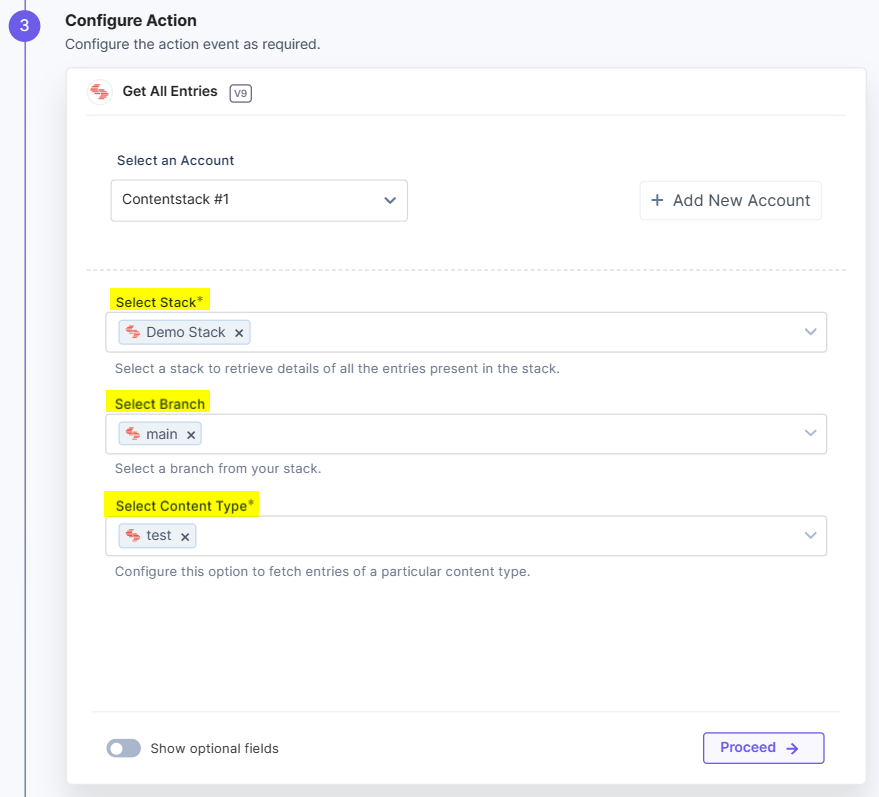
Note: By default, the main branch is selected (even if the Branch field is empty).
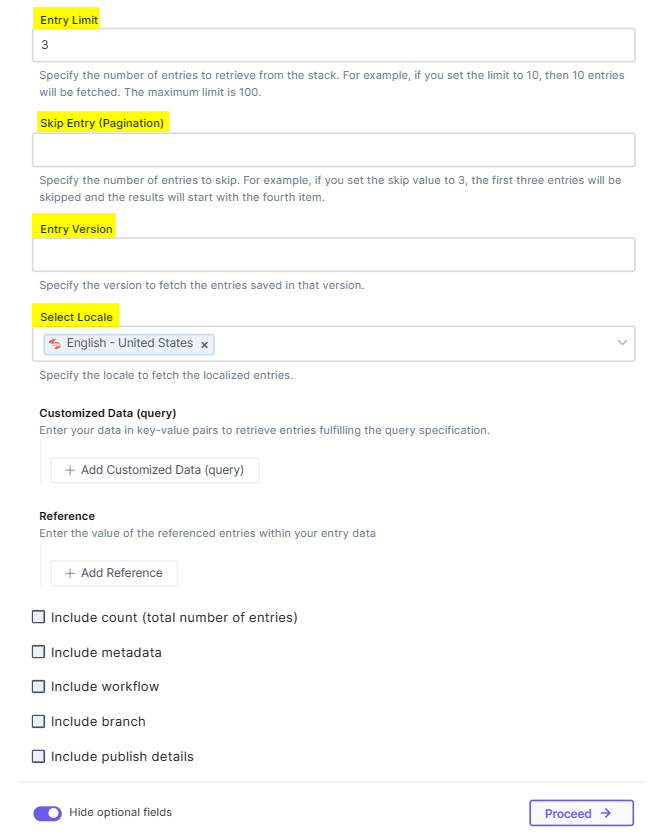
- [Optional] Enable the Show Optional Fields toggle button to display the Entry Limit, Skip Entry (Pagination), Entry Version, and Select Locale fields.
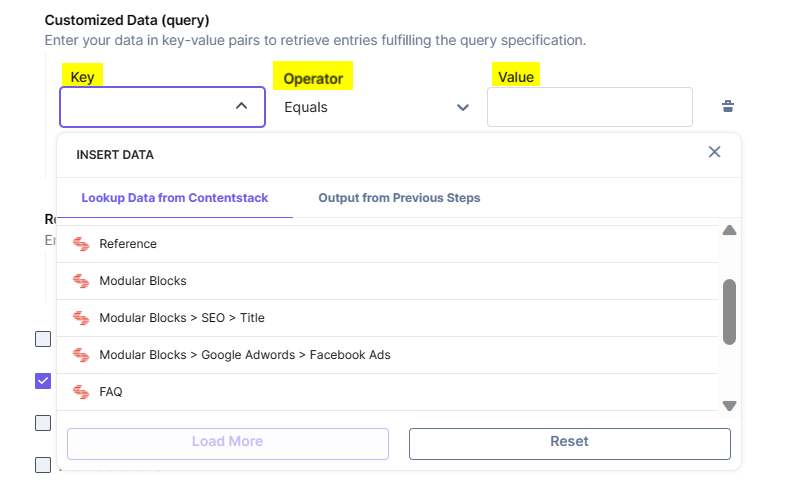
- Provide your data in the Customized Data (query) field to filter the entry. Enter your data in the Key, Operator, and Value fields.
In the Customized Data (query) field, you can filter the entry based on Updated At/Created At options. For example, you can fetch all the entries updated after a certain time and date as shown below: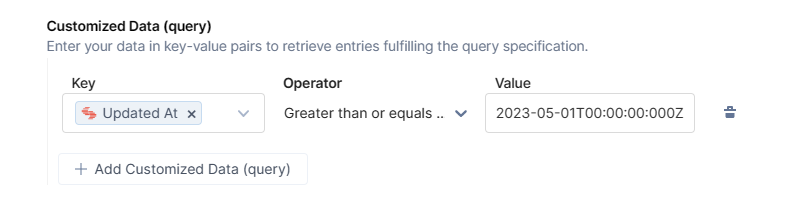
You can view the Lookup data for all the fields present in the content type including Reference, Modular Blocks and Group fields. Using the Operator filter you can sort the data.
Additional Resource: Refer to the Content Delivery API Docs for more information on Queries.
In the Reference field, enter the ID of the reference field of your content type.
You can also include the count of the entries, metadata details, workflow, branch and publish details by clicking the respective checkboxes.
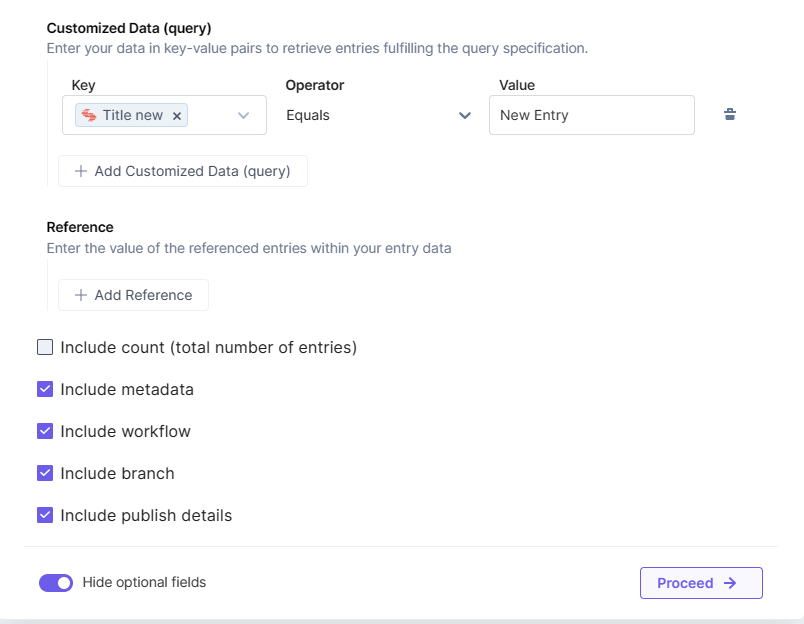
Note: The Reference and the Customized Data (query) fields act as filters to fetch only those entries that fulfill the specifications provided in both the fields.
- Once done, click Proceed.
- Click Test Action to test the configured action.
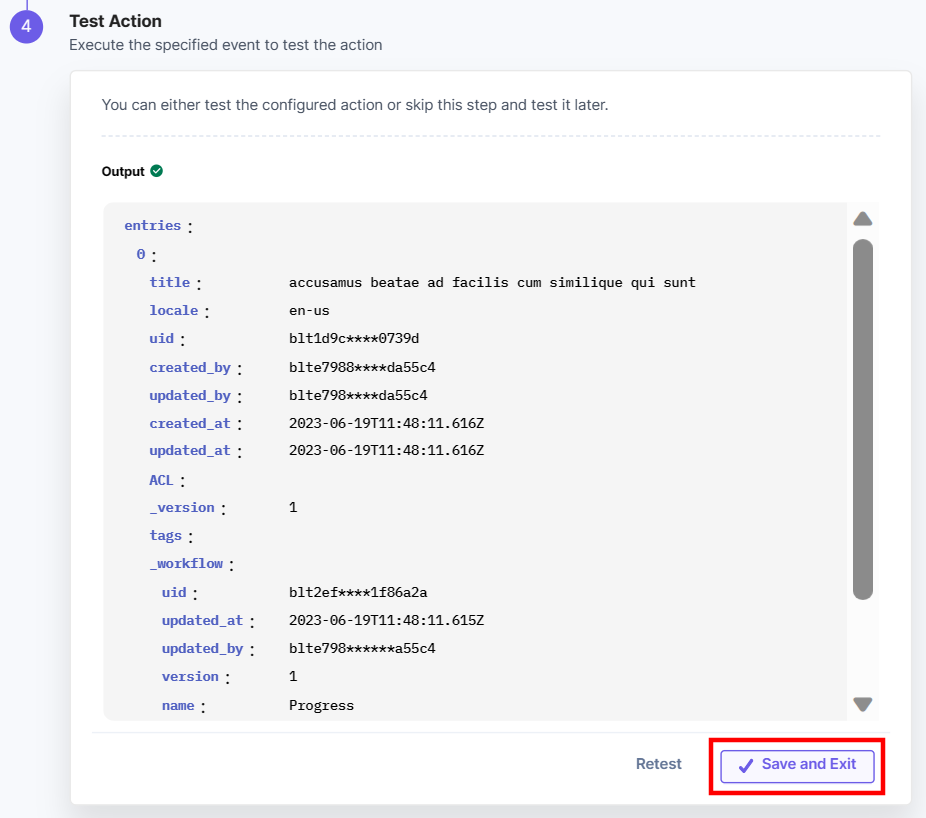
- The output will be shown as follows. Click the Save and Exit button.
Get a Single Entry
This action lets you fetch details of a single entry in your stack.
- Under Choose an Action tab, select the Get a Single Entry action.
- Click + Add New Account button to connect your Contentstack account as shown in the Connect your Contentstack Account to Automate step.
- Select a Stack, Branch, Content Type, and Entry from the Lookup list.
You can fetch the UID for all the previously configured automation steps directly from the Lookup list as shown below: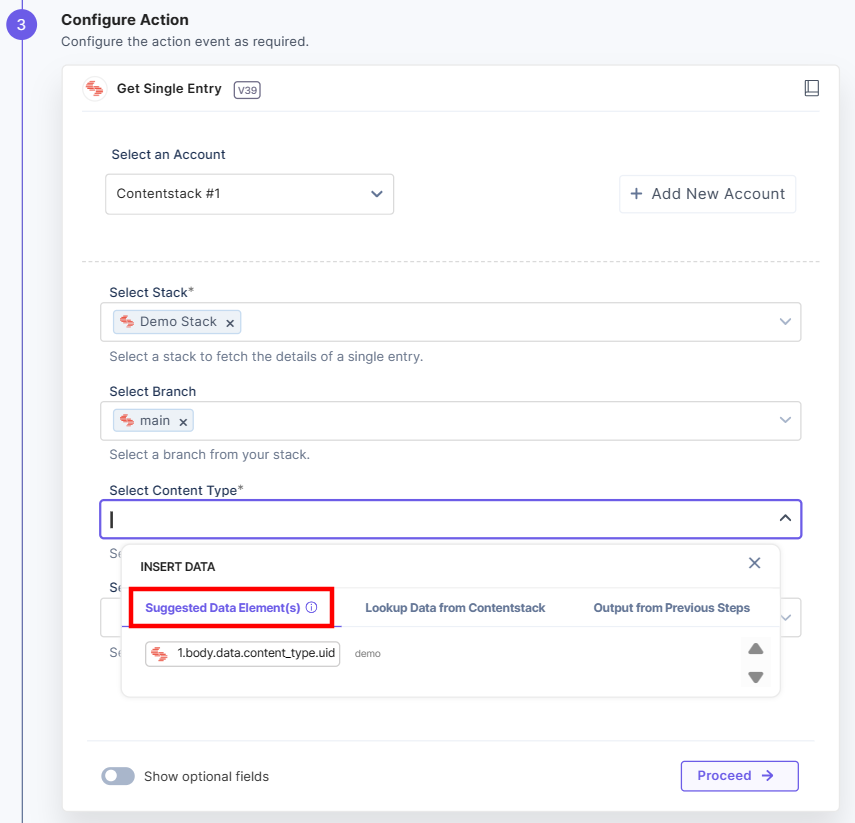
Note: By default, the main branch is selected (even if the Branch field is empty).
- [Optional] Enable the Show Optional Fields toggle button to display additional fields. Select the entry Version and Locale and check the Include workflow, Include publish details, and Include branch checkboxes to fetch these details in addition to the entry details.
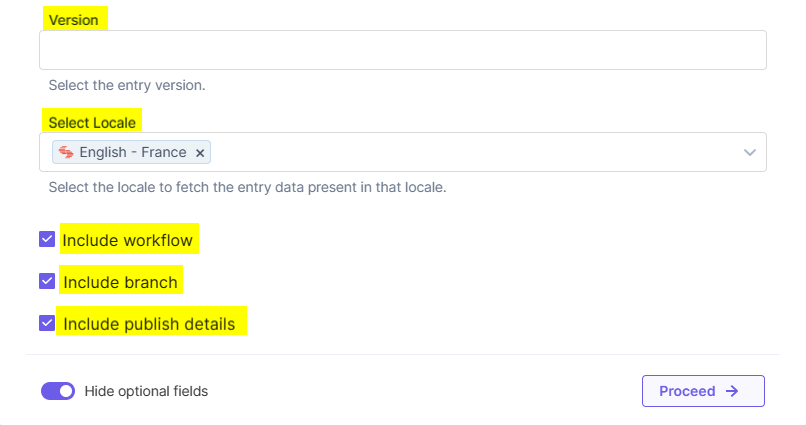
- Once done, click Proceed.
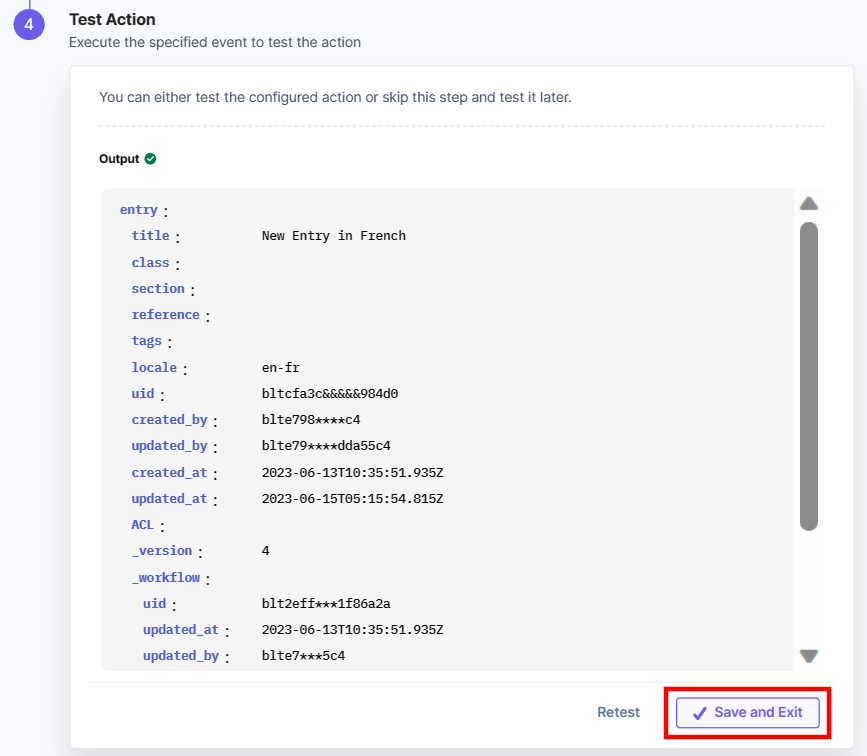
- Click Test Action to test the configured action.

- On successful configuration, you can see the below output. Click Save and Exit.
Localize an Entry
This action lets you create localized versions of your entries. Here’s a link to know more about Localization.
- Under Choose an Action tab, select the Localize an Entry action.
- Click + Add New Account button to connect your Contentstack account as shown in the Connect your Contentstack Account to Automate step.
- Select the Stack, Branch ,Content Type, Entry, and Locale from the Lookup list.
You can fetch the UID for all the previously configured automation steps directly from the Lookup list as shown below: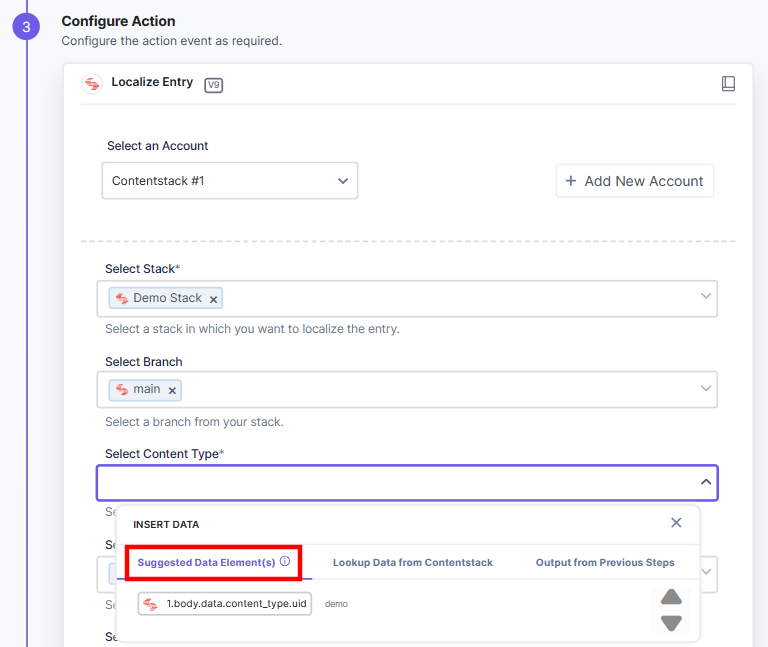
Note: Locale provides a list of languages present in your stack.
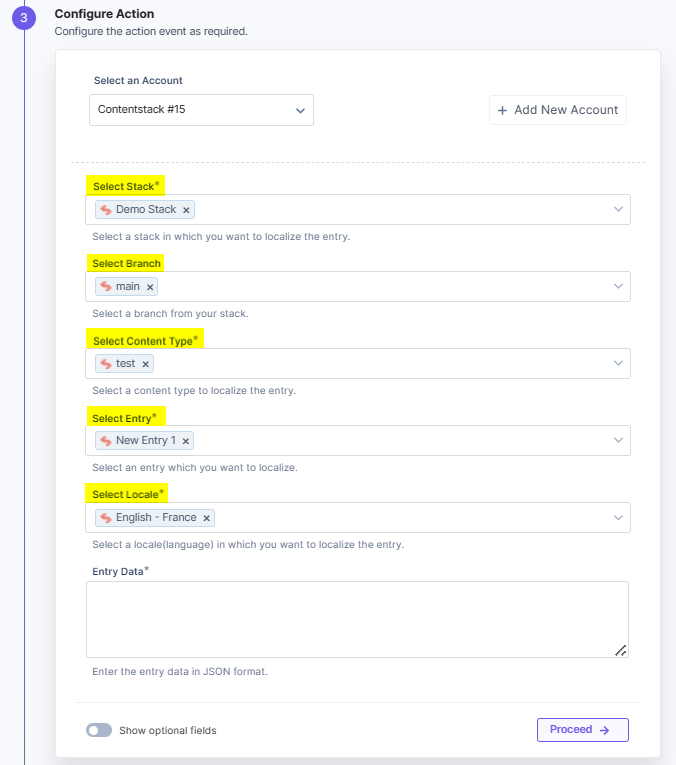
Note: By default, the main branch is selected (even if the Branch field is empty).
- Provide your entry data in the Entry Data field.
Note: Provide your entry data in JSON format as per your content type schema.
- [Optional] Enable the Show Optional Fields toggle button to display the Include branch checkbox to include the branch details.
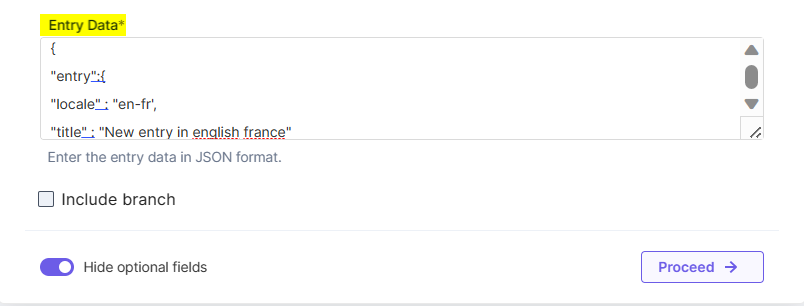
- Click Proceed.
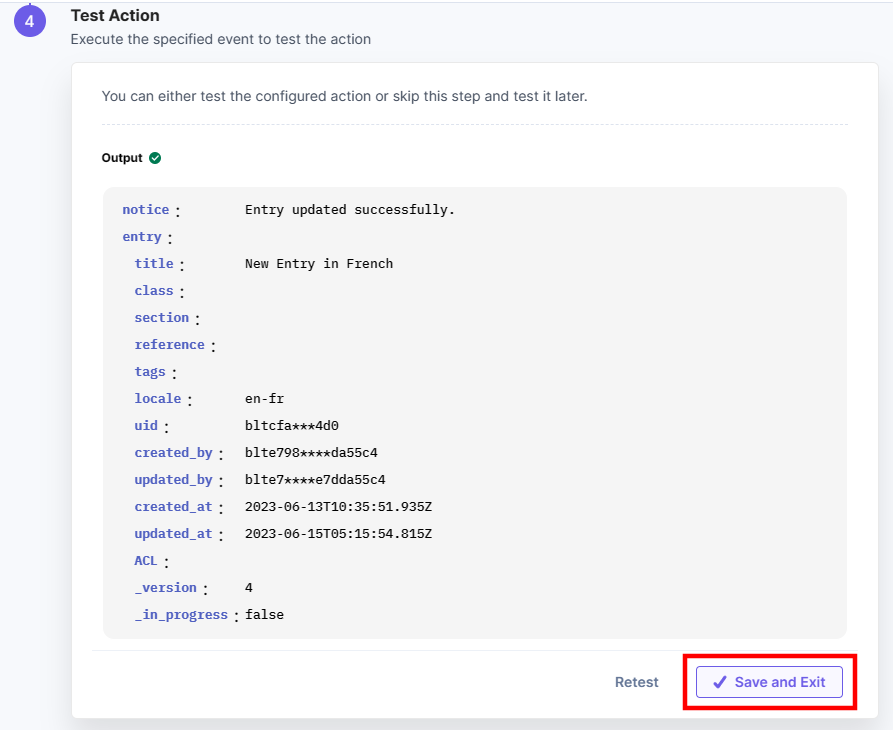
- Click Test Action to test the configured action.

- The output will be shown as follows. Click the Save and Exit button to finish setting up the Localize an Entry action for the Contentstack connector.
Publish a Queue
This action fetches all the entries present in the Publish Queue in Contentstack.
- Under Choose an Action tab, select the Publish a Queue action.
- Click + Add New Account button to connect your Contentstack account as shown in the Connect your Contentstack Account to Automate step.
- Select a Stack and Branch from the Lookup list.
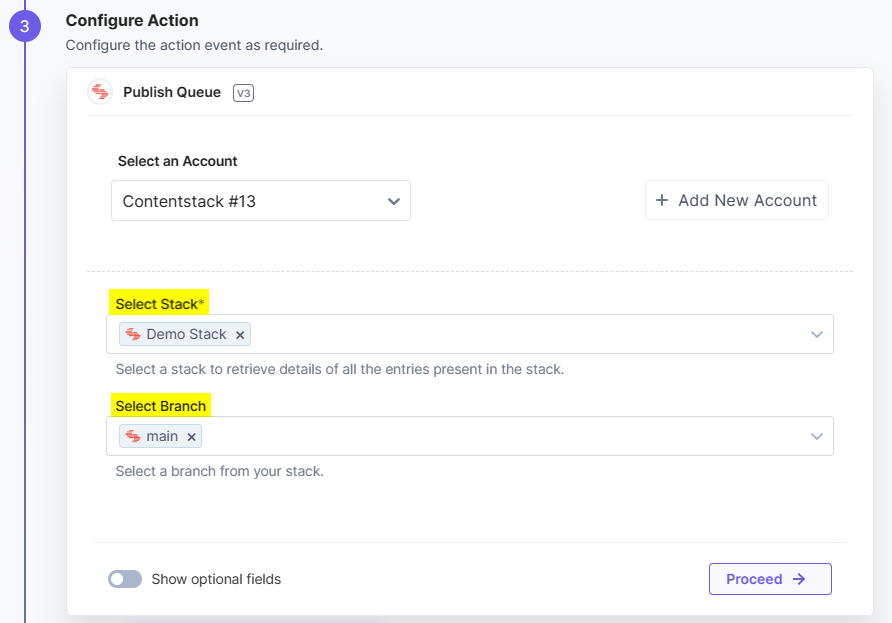
Note: By default, the main branch is selected (even if the Branch field is empty).
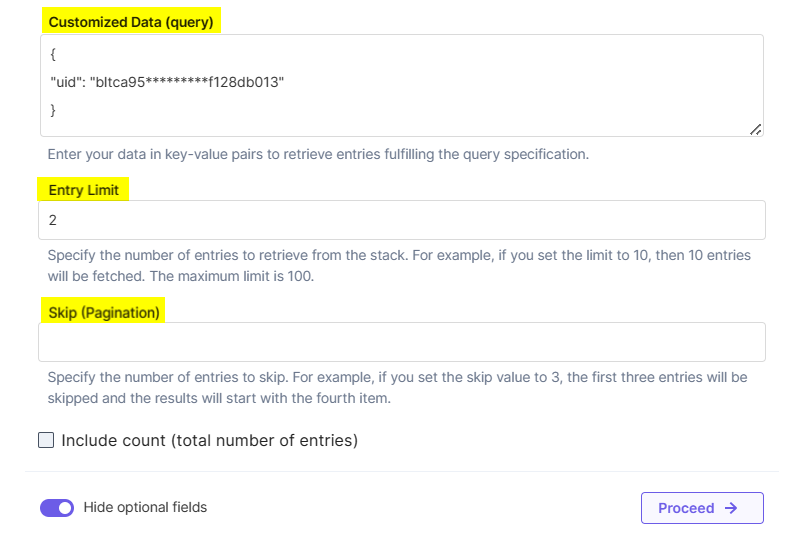
- [Optional] Enable the Show Optional Fields toggle button to display the Customized Data (query), Entry Limit, and Skip (Pagination) fields. You can also include the count for the total number of entries by clicking the checkbox.
- Provide your data in the Customized Data (query) field to filter the entry. Enter your data in a key-value pair in JSON format.
Additional Resource: Refer to the Content Delivery API documentation to know more about queries.
- Once done, click Proceed.
- Click Test Action to test the configured action.
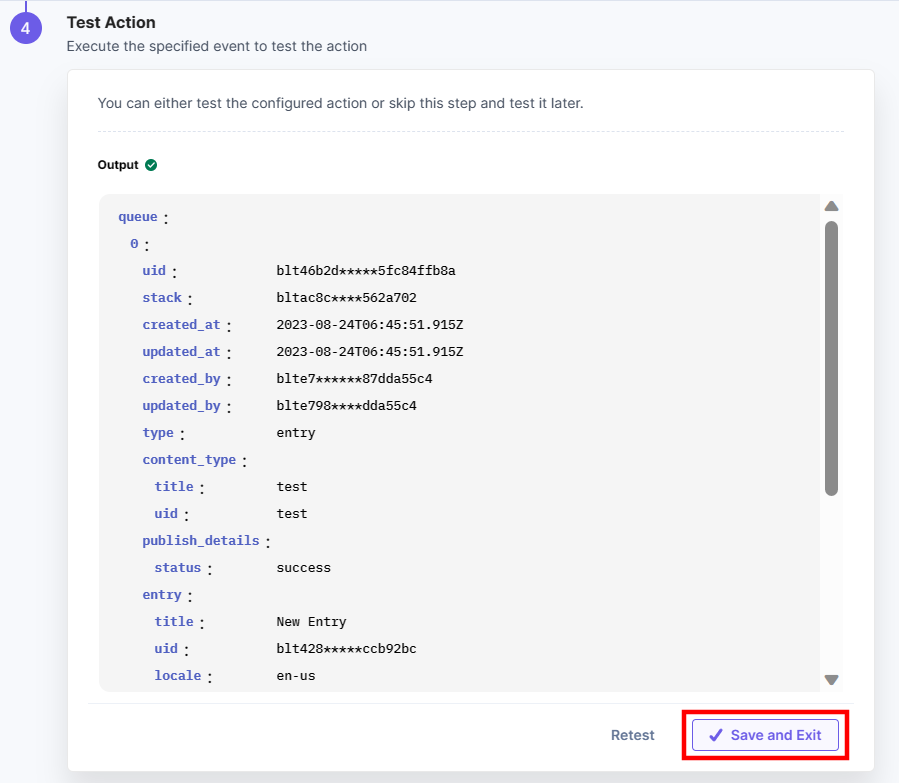
- The output will be shown as follows. Click the Save and Exit button.
Publish an Entry
This action lets you publish an entry automatically in your stack. To know more, visit publish entries.
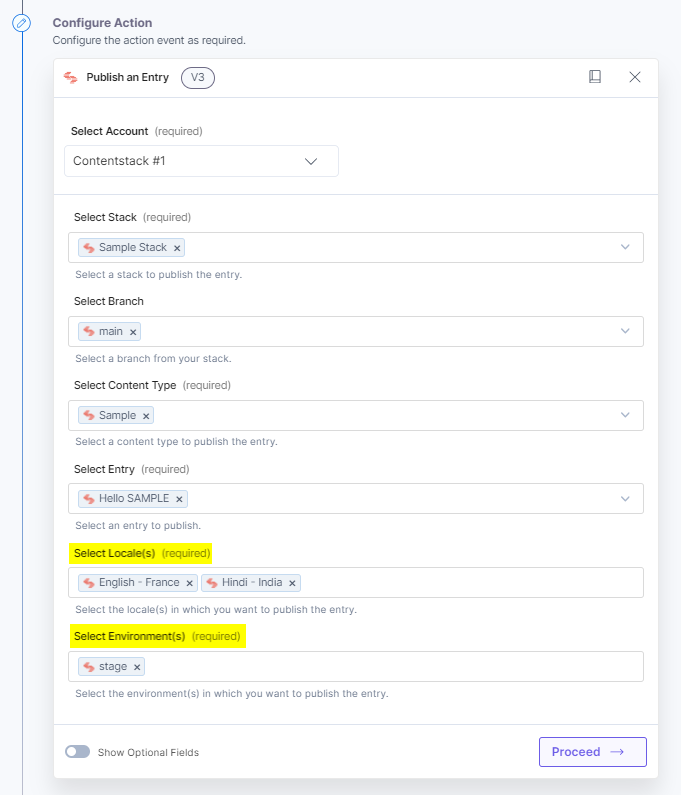
- Under Choose an Action tab, select the Publish an Entry action.
- On the Publish an Entry Configure Action page, enter the details given below:
- Click + Add New Account button to connect your Contentstack account as shown in the Connect your Contentstack Account to Automate step.
- Select a Stack, Branch, Content Type, Entry from the Lookup list.
You can fetch the UID for all the previously configured automation steps directly from the Lookup list.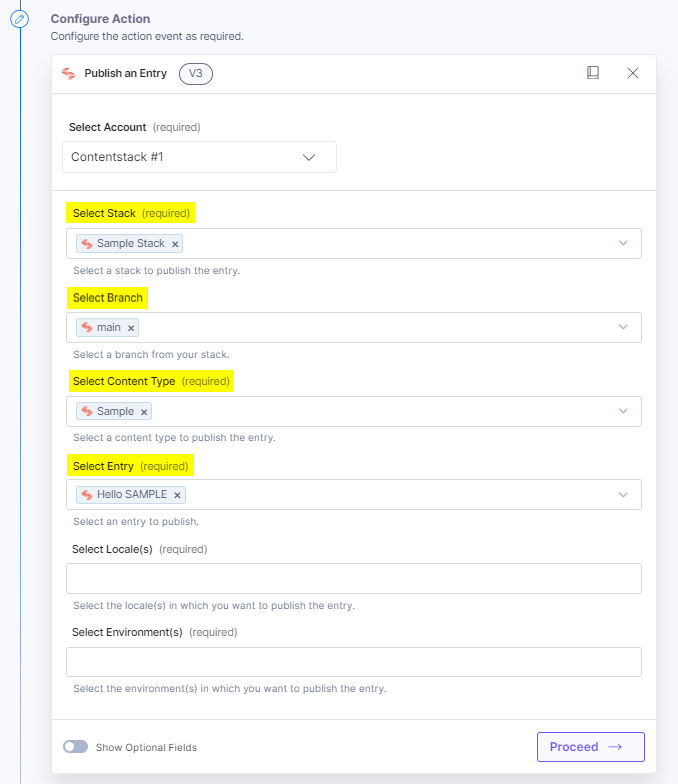
Note: By default, the main branch is selected (even if the Branch field is empty).
- Select the Environment(s) and Locale(s) from the Lookup list where you want to publish the entry.
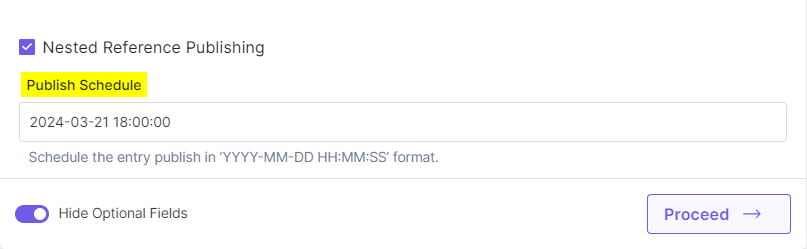
- [Optional] Enable the Show Optional Fields toggle button to display the Publish Schedule field. Click the Nested Reference Publishing checkbox to publish the entry along with the referenced entries. Learn more about Nested Reference Publishing.
Note: You can select multiple Environment(s) and Locale(s) to publish the entry.
- Once done, click Proceed.
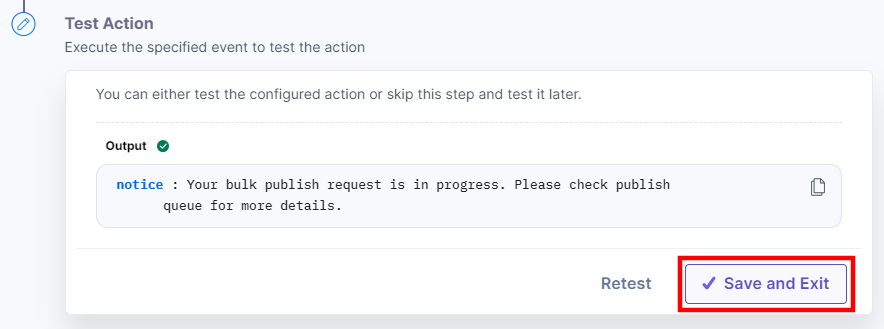
- Click Test Action to test the configured action.

- On successful configuration, you can see the below output. Click Save and Exit.
Remove Localization
This action restores the entry to its initial non-localized state within a stack. For more information, refer to our Localization documentation.
- Under Choose an Action tab, select the Remove Localization action.
- On the Remove Localization Configure Action page, enter the details given below:
- Click + Add New Account button to connect your Contentstack account as shown in the Connect your Contentstack Account to Automate step.
- Select a Stack, Branch, Content Type, Entry, and Locale from the Lookup list.
Locale provides a list of languages currently added in your stack for the selected branch.Note: By default, the main branch is selected (even if the Branch field is empty).
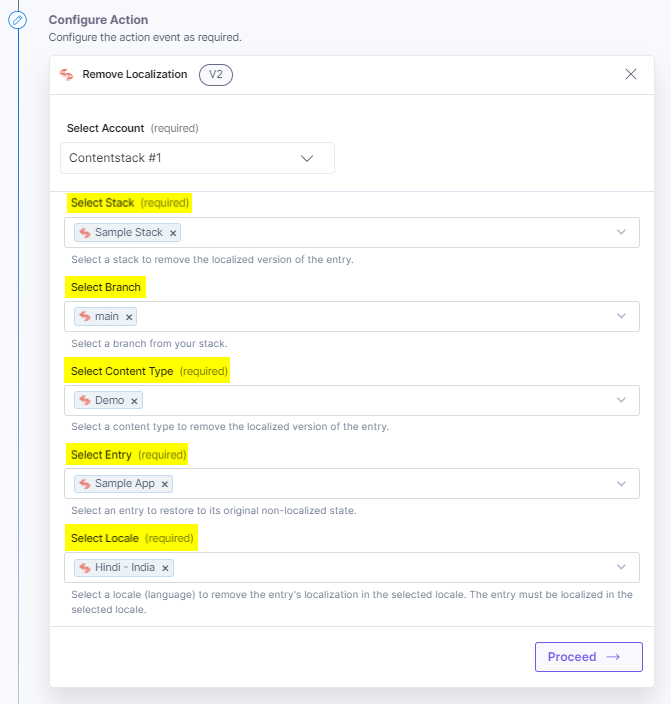
Note: The entry must be already localized in the selected locale to remove the localization.
- Once done, click Proceed.
- Click Test Action to test the configured action.
- The output will be shown as below. Click the Save and Exit button.
Set Entry Workflow
This action lets you set the workflow stage for your entry. Read more about workflow stages.
- Under Choose an Action tab, select the Set Entry Workflow action.
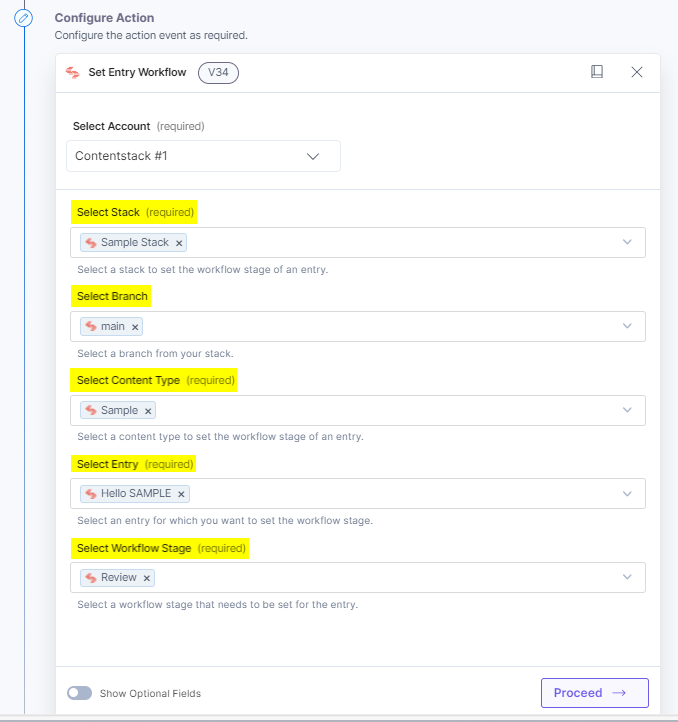
- On the Set Entry Workflow Configure Action page, enter the details given below:
- Click + Add New Account button to connect your Contentstack account as shown in the Connect your Contentstack Account to Automate step.
- Select a Stack, Branch, and Content Type from the Lookup list. Also, select an Entry from the Lookup list for which you want to set the workflow stage.
- Select the Workflow Stage ID from the Lookup list.
Note: If you select the Workflow Stage ID as Next Stage, the workflow stage of the selected entry will be updated automatically to the next stage. And, if your entry has reached the last stage of the workflow, a success message will be shown for the completed workflow.
Note: By default, the main branch is selected (even if the Branch field is empty).
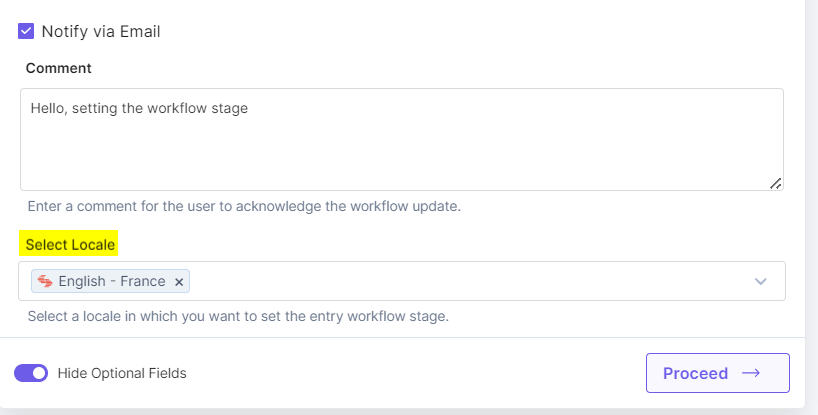
- [Optional] Enable the Show Optional Fields toggle button to display the Set Due Date, Comment, Assignee Name(s), Assignee Role(s), and Select Locale fields.
- Select the Assignee Name(s) and Assignee Role(s). With the Assignee Name(s), you can add the user to review the workflow updates, send an email notification and add comments for the assignee.
With the Assignee Role(s), you can add the users with similar roles, such as developers, testers to check the workflow updates.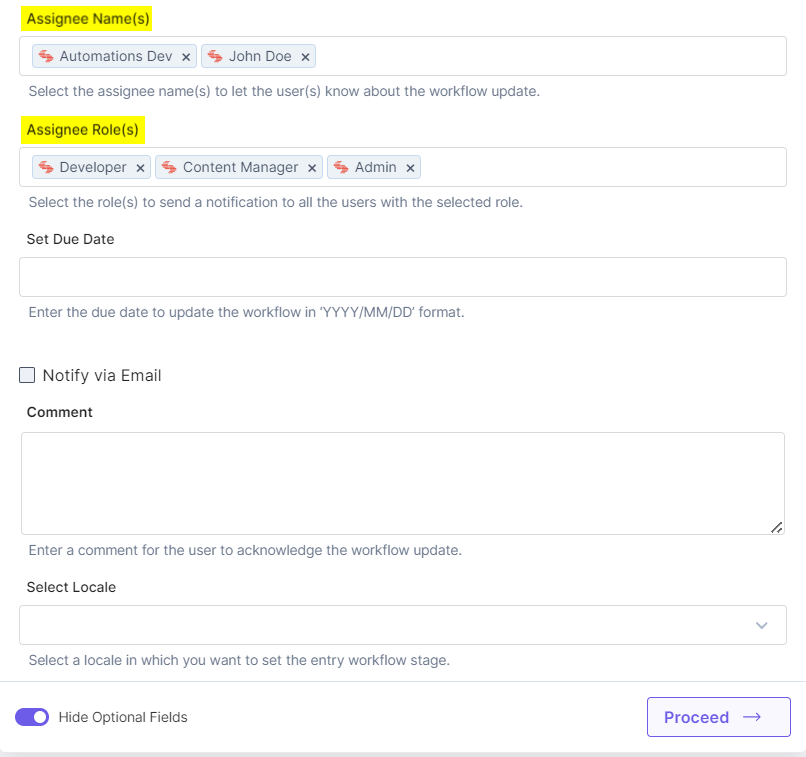
Note: You can select multiple Assignee Name(s) and Assignee Role(s) to let the users know about the workflow update.
- Set a Due Date. This defines a date for the entry stage to be completed. With Notify via Email, you can choose to notify other members in the workflow about the action changes via email.
- Under Comment, add a comment for the next stage user.
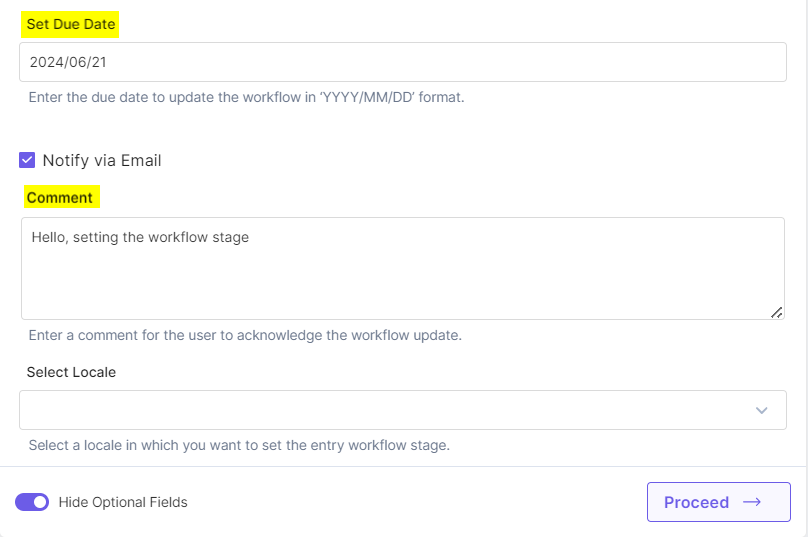
- Select a Locale from the Lookup list in which you want to set the workflow stage.
- Click Proceed.
- Click Test Action to test the configured action.

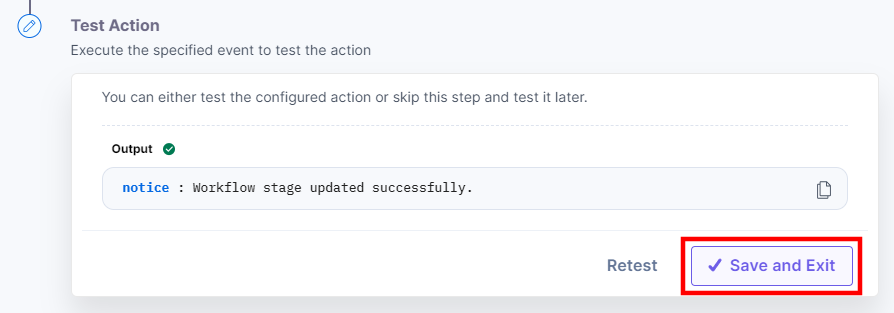
- If the setup is successful, you will see the following output. Click Save and Exit.
Unpublish an Entry
This action lets you unpublish an entry automatically in your stack. To know more, visit unpublish entries.
- Under Choose an Action tab, select the Unpublish an Entry action.
- On the Unpublish an Entry Configure Action page, enter the details given below:
- Click + Add New Account button to connect your Contentstack account as shown in the Connect your Contentstack Account to Automate step.
- Select a Stack, Branch, Content Type, and Entry from the Lookup list.
You can fetch the UID for all the previously configured automation steps directly from the Lookup list.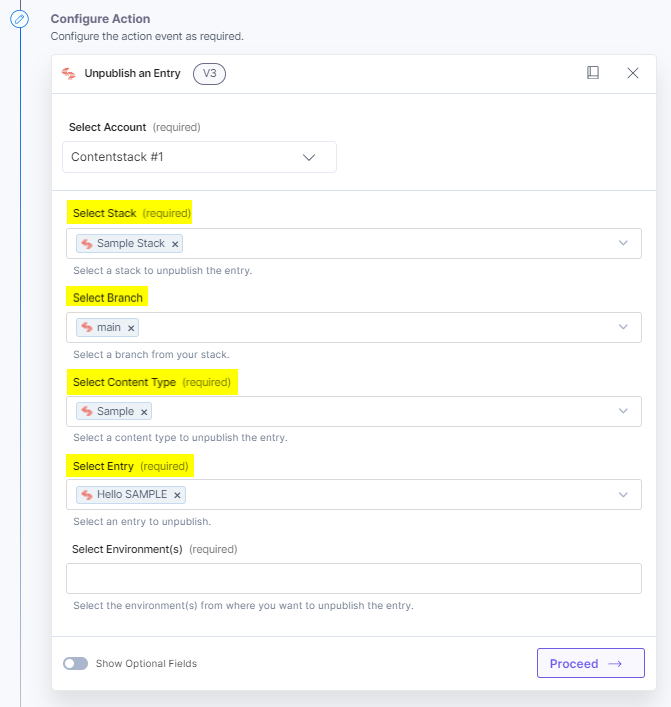
- Select the Environment(s) from where you want to unpublish the entry.
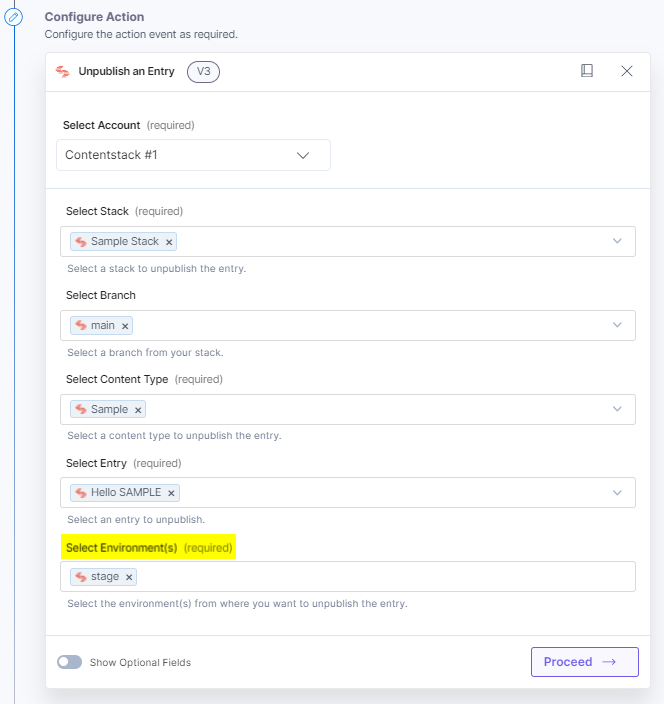
- [Optional] Enable the Show Optional Fields toggle button to display the Select Locale(s) and Unpublish Schedule fields.
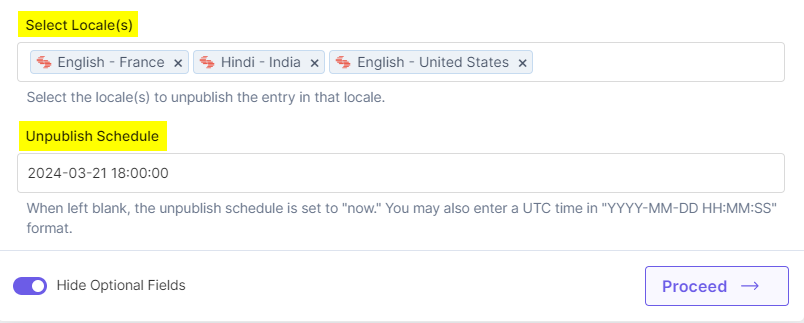
Note: You can select multiple Environment(s) and Locale(s) to unpublish the entry.
- Once done, click Proceed.
- Click Test Action to test the configured action.
- On successful configuration, you can see the below output. Click Save and Exit.

Update an Entry
This action lets you update an entry automatically in your stack.
- Under Choose an Action tab, select the Update an Entry action.
- Click + Add New Account button to connect your Contentstack account as shown in the Connect your Contentstack Account to Automate step.
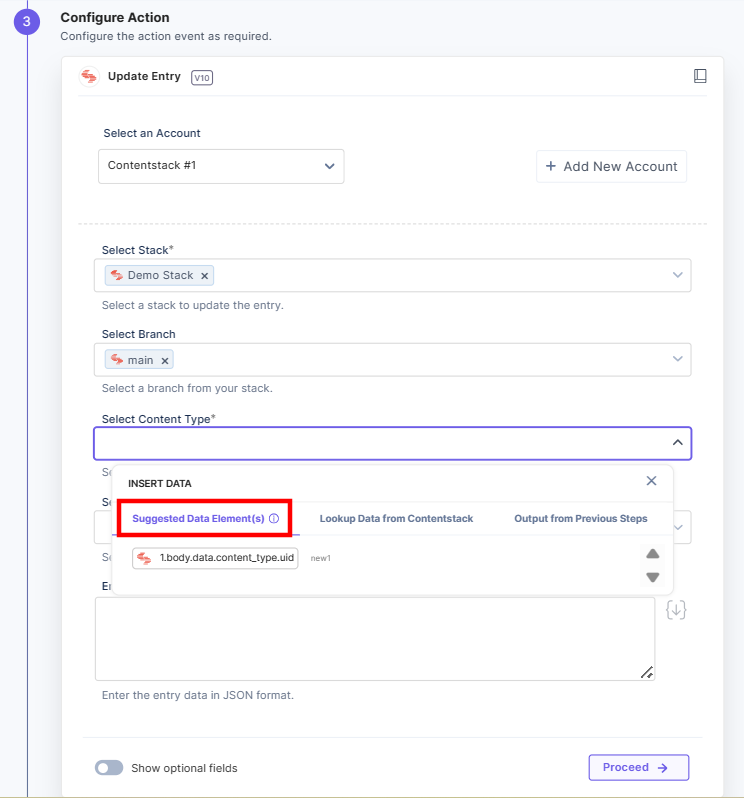
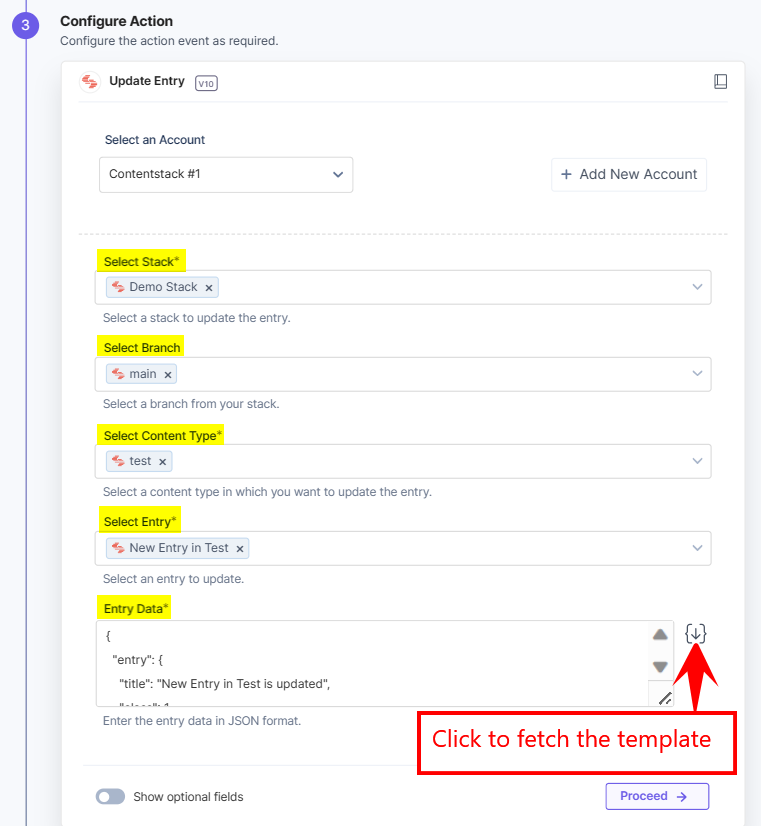
- Select a Stack, Branch, Content Type, Entry Data, and Entry from the Lookup list.
You can fetch the UID for all the previously configured automation steps directly from the Lookup list as shown below:
Note: Enter the data in JSON format only.
Note: By default, the main branch is selected (even if the Branch field is empty).
- In the Entry Data field, you can add a predefined schema template for your entry data. This will add a structure to provide your entry data in a particular format for different fields.
Note: You must configure the entry data for JSON Rich Text Editor, Custom, and Experience Container fields manually.
- [Optional] Enable the Show Optional Fields toggle button to display additional fields. Select the Locale and check the Include branch checkbox to fetch these details in addition to the entry details.
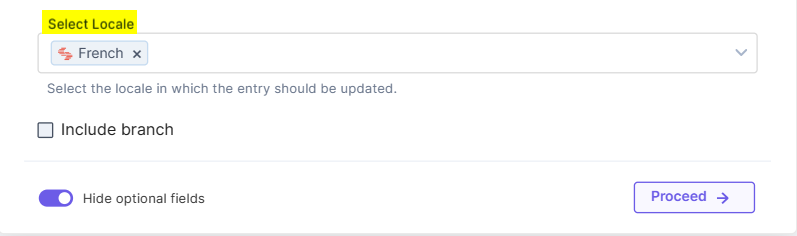
- Once done, click Proceed.
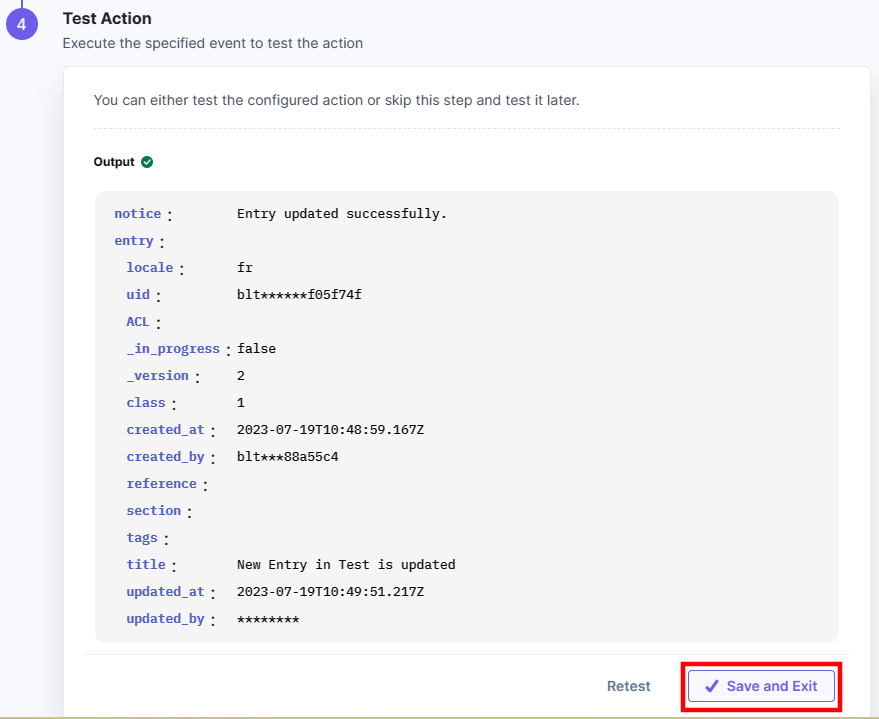
- Click Test Action to test the configured action.

- On successful configuration, you can see the below output. Click Save and Exit.
More articles in "Contentstack Management"
