
.svg?format=pjpg&auto=webp)
.svg?format=pjpg&auto=webp)
.png?format=pjpg&auto=webp)


.png?format=pjpg&auto=webp)
Contentstack Delivery
The Contentstack Delivery Connector lets you fetch entries and assets published in the environment. The Contentstack Delivery connector currently contains four actions: Get All Assets, Get All Entries, Get a Single Asset, and Get a Single Entry.
Note: With the Contentstack Delivery connector, you can only fetch the published entries/assets.
Einzelheiten zu den einzelnen Aktionen werden in den jeweiligen Abschnitten behandelt.
Voraussetzungen
To use the Contentstack Delivery connector, you first need to add your Contentstack account. To do so, follow the steps given below:
Connect your Contentstack Account to Automate
- Klicken Sie im linken Navigationsbereich auf Aktion konfigurieren .
- Click Action Step to configure third-party services.
- Innerhalb der Aktion konfigurieren, drücke den Contentstack Verbinder.
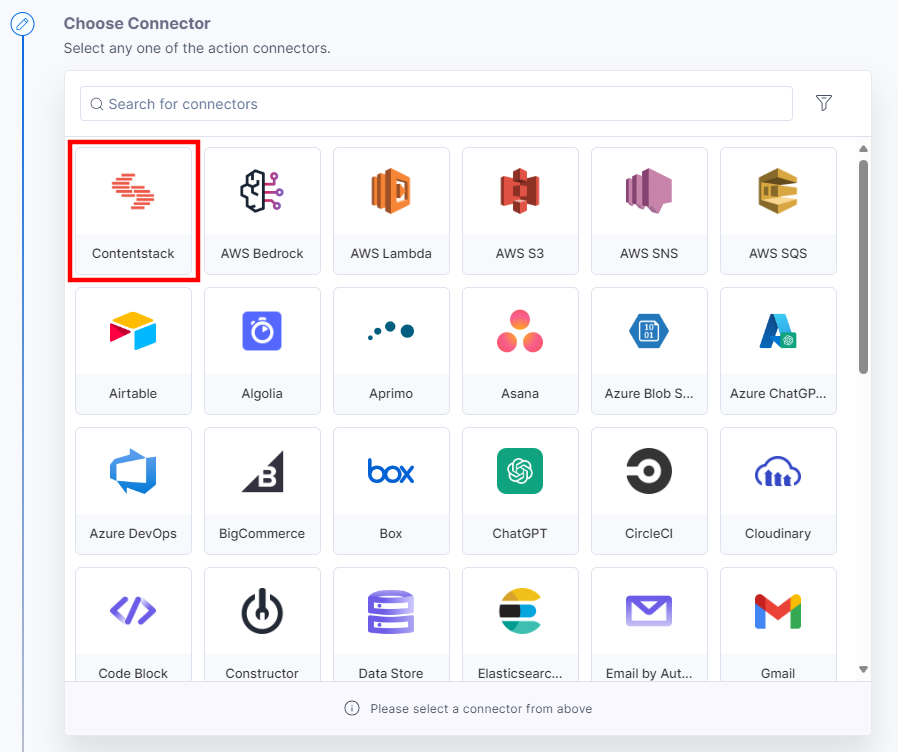
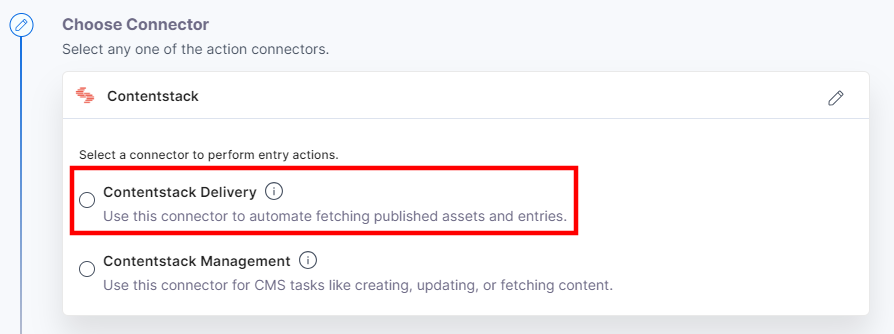
- Auswählen die aus Contentstack Delivery connector to retrieve published entries and assets.
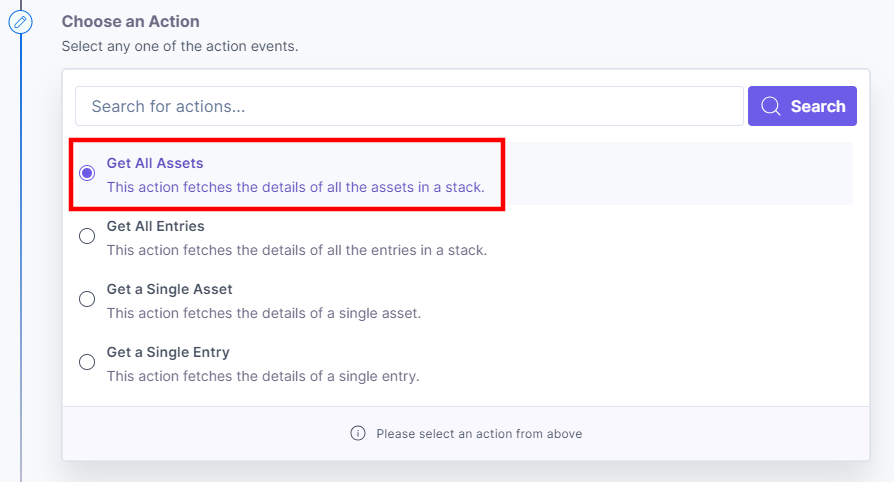
- Unter Wählen Sie eine Aktion tab, select any one action from the list. Here, we are selecting the Holen Sie sich Alle Vermögenswerte Aktion.
- On the Configure Action page, click the + Add New Account to add your Contentstack account.
- Im Autorisieren modal, enter a Titel. Geben Sie die ein Delivery Token of your stack. Click the Autorisieren Taste.
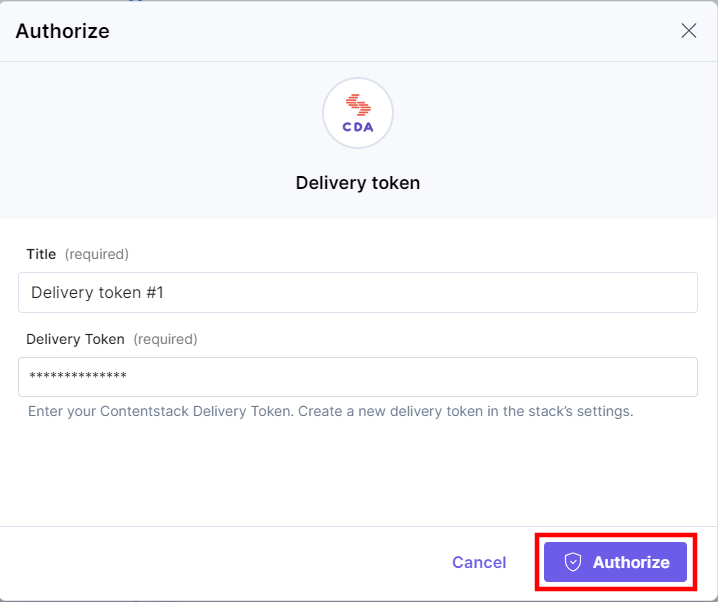
Additional Resource: To learn more about Delivery Tokens, refer to the Working with Delivery Tokens guide.
Once done, you can go ahead and set up your Contentstack Delivery connector.
Set up the Contentstack Delivery Connector
Perform the following steps to set up the Contentstack Delivery connector:
- Klicken Sie im linken Navigationsbereich auf Aktionsschritt konfigurieren .
- Then, click Action Step to configure third-party services.
- Innerhalb der Aktion konfigurieren, drücke den Contentstack Verbinder.
Hinweis: Sie können die Konnektoren anhand des Filters sortieren und suchen .
- Auswählen die aus Contentstack Delivery connector to retrieve published entries and assets.
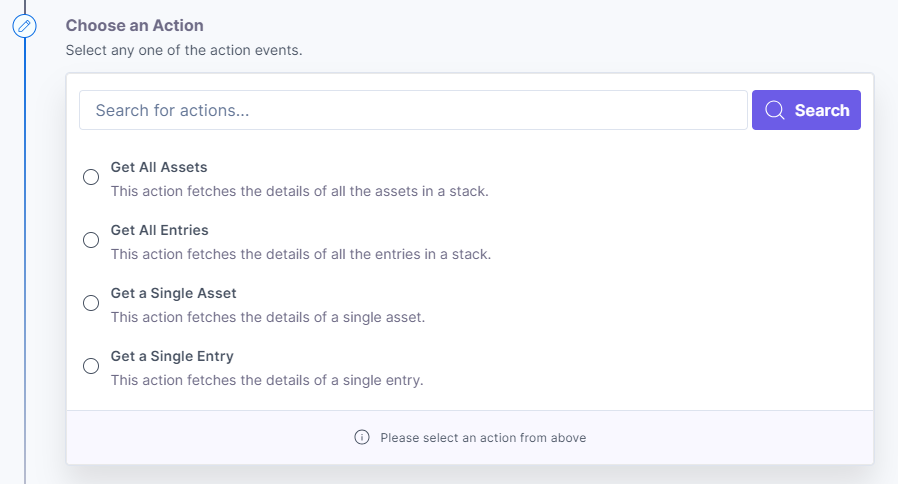
- Unter Wählen Sie eine Aktion, you will see four actions: Holen Sie sich Alle Vermögenswerte, Alle Einträge abrufen, Holen Sie sich ein einzelnes Asset, und Holen Sie sich einen einzigen Eintrag.
Schauen wir uns jeden von ihnen im Detail an.
Action 1: Select the Holen Sie sich Alle Vermögenswerte Aktion
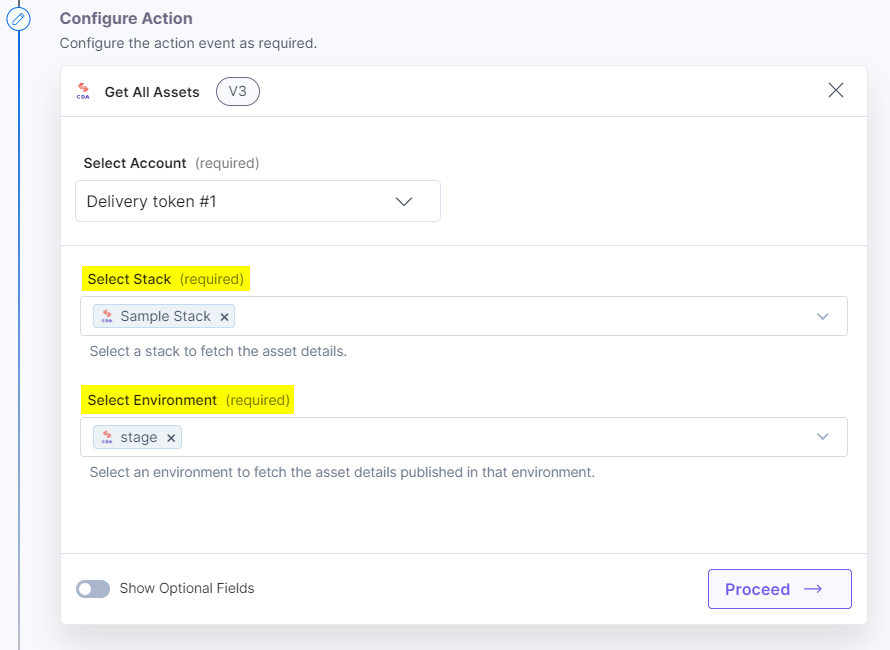
The Get All Assets action lets you fetch details of all the published assets in a stack. To use the Get All Assets action, follow the steps below:
- Under Choose an Action tab, select the Get All Assets action.
- Auf der Get All Assets Configure Action page, enter the details given below:
- Click + Add New Account button to connect your Contentstack account as shown in the Connect your Contentstack Account to Automate step.
- Select a Stapel and an Umfeld from the Lookup Liste.
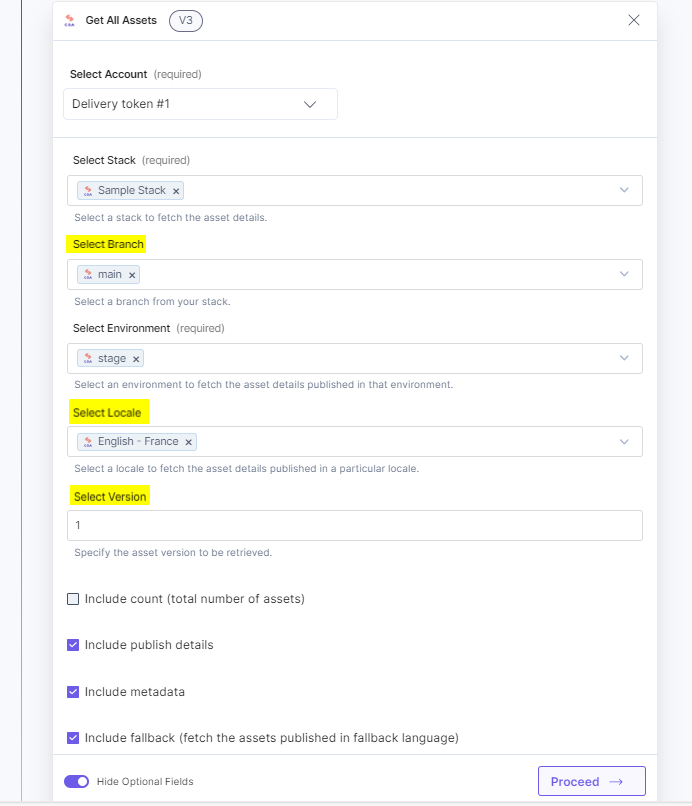
- Aktivieren Sie optional die Show Optional Fields Umschalttaste, um die anzuzeigen Zweig, Gebietsschema, und Version Felder.
Note: By default, the main branch is selected (even if the Branch field is empty).
- You can also include the count of the assets, metadata details, fallback (to fetch the assets in the defined fallback language), and publish details by clicking the respective checkboxes.
- Once done, click Proceed.
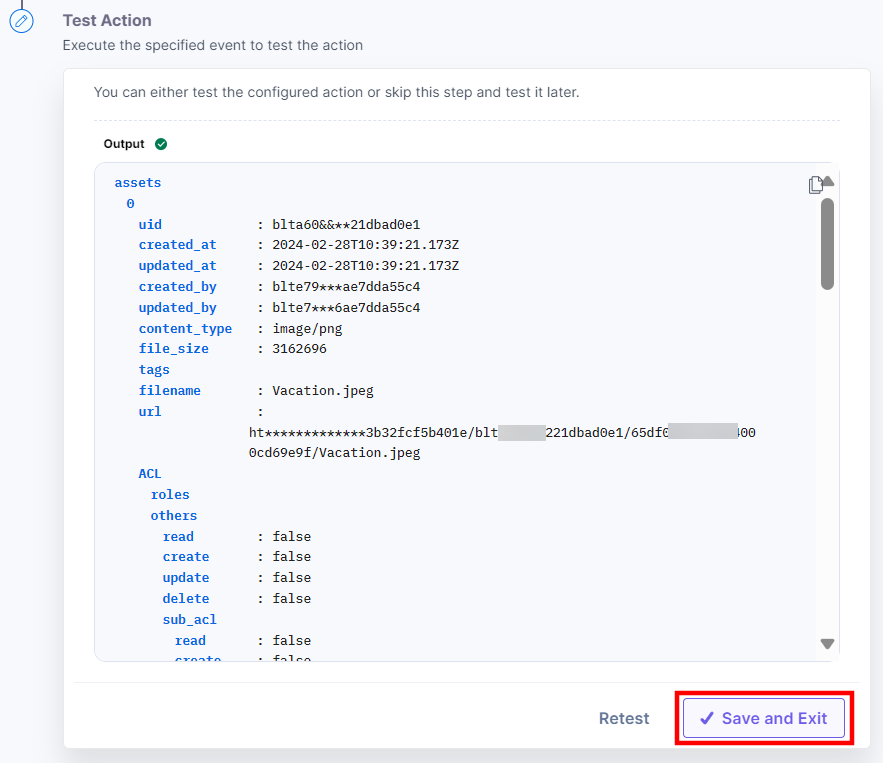
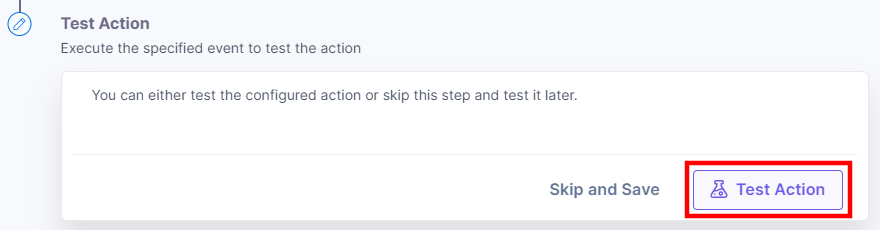
- Klicken Test Action to test the configured action.

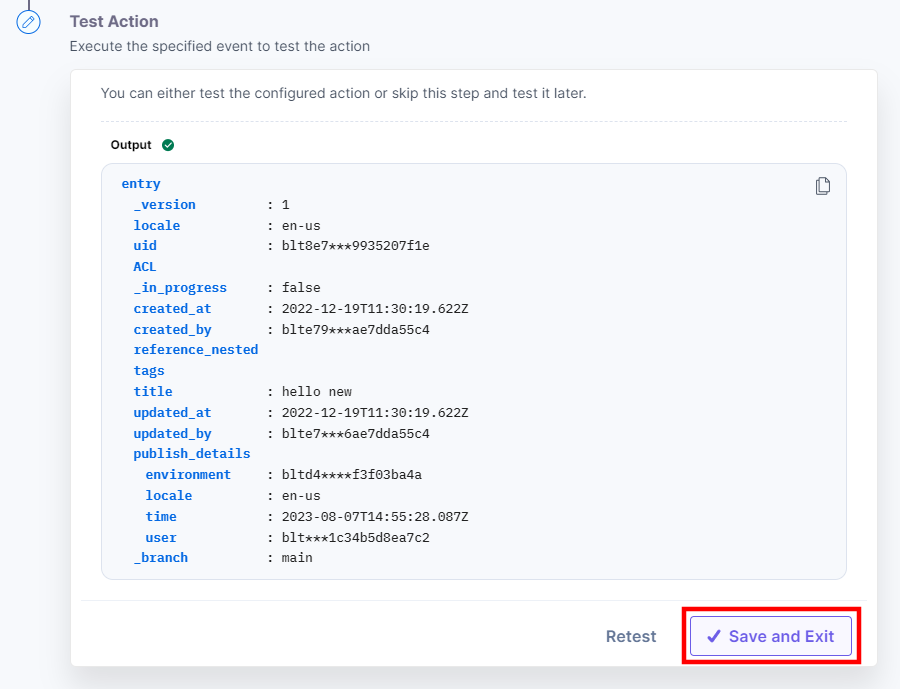
- On successful configuration, you can see the below output. Click Speichern und beenden.
Action 2: Select the Alle Einträge abrufen Aktion
The Get All Entries action fetches all the published entries in a stack. To use the Get All Entries action, follow the steps below:
- Under Choose an Action tab, select the Get All Entries action.
- Auf der Alle Einträge abrufen Konfigurieren Action page, enter the details given below:
- Click + Add New Account button to connect your Contentstack account as shown in the Connect your Contentstack Account to Automate step.
- Select a Stapel, Zweig, Inhalt Typ, und Umfeld from the Lookup Liste.
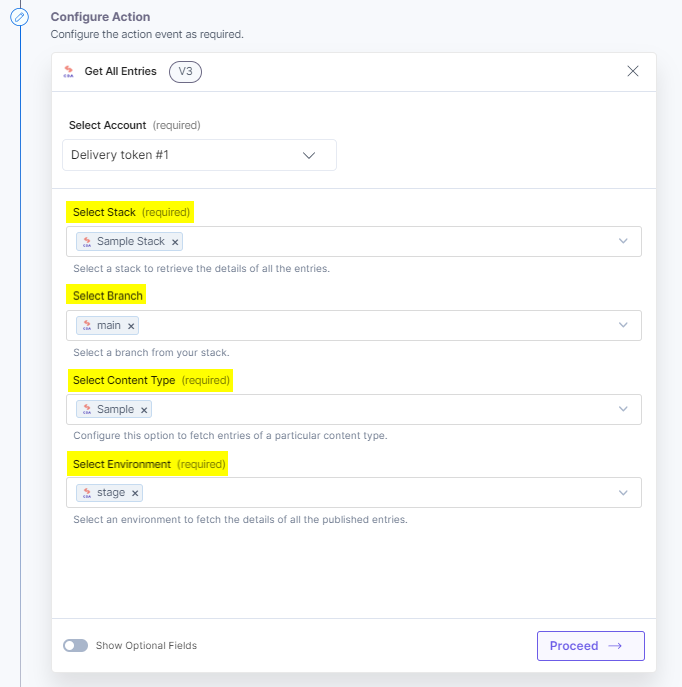
Note: By default, the main branch is selected (even if the Branch field is empty).
- Optionally, enable the Show Optional Fields toggle button to display the Entry Limit, Skip Entry (Pagination), Entry Version, and Select Locale fields. You can also include the count of the entries, fallback (to fetch the assets in the defined fallback language), metadata details, branch, and publish details by clicking the respective checkboxes.
- Provide your data in the Customized Data (query) field to filter the entry. Enter your data in the Taste, Operator, und Wert Felder.
In the Customized Data (query) field, you can filter the entry based on Updated At/Created At options. For example, you can fetch all the entries updated after a certain time and date as shown below:
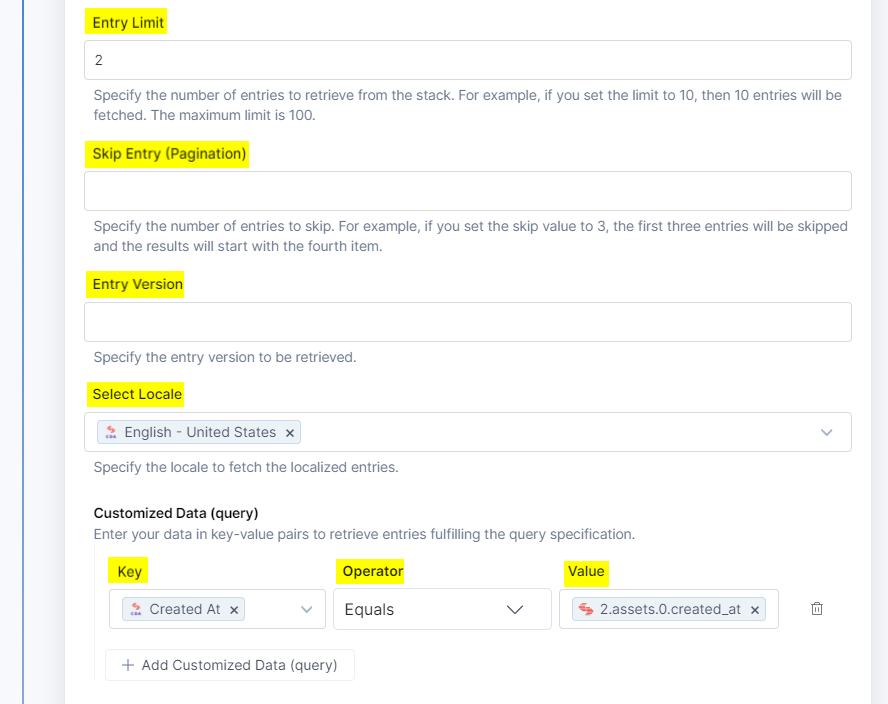
You can view the Lookup data for all the fields present in the content type including Reference, Modular Blocks and Group fields. Using the Operator filter you can sort the data.
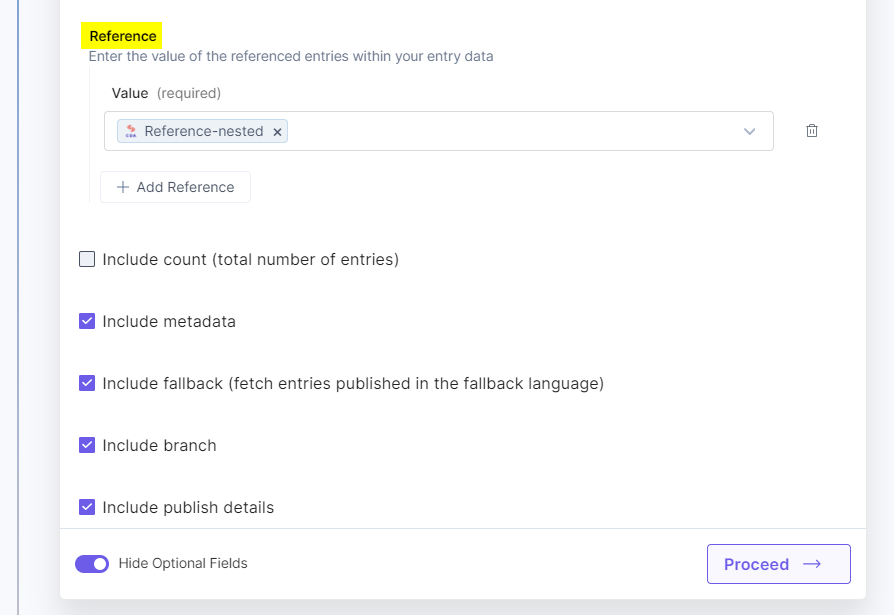
In the Reference field, enter the ID of the reference field of your content type.
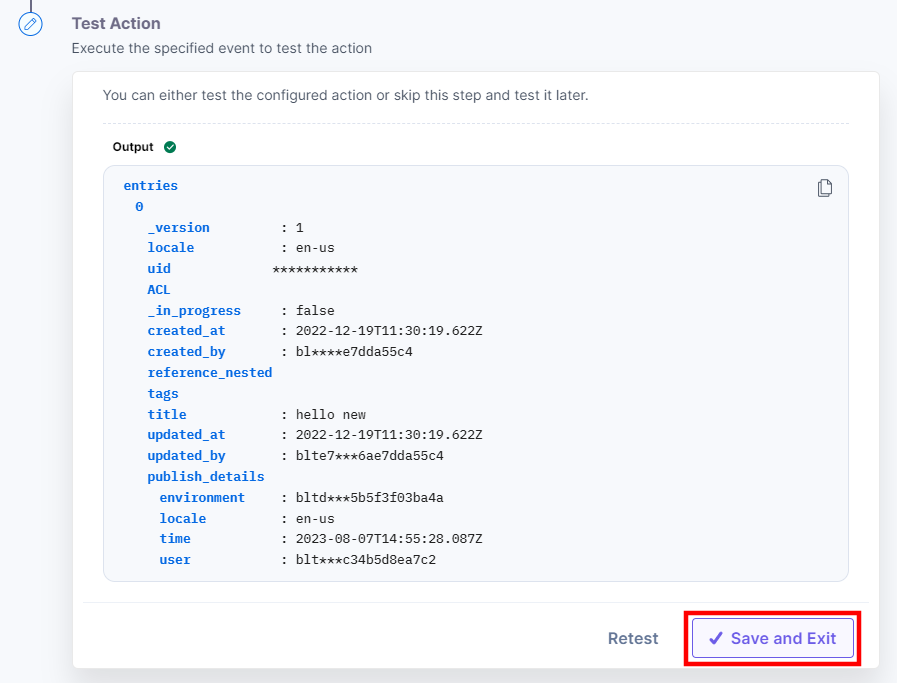
- Klicken Sie auf „Weiter“ .
- Klicken Test Action to test the configured action.

- The output will be shown as follows. Click the Speichern und Exit Taste.
Action 3: Select the Holen Sie sich ein einzelnes Asset Aktion
The Get a Single Asset action lets you fetch details of a single asset published in a stack. To use the Get a Single Asset action, follow the steps below:
- Under Choose an Action tab, select the Get a Single Asset action.
- Auf der Get a Single Asset Configure Action page, enter the details given below:
- Click + Add New Account button to connect your Contentstack account as shown in the Connect your Contentstack Account to Automate step.
- Select a Stapel, Umfeld, und Anlage from the Lookup Liste.
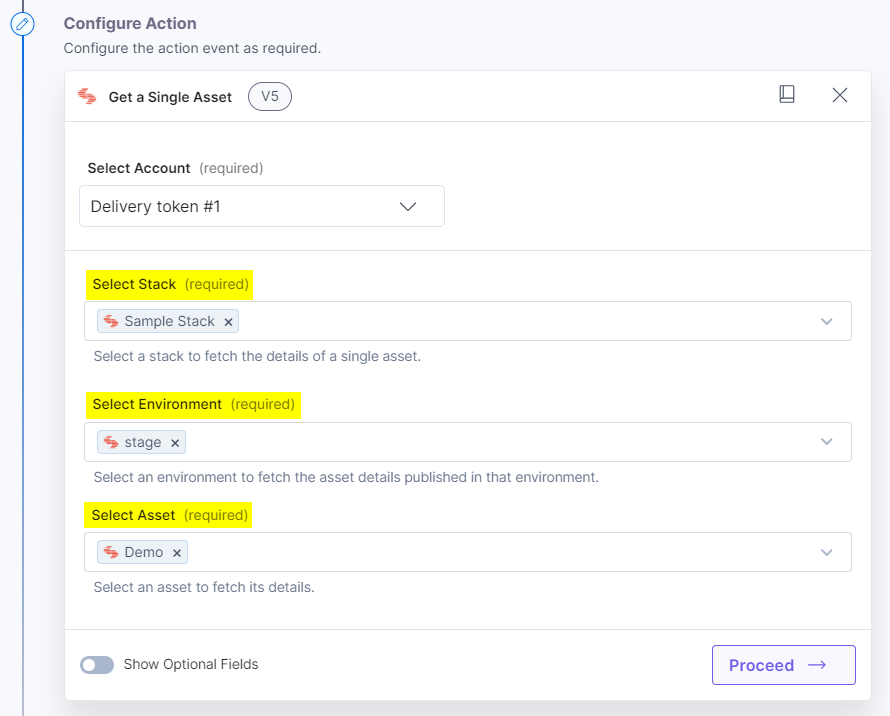
Note: By default, the main branch is selected (even if the Branch field is empty).
- Aktivieren Sie optional die Show Optional Fields Umschalttaste, um die anzuzeigen Zweig field. You can also include the publish and metadata details by clicking the respective checkboxes.
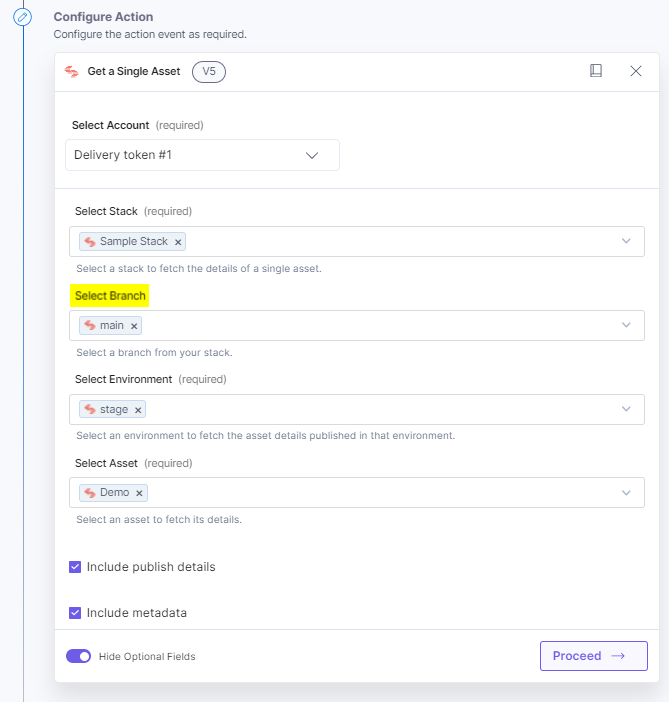
- Once done, click Proceed.
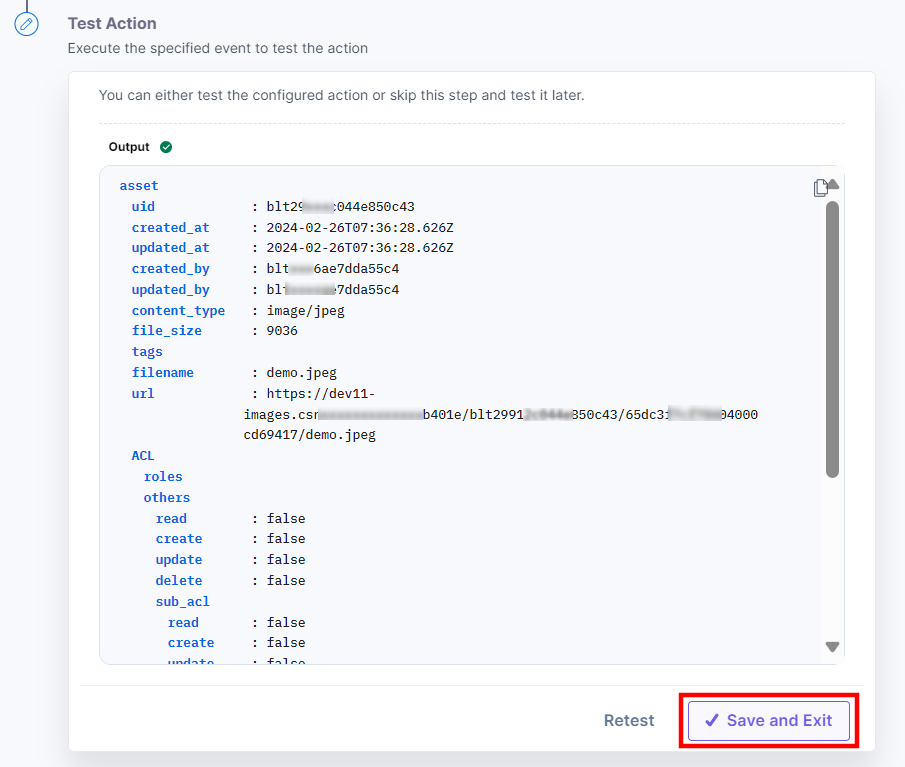
- Click Test Action to test the configured action.

- On successful configuration, you can see the below output. Click Speichern und beenden.
Aktion 4: Wählen Sie die aus Holen Sie sich einen einzigen Eintrag Aktion
The Get a Single Entry action lets you fetch details of a single entry published in a stack. To use the Get a Single Entry action, follow the steps below:
- Under Choose an Action tab, select the Get a Single Entry action.
- Auf der Get a Single Entry Configure Action page, enter the details given below:
- Click + Add New Account button to connect your Contentstack account as shown in the Connect your Contentstack Account to Automate step.
- Select a Stapel, Zweig, Inhalt Typ, Umfeld, und Entry from the Lookup Liste.
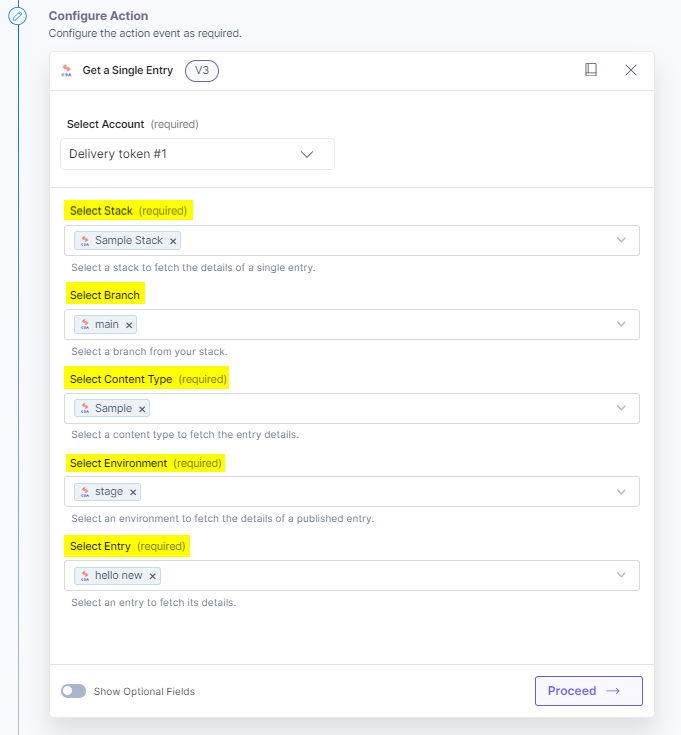
Note: By default, the main branch is selected (even if the Branch field is empty).
- Aktivieren Sie optional die Show Optional Fields toggle button to display additional fields. Select the entry Gebietsschema und Referenz Felder.
In the Reference field, enter the ID of the reference field of your content type. You can also include the metadata and publish details along with fallback (to fetch an entry defined in a particular fallback) and branch checkboxes to fetch these details in addition to the entry details.

- Once done, click Proceed.
- Klicken Test _ to test the configured action.
- On successful configuration, you can see the below output. Click Speichern und beenden.
This sets the Contentstack Delivery connector.
